
Japanese Road Roller
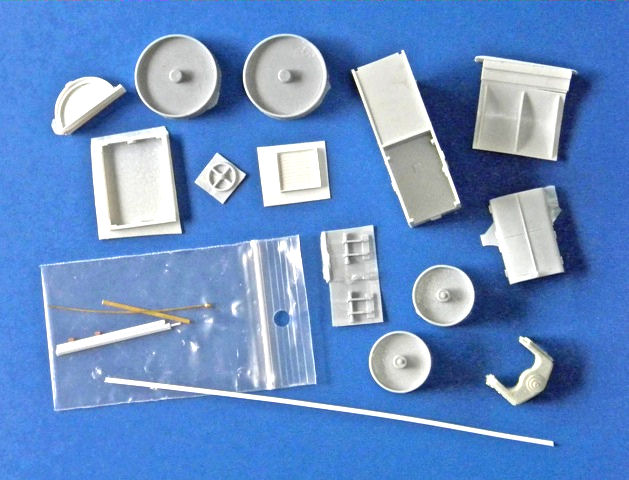
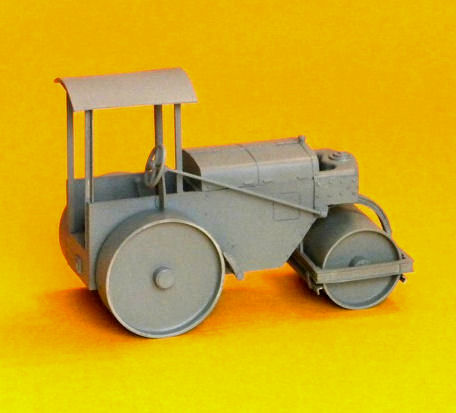
1/48 model builders now have a way to include a Japanese Road Roller in their WWII Japanese aircraft dioramas or to display as an unique stand-alone subject. Belcher Bits offers a mixed media kit of the IJN road roller that U.S. Marines found on the unfinished airfield construction site when they landed on Guadalcanal in 1942 and captured what would later be named Henderson Field. The kit is packaged in a zip-lock bag and includes 14 cast resin parts, four metal parts, and five pieces of styrene strip and channel stock. The resin parts are well detailed, generally free of pinholes, and remarkably tolerant of flexing. Casting blocks are minimal and easy to remove with an X-acto blade or saw. A folded instruction sheet tells you how long to cut the styrene pieces and where to attach them and the metal bits.
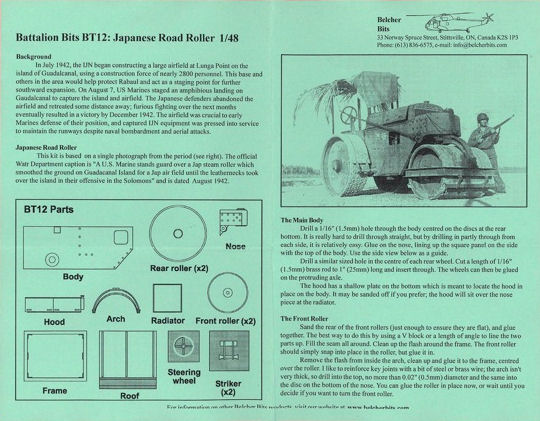
Everything fits nicely and the assembly is simple and guided by the step-by-step instruction sheet that includes a reproduction of a wartime photo of the original abandon roller on the construction site (with a Marine standing guard over it in the blazing summer sun). Apparently, the sun was so intense that Japanese laborers had covered the hot sheet metal roof with palm fronds and a tarp to shade them. The photo also suggests that an accurate replica of the original, as used by both Japanese construction crews and later by USN Seabees, would have to be completed with a well-weathered finish and a covering of dirt, grease, and crushed coral dust.
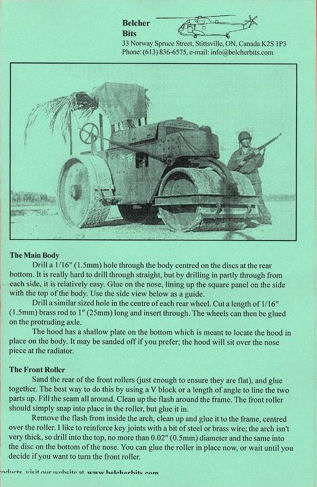
The most challenging step in the construction is the first step: drilling a hole accurately through the main body casting for the rear roller axle. Care must be exercised when drilling to assure it is centered within with the two circular plates on either side of the body. The instructions suggest that drilling from both sides will help keep the axle positioned at the desired 90˚ angle from the body. I found that to be good advice. After that, the assembly goes smoothly and quite quickly.
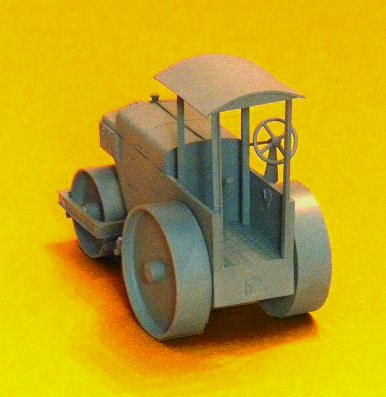
There is one area that may require a small amount of manipulation prior to removing the casting blocks. The main body casting has both thin cab sidewalls cast with the solid engine hood in one piece. I found that the cab sidewalls in my kit had cured with a slight bow inward along the top edge. Because the part is cast in resin, the warp was easy to remedy by immersing the entire casting in very hot water for a few minutes and then holding the sidewalls in the desired position until they cooled. It’s a simple process that most model builders who have worked with resin know only too well.
Once that was done, parts were removed from the casting blocks with an X-acto blade and dressed with a sanding block. Where necessary, edges were trued up with a sanding stick. Small parts like the steering wheel and roller scrapers were removed from the thin pour scrap by sanding the backside of the scrap (I placed a piece of wet/dry emery paper on a flat surface and gently wet sanded in a swirling motion until the parts came free). After a little dry fitting, everything was assembled with superglue. Little more needs to be said about the assembly of this kit. It’s that easy to build.
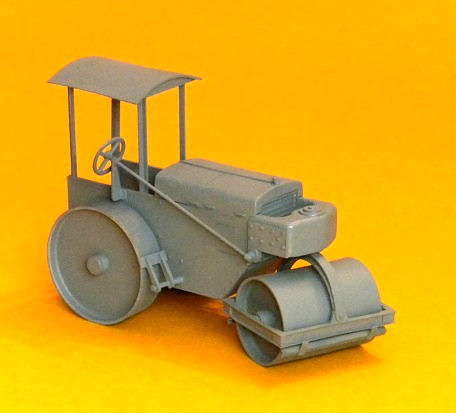
Kit manufacturer Mike Belcher candidly acknowledges in the instruction sheet that little information exists beyond a few wartime photos to confirm the many details usual found in walk-around studies, so it was necessary to rely on photos of similar equipment and advice from those who know about road rollers to design and detail this kit. I tried finding something on the Internet, but my efforts were fruitless. In the absence of a preserved example or discovery of a relic rusting on some South Sea island, we’ll have to assume he got most of it right. It sure looks like the one in the photo when assembled.
Painting is simple. Everything should be one color, presumably a medium gray (the instructions describe it as Japanese Navy Grey) with a lot of rust thrown in for good measure. Military vehicle builders will have a field day weathering this one and aircraft builders will have to add the appearance of more wear and tear than they are accustom to. Road rollers operating during wartime in the South Pacific were tools to be put to use, not washed. However, anything on Guadalcanal usually received a good drenching during the mid-afternoon rainstorms that are common on Pacific islands. So keep that in mind when applying weathering to this one.
Highly recommended as an easy-to-build break from the usual model building projects that require complex assembly and painting. This one is fun.
Kit BT12 is available by direct order from the manufacturer via the website above. My thanks to Belcher Bits and IPMS/USA for the opportunity to build and review this kit.


Comments
Add new comment
This site is protected by reCAPTCHA and the Google Privacy Policy and Terms of Service apply.
Similar Reviews