
Jagdpanzer Marder I (Sd.Kfz.135)
I would first like to give a HUGE shoutout to Mr. Gary Demory, Tamiya America Customer Service Supervisor without whose help this review may not have been able to be completed. During work on this project, I had a “the dog ate my homework” moment when a series of parts was suddenly missing from my workbench, and the guilty party kept saying, “I didn’t do it.” What to do? In spite of Tamiya’s California office being closed due to the pandemic, Gary went to great lengths to assist me in getting the parts I needed. Thanks for all of your help and outstanding service, Gary!
First Impression
The Marder I was a WWII German tank destroyer with a 75mm PaK-40 anti-tank gun. Most of the Marders were actually constructed on the base of a French artillery tractor (Trachteur Blindè 37L), which Germany had acquired more than 300 of after the fall of France in 1940.
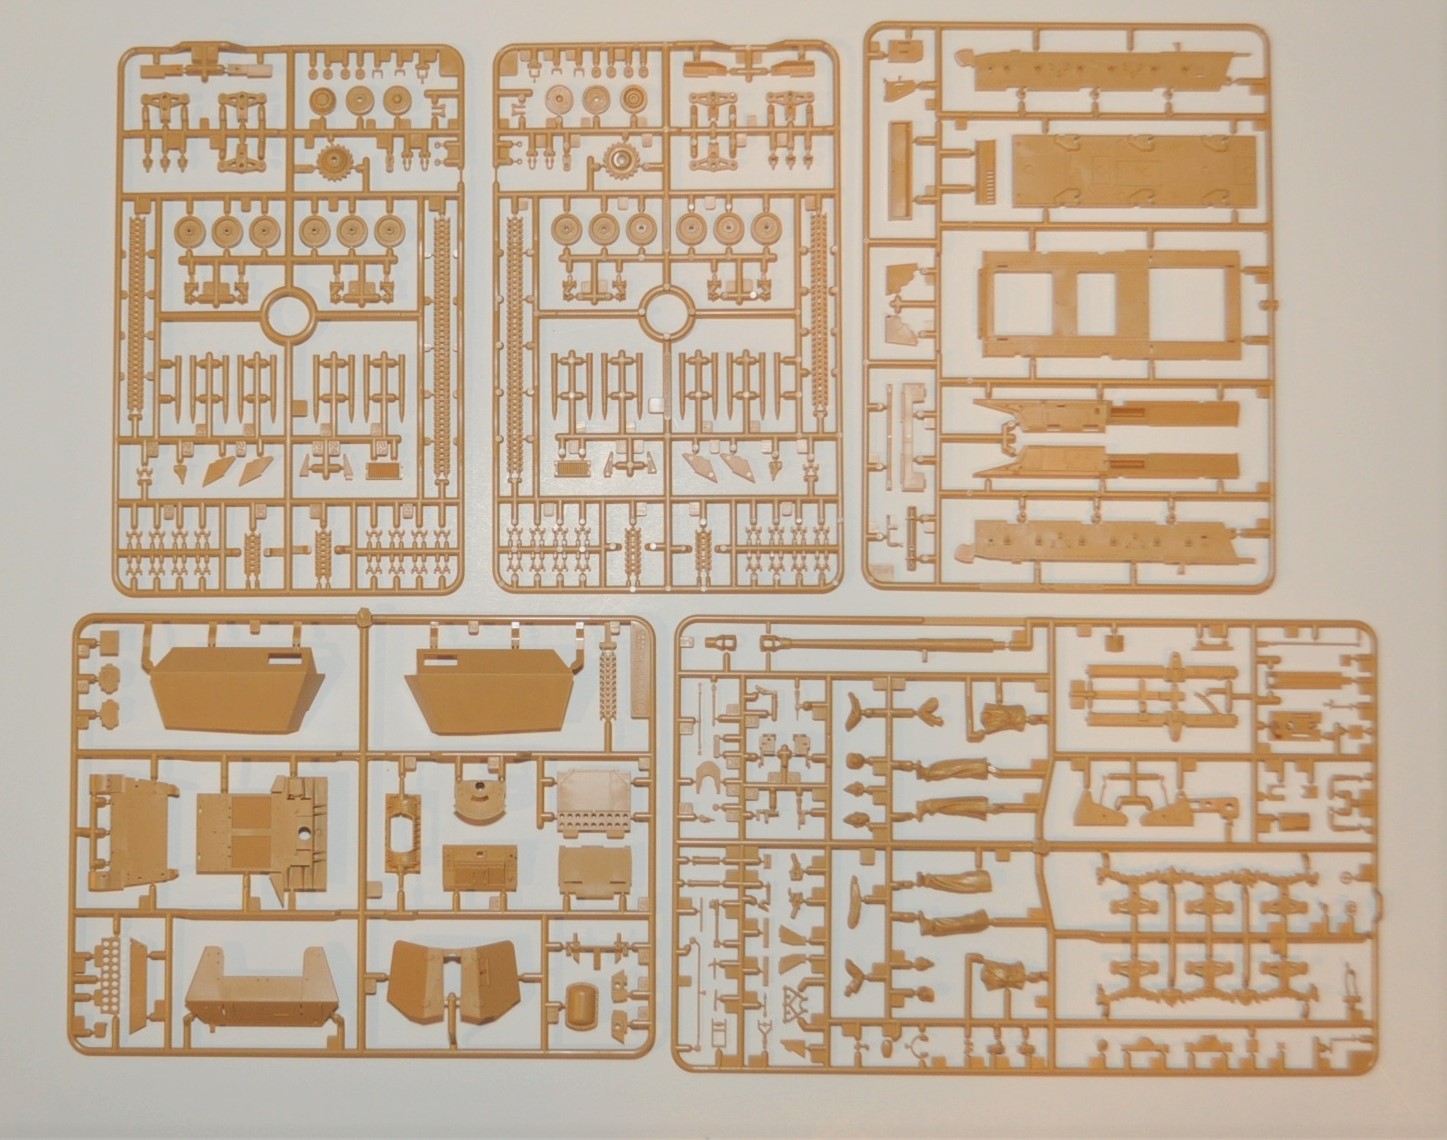
Inside the box you will find a small decal sheet, five dark-yellow sprues sealed in a single bag. The parts excellently defined with very sharp detail and are completely flash free. The 14-page instruction guide contains well-detailed diagrams. Callouts for parts and paints are clear and easy to follow. The instruction guide does not show the parts trees but this is likely due to the fact that there are no left-over parts.
In addition to the assembly guide, a very nice glossy full-color foldout is provided which shows a variety of reference photos (closeup shots of tracks, gun breech and exhaust among others) and also painting guides for three versions.
The Build
This is an excellent and enjoyable build. This kit is smartly engineered and parts fit together so well that no filler was required. I used Tamiya Extra Thin Cement for the entire build, which allowed me to keep everything clean. When needed, I ran an abrasive stick along the seams to eliminate them.
Construction begins with parts C7 & C10. To make sure I had them at a 90֯ angle, I used the lines of my cutting matt as a guide. Assembly continues with the hull bottom, sides, front & rear ends. Once the lower hull is completed, the instructions tell you to assemble the suspension, wheels and tracks. Although I deviated from this suggestion, I strongly recommend that most builders proceed as instructed to make it as easy as possible to add the tracks.
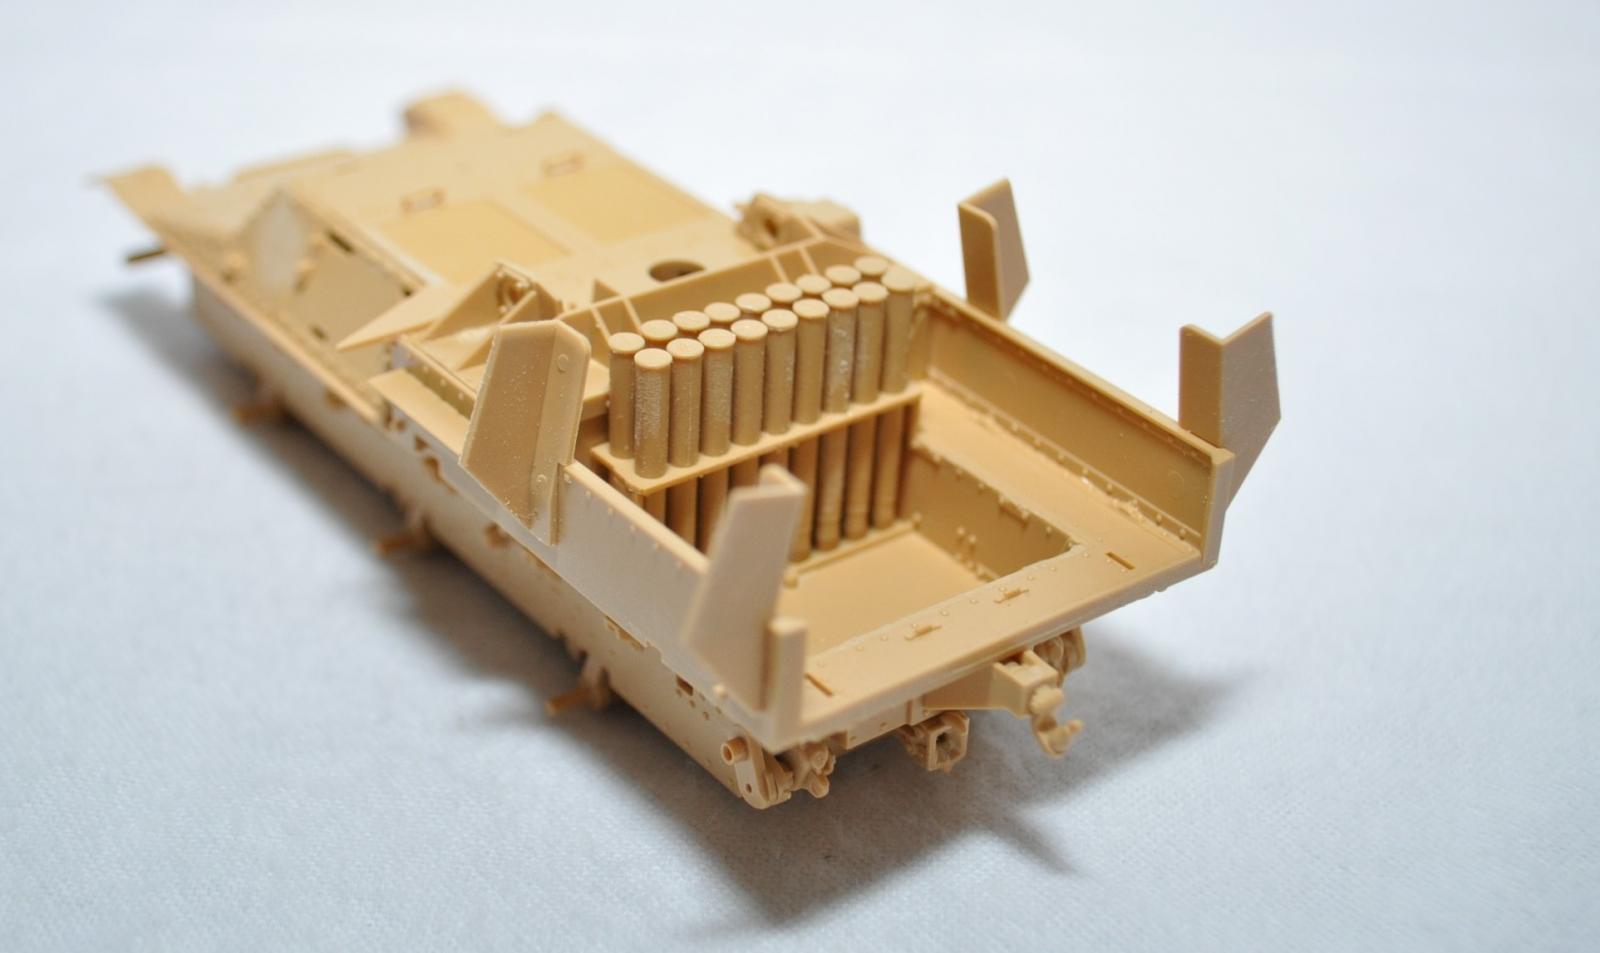
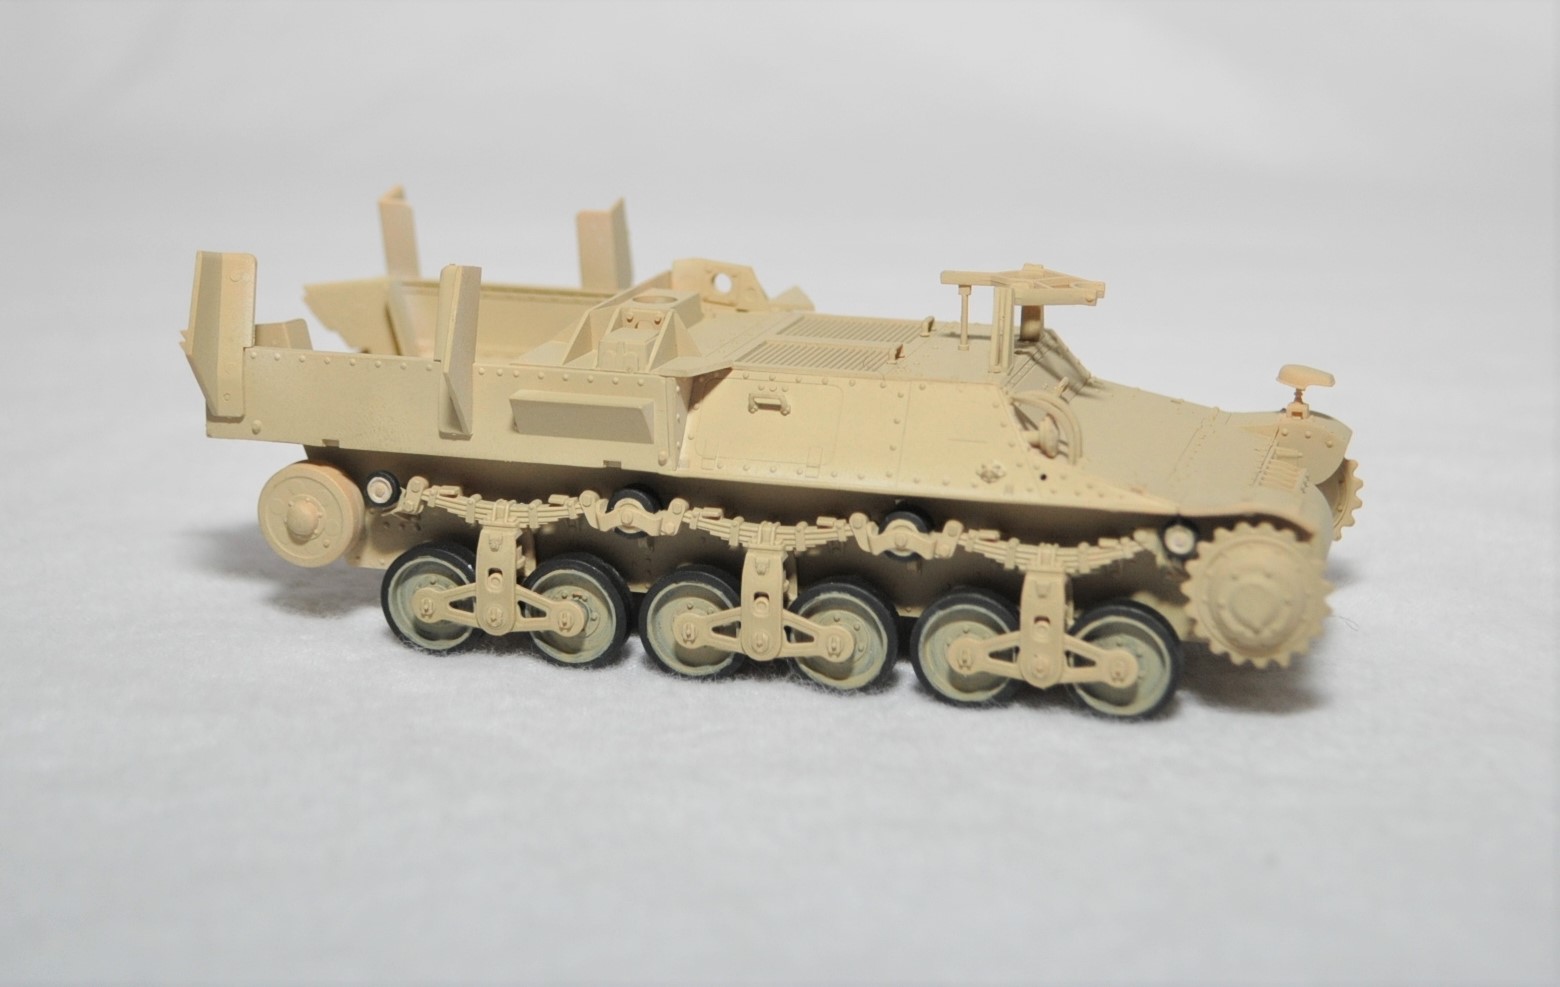
For my build, I added the top hull, upper hull sides, shell rack & the travel lock. I then primed this entire subassembly and then painted it with the base color. Next, I worked on the suspension subassembly. This is cleverly engineered with one single piece for the exterior side and three pieces for the interior side. This is one of the reasons building this model is quick and enjoyable. Sandwiched in between them are the wheels. To make painting as simple as possible, I primed the individual pieces and then painted them with the base color—including black on the wheels. I finished the entire suspension subassemblies and attached them to the model.
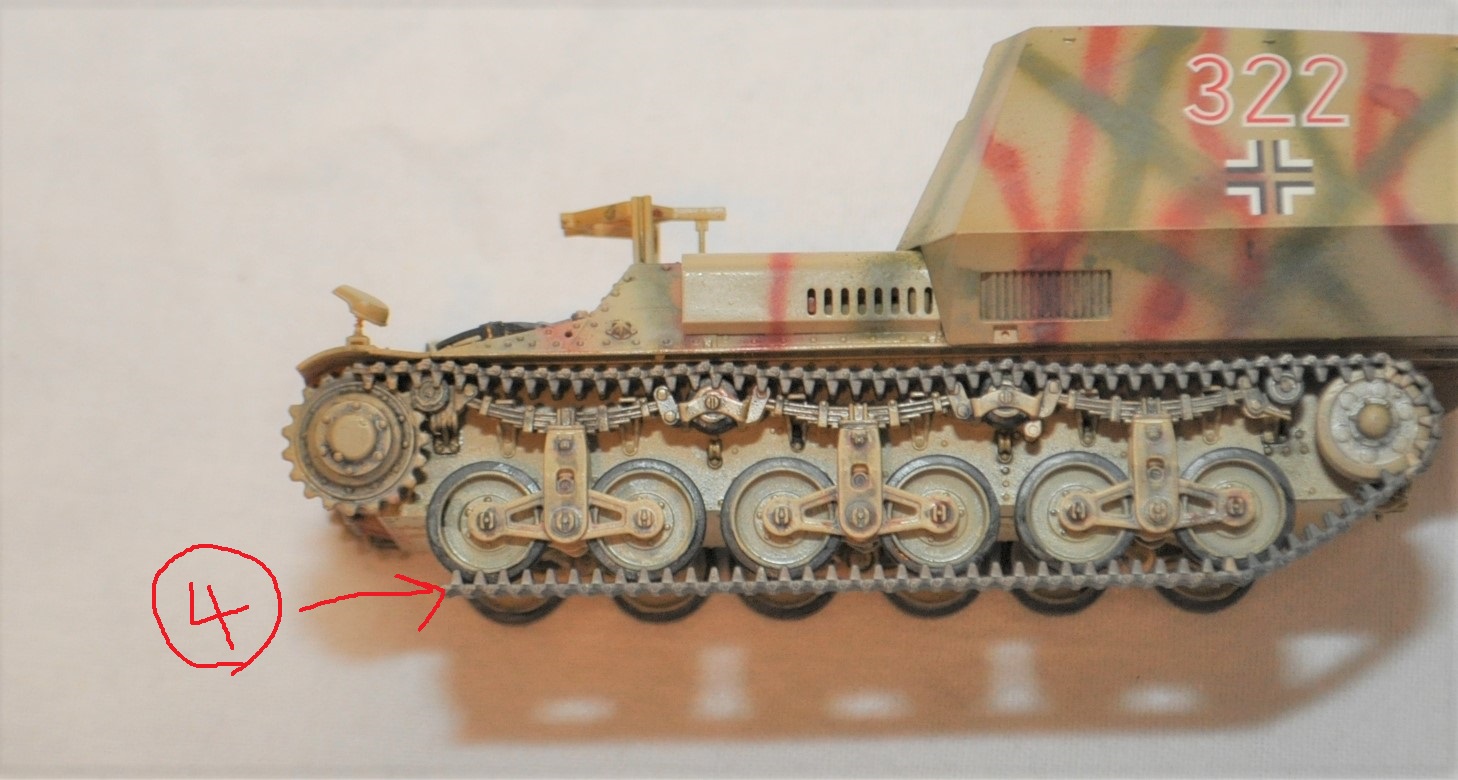
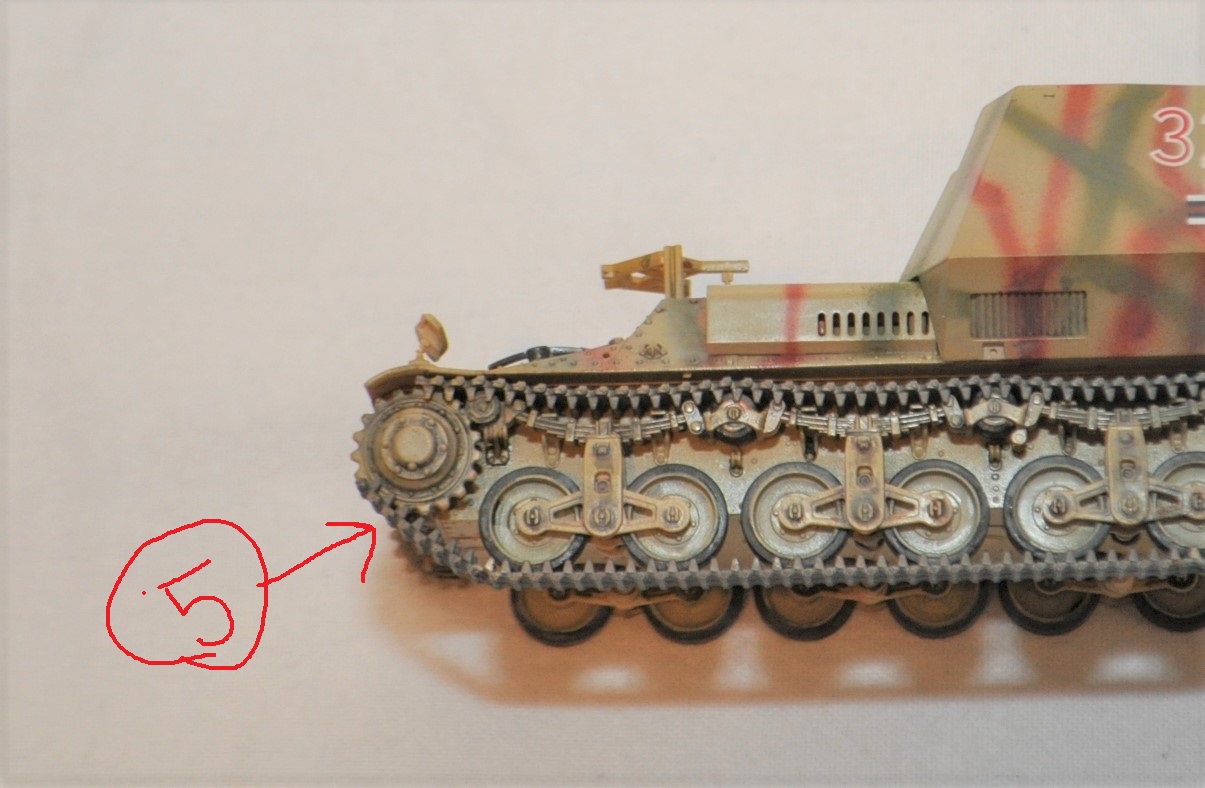
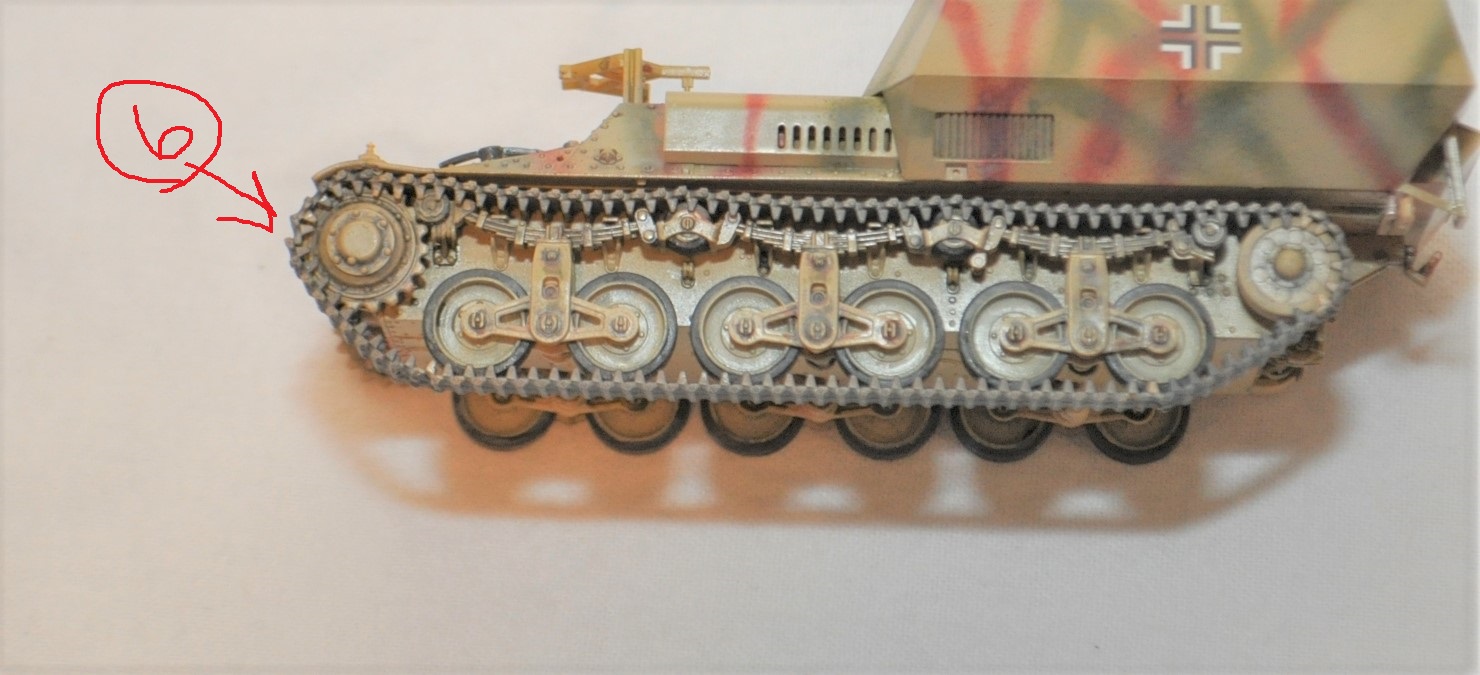
Please pay close attention that you do not glue the front cogwheels in place. Each wheel receives a nylon washer and this is all that is required for a snug fit. When adding the tracks, you will want the ability to move them for proper track fit.
The gun is very impressive. It alone consists of 23 parts! The breech is highly detailed, and I was pleased to find that the barrel is molded as a solid piece—excepting the muzzle break. I completed the entire gun subassembly—including the amor plating—but did not immediately attach it to the model in anticipation of final painting.
The next subassemblies I worked on were the side armor plates. The left, right and rear sides have some good interior detail. I assembled these, primed and base coated them individually. One exception was the radio, which I painted separately and added at the end.
The instructions show that the shells should be painted and placed into position before attaching the side armor. I recommend adding these at the end.
Painting and Finishing
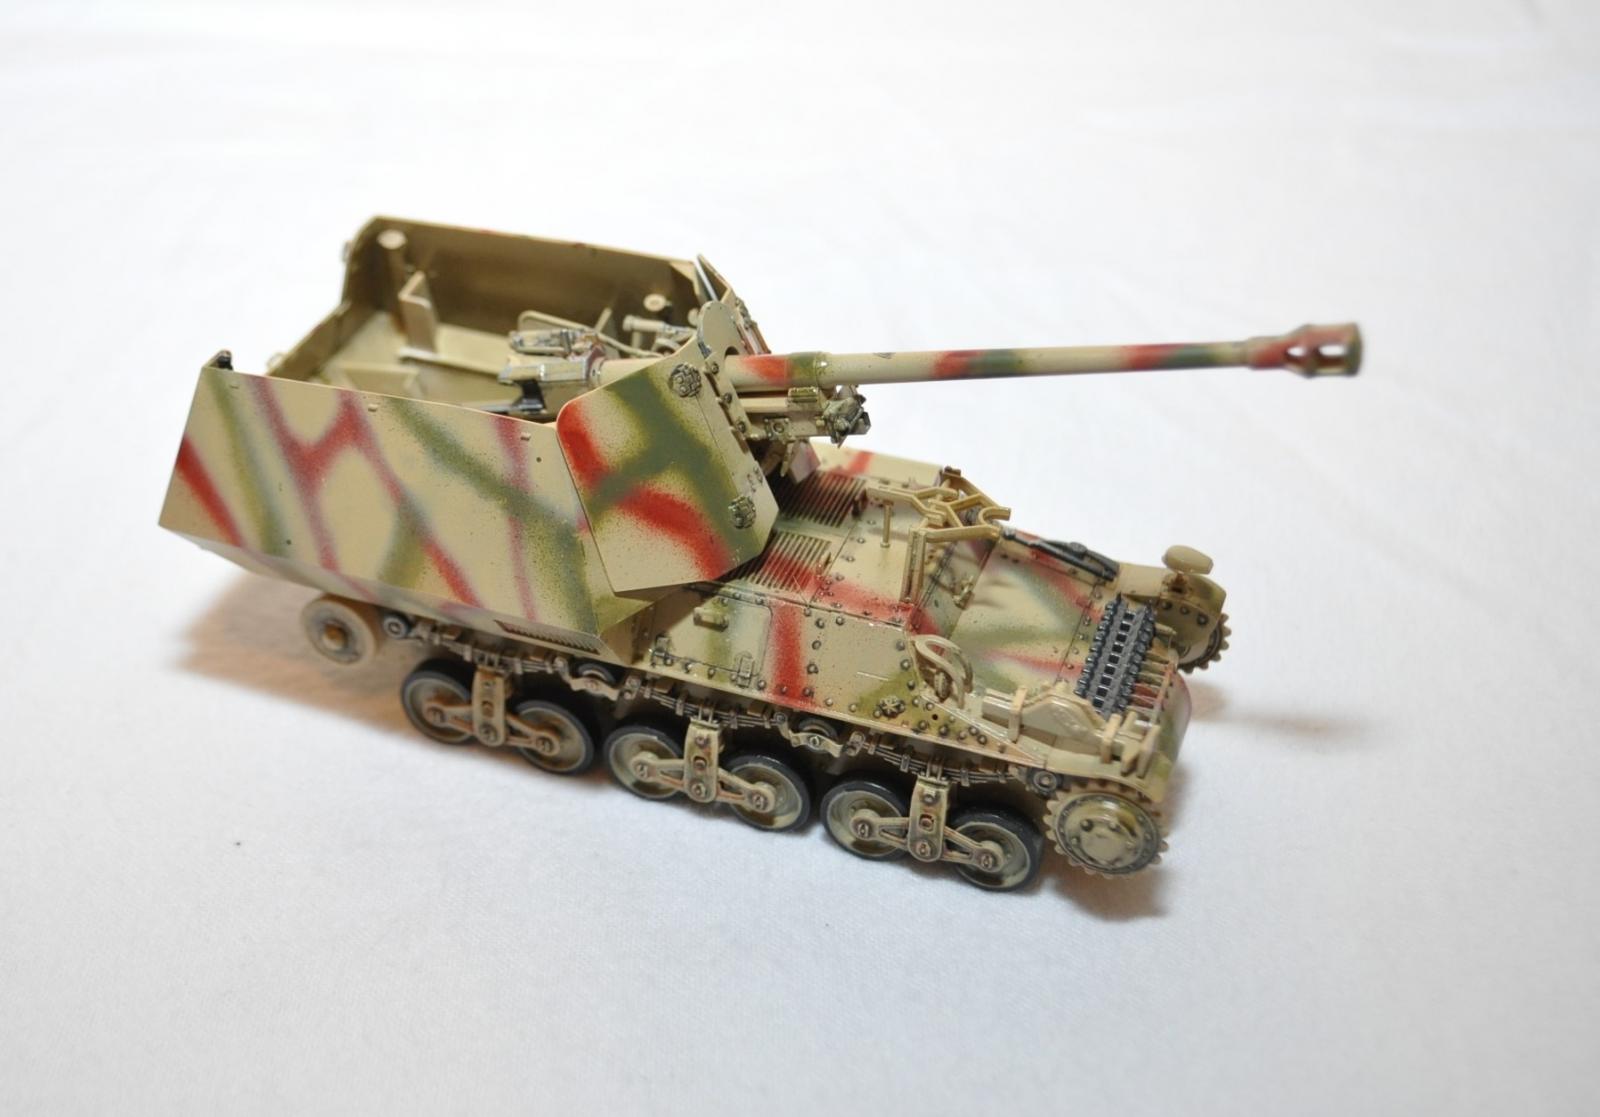
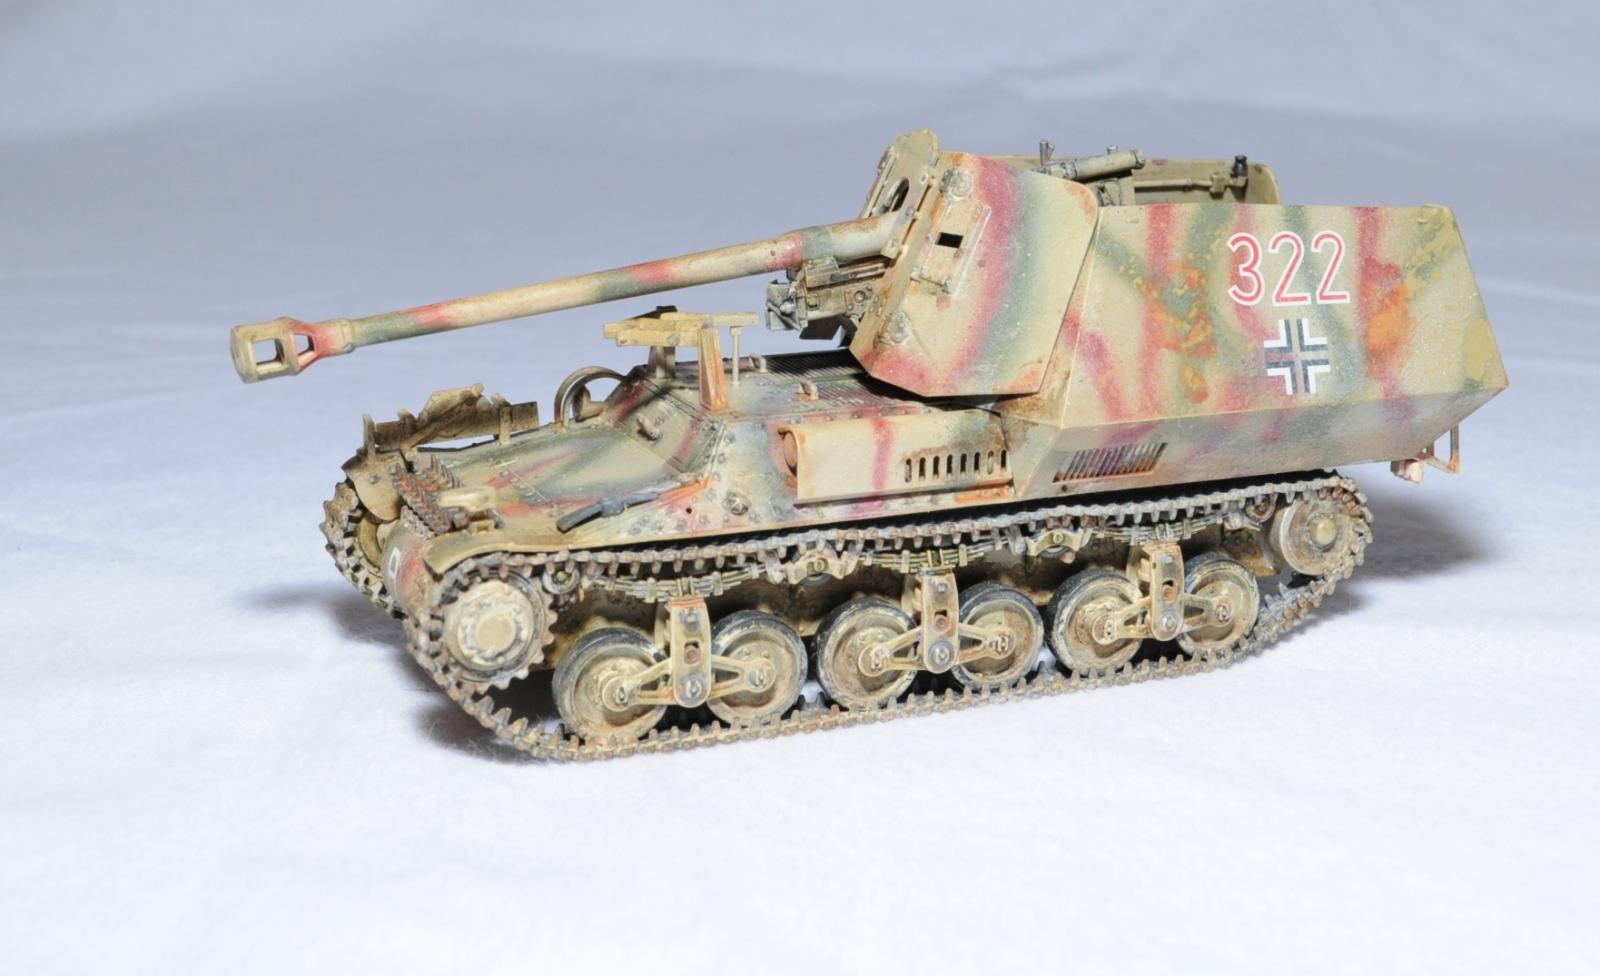
There are three paint schemes for this model: all German gray, white & gray or camouflage. For this review, I chose camouflage.
I used Tamiya paint throughout. Since the subassemblies had been painted with a base coat of dark yellow, I finished the camouflage pattern with dark green and red brown. In one of the photos, you will see the gun in place. This was a temporary placement for painting purposes.
The instructions indicated to paint the shells gold with black tips. If gold paint is all you have, this would be fine, however, it would more accurate to paint them brass.
Before adding the tracks, I primed and painted them with a base color of anthracite gray. I did some initial weathering before attaching them. As with the entire model, the engineering of the tracks is impressive, however, you must follow the assembly sequence exactly. Although I won’t go through each step (see photos), please pay close attention to the top piece. There are two important attachment points—the rollers. The top track piece is molded with sags--as would occur in real life. To make the appearance accurate and to make the remainder of the track construction correct, the top piece must be fitted properly.
I sprayed an acrylic gloss coat and then applied the decals. To finish weathering the model, I used a variety MiG & Vallejo washes and pigments.
Two optional figures are also provided.
Summary
This is an excellent kit. Due to its precise fit, impressive detail, and smart engineering, it is a fun kit to build and can easily be a great weekend project. Other than the parts mishap (thank you again Gary Demory!), there were no issues or difficulties.
Since it hit the market, it has been a hot item. I highly recommend you add it to your collection, if you haven’t already. Armor builders love their kits with parts galore, but they also love kits that go together quickly and look GREAT. This is one of those. It won’t disappoint.
Again, I would like to express my sincere gratitude to Gary Demory, Tamiya America Customer Service Supervisor. Thank you Tamiya America for supplying this review sample and for the honor to build it, and thank you IPMS for the opportunity as well as to Phil and Bill for all the work you do for the reviewers.


Comments
Add new comment
This site is protected by reCAPTCHA and the Google Privacy Policy and Terms of Service apply.
Similar Reviews