
IJMNS Yamato, Part 2
Initial Construction
Now that I had the kit in hand, I had to once and for all decide into what time frame to build it. Most of the parts you need to build the ship at any point in her career are in the box, but much of the build will be determined by what point in time you choose to place the ship. I finally decided to depict Yamato during the Battle of Leyte Gulf in October, 1944. I had good references that showed her differences at various points in her service history, with illustrations highlighting in particular her deck and superstructure arrangement of small and medium caliber weapons.
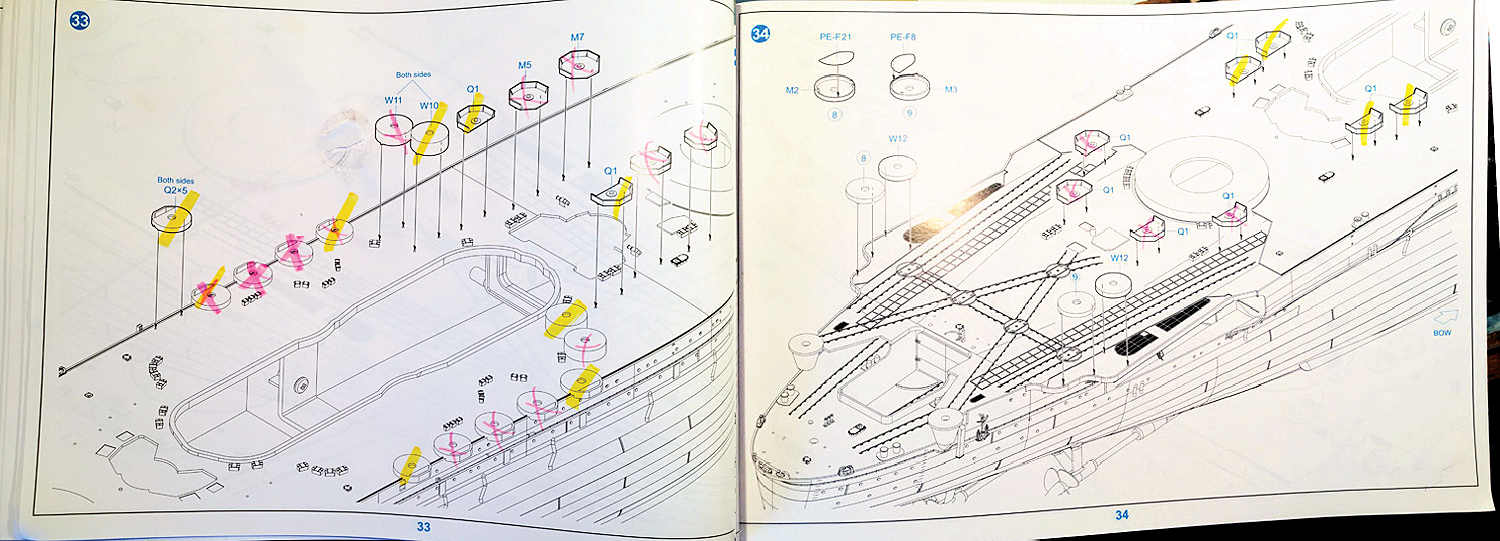
The kit instructions would have you build Yamato at the time of her final voyage. I was able to make the necessary changes to depict her six months earlier. This mainly involved not using all the small caliber (25mm) AA guns, their mounts and gun decks provided in the kit, and only opening those deck placement holes for the weapons, ammo boxes, etc. that were in place at that time. This was one of those occasions where it proved to be a really good idea to go through the entire instruction booklet before hand and plan what steps or parts to postpone placement of, and which ones to eliminate all together. I also needed to adapt the instruction sequence to my own preferred building sequence, one geared towards ease and conservation of painting.
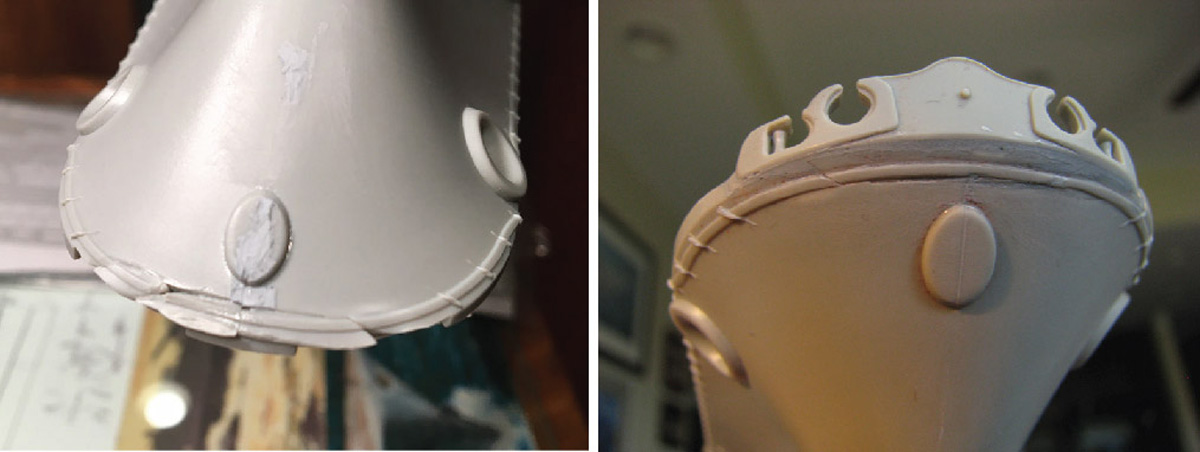
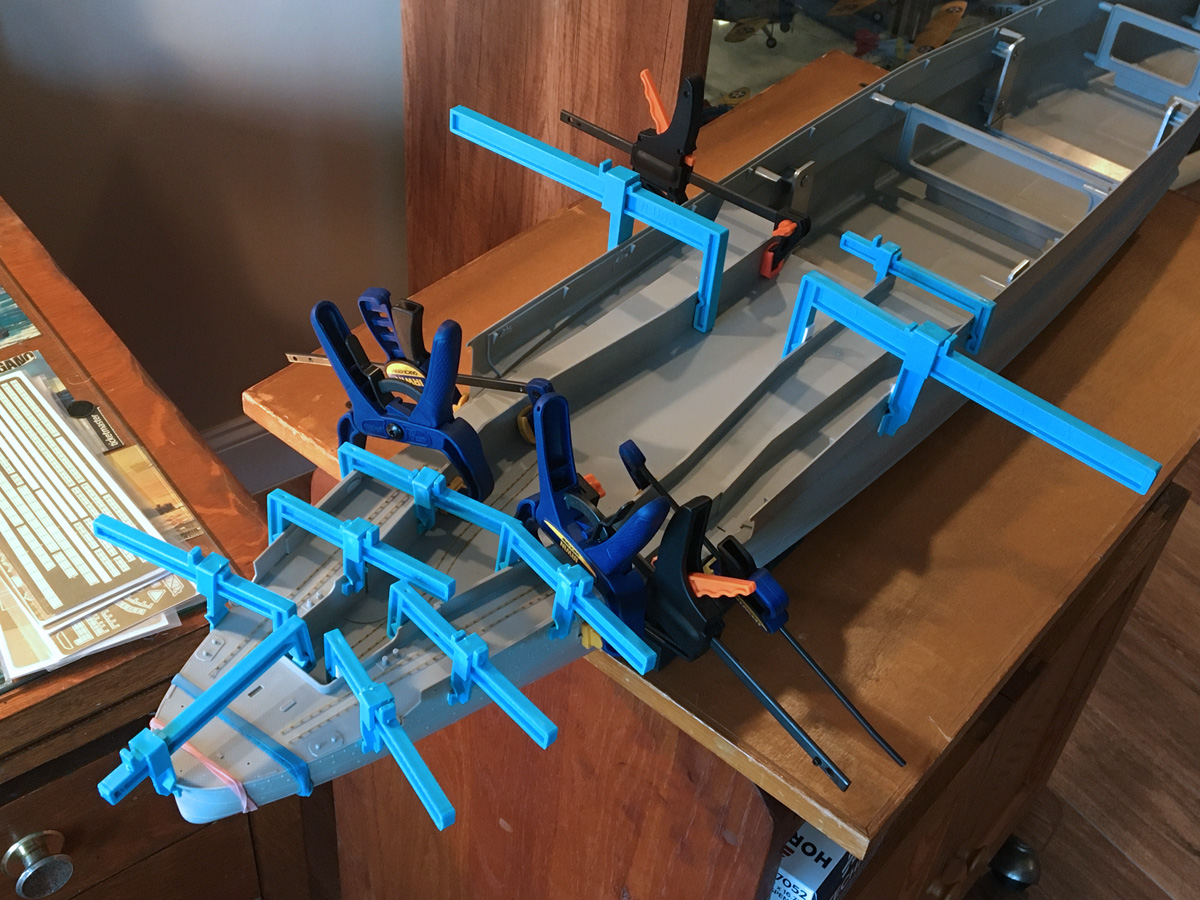
My first construction sequence was correcting a self-inflicted wound. I was inspecting the pre-assembled hull and promptly dropped it right on its delicate nose, shattering the bow where it meets the foredeck. Luckily, I was able to find most of the larger pieces and coax them back into place, cementing and puttying the bow into a recognizable semblance of its former self. The kit instructions would have you start with the ship’s boats and aircraft. I’ve discovered that these can provide a good distraction when you find yourself getting bogged down in the ocean of small detailed parts and subassemblies that make up the bulk of a battleship (and this lady has them in spades), so I held off on the boats and aircraft for a while and went straight into the deck assembly.
My stock of Model Master enamels is dwindling, and I knew I’d never have enough for this project, so I decided to experiment here with Tamiya lacquers. Tamiya’s color line includes several naval colors, including shades of grey paint used by the different Japanese naval arsenals and shipbuilding centers. For starters I picked up a couple bottles and a couple of spray cans of Kure Grey. Fortunately, this shade is the lightest of the naval grays used by the IJN, but “lightest” here is truly relative. To me, this is a very dark grey, and if I had my druthers, I’d mix my own lighter version. But since I was using spray cans, custom mixing was not an option (the quantity of paint needed pointed to the more economical use of at least some spray cans - the hull itself will take a lot of paint, at least one full can worth - so custom mixing was out and spray cans were in). I also plan to paint as many small parts and sub-assemblies as possible in mass before finally putting them in place, again to save masking time and wasted paint. While the can spray has a tendency to go on thick (multiple light coats…multiple light coats…), the bottle paint is easily thinned with hardware store lacquer thinner and airbrushes smooth and even.
Much of the kit’s boat and aircraft hanger deck is recessed under the main deck, so this is assembled and painted first. This assembly, like most of the ship, includes many photo etch parts. Overall parts fit is good and snug, and even though much of these areas will be invisible in the end, they are still quite extensive. You do have the option to open the doors to these compartments to show off what’s inside (and any appreciable detail you’d have to build from scratch), but I opted for the quick and easy route here and closed these outer doors. However, because much of what you can still see here is in hard to get to places, you will need to paint these areas before moving on to the main deck assembly. For the time being, I also opted to only partially complete the upper aircraft handling deck. This deck includes some long PE strips that represent linoleum covered areas that will lay under some of the aircraft trolley rails (more PE) that traverse the deck. These strips will be much easier to paint and install later (along with the particular sections of overlapping rails) than to try to mask and paint them once placed under the rails and glued down to the deck.
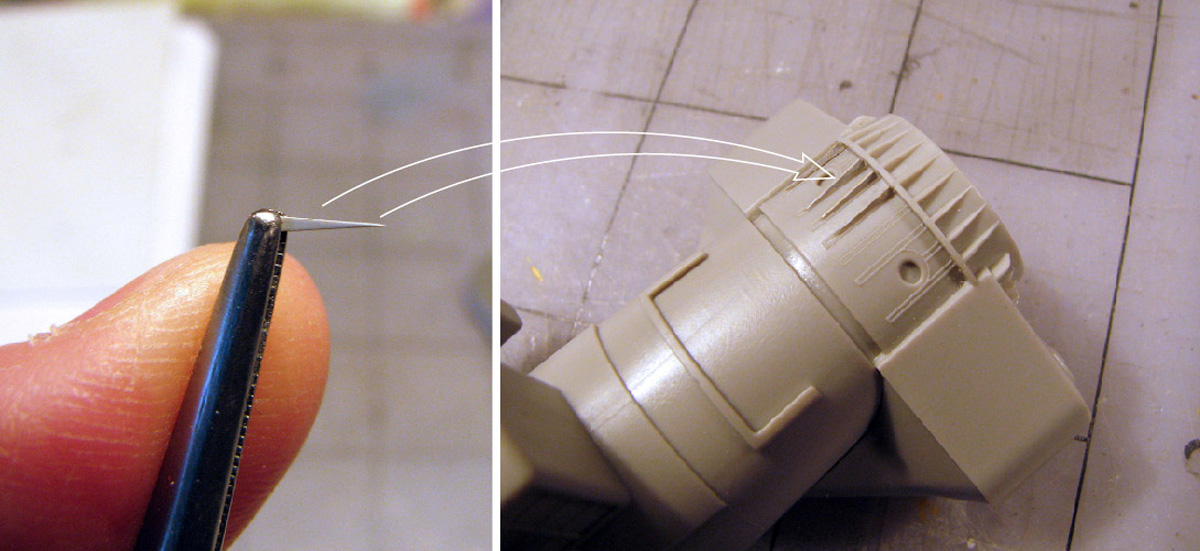
One nice thing about the PE that I noticed right off: many of the pieces that must be bent into place have weak spots strategically placed on the PE part to make bending to the correct shape easy and to ensure accurate placement. That’s a nice touch. On the other hand, some of the PE parts are really, really small. Some are too small for me to even hold with tweezers. I have to question the use in some places for very small PE parts when it appears that plastic parts could have been molded in place, and would have looked better if they had been. But that’s just me.
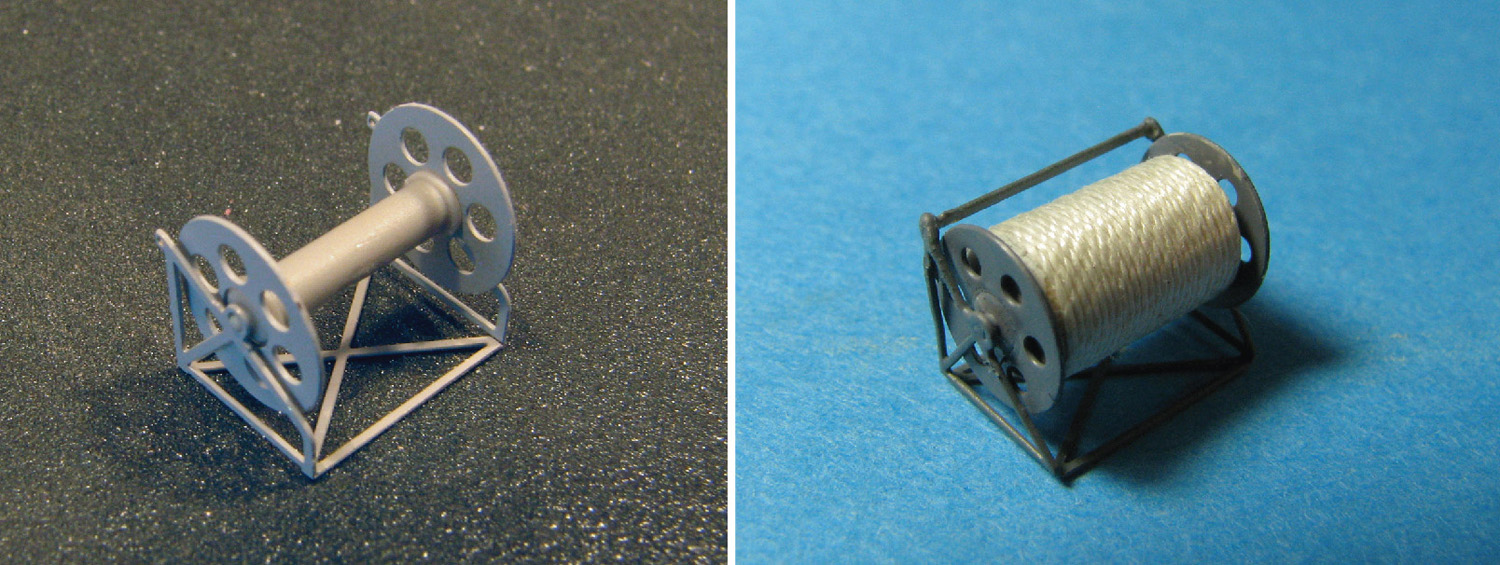
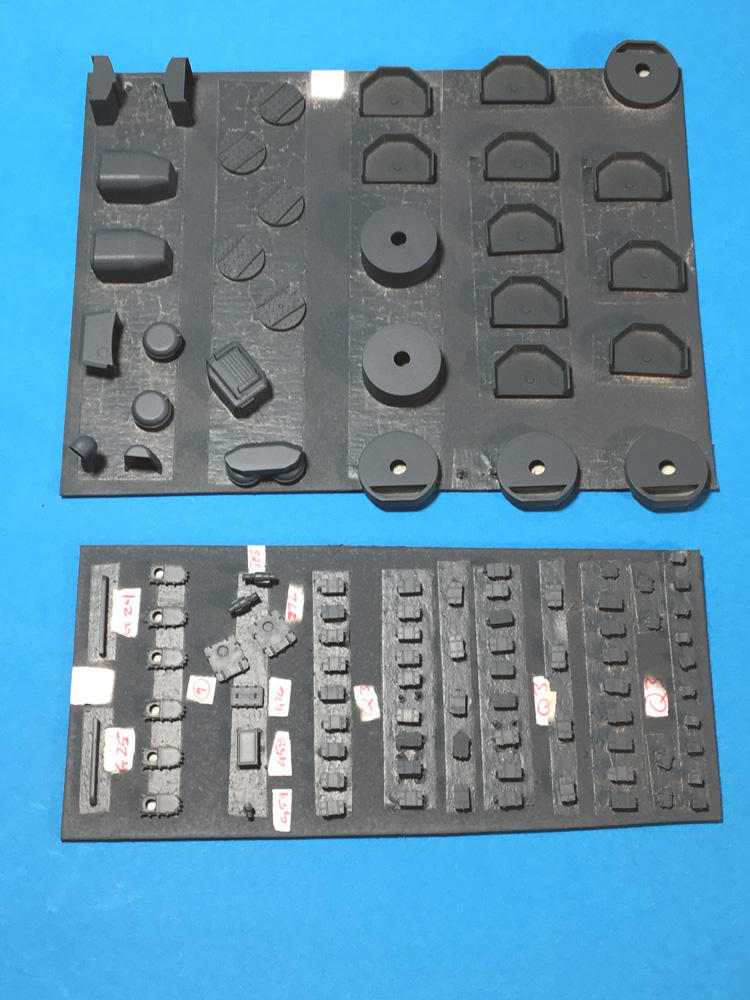
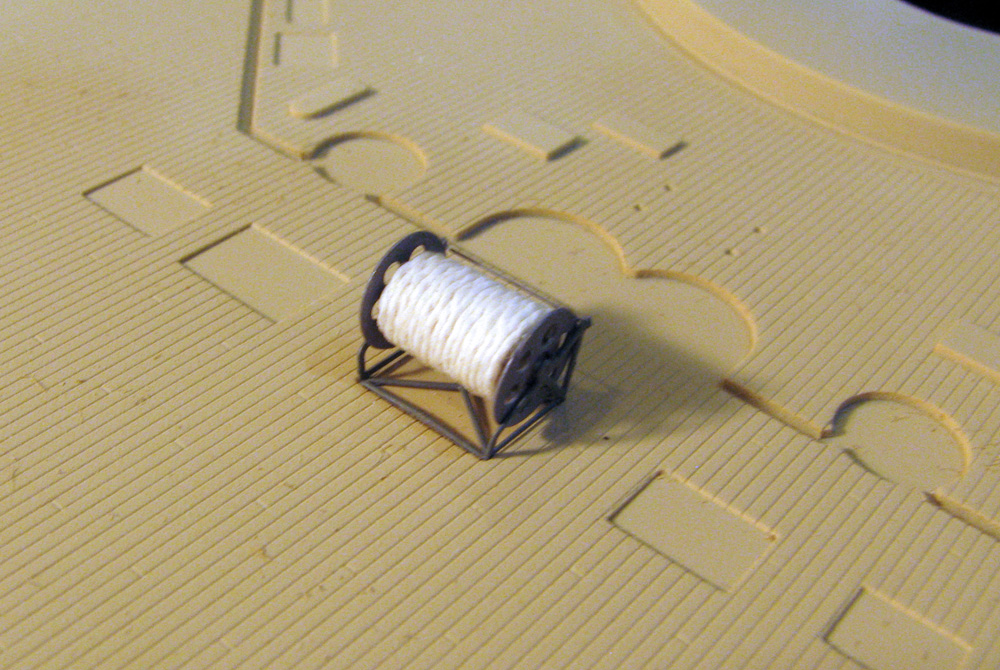
In the process of assembling small deck parts, I came to my first unexpected hurdle: all of the cable reels provided are empty spools. None of the fifteen reels (in five different sizes), made up from PE stands and plastic rollers, are represented with any cable on them. That just doesn’t look right, so I made my own cable. I first applied double sided tape over center spools to the desired thickness, then wound some of my wife’s fine quality weaving yarn (yes, I asked) in a single layer around the spool. I used two different thicknesses to represent larger and smaller diameter rope. The thicker yarn required an initial coating of diluted white glue to smooth down the yarn fuzz, but the thinner yarn worked quite well right off the spool. The process was time consuming, but the final effect is very convincing.
The second conundrum evolves the reel placement areas on deck. Each location is indicated by a bare (that is, un-planked) recessed rectangle moulded into the deck. Every reference that I have shows these reels siting on the wood deck. So, I’ll have to make “planked” inserts to cover these depressions from plastic card stock.
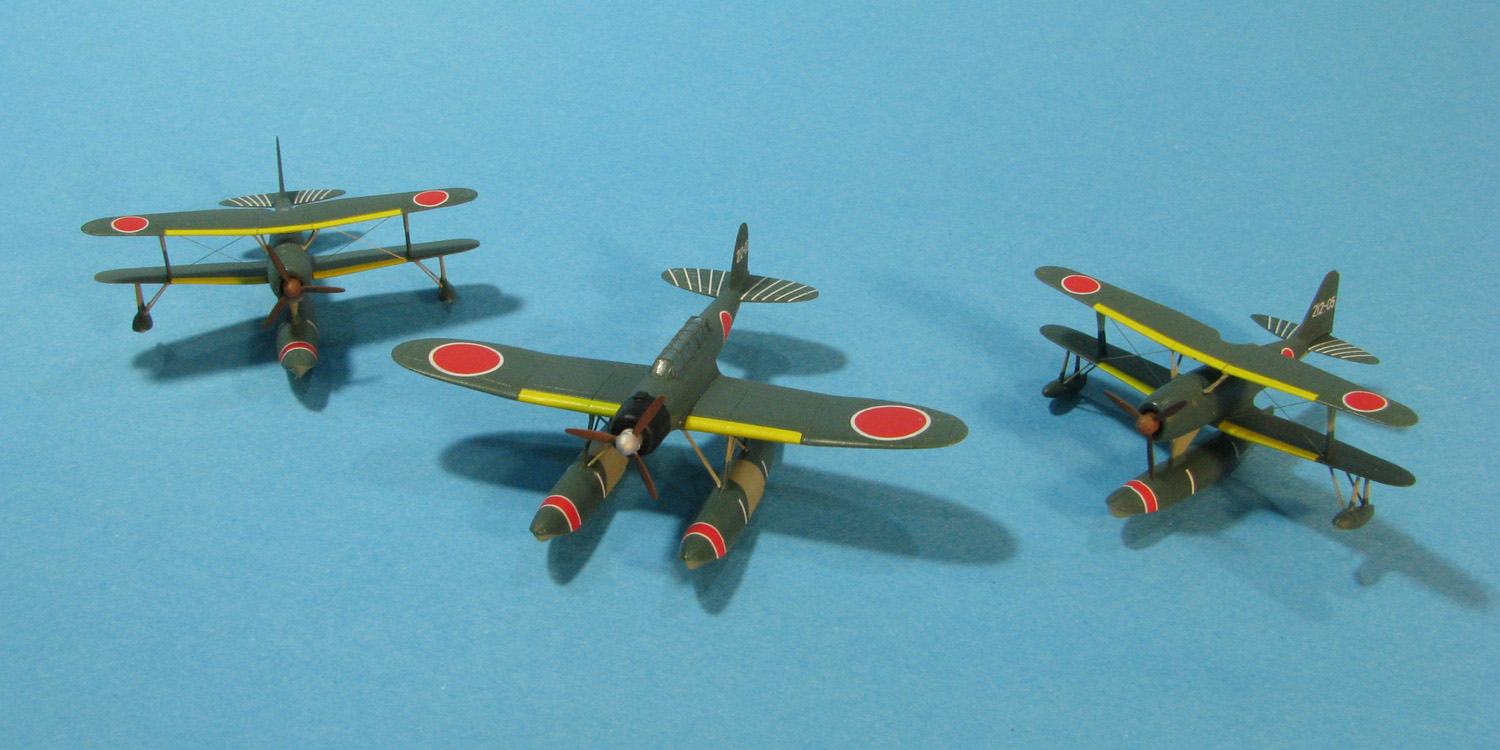
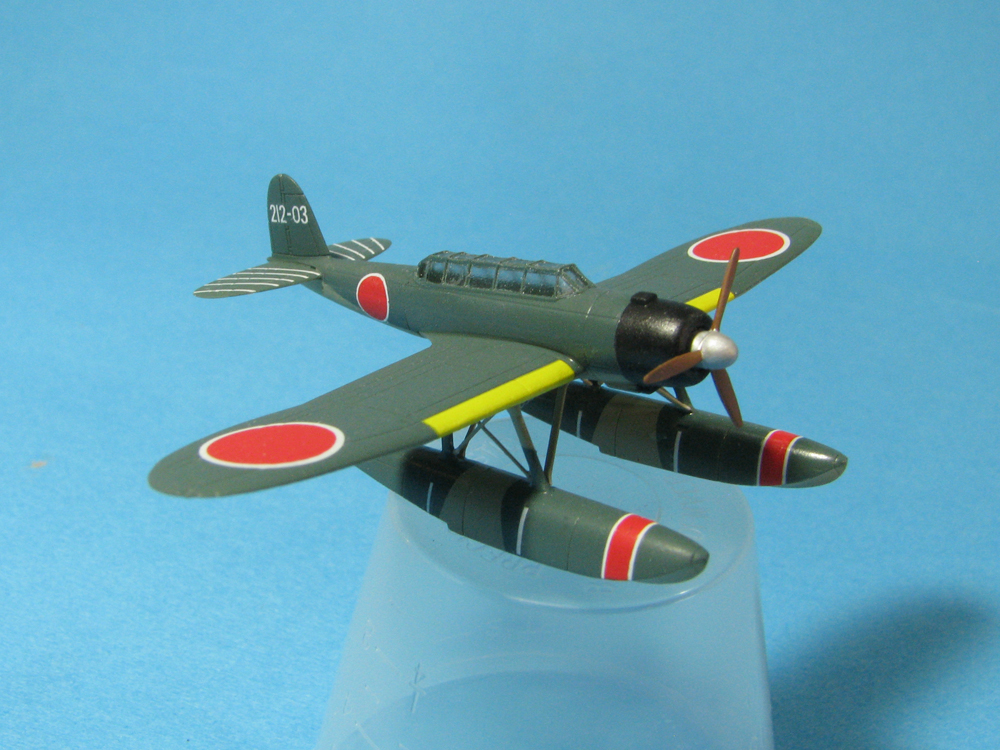
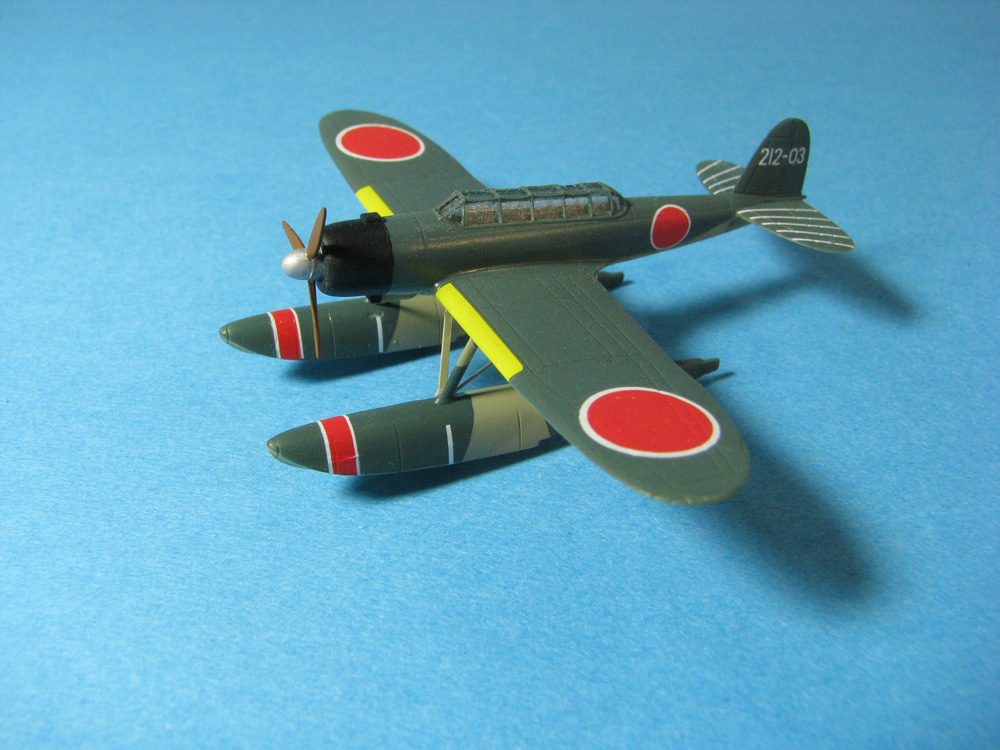
Once most of the deck details were either in place or ready to be attached, it felt like a good time to move to aircraft construction. The kit provides two Jakes and two Petes. Since there seems to be no definitive answer to how many of what aircraft Yamato carried during the Leyte Gulf operation (or most other times, for that matter), I arbitrarily chose two Petes and one Jake. Just as well, since I screwed up some of the Jake decals during application. These aircraft are nice little mini kits. Molded in clear plastic, they are nevertheless easy to assemble and not overly scribed. They’re large enough, and the canopy framing is just pronounced enough that masking is relatively easy. The final effect looks good. The decals are opaque yet conformed easily to detail with a little Solvaset, even the leading edge yellow ID strips. A few small PE support braces and wing struts are included and fit into place with minimal verbal encouragement. Note: the PE cabane struts for the Petes are not accurate. The kit provides “V” struts when they should be “N” struts. I used them as is. I also added cross bracing wire made from 0.1 mm nickel silver rod from Albion Allows.
The next step is the intricate castle that is the main superstructure. More on that and the armament assembly in part 3.
Once again, thanks to Debra at MRC and Phil at IPMS for making this kit available for review.


Comments
Add new comment
This site is protected by reCAPTCHA and the Google Privacy Policy and Terms of Service apply.
Similar Reviews