
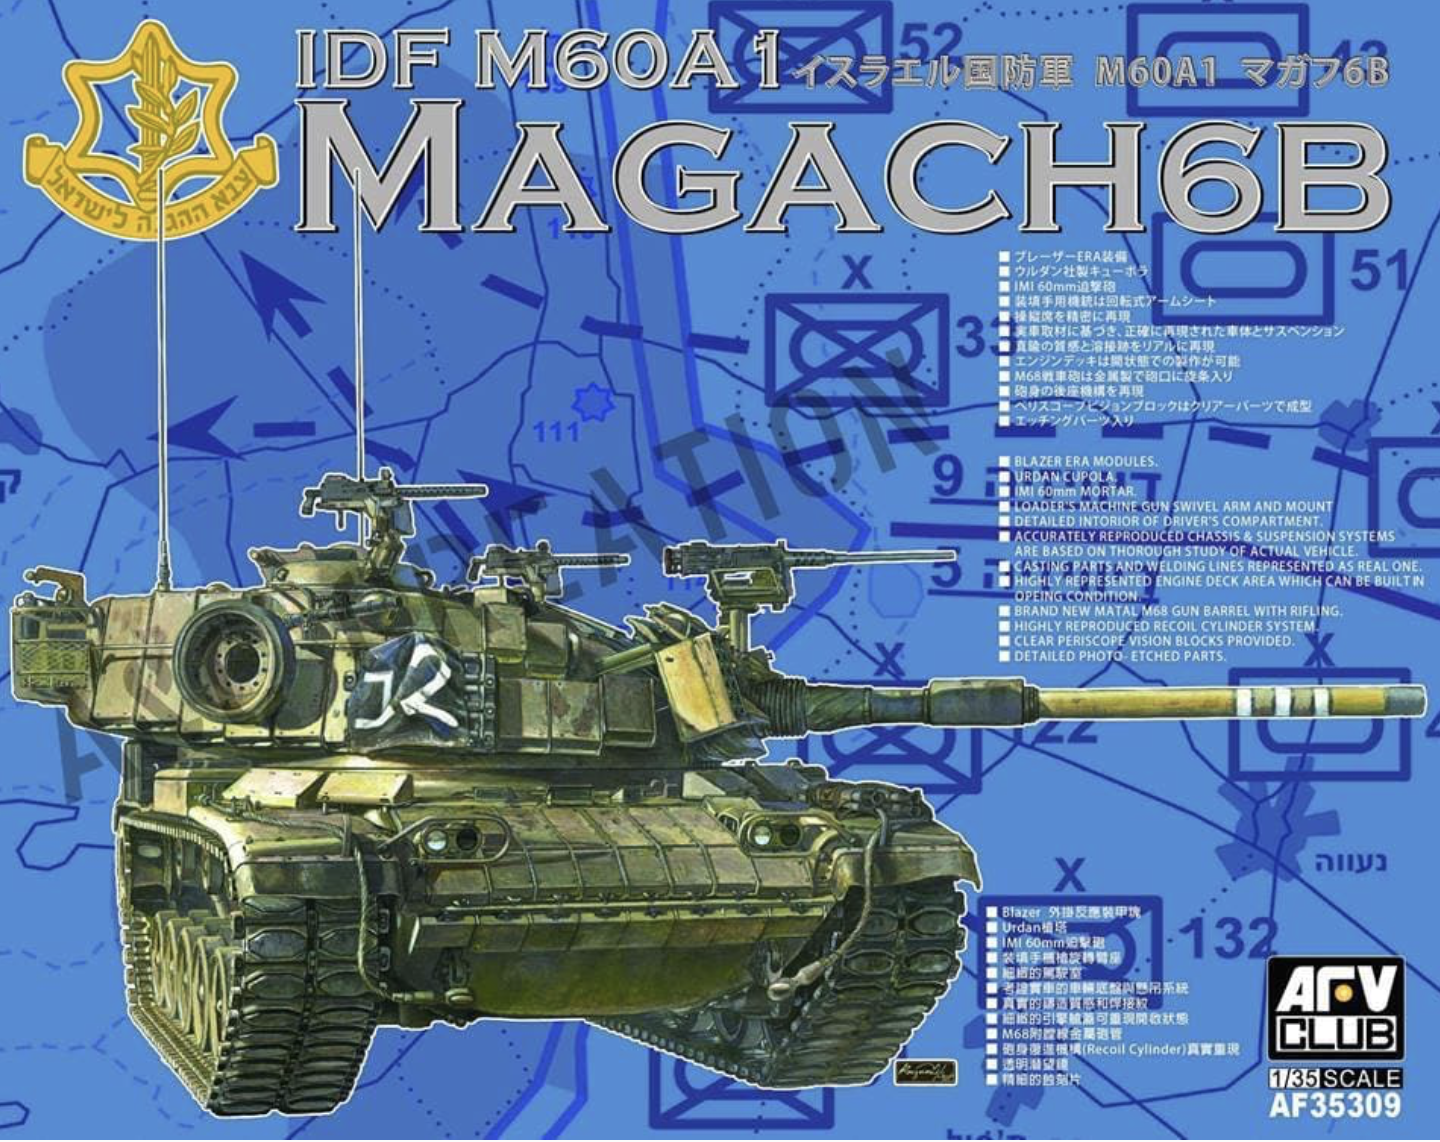
IDF M60A1 Magach 6B
History and this Kit
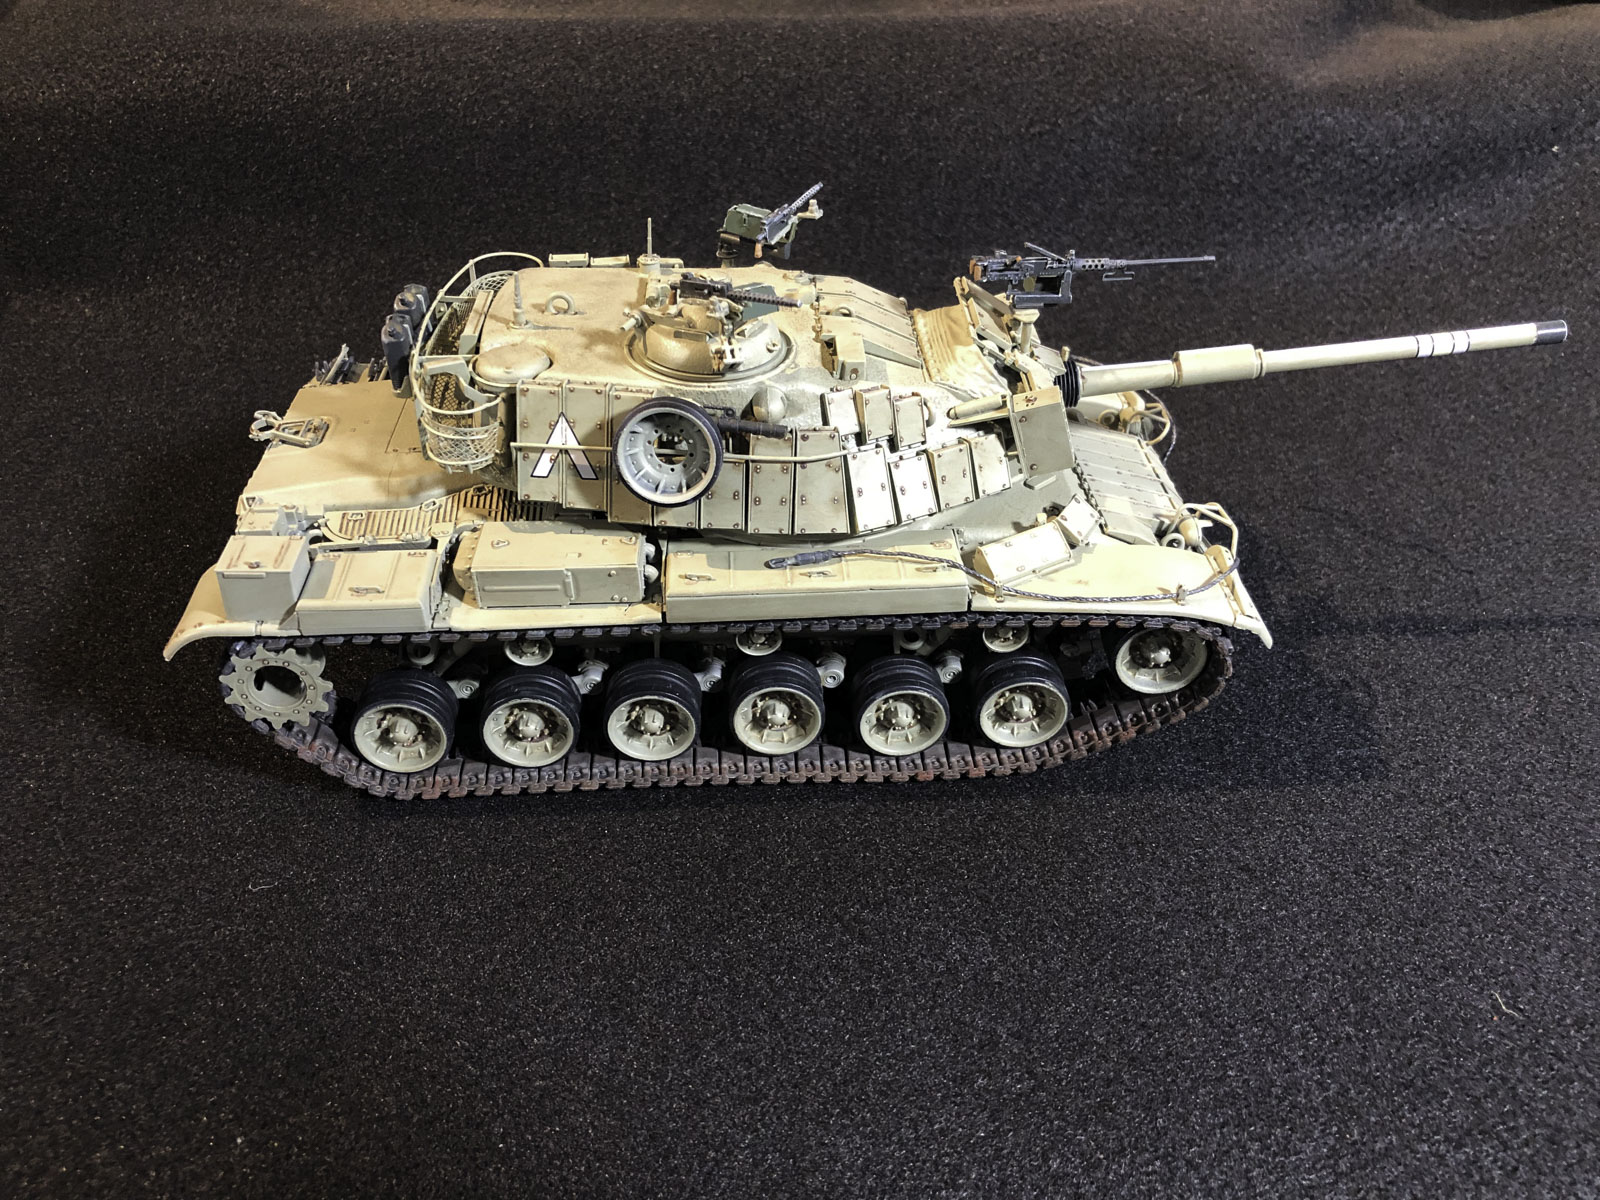
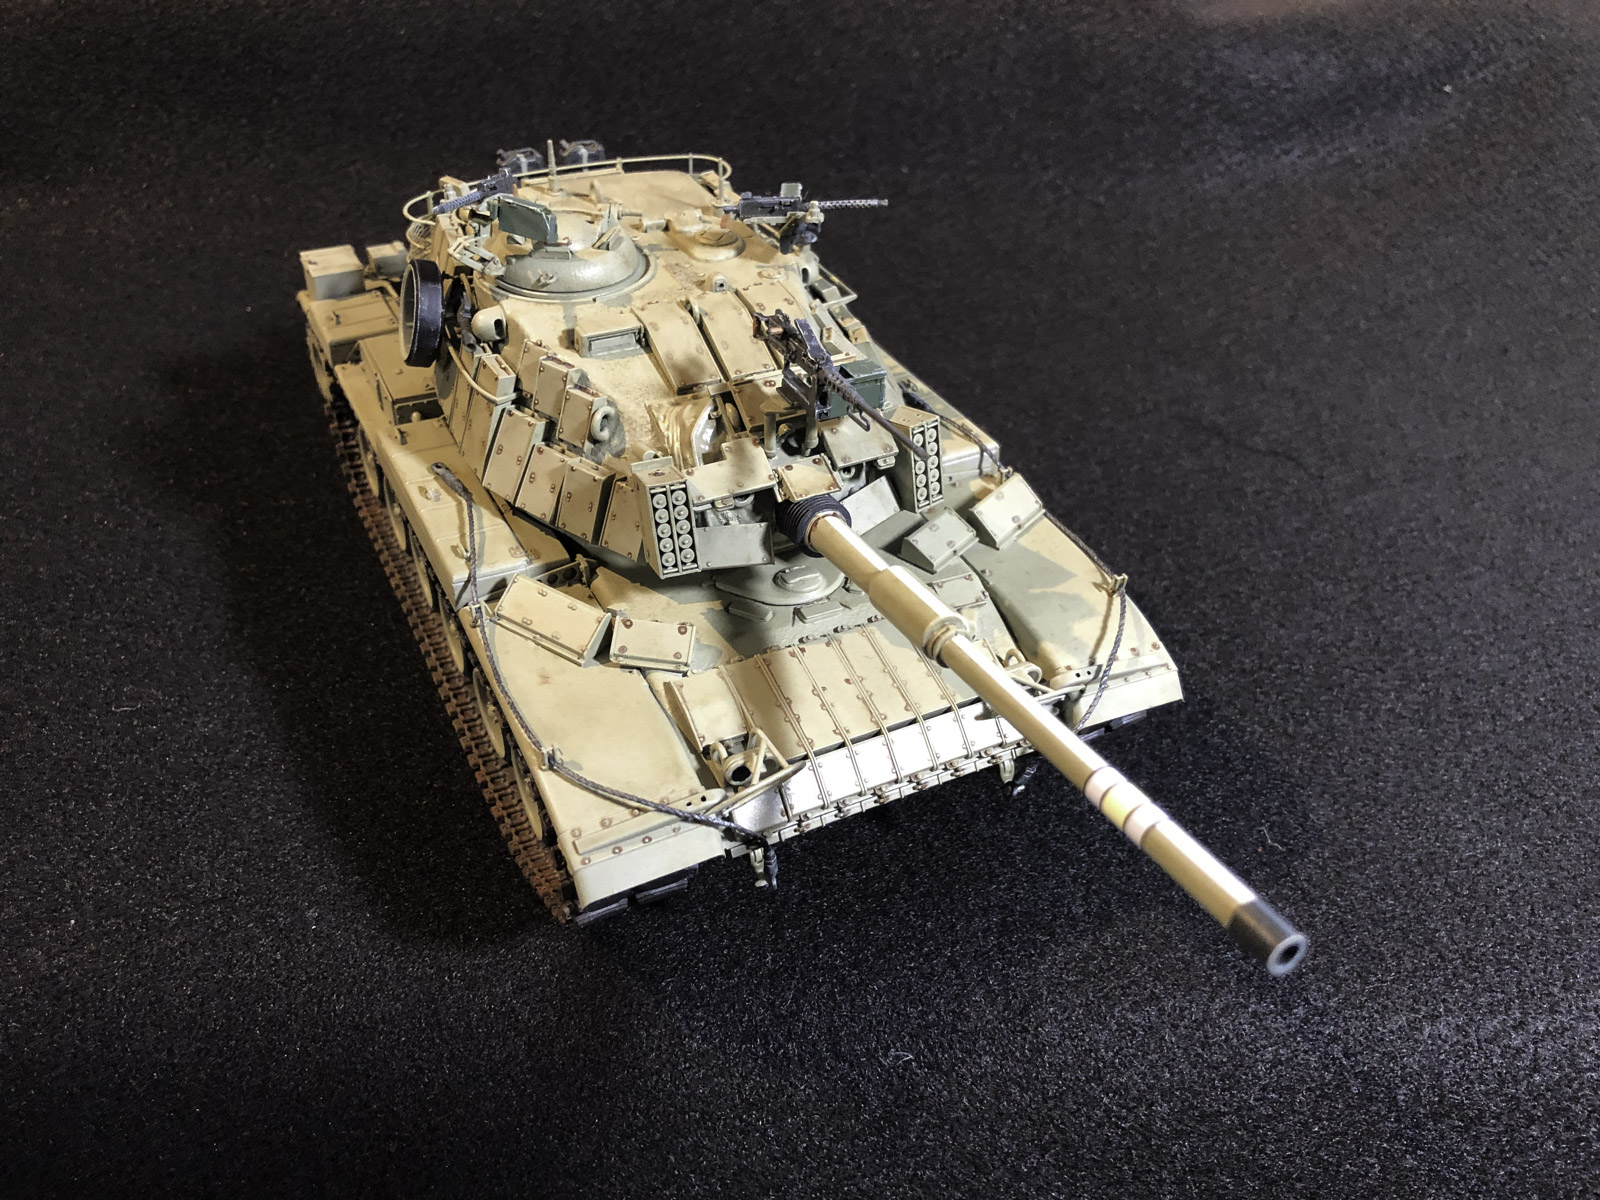
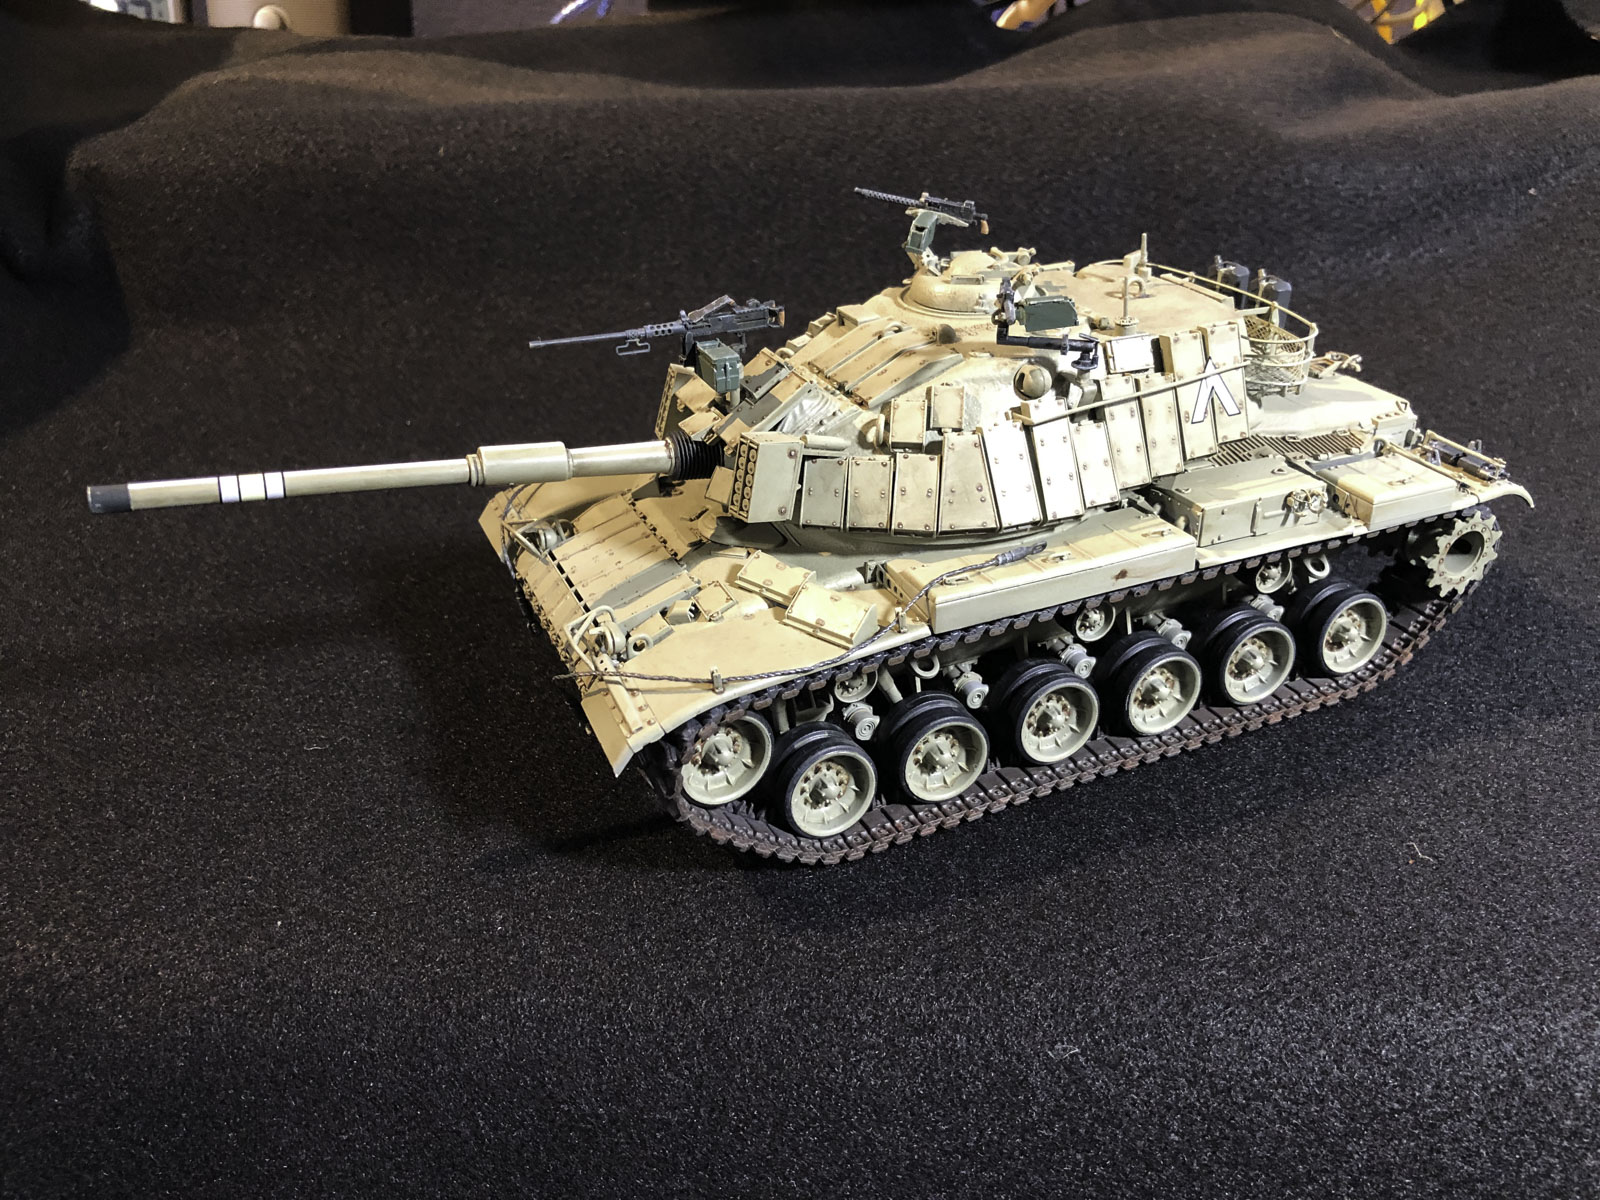
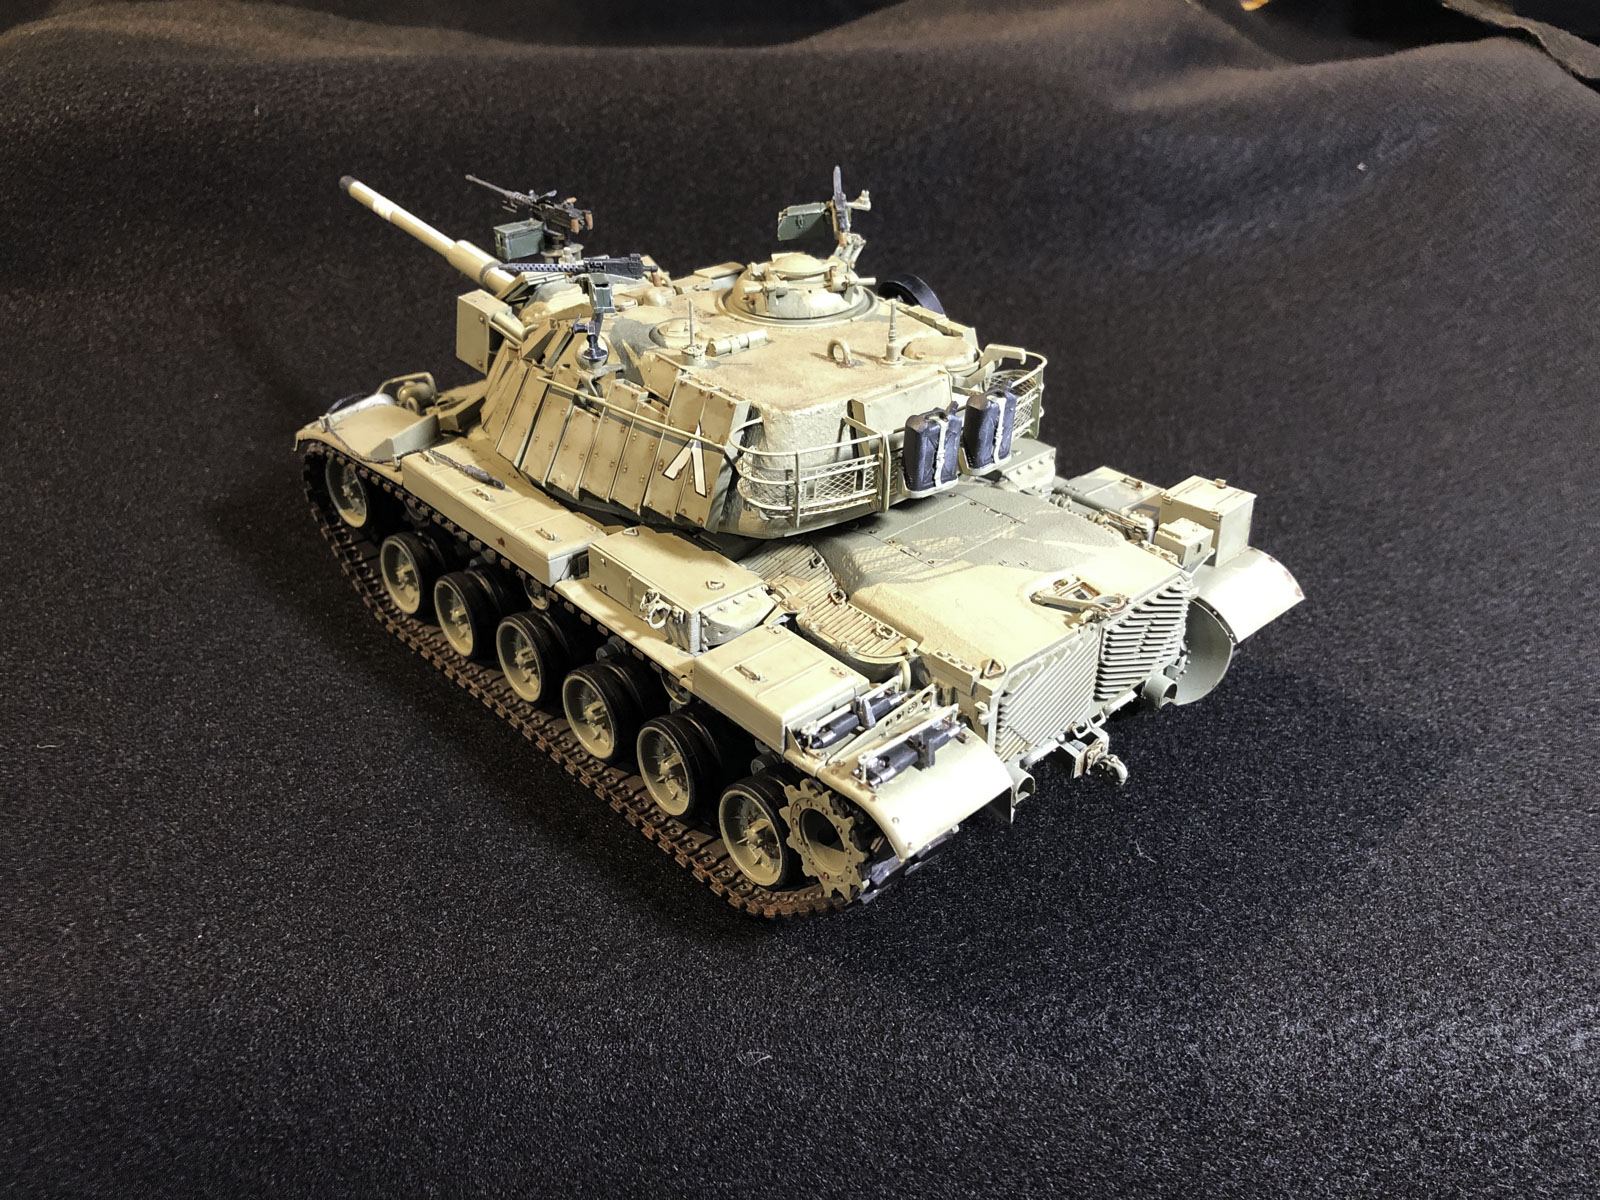
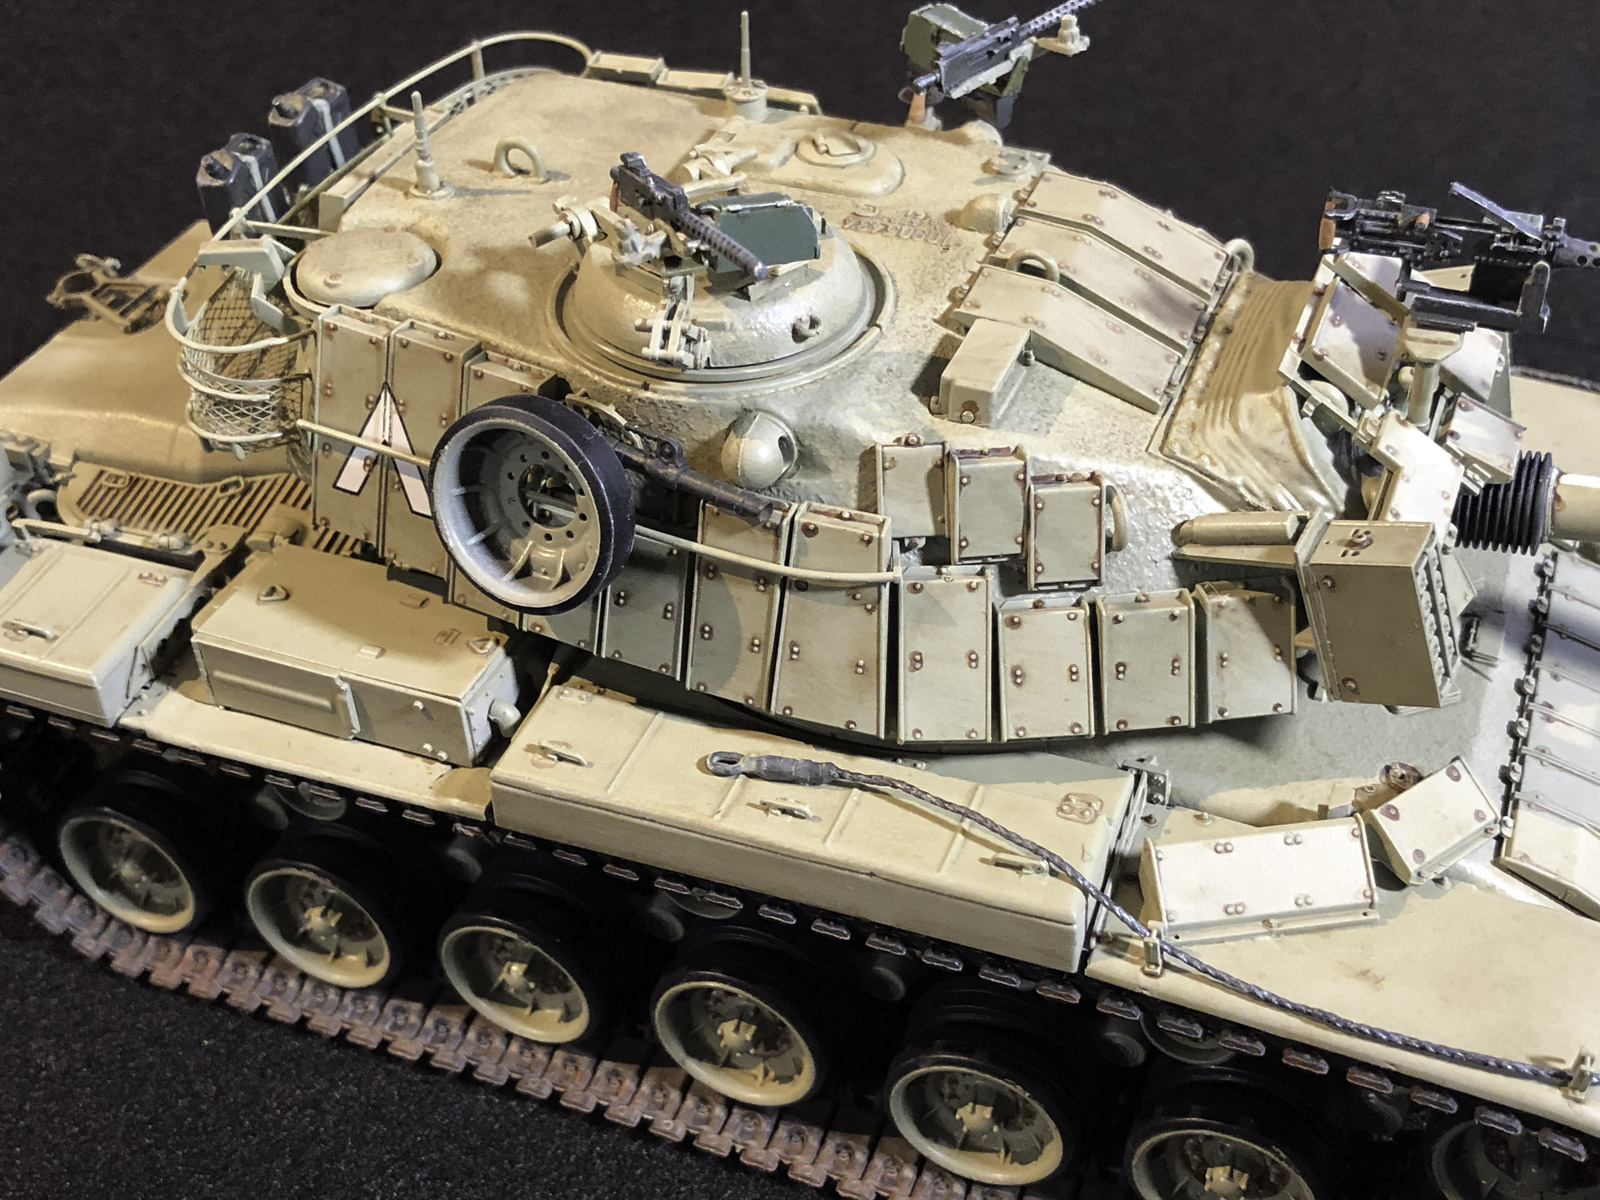
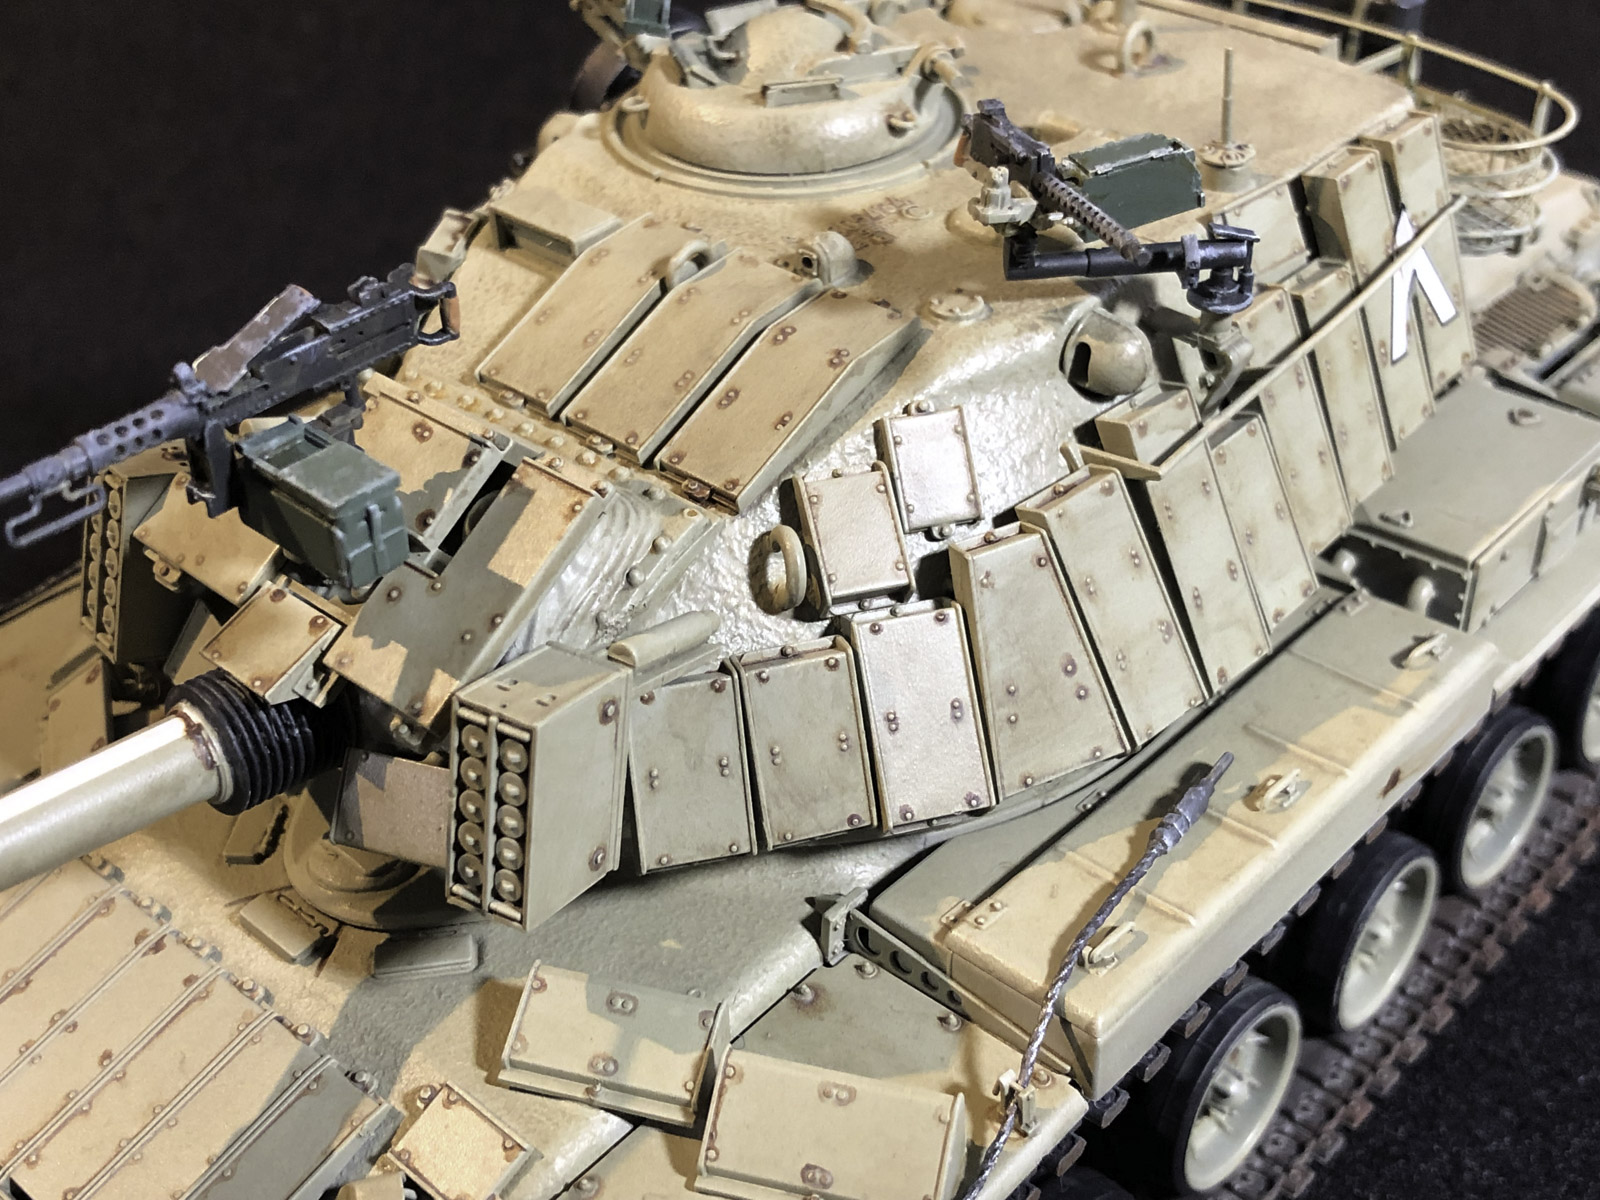
The Magach tank was produced and based on both the M48, and with the Magach 6B on M60 tank hulls. I took this review assignment because of my interest in the M60 Patton tanks. Having built several over the last few years and AFV’s M60A1 kit #35060 and Takom’s M60A1 with the Explosive Reactive Armor, I was equally up for the challenge of the Magach 6B. This latest version of the Magach 6B has mostly aspects that we modelers can’t see: the British 105mm gun and 750hp diesel engine. As the M60 tanks were modified into the Magach 6 series the most noticeable difference is the explosive reactive armor panels surrounding the turret and the frontal hull area, and the addition of a M2 50 cal. and two 30 cal. machine guns on the turret.
The Build
The Magach 6B is not a difficult build, though I suggest that the kit instructions are followed to insure the numerous small parts are included in the various sequence steps. My only departure in this build was to not include any of the internal parts as my kit was built for ‘closed’ version of the Magach.
There are a lotof very small parts. When tackling the various machine guns, for example, there are six pieces required to assemble the side feeding ammo box for just one of the .30 cal. guns. I also noticed many instruction drawings which largely leave the actual location of a part to the builder’s discretion; sometimes looking at subsequent drawings provides the placement insight, but not always. I found that checking off each of the numerous handles, levers and small photoetched parts helped ensure that I had not missed any of them in the assembly of the kit.
Lotsof flash—often in small areas or parts, requiring tedious sanding and or filing. And, there are numerous plastic ‘stubs’ (used in the molding process I am guessing) which need to be removed prior to assembling many pieces; while not a real hurdle, these are a nuisance.
For example, looking at detail drawing no. 19, positioning of the reactive tiles appears to be reasonably straight-forward, though the actual spacing and location tiles (looking from the left front) leave some adjustments and spacing to your judgment. Detail drawing 20 (providing both an overhead and left frontal view provides better overhead spacing for the tiles but the drawings for the headlight guards are confusing. A very careful review of detail drawings 20 is needed, though the actual placement and angle remains a mystery and up to the individual modeler. The lower reactive tiles are never really depicted in drawing #19, and once again up to the modeler to divine. When looking at detail drawing #28, turn the page to see the suggested location for the reactive tiles on pages 16 and 17: drawing panels #29, #30, #31 and #32 provide placement drawings illustrating the spacing and reactive tile placement.
There are several mistakes in the numbering for the part trees; e.g. two part tree numbers #20. When directed to drawing ‘U’ one starts a search only to come to the conclusion that the instructions are again in error, when I believe the drawing should refer to ‘V’.
Painting
My painting of Magach tank was delayed in part because I wanted to use several 3rdparty tools and paint. For the first time I used the M60 painting masks from Quickwheels—these worked as advertised and provided a much quicker masking and paint for the many roadwheels, saving time in the most tedious aspect of armor building. I also had to located two added painting sets I wanted to try with the Magach project. The first was to locate the Middle East War Color set from AK Interactive. I used their IDF San Grey, AK 792 for the overall paint on the Magach 6B. After a gloss coat, I then applied a pin wash depicting rust and weathering around all of the raised details. After decaling, which only consisted of six decals, I applied several coats of Mig filters, General Dust (F429) and Subtle Dirt (F431). Both of these filters added to the overall weatherbeaten and dusty appearance of the Magach 6B.
Decals
While I previously mentioned decals, there are markings for four separate tanks, I didn’t find them to be of very good quality. They appear too thick. There is a good deal of visible film around the margins and even though I had applied several gloss coats, and used a lot of MicroSet these decals were difficult to move about the surface.
Overall Evaluation
The Magach 6B tank was a bit on the challenging side. Though it was never built in large numbers, it served the Israeli Self Defense army during the late 1960’s through the 70’s, into the 1982 Lebanon War, and finally into the early 90’s, when the Merkava tanks were introduced. Along side my previous M48, M60, and M1A, it provides another snapshot of the history of modern armor development. I highly recommend the AFV Magach 6B.
Thanks to AFV Models for this kit, which provides interesting insight into the Israeli Magach family of tanks.


Comments
Add new comment
This site is protected by reCAPTCHA and the Google Privacy Policy and Terms of Service apply.
Similar Reviews