
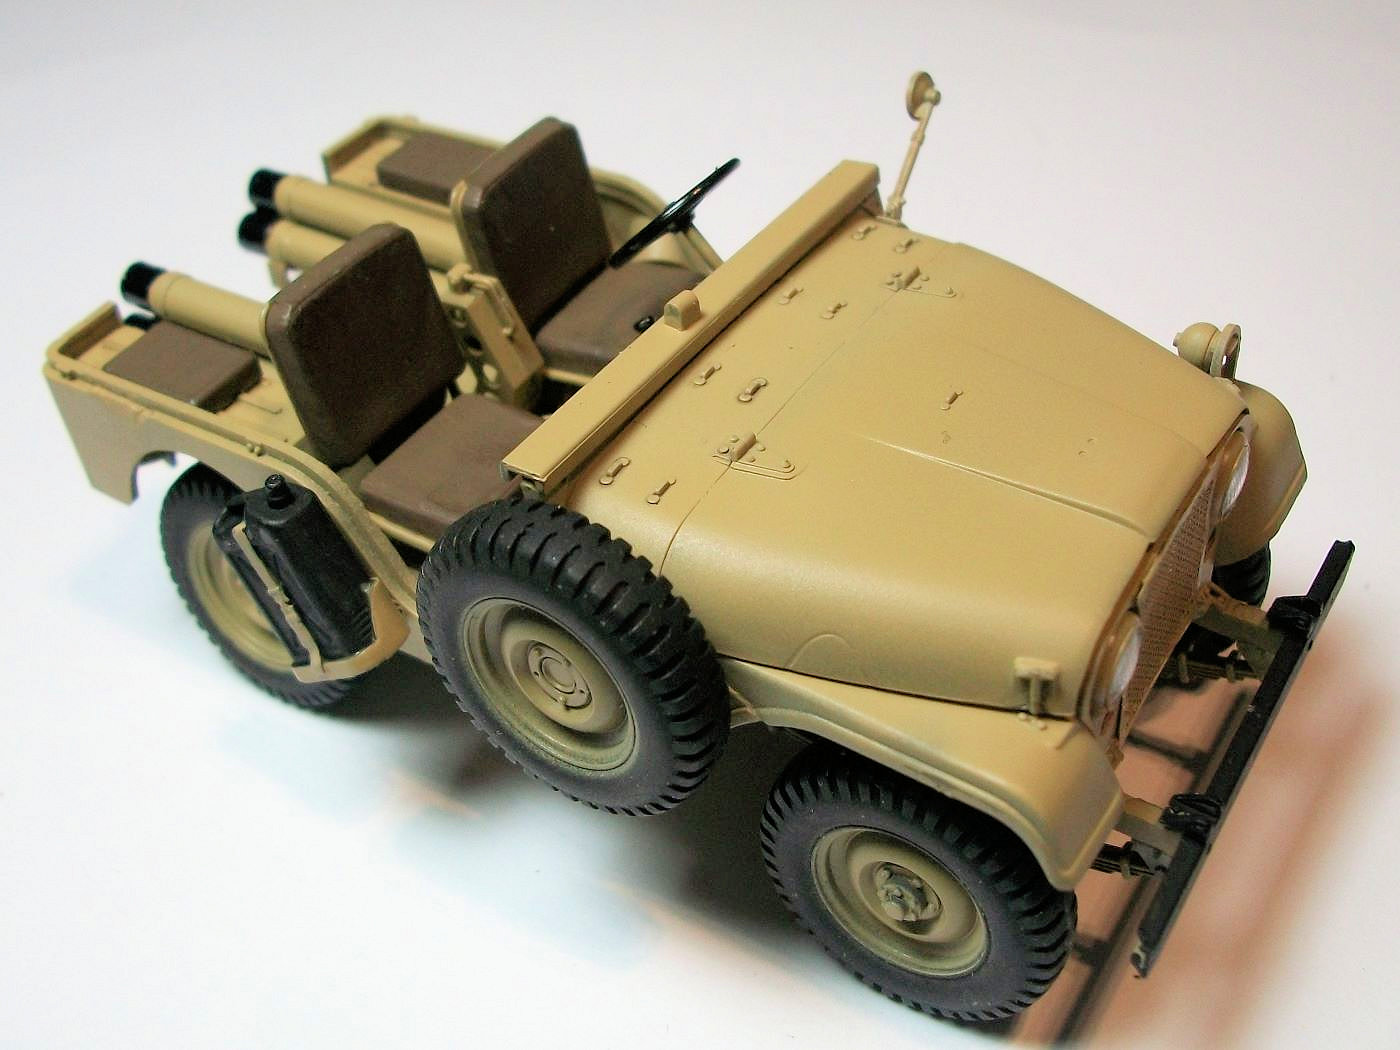
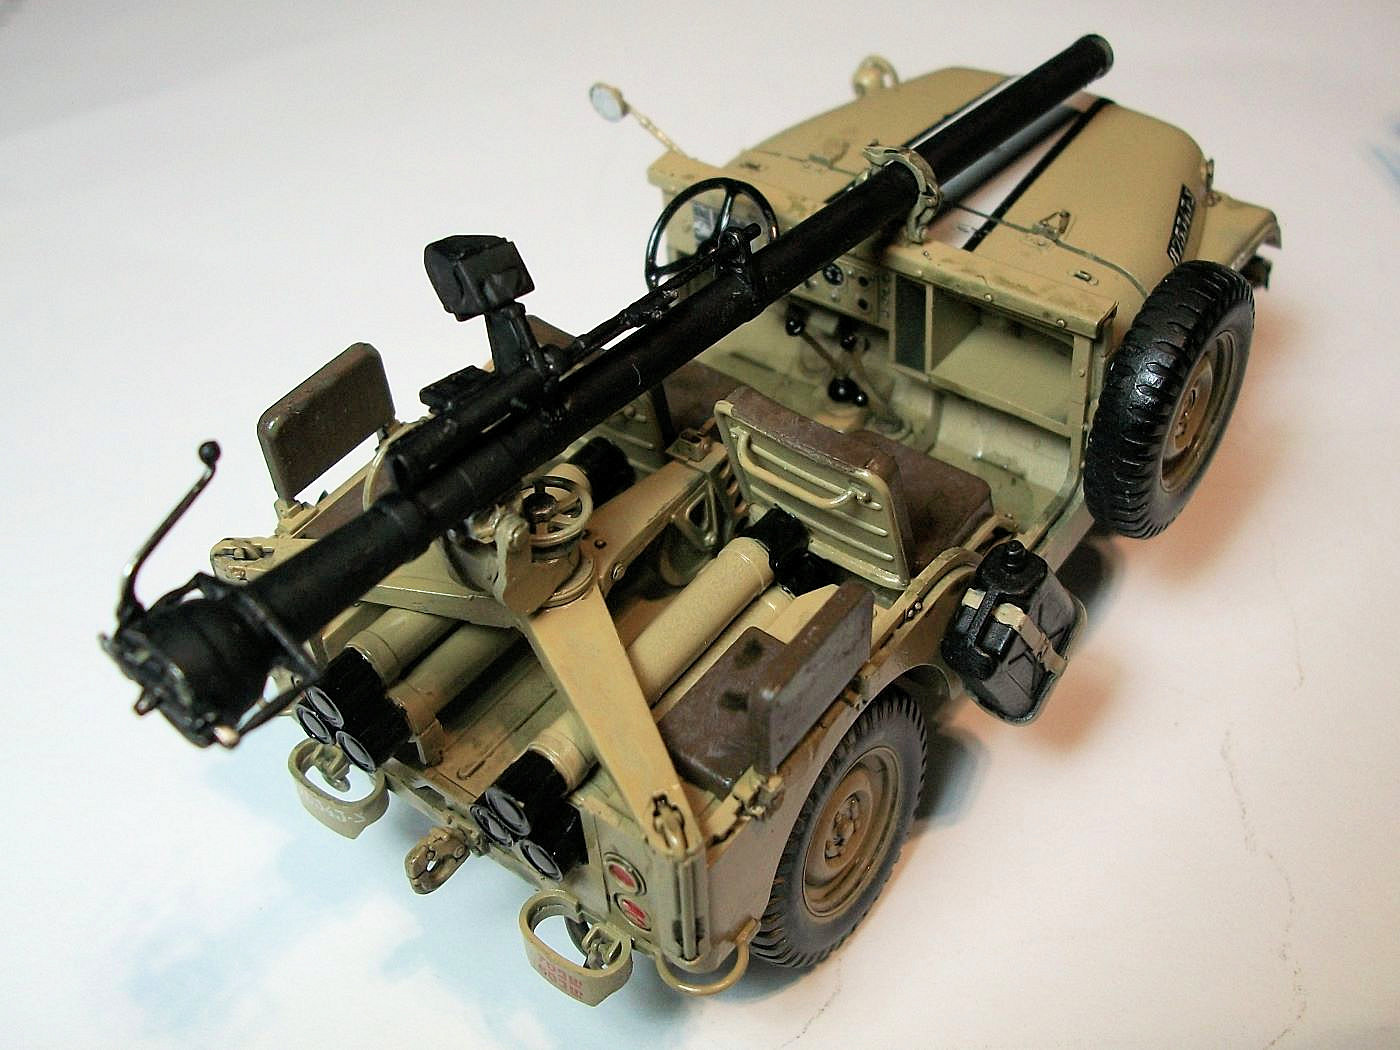
IDF ¼ Ton 4x4 SIYUR reconnaissance and TOLAR Recoilless Rifle Vehicle
AFV Club has put two kits in one packaging for the IDF Jeep Siyur (Reconnaissance) and Tolar (Fire Support) versions that were in service with the IDF from around early 1965 to the end of the Yom Kippur war in 1973. They were used in large numbers and for many functions during this period.
- Eleven x Light brown Sprues
- Two x Clear Sprues
- Two x Photo Etch sheets.
- Two x decal sheets
- 2x Instructions
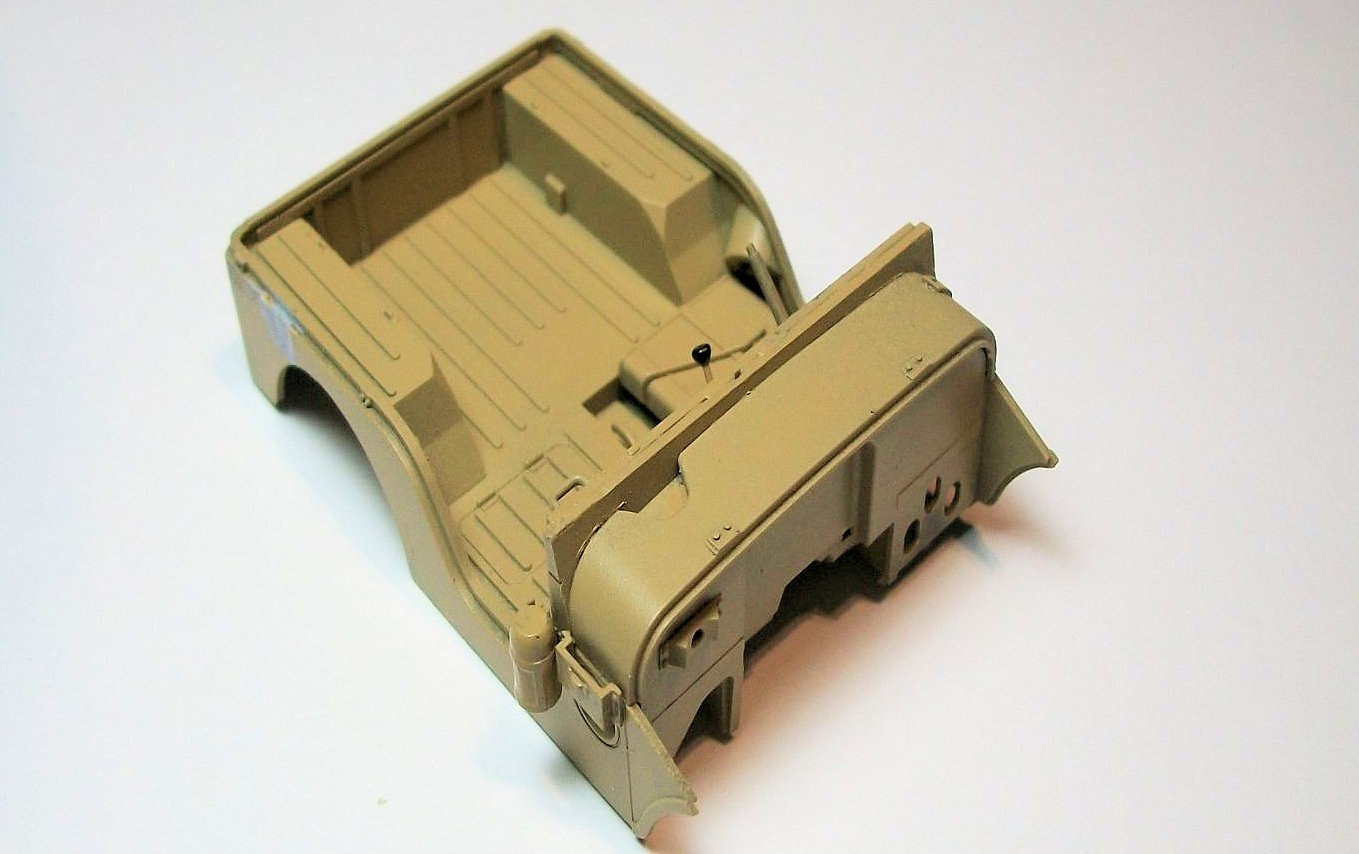
The detail quality is excellent with only a few pin marks to remove.
Siyur and Tolar Construction
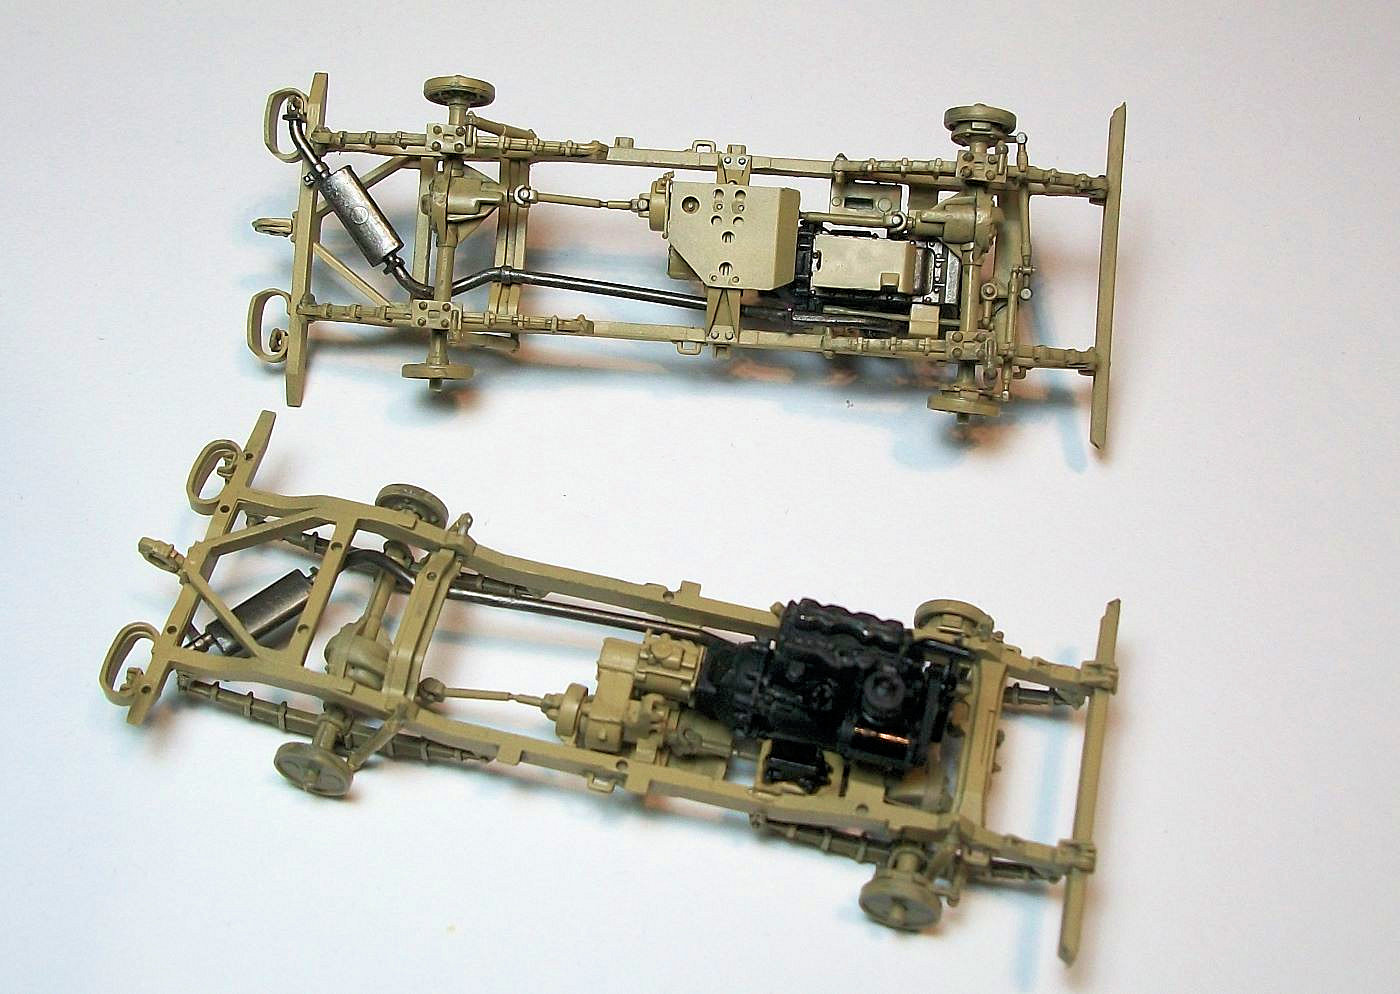
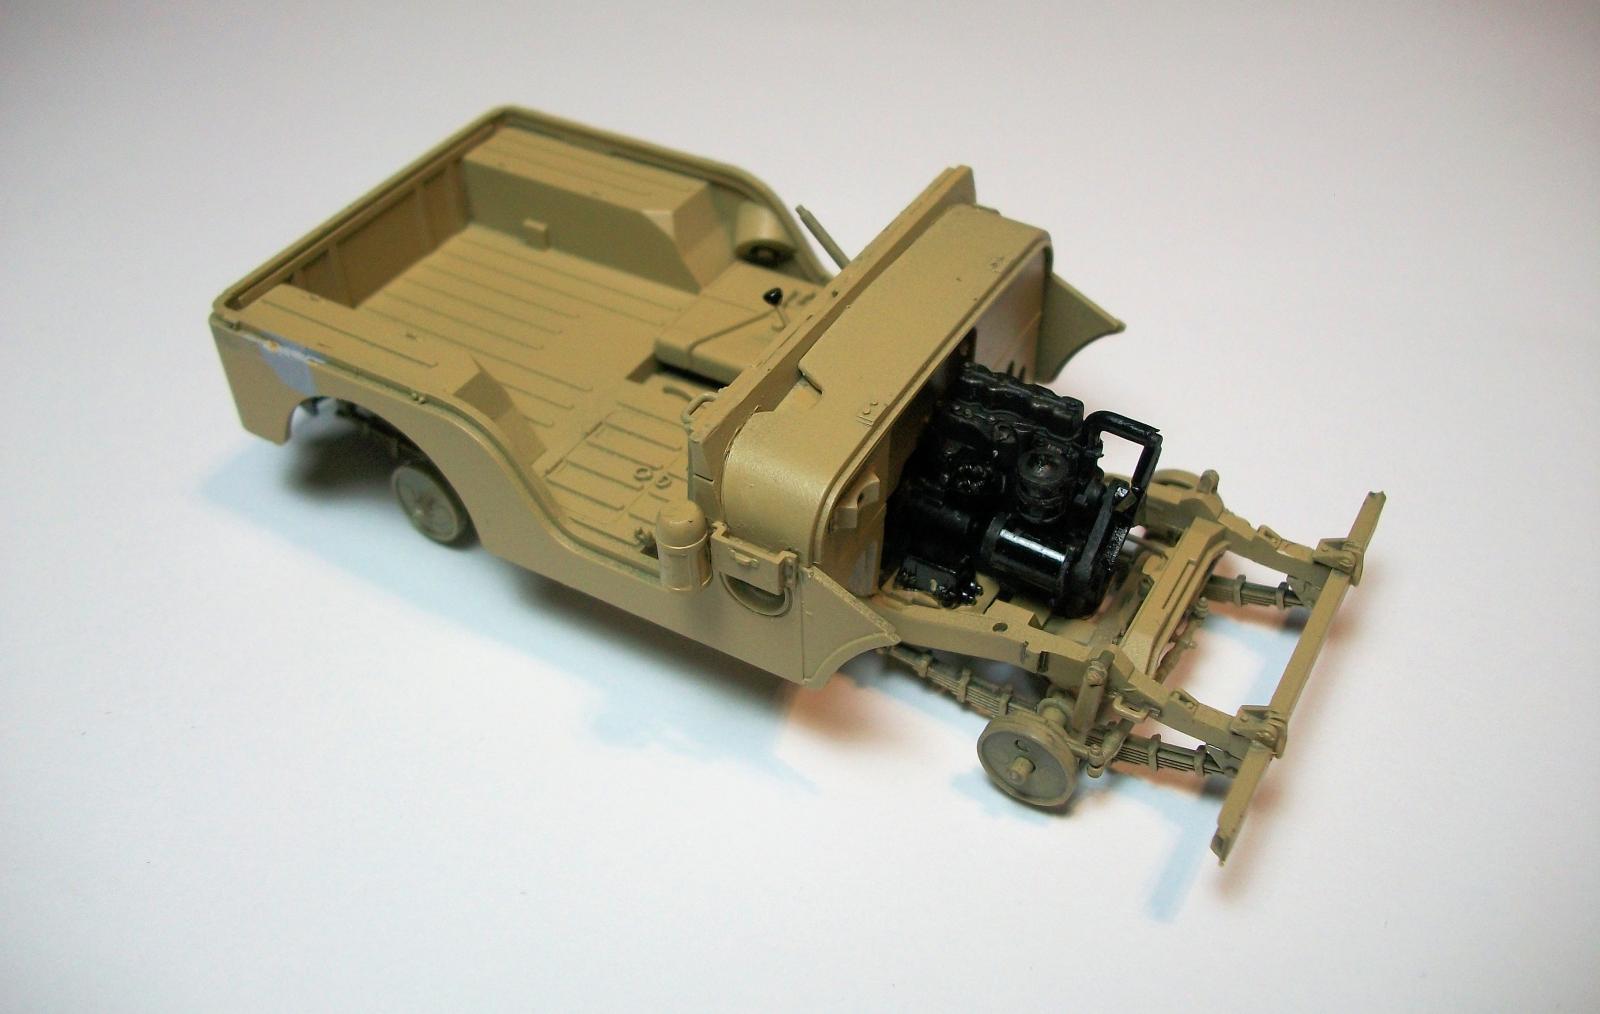
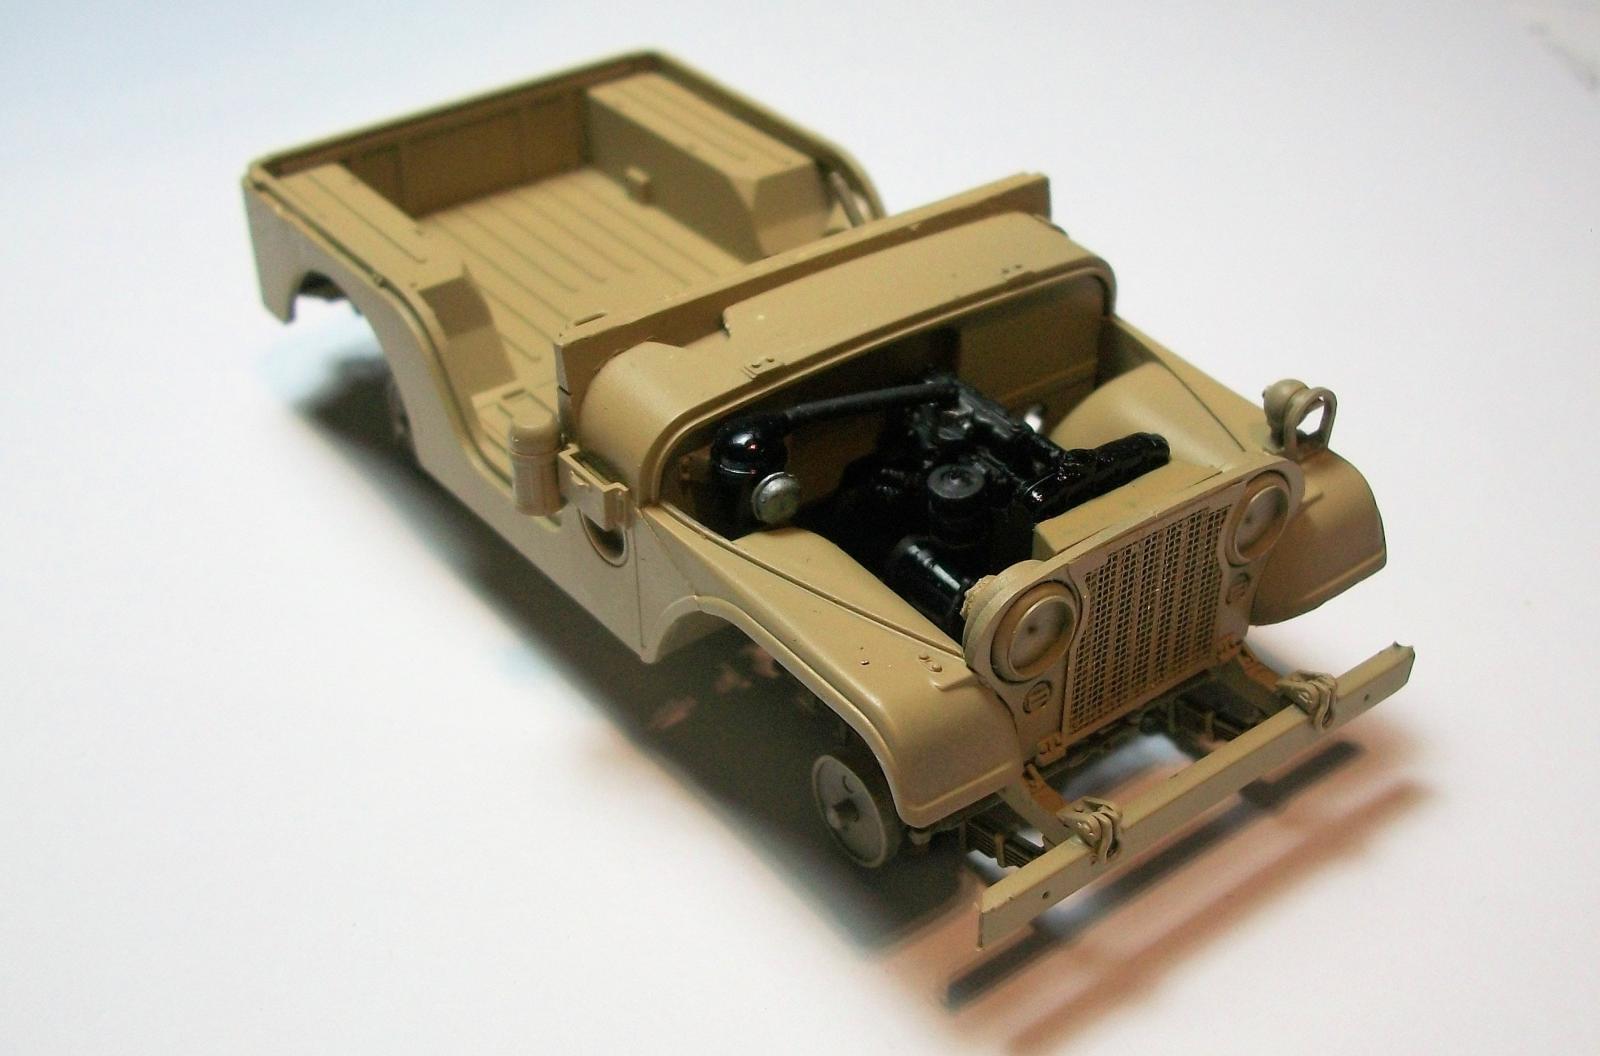
Assembly stages 1 to 3 are identical for both versions, so I built both in parallel. The only issues are that the color call outs have several mistakes in both instructions in various stages so beware. The engine fan blades are very thick and need to be thinned down (PE parts would have been a great addition). You also need to be careful of the assy of A36 & A40 as they can interfere with the main body part B27.
For the following assembly stages I will do one vehicle at a time
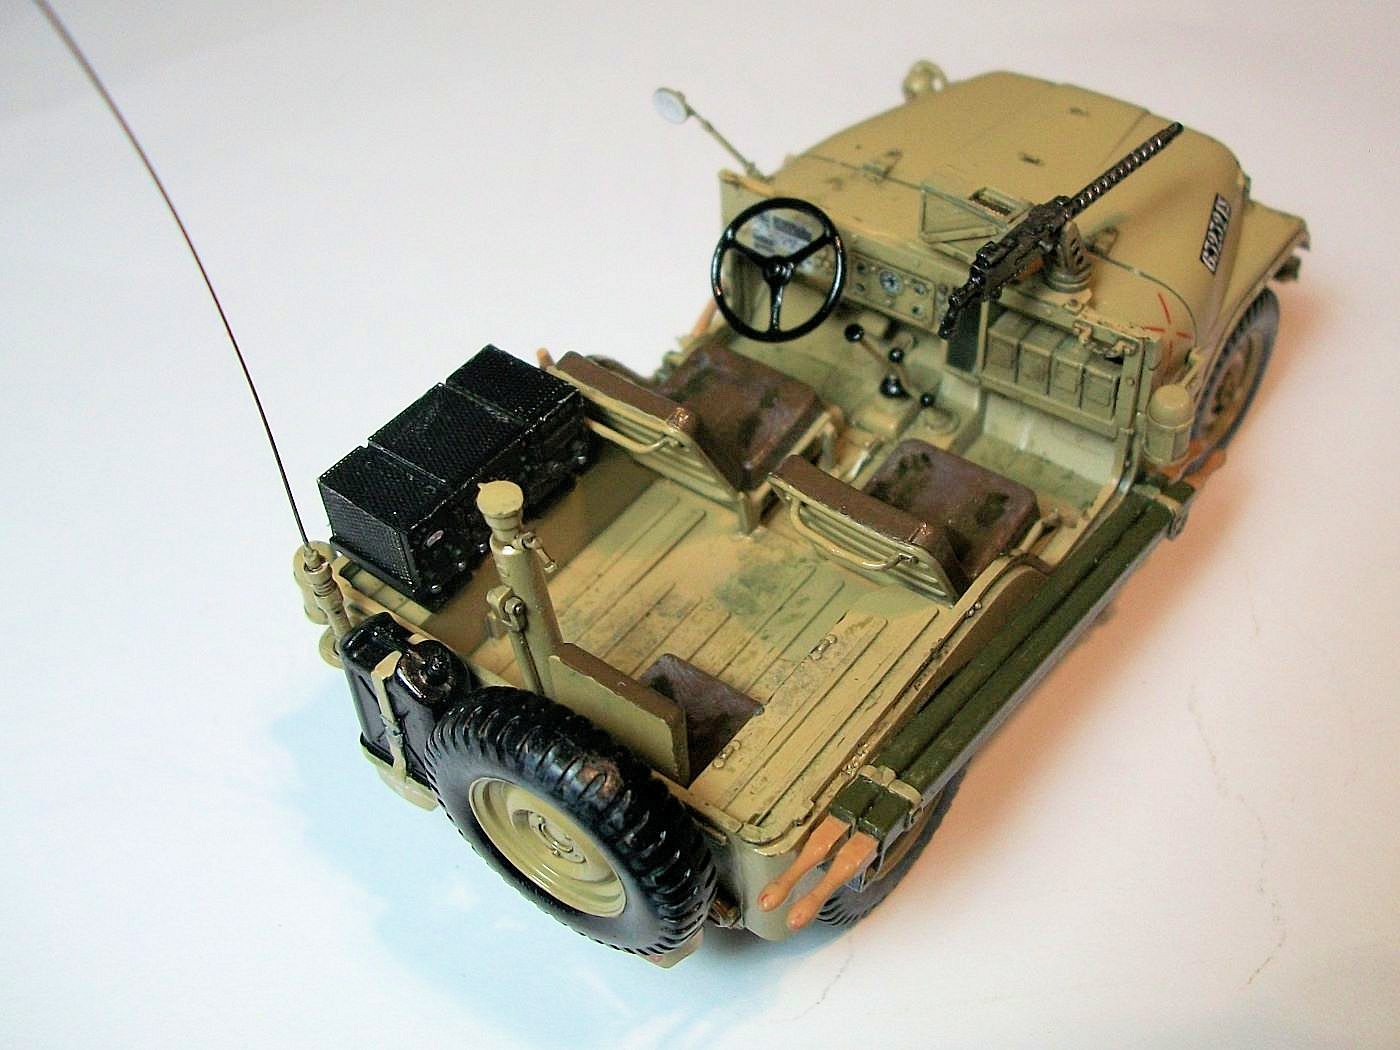
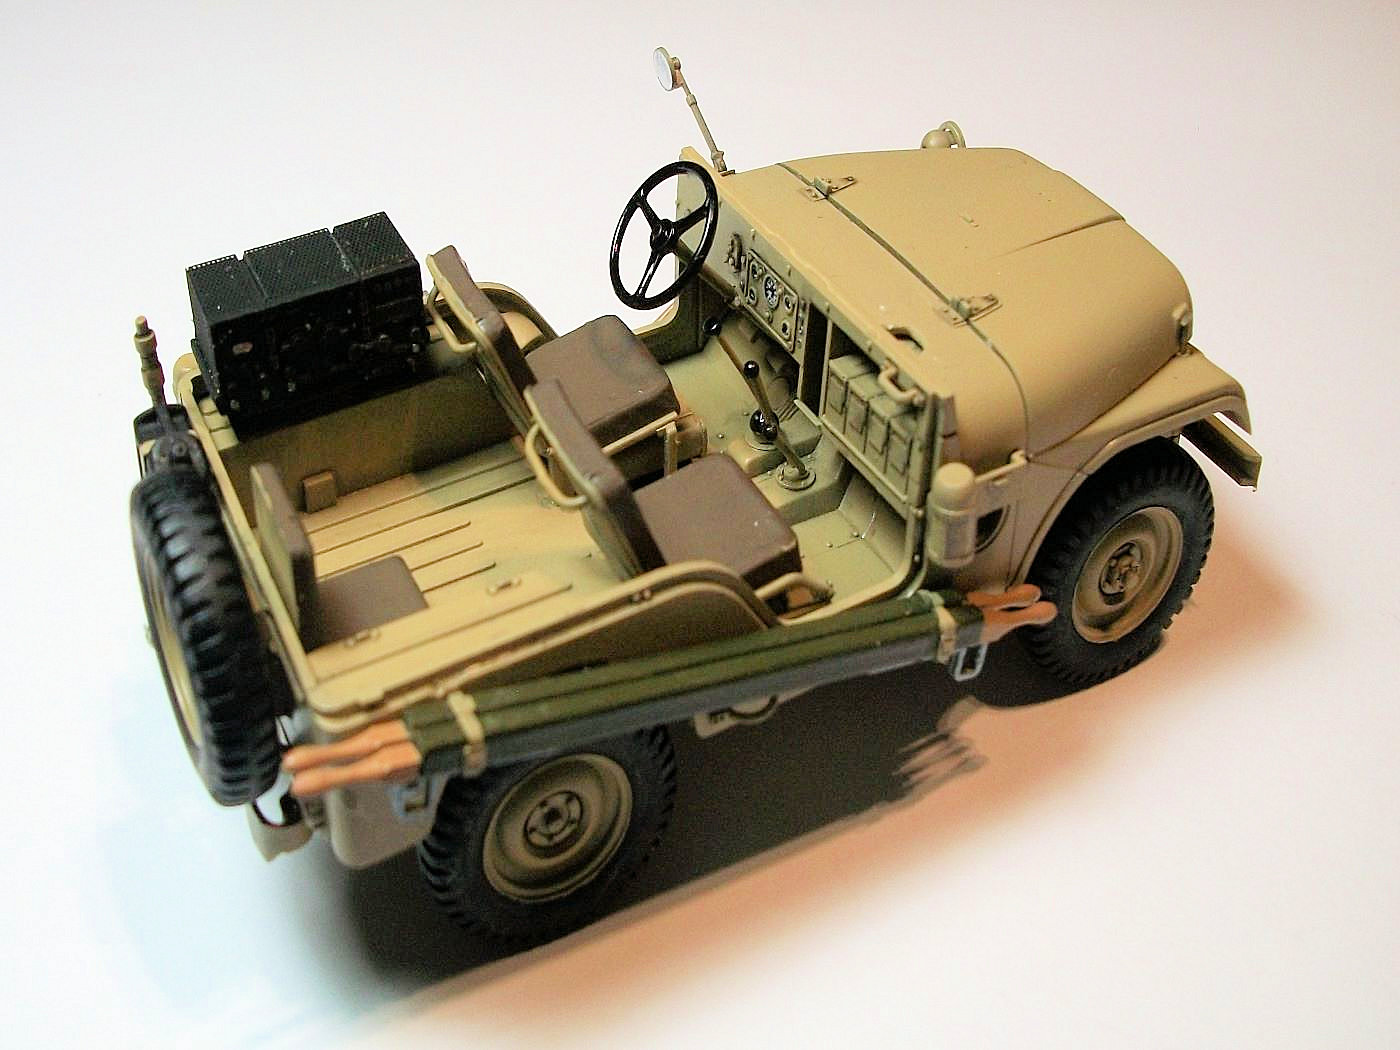
Siyur
Stage 4 - no issues here
Stage 5 - Just be careful with the attachment of the body to the chassis. You also have to decide on which marking you are going to use as there are differences that start at this stage.
Stage 6 - The only thing to note here is that you need to remove the pins from the rear of Items 35 to allow you to install them. Also you may want to leave off part B17 if your doing a version with the White Hood strip decal.
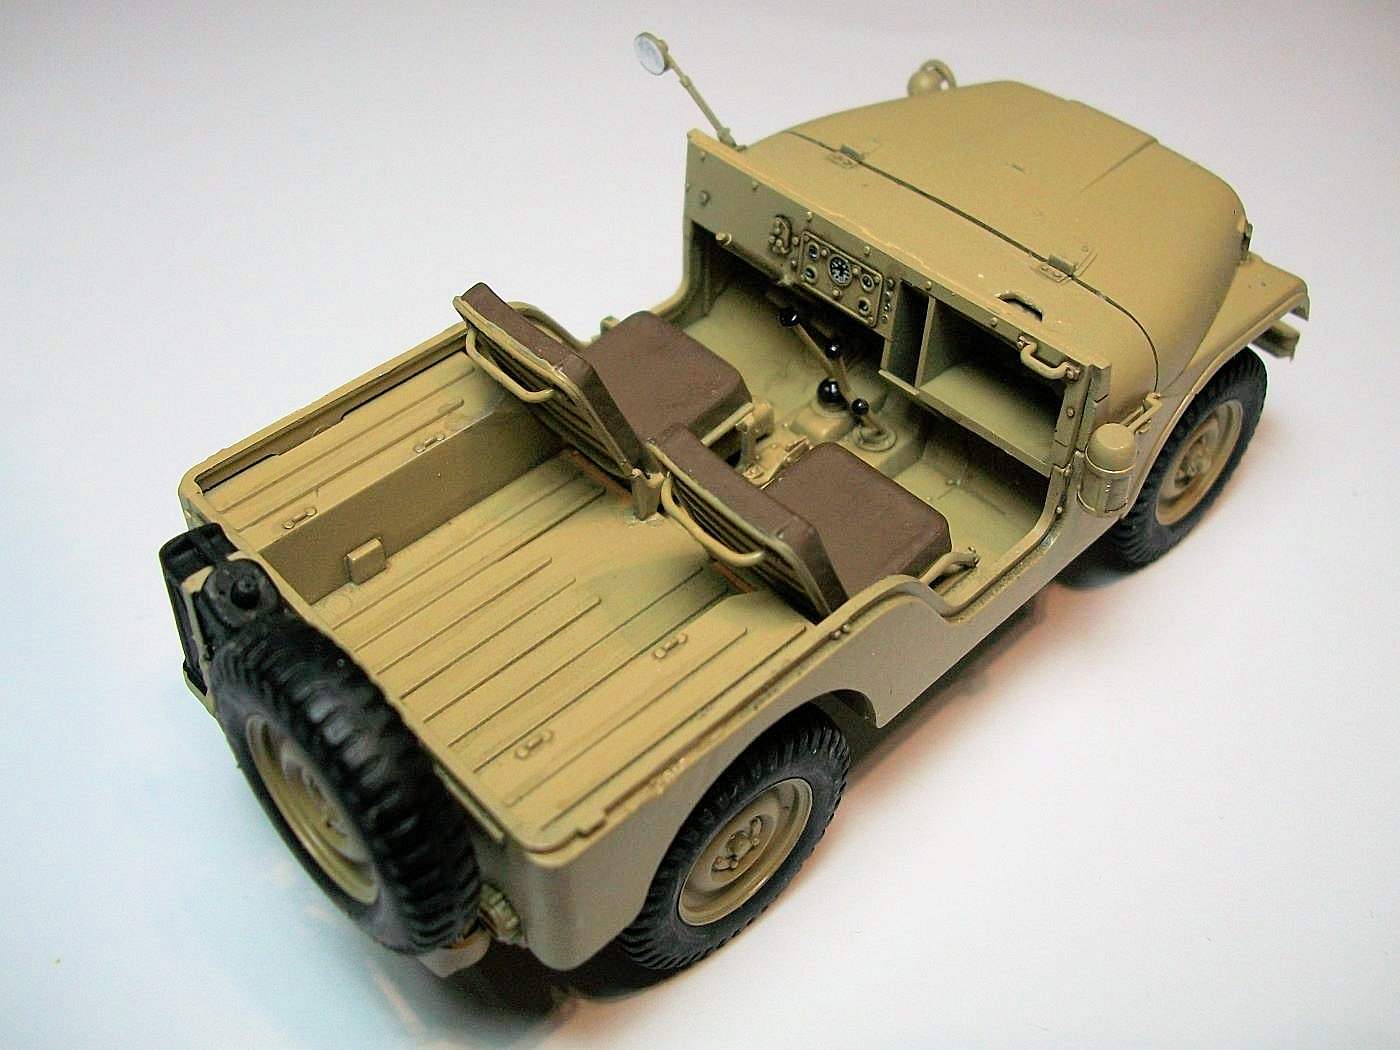
Stages 7 - through to the final stage 12 are easy with no issues.
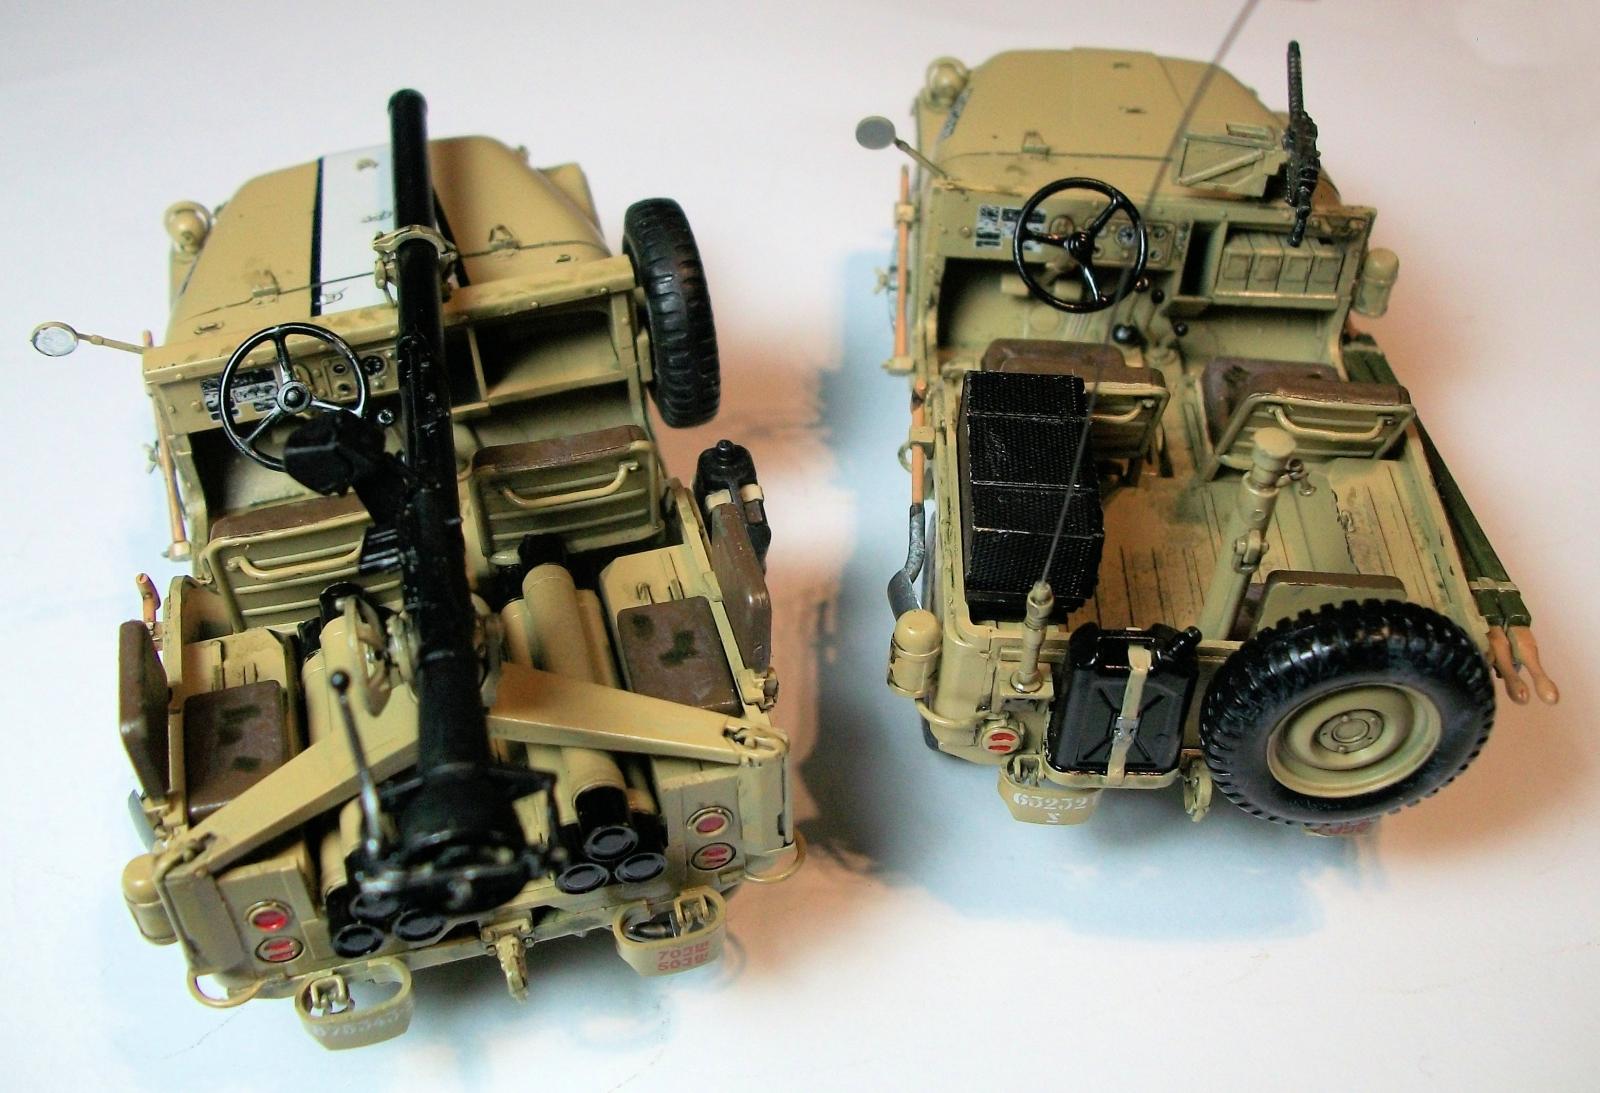
Next for the SOYUR is painting and adding the selected markings I selected version C. Please also note the stretcher should be Olive green fabric and natural wood for the handles as this is not shown any where.
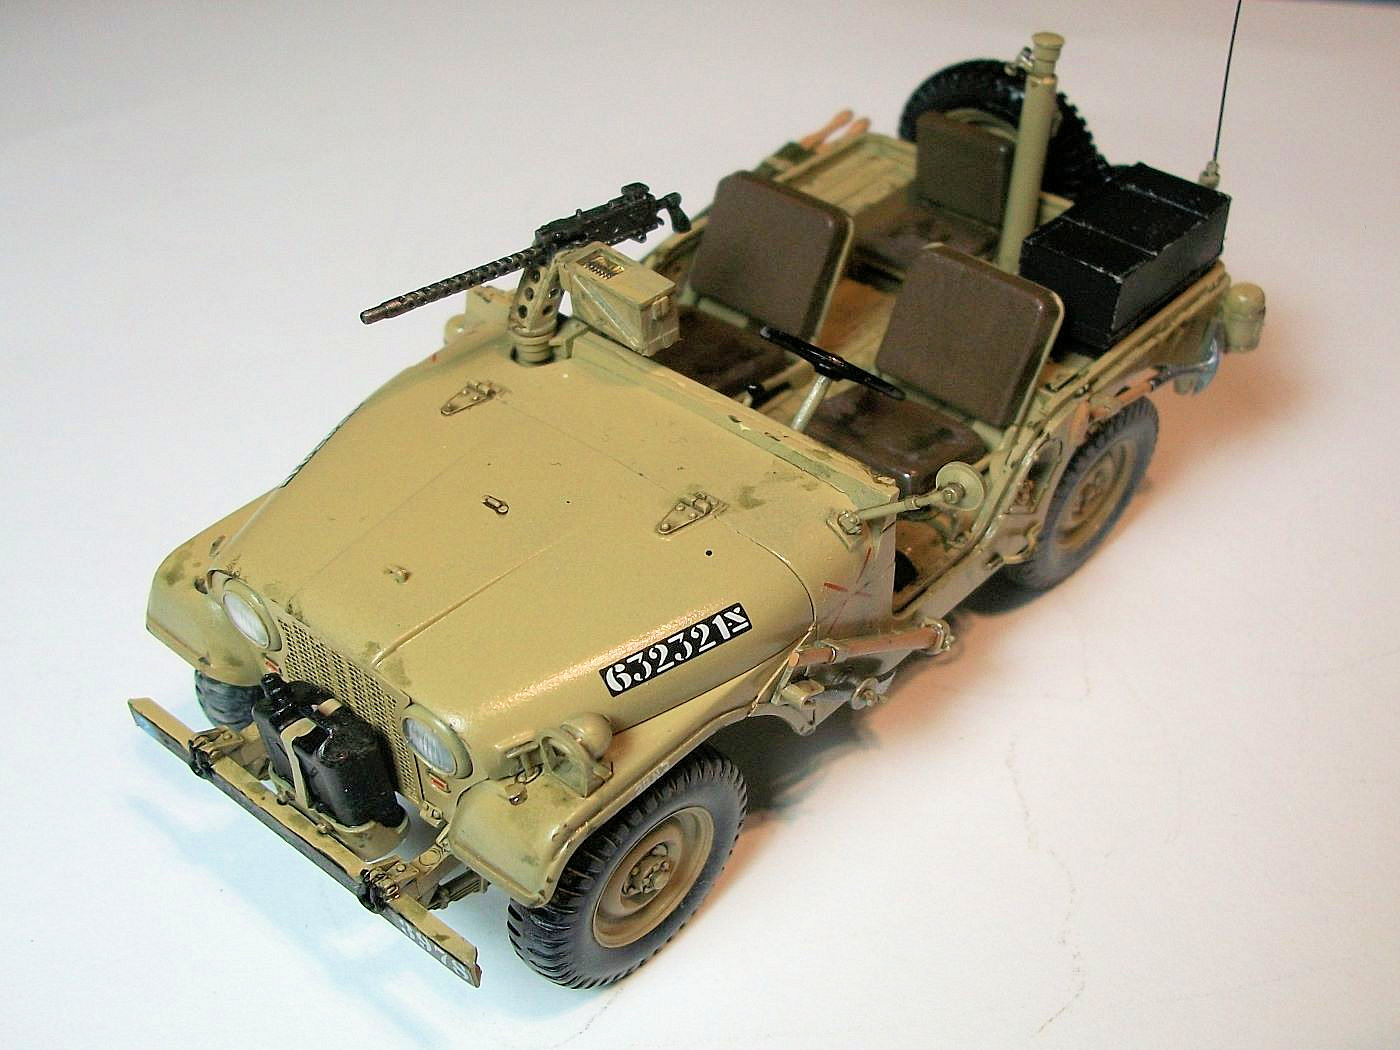
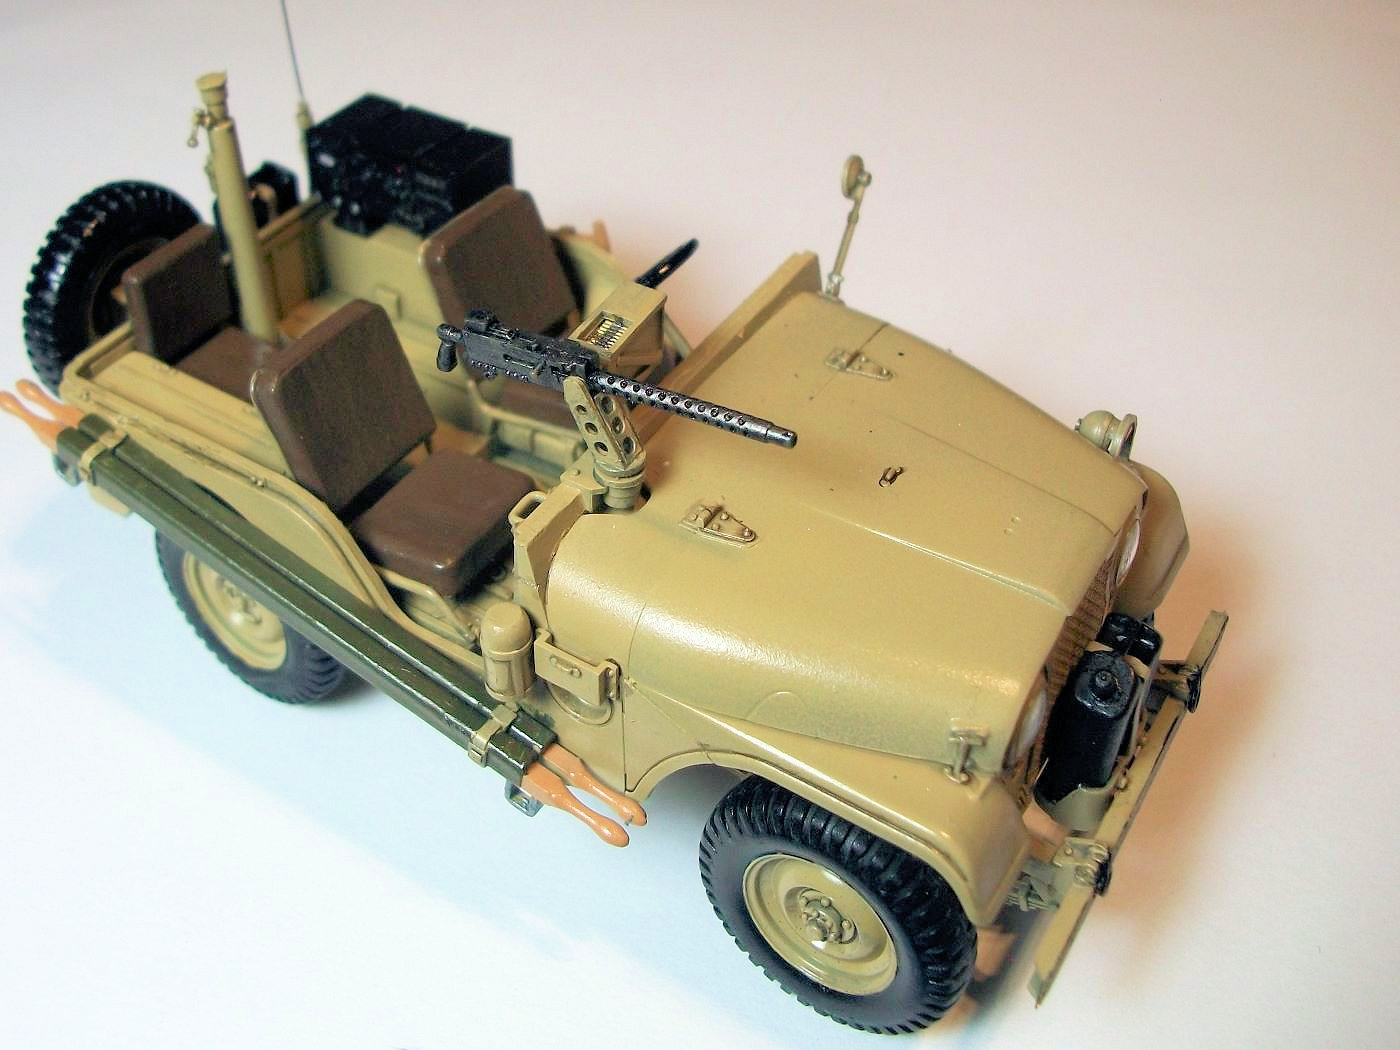
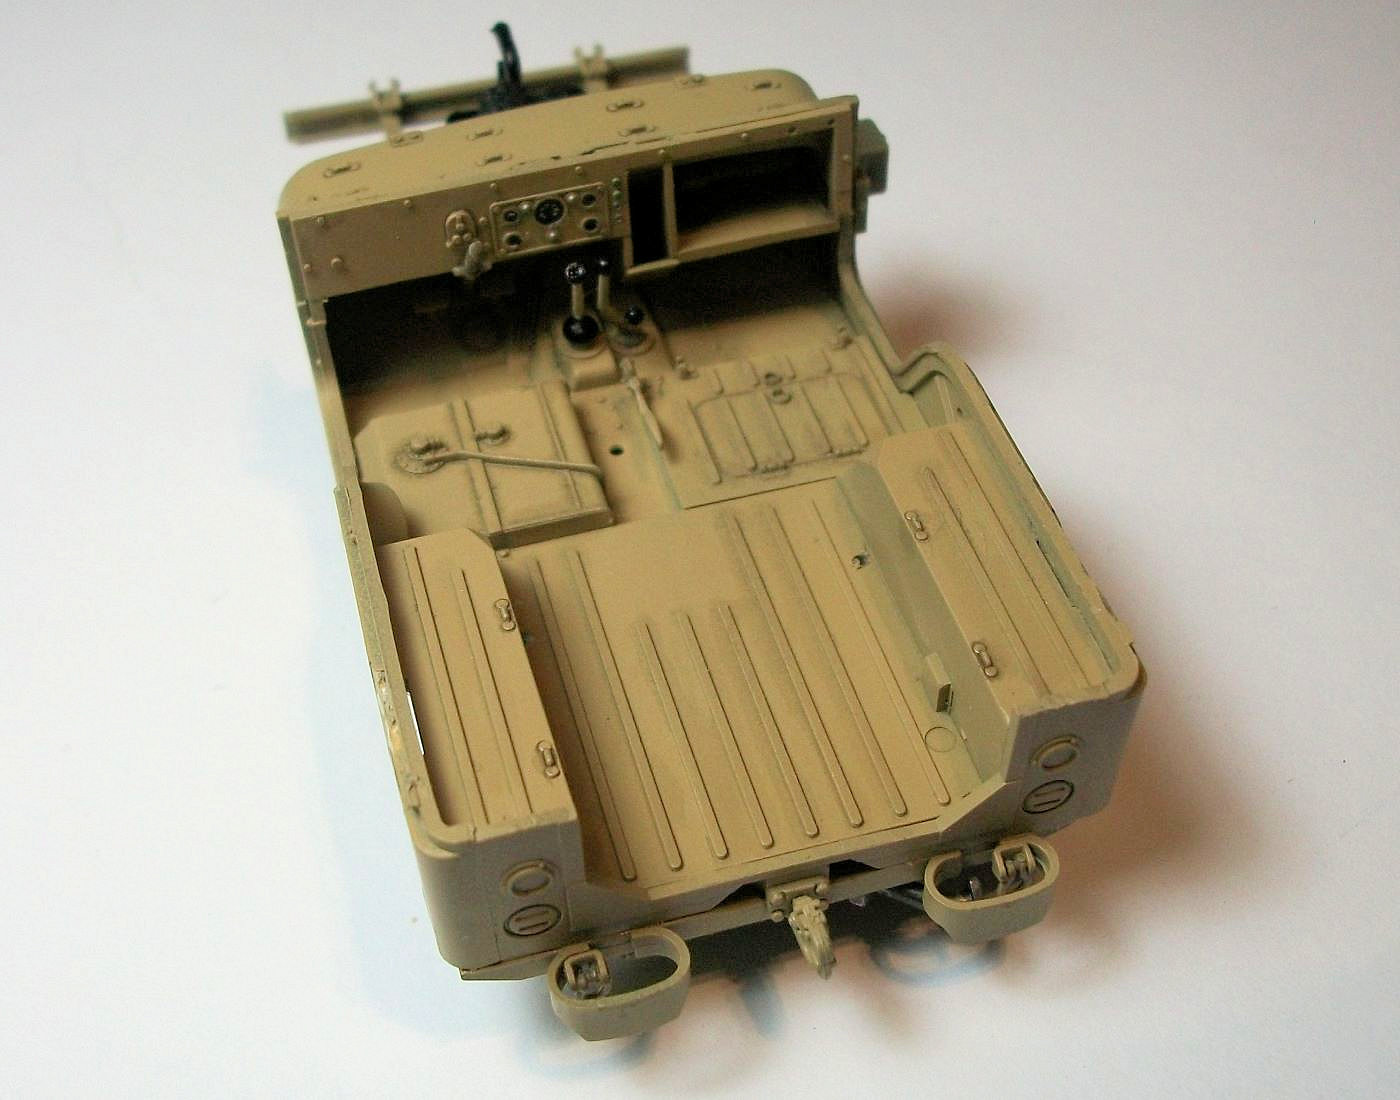
Tolar
Stage 4 - no issues.
Stage 5 - Just be careful with the attachment of the body to the chassis. You also have to decide on which marking you are going to use as there are differences that start at this stage. Also note the decal call out does not match the provided decals, but you can tell which ones should be used from the picture.
Stage 6 - The only thing to note here is that you need to remove the pins from the rear of Items 35 to allow you to install them. Also, you may want to leave off part B17 if you are doing a version with the White Hood strip decal. The instructions call for a Gas Can to be installed on the front bumper but this is not shown on the version that the Decals cover. I did not install it, but that’s your choice.
Stage 7 - no issues
Stage 8 - not that the part D23 shown should be part D18
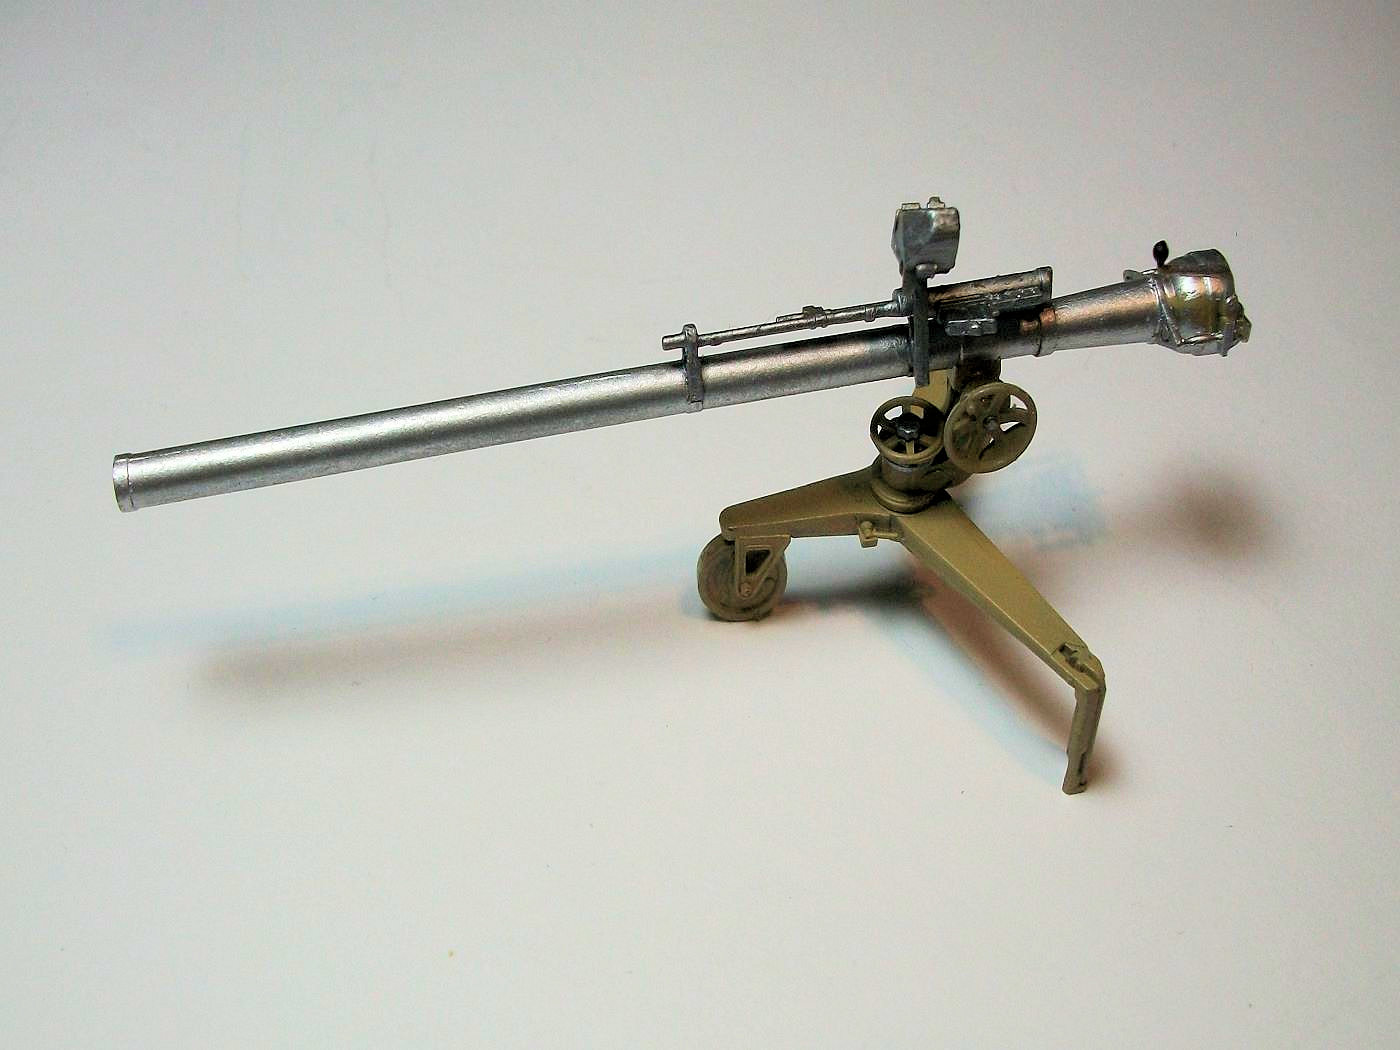
Stage 9 - There is an option to build the sight open or closed. I did closed because I could not find the part E19.
Stages 10 through to the final stage 12 are easy with no issues.
Next for the TOLAR is painting and adding the selected markings I selected version C.
This kit is great and I really enjoy building the two IDF Jeeps.
Thanks go to AFV Club for providing this kit to review and IPMS USA for allowing me to review it for them.


Comments
Add new comment
This site is protected by reCAPTCHA and the Google Privacy Policy and Terms of Service apply.
Similar Reviews