
Hurricane Mk. I Tropical
The Hawker Hurricane needs little introduction. It was one of the finest fighters of the Second World War. It usually took second place to the more glamorous Spitfire. The “Hurri” served Britain and the Allies faithfully throughout the war and was adapted to many different environments. The subject of this build is a Hurricane Mk I Tropical that flew in North Africa.
The kit comes packed in a sturdy box with a nice picture of a Hurri about to turn in and take a shot at an Italian Marchetti bomber over a desert landscape. The side of the box shows six different aircraft that can be modeled, as well as other useful information like paint colors. There are four individually packaged sprues, a photo etch fret, clear parts, decal sheet, and instruction booklet.
Before detailing how it went together, I’m going to first break this kit into the good and not so good points.
The Good
The parts show very nice detail with fine, recessed panel lines, cowling fasteners and select rivets. The canopy and windscreen are some of the thinnest I’ve seen in this scale and very delicate. Very little flash was found on the other parts to be removed.
The fit of most parts is fine. Cockpit detail is adequate. The photo-etch fret (PE) includes an instrument panel, a Sutton harness and tiny canopy handles.
Two well-printed instrument decals are provided. One with instruments and placards to lay over the top of the PE panel and an instrument only decal that goes behind the panel - if you want to paint the panel. The rest of the decals are very nice and printed by Cartograf.
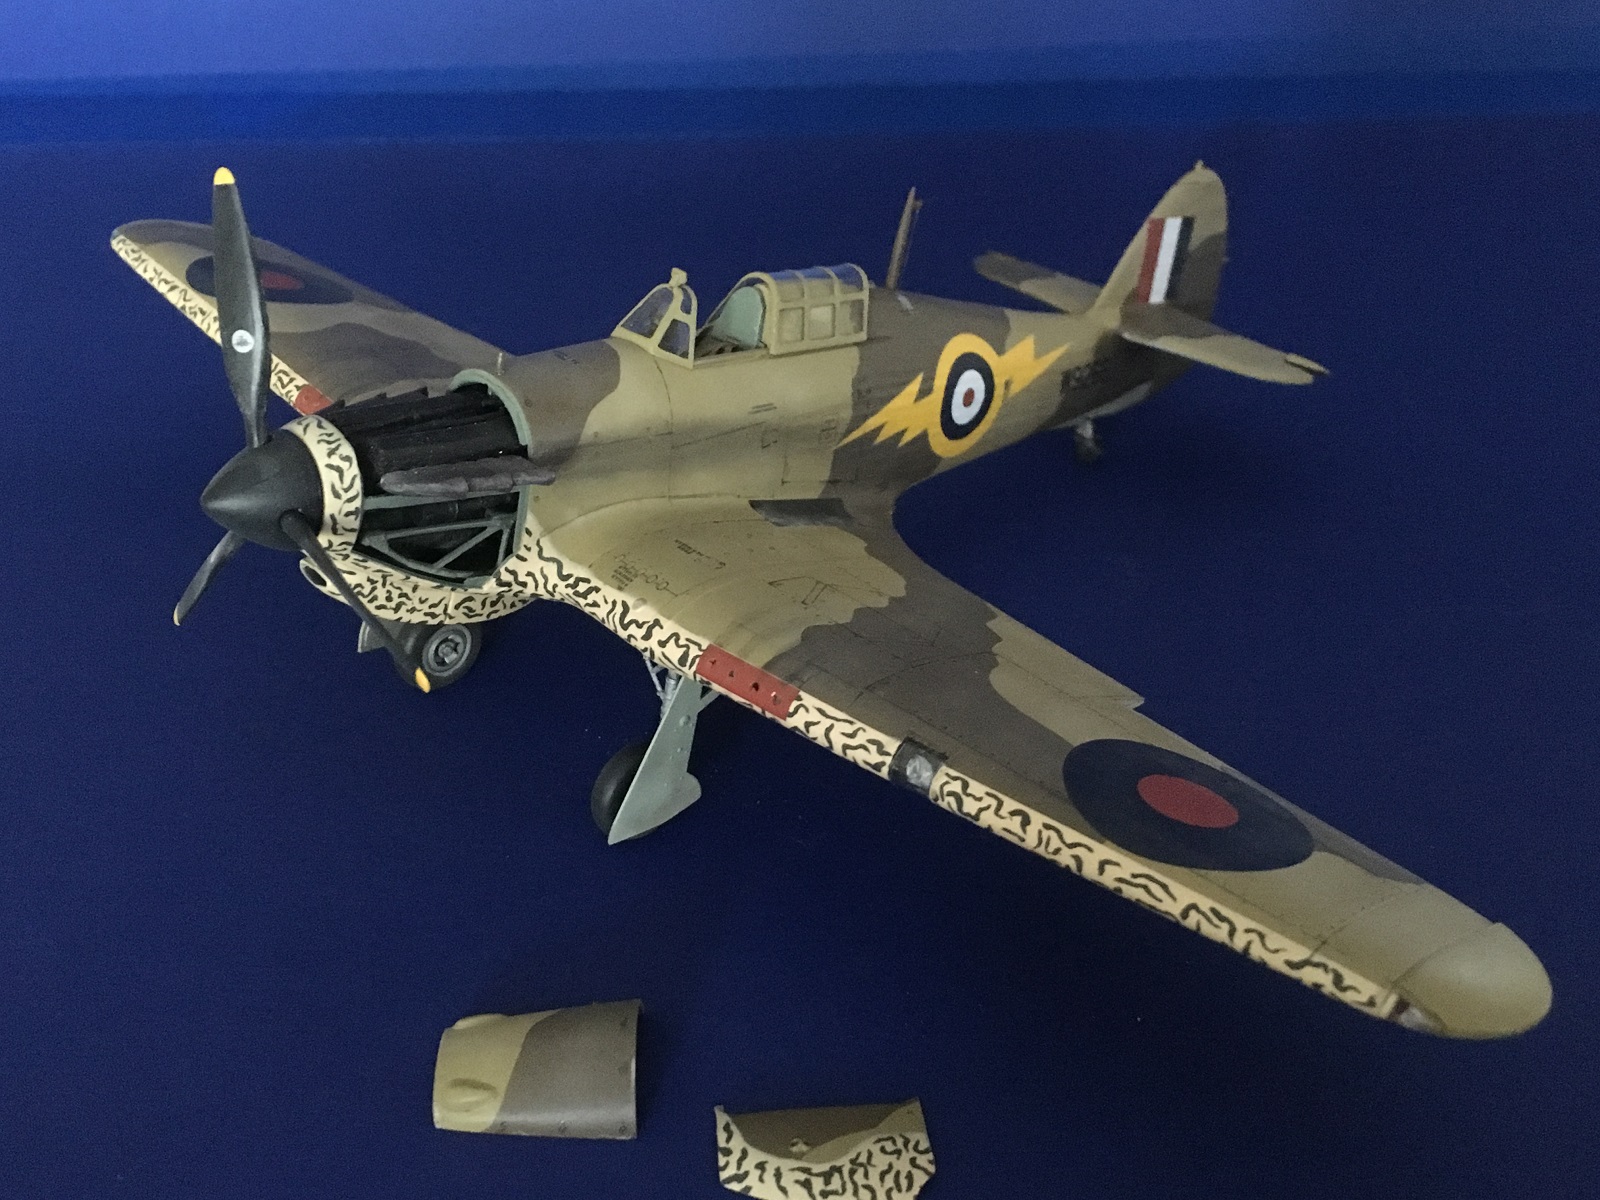
A lovely little Rolls Royce Merlin engine is provided. The left side and top cowl panels are separate to display the engine, oil tank and firewall. If care is taken the cowls fit fine with the complete engine installed.
The Not so Good
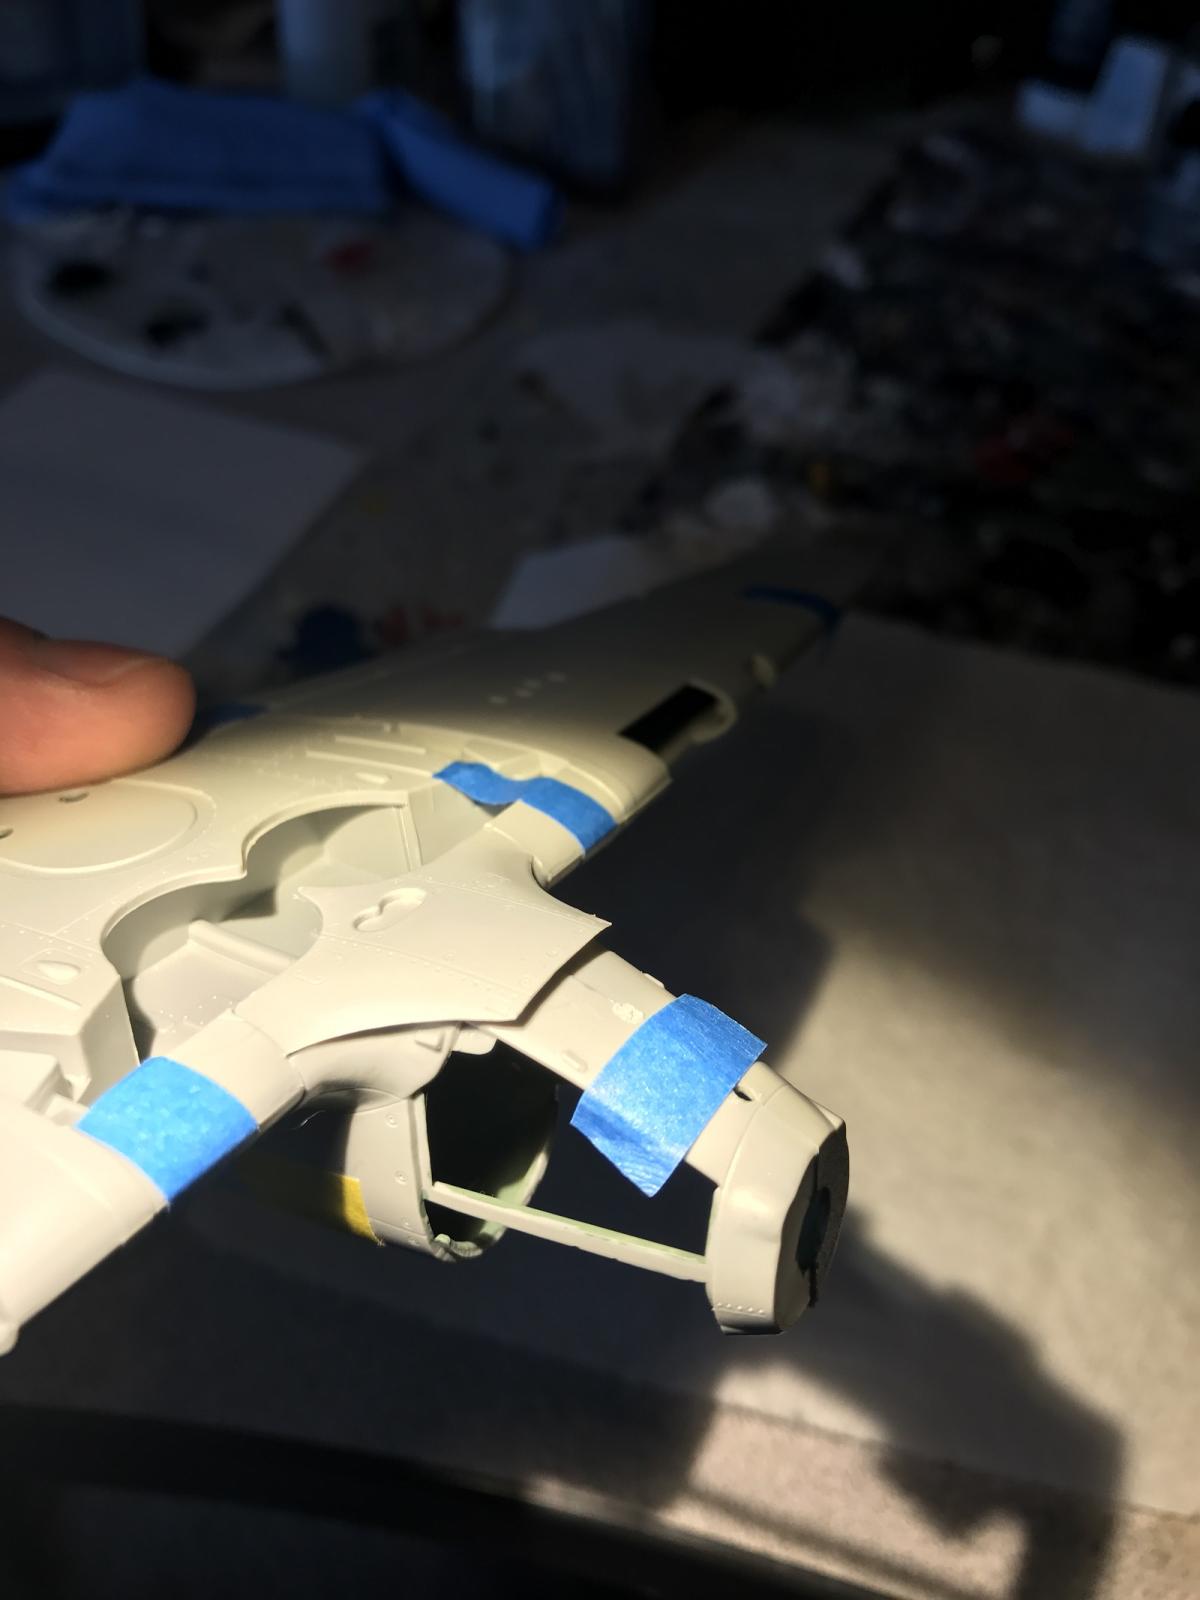
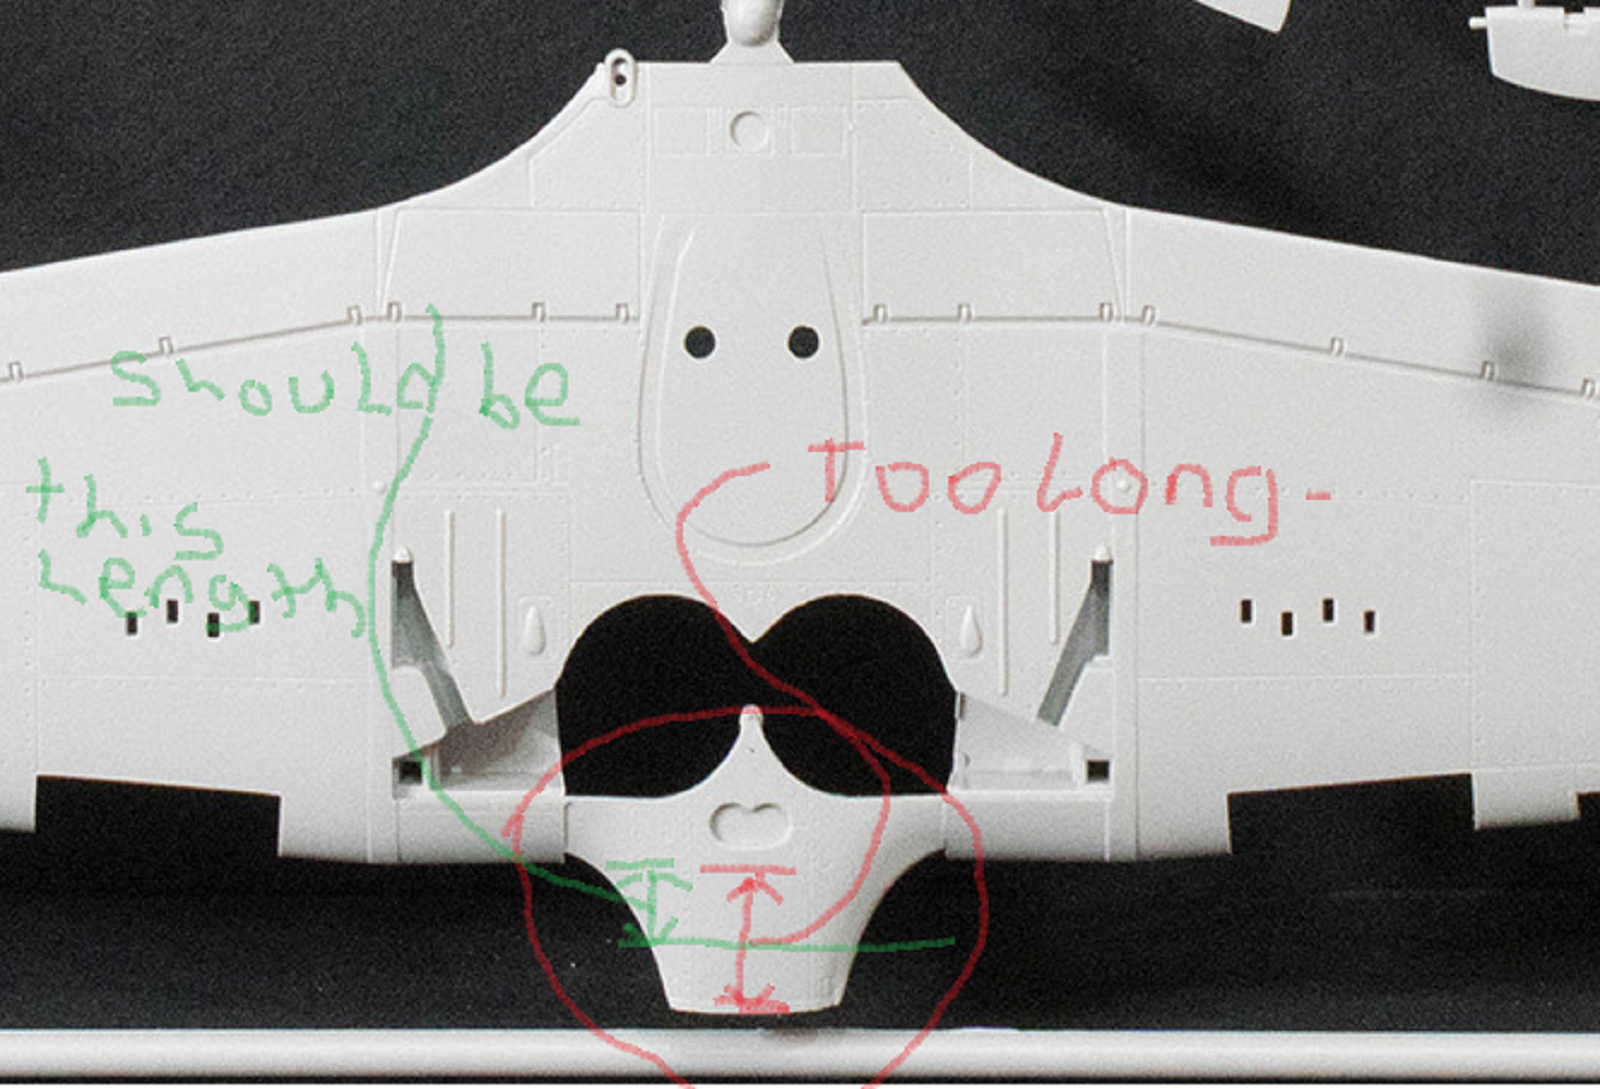
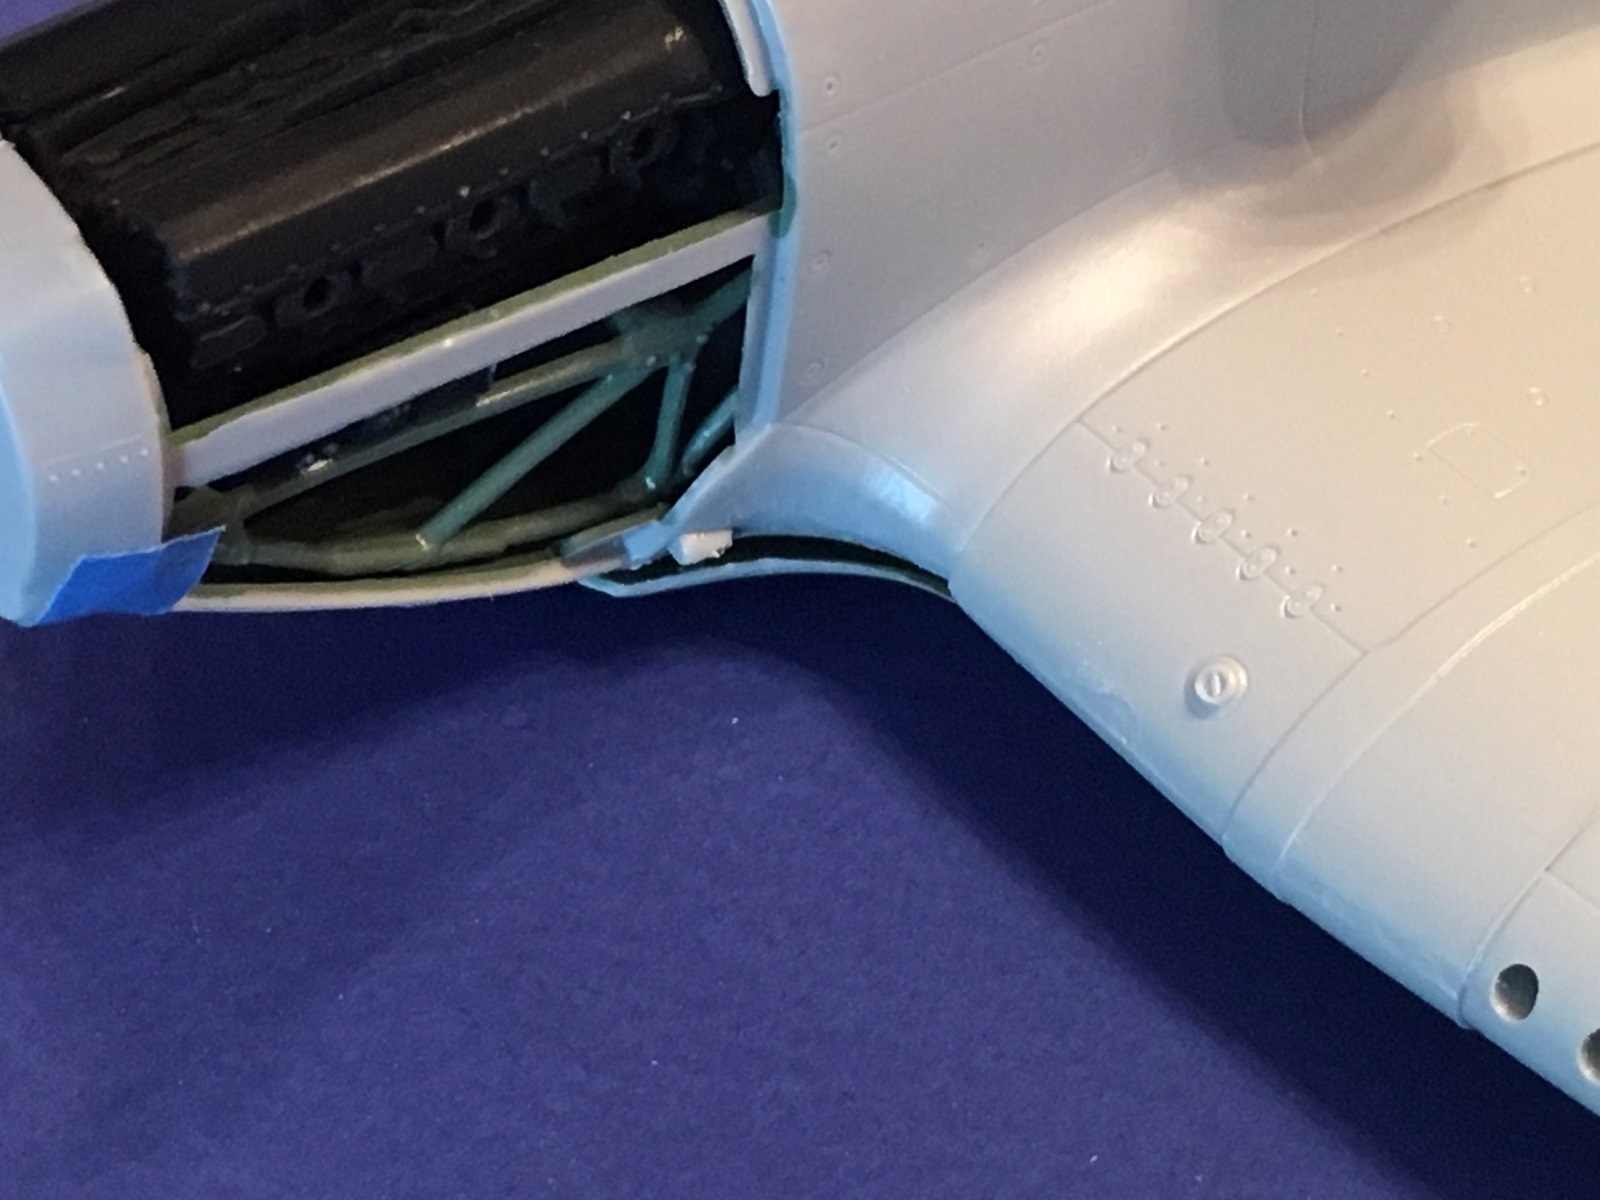
The sprue containing the lower wing is incorrect. I believe what is supplied should go with Italeri’s Mk II kit with the longer nose. The lower belly panel in front of the wheel well is too long for the shorter nose of the Mk I fuselage supplied. Compounding this, the lower leading edge wing roots don’t match the curvature of the upper wing roots. I confirmed this is not an isolated incidence as product reviews on several other website show the incorrect sprue, as does Italeri’s website webpage. No corrected sprue was sent, even though IPMS contacted the supplier. I am certain that Italeri and hobby shops will be getting plenty of these kits returned! Had I bought this kit from my local hobby shop, I would have returned it as well.
I really dislike the term “unbuildable”, but for a new modeler with minimal experience, it may be just that. As an experienced modeler, I’m going to contradict myself and say this kit is buildable, but unnecessarily involves lots of careful measuring, cutting and reshaping to get everything fitting and looking right. I also had to re-scribe lost panel lines and rivet detail.
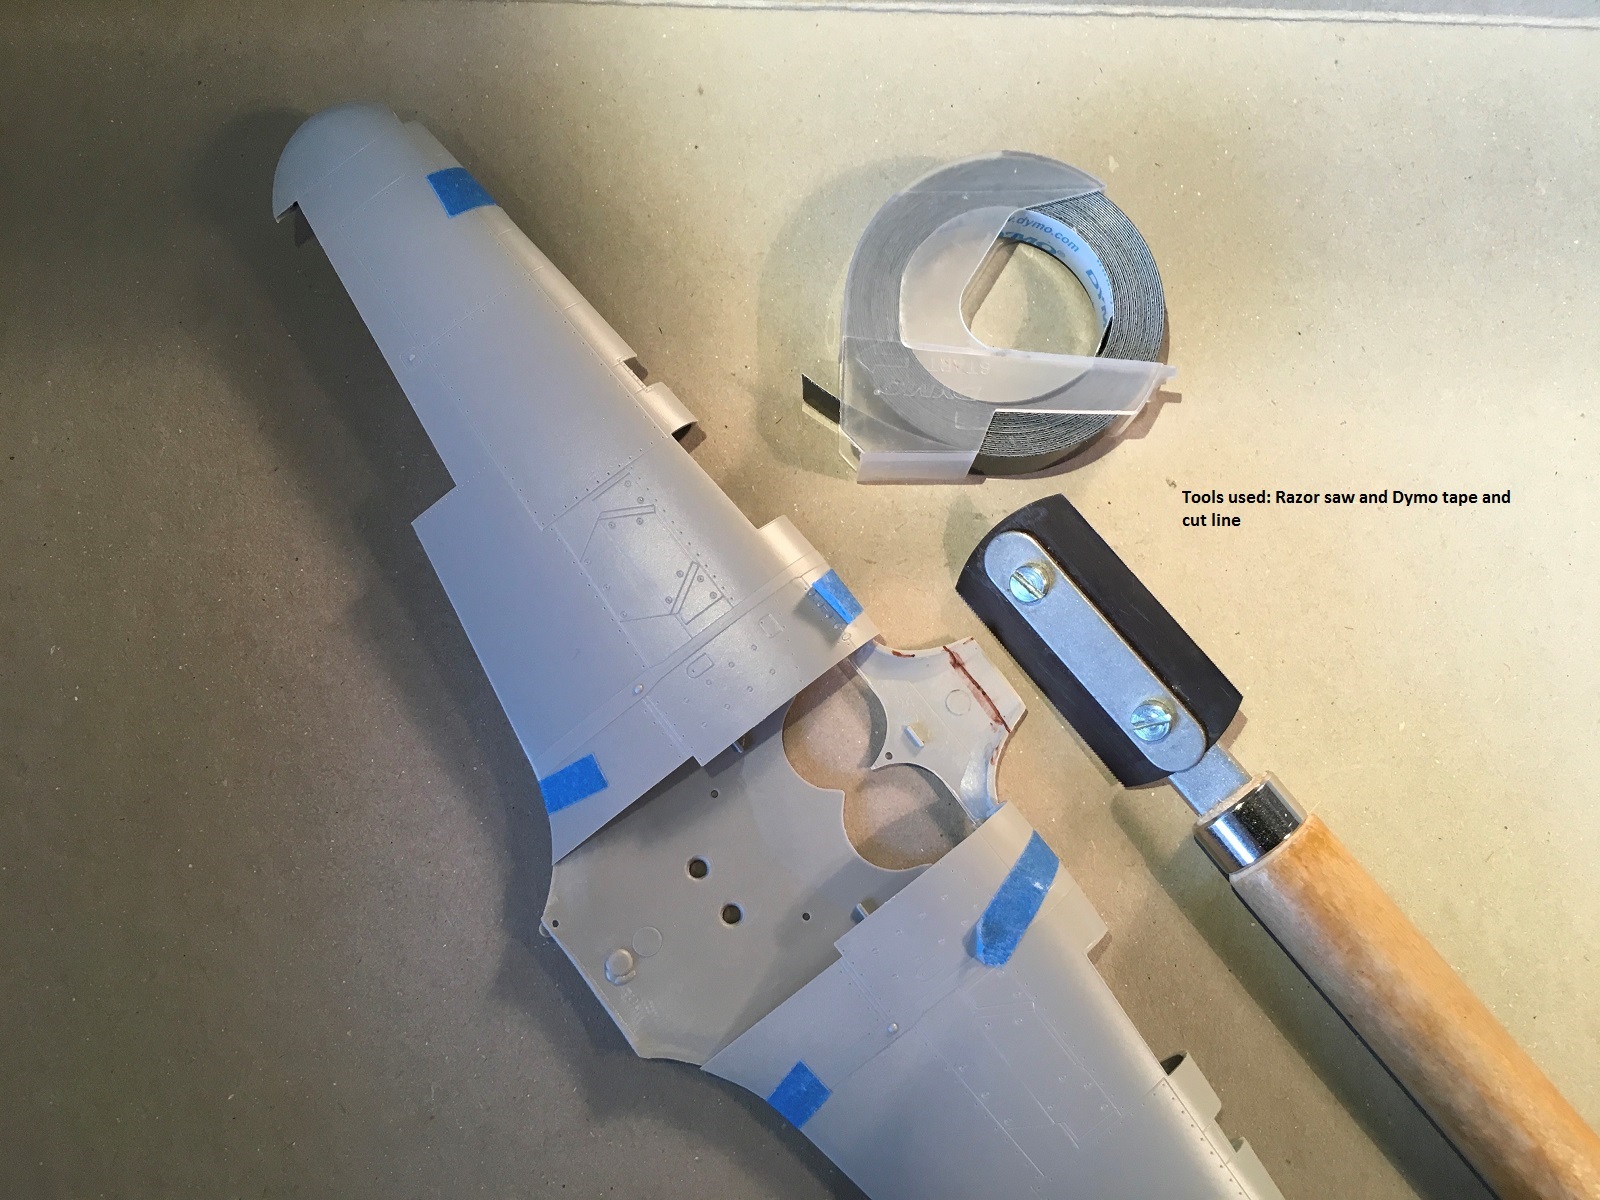
Shortening of the lower wing belly panel was done with my razor saw. Two angled cuts need to be made to accommodate mating to the underside of the nose. An X-acto knife with a #11 blade, super glue and sanding sticks shaped, blended and smoothed the wing root curves.
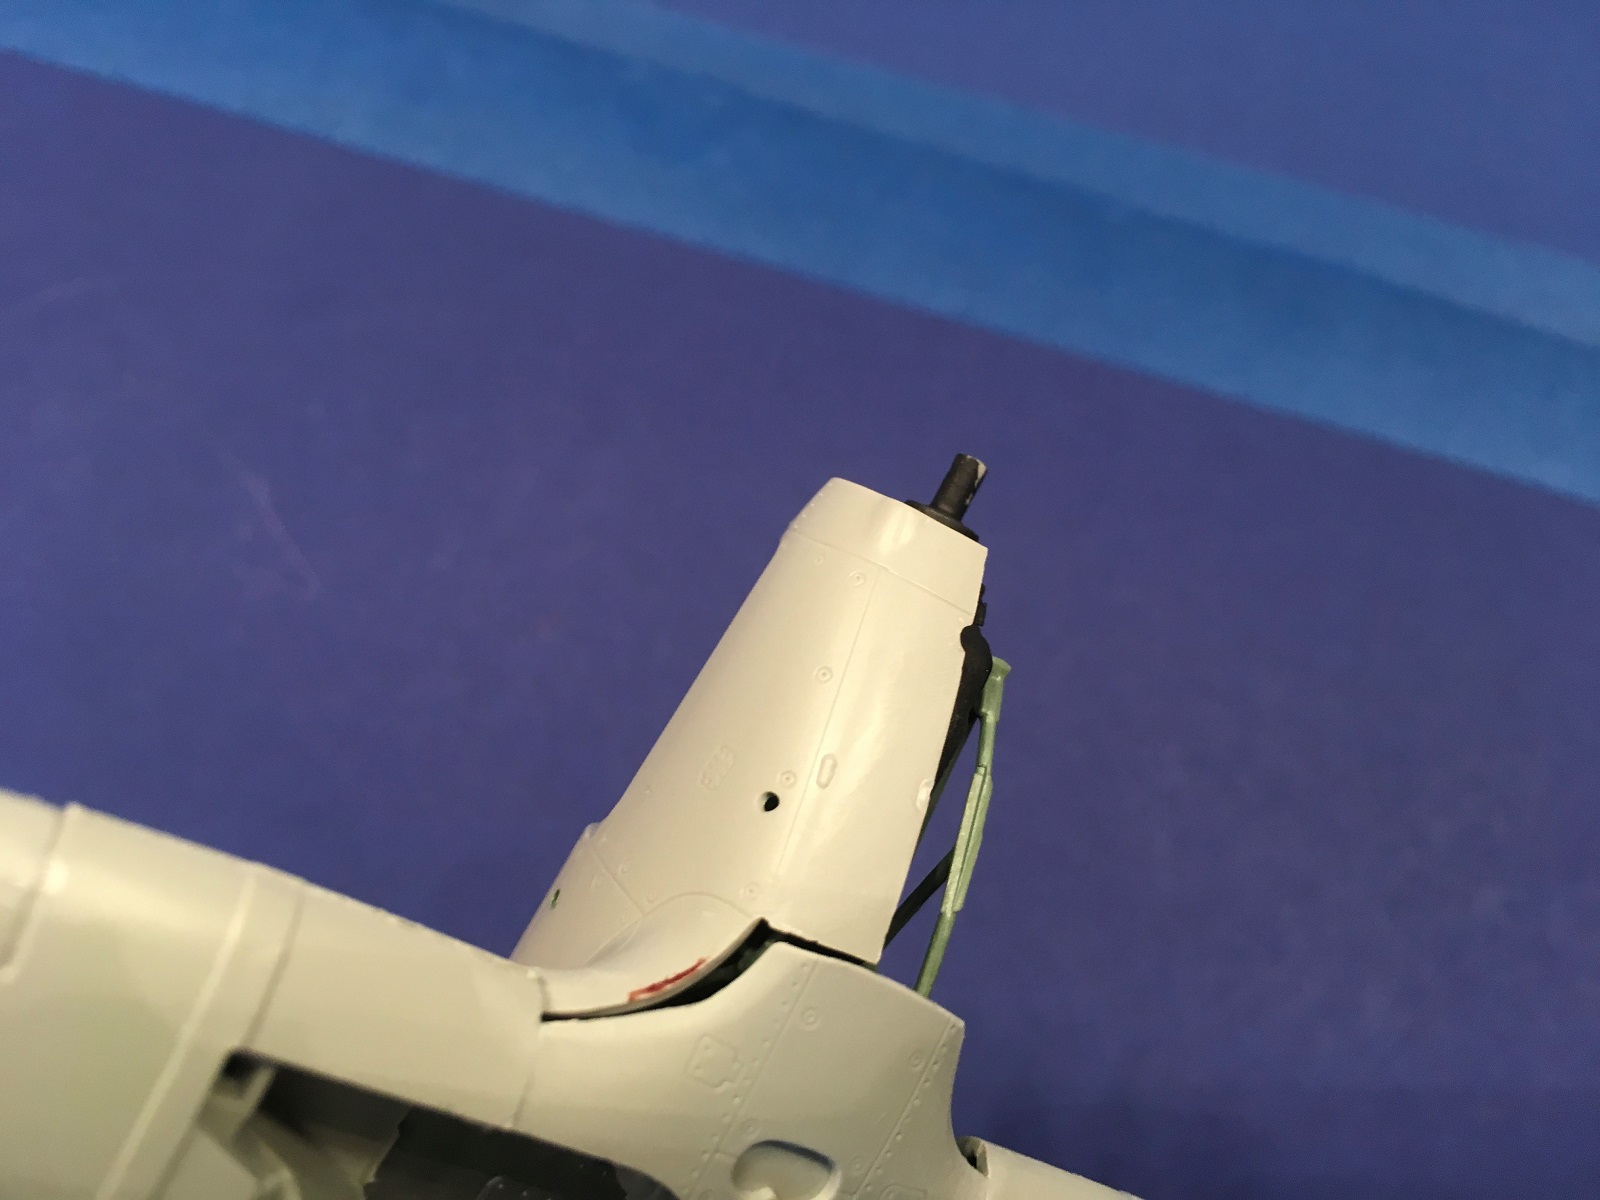
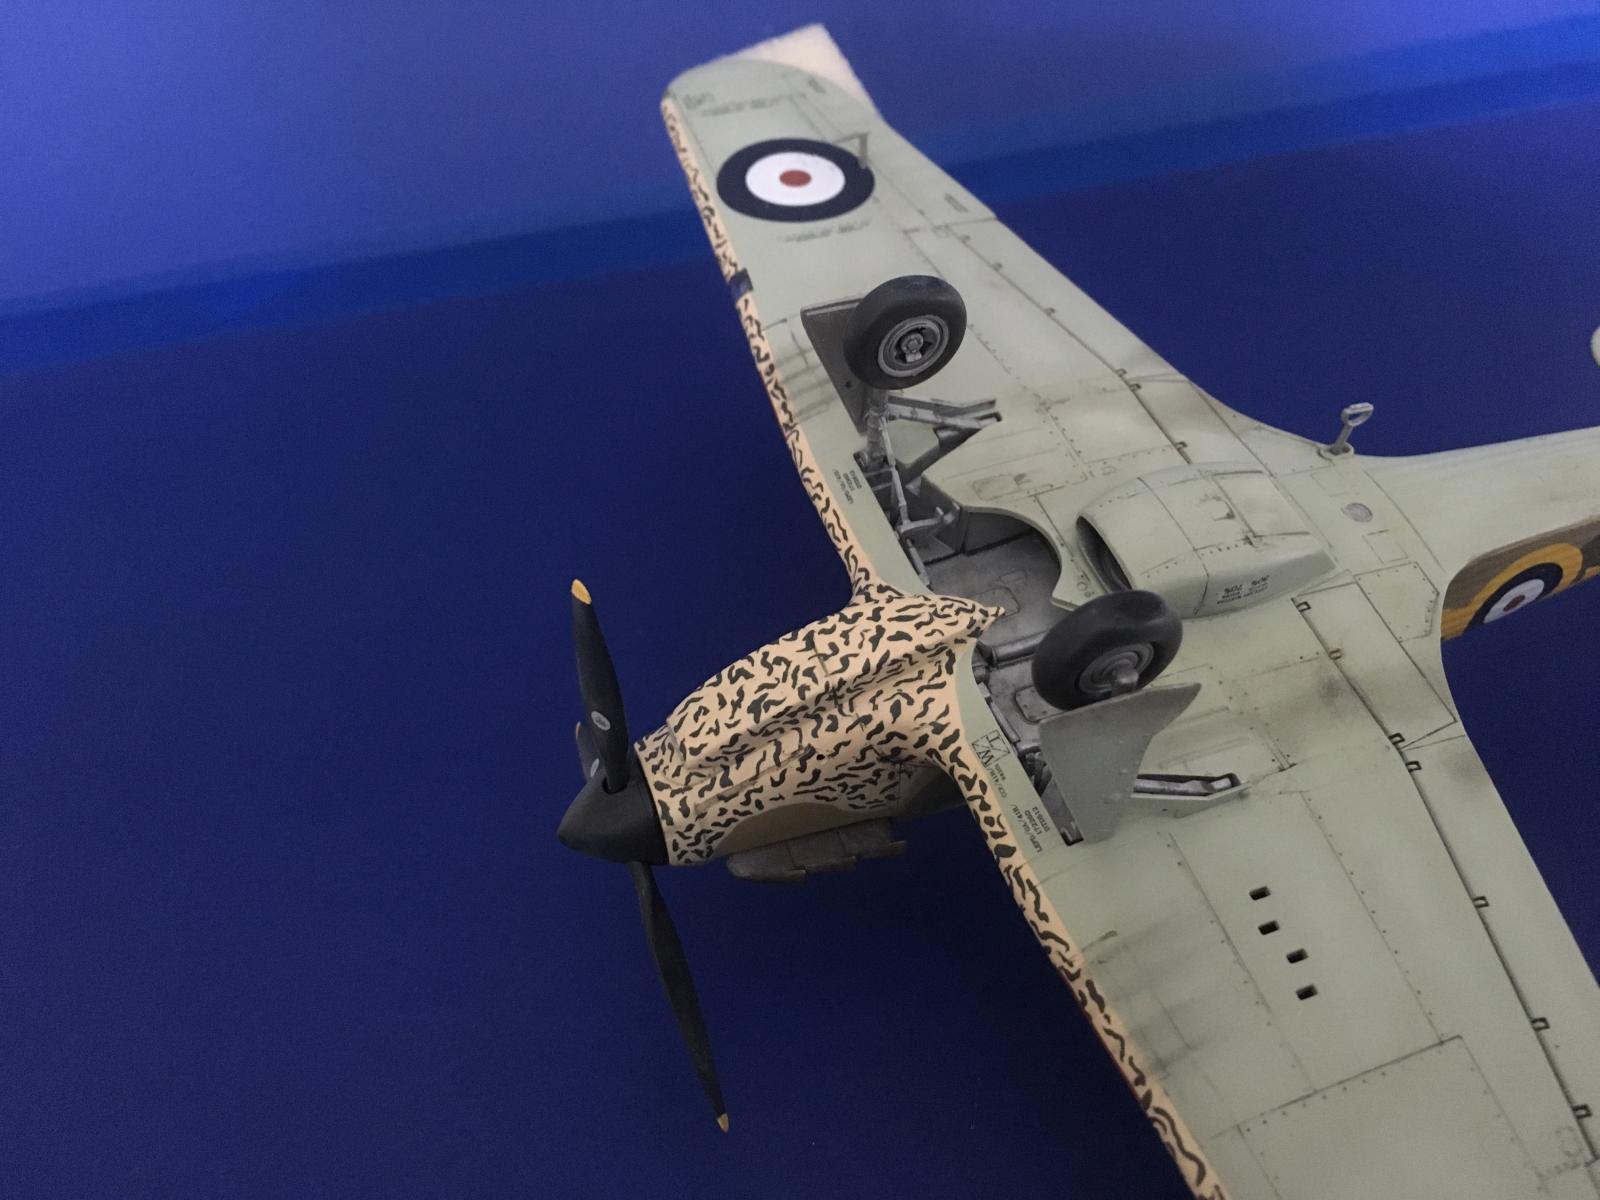
The tropical filter hides part of the joint. When mating the filter to the underside of the forward fuselage, the curve of the filter does not quite match that of the fuselage and a little filler was required. The locating stub at the rear of the filter has to be removed as there is no locating hole just in front of the wheel well. Either that or drill a hole to accept the stub.
A couple of other issues: The instrument the only decal that goes behind the P/E panel did not line up with the instrument holes. I took the easy route and used the complete panel decal, however, I wish I had taken the time to cut up the other and position the instruments in their correct spots behind the panel. I think it would have looked better. There were a couple of sink marks on the right fuselage side from cockpit mounting attachments areas.
The wing leading edge machine gun inserts did not fit well and required filler and blending, especially at the rear. I lined up the top and blended the underneath. The fit of the tailplanes was a bit sloppy and left some large gaps that needed filler.
The wing to fuselage fit issue was a shame, as most of the kit went together quite well. The other minor fit issues were dealt with through standard modeling techniques.
The rest of the build was uneventful. A little filler was needed to blend the wing roots where they meet the fuselage. The flying controls-ailerons, elevator and rudder were all separate and posable. The ailerons were designed to be movable, but the fit is a bit loose so I glued them in the neutral position. The elevators were glued in the “down” position, and the rudder neutral.
The Sutton harness is part of the P/E supplied in the kit. There are four straps that make up the real shoulder/back harness but are supplied as one piece. After a bit of thought, I simply bent the longer shoulder harness towards the center and over the rear, shorter strap, so they all hung vertically and squashed them together. Repeat for the other side. To mount it all, feed the shorter straps through the center of the seat back, and attach the longer shoulder harness to the rear seat armor plate. The lap belts were glued to each the side of the seat, then draped over the seat pan. The completed Sutton harness look convincing when installed.
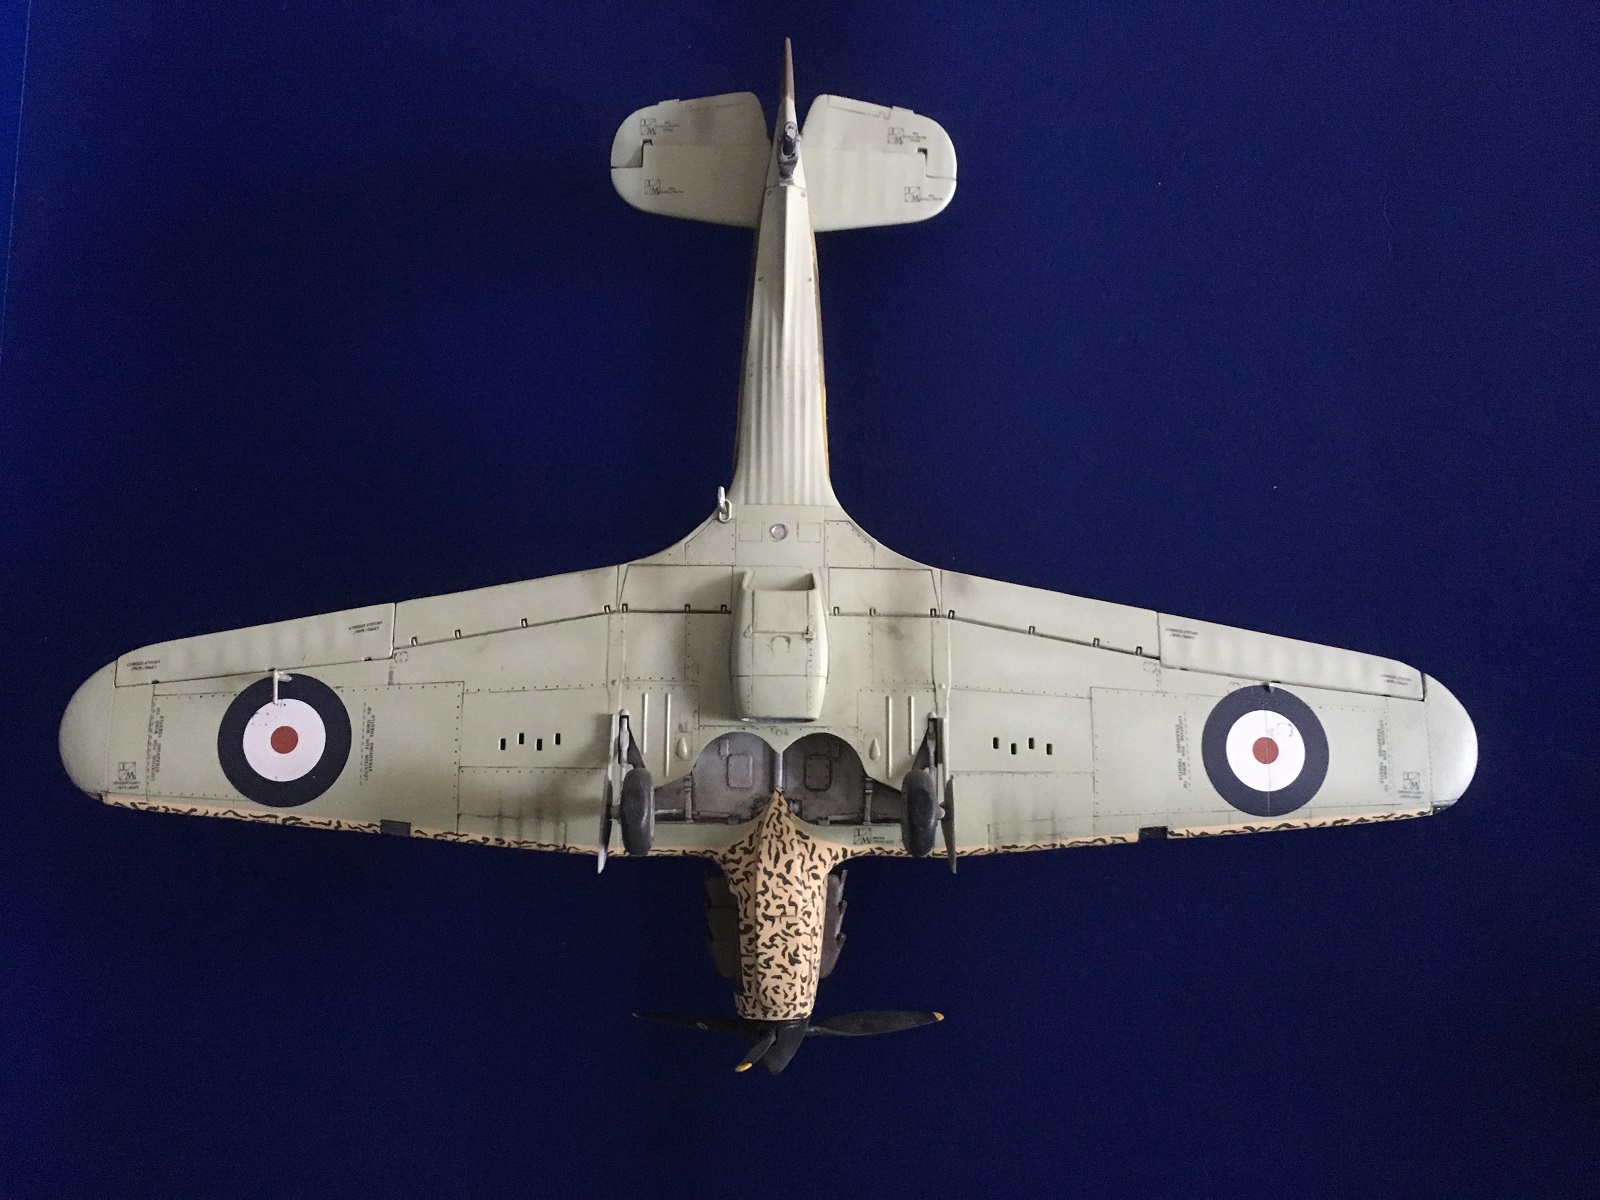
The undercarriage bay and all undercarriage legs, actuators, wheels and doors look and fit fine. The wheel hubs are separate and supplied in both 3 and 4 spoke styles, but no mention is made as to which to use. The main tires are nicely flattened, but the tail wheel tire looks like it needs some air.
The canopy and windscreen are some of the thinnest I’ve seen and quite fragile. I used a razor saw to remove them from the sprue. While cleaning the remaining sprue stub from the sliding canopy, I cracked it a bit!! The canopy frame features curved edges around the “glass” that is incorrect. All edges should be square. I used the Eduard canopy mask and this included the curves, so I went with it. They are not too noticeable in this scale.
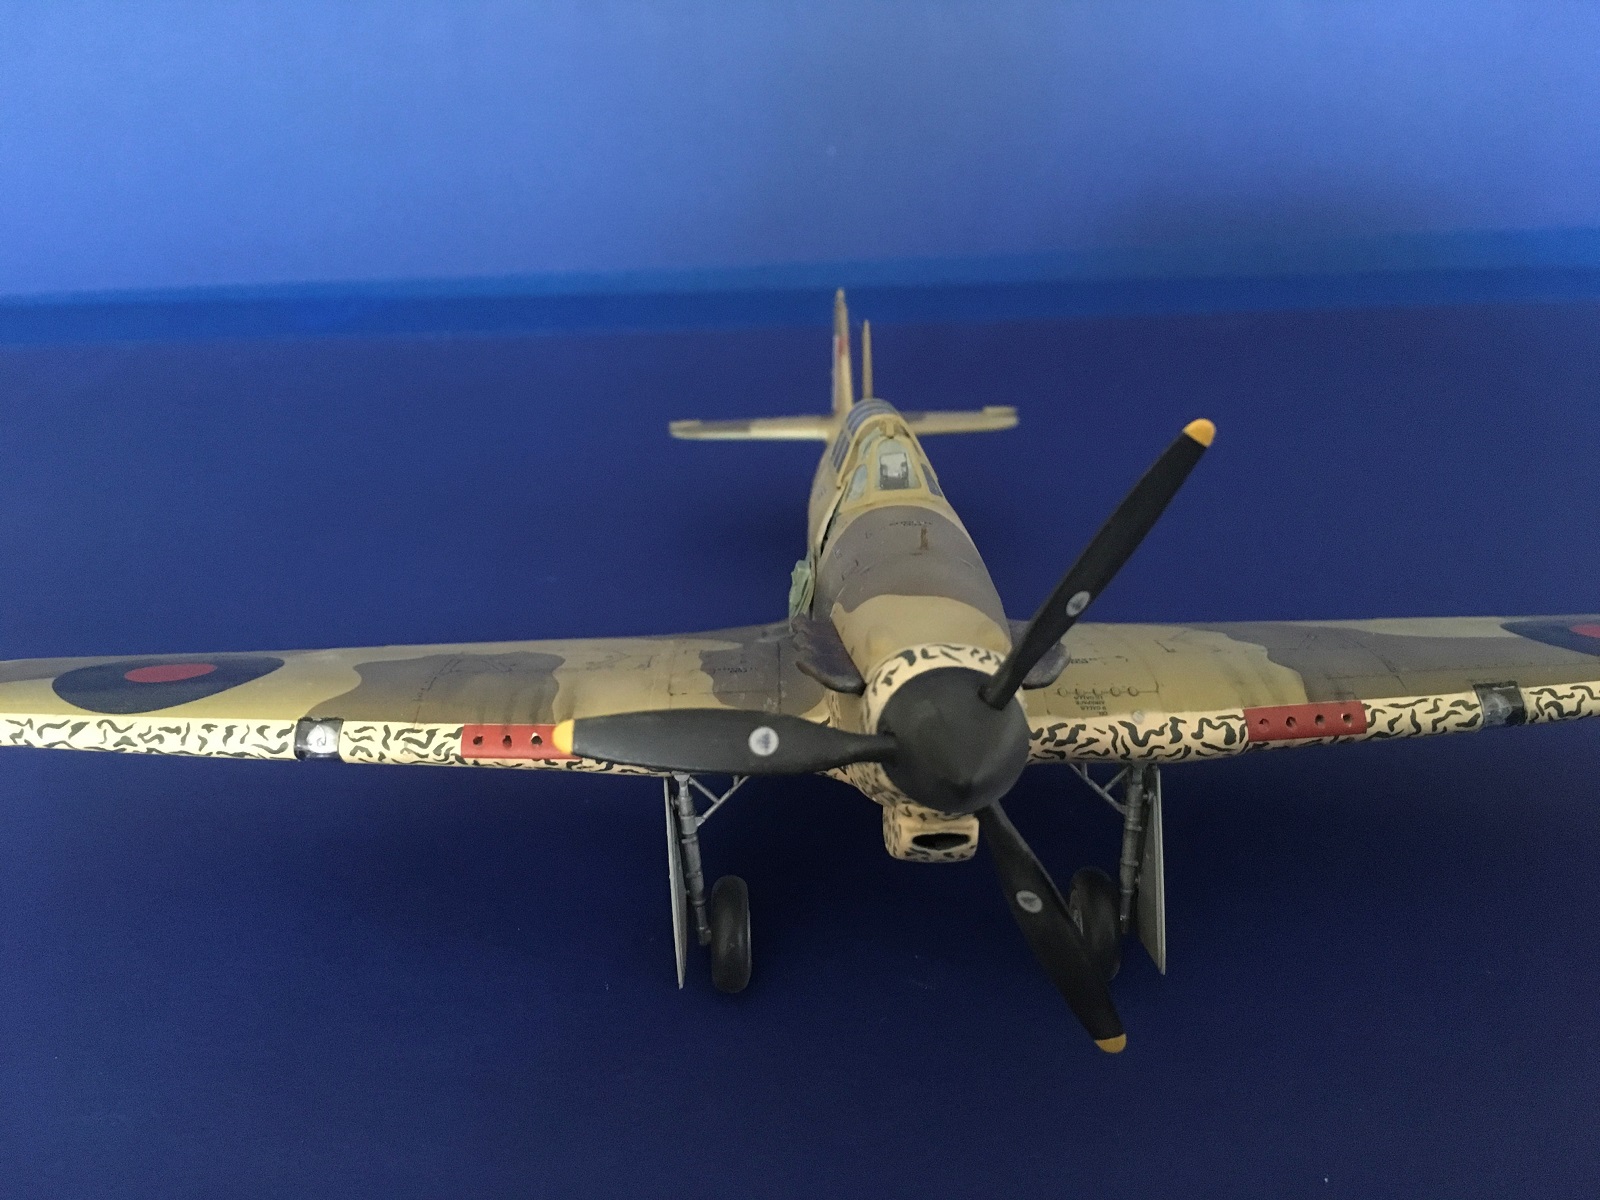
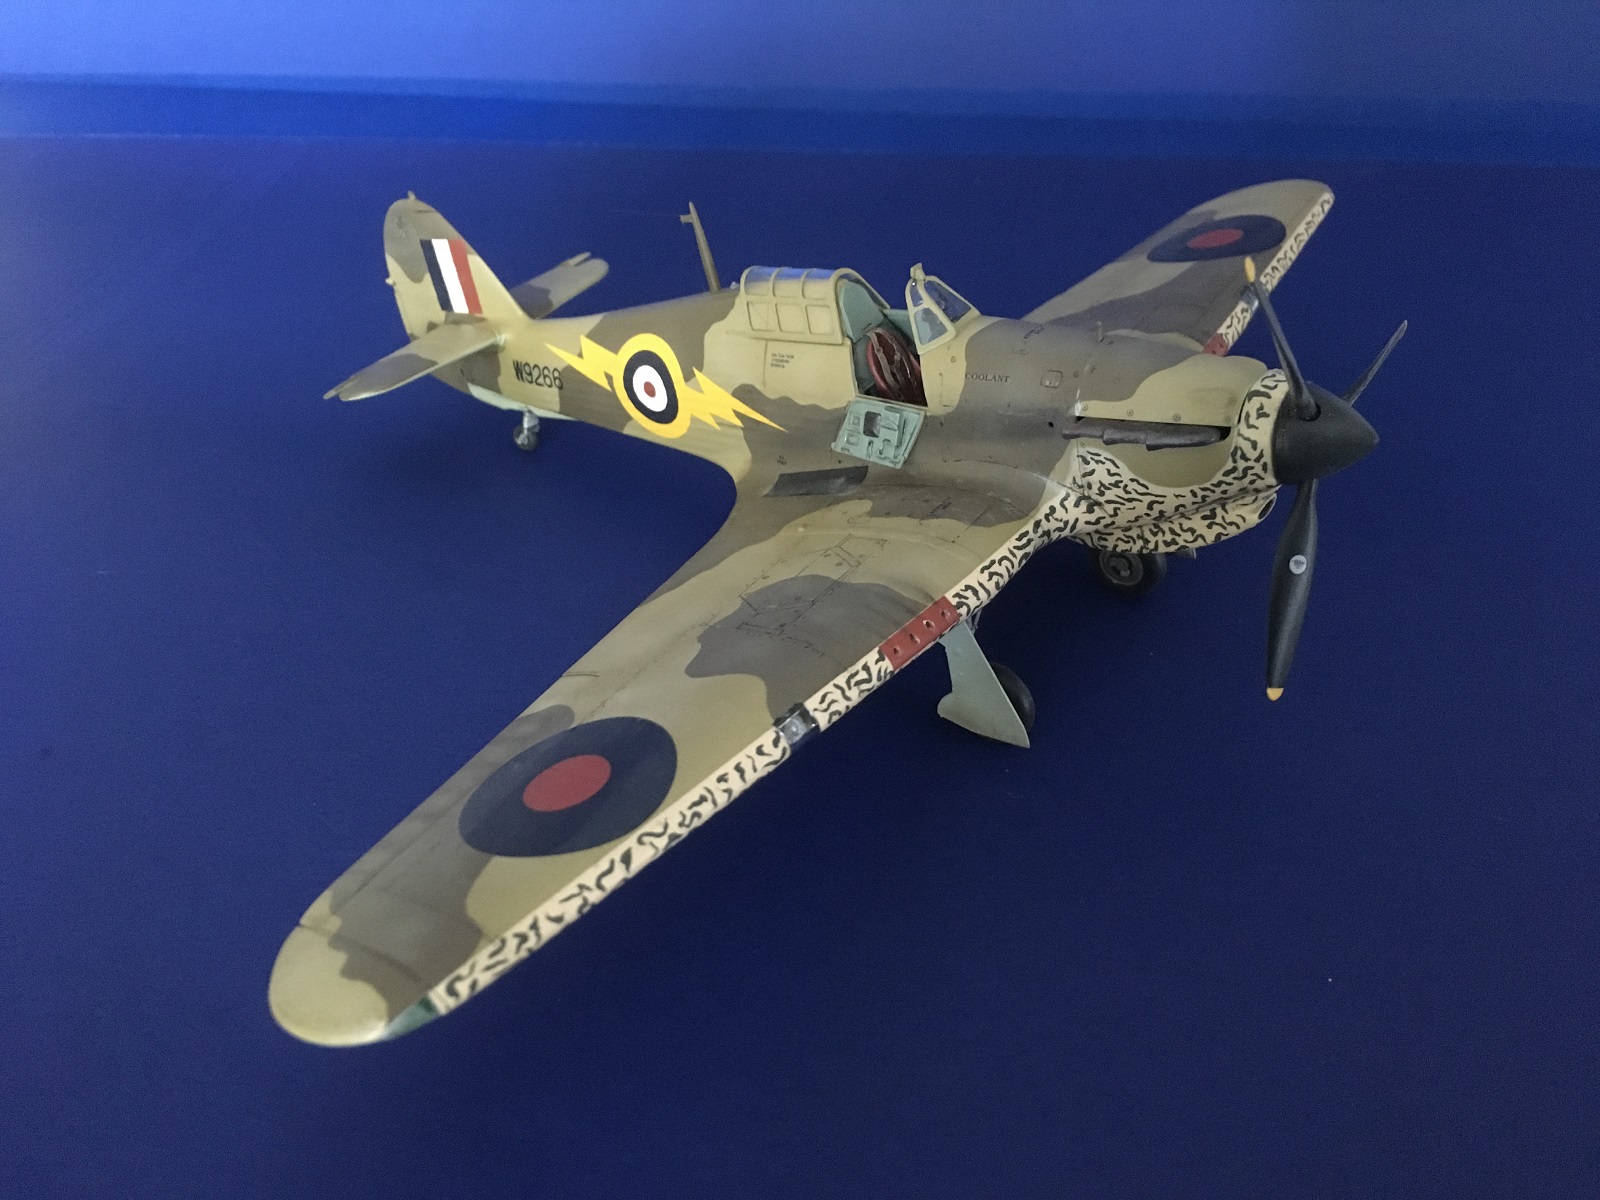
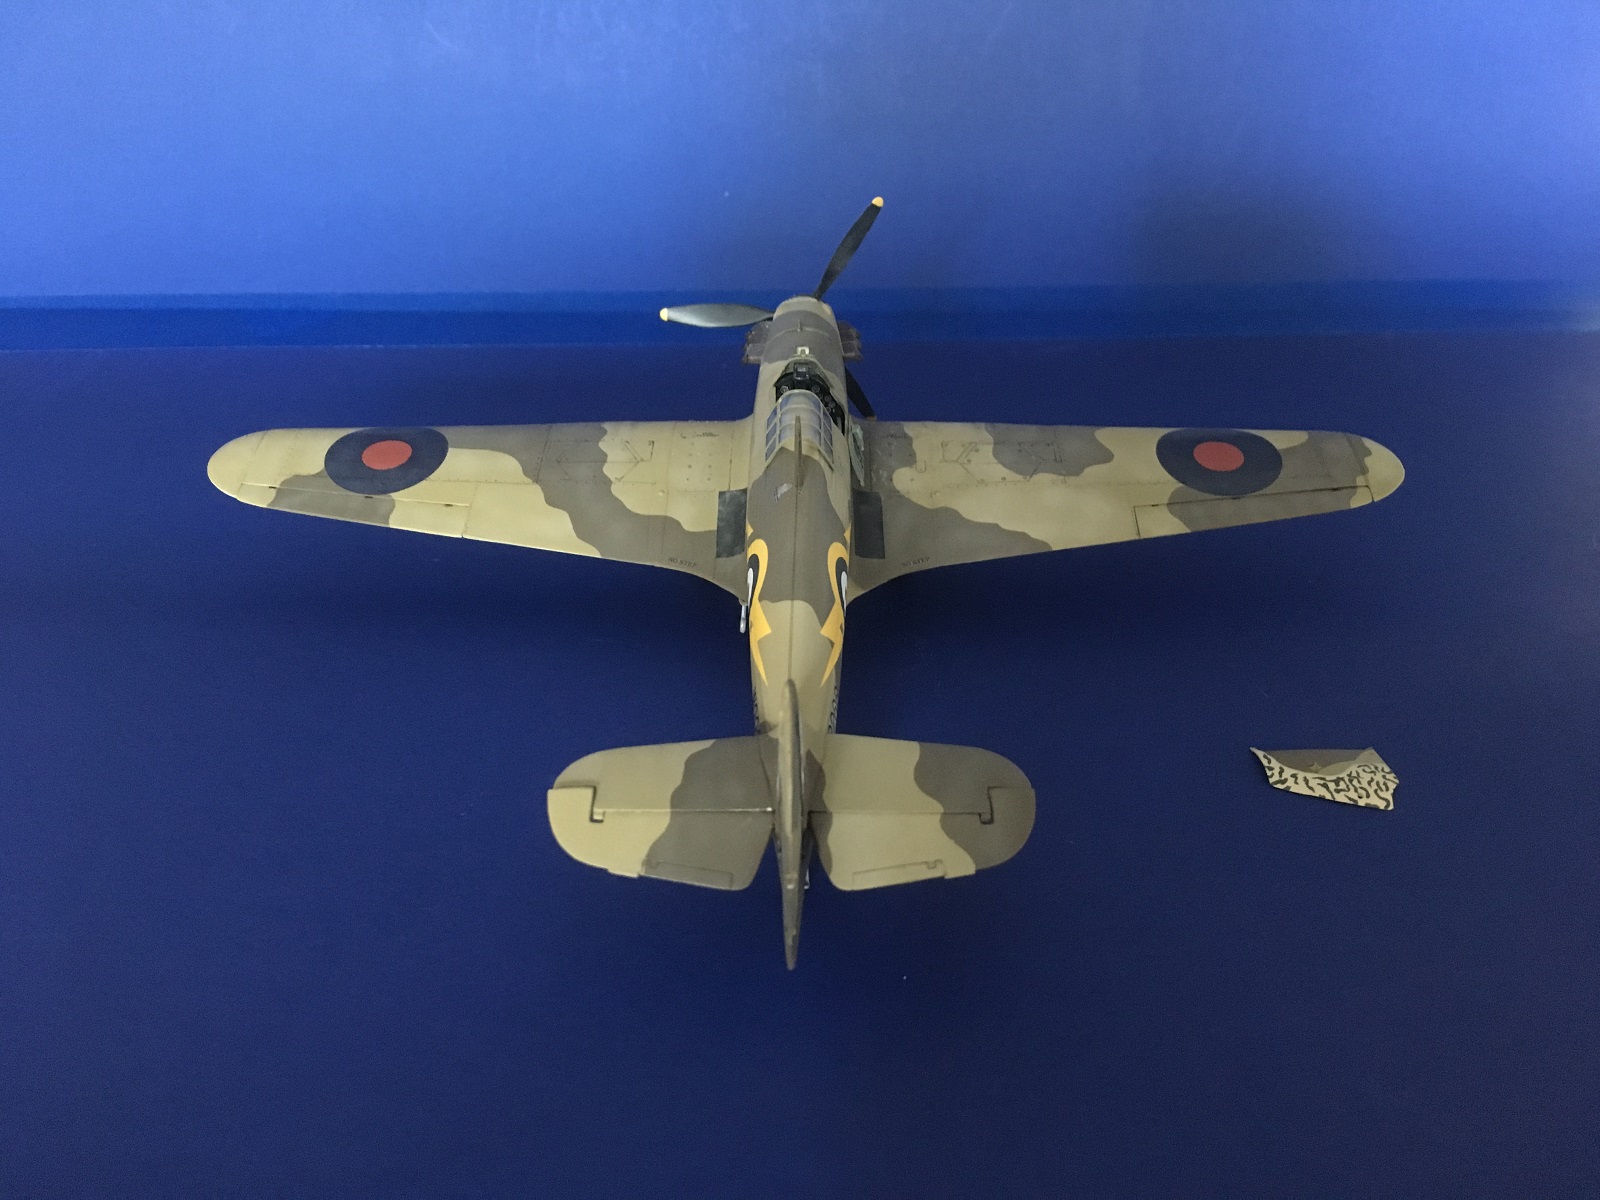
Markings are included for six different aircraft. I chose RAF, No. 274 Sqn., Lt. Dudley Honor, Gerawala, Egypt, 1941. The aircraft was painted in dark earth, middle stone, and sky blue. It featured an unusual paint scheme over the nose and wing leading edges of sand and green squiggles. I masked the wings with tape and used “silly putty” around the compound curves of the nose. I sprayed radome tan for the sand and the dark green squiggles were painted with a fine brush. All paints used were Model Master Enamels.
The decals performed well and responded to setting solution fine. All stencils and markings are very nicely printed and legible.
Overall, I did enjoy building this model despite the wrong wing part and the extra work needed to make it fit. Basically, if one wants to look at it this way, it is a great exercise in scratch building and modifying parts to make the model fit.
I have no doubt that Italeri/Hobbico will fix the issue. I hope that it does not deter people from buying and building this kit, as it is generally a nice model that goes together quite well. Once the issue is fixed, I would recommend it to people with a couple of builds under their belts, simply because of the photo-etch.
Thanks to Italeri, Hobbico and IPMS for the opportunity to review this model.

Wing root repair
Wing root repair
Wing root repair

Wing root repair
Wing root repair
Wing root repair

Finished Hurricane model

Finished Hurricane model
Finished Hurricane model
Finished Hurricane model
Finished Hurricane model
Finished Hurricane model

Finished Hurricane model
Finished Hurricane model
Finished Hurricane model

Comments
Add new comment
This site is protected by reCAPTCHA and the Google Privacy Policy and Terms of Service apply.
Similar Reviews