
Her Majesty’s Estafette
This is a high-quality resin kit of a unique steampunk vehicle with figures. The part fit is exceptionally good, but there are some small & delicate parts to work with, and resin experience is important.
Industria Mechanika is a low volume, high quality ‘garage’ kit company focusing on original concept designs of steampunk, airships, fantasy, fantastical figures, and other whimsical creations. Many of IM’s kits are original designs created by its owner and designer, Michael Fichtenmayer, or other designers. The kits are produced in resin of the highest quality, and many include photoetch, decals, and other accessories.
Her Majesty’s Estafette is designed by Christohe Desse, who has designed several other kits for Industria Mechanika. Desse is a special effect artist and modeler for advertising, tv, film, and games in France, Germany and Singapore. Christophe enjoys creating cartoony or stylized characters and supercharged muscle cars.
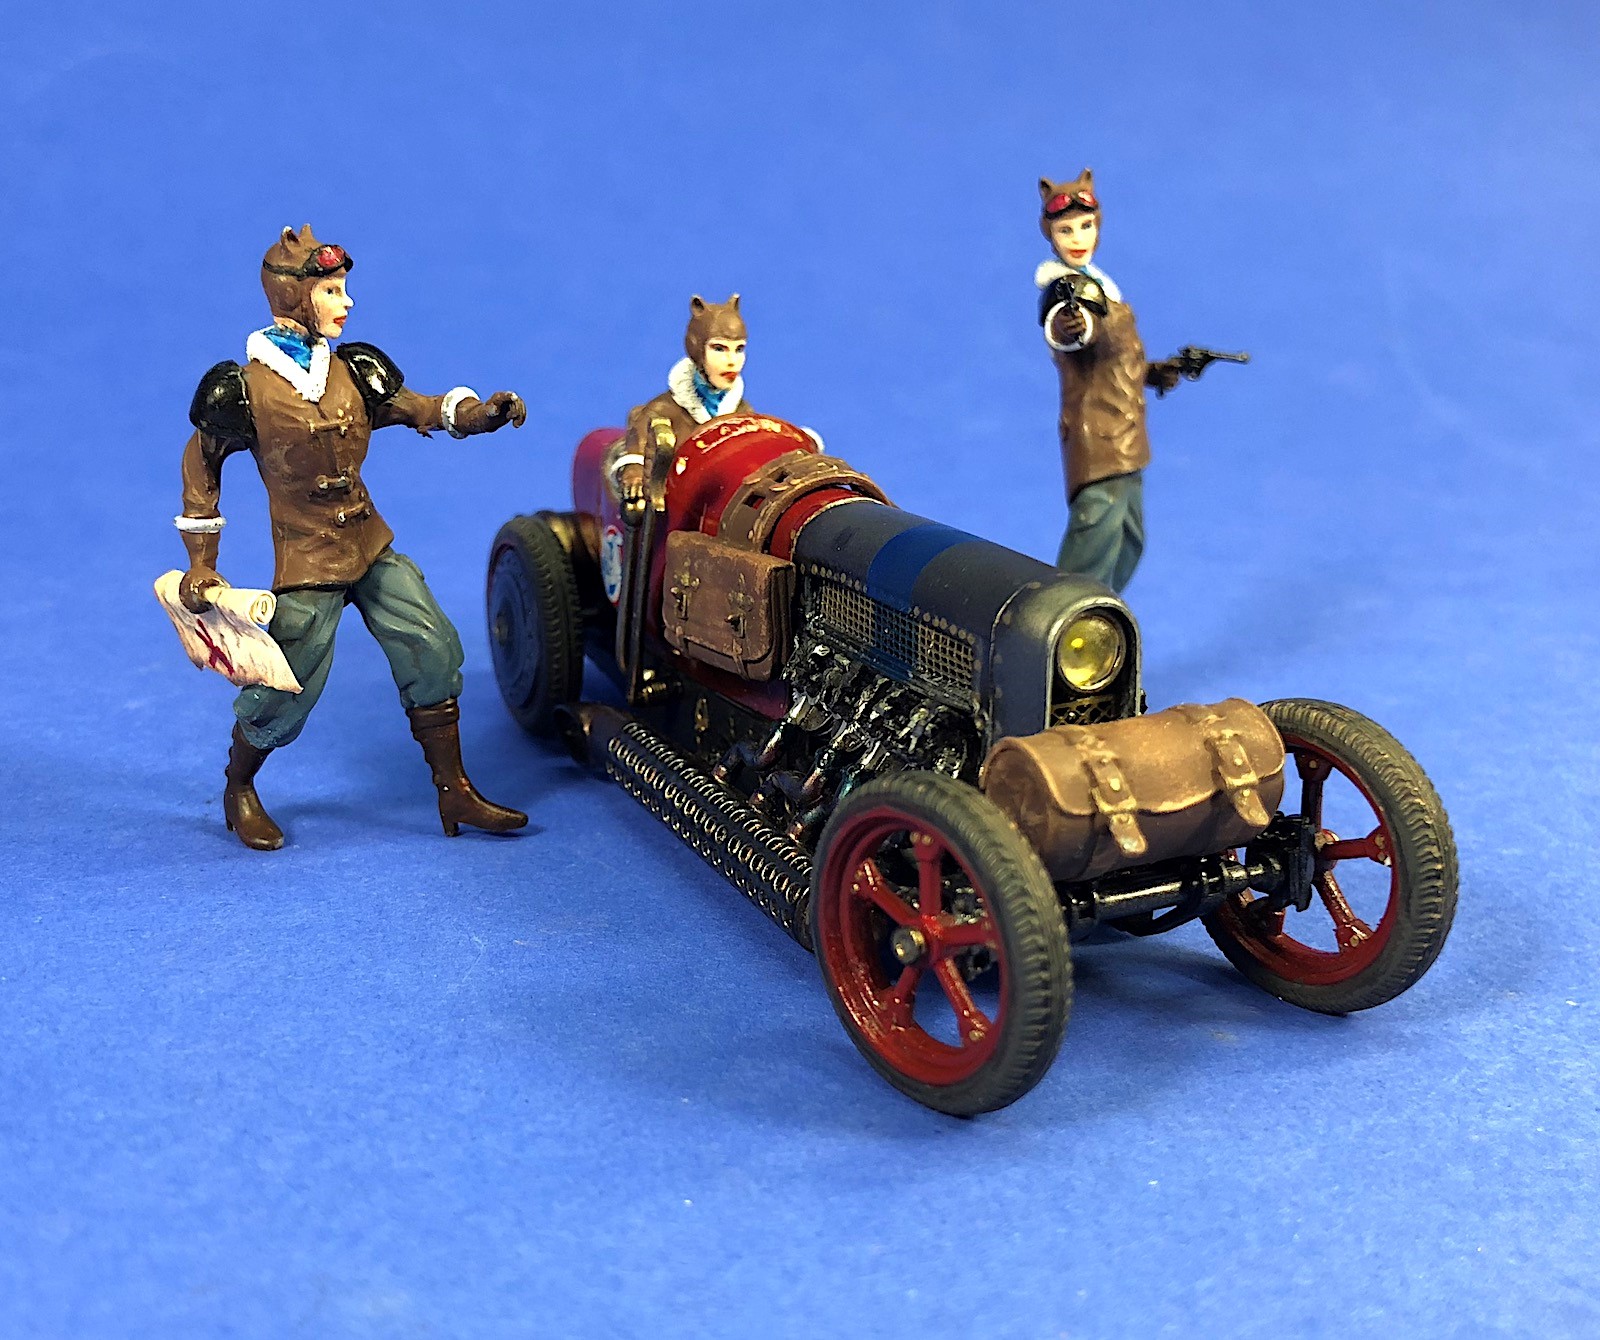
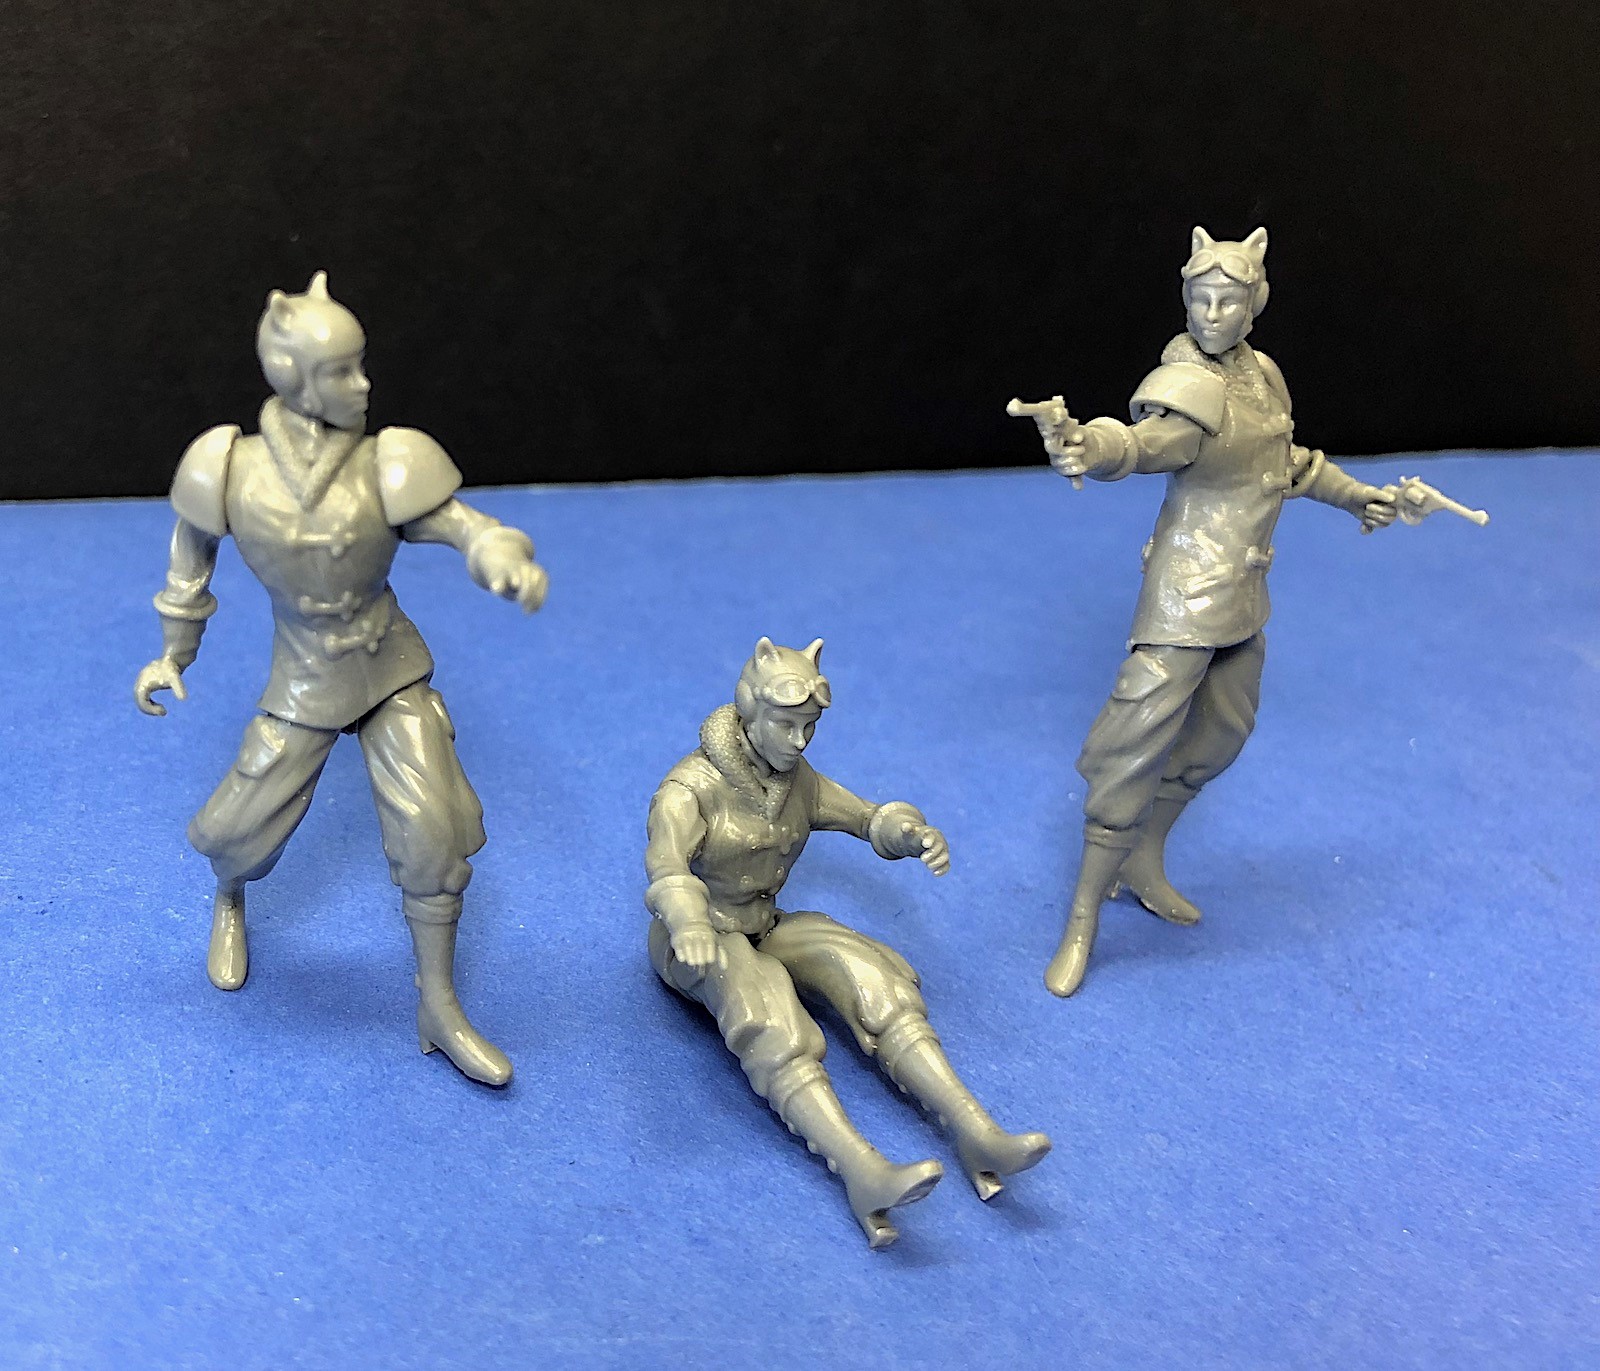
The Estafette is based on the J.A. Prestwich (J.A.P.) engined GN Grand Prix Special cyclecar. The J.A.P. engine was designed in 1908 as an air-cooled V8 with exposed valvetrain and ‘total loss’ oiling used to originally power dirigibles and later adopted to lightweight cyclecars, a cross between motorcycles and cars. The GN Grand Prix Special cyclecar had a wood frame and weighing only about 1000 ponds was quite lively with the 5-liter V8 J.A.P. engine. One of the founders of GN, Archie Nash, went on to produce Frazer Nash sports cars. Desse takes off with the Victorian character of the vehicle and adds three female figures in appropriate Steampunk attire. The Estafette or mounted couriers, include a driver, standing figure with map, and a guard with guns drawn.
The kit comes packed in a sturdy lightweight cardboard box about 6" x 6" x 4” deep. The edition and kit number are written on the box. This sample was from Edition 2 and kit number 73 of 100.
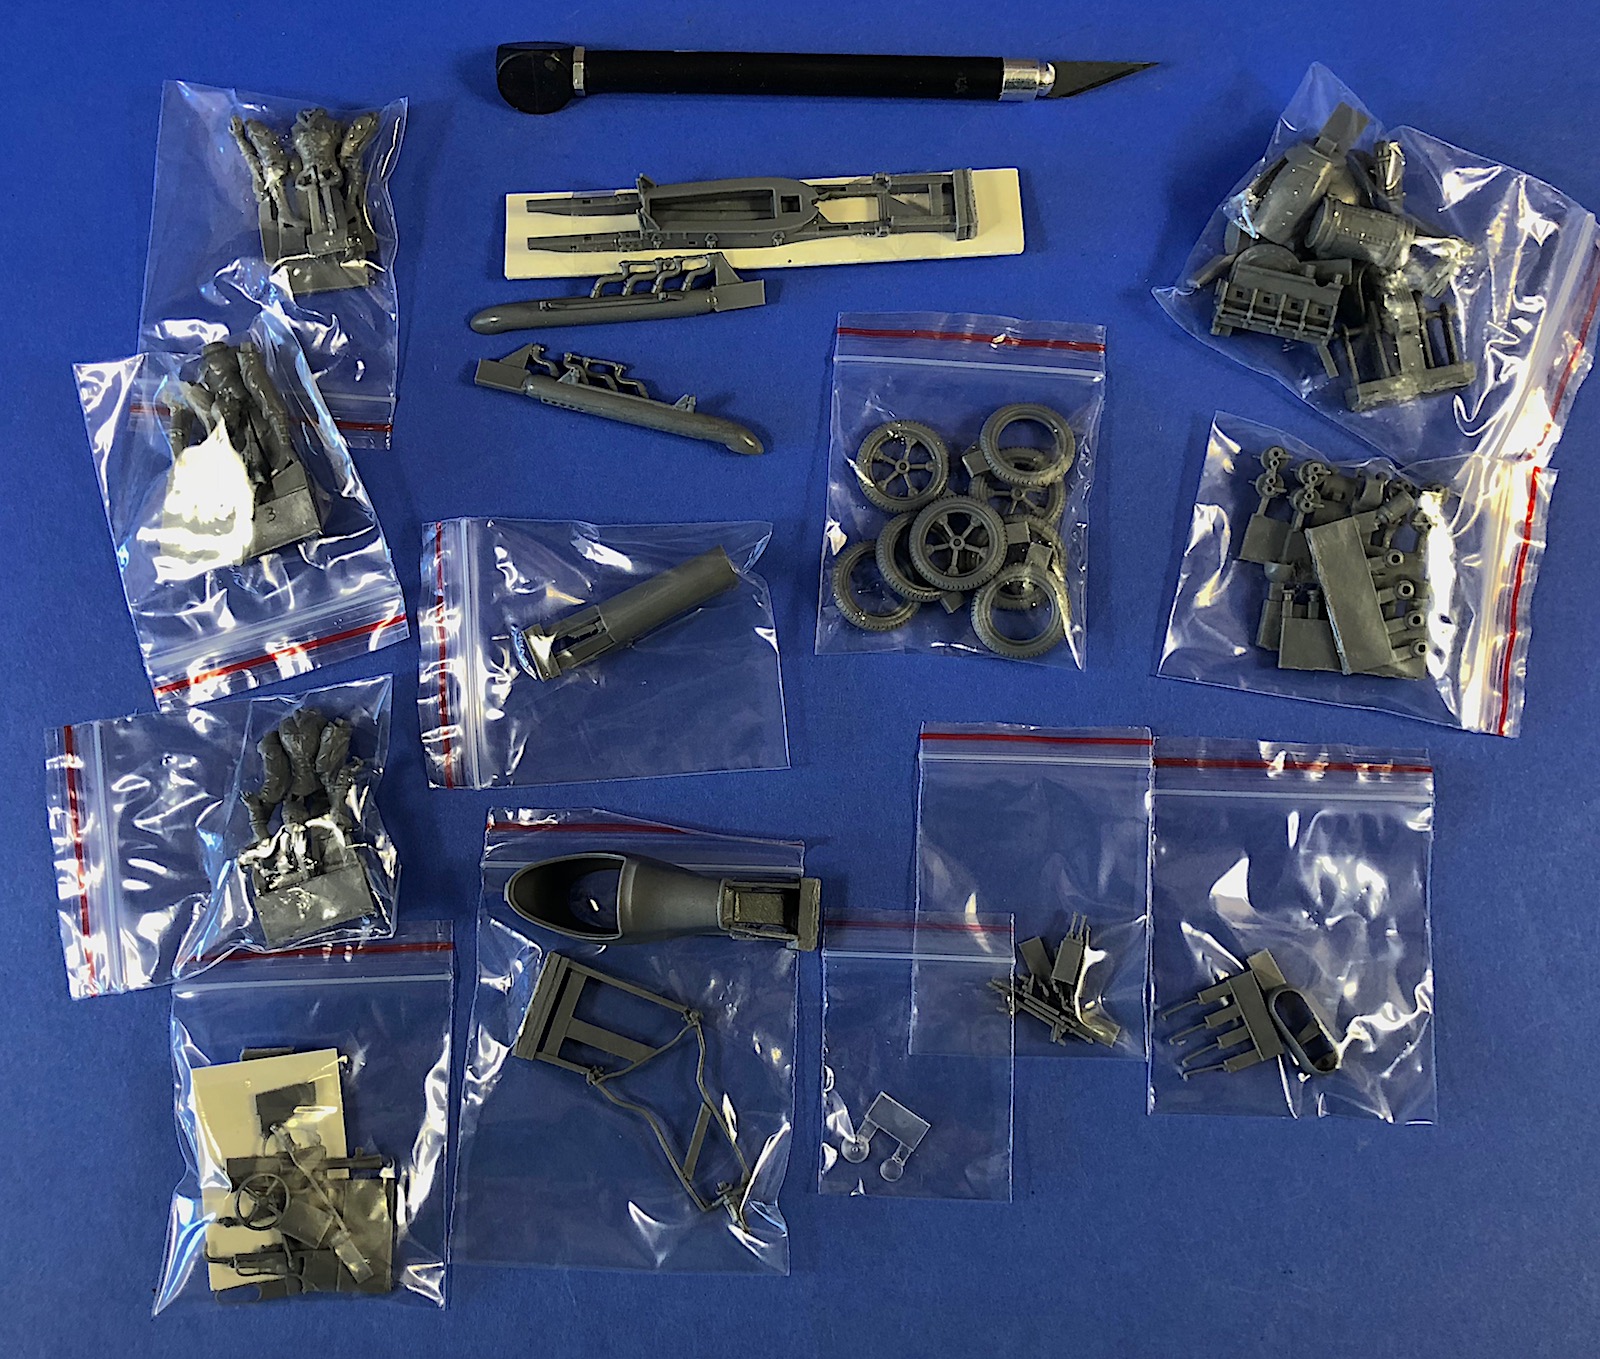
Inside the box are 13 zippered plastic bags of parts, all grouped into larger plastic bags for safety. The vehicle body, mufflers/tail pipes and vehicle frame are shipped loose inside the larger bags. The parts are molded in a medium gray resin and are attached to casting blocks. There appears to be no flash on the parts and no mold seems. The detail on the molded parts is very good. The molding quality of the parts is excellent. A small brass photoetch fret and a small decal sheet are also included.
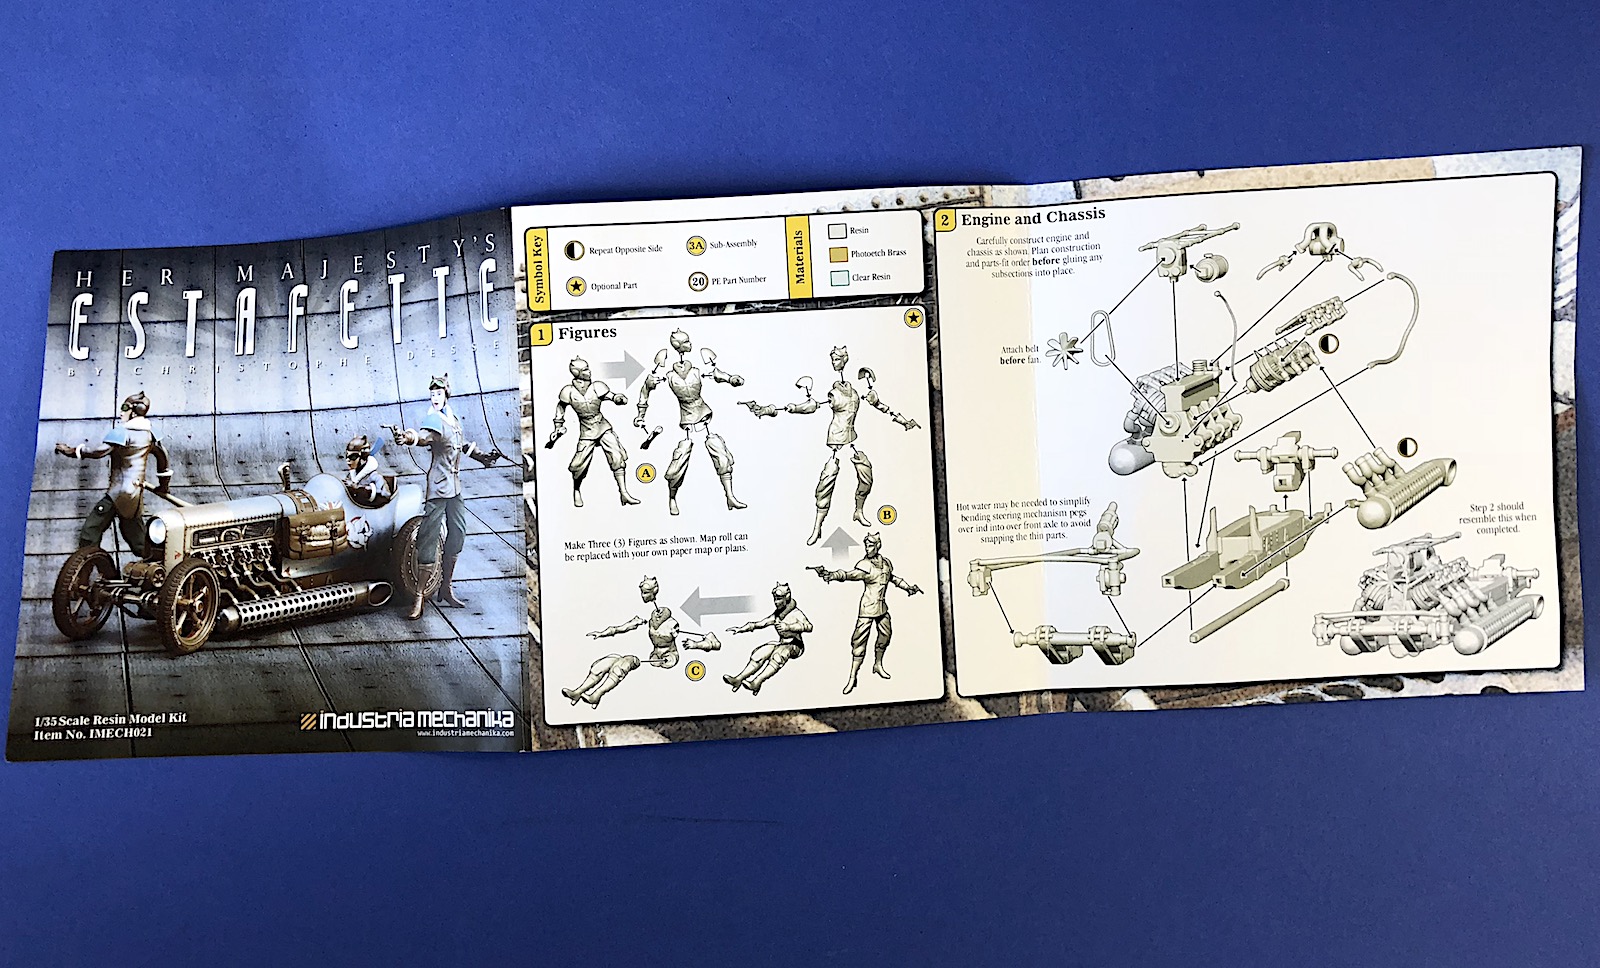
The instructions are a 5 1/2 x 5 1/2 foldout with seven assembly steps. The assembly diagrams are exploded 3-D diagrams that look like photographs or computer renderings of the kit parts. The instructions do not use part numbers, although the PE parts are numbered. The instruction cover includes a guide to painting the vehicle, although no paint colors are called out, leaving it to the discretion of the modeler. The instructions are nicely illustrated and very clear.
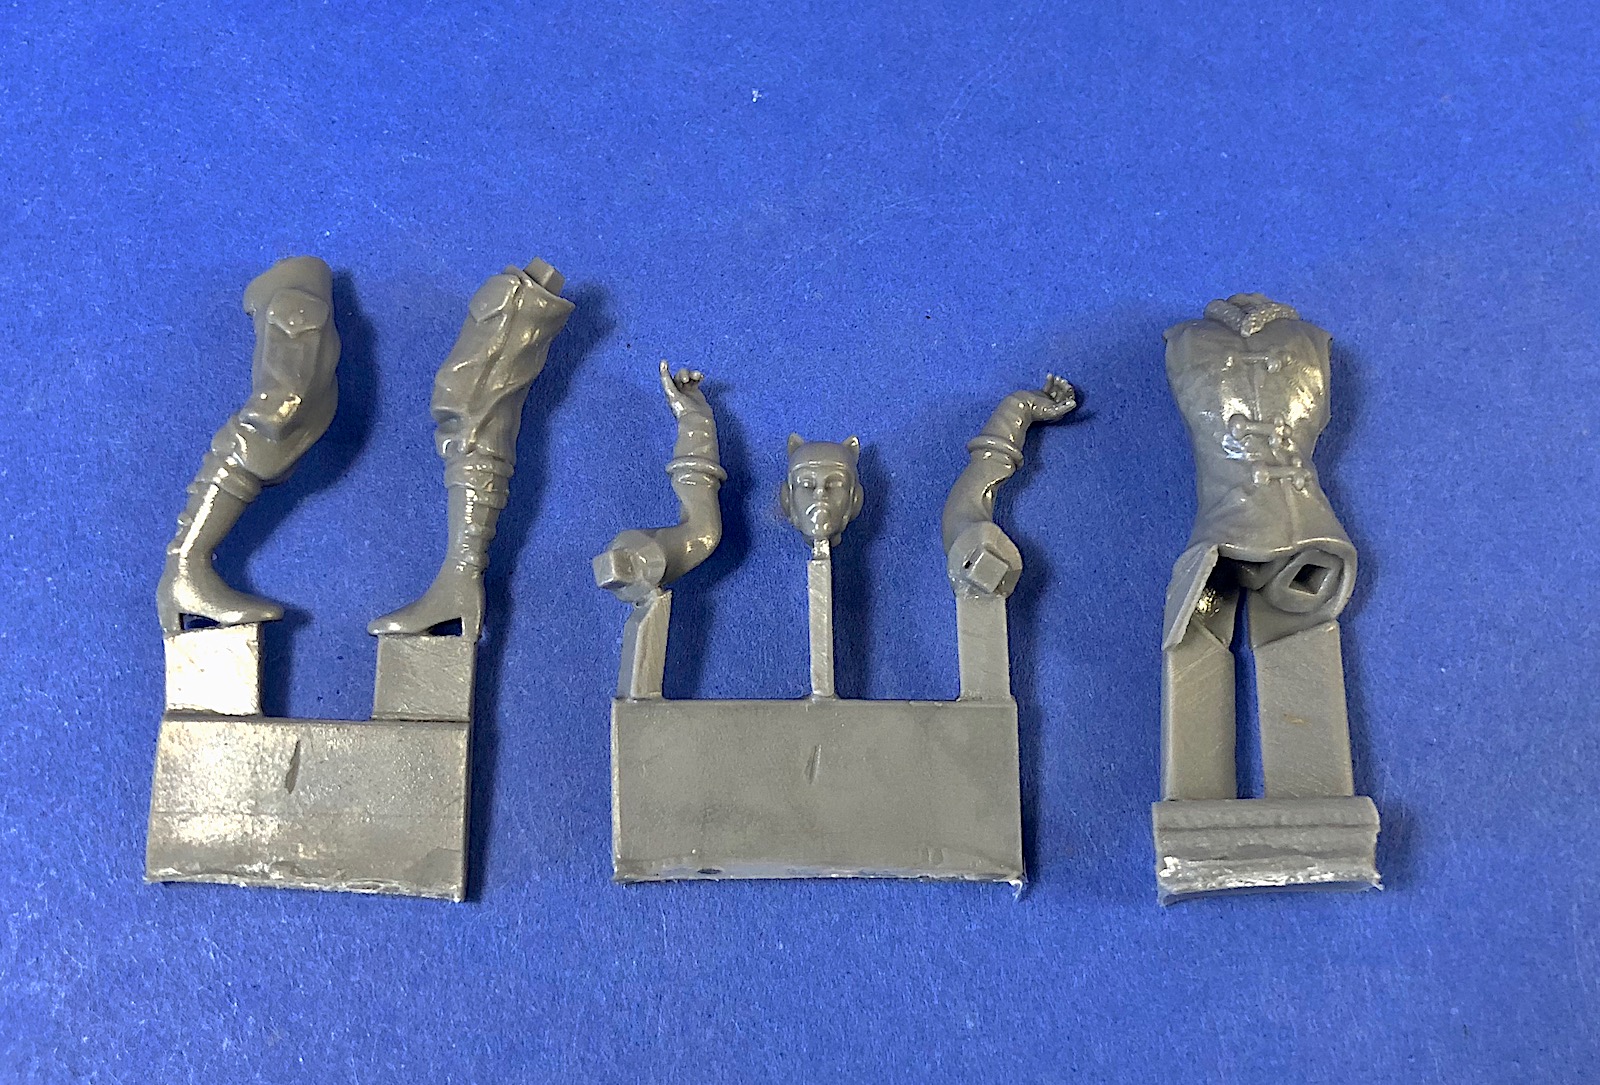
Three figures are included with the kit, one driver and two standing guard figures. Although a little soft, the figures have nice detail. The molding quality is superb with no flash on the parts, and the trigger guards on the guns even have openings around the trigger! The individual figure parts have square pegs to fix them aligned correctly in the proper orientation. There are clothing seams down on the front of the trousers, but there are no apparent mold seams.
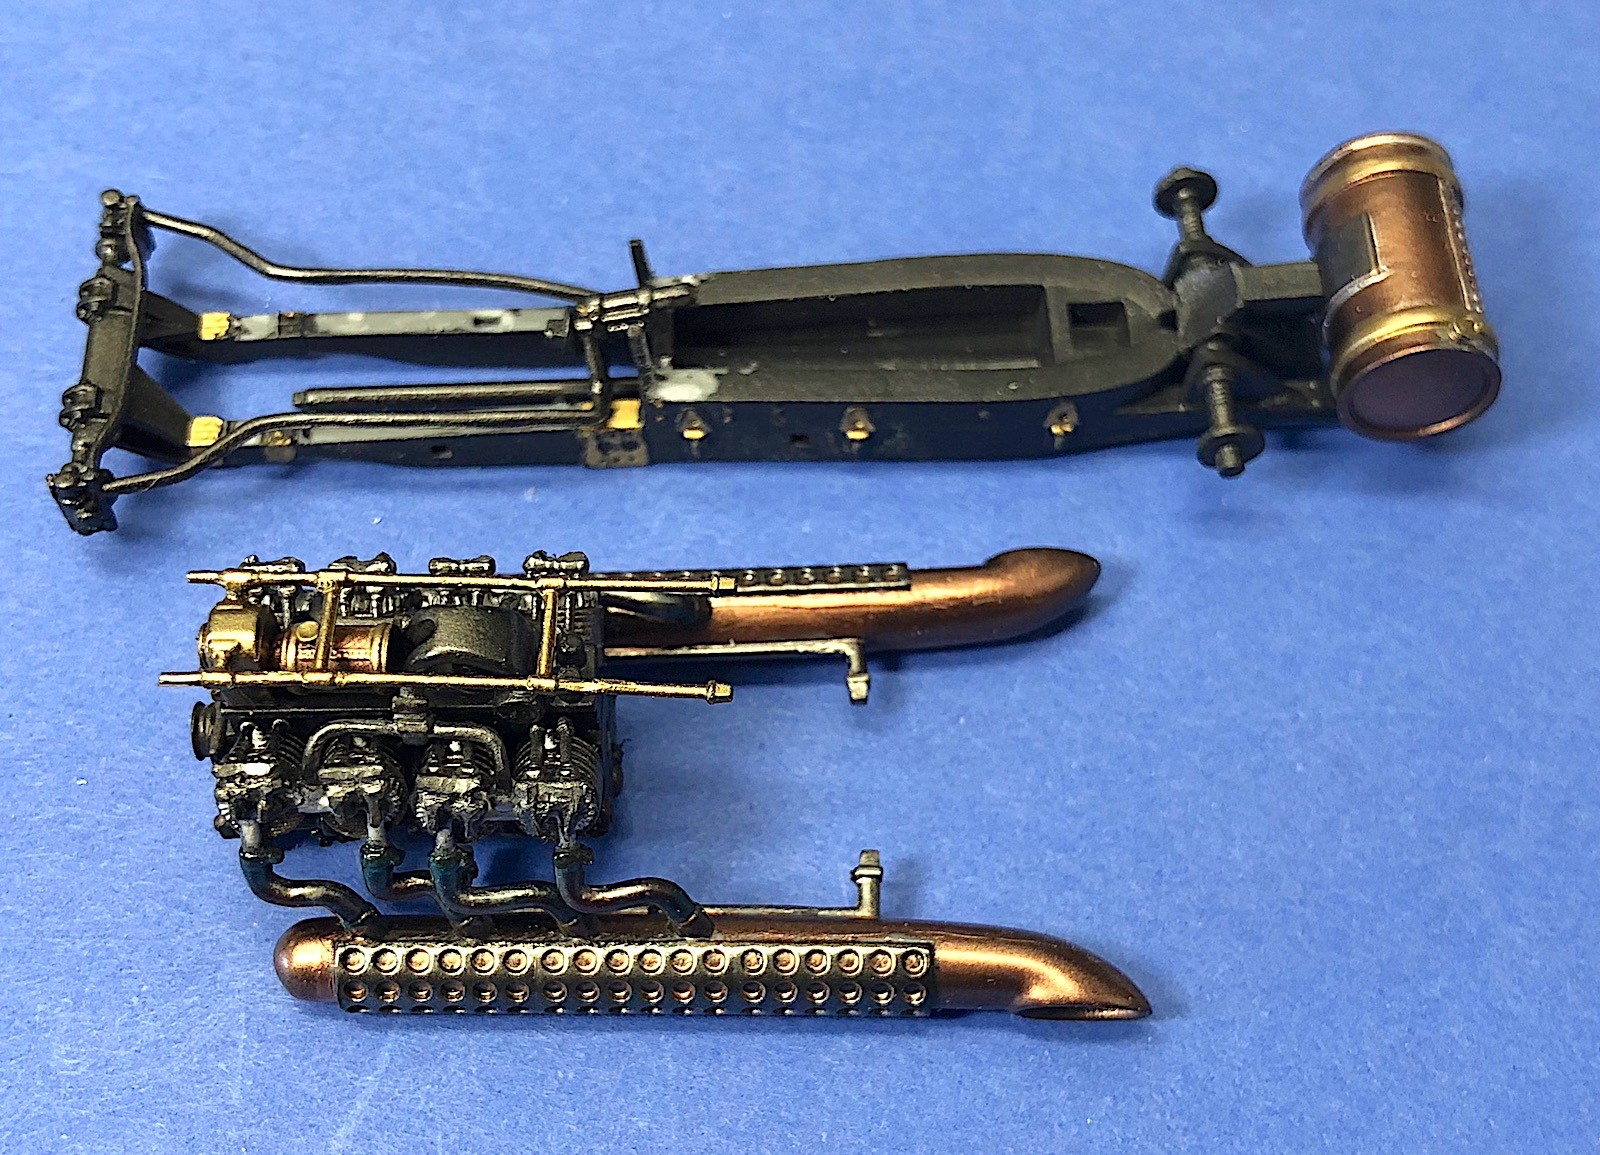
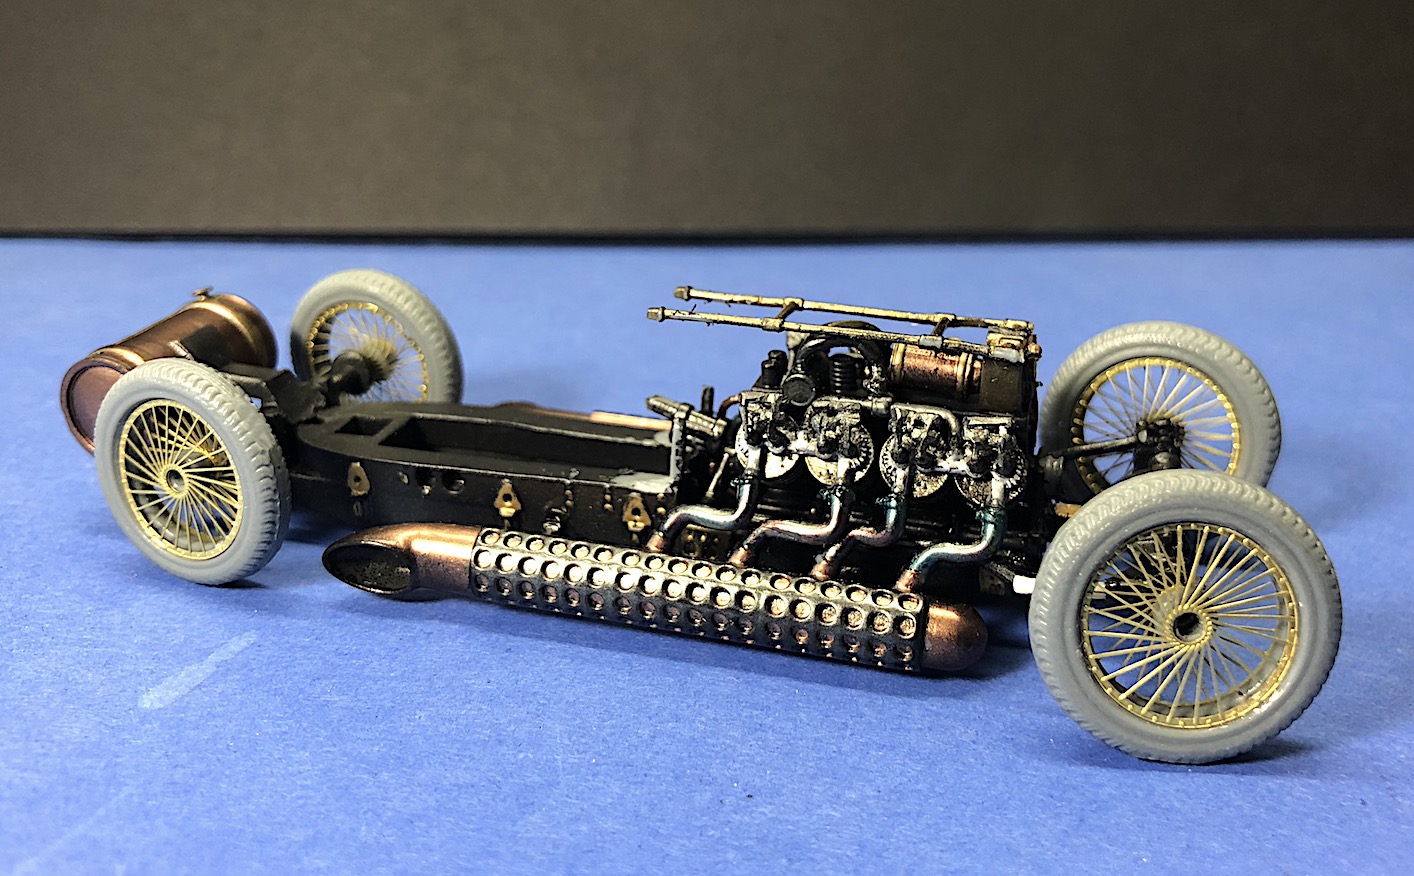
The engine and chassis are assembled in step 2. There is some nice detail with these parts and it creates an interesting looking engine. There is some difficult cleanup of the small pipe sections, fan belt, and particularly the valve stems and rocker arms. The casting blocks for the rocker arms are on their exposed face so it is difficult to remove the casting block and retrain the fine detail. The valve stems and rockers are molded in pairs, but reference photos show them separated. The casting blocks attach to the rocker arms so use care in cleaning them up. Refer to the illustration’s cover or box art to see how the rocker arms should look. Once assembled the rocker arms are nicely exposed and the signature element of the engine.
The instructions advise to check the part fit and order before gluing to make sure everything fits. Check fit the muffler and exhaust headers when installing the cylinder heads to make sure everything aligns. Spark plugs are molded on the top side of the cylinder heads to allow additional wiring if desired. The huge side pipes/mufflers add mass and great character to the car. I painted the exhaust headers with Alclad hot metal colors to reflect the heat in the pipes.
Note there are left and right side pieces for the small intake manifold parts that connect to the cylinders. The longer leg on these sections goes to the front of the engine. It’s a little difficult to get these manifolds sections aligned with the cylinders and the larger intake manifold. I ended up gluing the short sections to the cylinders then placing the larger intake manifold before the glue set.
The cooling fan fits lower, not to the top pulley on the manifold as shown in the instructions. The image of the completed engine shows the fan in the correct location. There is a gap behind the top fan pulley that the spacer in the grille bar fits behind. This might be possible if the grille is attached to the chassis before gluing to the hood, but I couldn’t get it to fit and cut off the bar & spacer. The front steering mechanism needs to be installed on the chassis before the engine, although I was able to bend it enough to install after the engine. The instructions state that hot water may be necessary to soften the steering links to slip them over the front axle, although I did not find this necessary.
There is a photograph of the completed engine that helps illustrate the construction. The chassis and engine make a nice subassembly with lots of detail. The massive side pipes hanging off the chassis look nice and add appropriate character to the assembly.
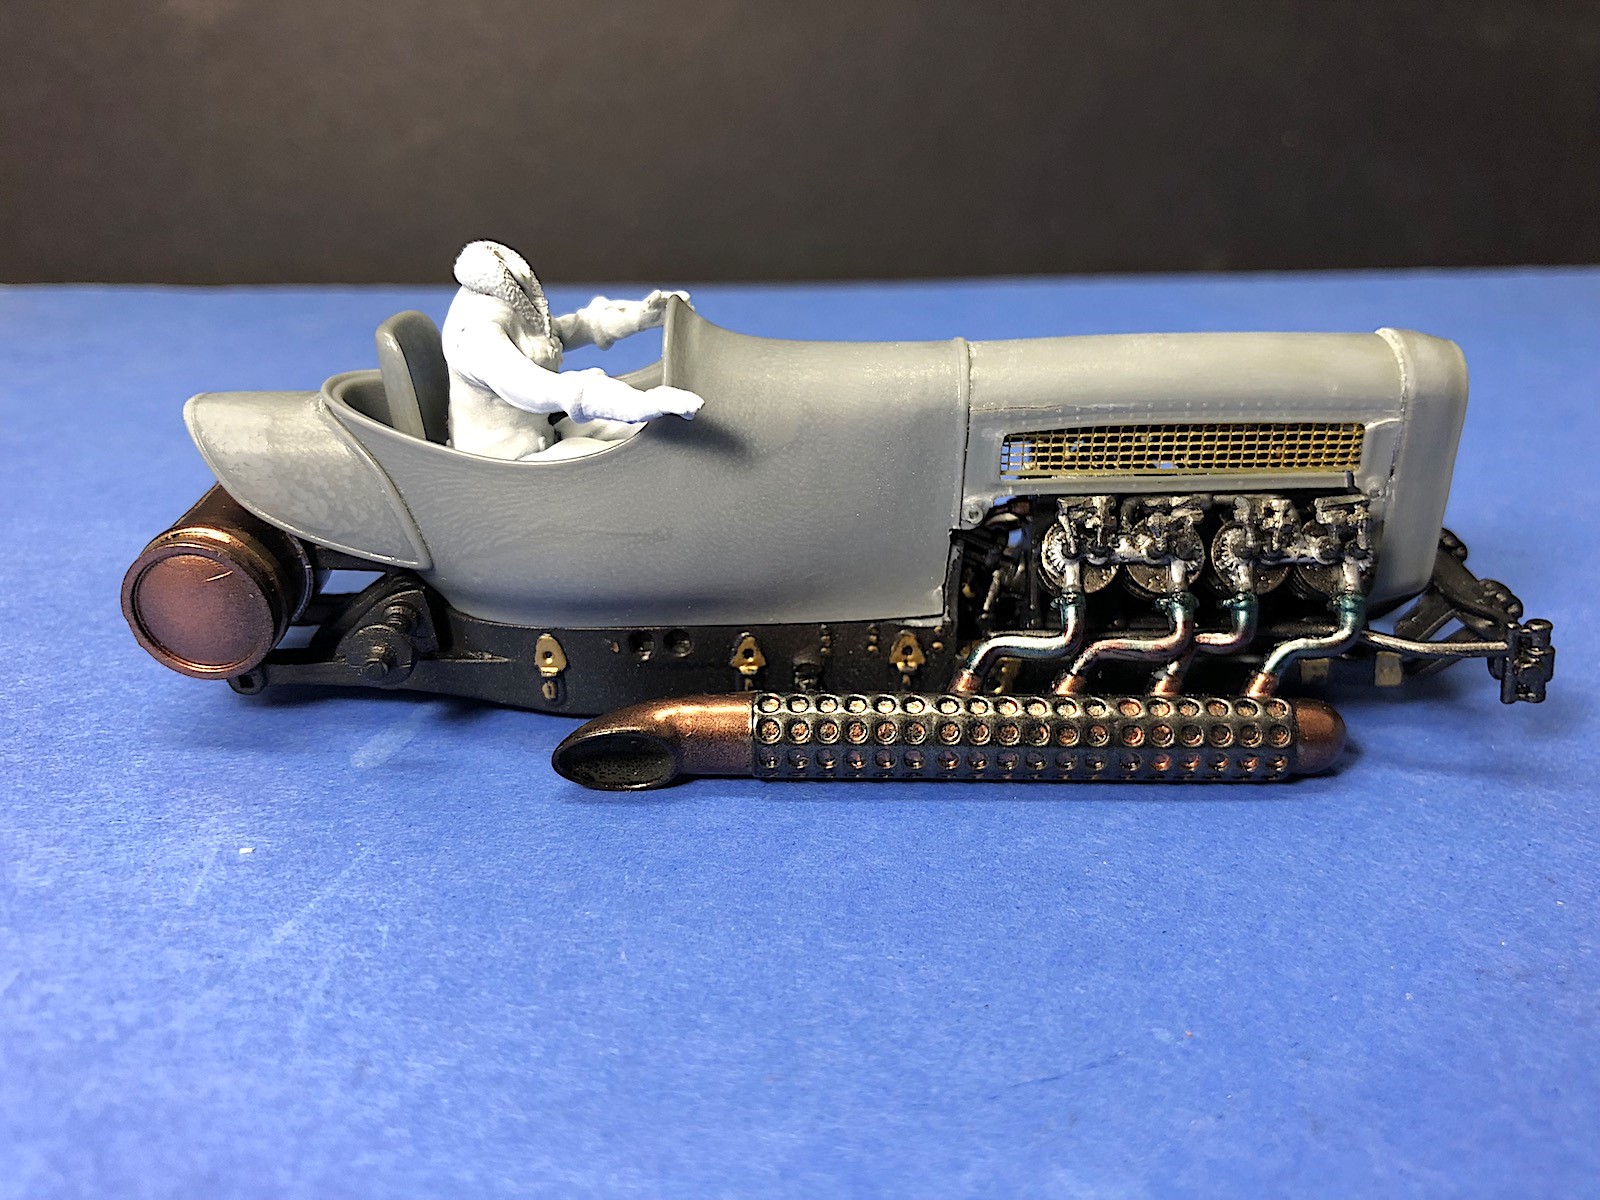
Step 3 assembles the body and exterior accessories such as the saddlebags and front bag. Photoetch pieces are provided for the front and side grills on the hood. Check all of the resin pieces for warpage and dip in the hot water if necessary to straighten them out. I needed to scrape out the interior recesses for the photoetch grills, which then fit nicely. I broke the bottom side rails on the hood during assembly and replaced them with a small channel.
The rear bonnet fits nicely to the back of the car body. I assembled the radiator shell, hood, car body, and rear bonnet together before attaching them to the frame. This allows cleaning up the joints and makes painting a lot easier, but complicated assembly of the wiring manifold, steering box, and grille. It would be worth trying to paint the body parts separately, then install them to the chassis before gluing everything together. I primed, sanded, and primed again to remove any rough spots. I also added some additional Archer resin rivet decals.
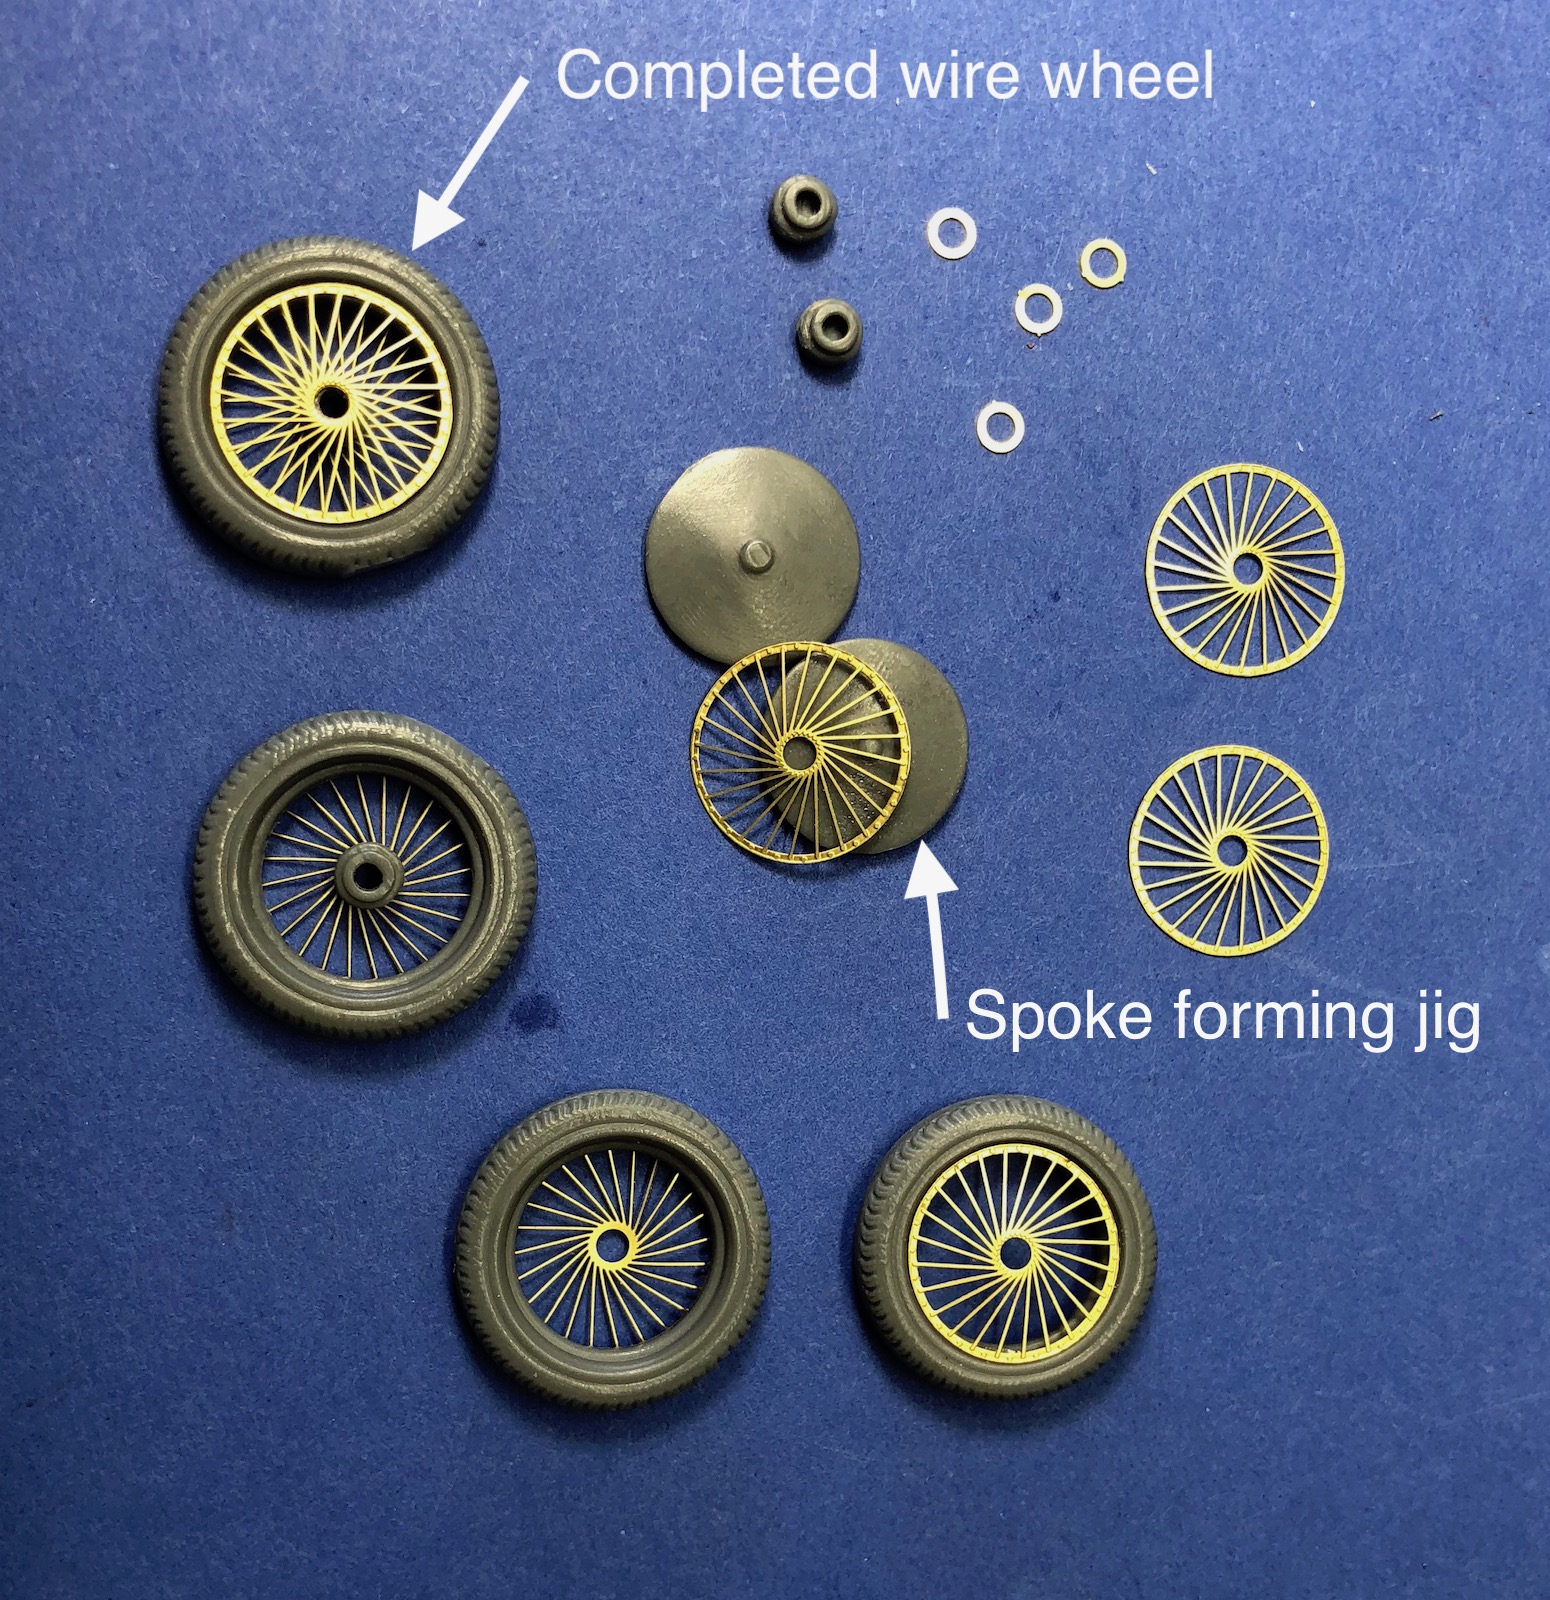
Mag wheels and wire wheels are provided as options for all four wheels. There are also some optional hubcaps provided for the rear wheels. The mold blocks create a flat spot on the tires, so turn that down to represent weight on the tires.
A small decal sheet is included with insignias, small British flags, and some small arrows. There are not as many decals as shown on the illustrations, so I used one of the insignias on the body, and the other on the guard’s tunics. The decals are extremely thin so take care getting them off the backer and into position.
Overall this is a high-quality resin kit with nice detail that I enjoyed building. The finished kit has a nice steampunk Victorian character. There are lots of opportunities to work with metal finishes, and there is also provisions to add additional wiring & plumbing. It’s a small vehicle, only about 4 inches long at 1/35th scale but builds into very interesting model with a unique steampunk character.
Experience working with resin kits and small parts will help with the enjoyment of building this kit. The Estafette is a great work of creative, innovative modelling, and fun to build.
Thanks to the IPMS Review Corps for allowing me to do this review.


Comments
Eteffete instructions
Would any be able to provide me with a copy of the instruction sheet? Mine went missing.
Give me your email and I'll
Give me your email and I'll send a copy.
Add new comment
This site is protected by reCAPTCHA and the Google Privacy Policy and Terms of Service apply.
Similar Reviews