
Hawker Tempest V
The Aircraft
The Tempest was a follow-on for the Hawker Hurricane and Typhoon. Through the Typhoon and Tempest development, Hawkers had problems with several new systems, and the Air Ministers were ready to scrap the new aircraft programs. One of the people who successfully argued for their retention and one of the problem solvers was Roland P. Beamont.
The resulting aircraft was very fast, quite maneuverable, and a success against the Luftwaffe. But its biggest use in late World War II was against V-1 flying bombs. The Tempest had the speed and toughness to fly alongside a V-1 and tap the wing tip of the missile. This would cause the gyros in the navigation computer to tumble, and the V-1 would crash well short of its target. Good for London, not so good for those living along the flight corridor. Tempest Wing (#150) accounted for 638 V-1s.
The Kit
2 gray sprues of parts and a separate plastic envelope with the canopy in it. I went to my stash and determined that this mold was originally used by AHM/Crown and Revell.
The fuselage is just 2 parts, the wing is a single part and the horizontal stabilizer is also a single part. There are two sets of main gear doors, left and right for building the kit with gear up, as well as a single door for the tail wheel and a spinner without blades for “flight”. There are also left and right parts with the gear doors, wheels and gear legs molded as a single part, a single part tail wheel/door assembly and a prop with blades for “parked” display.
Using either configuration, this kit is built with 9 parts, counting the prop retainer. More on the tenth part later.
Construction
This simple kit has three steps. There are 5 steps in the instructions, but 2 of them are for in-flight, 2 are for gear down, and 1 is common to both.
- Fuselage, horizontal stabilizer, canopy and propeller
- Fuselage/wing
- Landing gear or gear doors
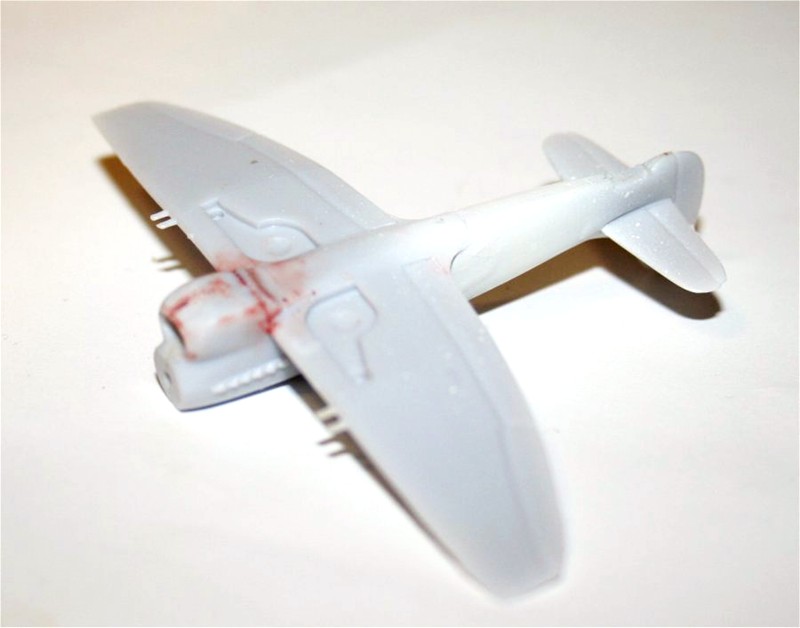
I got so wrapped up in the assembly that I didn’t take any pictures of the kit until I had finished step 3, mating the fuselage/wing assemblies. Fit was pretty good, requiring no filling on the upper wing/fuselage joint. There was some filling required on the fuselage bottom and wing, though.
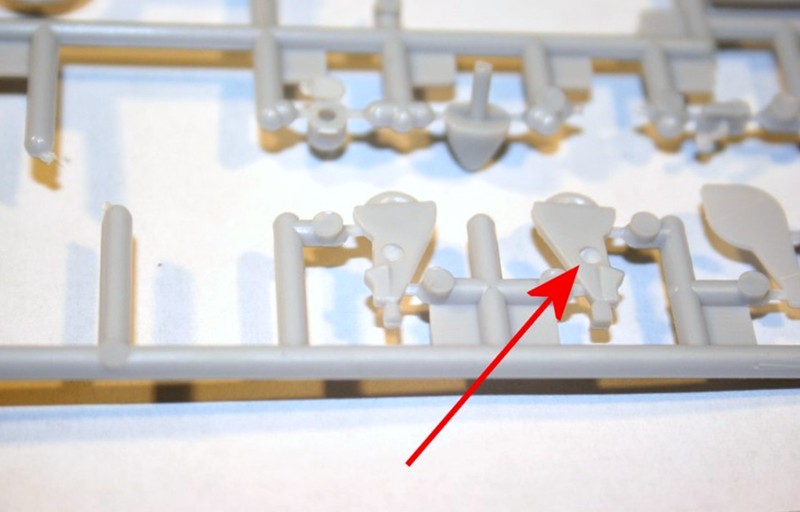
The landing gear is a single part, but it requires the most work of any part in the whole project. I checked the Crown kit, and it has little ejector pin holes in this spot. The Minicraft holes are equally large, but 3 times as deep. Filling and cleaning up these holes was a small chore, but necessary.
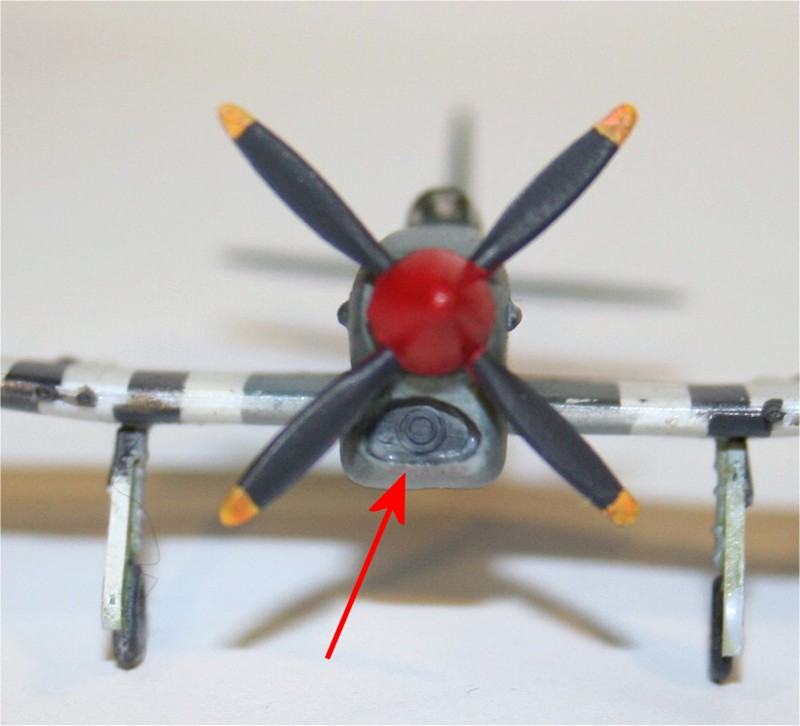
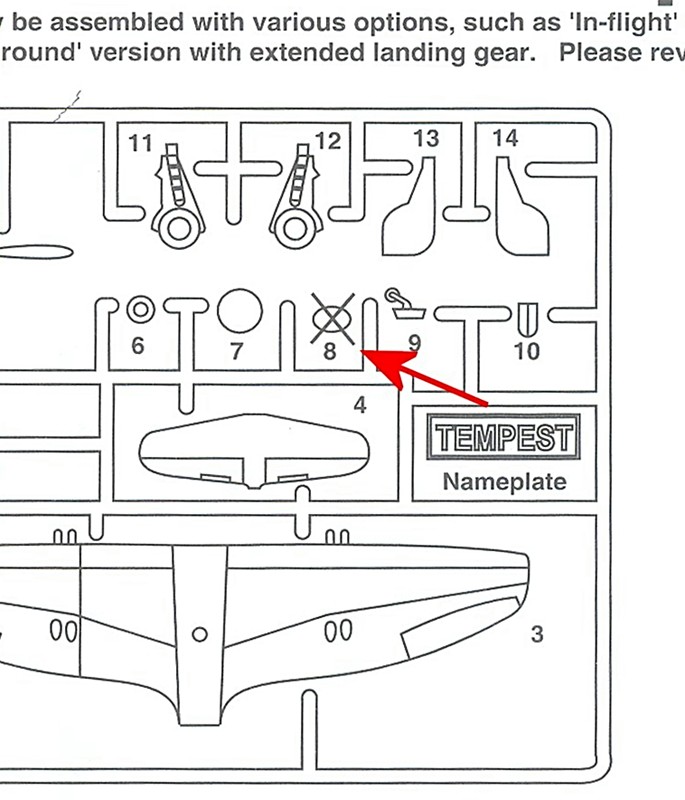
The last thing I did during construction was put in part #8 It’s shown as “not used” on both the Crown and Minicraft instructions, but having built a Tempest before, I know what it is. It’s the front of the radiator, right there under the prop. Otherwise you’ve got this great (for 1/144 it’s huge) hole right there in front.
Painting
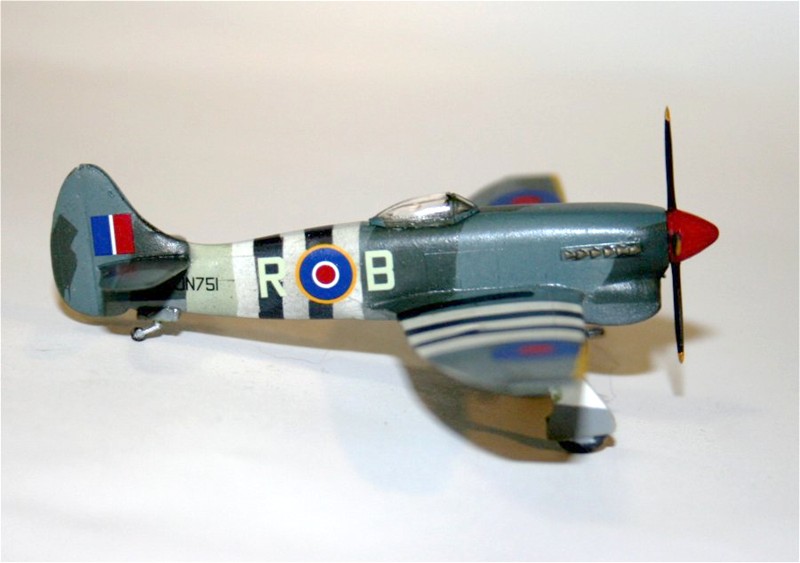
I had decided to do Roland Beamont’s Tempest. About 25 years ago I built Revell’s 1/72 Tempest, and did my very first set of D-Day invasion stripes. The decals were for Roland Beamont’s plane. The Revell kit has been destroyed in a move, but the memory lives on. So invasion stripes it will be.
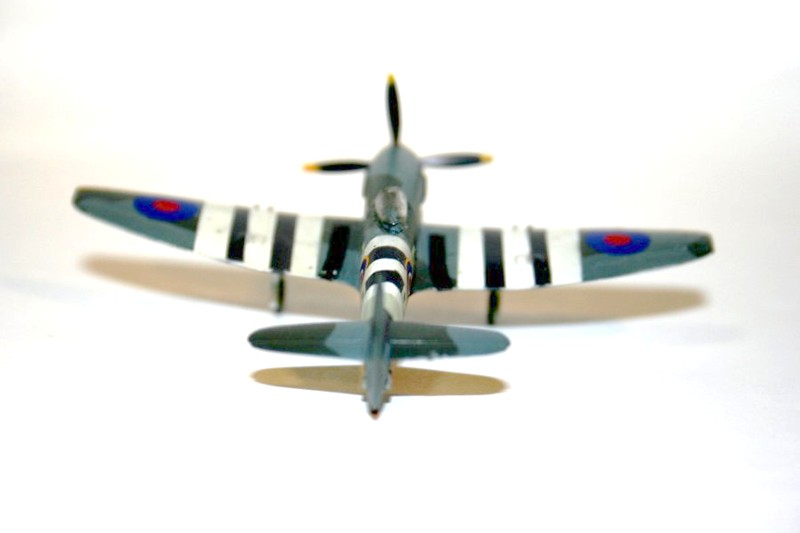
I painted the wings and fuselage white. I find Floquil’s Reefer White to be great for this kind of job. I then masked the white and painted the Sky band on the rear fuselage, then covered the sky band with tape. I painted the remainder of the top Ocean Grey, then made masks and painted the Dark Green. Another mask for the underside gray and all the masks could come off. I then masked the white areas and painted the black stripes. These didn’t work nearly as well as the 1/72 stripes I did, but they’re OK, especially at 2-3 feet. By now I had finished the cleanup on the landing gear doors, and masked and painted the white, underside grey and black on them. A little brush work finished the wheel wells and the inside of the gear doors, as well as the tail wheel.
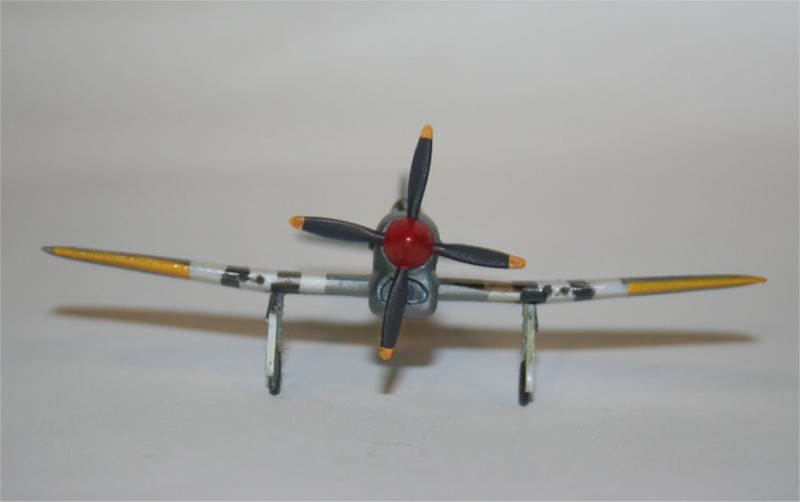
The prop went fairly easily, painting the blades black, then masking and painting the tips yellow and the spinner red. I coated the entire project with Future and was ready for markings.
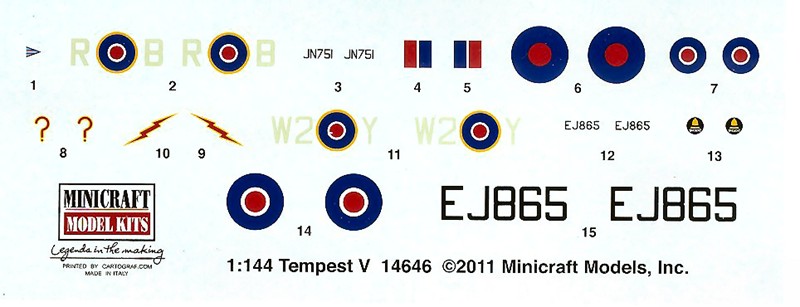
Decals
Almost everything went beautifully with the markings. The Cartograf decals are marvelous, with solid color, so the black and white stripes don’t show through the roundel or the aircraft codes, everything comes off the backing sheet cleanly and in one piece without folding, tearing or orange peeling. I was able to get all of the markings in place first try, except for the pennant under the cockpit. The decal is so small that the surface tension of the water under it kept it from staying where I put it. I finally got it close, blotted it, and moved it into position. Then another coat of Future, and then dull coat.
Final Assembly
I always leave the small and delicate parts for final assembly, since I have a record of breaking stuff off while handling during decal work. In this case it was simplicity itself. The main gear went into place without a fight, the tail wheel is still attached, the prop has a friction fit, so I didn’t have to glue it, and the canopy fits cleanly.
Overall Evaluation
Recommended. Fit is excellent, and it’s a good kit to build when you’re not up for a difficult project. I loved the decals, and I found the markings to be very interesting.
A quick final word on Roland Beamont. Other than flying in the Battle of France (3 kills), the Battle of Britain (3 more) and in France post D-Day (3 here too), and against the V-1s (62 destroyed) he’s also famous for being the first to fly the Canberra, the EE Lightning and the TSR.2.
Thanks to Minicraft and IPMS/USA for the interesting model project which brought back some fond memories.


Comments
Add new comment
This site is protected by reCAPTCHA and the Google Privacy Policy and Terms of Service apply.
Similar Reviews