
H-21C Shawnee "Flying Banana"
This kit has been long in coming; a 1/48 scale H-21 appears to be a popular seller; first in the 1950’s with “Helicopters for Industry” corporation having tooled a rudimentary but well-done for the time model of the H-21A; released approximately in 1956, the molds of this kit (along with that company’s Hiller “ramjet” powered flying jeep helicopter with it’s rotor tip ramjet engines, and the H-19A), were then sold and marketed to Aurora around 1958.
This kit was available through the 1960’s, and is still a classic and much-sought collectors’s item, fetching up to $175 on the market. Fondarie Miniatures developed their own new kit of the H-21 helicopter in the late 1990’s, which was released with vacform canopy and cabin windows, metal parts, and the usual short-run struggle to build; then came Special Hobby with it’s vastly improved injection molded canopy and resin parts. So, when about four years ago Italeri announced it was finally going to scale up it’s excellent 1/72 H-21, rotorhead modellers rose up in anticipation, and have been thwarted in their happiness until now.
Has the kit been worth the wait? In my opinion,it’s a resounding “yes!”
Initial impressions on opening the box were extremely positive; there are some areas where detail is very heavy, such as external scab plates and the six hinges around the engine access panels. But the remainder is restrained. The canopy framing is well done, and appears to be of a later model with some additional metal applied. The original “A” model framing was a bit more slender and less pronounced, so a backdate to the “A” will require a bit of sanding and polishing so the rescribing and redefinition of the framing will be required.
A prominent feature of the “C” model was provision for external fuel tanks to be carried. Usually only one tank was carried, as the H-21 is critical on weight and power matching; I seem to remember seeing two tanks on one occasion, but cannot find pictures on the net.
The Box art has a dramatic scene of a U.S. Army H-21 in the early 1960’s, being utilized as a troop carrier early on in the Vietnam conflict. Slow, noisy, and unarmored, and unable to carry much weight in the hot, humid Southeast Asia region, it was soon determined to be unsuitable and as soon as Hueys were available, was pulled from service.
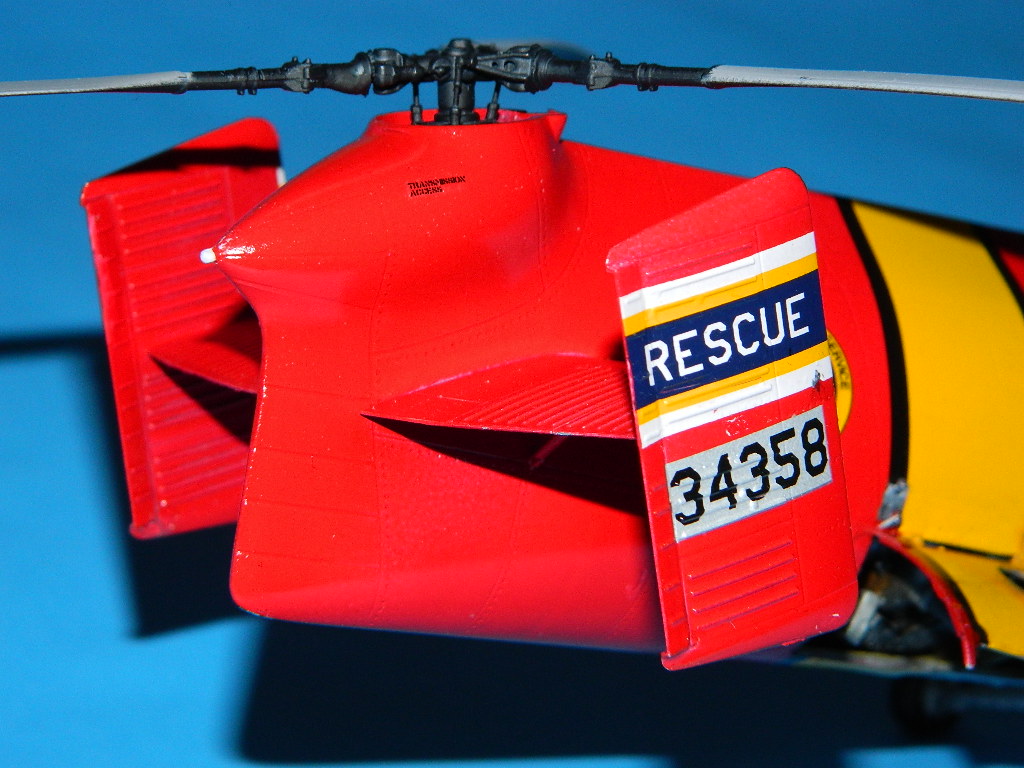
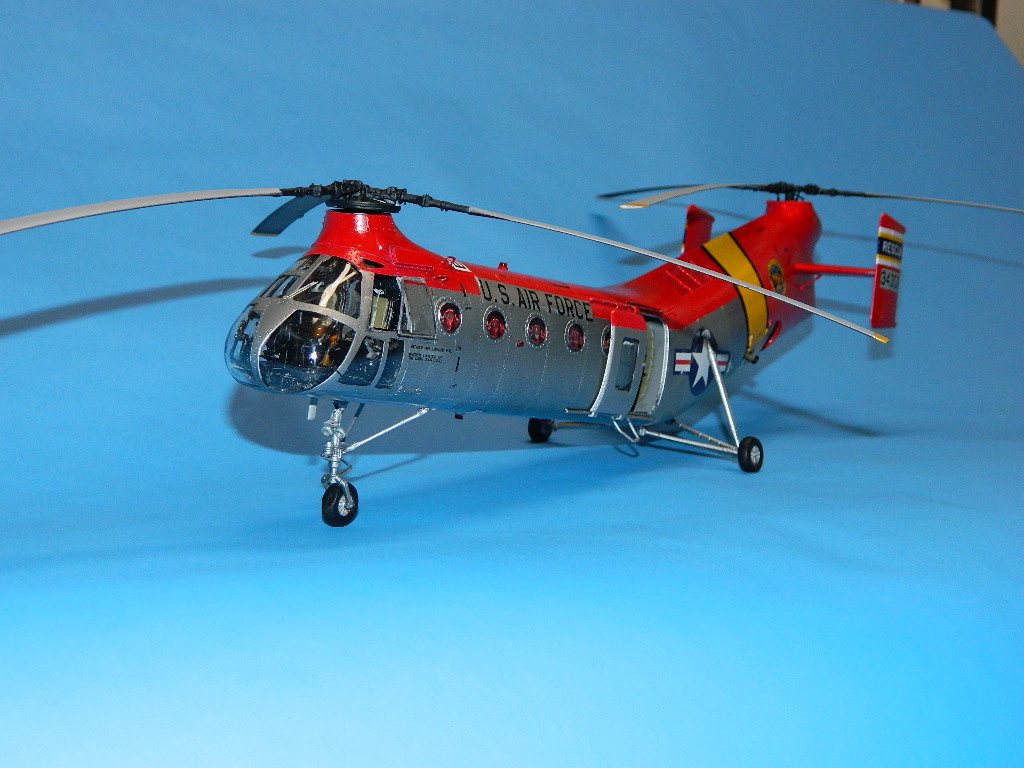
The kit decal sheet is notable for having full stencils , three options, and perfect color registration and density. Provided are markings for one overall olive drab U.S. Army option with yellow stenciling , one medium blue French Amy version, and the colorful U.S. Air Force version with corroguard © aluminum paint, red arctic tail and cabin top markings, and yellow fuselage “rescue” bands. Also provided are white and blue tail fin rescue bands. This sheet performed better than Cartograf decals, in that they are thinner, stood up to handling, slid into place, and stuck; I used a bit of solvent on the tail fin bands, where the silver decals matched the corroguard, and “rescue” notation on the externally braced fins. They worked very well, were very opaque; and when applied over the red markings, exhibited no transparency. VERY WELL DONE!
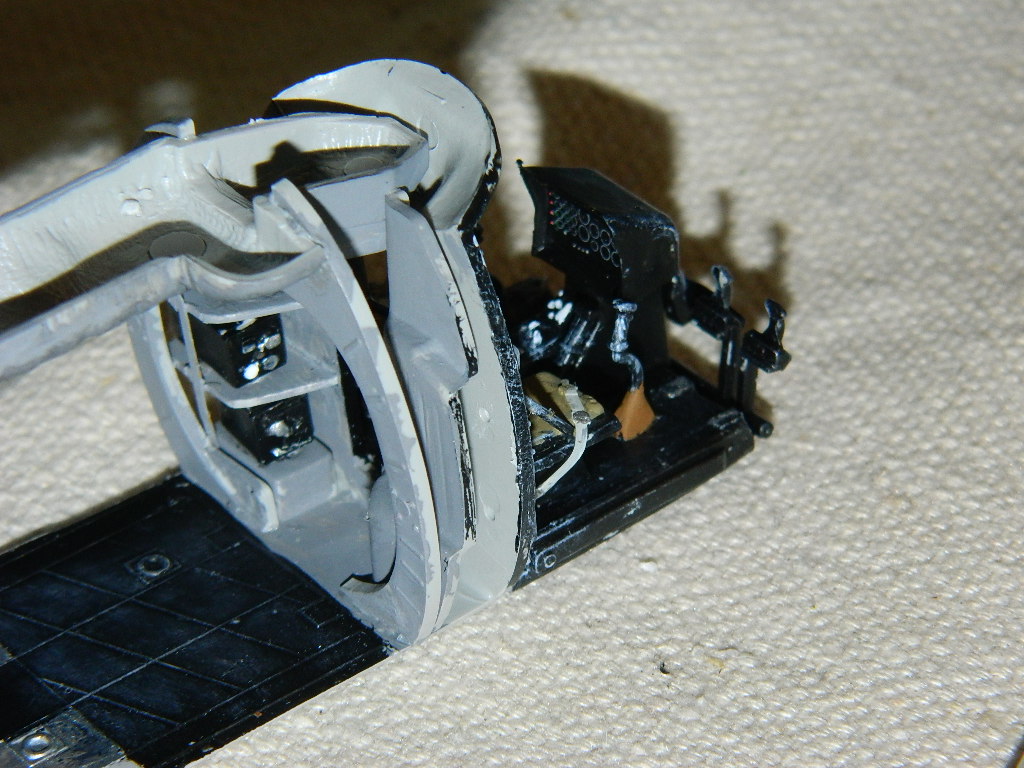
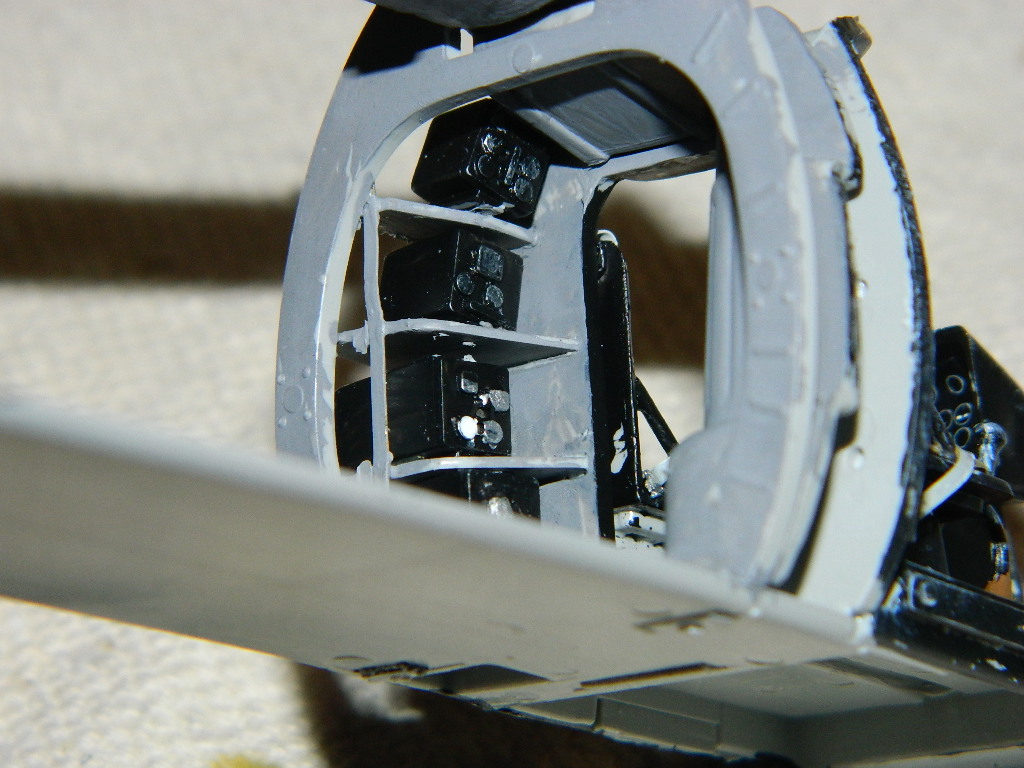
On to the build. The cockpit has appropriate accoutrements, with all cyclic and pitch control levers being well-detailed and in scale; no baseball bats here! The instrument panel has a decal, and serves the purpose as it is difficult to see after assembly. Four radios and control boxes are provided for the front left cabin rack, and the bulkheads all fit and do not interfere with the fuselage closing up; tolerances are spot on. There is even the overhead switch panel in the interior of the cockpit!
The kit has two types of tail fins; the early smaller versions, and later, larger surface areas for the French version. Be careful to open up the holes for the vibration braces on the lower half of the stabilizers only… and the fins as well. I did not mirror my holes, and ended up having to fill the extra hole I made. Also, as you must open the holes for the fins, and it should be noted that the tail trim vanes both should point to the right or “starboard” side; they provide stability in forward flight to keep the aircraft moving straight, and some might try to have them facing the wrong way. This is noticeable in pictures of the actual aircraft, but the modeler has to ensure assembly is correct, as there is no “dummy-proof” on this section.
The engine and drive train is a fantastic piece of work, and very visible on the finished model whether you opt to open the servicing doors or not. There are four bulkheads involved here, and taking time to assemble and “fit check” before the cement sets up is time well spent.
The kit includes a photoetch fret which has the cooling air screens, seat harness, and windshield wiper. I used them all and fit was precise and accurate. The screens themselves were always a difficult area on other kits, and it was almost impossible to get these right before. Italeri captured the look precisely. The only problem you will have is to figure out a way to mask the interior bits for final painting; on my next build of this kit I’ll be doing just that, with the engine access doors off, which will allow me to reach in and access the masking.
Speaking of the engine access doors, these have heavy hinges on them, and they are not designed to represent an open door. The way to do it is to cut them off and attach after the doors are installed open with a butt join, but I tried it the hard way with limited success. (and I lost a couple of the brackets)
The rotor heads and blades are scale thickness, with resultant fragility. I broke off at least two during painting. I’m thinking of installing pins in the future, but that will require a bit of micro-drilling. The “at rest” rotor droop is incorporated in the blades as well; it may be a bit too pronounced, but it looks good. It’s one of the things previous kits were winners on with the metal rotor heads, but blade installation was always tricky on them. Italeri have done a great job here as well, and the rotor head look appropriately “busy”. The kit would have you cement the mounts with restraining collars before cementing in place; I don’t recommend this but put the mount “spigots” in the rotor head wells, using a piece of wire or toothpick to make sure they are even all around when cementing, Then you can remove the rotors for transportation, not to mention they will be broken off if you try to work on the model after rotor installation.
And, pay attention to rotor orientation; the front blades are attached to the rotor head with the large “Frisbee” plate, and rotate counter-clockwise when looking down from the top; the aft blades rotate clockwise.
One other note; the main gear can be installed with the lower “A” frames without the vertical shock braces, so when you paint and decal the model, the National insignia can be properly placed; afterwards, the strut top mount can be installed by poking through the blue decal area (it is very close to the top of the star) and you won’t have the tricky cut/install method to perform.
As this was a review model, I used the kit supplied Arctic markings; a good choice in my opinion. Stencils worked great s did the rest of the decals. One thing missing is the external tank carried on some missions; A true details F-80 resin tank was procured, but I can’t confirm if that was the type used, as pictures seem to show “Misawa” type F-80 tanks in these instances. The kit shows tanks on the instructions, but none is included in the kit, and neither is there a mount provided. A cargo hook is on one runner, with rigging diagrams for the cargo harness, to be provided by the builder.
Tires have flats on them, and the external brake pucks are separate miniscule parts, as are the crew door handles. Grab handles for climbing up the service the forward rotor head are also included, and the servicing platforms (the corrugated panels added to the forward rotor tower on either side) are convincing. The same goes for the rescue winch arm and hook.
I sincerely appreciate Italeri/Hobbyco providing us this model; full marks for the kit itself and the final appearance; we finally have a decent, easy to build H-21. Hopefully they will pantograph up their 1/48 H-19B next, and we will then have the full range of 1950’s era early helicopters in the 1/48 scale arena. A great kit and well worth purchasing more than one for different schemes!
Thanks once again to Italeri and their U.S. distributor, Hobbico USA, for this long-awaited release of the “flying Banana”, and to the IPMS reviewer corps leadership team for sending it to review.


Engine Assembly

Engine Compartment
Front Cabin
Radio Compartment

Seats With PE Belts
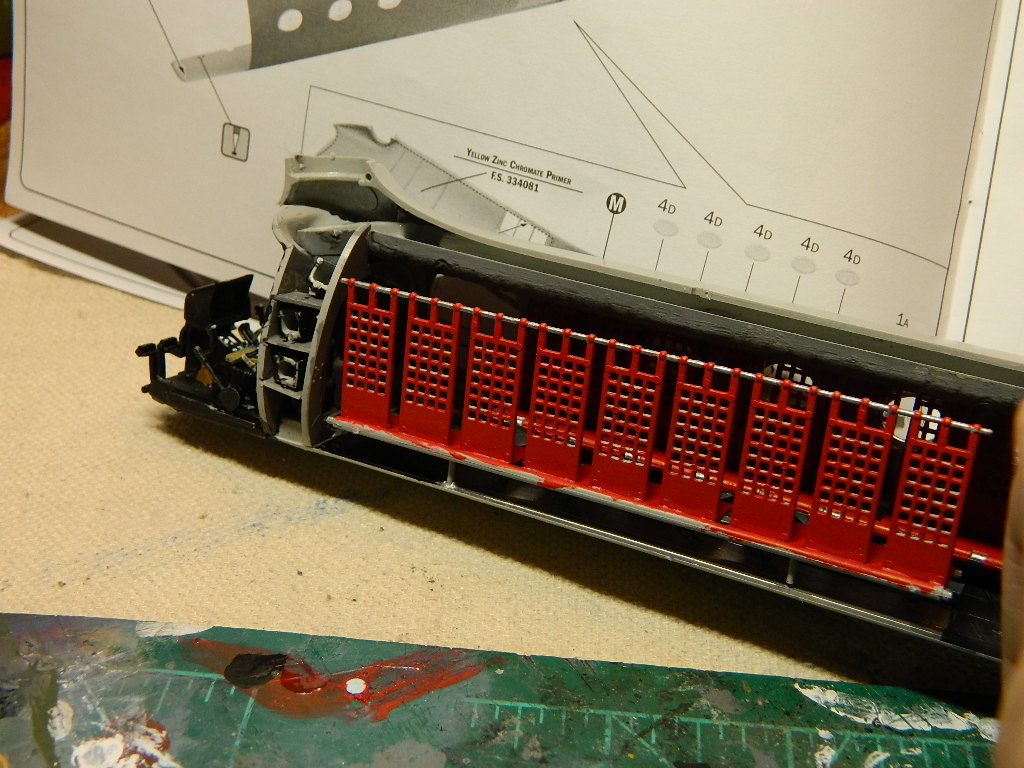
Troop Seats
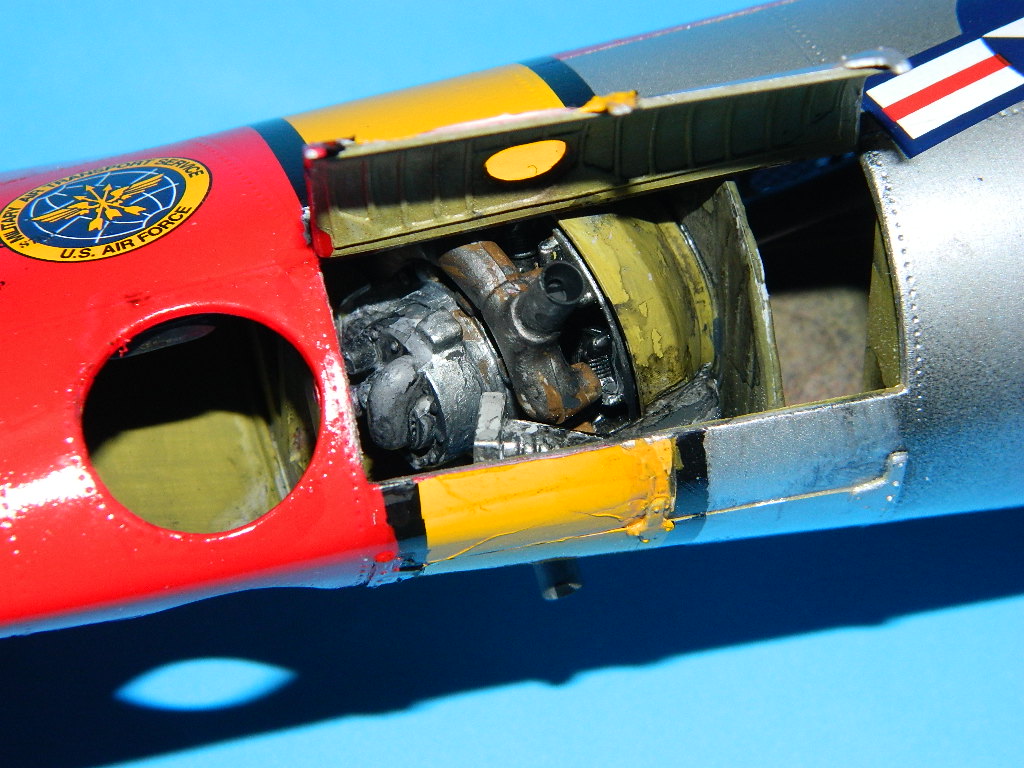
Engine Installed

Engine Door Open
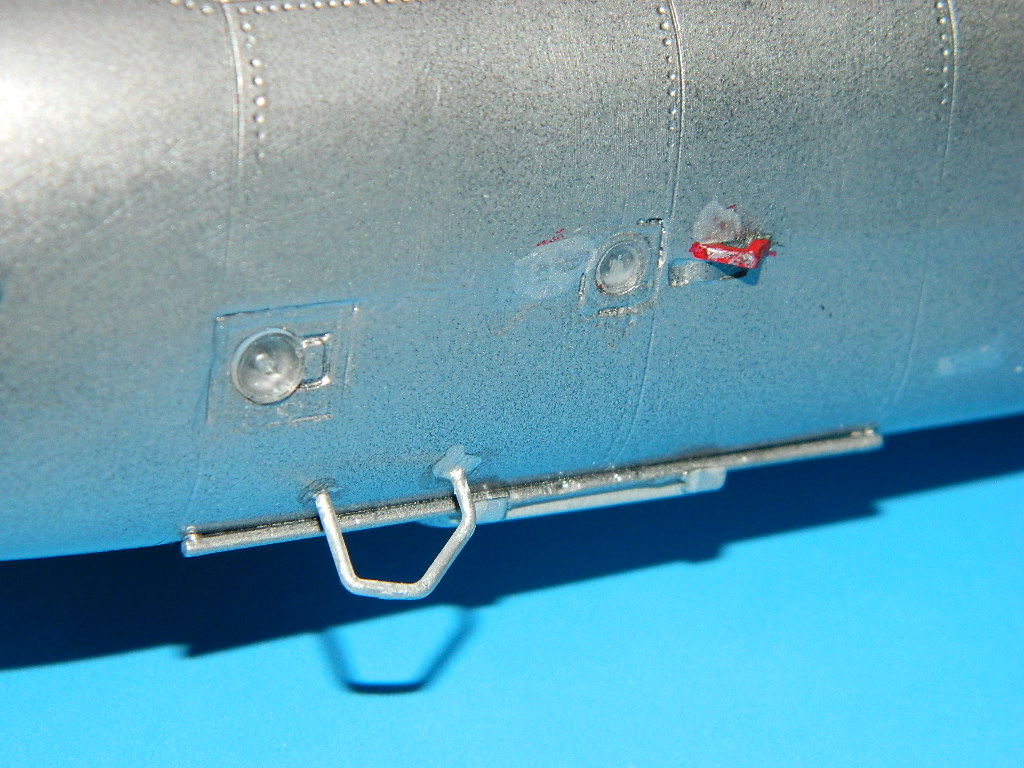
Lower Light & Step
Aft Fin Detail
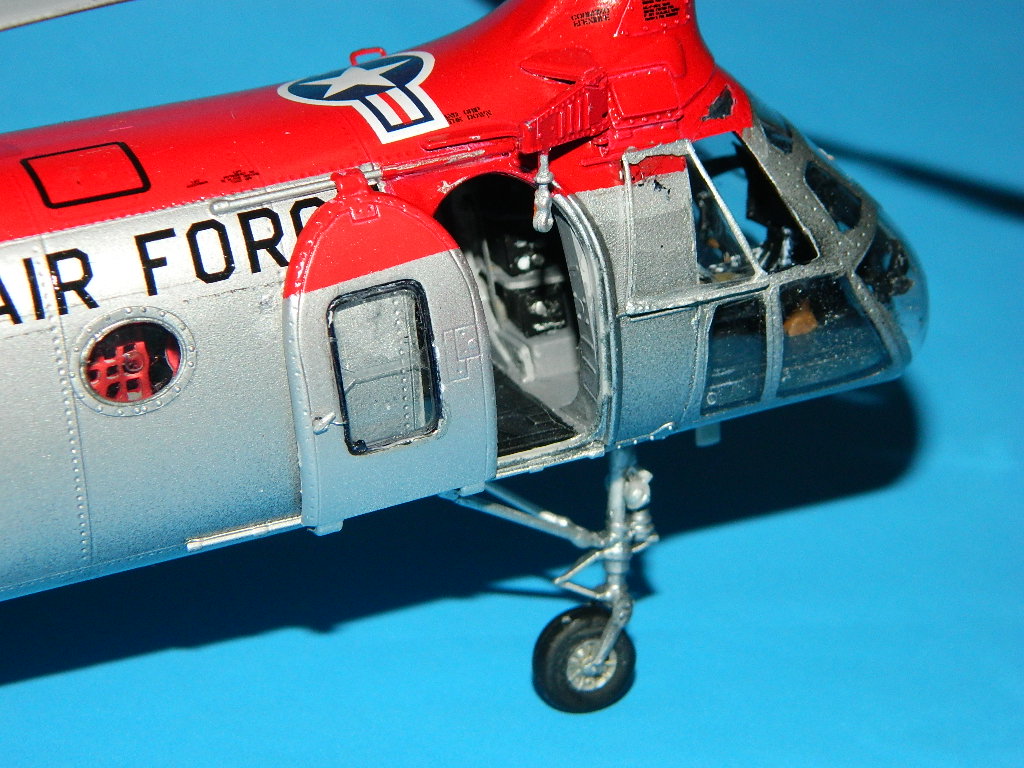
Front Crew Door
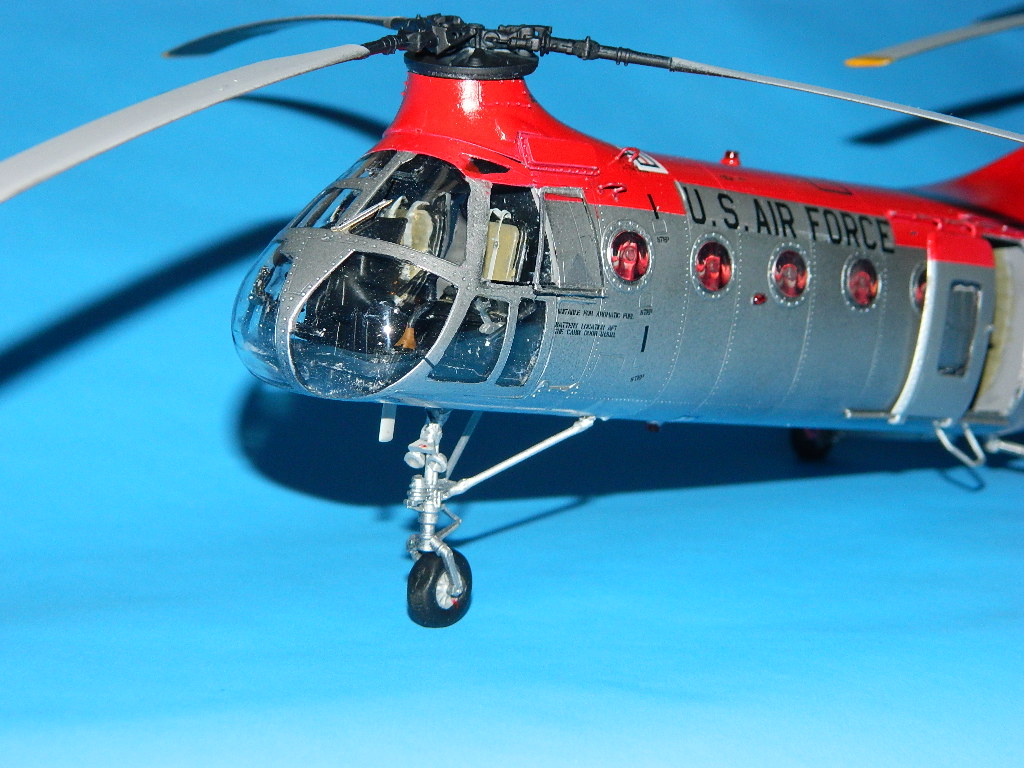
Cockpit & Nose Gear Detail
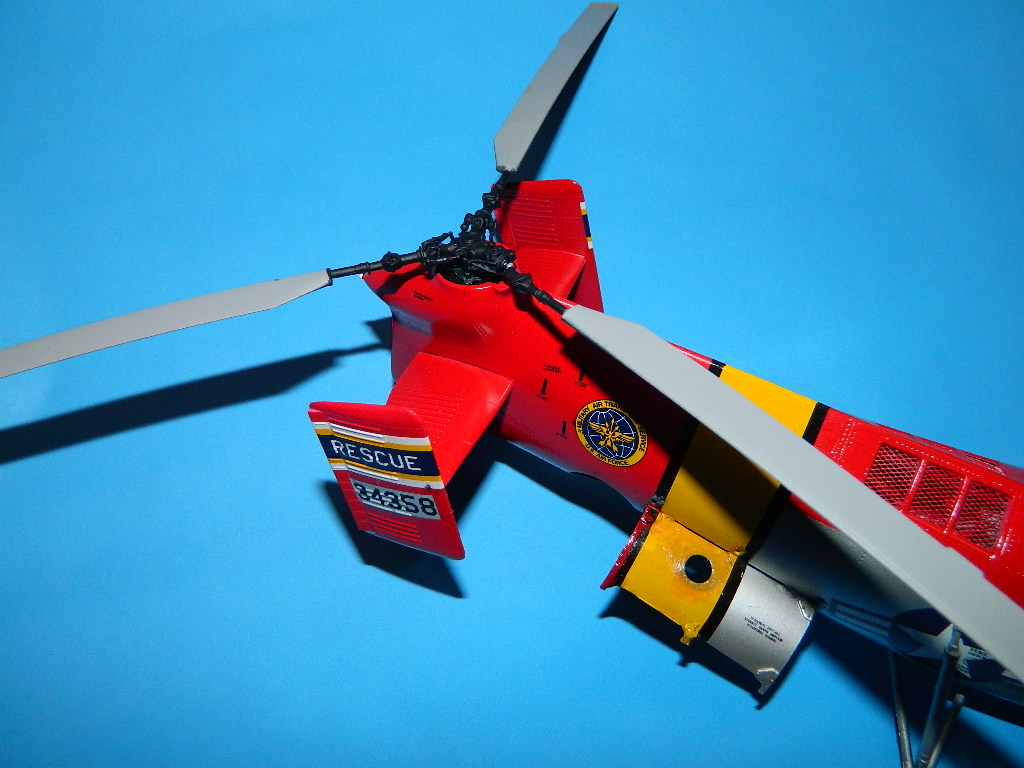
Rear Rotor & Fin Detail
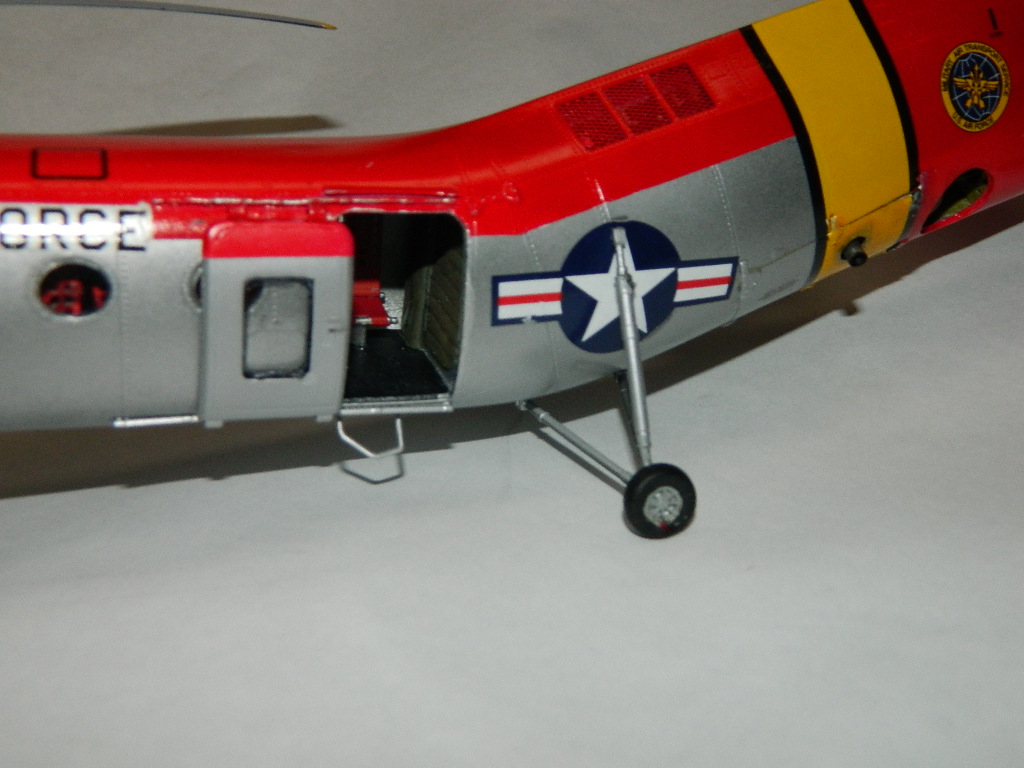
Side Door
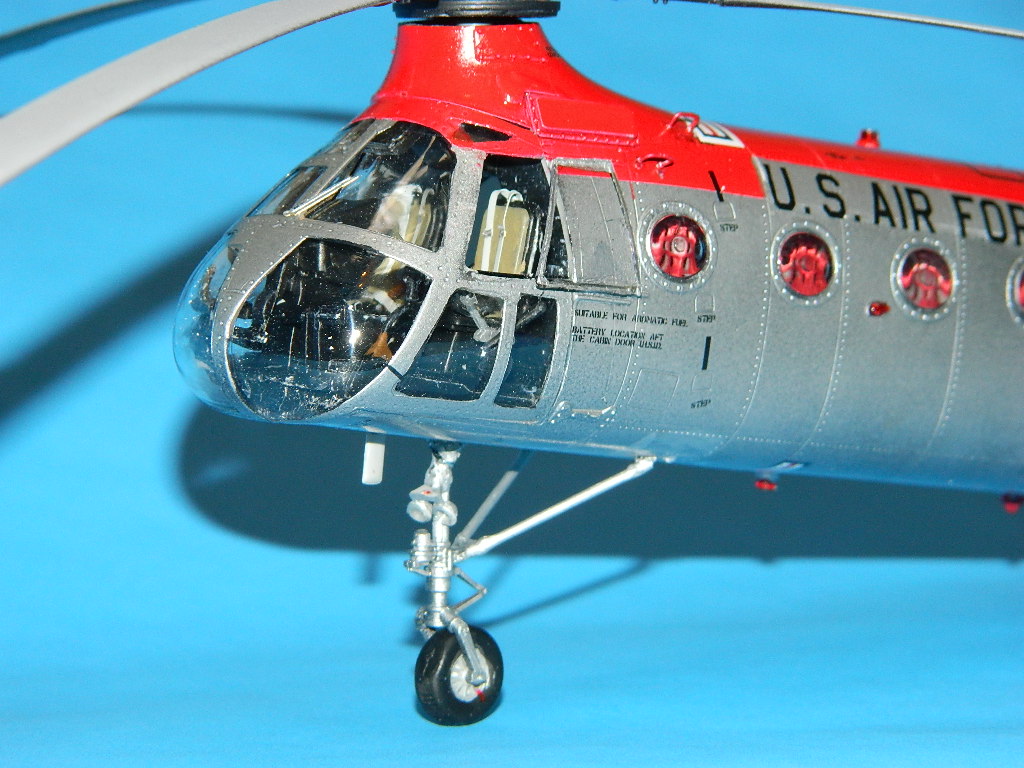
Left Cockpit Detail
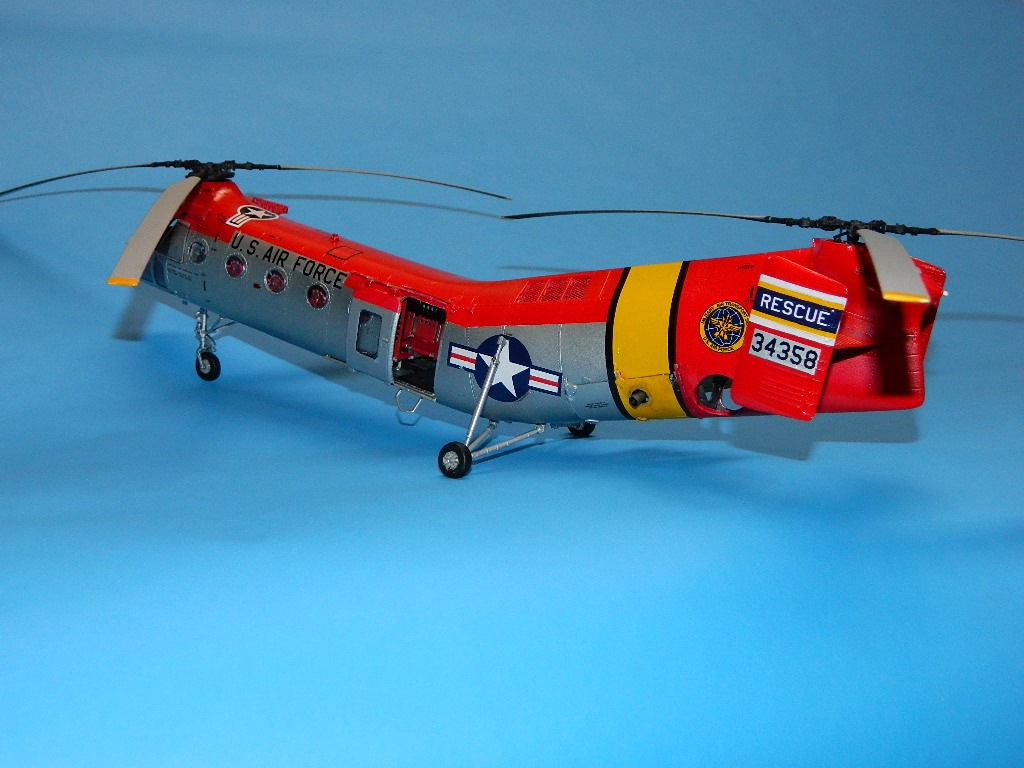
Left Rear View
Comments
Add new comment
This site is protected by reCAPTCHA and the Google Privacy Policy and Terms of Service apply.
Similar Reviews