
Grunau Baby IIb
History
The Schneider Grunau Baby was a single-seat sailplane first built in Germany in 1931, with some 6,000 examples constructed in some 20 countries. It was relatively easy to build from plans, it flew well, and the aircraft was strong enough to handle mild aerobatics and the occasional hard landing. When the Baby first appeared, it was accepted wisdom that the pilot should feel as much unimpeded airflow as possible, to better sense rising and falling currents of air and temperature changes etc.
It was named after Grunau, the town where Schneider's factory was located, now Jeżów Sudecki in Poland. The tips and leading edges of the wings up to the main spar were covered with plywood. The tail unit was built of plywood. The intention was to create an aircraft suitable both for training and for cross-country soaring. Typical for its day, it was a high-wing braced monoplane with a fuselage of hexagonal cross-section and an open cockpit. The Baby was an instant success, and was enthusiastically promoted by gliding champion Wolf Hirth. An extensive redesign was undertaken in 1932 following the fatal crash of an unrelated Schneider design, which resulted in the Baby II. This version and the definitive Baby IIb that followed were adopted as standard sailplane trainers for the German Air Sports Association (later the National Socialist Flyers Corps).
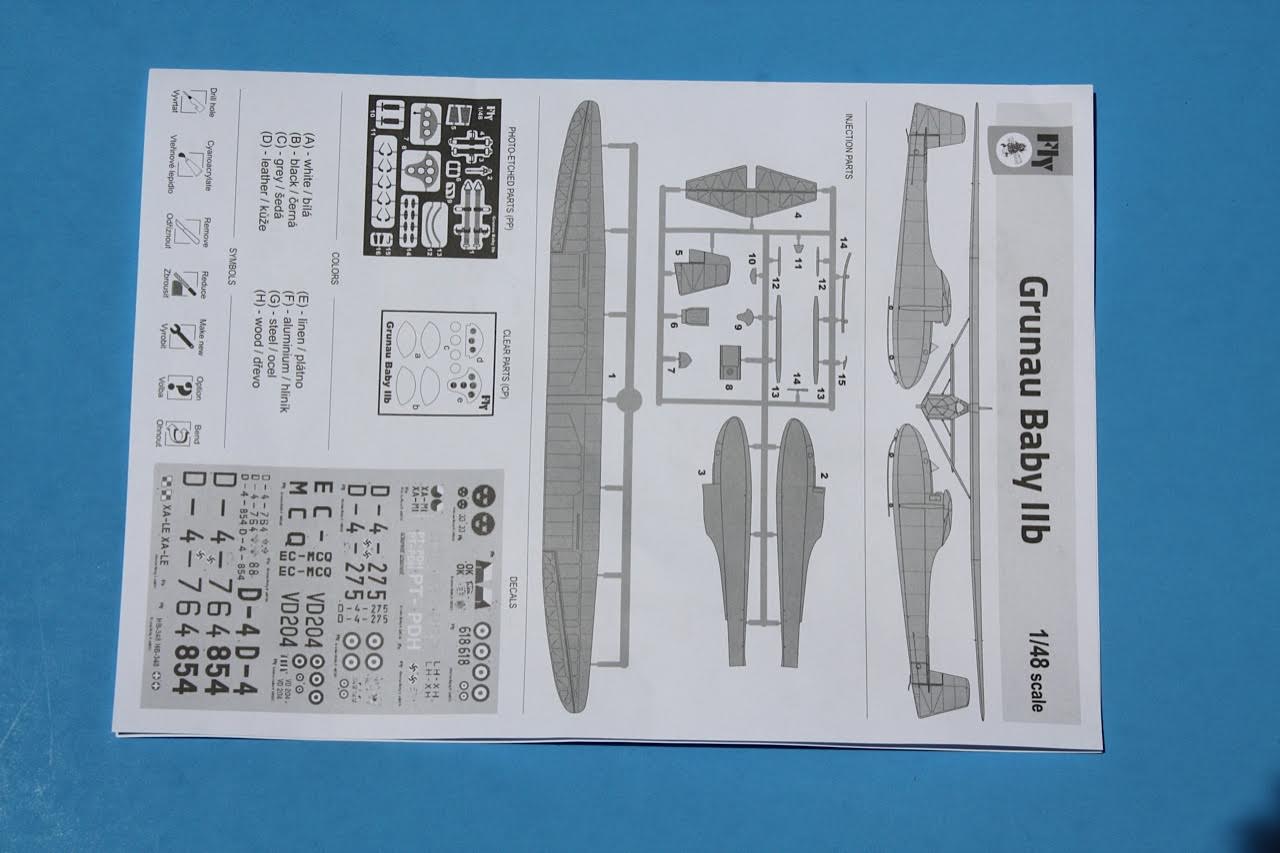
The kit is produced by Fly, a Czech Republic maker of scale model kits. The kit arrives in a very colorful box with artwork of a Grunau Baby displayed on the top. The bottom of the box shows 15 Grunau sailplanes in use by different countries showing markings and colors.
Construction
The kit consists of approximately 15 parts and comes on two grey sprues. There is also one photo etch sprue for the control horns and strut brackets, one sheet of clear acetate with outlines for the clear parts, and a small decal sheet. The parts are nicely molded, with no flash, fine panel lines, and small sprue gates. The 4 page instruction sheets show the suggested assembly through 9 steps starting with the cockpit assembly and progressing through fuselage, assembly of wings and tail planes to fuselage, and final parts assembly. This kit at first appeared to be relatively simple with only 15 parts but turned out to be more difficult than anticipated.
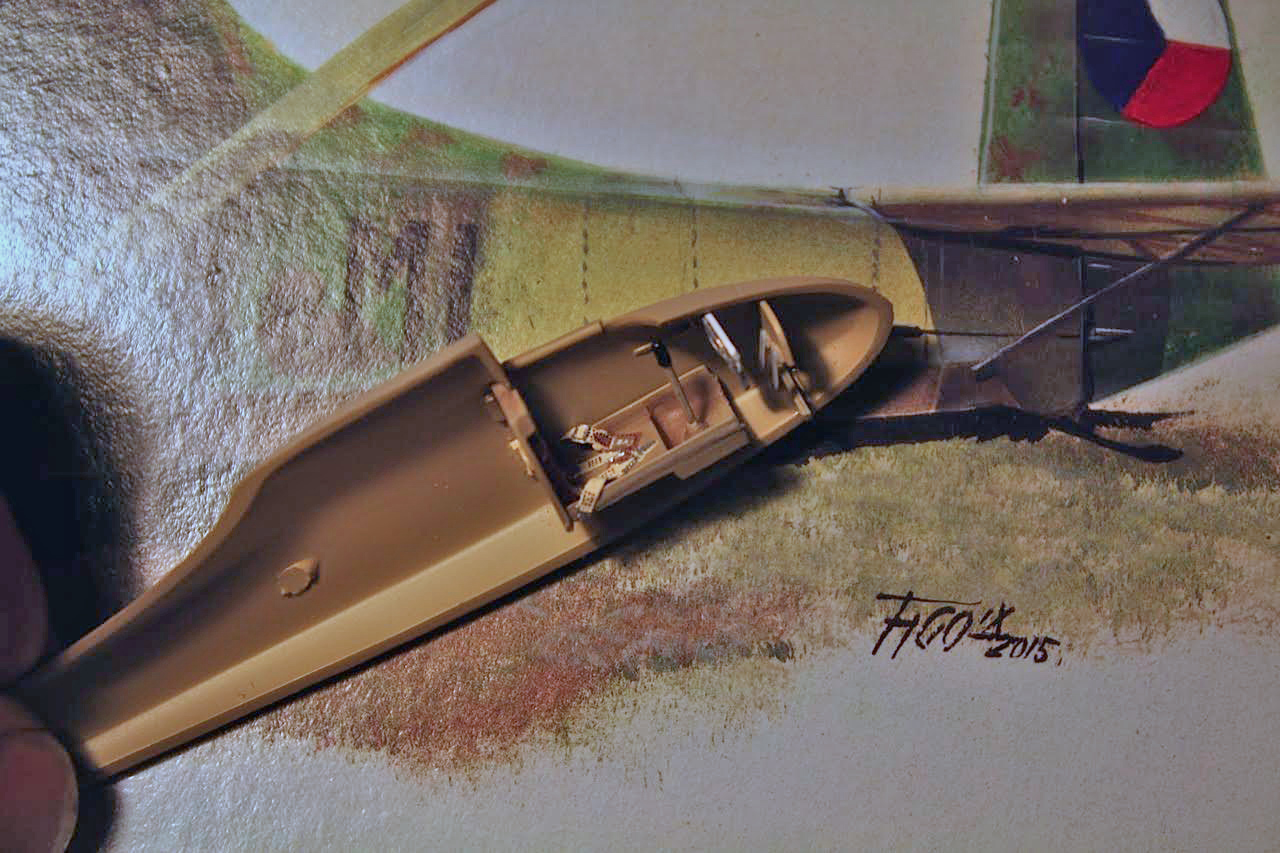
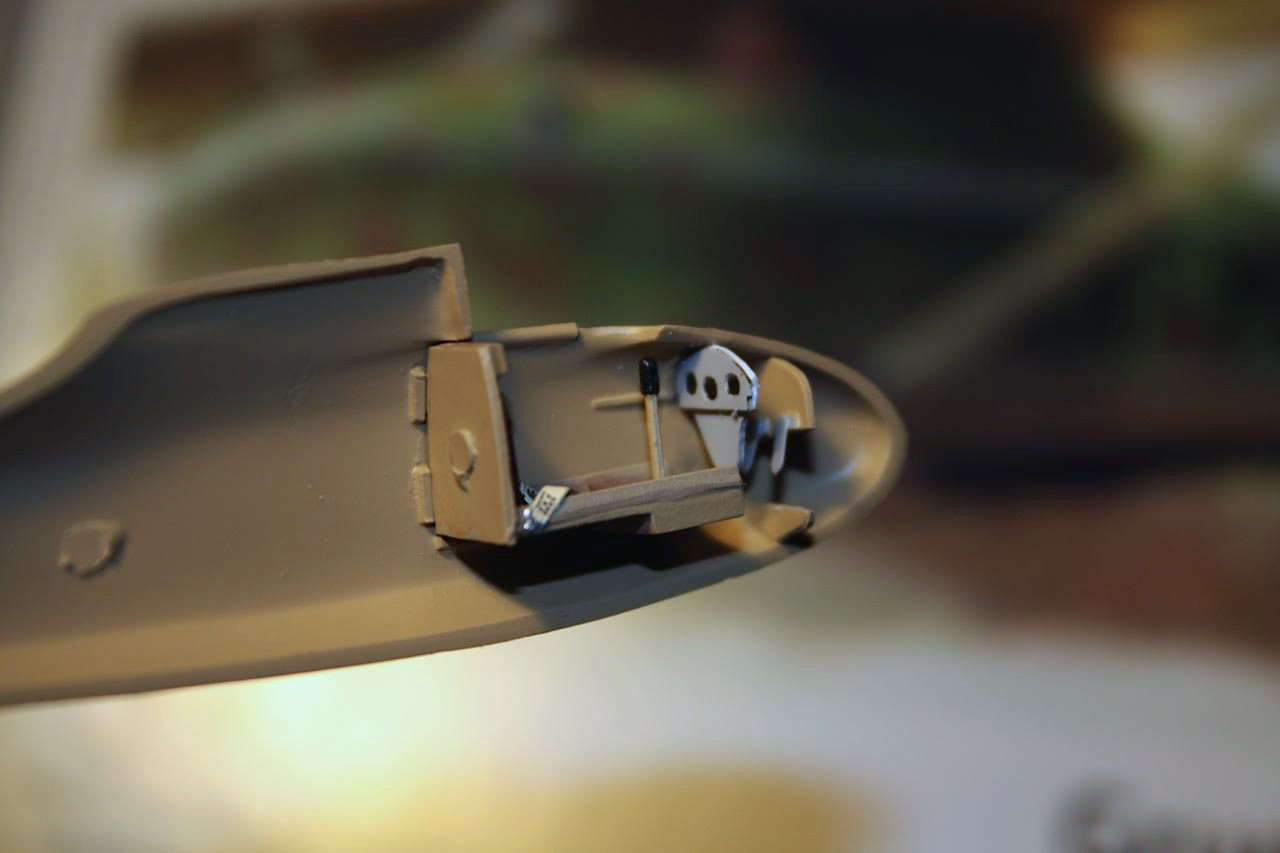
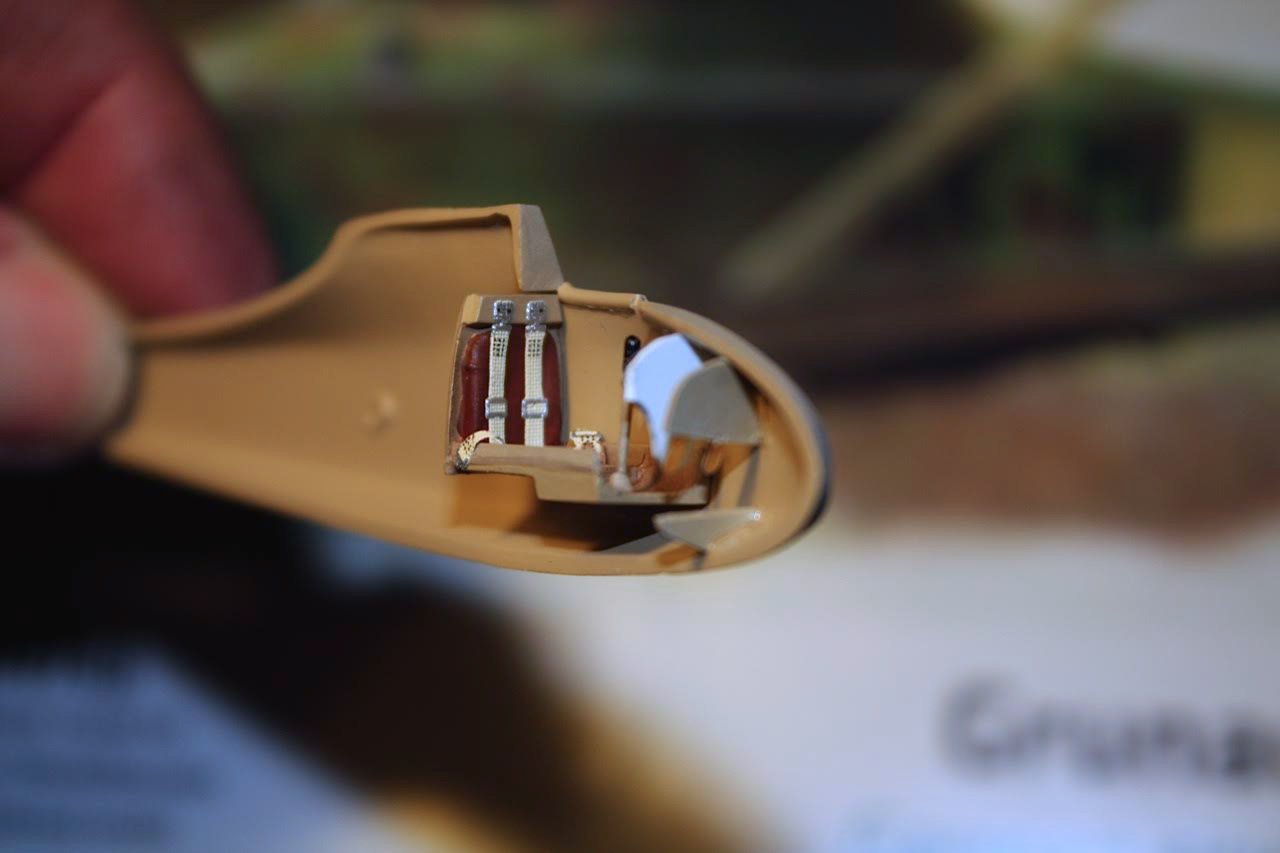
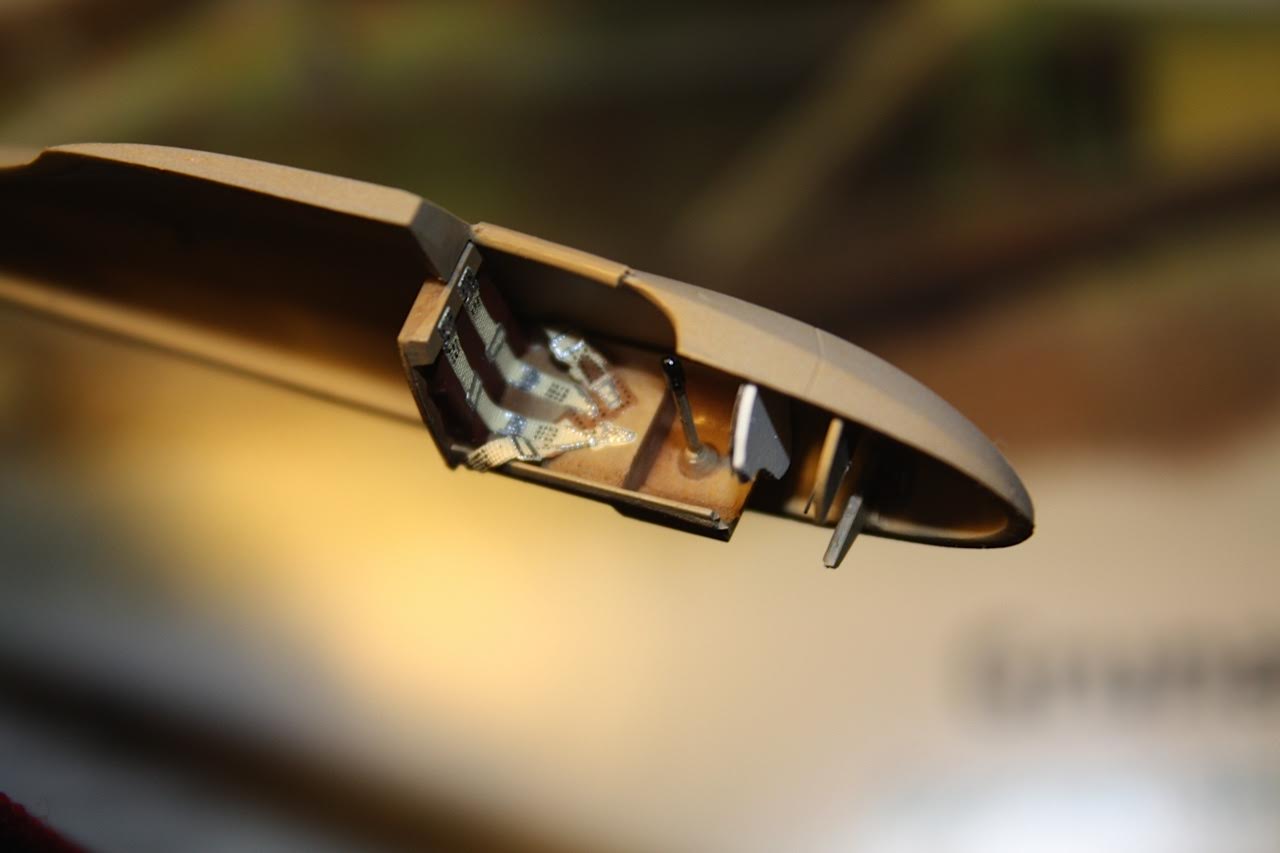
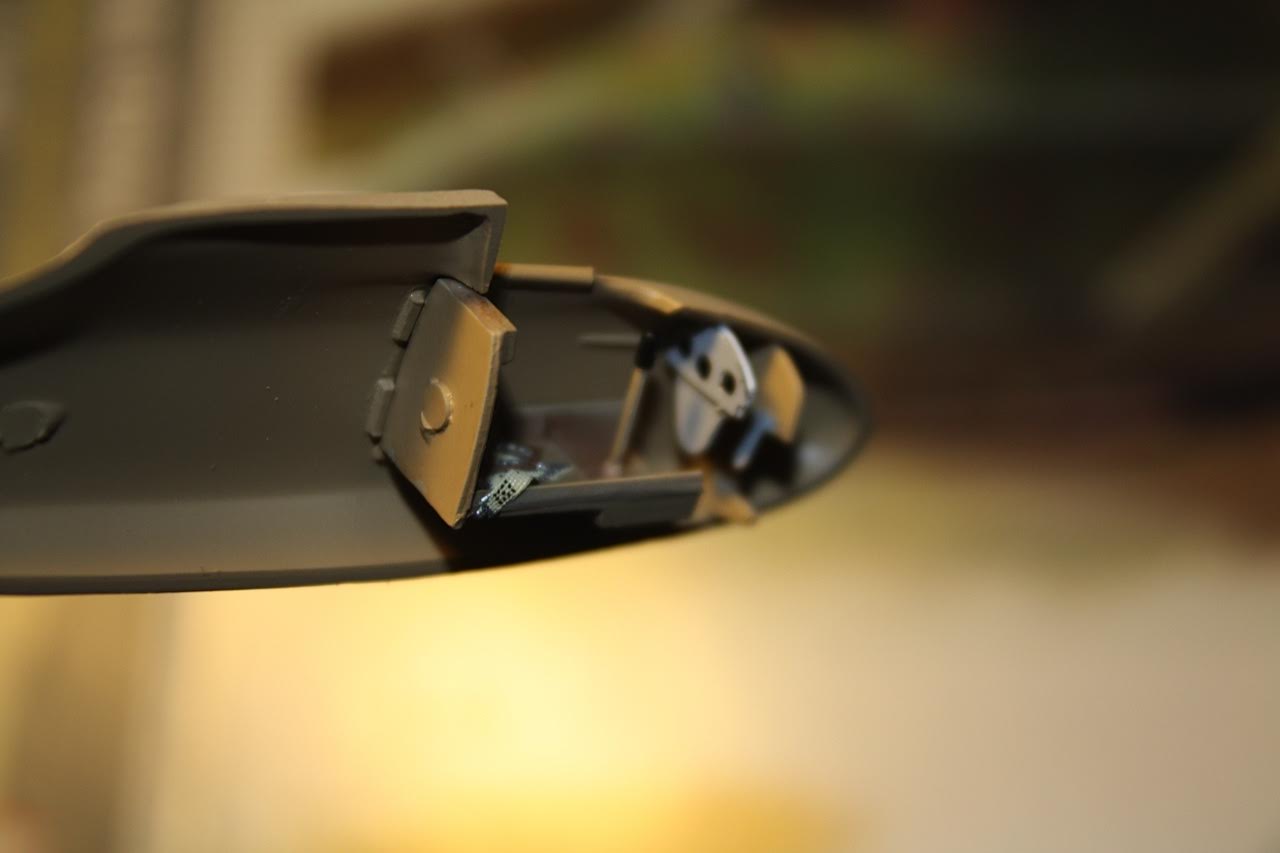
The kit fits together very nicely! But there are no positive assembly locators on any of the parts. So care must be taken when gluing the parts together. The instrument panel consists of clear acetate with preprinted gauges sandwiched between the rear panel and a photo etched instrument panel outline. It looks great when installed. The rudder pedals are also photo etched pieces which you attach to a plastic bulkhead. Step four of the construction process is dedicated to just assembling the photo etched seat belts. Not being a great fan of photo etched seat belts I opted not to use them and installed an after market set of peel and stick seat belts instead. I did take the time however to assemble them, bent them to fit the seat, and painted them to validate the seat belts for this review. There is nothing wrong with the kit supplied photo etch seat belts, they should look great when installed. The assembly of the clear acetate windscreen to the photo etched bracket caused a few frustrating moments. The photo etched bracket has to be bent to the shape of the front of the cockpit and then you install the flat acetate part to the photo etched bracket. Thankfully the makers supplied two each of the a or b style since I destroyed two of them getting the clear part to fit. So in the end I fitted the clear acetate windscreen to the front of the cockpit edge and then fitted the photo etch bracket to it. There are however no instructions as to why there are a or b windscreens. They each just have a slightly different shape. There are no positive attachment points for fitting the rudder, elevator, or main wing to the fuselage. I ended up drilling and pinning each of those parts to the fuselage. The final assembly consists of adding the fine photo etch parts such as the rudder horns, aileron horns, wing strut brackets, and landing skid hook. The photo etch parts are very fine and I ended up losing some of them.
Painting
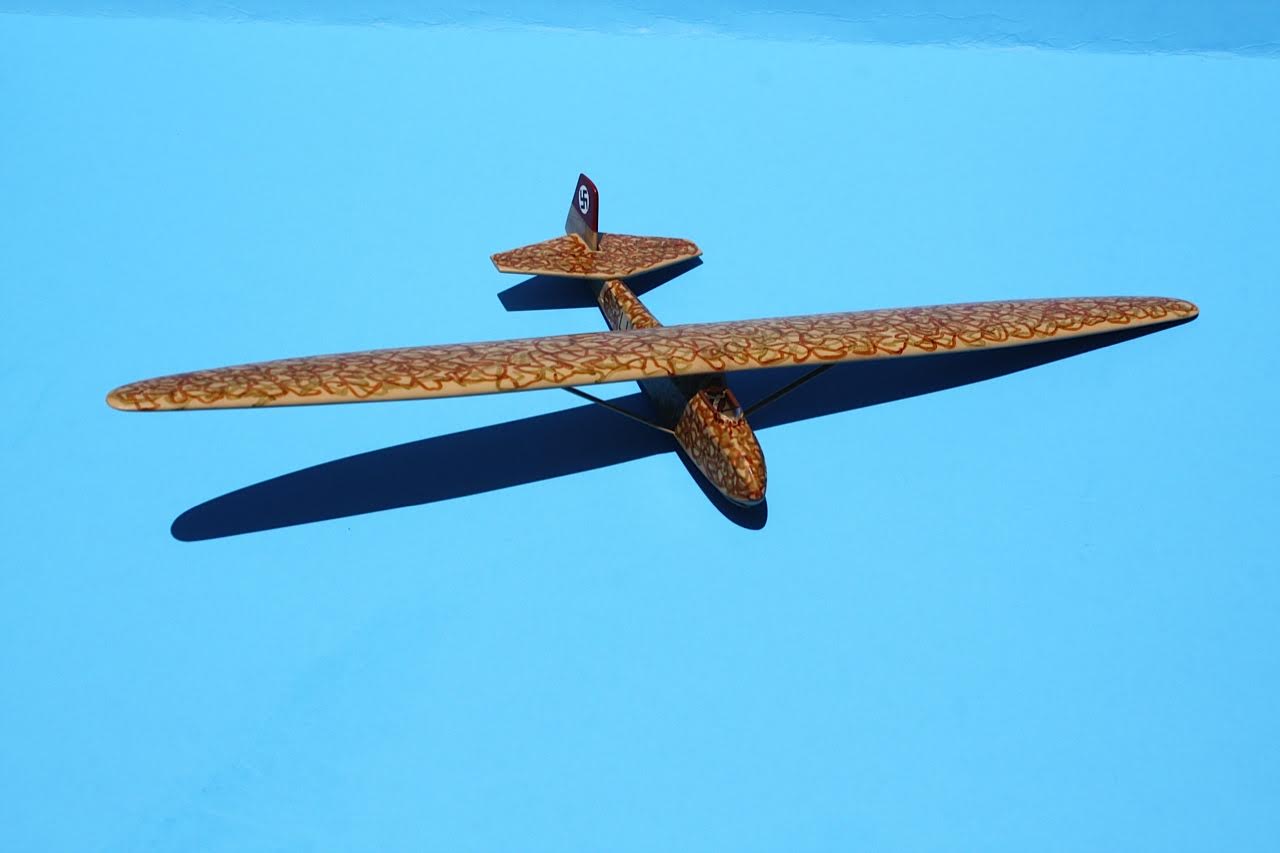
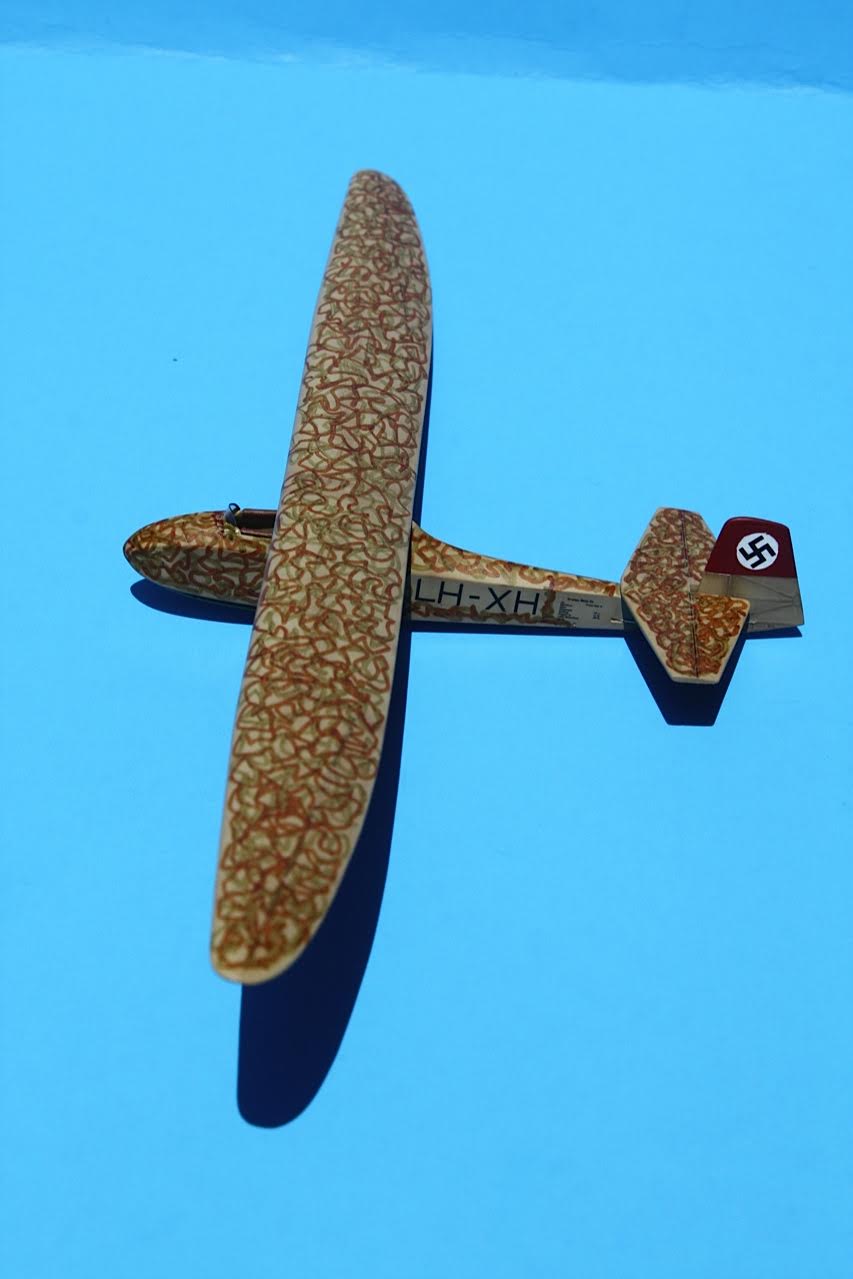
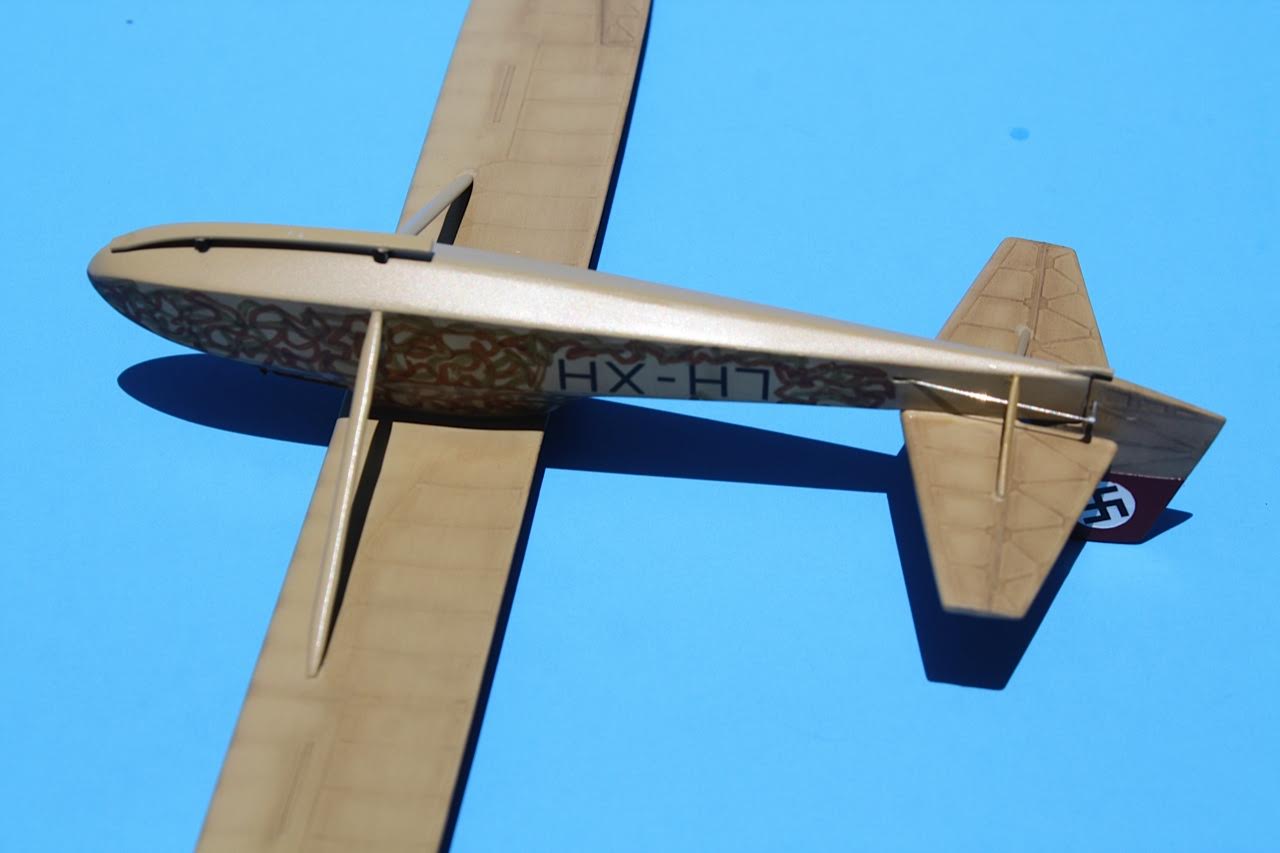
I painted the overall aircraft using Tamiya colors. Light Sand for the overall aircraft color, and then masked and painted the rudder red and white for the swastika decal.
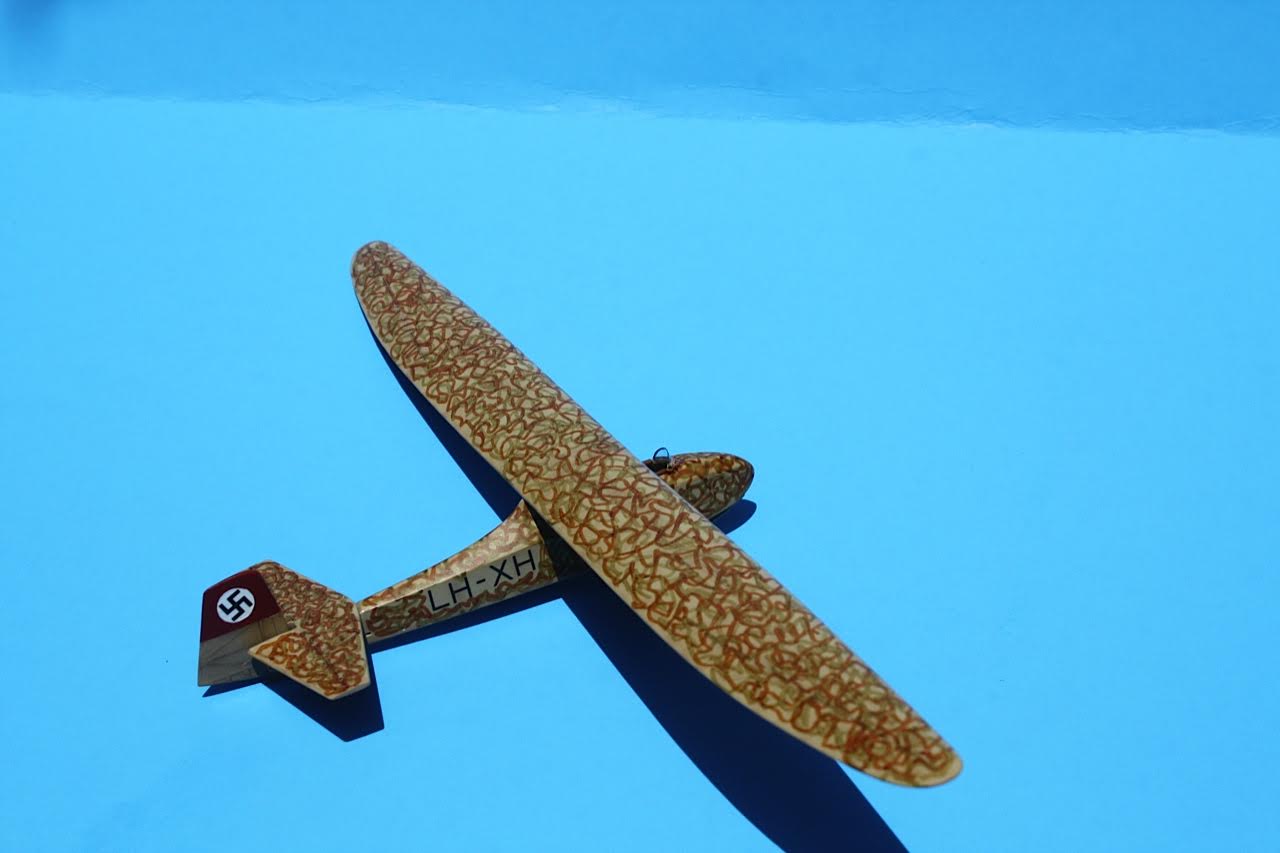
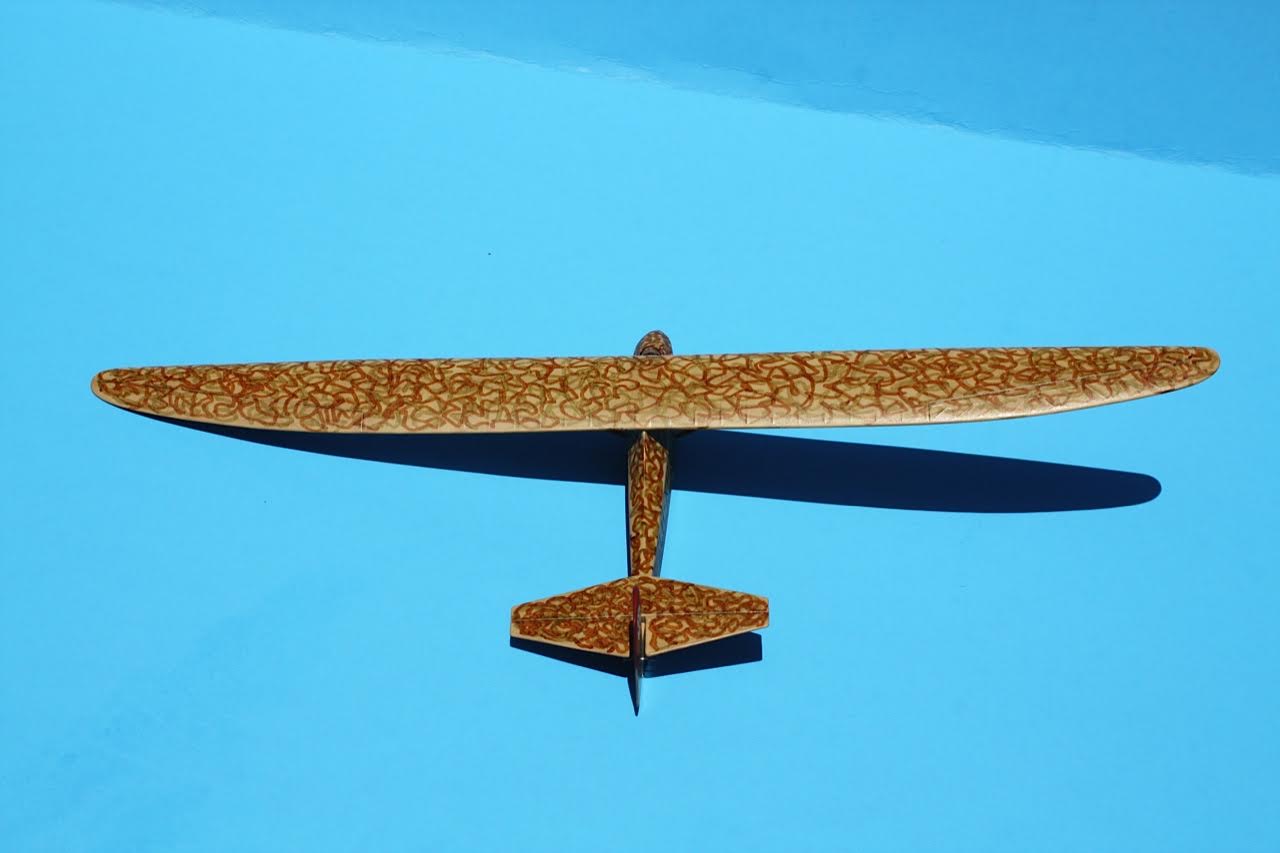
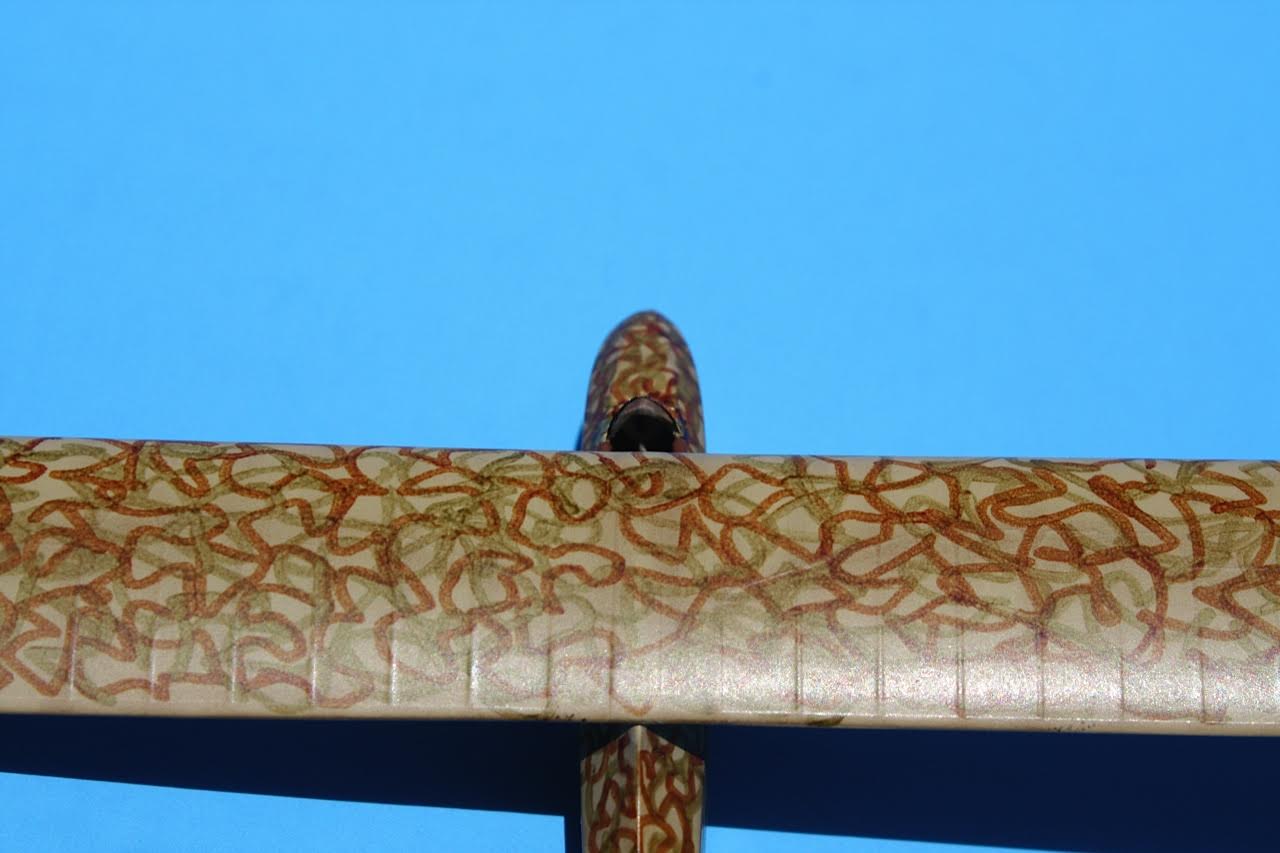
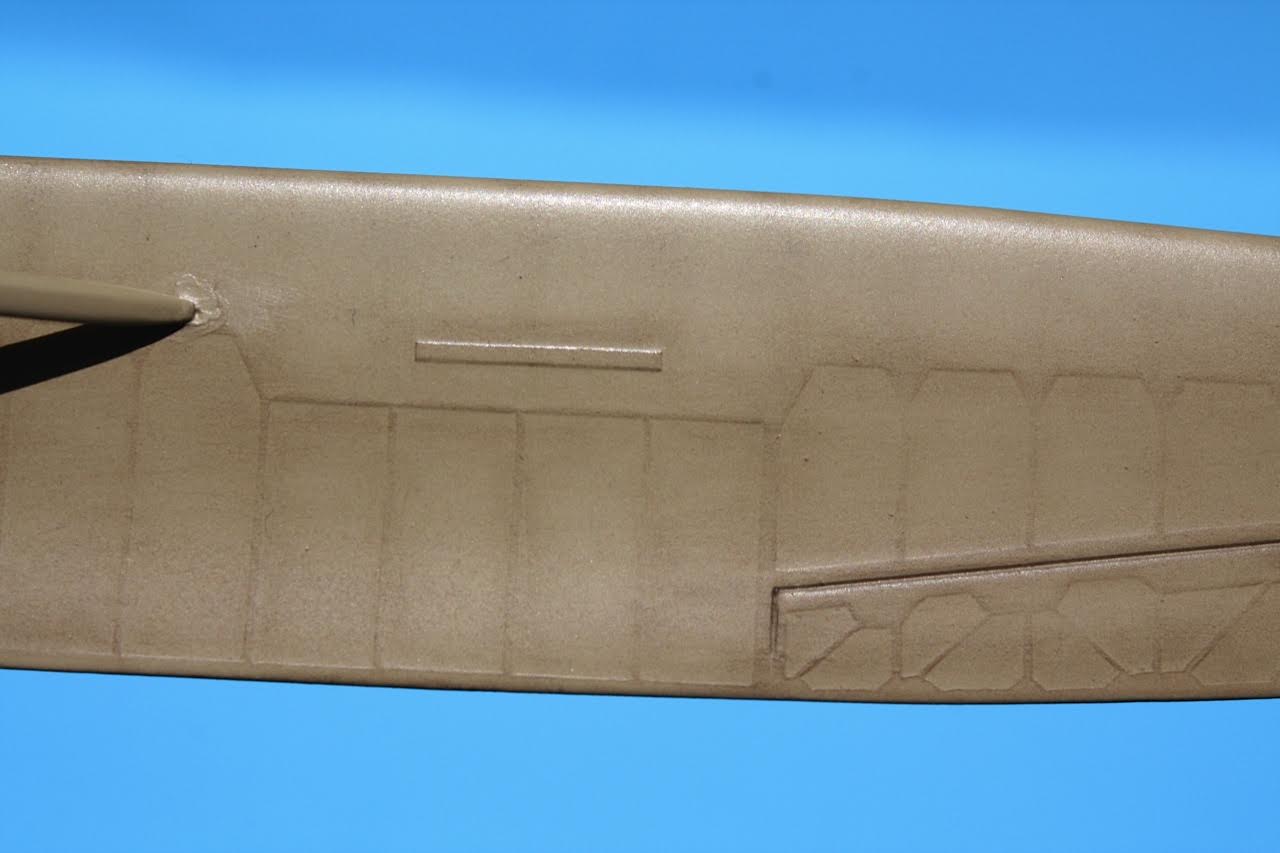
I then used chalk pastels to highlight the fine detail of the ribbing in the fuselauge, wing, rudder, and elevator. There is one photo showing the fine ribbing detail. The camouflage pattern was replicated using Winsor and Newton Promarkers in burnt sienna and olive green colors. These markers are great for modeling since they will not bleed when over coated with a flat lacquer.
Decals
There was only one decal option that came with my review kit. The decal sheet shown with the instructions has the options for the other 14 options. The decals were very thin and were printed within register and I had no silvering problems.
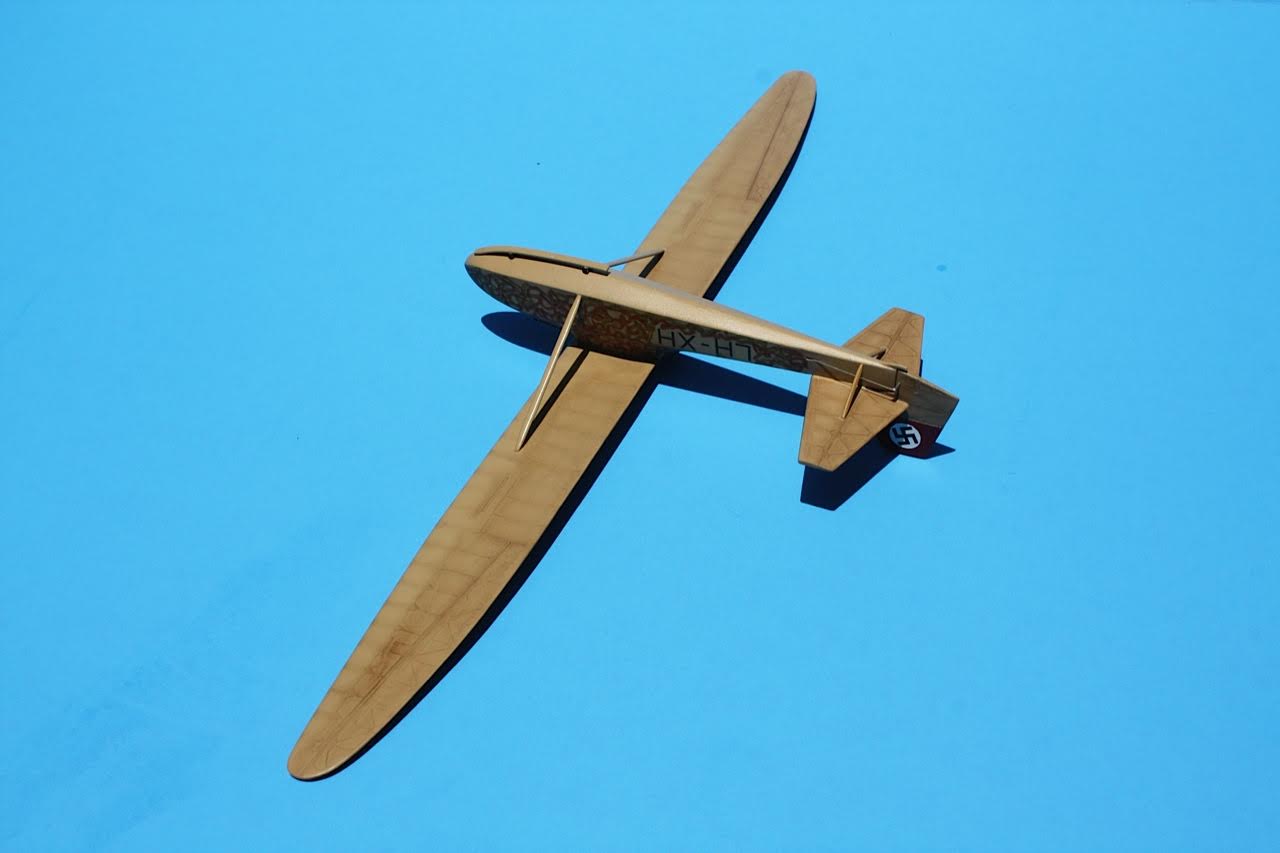
Overall the kit is a joy to build and builds into a nice sailplane. The fine panel lines and the detail are exceptional for a kit of this scale. The only recommendations that I would suggest is for the Fly company to change the windscreen to a clear injection molded piece and to add a set of peel and stick seat belts instead of the photo etched parts supplied to finish off the cockpit.
My thanks to Fly and IPMS USA for the opportunity to build a kit I normally wouldn't have chosen. I look forward to building Fly kits in the future.


Comments
Add new comment
This site is protected by reCAPTCHA and the Google Privacy Policy and Terms of Service apply.
Similar Reviews