
Glue Looper
How does one apply glue in a small area with maximum control over the quantity applied and with precise application? Glue Looper has provided a tool that addresses both location and quantity.
Please note that Glue Looper provides very clear and specific instructions for the use of the product, so you won’t see a lengthy repeat of those instructions in this review. Also, please note that Glue Looper provides a “how to” video on their website. We all know that a picture, in this case a “moving picture,” is worth a thousand words, so take advantage of this video prior to using Glue Looper. Go to https://www.creativedynamicllc.com to view the video.
Just a few words about the video, around second 37 you will note that the modeler seems to dip the applicator into a drop of super glue and then gently scrub the applicator on the edge of the white cap being used as the “work station”. The modeler is actually wicking away what he thinks is excessive glue. Just like in brush painting, one wants to end up in a “Goldilocks” situation… not too much, not too little, but just right. With some basic experience using the Glue Looper, you will begin to wick away surplus glue almost without thinking about it, but until experience kicks in, it is best to actually “think about it.” The modeler uses this wicking motion again at the 1:30 mark.
Finally, note that the modeler turns the Glue Looper 90 degrees (think sideways) when loading the loop.
A couple of other tips that Glue Looper includes in their literature are:
- Be gentle and simply touch the loop head to the seam of the parts. The glue will flow into the seam without any motion of the loop head being necessary. It is not necessary to drag the loop along the seam.
- Do not use the Loop on its side. You ca load the glue by dipping the Looper into the glue on its side, as seen in the video, but do not apply the glue by turning the Looper on its side.
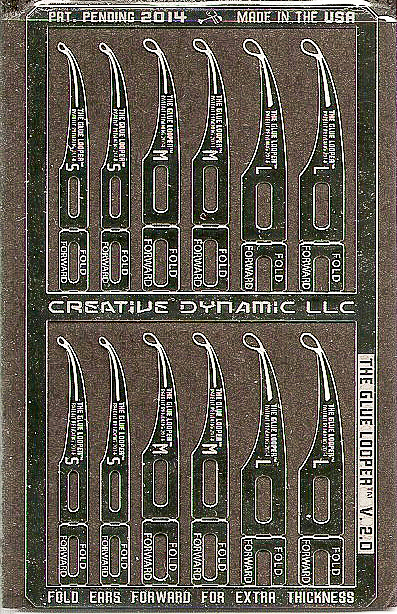
I learned from the Glue Looper folks that Version 2 of the Looper (I am reviewing the V2 item) differs from V1 by the addition of a small groove extending away from the glue loop. The glue actually wicks into the groove much like a paint wash follows a panel line, and it then provides an even flow of glue into the seam when being applied.
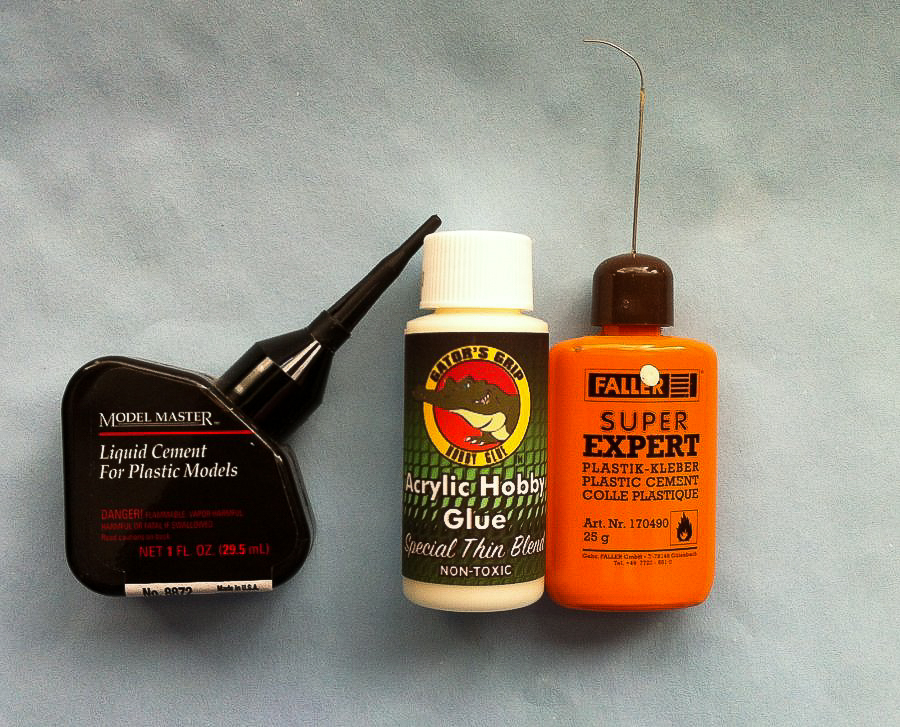
Of course, I couldn’t leave well enough alone and had to mess with some non-super glue adhesives to see if Glue Looper works with them. I tested Faller Super Expert glue, Model Master Liquid Cement and Gator’s Grip Acrylic Hobby Glue -Thin Blend. I squeezed a sample of three different glues out and used the S Glue Looper (small) to apply each to a seam. Glue Looper applied each of the three with some degree of success. Faller and Model Master Liquid Cement are, by their nature, thicker than the thin blend of Super Glue which Glue Looper suggests, but the application process worked, although I had to drag the Glue Looper along the seam due to the thickness of the “tube” glues. The Gator’s Grip Thin Blend went on well because it is thinner than the other two tested glues.
Glue Looper did something very creative here, and it resulted in a tool that is easy to use and functions well. Glue Looper provides three sizes of loop from small to large, so the proper loop size is available for anything from very fine work up to attaching hulls, fuselages, or superstructure. It’s all good!
This product is easy to use, can be used effectively by modelers of all experience levels, and is reasonably priced. One gets four loops of each size in the package I’m reviewing. I highly recommend this product and thank Creative Dynamic LLC for the review sample.


Comments
Add new comment
This site is protected by reCAPTCHA and the Google Privacy Policy and Terms of Service apply.
Similar Reviews