
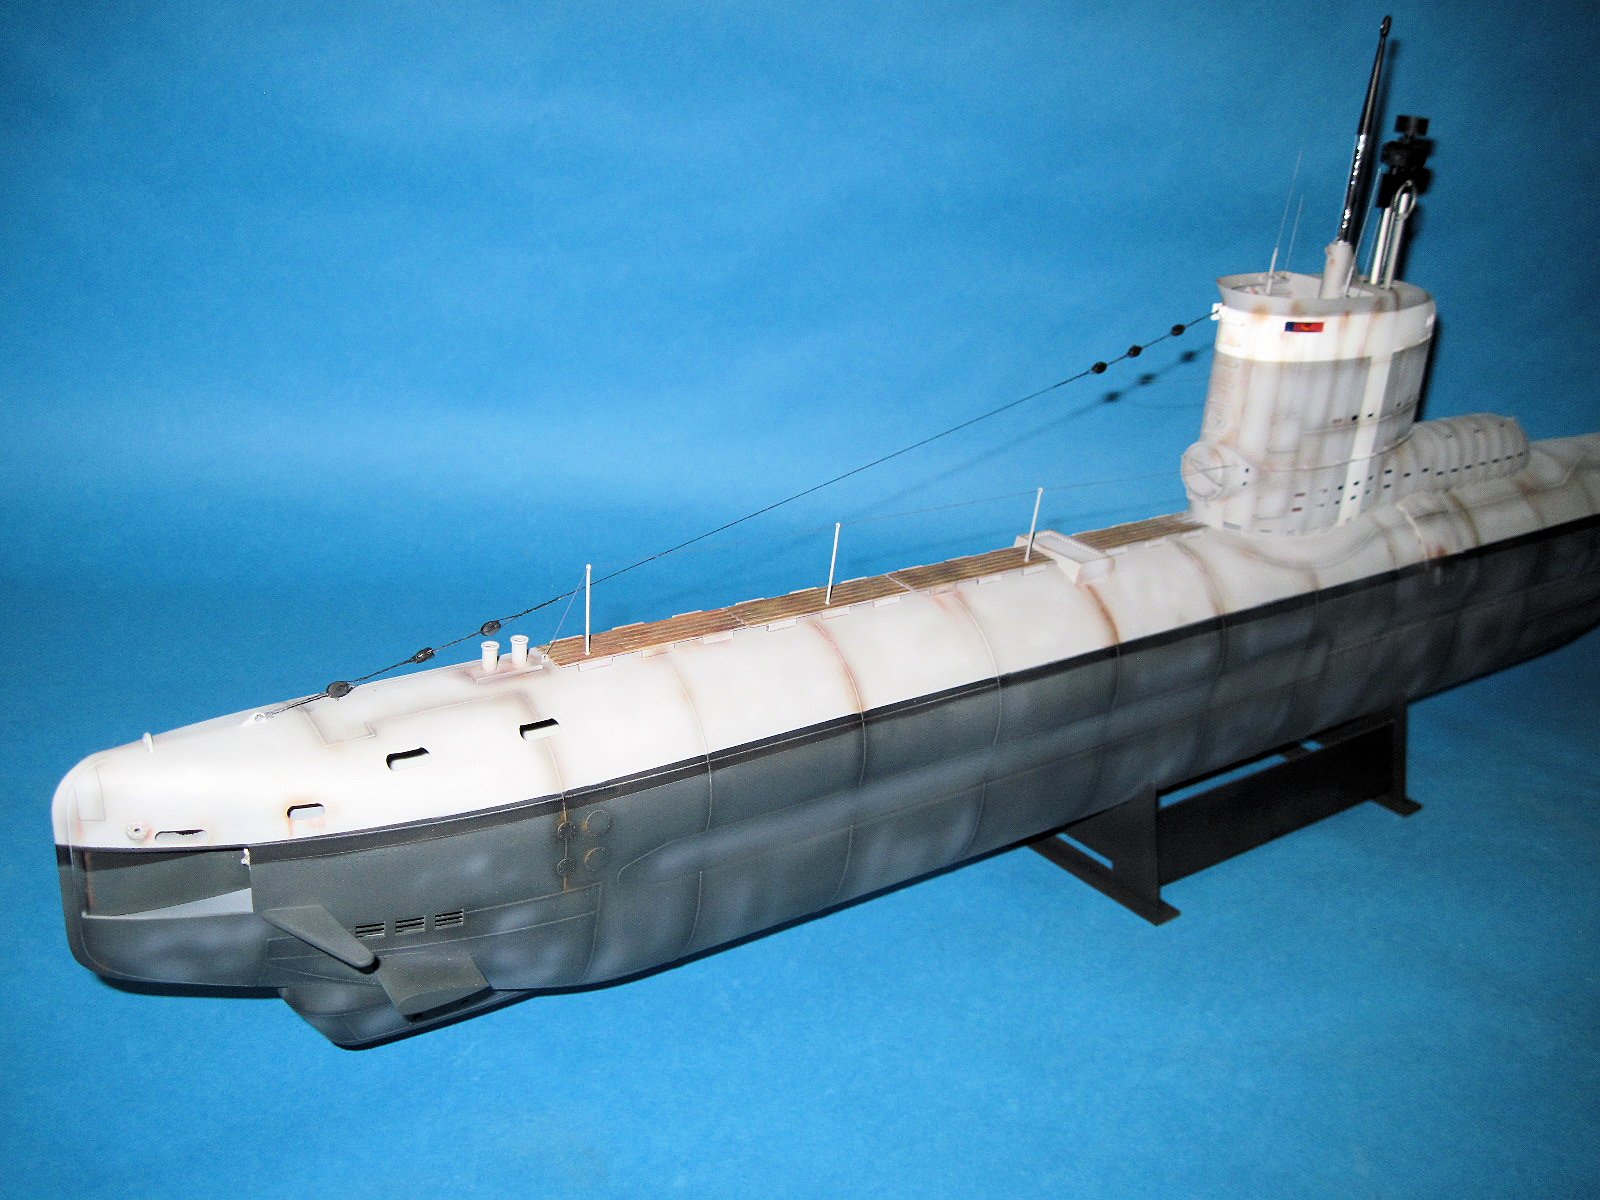
German U-XXIII Coastal Submarine
When Bronco first announced a 1/35th scale Type XXIII U-boat, I was fired up. I love U-boats and this scale was only previously available in very, very expensive resin. When it became available for review, I jumped on it. Upon opening the large box, you have lots of plastic to contend with as the finished sub will be as large as the 1/72 Revell Type VII’s. Inside are 113 gray parts with nice detail that make up the sub itself. The hull is split in half and also in front and rear sections. There are 52 parts to build two torpedoes and 21 to build a raft that can be attached to the front. Also included are 9 clear parts, a sheet of photoetch, two magnets and a nice sheet of decals. Being this large, you will notice that the sprue attachment points are pretty thick. Cutting with a razor saw is the way to go.
And now for the AMS to set in; yes, I could have built it OOB and written the review but a canvas this big needed even more love and so the path was chosen to dress it up. The best reference for this kit is Zum Models book on the Type XXIII. Not easy to come by and I eventually found one in Germany and ordered it. Before I start a project like this, I like to review what’s out there, compare to literature and come up with a list of things I need to add to the kit. So, after some digging and on-line discussions, I came up with the list of the following I wanted to modify:
- Fabricate bulkheads in the front torpedo bay (there are none)
- Create and Detail the torpedo tube door
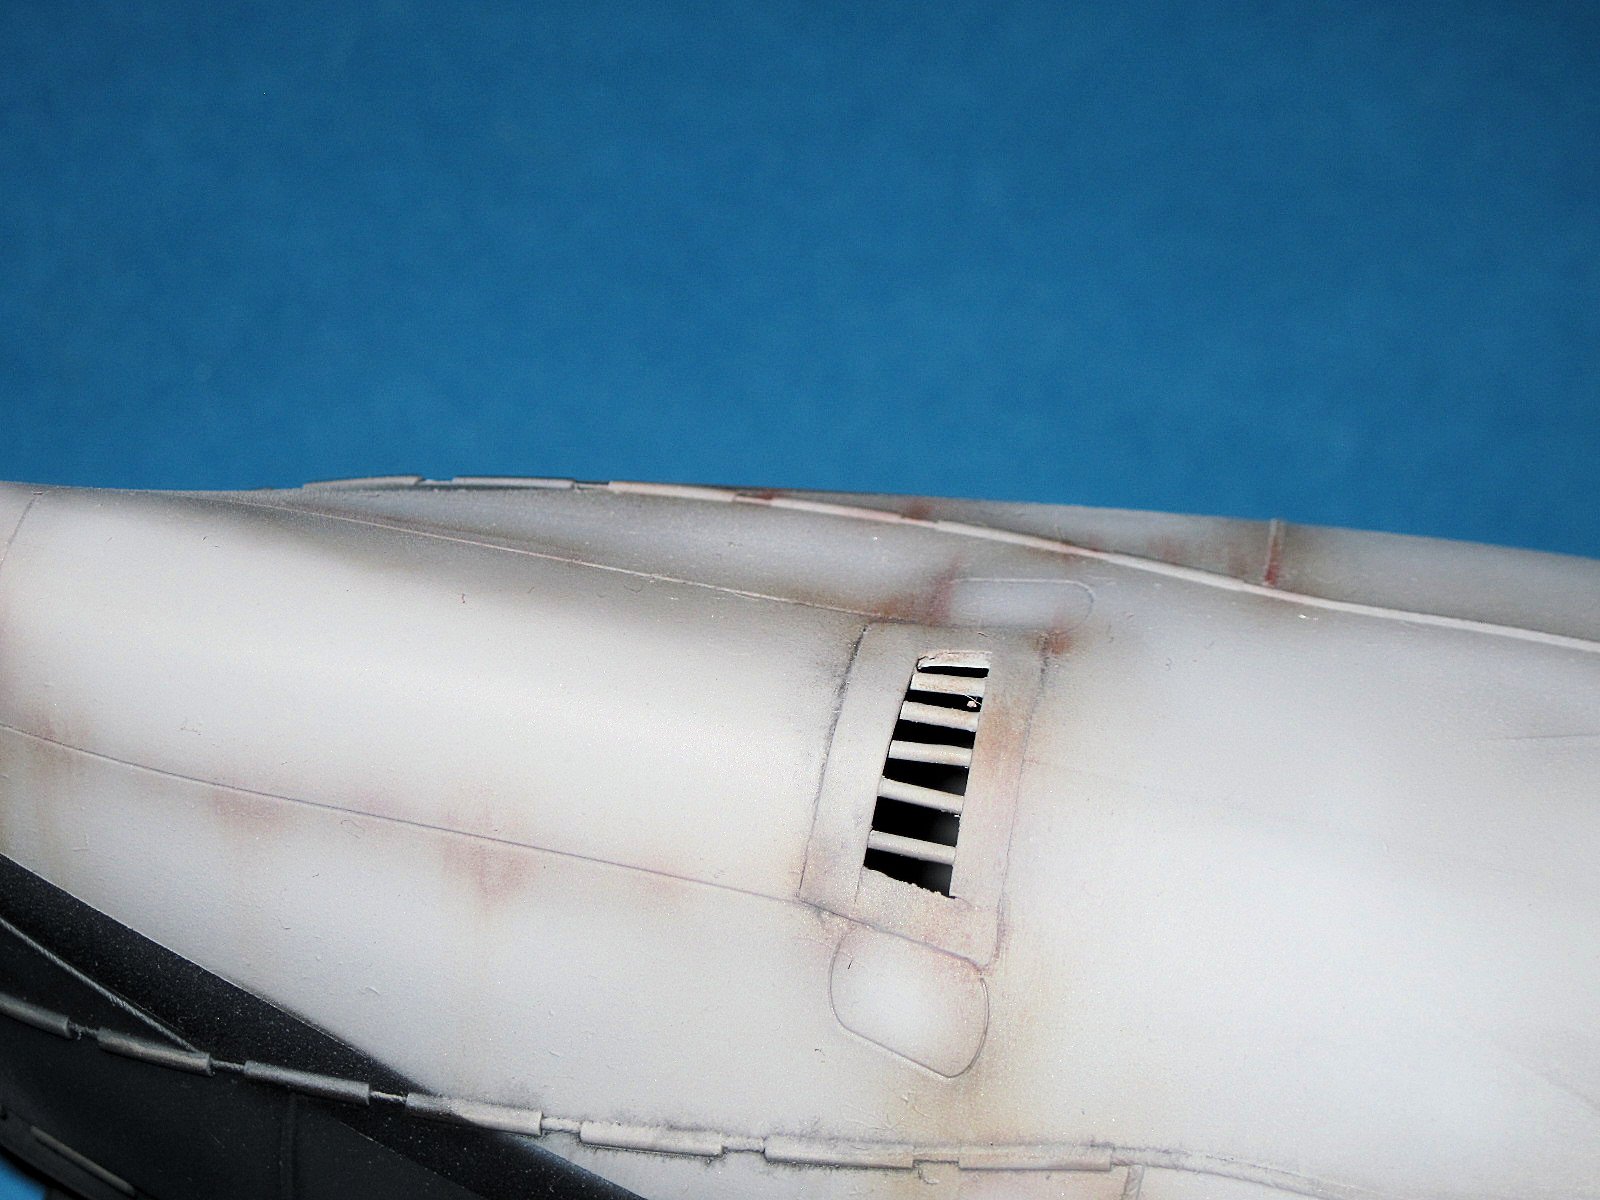
- Modify the drain vent on the aft top to replicate actual
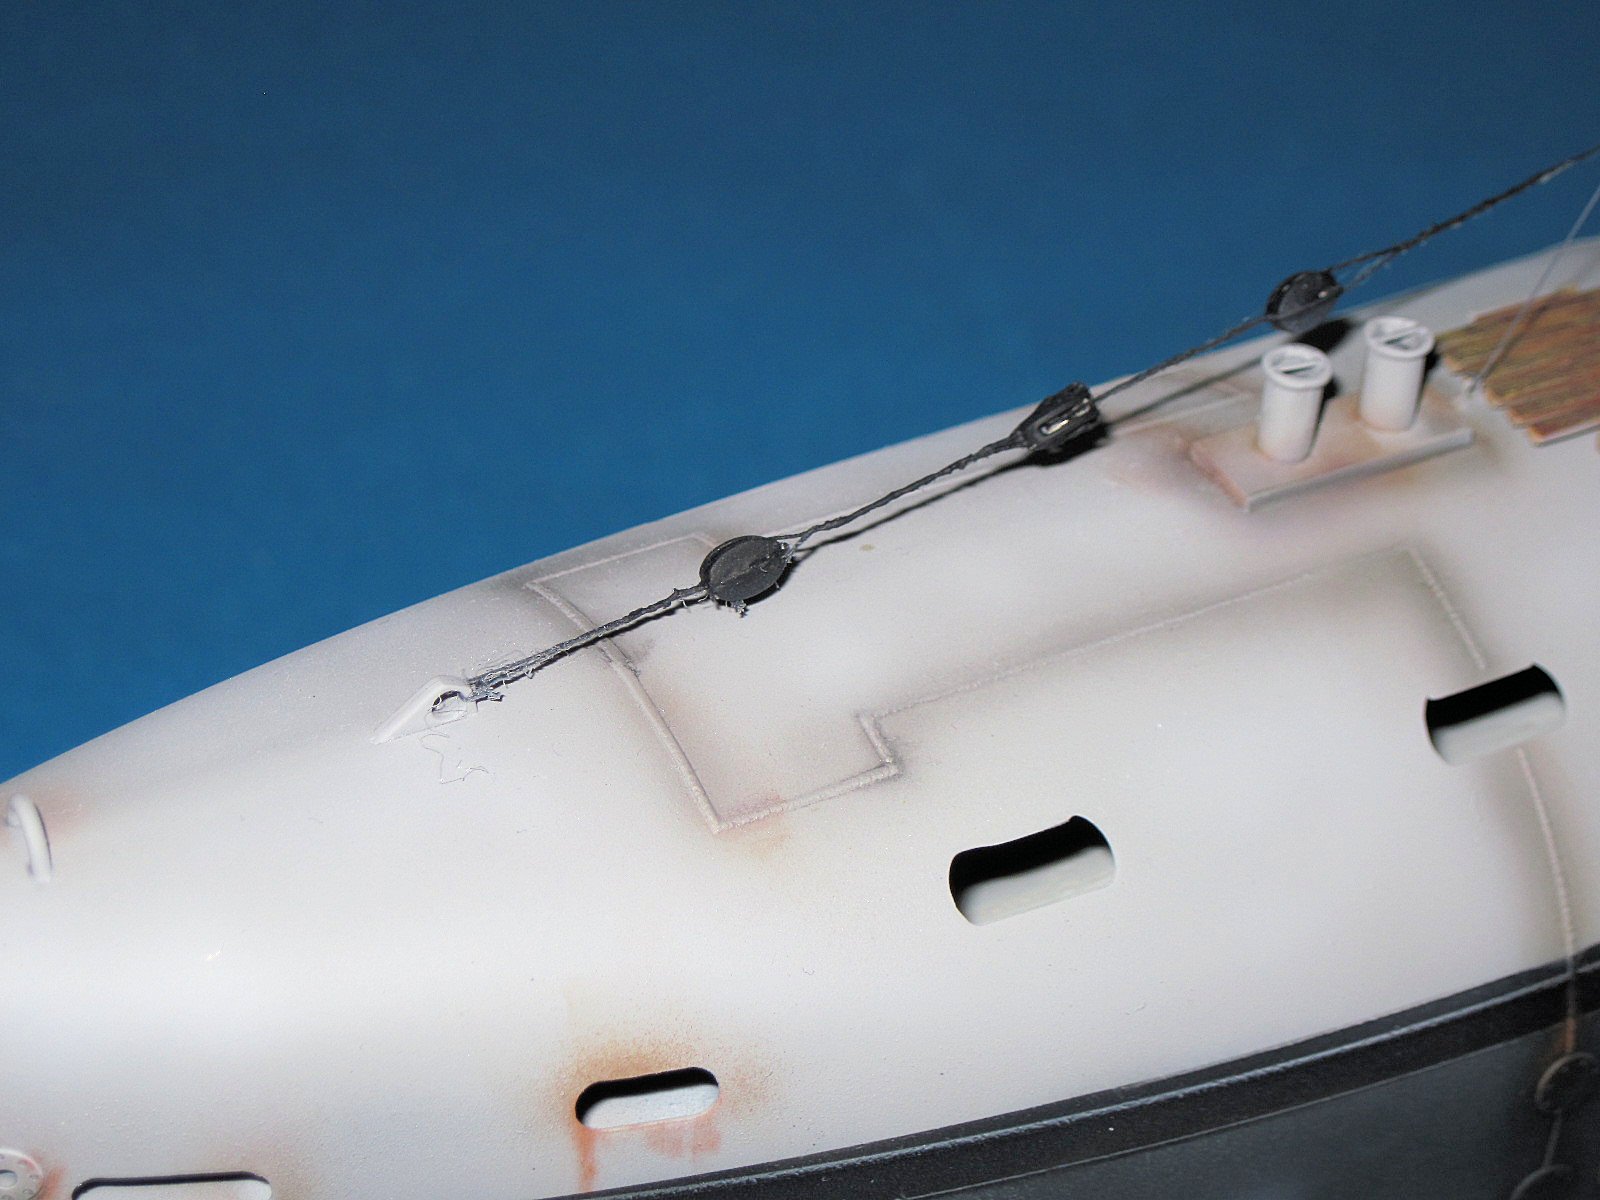
- Run brace across the front tie downs as per picture
- Replicate the rigging of the antennae correctly with stropped blocks
- Add horn to the conning tower
- Add hand holds on the drain vents at rear of conning tower
- Create brackets for attachment of railing on front deck
- Create bracket for attachment of antennae
- Add the voice tube to the conning tower
- Add the storage lockers to the conning tower
- Add the life saver bracket and handholds to the periscope base
- Rebuild antennae’s with wire
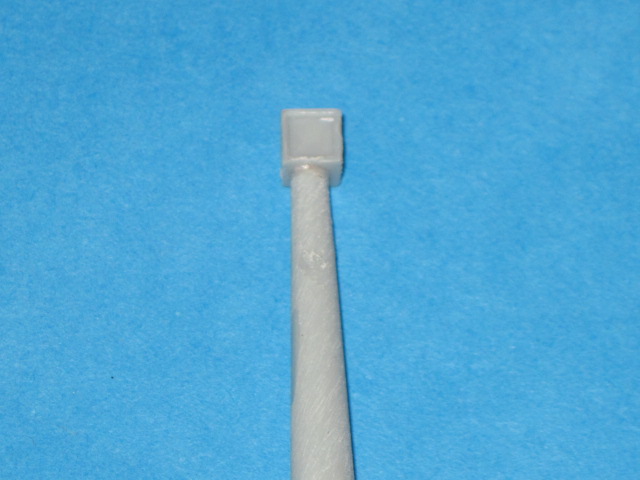
- Rebuild the incorrectly shaped periscope top
- Add more texture to the Schnorkel
- Add tubes for antennae lowering
- Add retraction tubes for Schnorkel
- Add guide line to Schnorkel
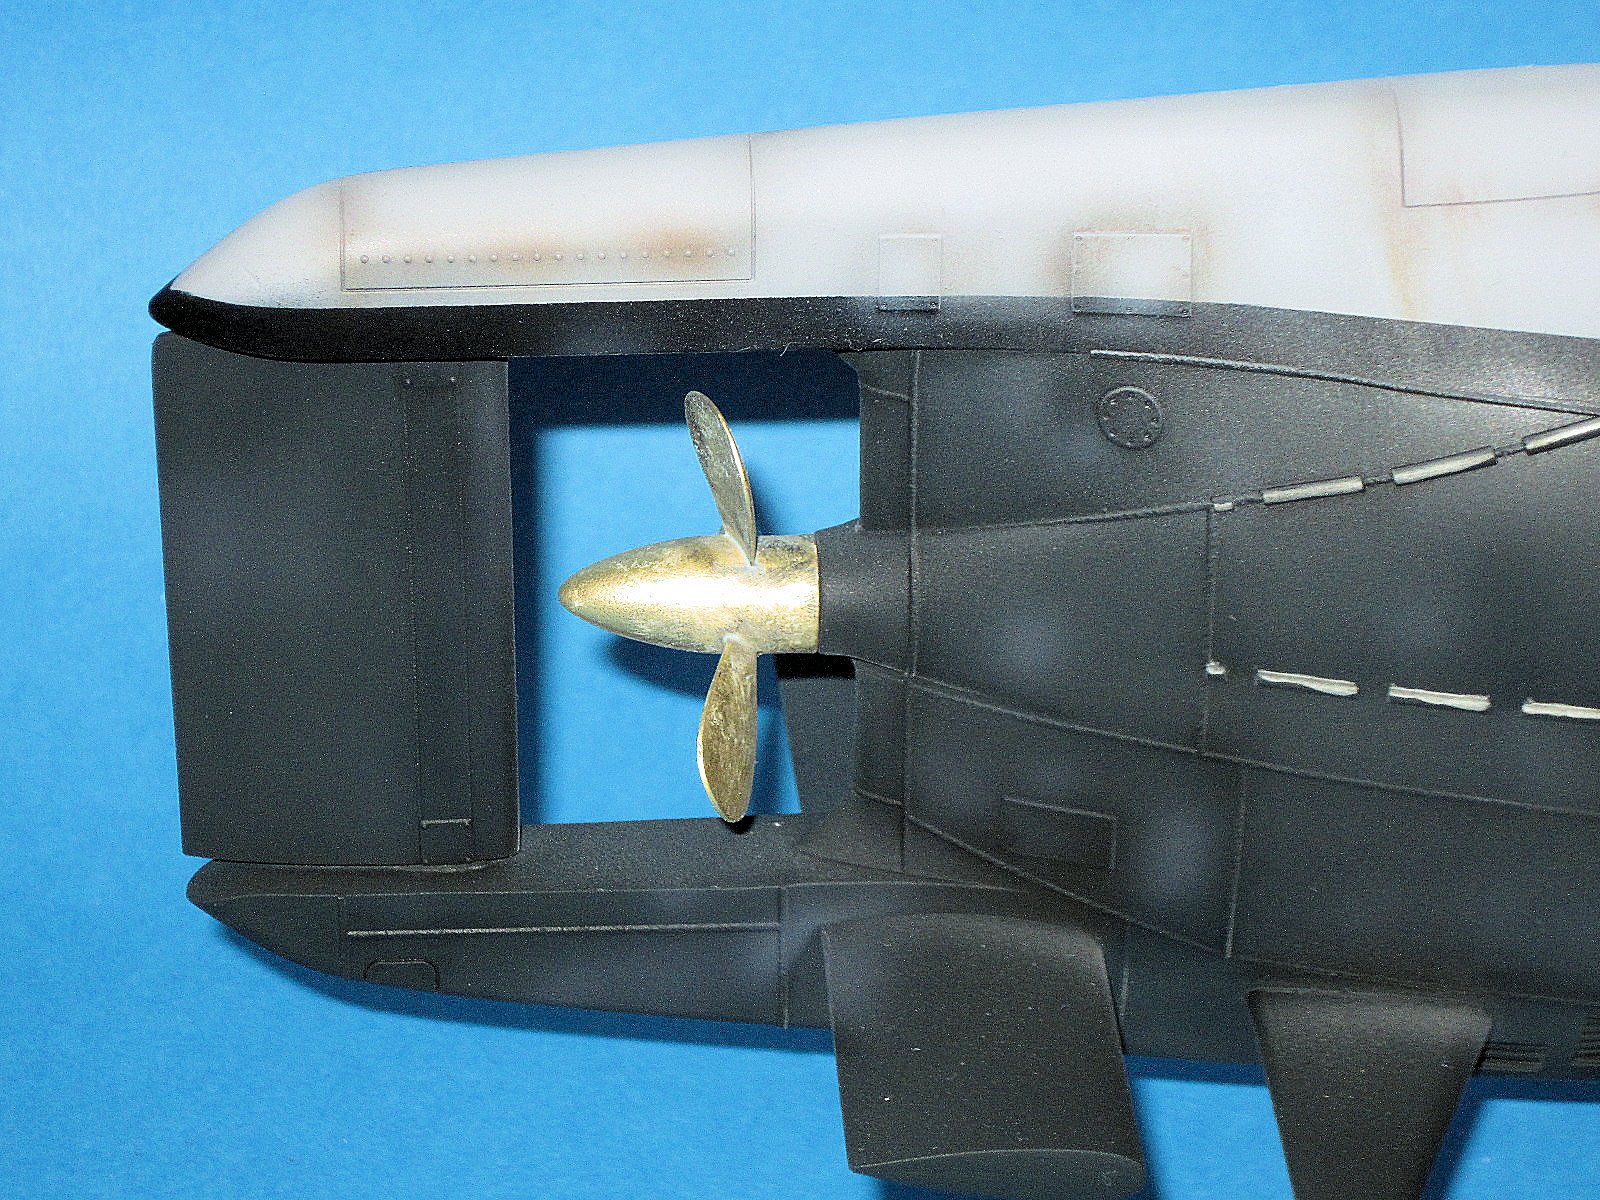
- Add/Fix the propeller
- Add grates to side duct
- Correct davit at back of conning tower.
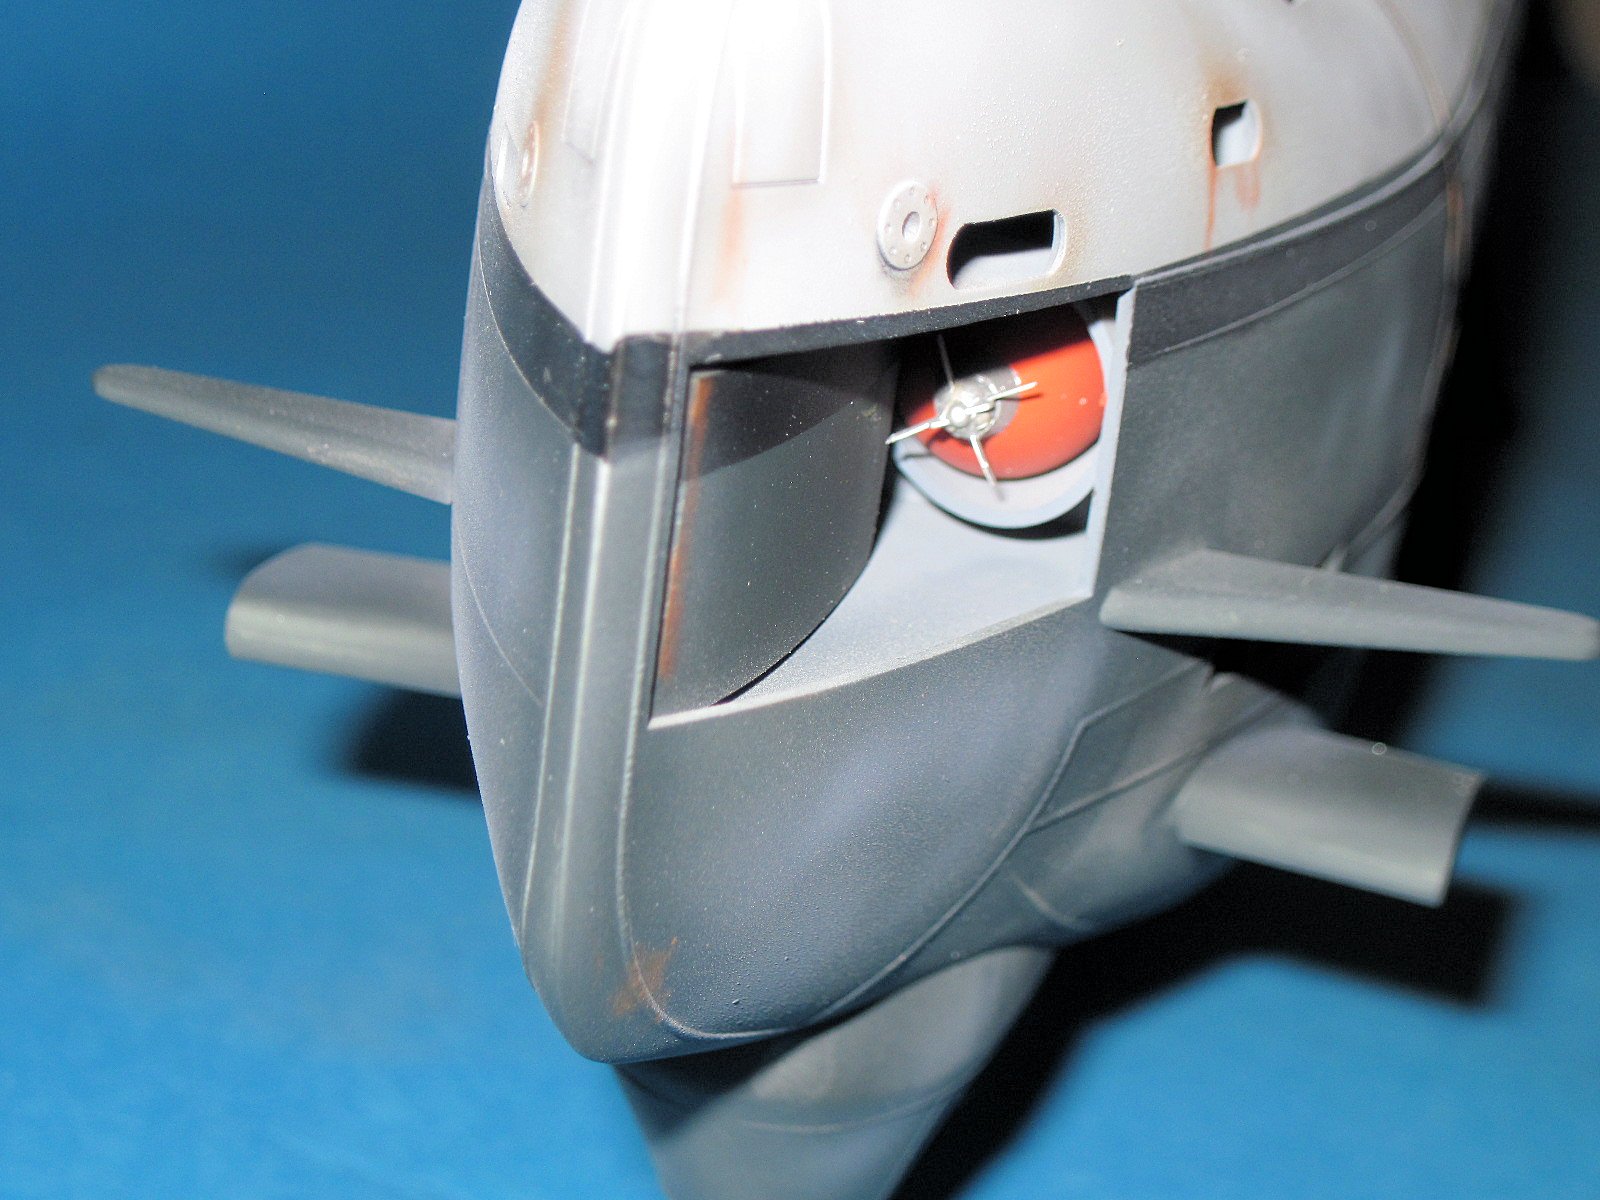
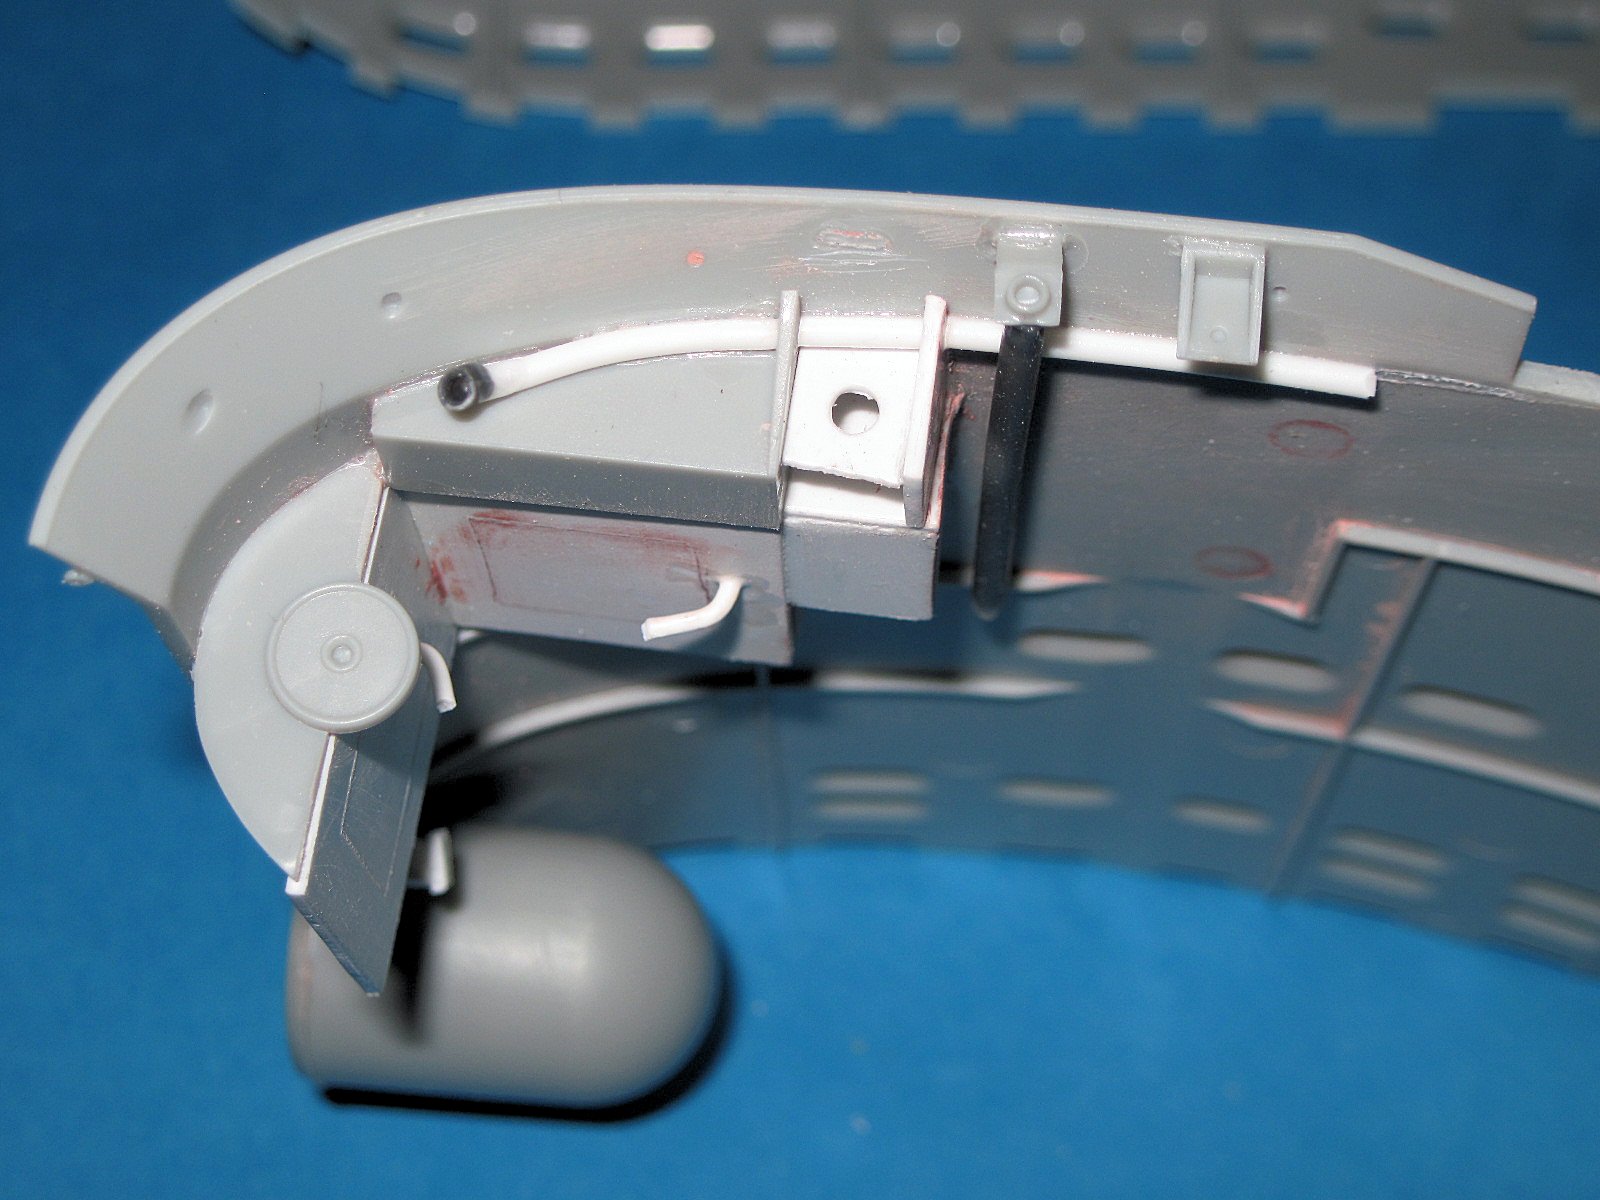
Getting to this point even took several months of looking, evaluating conflicting info, and coming to a plan. Construction starts (not I the cockpit) but in the front torpedo bay. There are two terrifically detailed torpedoes in the kit. I elected to have one torpedo inner and outer door open and the torpedo in its tube. I assembled one, painted it and set it aside. The photoetch nose spinners are a great touch.
Missing in the bow are the bulkheads between the port and starboard torpedo tubes. Using a contour gauge, I fabricated top, bottom and separating bulkhead from sheet and replicated the holes in all parts. I assembled the torpedo tubes and inner parts and realized I needed to make inner doors. The doors and their supports were fabricated and sized to fit the tubes. The outer torpedo doors are meant to attach by magnets. I made a hinge and added the doors later in the build to allow the torpedo to be left out until painting was complete. The interior bulkheads were painted, weathered, and the vents added. At the rear, the rudder was built and the primary periscope housing tube added. Just that quick, the hull was ready to assemble.
I glued the starboard and port sides together front and back so I had two sides to the sub ready. This allowed me to mount the interior parts such as the torpedo area, the rudder and the periscope mount. To join the entire hull, I used a lot of clamps and slowly worked my way around the entire hull until it was thoroughly Tenex’d in place and was set aside to dry for a couple days.
At this time, I built the included base as it is a great support for the next step which is to add the diving planes. Look at your references here as part C16 was faired over on some subs as it was not particularly effective. I did add it as it was appropriate to my sub, U-2360. I did not add the deck boards or railings until later. There is a photoetch grating that covers a drain hole at the rear of the sub. It’s nice but not representative of the actual part. I fabricated some rails and a flange and added those. Not completely happy but better than the kit part.
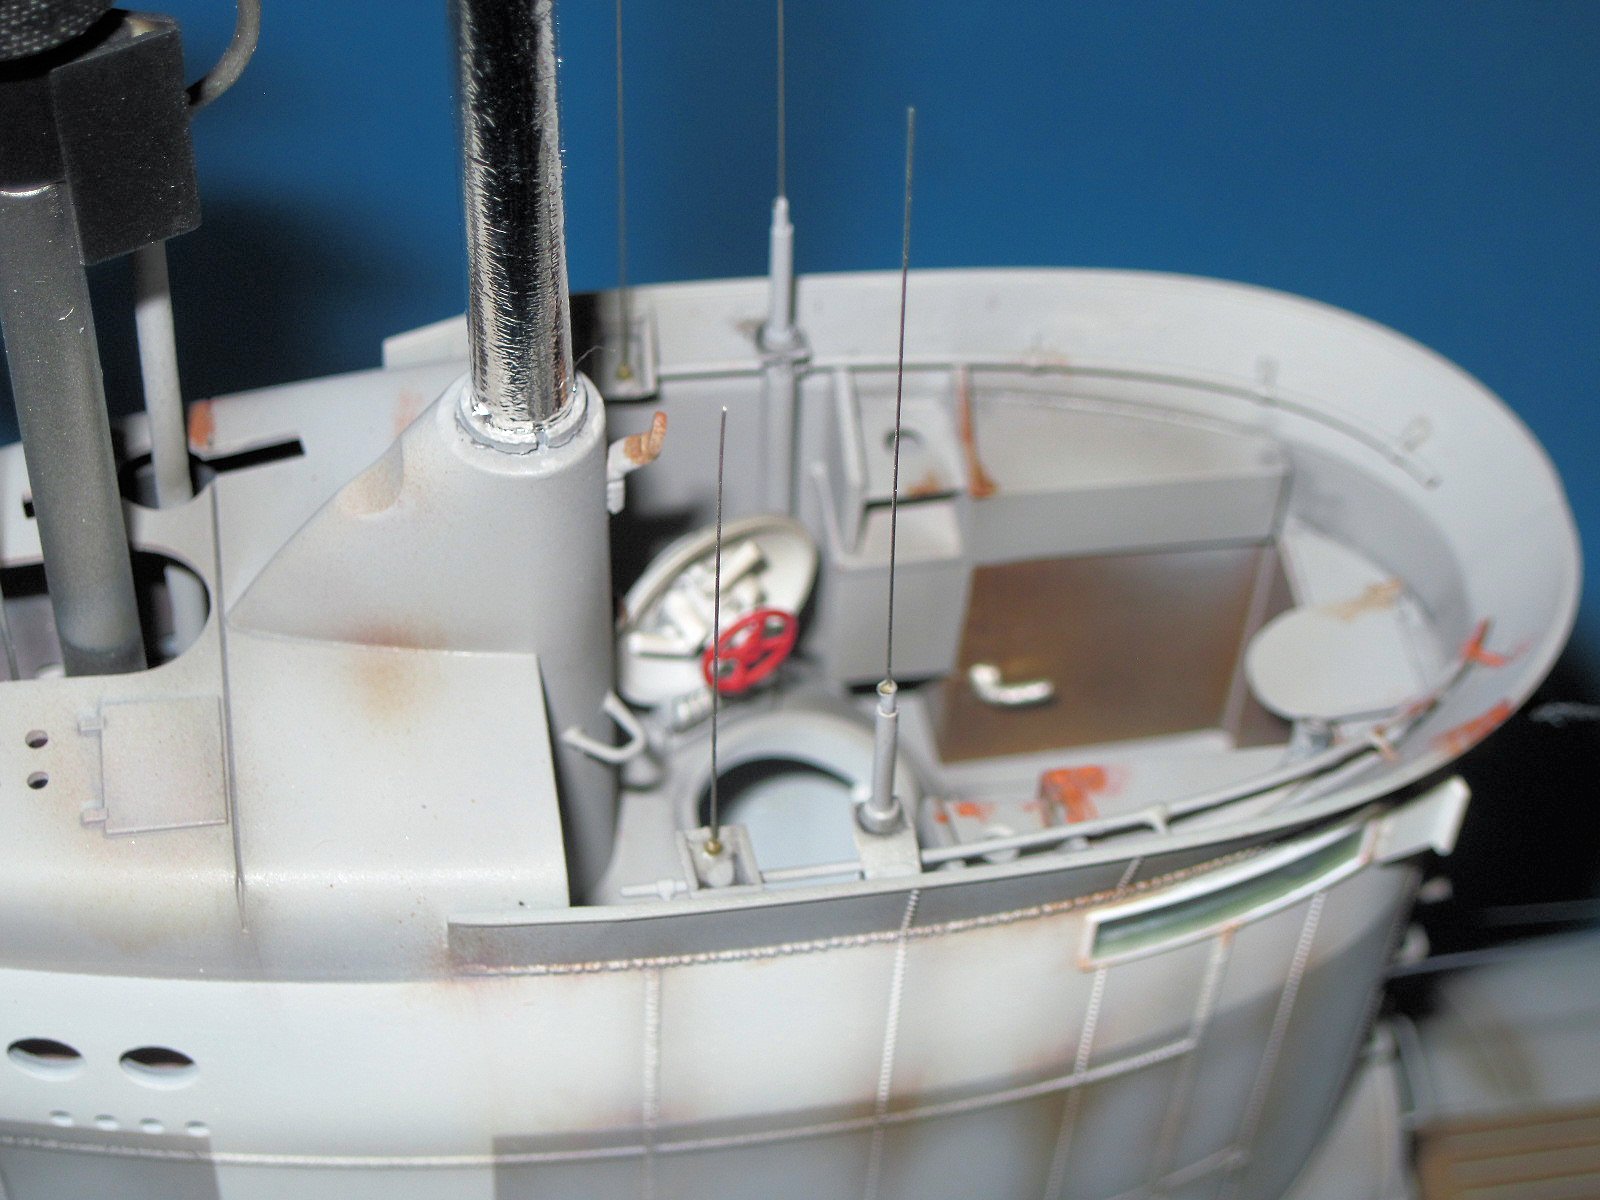
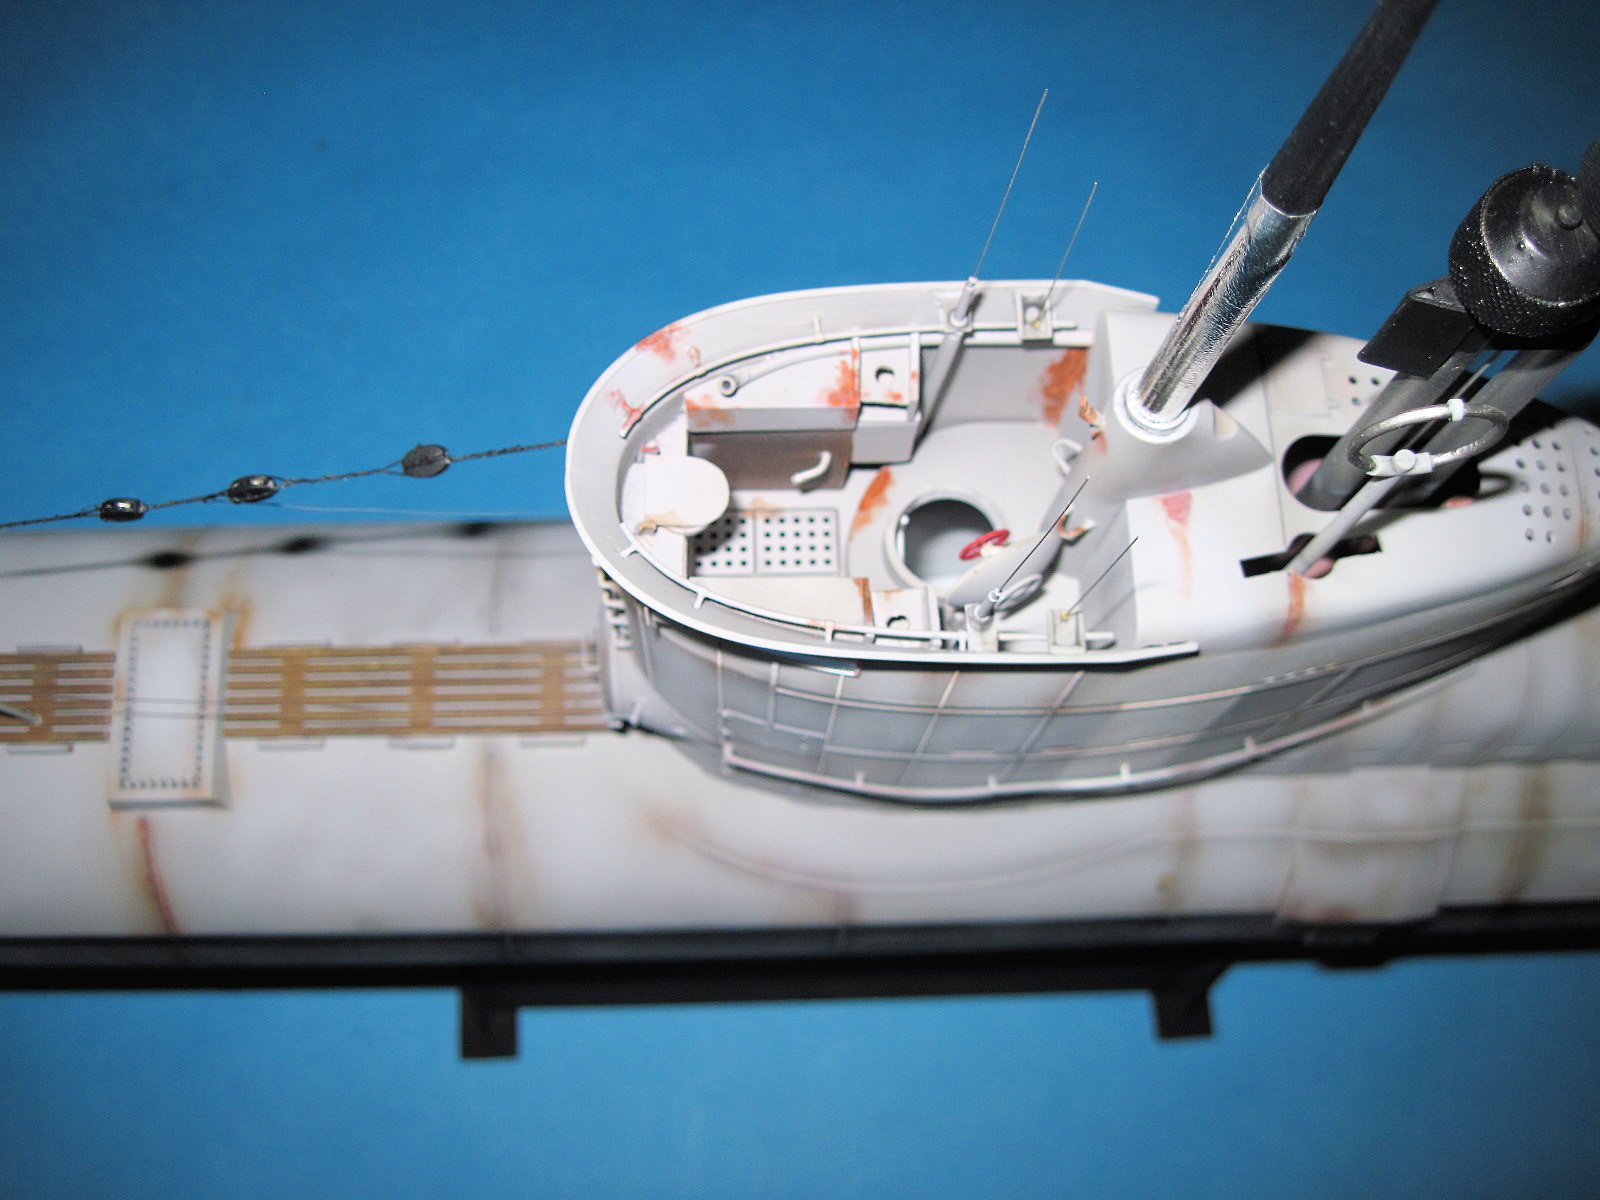
On to the conning tower. Lots of modifications to this part. First, the flood holes are see through and while the kit includes a muffler for the diesel engine, the rest of the interior parts are blank. I added three tubes for the Schnorkel and periscope housings as they would be visible. I used spacers to keep these square. The front of the CT has a horn in the middle that is just a hole. I used several sizes of tube and squeezed one to replicate the part. After the lights were added, I used plasticard to replicate the storage locker common to the subs on the front and both sides. Handles were made from wire bent and drilled into place. This was sprayed primer red on the interior surfaces. One thing to note, the parts fit great on all of these which helps with the entire assembly.
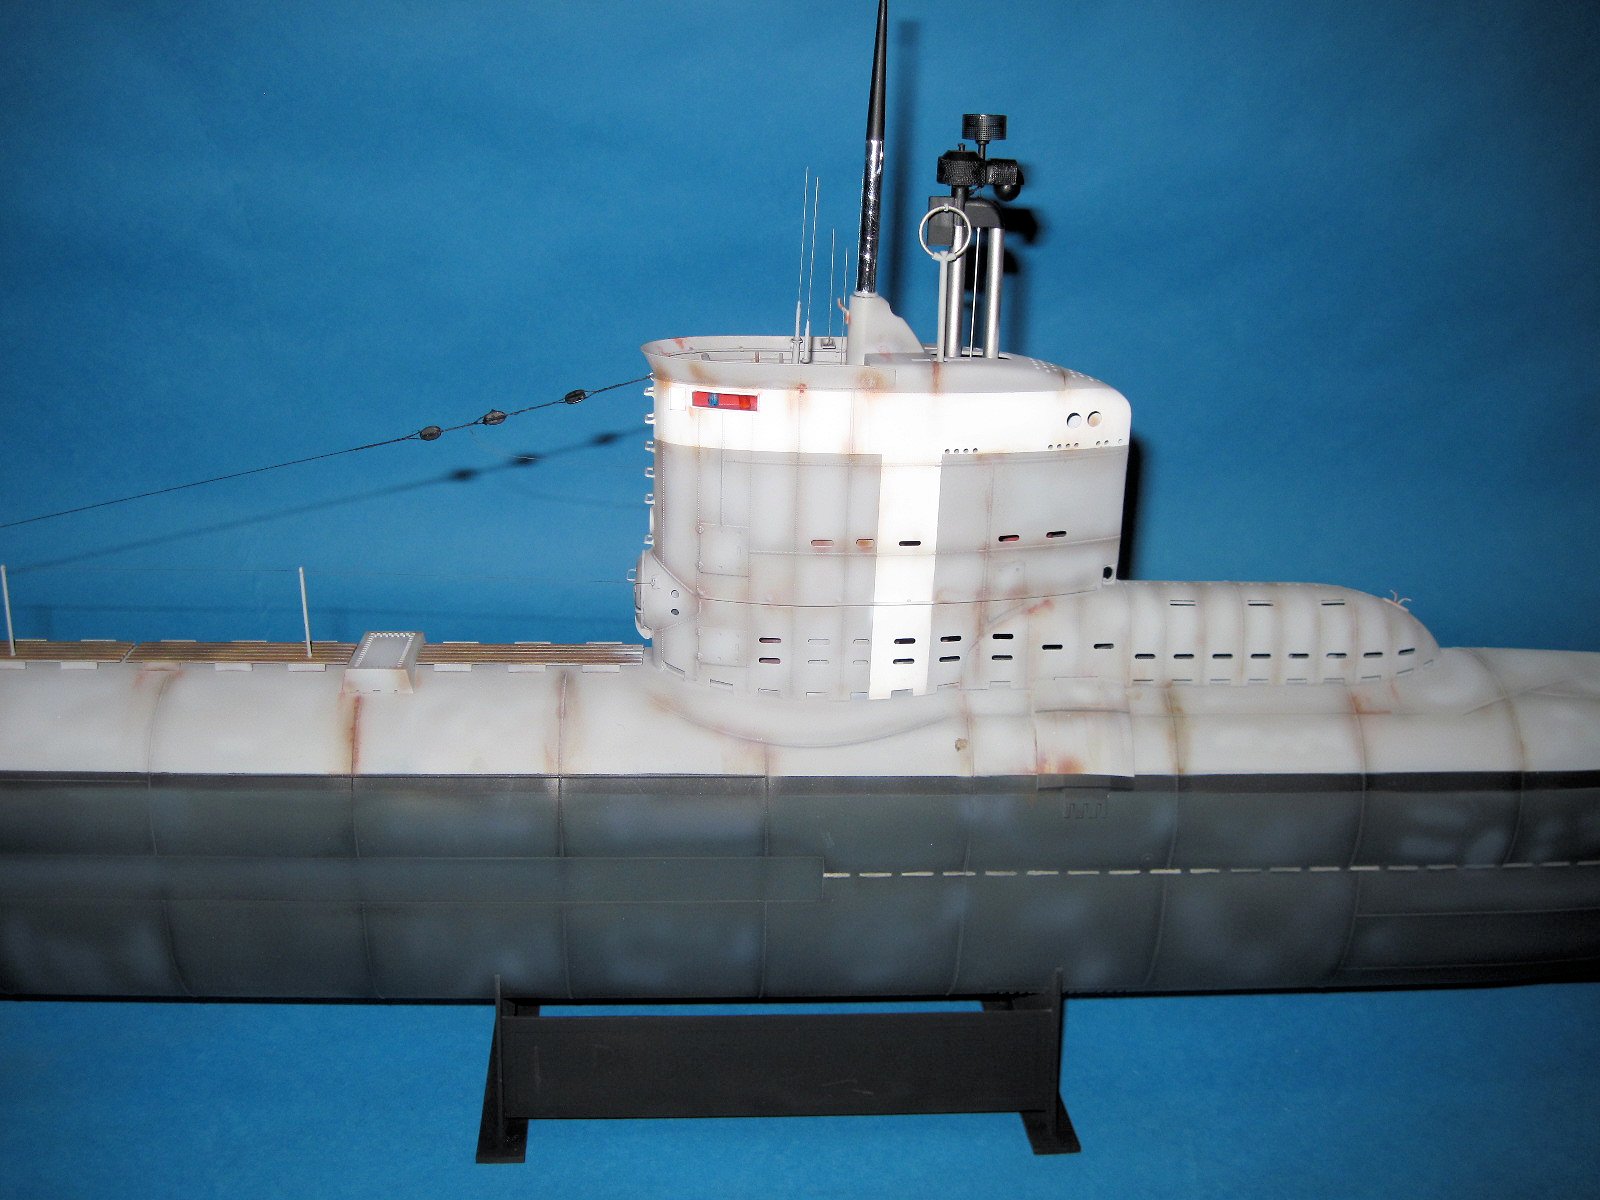
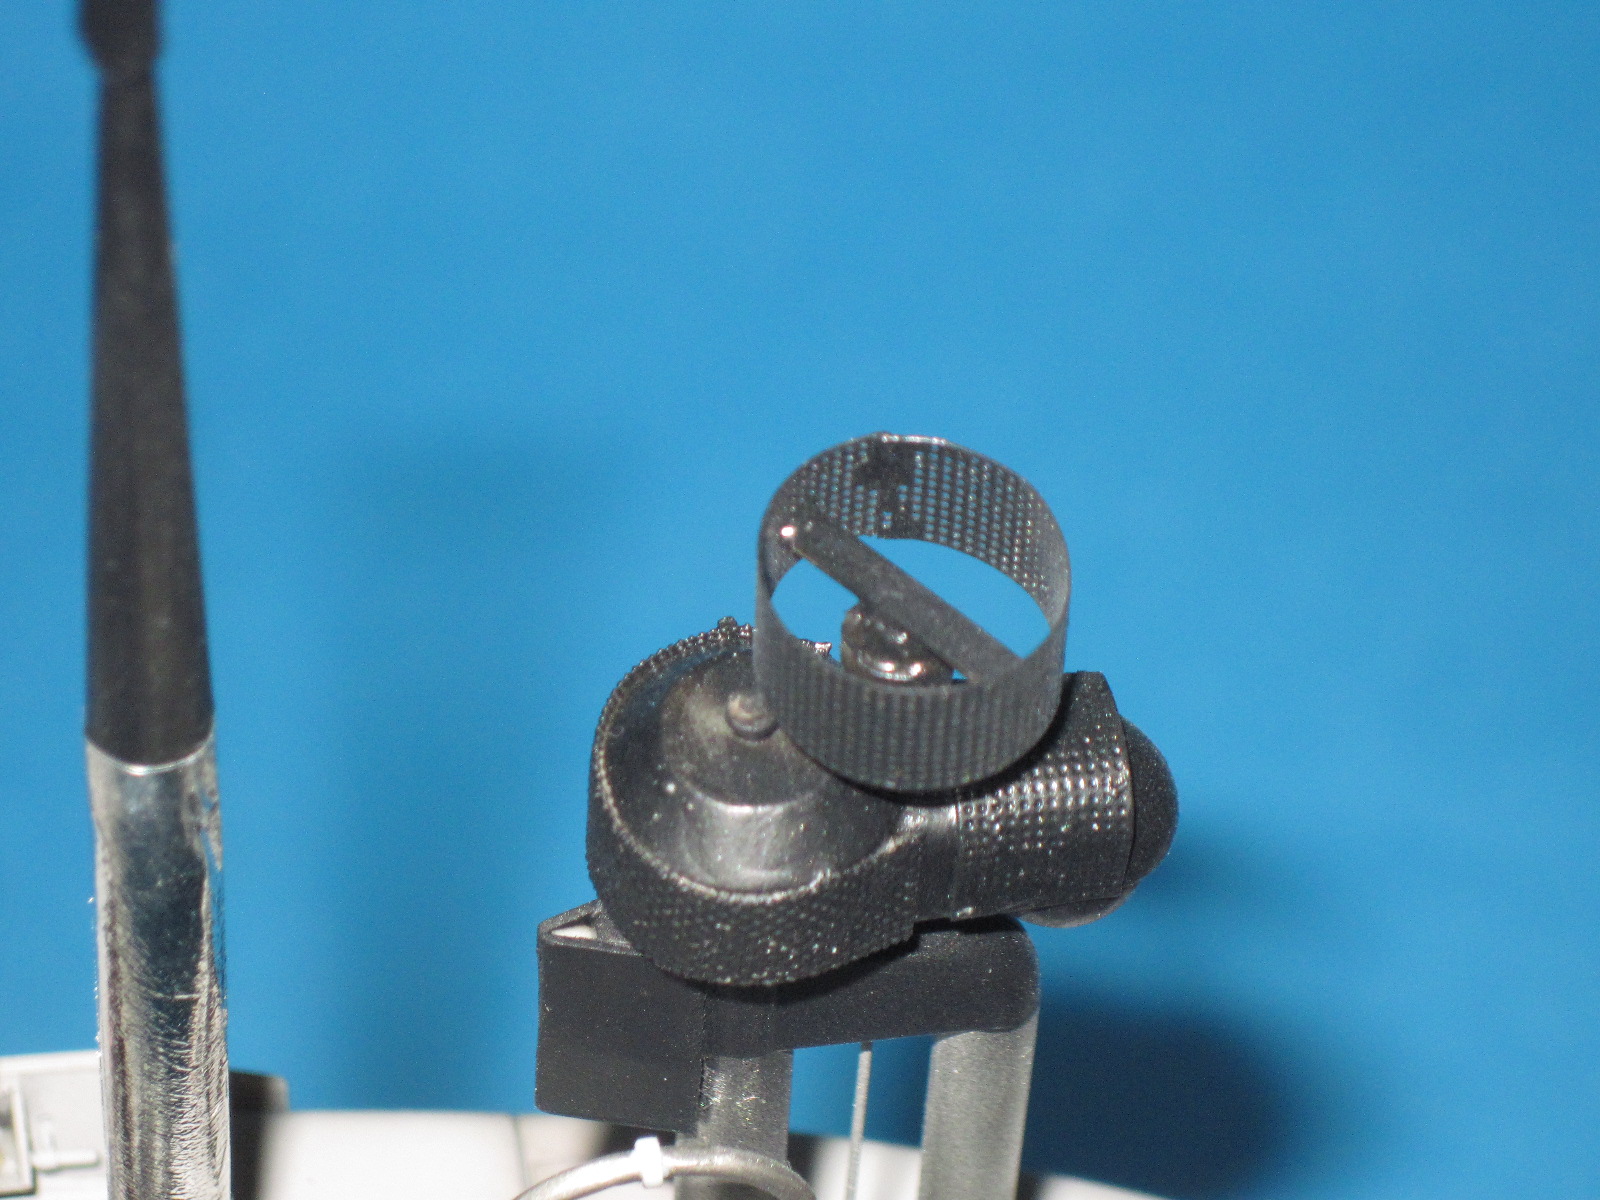
The main conning tower parts were glued and work was done on the periscope housing. I added two missing hand holds from wire and then a life jacket bracket from smashed sprue. The top of the housing has a prominent ring and bolts around it and was made from plasticard and Grandt line bolts. The periscope is the wrong shape- not even close actually. I cut off the top, added some sprue and sanded it to a much closer shape.
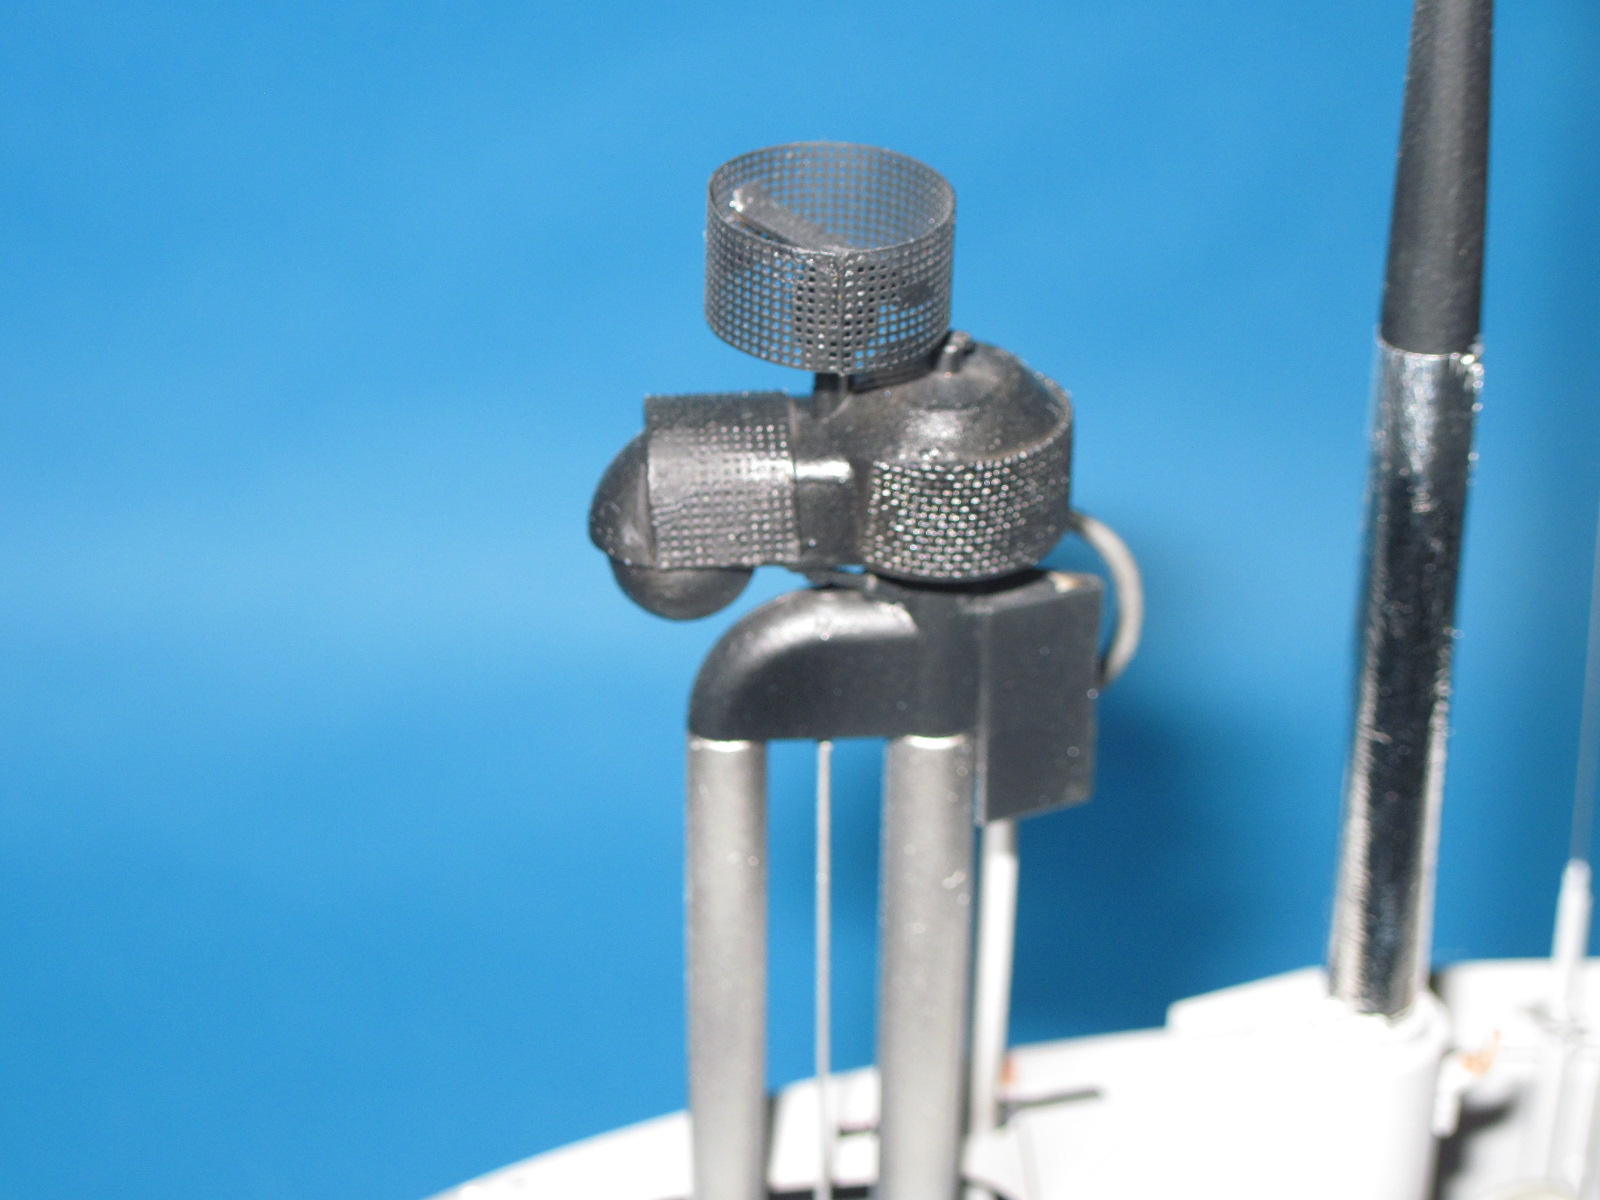
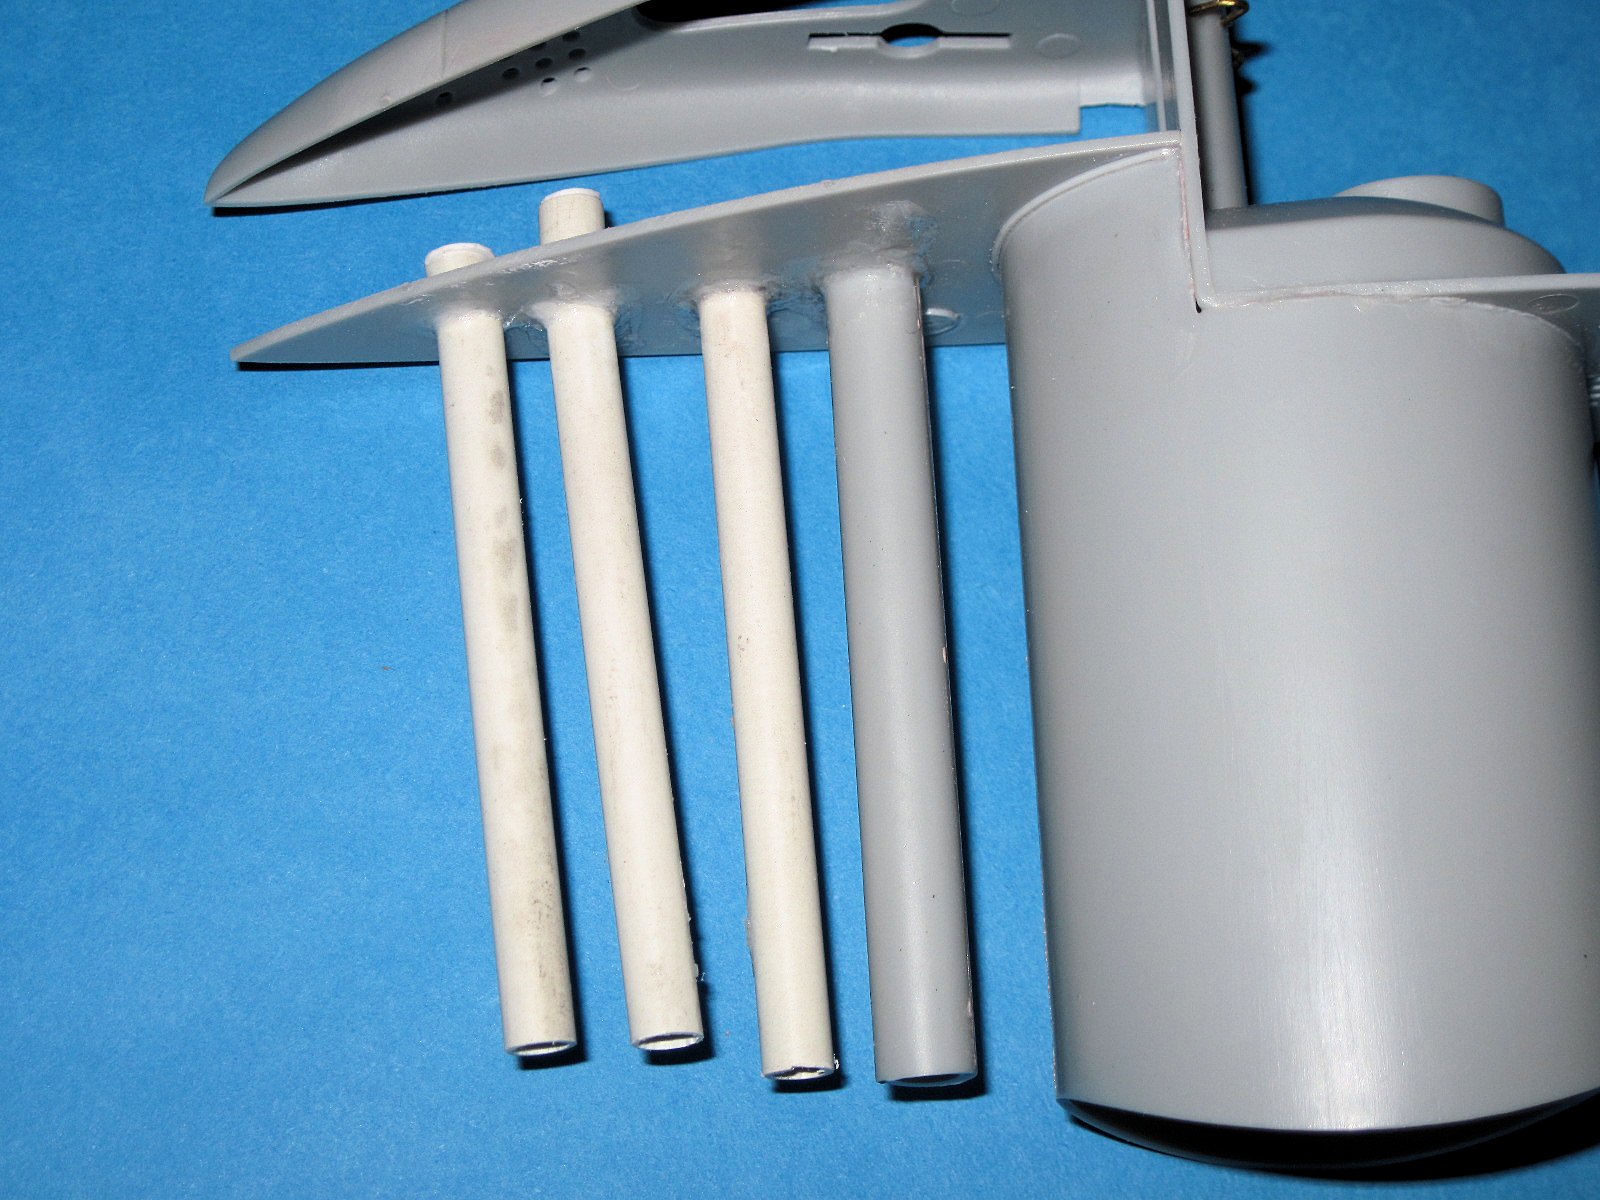
The Schnorkel was next. It is not a bad representation and has several photoetch pieces. The actual Schnorkel were usually covered in radar resistant material. To fix this, I added mesh to additional parts of the build. I also added several fittings at the bottom as the kit part was a bit simplified. Once all the construction was done, I painted Mr. Surfacer on all the needed surfaces for a nice effect. Lastly, I added a central guideline to go down the middle like the real thing.
The periscope was added to the conning tower and the entire assembly was glued to the main hull. Fit is extremely good here. I had created a little interference with the add-ons but it was quickly dealt with by sniping some of the tube shorter. Lastly, the UZO plate was fabricated and added to pivots to cover the area where the UZO would mount
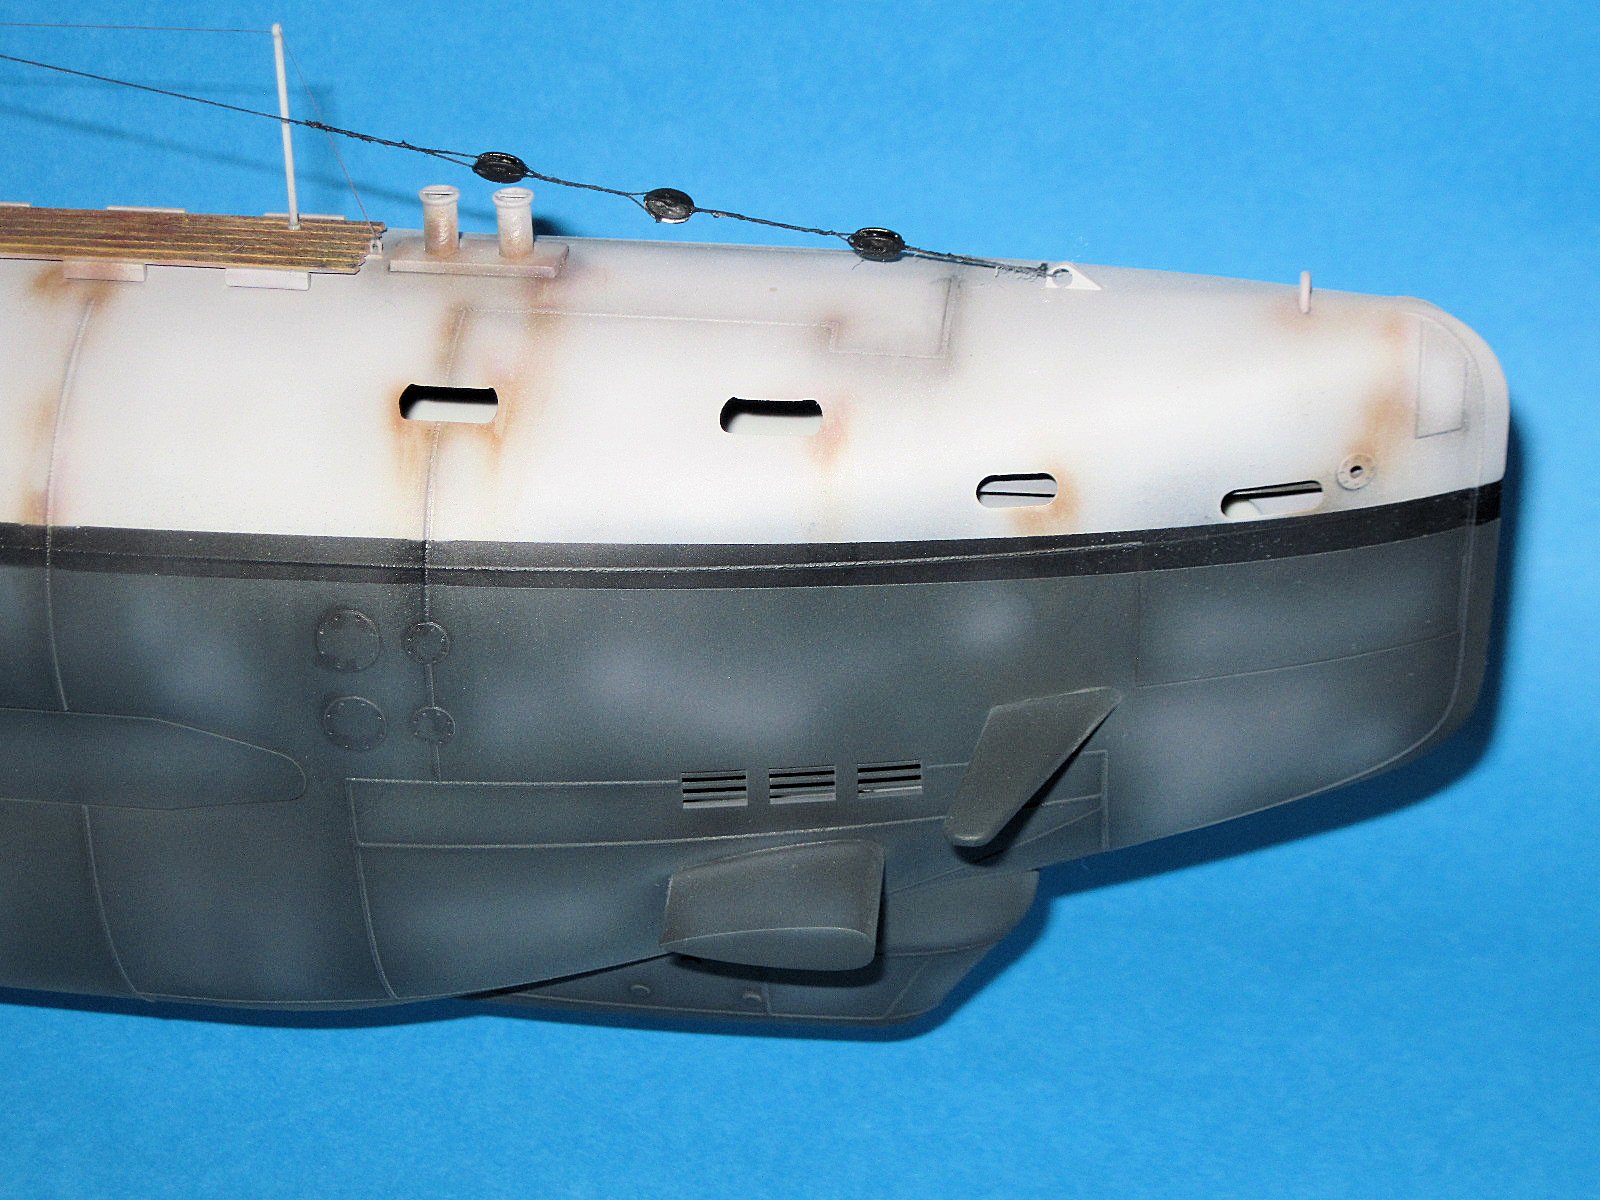
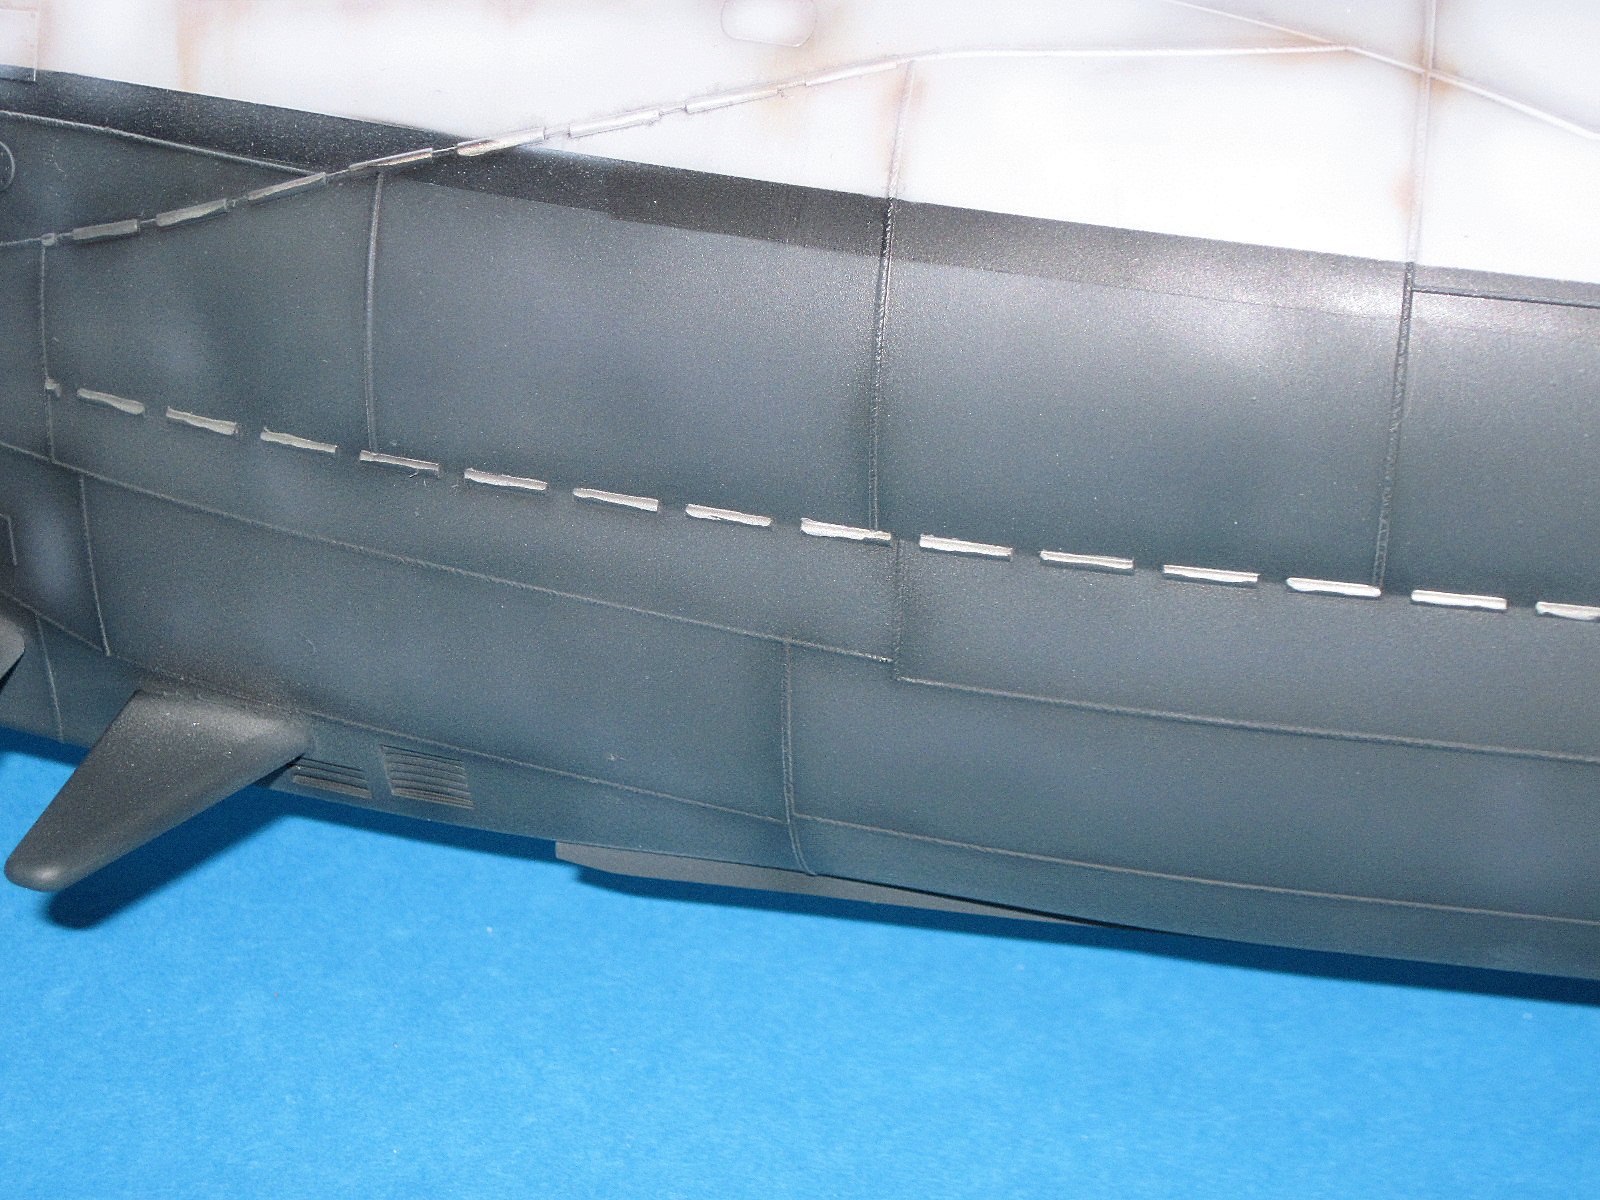
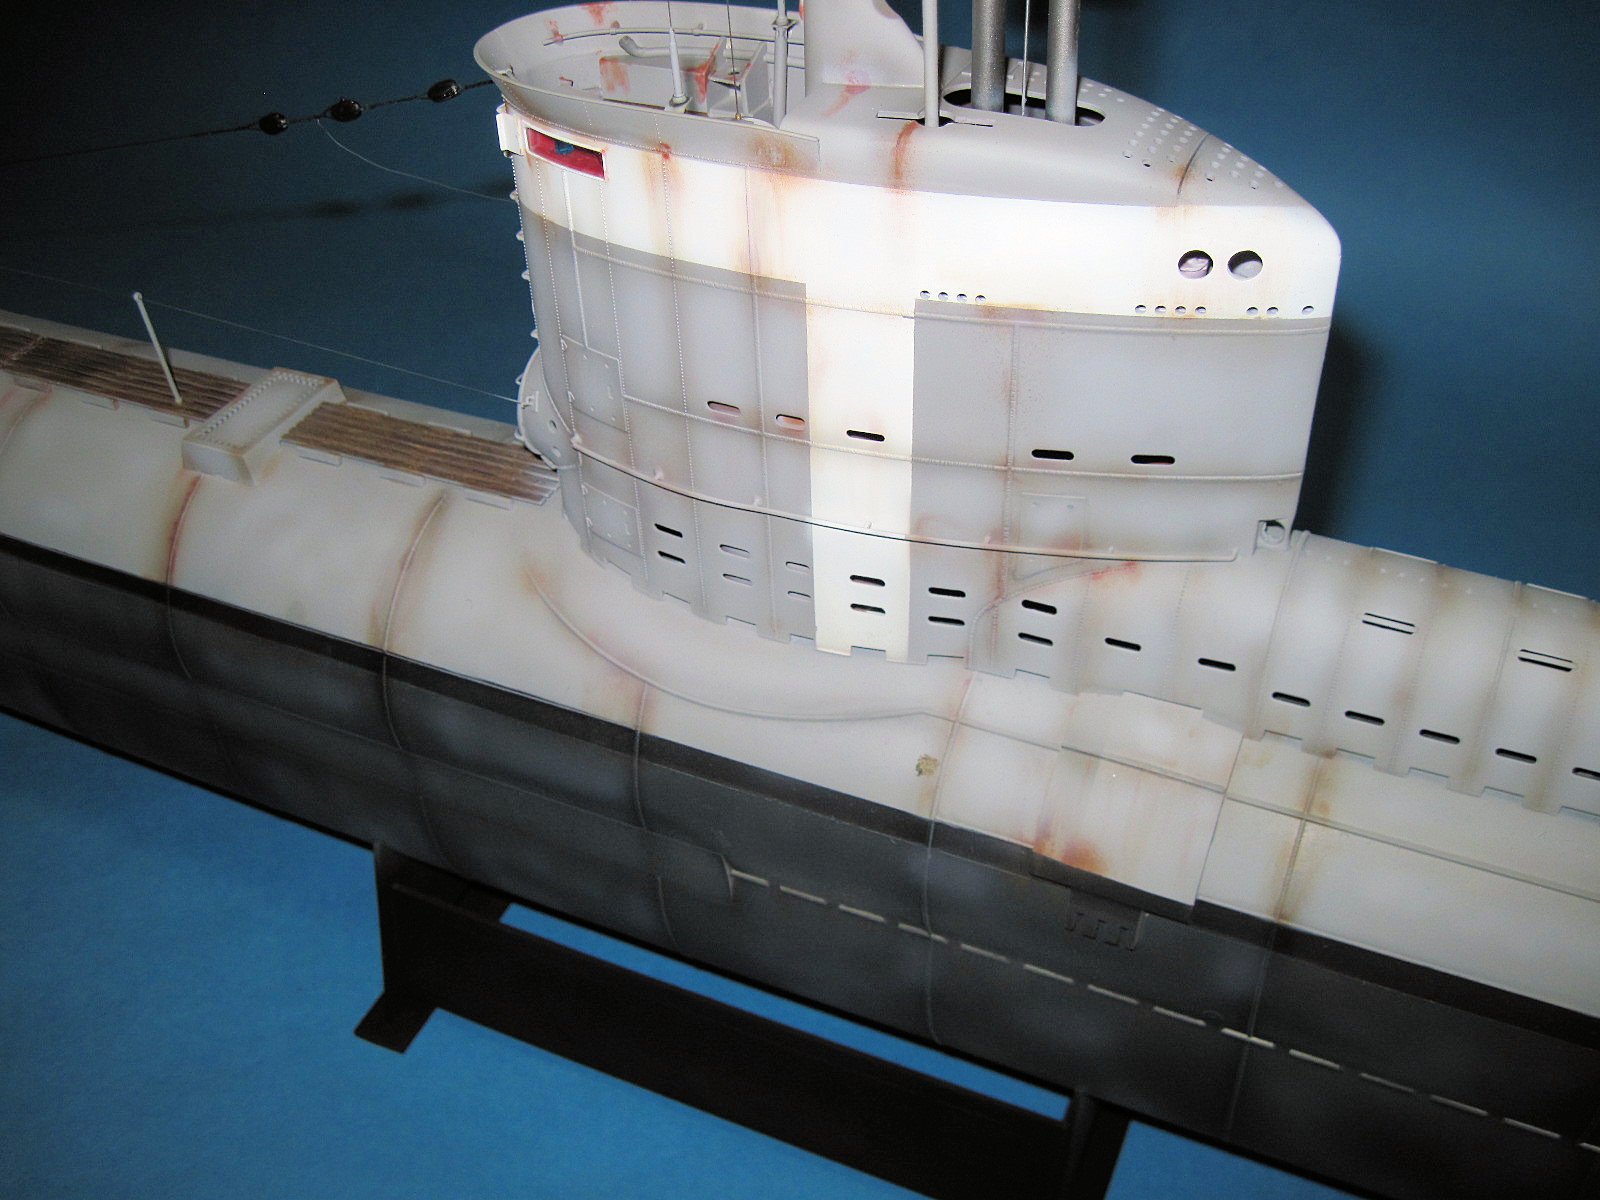
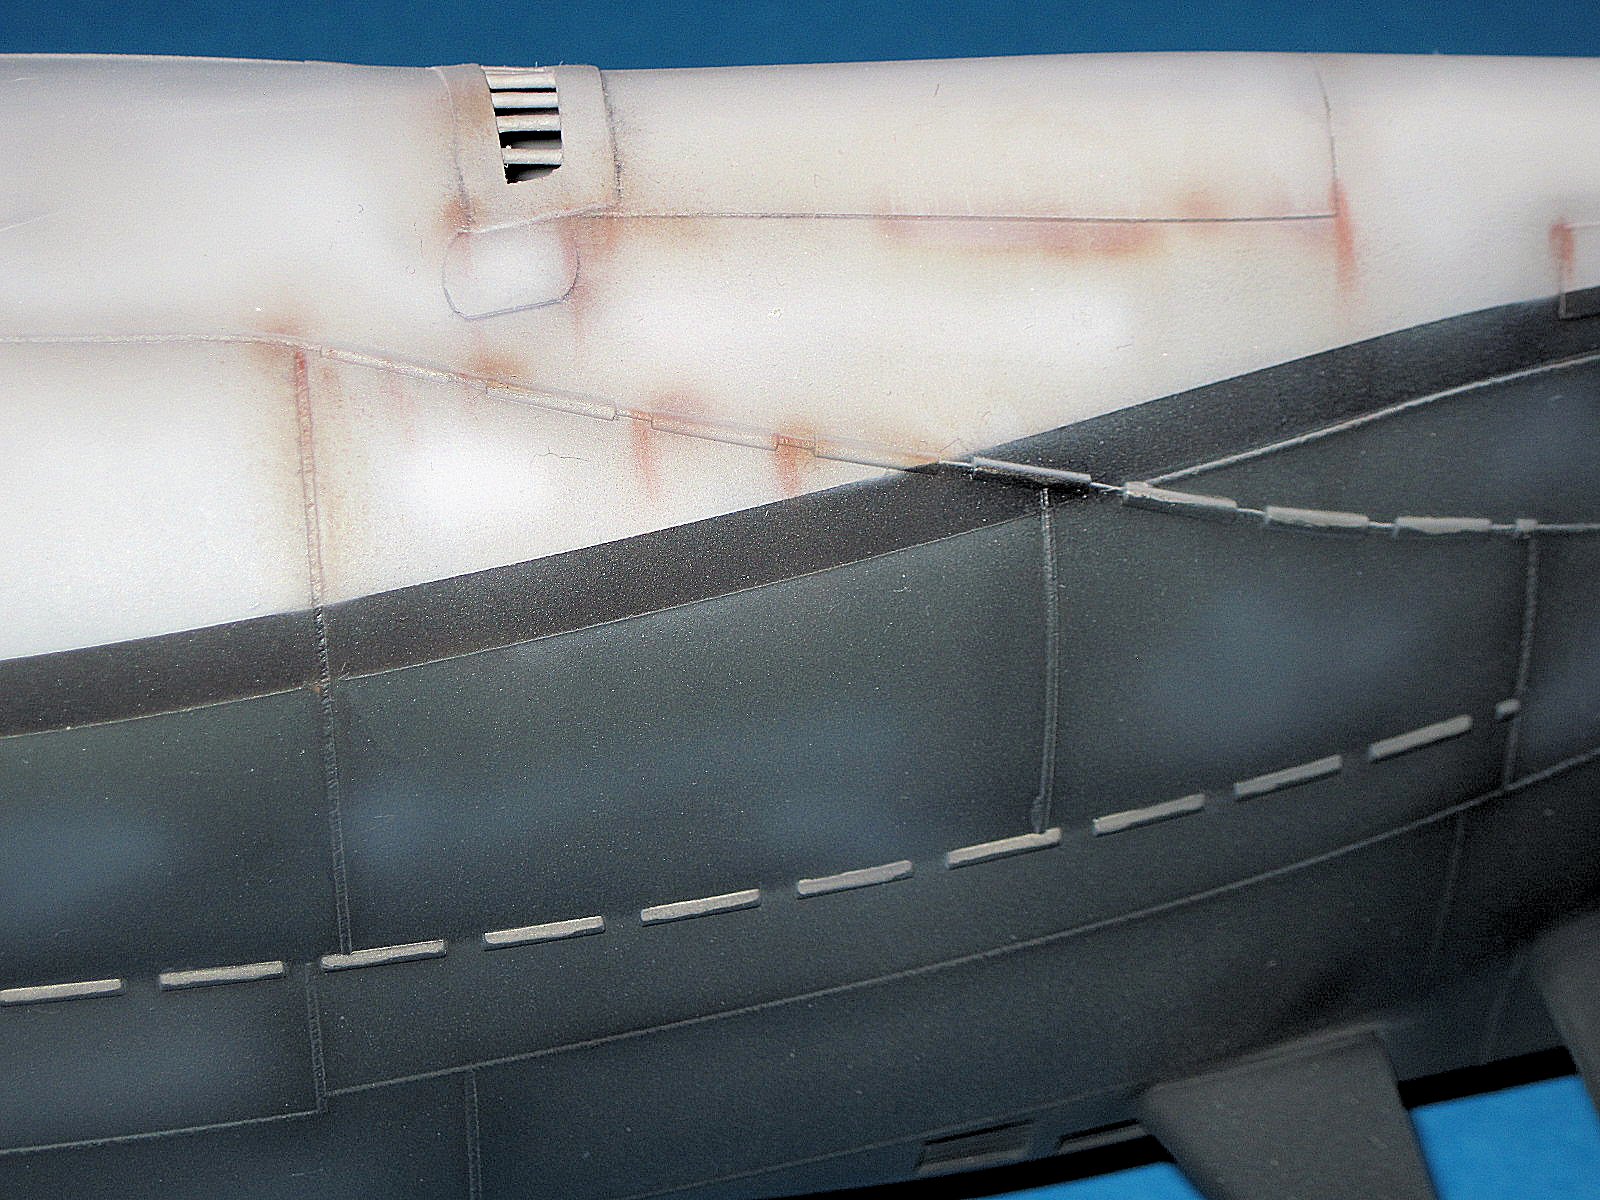
At this point, the hull needs it’s paint. The bottom was painted with White Ensign Model Schiffsbodenfarbe Grau 1. When that had dried, I masked the bottom off and sprayed black for the line between the top and bottom. This was masked and the top preshaded with black and then sprayed Hellgrau. This took a LOT of paint as the kit is huge. The entire ship was given a gloss coat and then the conning tower lines masked off and sprayed a very light gray, almost white but white was too stark. Everything was sealed again and weathering commenced.
I added black washes in selected areas along with transparent black to highlight panel lines. I took a slightly lightened version of the bottom color and highlighted panel lines. If you look at the rear of the sub, you’ll see what appears to be little blocks all in a row from the middle to the aft section and then up toward the top of the sub. These are the zinc blocks added to prevent rusting and were a dark silver color. There were hand painted Citadel Bolt Gun Metal. Once dry, I flat coated the entire sub and started with pastels. I used Mig pigments as well as others to get a dirty look and then over sprayed it with base color to get more natural. It turned out OK- still not super happy with it.
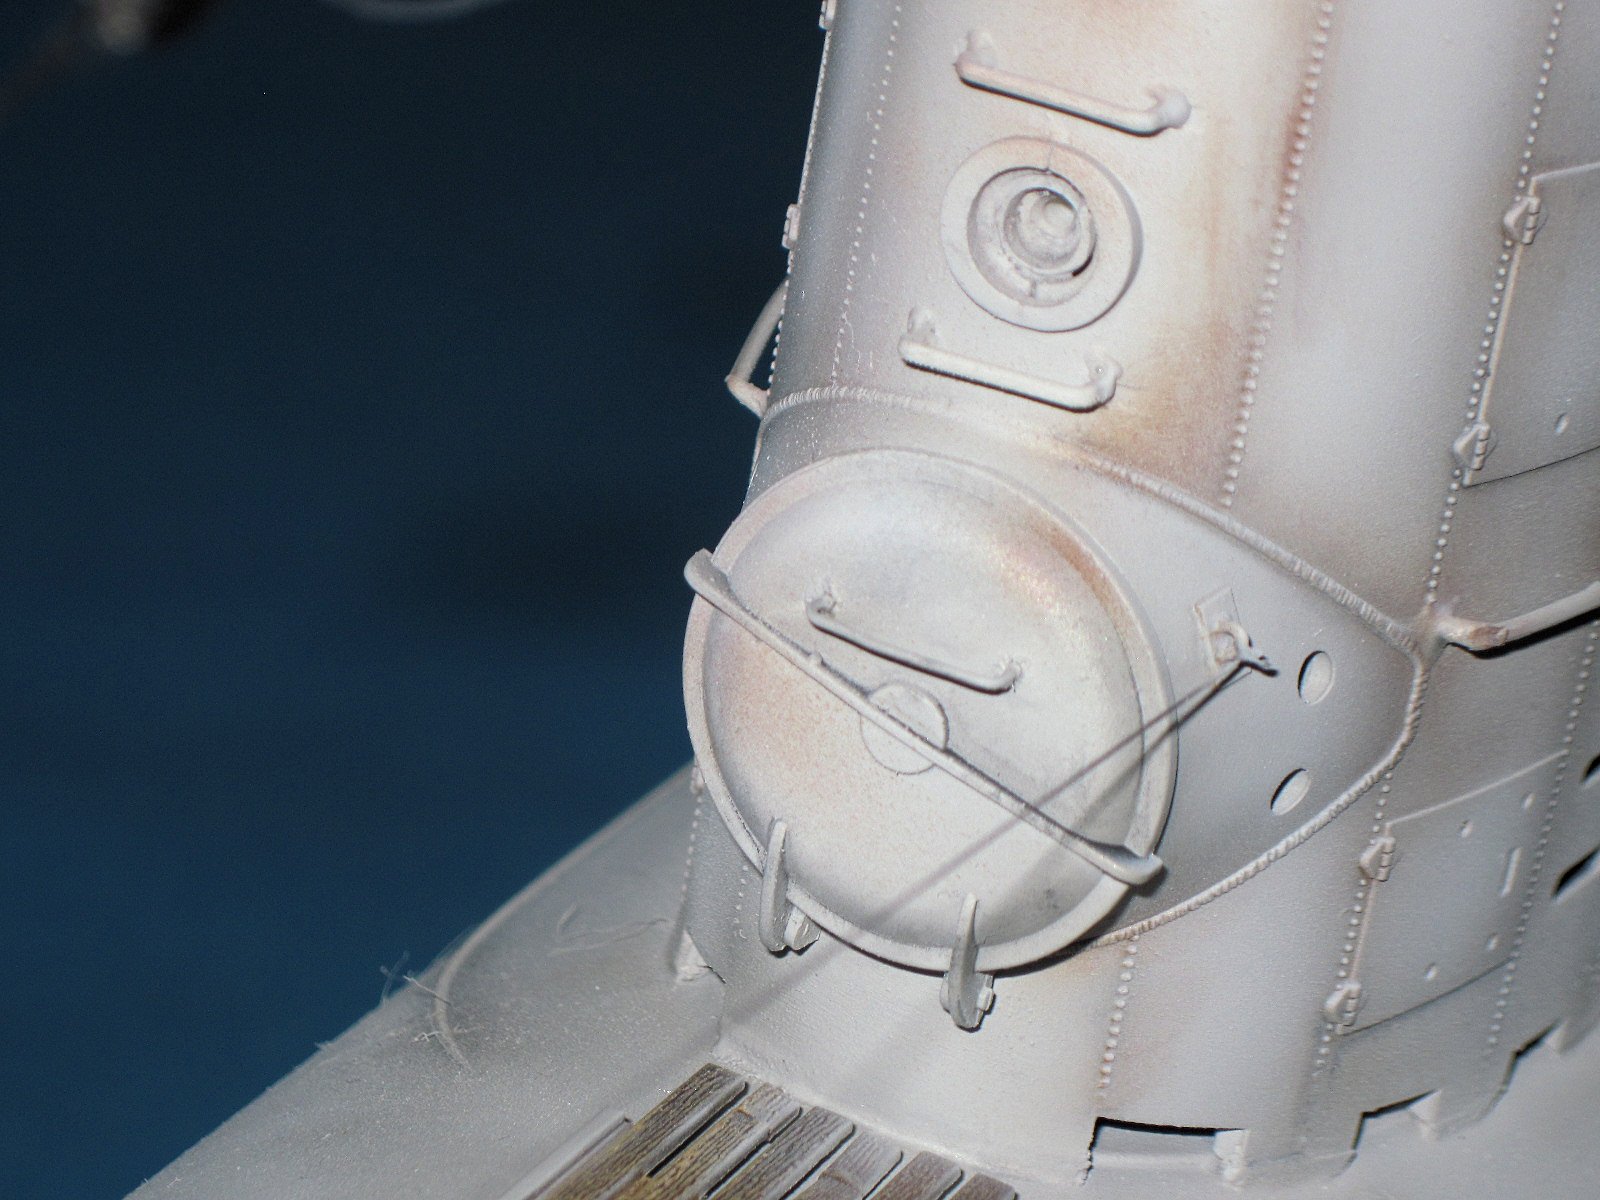
To finish it off, the Schnorkel was added and the antennae’s on the conning tower were added from fine wire. As I was about to finish, I noticed G Factor had come out with a brass prop and so I ordered it and added it to the back. The main hatch cover was modified to show the locking mechanism and internal hand wheel. Wire was wound around the bottom to represent the spring loaded nature of the hatch. I painted the wood walkways and mounts and weathered with black and brown and attached the planks. These were glued in place on the front of the sub.
The rigging was next. The kit instructions have you run a rope hand rail from the conning tower and a piece of string from the conning tower to the front. The railing is pretty straight forward except there are no termination points on either end. I added an anchor point on the conning tower for both lines out of plastic and wire. The actual pictures of the subs show 3 blocks at the top and three at the other end main antennae. I got parts from Bluejacket Shipcrafters and carefully added line and tied them off creating a harness. This was glued on, tightened, and looks like the real thing. Very last thing was to add the running lights. Please note the errata in the instructions regarding color. A small sheet with the correct info is the one to use. Another coat of flat and its done.
This started off as real cool build and I did very much enjoy it but I can say it took a year to complete with all the add-ons and the like. Out of the box, this is a very nice kit and I have even seen it turned to RC and dive able. It is also a superb pallet for the super detailer and it is BIG. Highly recommended to all sub fans everywhere.
My thanks to Bronco Models, Dragon Models USA and IPMS for the much appreciated opportunity to add this to the submarine case.


Comments
Add new comment
This site is protected by reCAPTCHA and the Google Privacy Policy and Terms of Service apply.
Similar Reviews