
German s.Sp. Artilleriewagen with Waffen Tank Crew (1944-1945)
Introduction
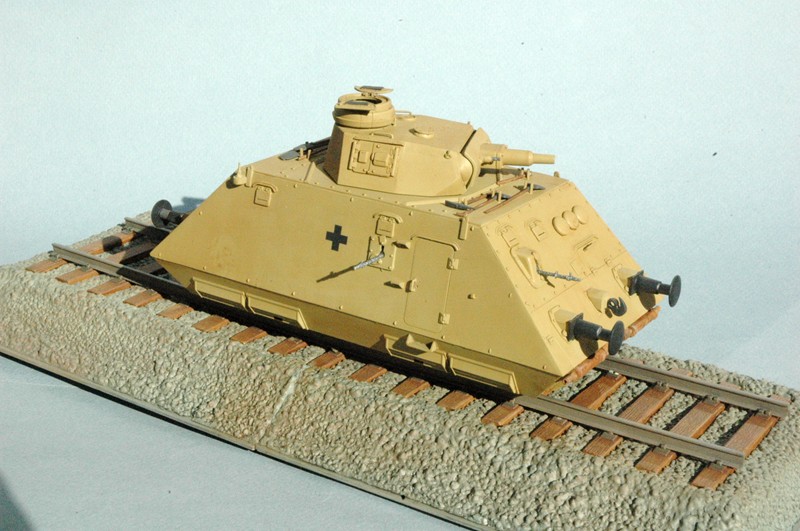
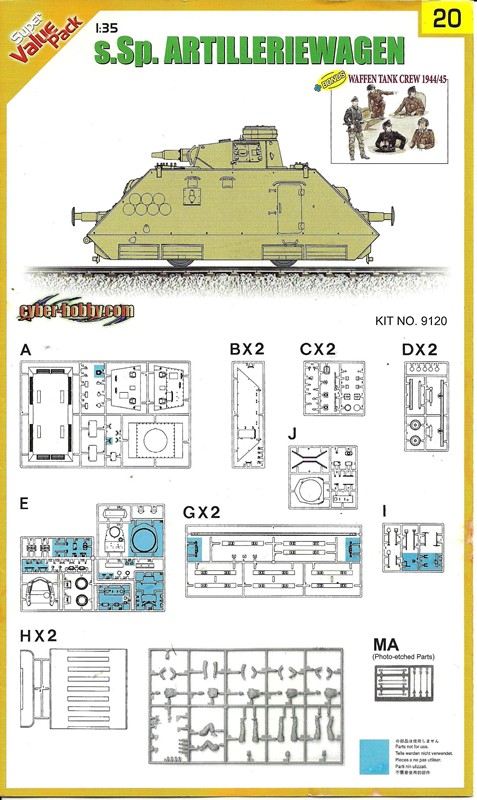
Cyber-Hobby.com has released another kit in their armored train series. This is a re-release of the heavy railcar which mounted a Panzer III Ausf. N. turret with the 7.5cm KwK L/24 gun. These heavy armored rail cars were introduced in 1944 and saw extensive service in Russia and Yugoslavia. After the war Czechoslovakia used them until the mid 1950’s. These rail cars were self propelled and could run independently; however, they were designed to be operated in trains of 20 cars or more. In actuality, due to fuel shortages, they often ran alone or in small numbers. The armored rail cars were built for the Deutsche Reichbahn by Steyer starting in May 1944 and were operational from November 1944 to April 1945. They weighed around 18 tons and had 20mm armor plate. They were powered by an air cooled 76 hp Steyer motor which was sorely underpowered and resulted in terrible gas mileage.
This armored car came in 2 basic forms, the Artilleriewagen (artillery car), the subject of this review, and a Kammandawagen (command car). There was also a flak version planned but that was never completed. In addition to the main gun the vehicle was also equipped with several machine guns for close in defense. The vehicle was also large enough to carry several infantry troops providing support in case of an attack by partisans.
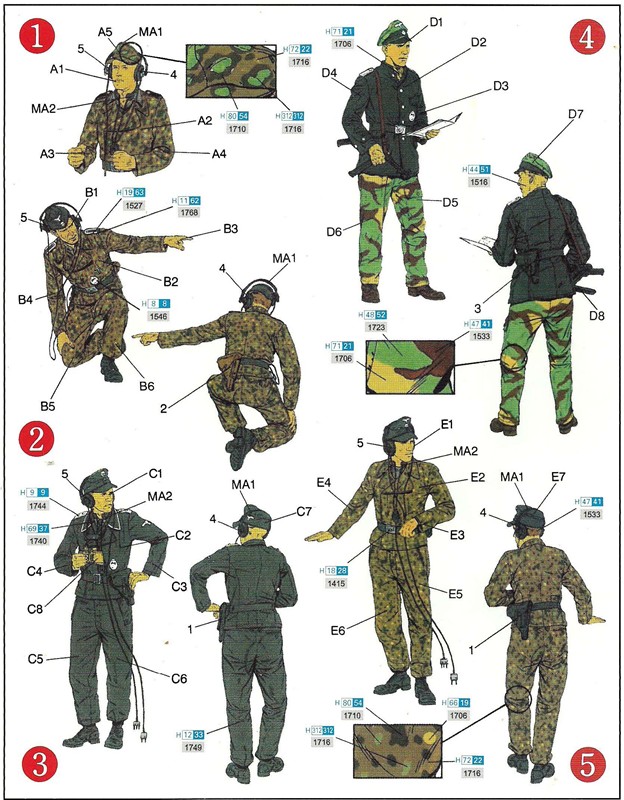
The model comes with the typical Orange Box instruction booklet that has 18 assembly steps, a four view profile and a color paint chart for the included figures. The finished model sits on the typical Dragon track section, which is designed to be attached with other track bed bases from Dragon’s previously released train cars. This is helpful if you want to build an armored train with more than one car. The base includes the bolted rail connectors to complete the detail when connecting more than one section of track bed together. In the typical Orange Box tradition the kit also includes a bonus Dragon figure set. This figure set is the Waffen Tank Crew (1944-1945) and will allow the modeler to pose appropriate figures with the finished armored rail car.
Construction
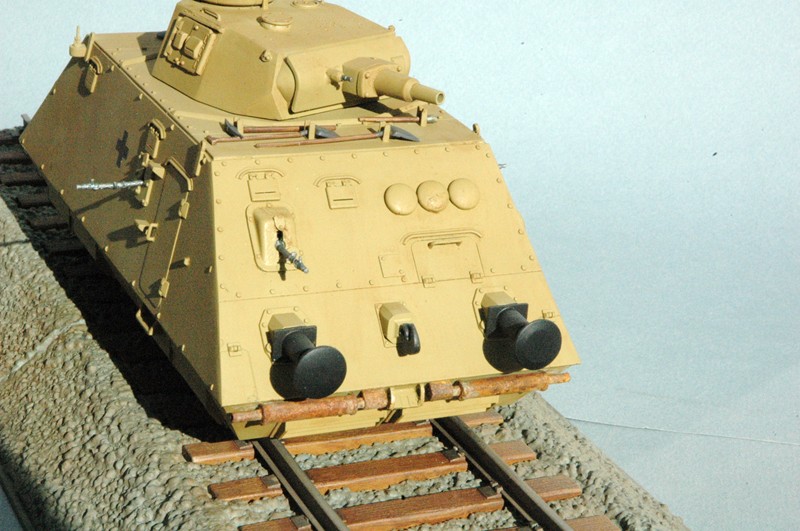
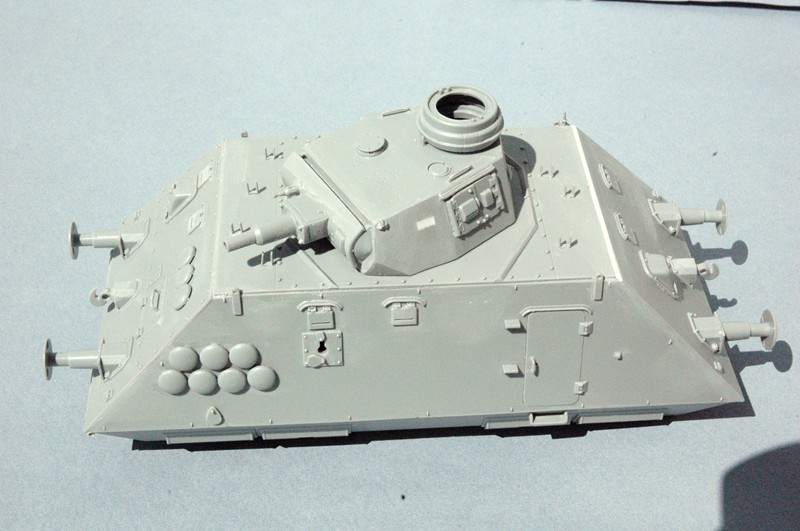
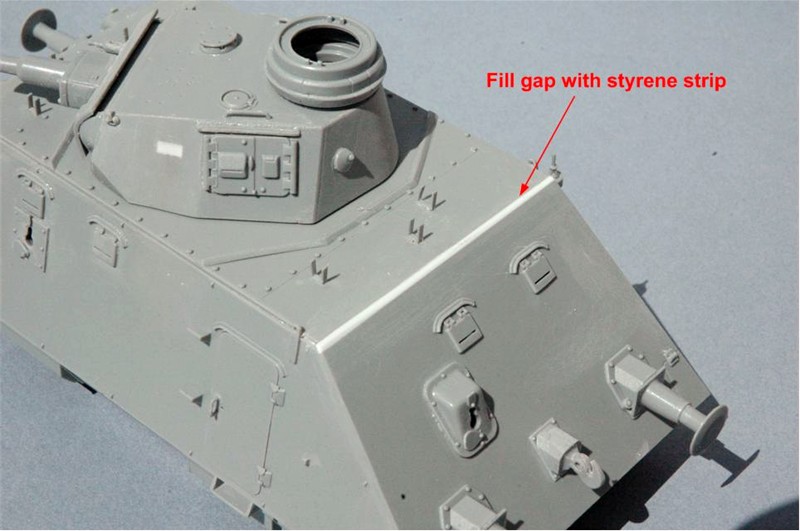
Construction begins with the lower hull. The upper hull consists of the front and rear glacis plates and identical side walls. The side wall will need to be prepared before assembly to the front and rear glacis. The side walls and roof plate will need to have the correct locating holes drilled out as well as the view ports, which are different for each side. The side walls, (part B1) have the correct holes for each side marked. Use care when opening them up as the view ports and mounting holes will be different for each side. All view ports and hatches are separate pieces and can be posed in the open position if wanted. Once the side walls and roof plate are prepared assembly of the upper hull can commence. Use care when joining these parts being sure to have everything square. I had a small gap when placing the roof plate on the upper hull. I chose to place the roof plate all the way forward and had a resulting gap at the back edge. I filled this with a .030” styrene strip and that worked perfectly. After completing the upper hull I joined it to the lower hull and the fit was perfect.
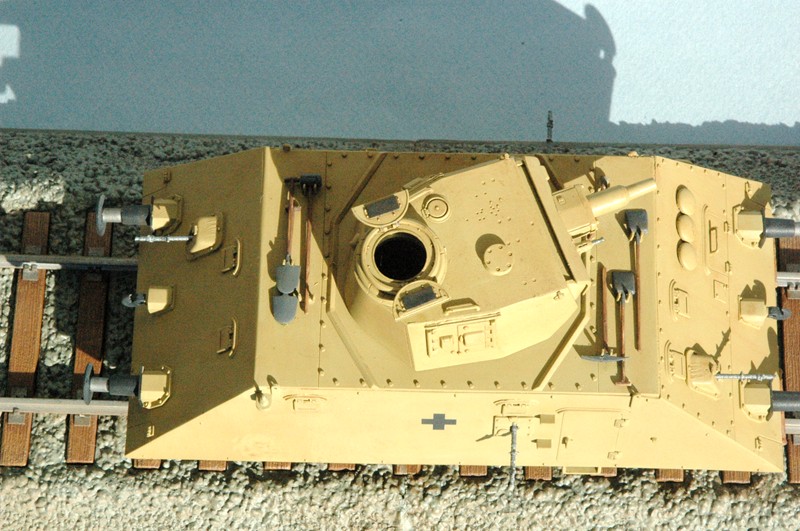
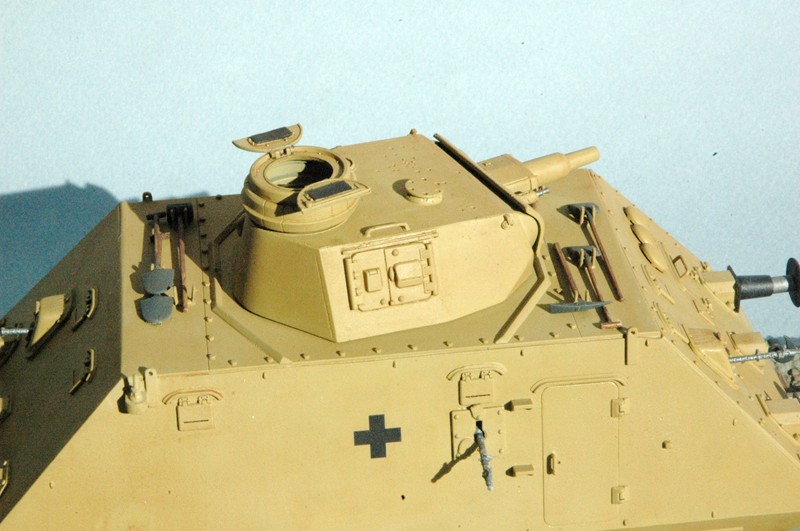
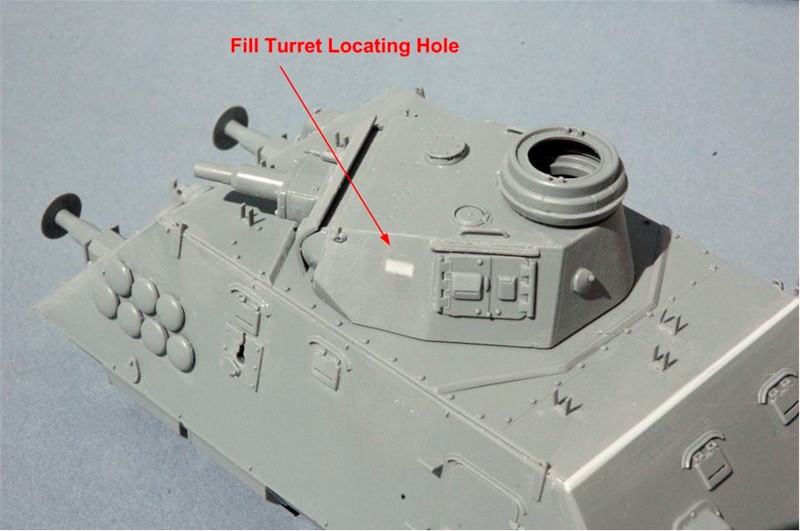
Moving on to the turret, construction begins with joining the turret bottom, roof and front plate to the turret. Unfortunately this turret is not from one of Dragon’s recent releases and as such suffers with a lack of detail seen on their latest releases. The main gun does not include a breech nor is a turret basket included. The turrets side hatches cannot be opened, however the tank commander’s cupola hatch can be posed open. The side of the turret has a large locating slot for a front viewport, which is not seen on this variant. That will need to be filled. I used a styrene strip .040” x .188”. This fit perfectly and once it was dry I was able to sand it flush to the turret sides.
The pioneer tools are mounted on the rail car roof and they do not have the typical German tool clamps, but rather just brackets to place the tools in. This model albeit simple in construction offers the modeler a good base to super detail the kit. In my research for this vehicle I was able to find different web sites with enough information to speculate how the interior was laid out. This includes schematics for the driver’s controls and a basic interior layout. As mentioned the turret will need to have a basket added as well as a breech for the main gun. Situated around the perimeter of the sides of the rail car are small bumps. These are actually small rings on the real vehicle. I suppose they were used to attach camouflage when needed. These could be removed and replaced with small wire rings to add realism and accuracy.
Finishing
I painted my model in overall dark yellow and added the black crosses. There are no other markings used. I washed the entire model with a burnt umber oil wash and will add some streaks and dry brushing to finish it off.


Comments
Add new comment
This site is protected by reCAPTCHA and the Google Privacy Policy and Terms of Service apply.
Similar Reviews