
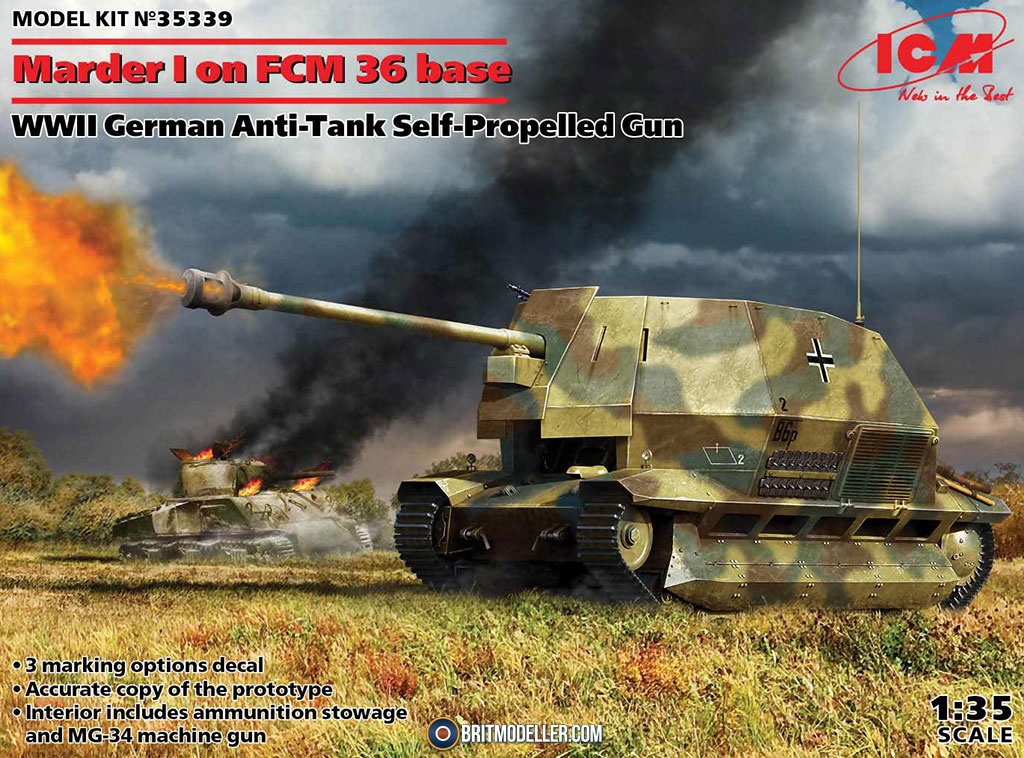
German Marder I on an FCM 36 Base
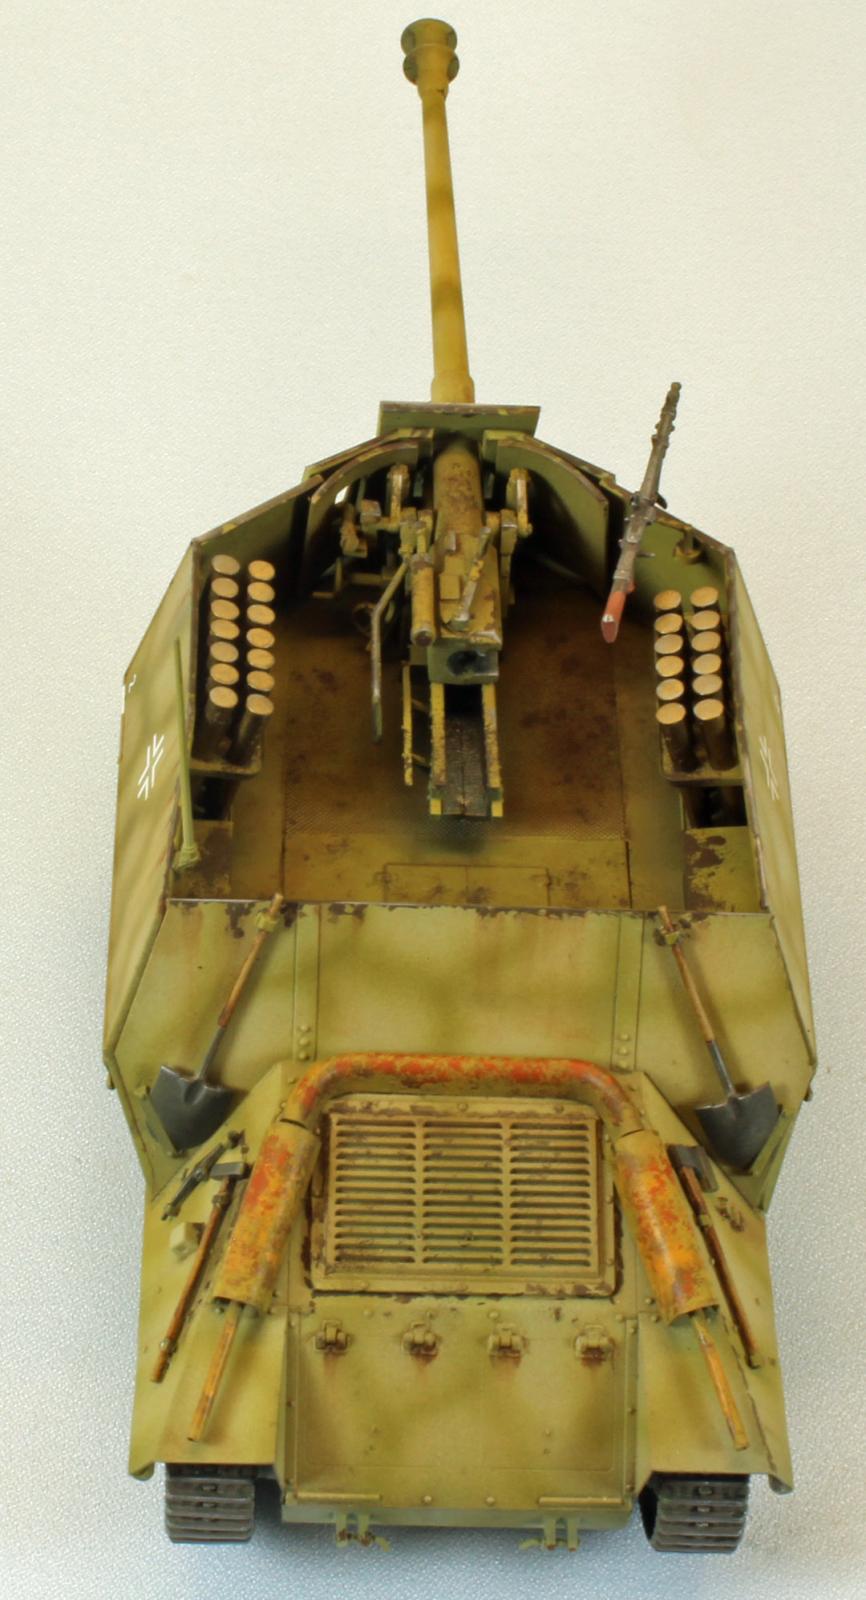
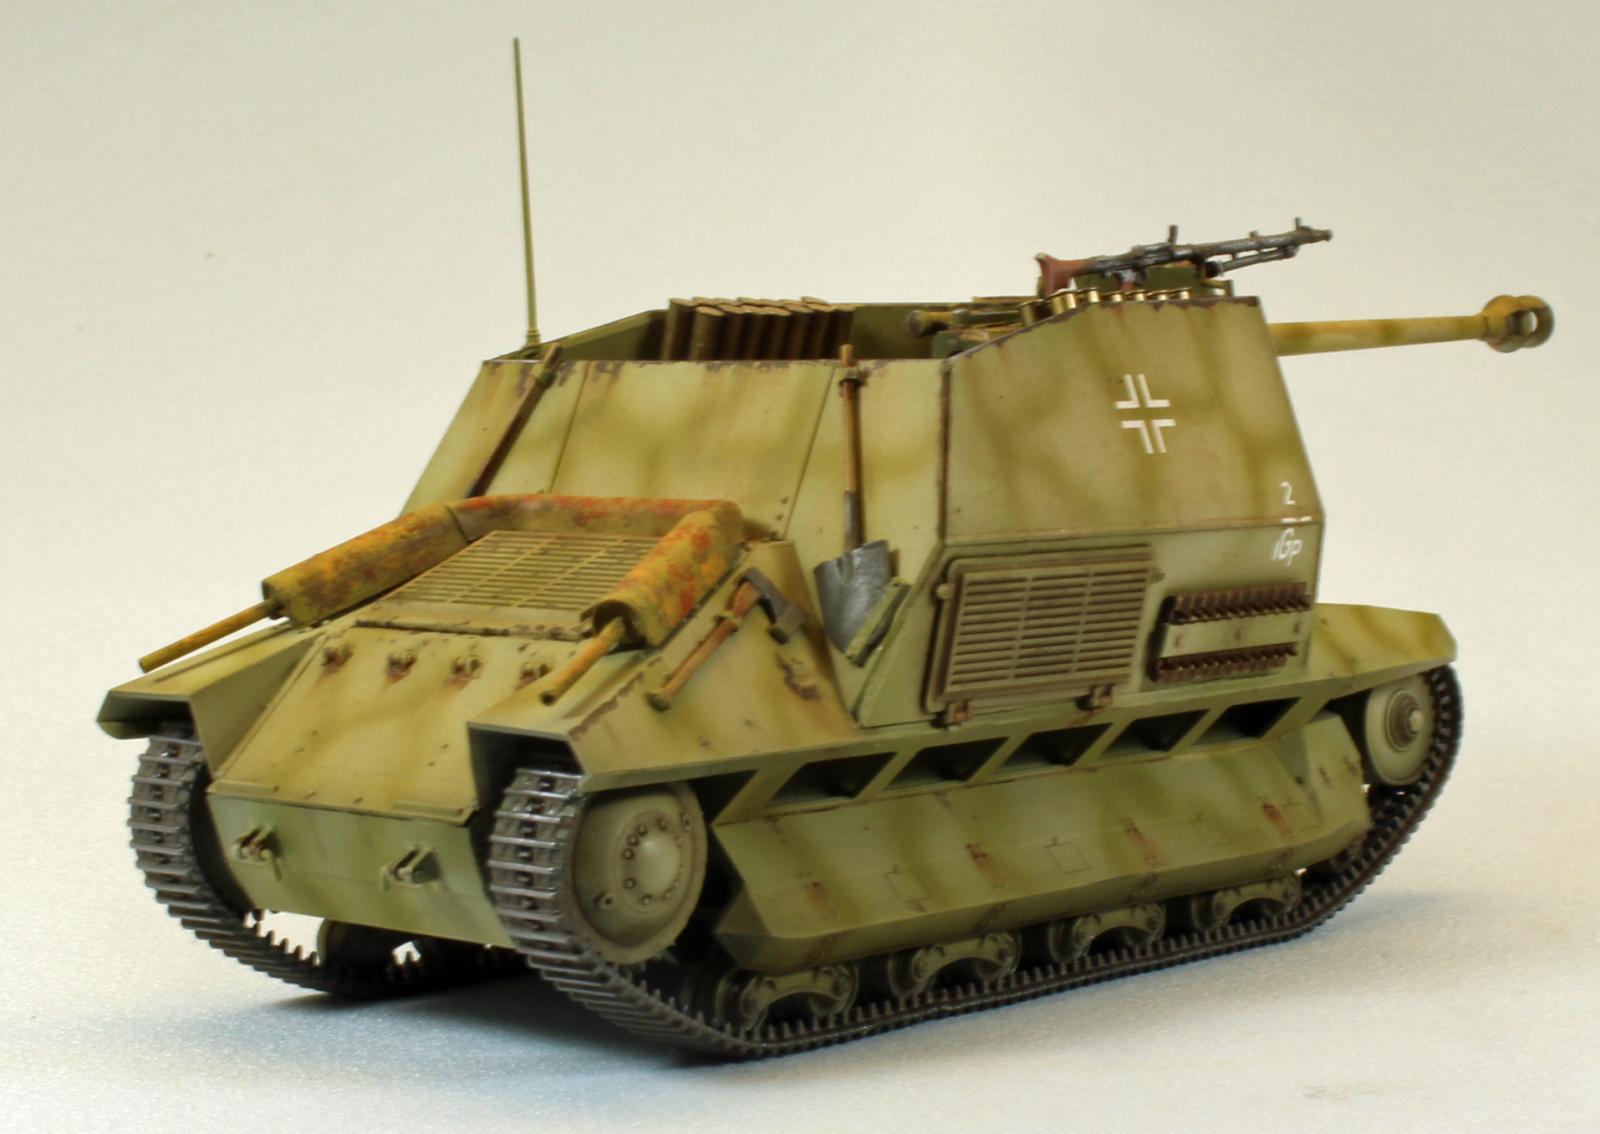
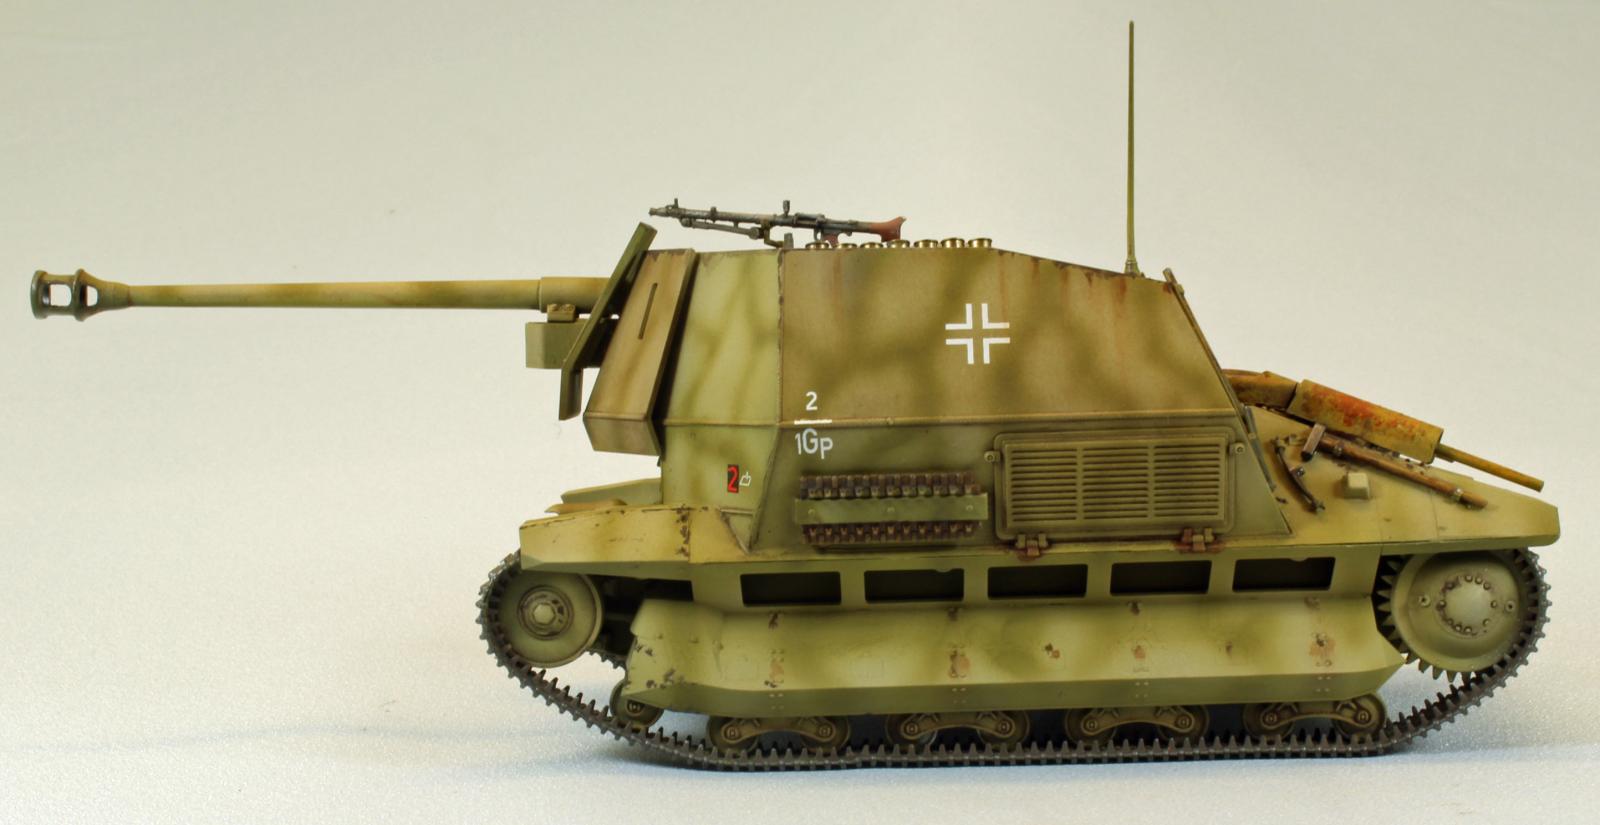
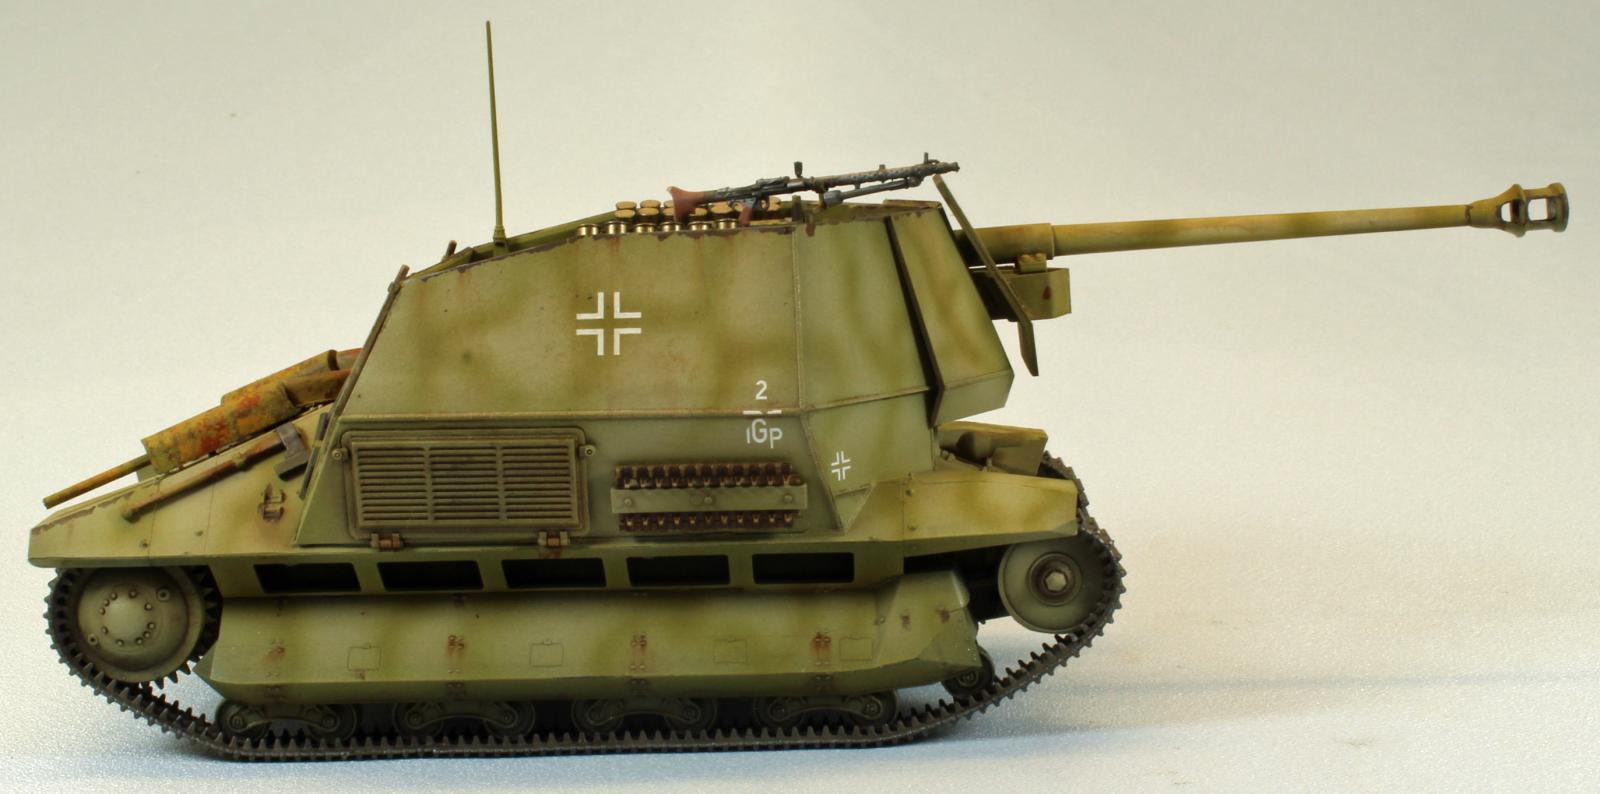
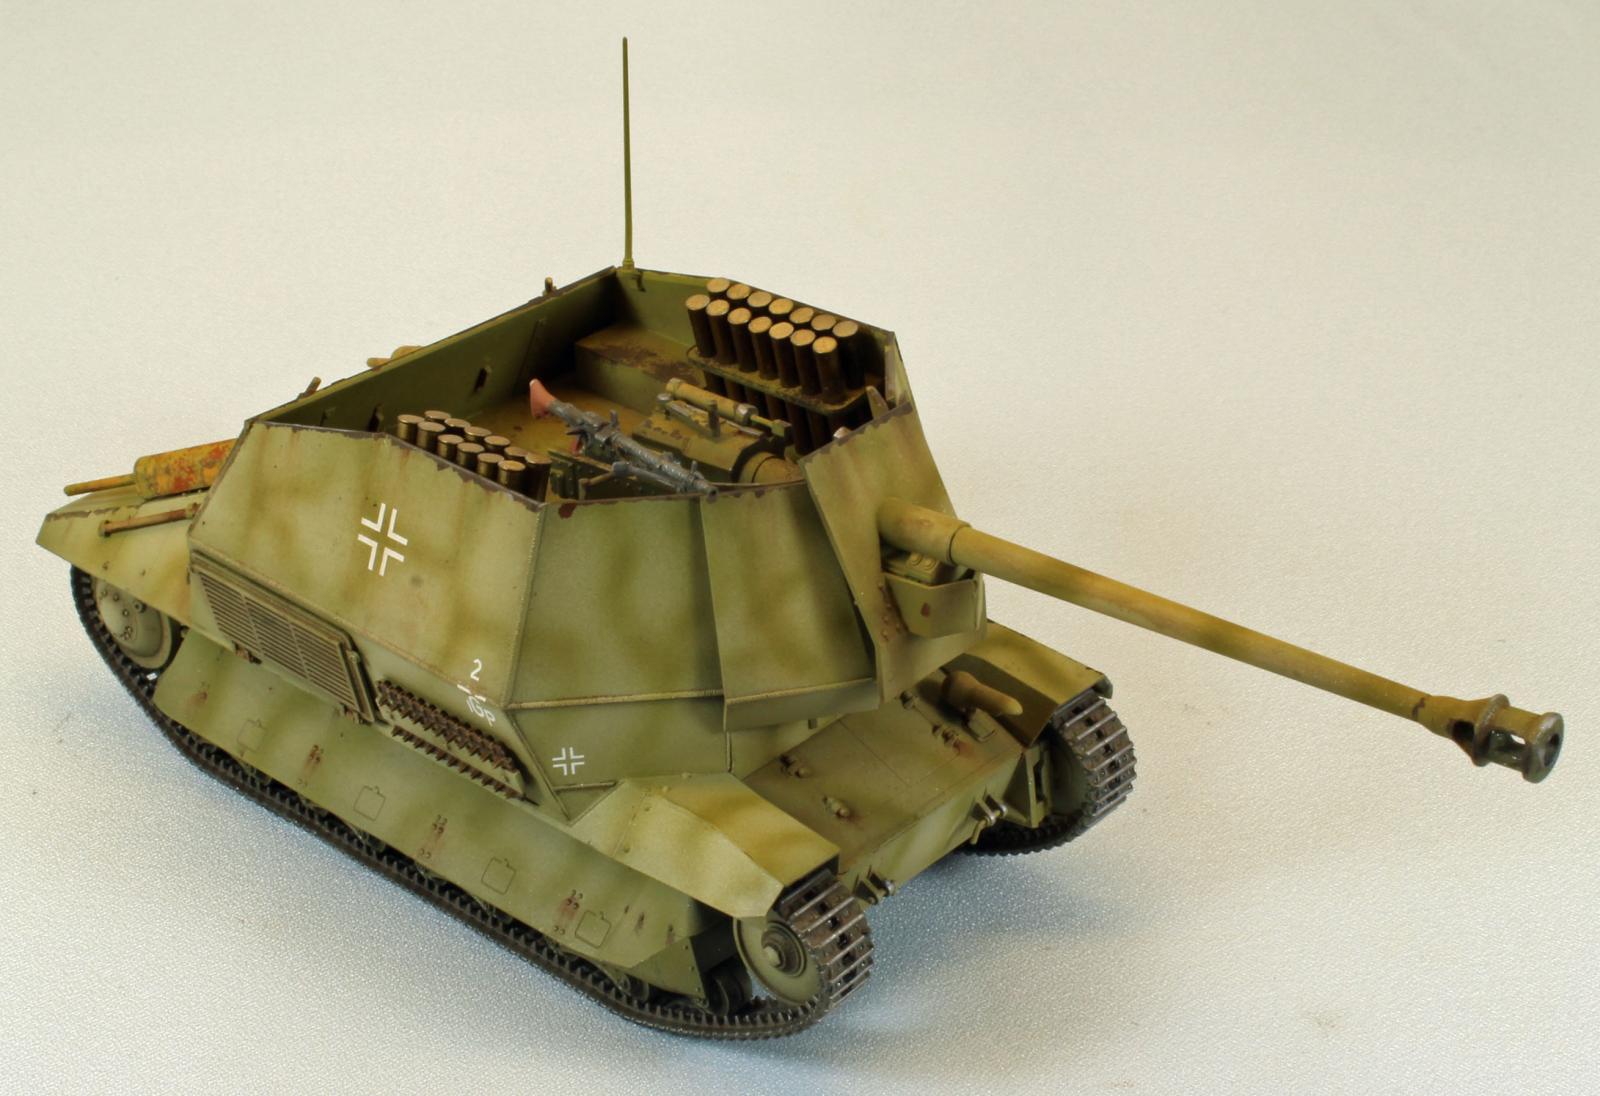
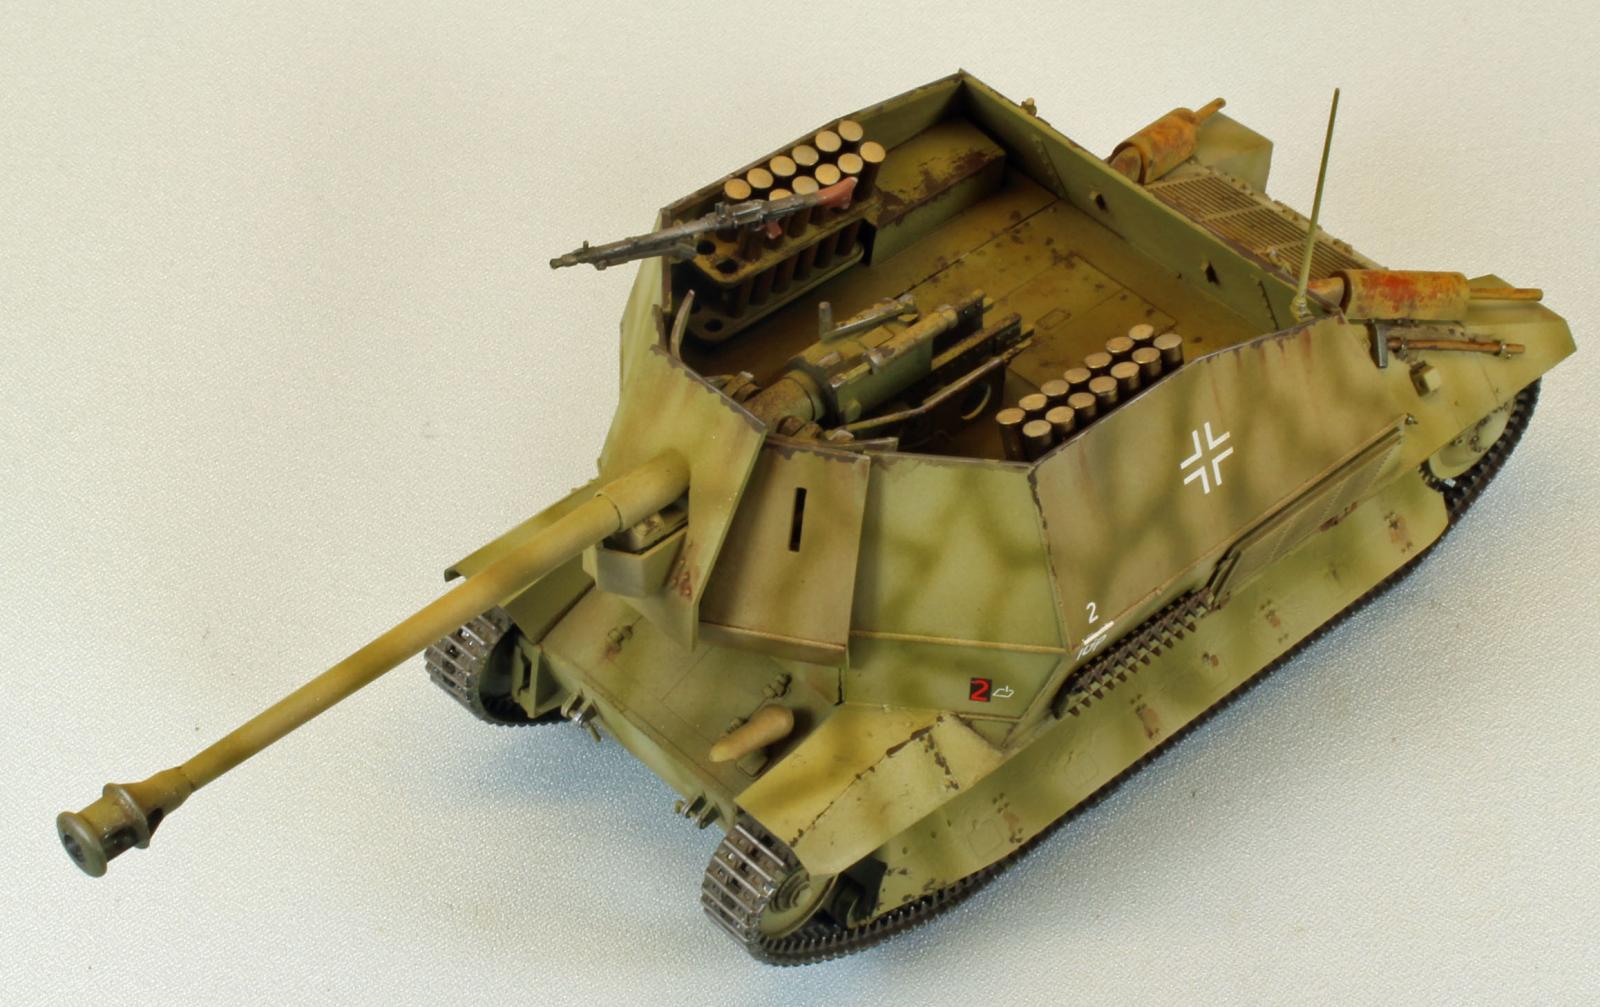
Prolific ICM is back again with another new offering – this time it is in the form of a re-purposed, French FCM 36-based Tank Destroyer, designated the Marder I. This diminutive vehicle is actually (physically) larger than its other ‘Marder I’-designated cousins, the Lorraine and Hotchkiss-based vehicles. ICM’s kit sports a single piece barrel with a two-part muzzle brake and poly/nylon track that comes in four pieces. A nice, three-piece exhaust is rendered at the rear, and enough 75mm plastic rounds are included to fill two ammunition racks in the fighting compartment.
ICM is not only producing a lot of new kits these days, but they have also introduced a line of acrylic paints, a few of which were used in this build. A separate IPMS review of these paints can be found here.
History
The German Marder (or ‘Marten’) is the name given to a variety of diminutive, open-topped AFV’s armed with native or captured guns to fill in the gaps between under-gunned main battle tanks, such as the PzKpfw II, and the enemy tanks the Wehrmacht were encountering in the field, such as the T-34 and KV-1.
What was needed was a more powerful anti-tank gun that was mobile. The Germans had experience in taking the chassis of an under-gunned tank to provide mobility for a heavier weapon. These vehicles provided mobility to either the captured Soviet 7.62 cm Pak 36(r) gun or in later versions the German 75 mm PaK 40 anti-tank gun. Due to the weight and space constraints of the small chassis, the Marder series were not fully armored. Thin upper armor protection was provided only for the front and sides against shrapnel and small arms only. All Marder series had open tops. Some were issued with canvas covers to protect the crew from the elements. Between July and August 1942, 170 Marder Is were built on the Lorraine chassis. Later, several other French and Polish tanks were used as the conversion base for the Marder I, including the Hotchkiss H39 and FCM 36.
The Marder Is initially served in infantry divisions on the Eastern Front and met with good success. They later made up a significant component of the armored fighting vehicles of the reformed 21st Panzer Division in Normandy. The Germans captured 37 FCM 36s, rebuilding 10 of them in 1943 as Marder I tank destroyers, with the 75 mm PaK 40 anti-tank gun and officially called 7.5cm PaK40(Sf) auf Geschützwagen FCM(f). These were employed by 21st Panzer Division in the Battle of Normandy, in 1944.
One FCM 36 survives at the Musée des Blindés at Saumur. It has been restored to running condition.
The Kit
As far as I know, this is the only injected styrene kit of this particular vehicle, although ICM produces and sells the FCM 36 French Tank separately. As with all of their offerings, the kit is shipped in a sturdy, white ‘locking’ clamshell box with a standard model box top over it.
The overall impression is one of sturdiness. Since the kit is not shrink-wrapped, the double layering helps to ensure that nothing will be lost in transit. Once open, all parts are bagged for protection, with the decals slipped inside the instruction booklet. The four pieces of track connect together to produce two runs, with plastic sections for use as spare track. The single-piece barrel has a flash suppressor split vertically into two pieces. The plastic is soft but not too soft, and the molding is excellent with no noticeable flash or sink marks. The detail is crisp, and the number of attachment points and nodes are located in areas that are easily addressed. While many of the parts are very delicate, ICM pulls off the design without resorting to using photo-etch.
The contents of the box include:
- Seven sprues of parts molded in light-grey plastic
- 1 small-sized decal sheet
- 4 sections of track consisting of a poly/nylon material, packaged flat, in a separate bag.
- 1 20-page, full-size color instruction booklet, including a parts map and three five-view color painting and decal guide. All text and label information are translated into English.
- Markings provided are for three vehicles, all WWII German Wehrmacht.
The Instructions
The instruction booklet is excellent. Printed in color on high-quality, satin-finish paper, it starts off with a short history and vehicle specifications, color reference information, contact information, and an excellent parts map with unused parts clearly identified. What follows is a two-color set of instructions broken into 62 well-illustrated, small steps. Images are rendered from several angles so you are never forced to guess about how things go on ‘the other side’. The last two pages show three, full-color multi-views of camouflage schemes representing the following units:
- 931st Assault Gun Division, 2nd Battery France 1943 (Summer, Tri-color)
- Training Camp, Mobile Brigade ‘West’, Summer 1943 (Summer, Tri-color)
- Mobile Brigade ‘West’, 2nd Battery, Maneuvers, Spring 1943 (Overall German Yellow)
Clearly ICM has invested heavily in making an excellent set of instructions, and the quality shows through. Well done.
What to Consider Before You Start
While the kit has an open top, the interior area is accessible enough to (not) require any interim painting – I finished the entire kit before touching my airbrush, following the steps as presented by ICM.
As usual with ICM’s latest kits, everything fits very well - which brings to mind a phrase I normally reserve only for Tamiya kits: ‘if it doesn’t fit, you have likely done something wrong’.
The Build
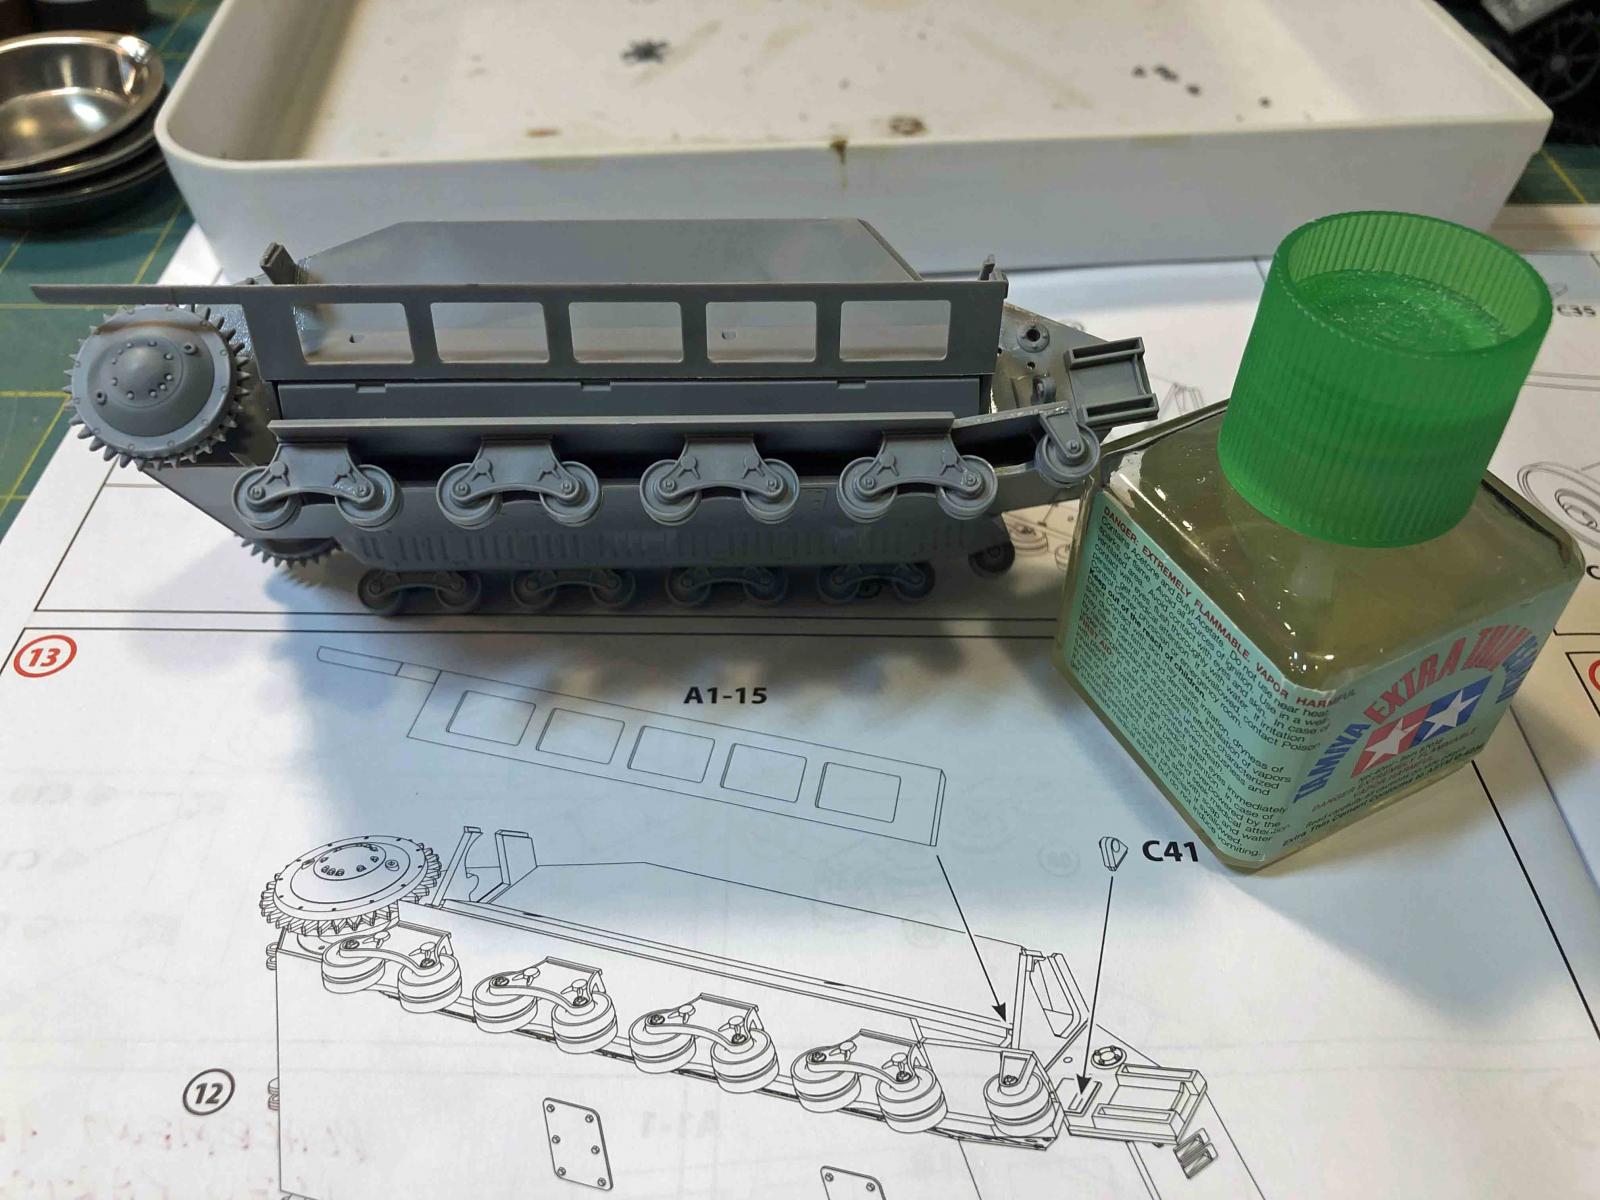
Assembly starts with the lower chassis, which is quite detailed and built in layers. In Step 2, parts C41 (on both sides) should be placed with the dimples orientated outwards, towards the front of the tank. These dimples will receive Parts C23 in Step C13.
In Steps 10 and 13, Parts A1-1 and A1-15 are attached. From the images it is hard to figure out how exactly these parts are placed. I used parts A1-7 (Step 14) and C-40 (Step 17) to help understand how things worked. In the end, while unusual, the design fits perfectly.
The three-part exhaust system comes together in Step 29. I hollowed out the ends of the two exhaust pipes and attached them at the very end after painting and weathering, since this area is completely accessible.
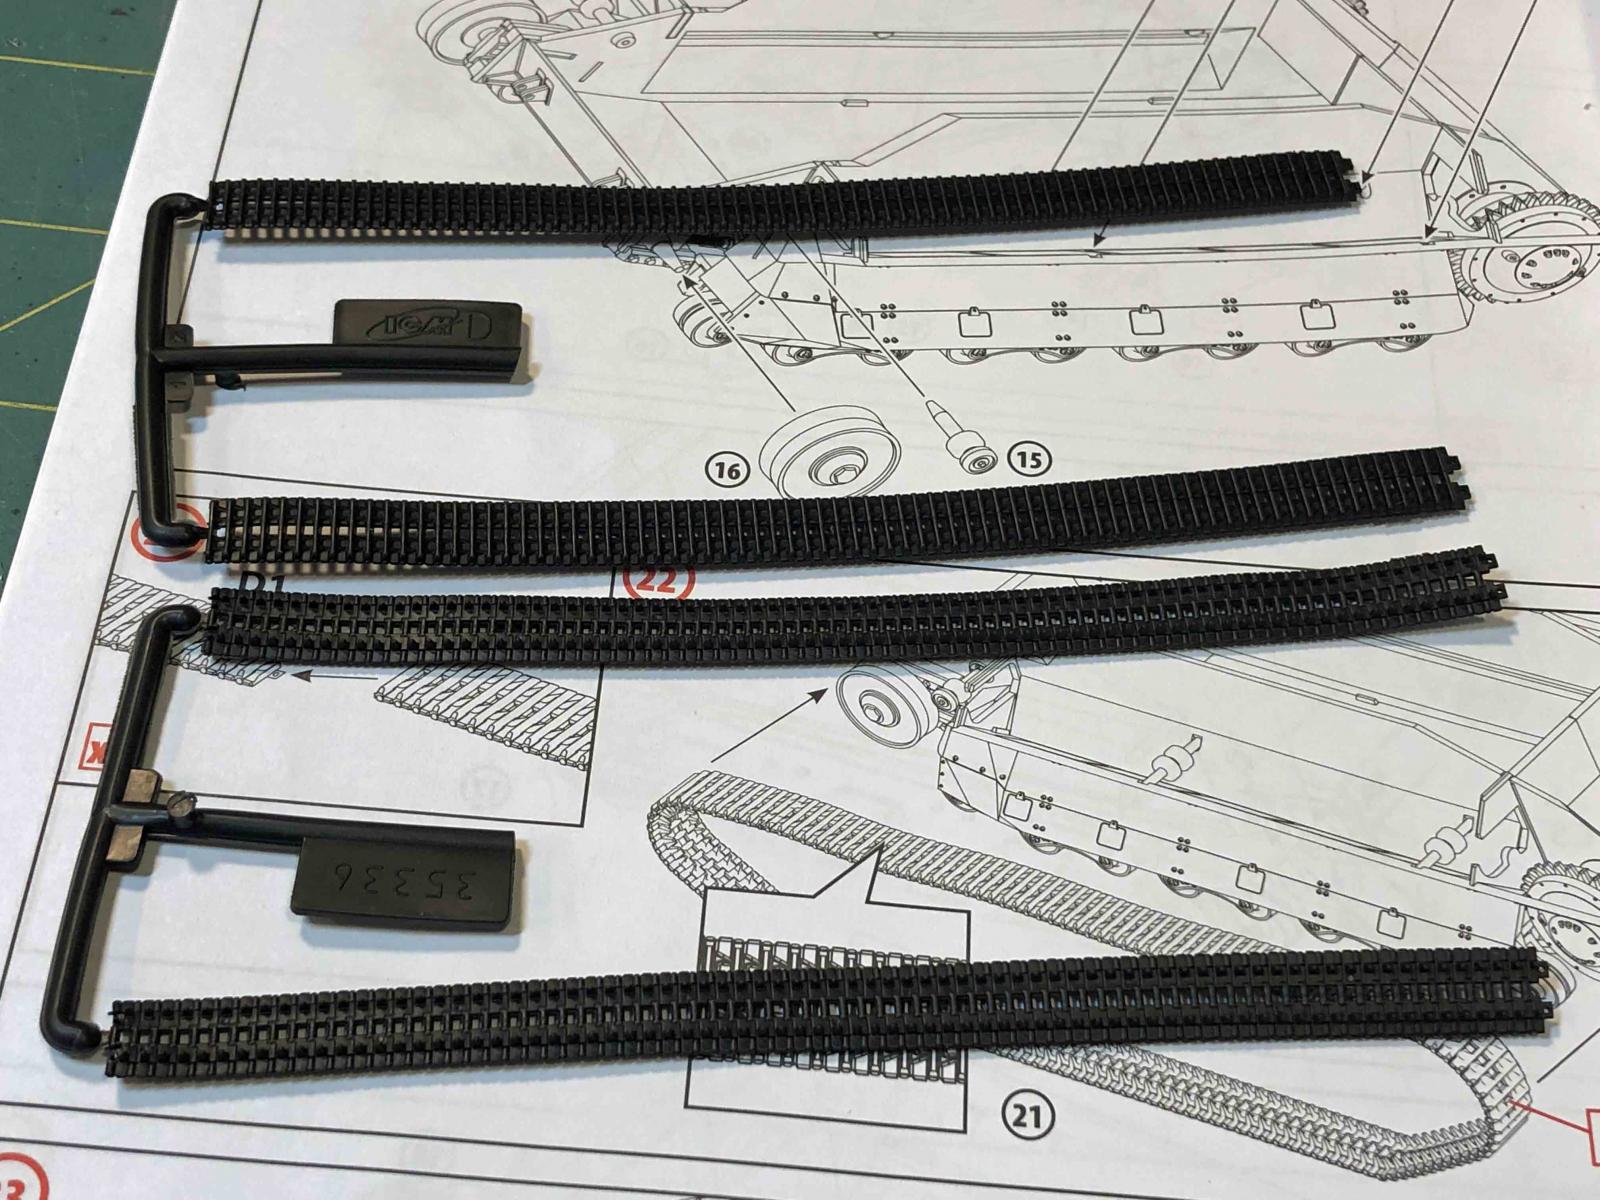
Track
I was a circumspect about the track when I first saw it. I understand that for a vehicle of this small size, the track would be problematic, regardless of how ICM chose to represent it. Thankfully, the four small pieces of poly/nylon material were packaged in such a way as to prevent kinks and/or bends – all four pieces arrived flat and straight as an arrow.
Only two tiny (male) prongs connect to their (female) counterparts to attach the pieces, however, and stretching these around the sprockets and running gear was concerning.
I tried Tamiya’s ‘Green Top’ cement to no avail; in fact, the track did not respond to any solvent-based adhesive. As a last-ditch effort before resorting to staples, I tried using extra-thin CA glue, and to my complete surprise, the track held. Furthermore, when it came time to attach the track, I found that it contains just enough elasticity to stretch around the various parts without taxing the connections too much. I don’t know what kind of material this is, but I didn’t expect CA glue to work, and I didn’t expect it to fit so well into where it goes. My hat is off to ICM – good job. Needless to say, I won’t use any distillate-based products for paint and weathering these track runs; I don’t want to jinx anything! In the end, I just spot-painted what was visible using Vallejo Panzer Aces 304 Track Primer, and carefully detailed it using Uschi Chrome powder.
And that’s it. Everything else attached as expected, in the order given by ICM in the instructions. This is how model building is supposed to be!
Painting, Decals and Finish
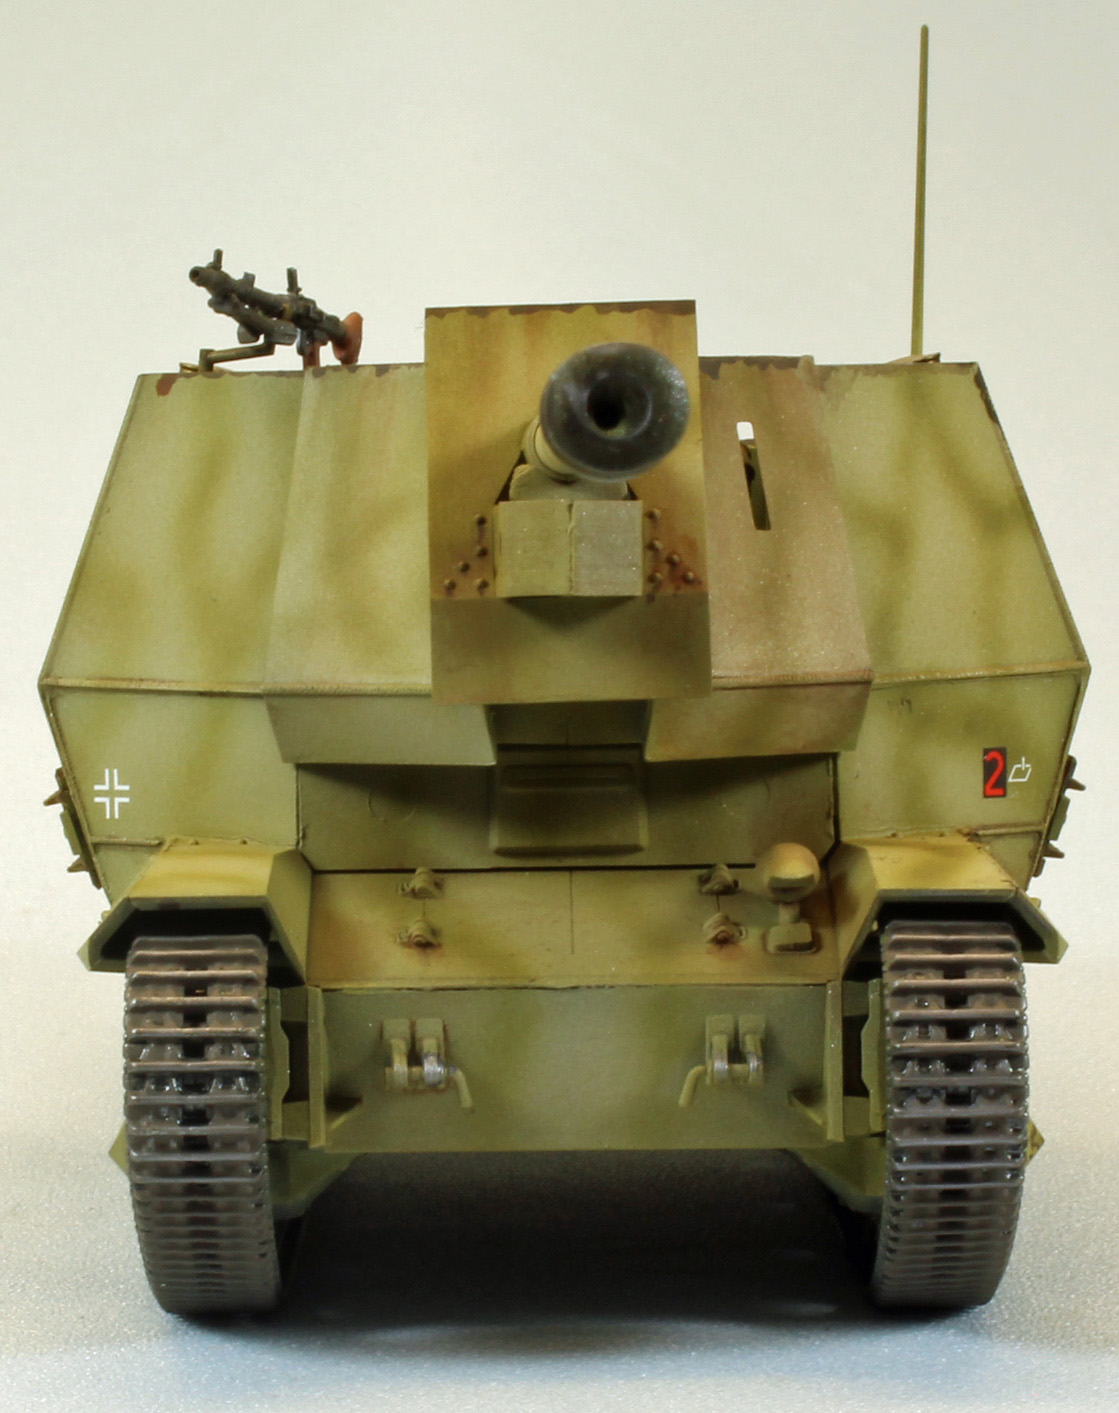
Since I wanted to review a set of paint released by ICM specifically for this kit, I decided to paint my Marder I the scheme presented on page 19 of the instructions – (“Training camp of the mobile brigade “West”, summer 1943’). At least that was the plan. The scheme sports a hard-edge demarcation line (in saddle brown) between a base coat of middle stone and camouflage green. After my initial run at it, however, I found that I wasn’t as good with a brush as I thought I was. In the end, I ended up with a hybrid finish that backed off the original plan by a few steps. The journey, however, allowed me to put the paint through its paces, which is all I wanted to achieve.
Before painting, I made a sticky board of all the parts that were finished separately. These included the pioneer tools, the MG34 machine gun, exhaust system, and the 75mm rounds.
I started by applying a coat of Alclad II Lacquer Black Primer Microfiller Primer for my dark, primer/pre-shade coat. I needed to use something, and a primer was not included in the paint set. Having issues with acrylic primers in the past, I felt I would go with the tried-and-true Alclad paint. Plus – I wanted to see if the ICM paints had any reaction to a lacquer base (they did not). I use a hot dark primer coat to give the plastic some grip, and to fill in the recesses - creating a shadow effect near the flat surface edges and adding depth for subsequent coats to come.
I followed the Alclad with a careful coat of ICM 1060 Middle Stone, thinned 50/50 with Tamiya X-20A Acrylic Thinner which, during testing, I felt worked the best. I did not feel the need to use any retarder – I had zero tip dry using the X-20A as my thinner.
I wanted to try their 1071 Camouflage Green next, but felt the color was too close to the Middle Stone, so I made a post-shading pass using Tamiya Deck Tan to lighten up the external surfaces, while leaving the internal fighting compartment the original (darker) Middle Stone color.
Over the deck tan I painted a thin-line scheme using ICM 1071 Camouflage Green, and then, after some false starts hand-brushing ICM’s 1050 Red Brown, I backed up and left things as they were with the (airbrushed) Camouflage Green line.
With the basic scheme down, I went to work on the detail painting. I used Vallejo 311 New Wood and Tamiya Flat Black for the pioneer tools. These would be weathered with Mig Oils and Uschi Chrome pigment later. Next, I hand-painted the exhaust pipes and muffler with Lifecolor 702 and 703 Rust in a random pattern. Once that was dry, I brushed on a layer of Mig Chipping Fluid followed by a coat of ICM’s Middle Stone so that I could work off some of the base coat coming up to show some wear.
The 75mm ammunition rounds received a primer coat of Alclad Gloss Black Base, followed by AK Extreme Metal Brass, both sprayed straight from the bottle. I masked off the ends of each round before spraying the brass color. It turns out that the pointy ends of the rounds cannot be seen at all if displayed in their containers within the fighting compartment – a note for next time!
I gave the entire vehicle a healthy oil filter made of Mig Wash Brown, followed by a detail workover with Vallejo Cam Medium Black Brown to represent chipping along the edges of the fighting compartment. Once satisfied, I laid down several coats of Pledge floor polish (Future) to prepare the surfaces for washes and decals.
I applied the decals using the Red and Blue MicroSol/MicroSet products without any problems. The ICM decals are very thin and separate from the backing effortlessly. Once the decals were dry, I applied an oil wash using Van Dyke Brown to the entire vehicle. I covered the wooden portions of the pioneer tools with un-thinned Wash Brown oil and let that sit overnight to soak in before wiping off the excess the next morning with a Q-tip.
I then shot the whole vehicle with Vallejo Flat Varnish to kill any shine left over. I added a little dry pigment here and there to finish things off.
Conclusion
ICM’s recent offerings are a lot of fun to build, and this kit, after three others, was no exception. The fit is excellent, the design, simple. The lines are sharp and the plastic is easy to work with.
To their credit, ICM chose to provide plastic parts for the walls of the fighting compartment and gun assembly in lieu of using photo-etch. I know some modelers who might find fault with that – who feel that the use of PE parts only adds to a model, but I disagree. Styrene engineering has come such a long way in the past few years. Except for perhaps mesh screens, including PE in place of plastic only complicates a build. Other manufacturers might have made the entire fighting compartment using PE, but ICM’s parts are super thin and look great, and because they are made of styrene, went together in no time at all.
That, and the superb instructions as well as a low parts count lead me to recommend this kit for all modelers, regardless of experience level, as long as they go slowly and follow directions. This is an unusual vehicle and will no doubt attract a lot of attention on the showroom tables or in your glass case at home.
I would like to thank ICM for providing this kit for review, and to IPMS USA for giving me the opportunity to build it.


Reviewer Bio
Eric Christianson

Eric Christianson is a father to two boys (Reed and Dean), the President of the Seattle Chapter of IPMS, and a long-time Little League umpire. He is also a devoted husband and companion to a wonderful woman named Jackie who enthusiastically supports his passions. Recently retired as a programmer, his home office has been scratch-built into ‘a perfect model room’. Modeling since he was a boy, Eric mostly builds armor these days, but still dabbles in 1/32nd aircraft and other types of models from time to time. He also enjoys presenting seminars on weathering and technique at local shows. Many of Eric’s kit reviews can be found on the IPMS USA website.
Comments
Add new comment
This site is protected by reCAPTCHA and the Google Privacy Policy and Terms of Service apply.
Similar Reviews