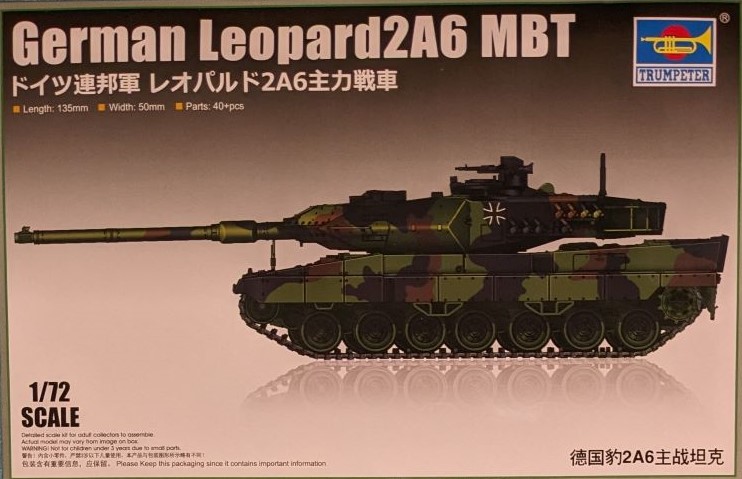
German Leopard 2A6 MBT
From the Trumpeter and MRC websites,
The successor to the Leopard 1, the Leopard 2, was first produced in 1979. A variety of upgrade programs and options are available for the Leopard 2. These include the Atlas Elektronik Vehicle Integrated Command and Information System (IFIS), a digital command and information system. The Leopard 2 has had technical improvements under Upgrading Level I and Level II programs. A new smoothbore gun, the 120 millimeter L55 Gun, has been developed by Rheinmetall GmbH of Ratingen, Germany to replace the shorter 120 millimeter L44 smoothbore tank gun on the Leopard 2. It permits effective use of a new APFSDS-T round, DM53 (LKE II), with a longer rod penetrator, which is under development.
The rigid box top sits on a sturdy box that does a good job of protecting the kit’s two plastic sprues (one holding the lower turret, the other sprue has the outer halves of the road wheels, barrel, bustle racks, and detailed parts); the upper hull, lower hull, upper turret, two tracks with running gear are separate, and decals, for a total of 40 parts. There is a lot of protection for the parts with each sprue in its own plastic bag and further protection with foam wrapped around the more delicate parts.
The instructions are a bifold covering two steps. Construction starts with the lower hull, moves on to the right and left tracks (which already have the road wheels, return rollers and tracks molded as one well-defined piece), mounting the upper hull with details, then on to the turret with its details. There are minor notes that are identified here by their instruction step:
Step 1: Remove the sprue gates on the right and left tracks and they are ready to mount on the hull. The upper hull mounts to the lower hull by means of interconnected posts and results in a tight fit. The rear-view mirrors (Parts Nos. B and B3) are small, and I recommend adding them at the end of the build, so they don’t get knocked off and become space travelers.
Step 2: The upper turret (Part No. F2, like the left and right tracks come separately) requires sprue gate cleanup. Recommend keeping the commander’s machine gun (Part No. B7) and aerials (Parts Nos. B9) off until completion of the model as they are quite delicate. The turret bustle racks take some finessing to get the upper and lower halves to line up correctly (this would have been easier if the vertical supports were molded to either the upper or lower horizontal supports, rather than half on top, half on bottom so that they have to be lined up to mate without any locator pins). The most perplexing aspect of this model is the main gun barrel (Part No. B6) as the instructions show the bore excavator rotated 90o to the right (looking at the tank) instead of on top of the barrel. This is an easy fix, but disconcerting nonetheless given the plethora of information and photos of Leopard tanks in the wild.
I followed the instructions, and it was easy to build with the notes outlined above. Attention and care should be used with the fiddly bits, but the model builds together well and relatively easily.
The color painting guide provides views of both sides, top, front and back with color call outs for Mr. Hobby, Acrysion, Vallejo, Model Master, Tamiya and Humbrol. Decals are provided for two Bundeswehr Leopards with numbers and blank license plates for other tanks. The decals are thin, lay down well and mine did not silver.
This model was a lot of fun to build and paint. This is a gem kit for beginner modelers as the running gear are one piece per side and the vehicle almost snaps together. While there are no clear parts provided, this is easily overcome with painting at this scale. It builds into a beautiful and impressive model quickly and then you can focus on painting. I look forward to seeing what more talented modelers can do with this kit.
Profuse thanks to Model Rectifier Corporation and IPMS/USA for providing the review sample.


Comments
Fixing the rotation of the gun barrel
Hello,
I bought this Leopard as my first kit and I've been wondering how you went on about fixing the rotation of the gun? I've noticed it was rotated by 90° so I was looking around the internet and I stumbled uponn this review
Correct Orientation of the Gun Barrel
Sorry for not responding earlier. Fixing the rotation was easy and straight forward. Just rotate the barrel 90 degrees so the bulge is on top and glue in place.
Add new comment
This site is protected by reCAPTCHA and the Google Privacy Policy and Terms of Service apply.
Similar Reviews