
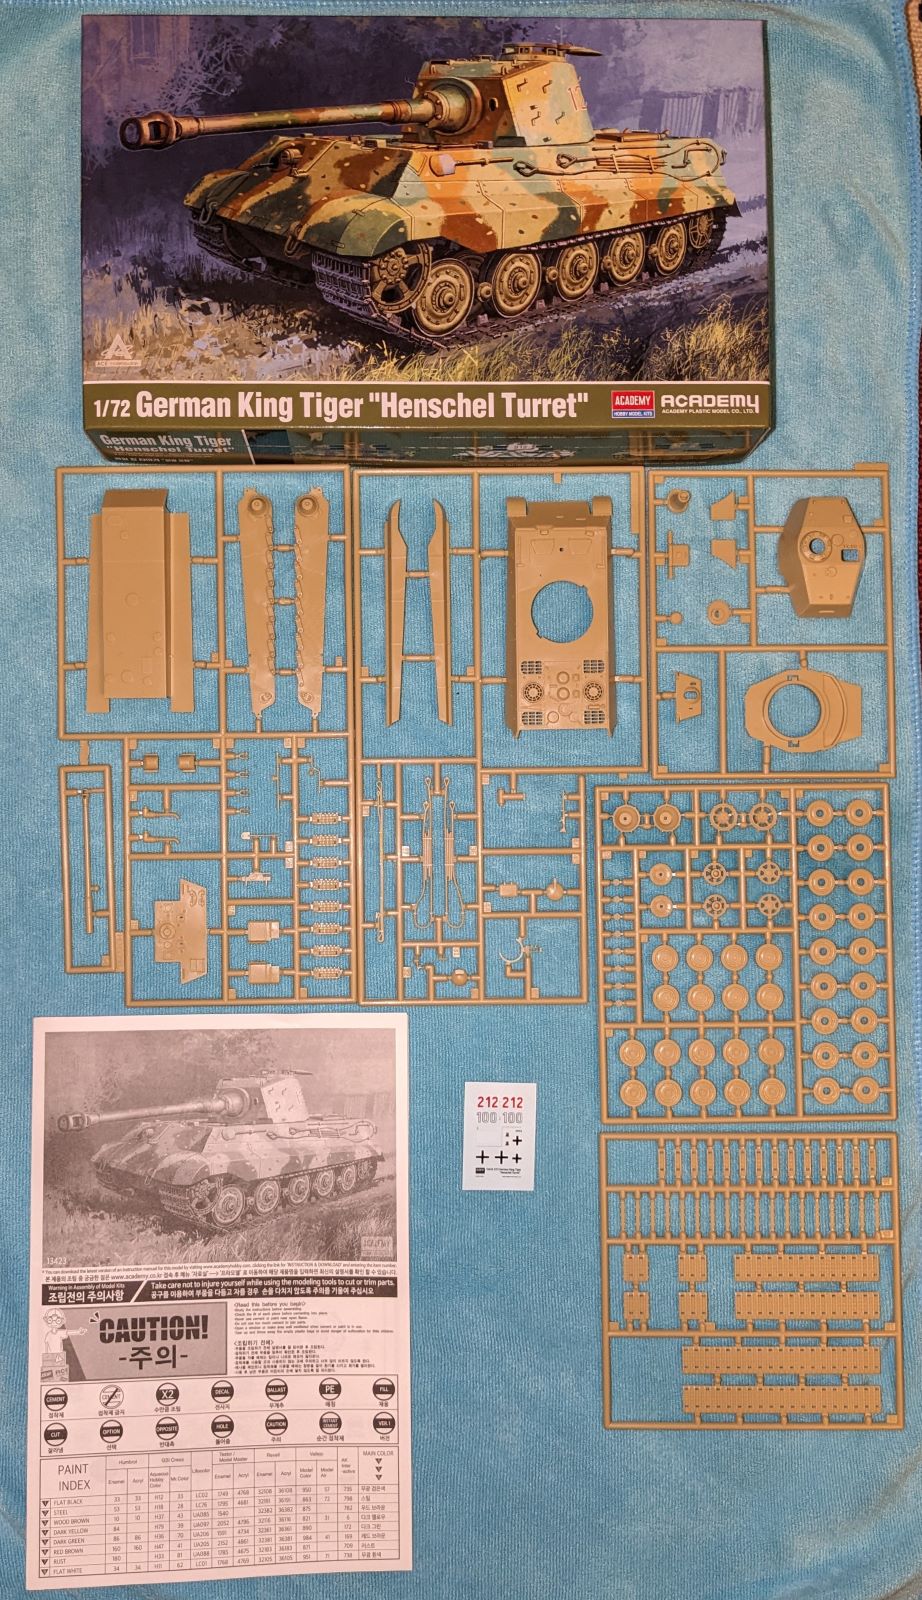
German King Tiger "Henschel Turret"
The King Tiger, Panzerkampfwagen Tiger Ausf. B (Sdkfz. 182 (Sdkfz.267 and 268 for Command Variants)), often shortened to Tiger B, Tiger II, or Königstiger (German for Bengal Tiger or "King Tiger"). Allied forces usually called it the King Tiger or Royal Tiger.
In early October 1942, plans for production of the VK 45.03 were issued for a successor to the Tiger I. Initially two designs were provided, one by Henschel and one by Porsche. Both used a turret design from Krupp mounting the long barreled 88mm KwK 43 L/71; the main differences were in the hull design, transmission, and suspension. The Henschel version used a conventional hull design with sloped armor resembling the layout of the Panther tank. It had a rear mounted engine and used nine overlapping road wheels per side, mounted on transverse torsion bars, in a similar manner to the original Tiger. To simplify maintenance, however, the wheels were overlapping rather than interleaved as in the Tiger I.
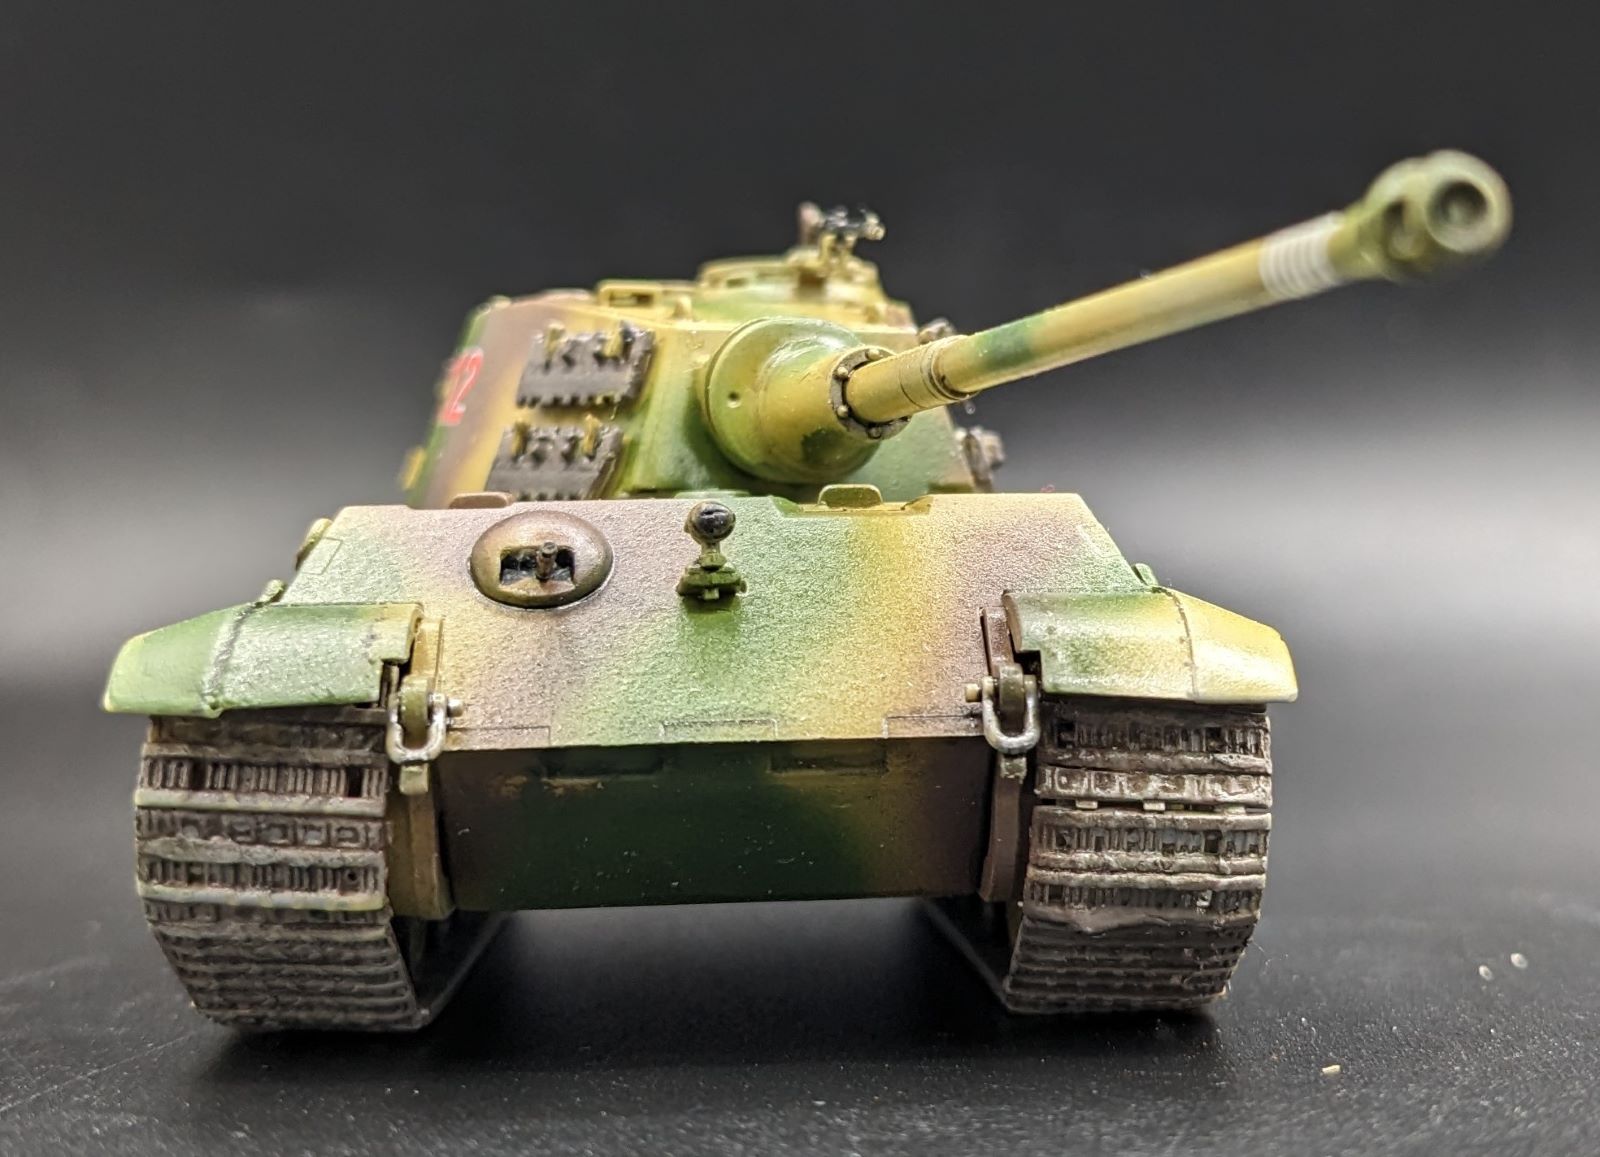
Henschel won the contract, and all Tiger IIs were produced by the firm. Two turret designs were used in production vehicles. The initial design is sometimes misleadingly called the "Porsche turret" due to the belief that it was designed by Porsche for their prototype. In fact, this turret was simply the initial Krupp design for both prototypes. Fifty early turrets were mounted to Henschel's hull and used in action. The more common "production" turret, sometimes called the "Henschel" turret, was simplified, and the subject of this kit. The King Tiger first saw combat in Normandy in July 1944.
This model contains the prevalent Henschel production turret. Of the estimated 490 Tiger IIs built during the war, eight remain, with only two in driving condition.
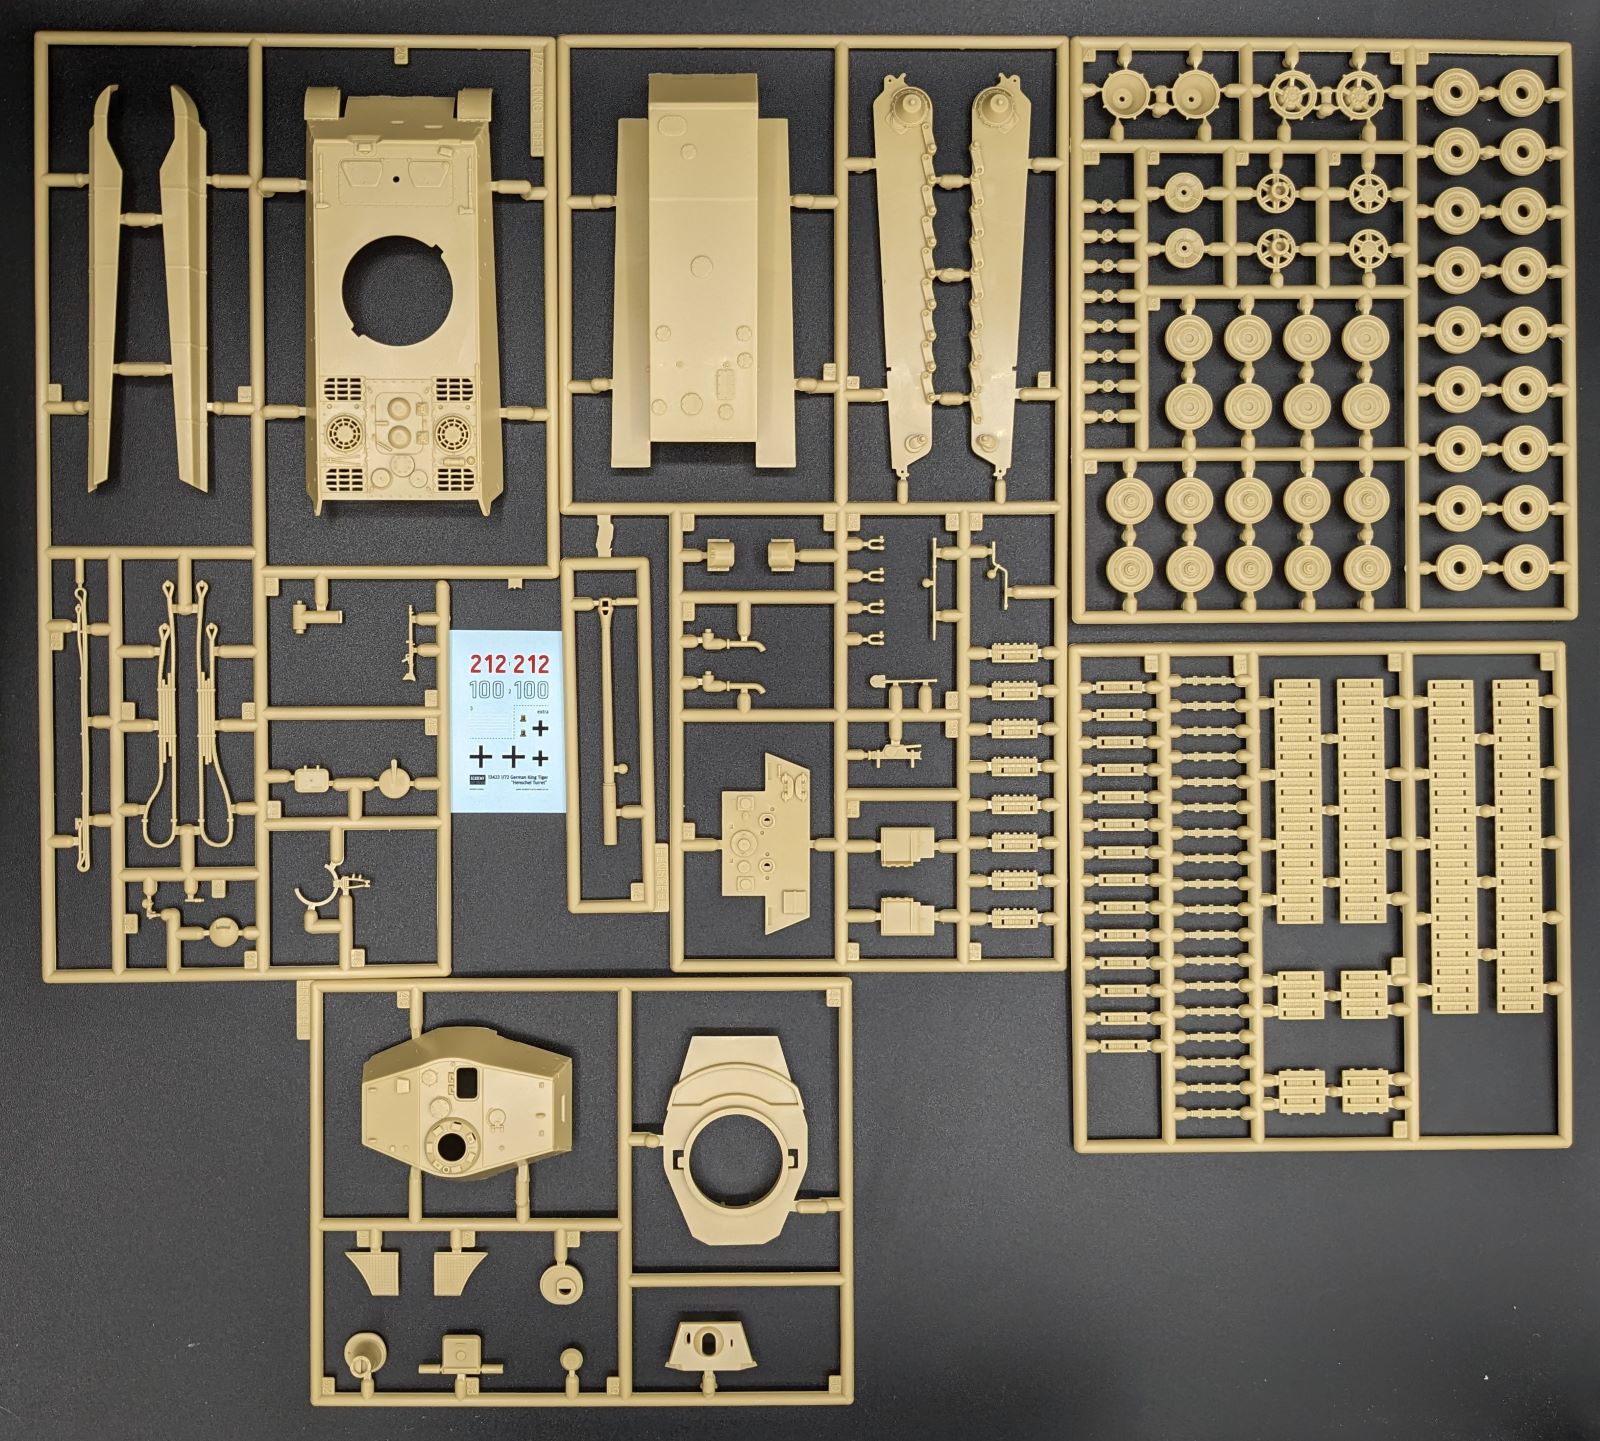
Upon opening the rigid box top open, the sturdy box that does a good job of protecting the kit’s five plastic sprues, and a small decal sheet for three tanks (two have the same turret markings, with one in whitewash) in Wehrmacht service.
The quad-folded instruction manual covers 22 steps. Construction starts with the running gear and tracks, hull, and progresses to the turret. Ace Corporation mark is present on the interior of the hull, revealing that this kit traces its roots back to that company’s release in 2007. There are minor notes that are identified here by their instruction step:
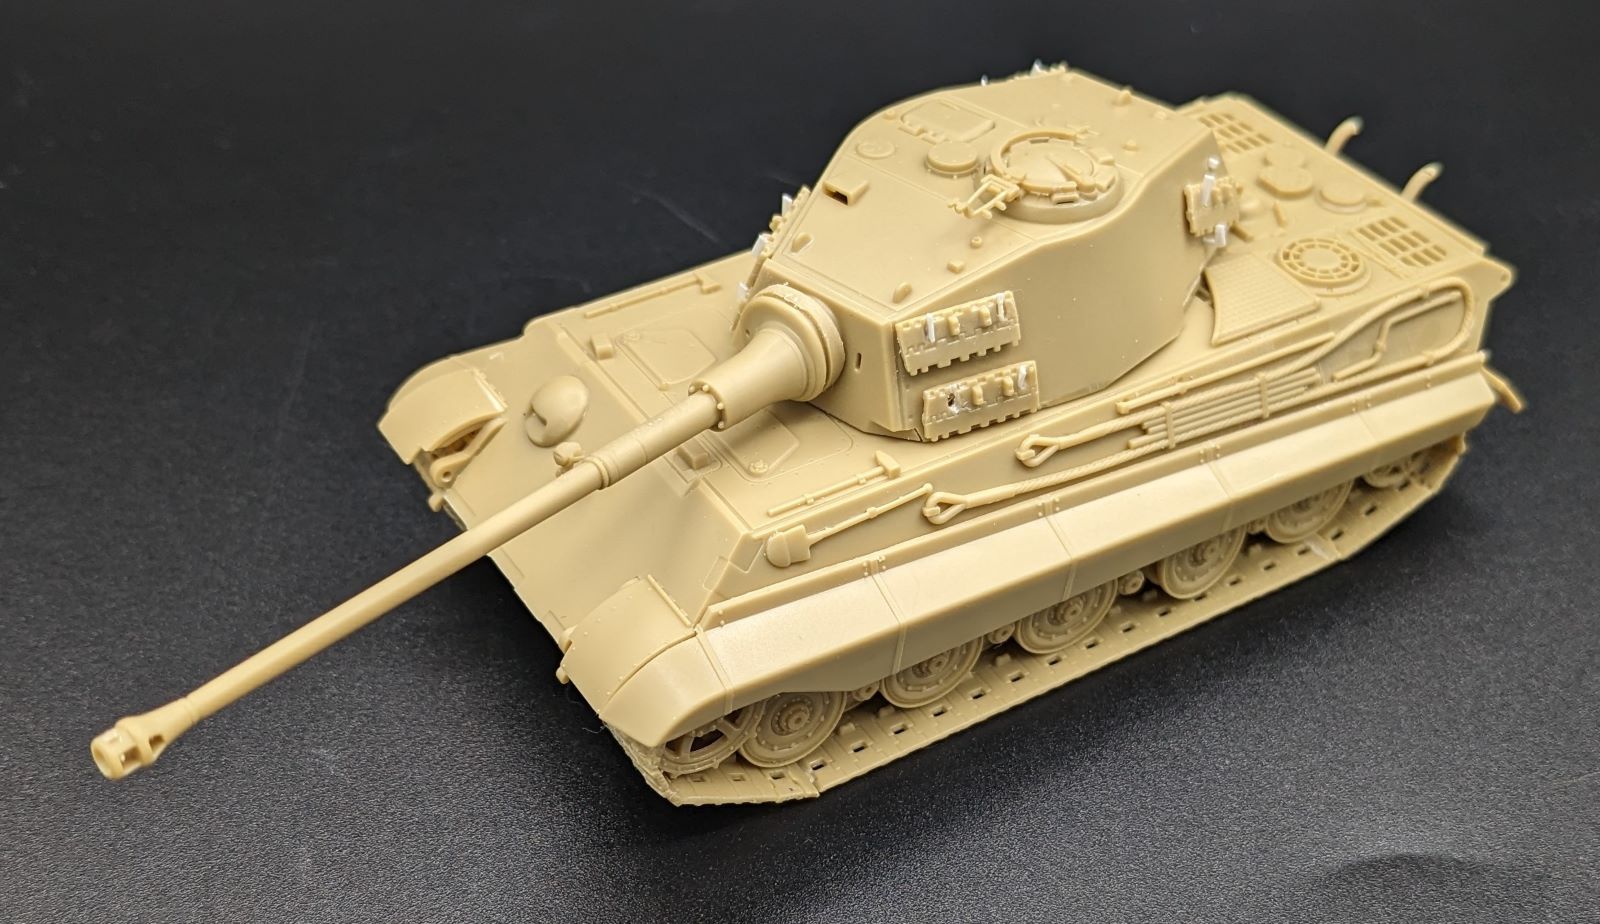
Step 7: The tracks are fiddly in 1/72 scale and care should be taken to ensure they are lined up correctly. This step shows the right-side track assembly and states to do the same for the other side; however, take care to ensure that the track teeth line up with the running gear in its mirror image.
Step 12: A niggle to be sure, and easy to correct, but hollowing out the exhausts (Parts Nos. 25) is easy and makes a difference.
Step 13: Thin the exhaust covers (Parts Nos. 26 and 27) as they are too thick.
Step 14: I recommend leaving off the sponson machine gun (Part No. 31), and towing clevises (Parts Nos. 29) as they are easy to knock off. Better to paint them separately and install them at the end of the build.
Step 16: The air intake covers are molded in thick plastic; PE would have been better, but with some care, can be made to look realistic.
Step 17: The barrel mounting piece is incorrectly labeled Part No. 24. It should be 43 (Part No. 24 is the rear left side fender used in Step 12).
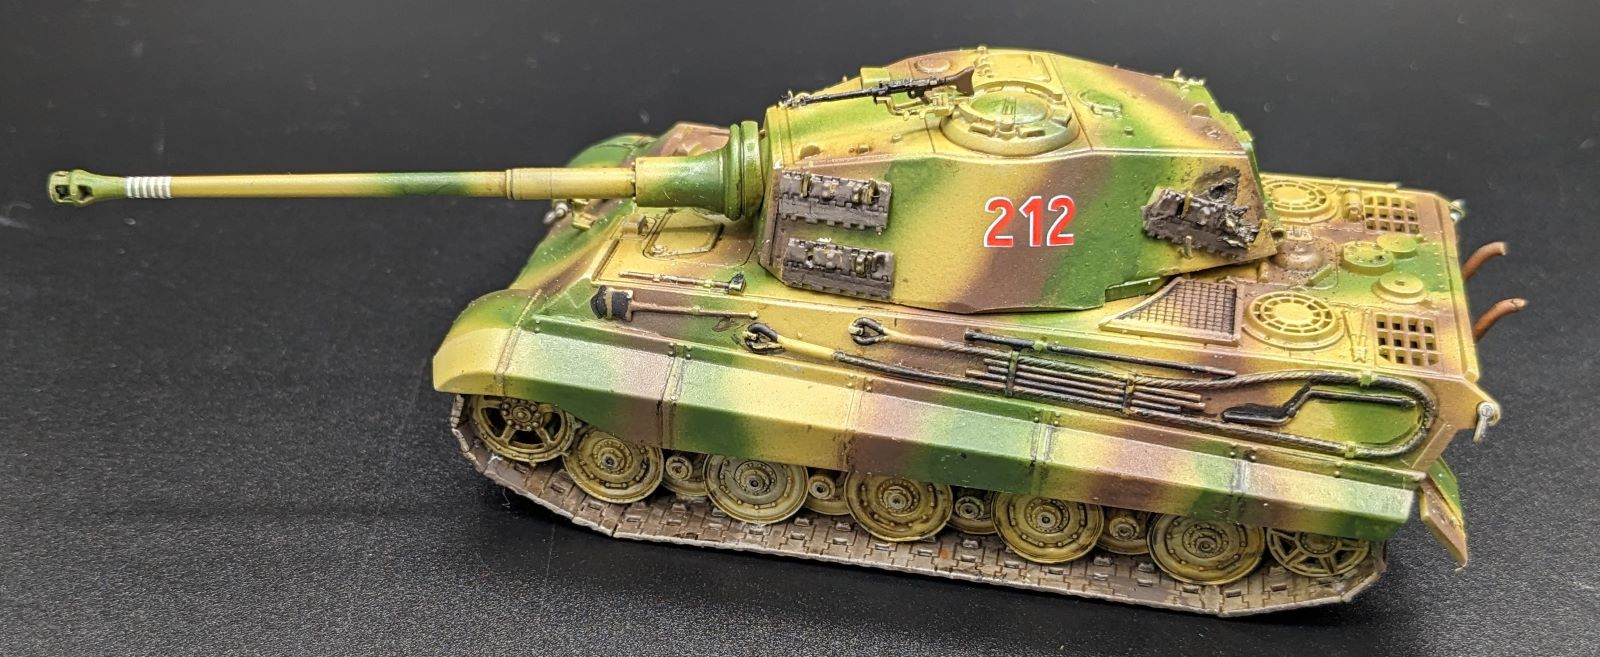
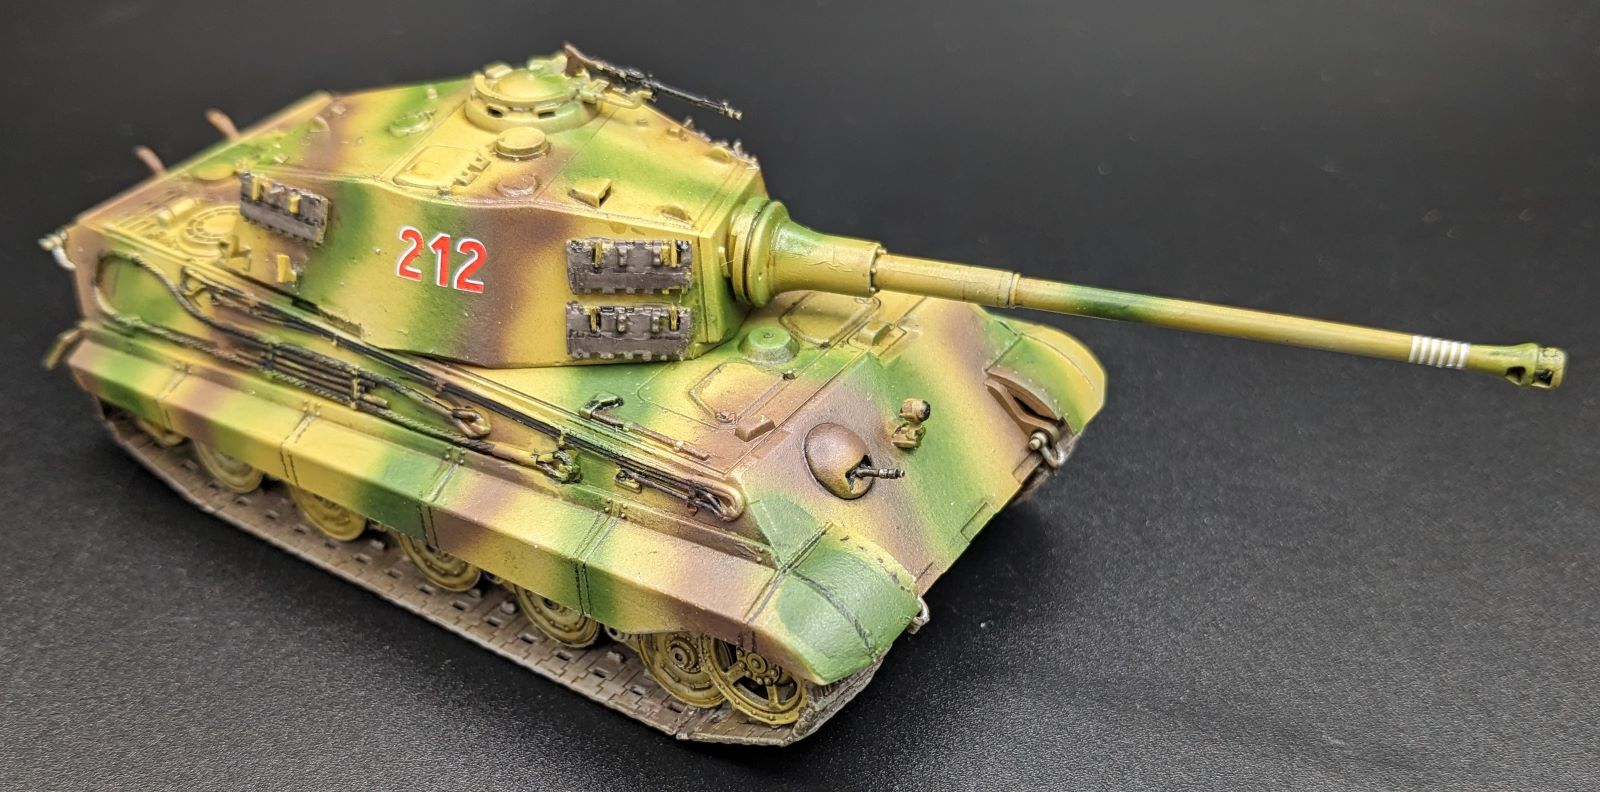
Step 18: Perhaps the most disappointing aspect of this build is the lack of track hangers on the turret (four sets each side on the left and right side of the turret), with the tracks just glued on to the side. I decided to scratch build the tack hangers using the box art as a guide, and I believe the extra effort is worth it, especially as the model was built with one track section missing and another damaged to show more visual interest.
Step 19: Hollow out the main gun barrel for more realism. Again, I’m surprised with today’s technology that this is still an issue, but it is easily solved with a pin vise.
I followed the instructions, and it was easy to build with the notes outlined above. Attention and care must be used as there are a lot of fussy bits, primarily in this scale.
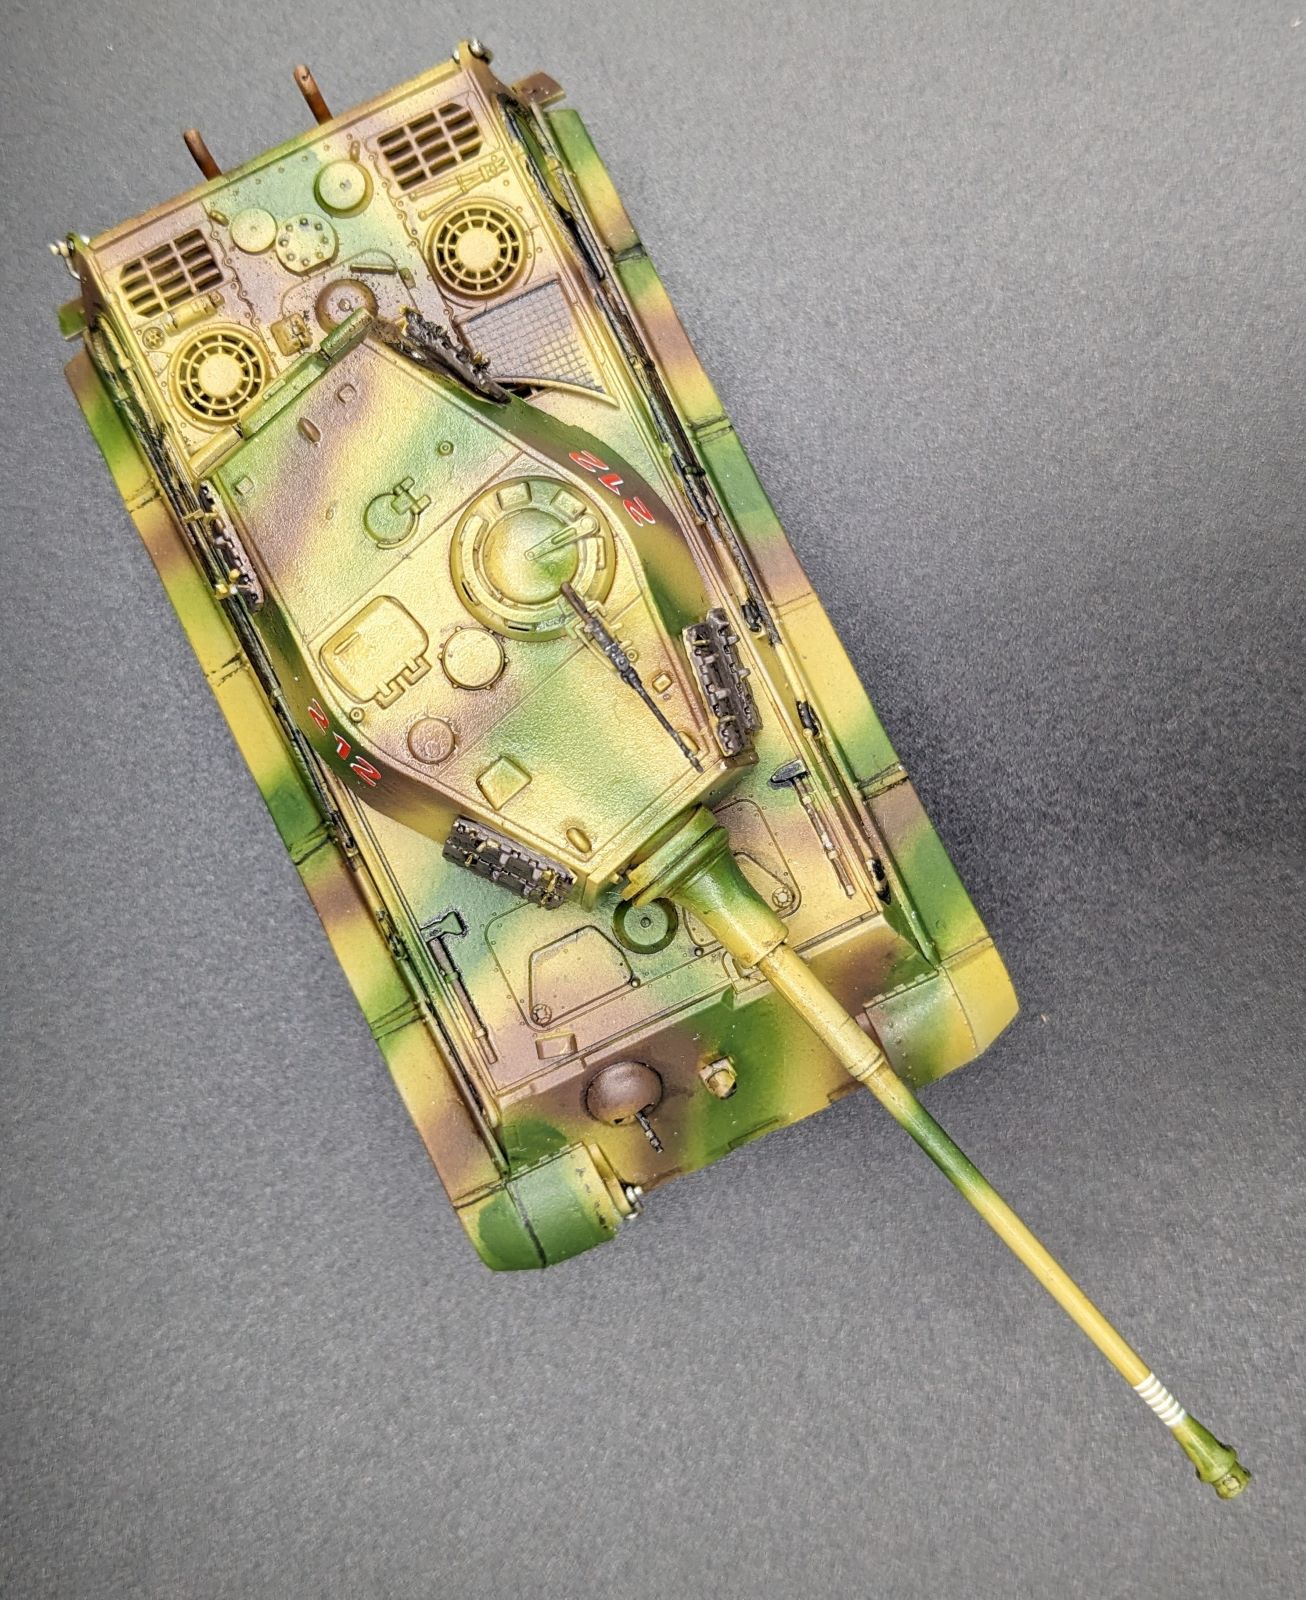
There is a two-sided black and white painting guide for three tanks:
2./s. Pz.Abt 501 (212), 1944 Ardennes in dark yellow, olive green and red brown with whitewash
2./s. Pz.Abt 501 (212), 1944 Ardennes in dark yellow, olive green and red brown
2./s. Pz.Abt 501 (100), 1945 Berlin in dark yellow and olive green
The decals are thin, lay down well and mine did not silver.
This model was a lot of fun to build and paint. My only annoyance is that the track assembly process is tedious and recommended for modelers who have assembled individual tracks before. The exhausts and main gun barrel need to be drilled out, and a few parts (primarily fenders and mud guards are slightly too thick). Anyone with a few models under their belt will have no problems with assembly. The King Tiger builds into a beautiful and impressive model. I look forward to seeing what more talented modelers can do with this kit.
Profuse thanks to Model Rectifier Corporation and IPMS/USA for providing the review sample.


Comments
It is a reboxing of the…
It is a reboxing of the Revell's Tiger B. I have it, and the sprues you show are the same ones.
On Scalemates: https://www…
On Scalemates:
https://www.scalemates.com/fr/kits/revell-03129-tiger-ii-ausf-b-production-turret--111357
You can even download the kit’s instruction, or watch unboxing videos of the Revell’s Tiger B. They also link to that page when dealing about Academy's kit.
Add new comment
This site is protected by reCAPTCHA and the Google Privacy Policy and Terms of Service apply.
Similar Reviews