
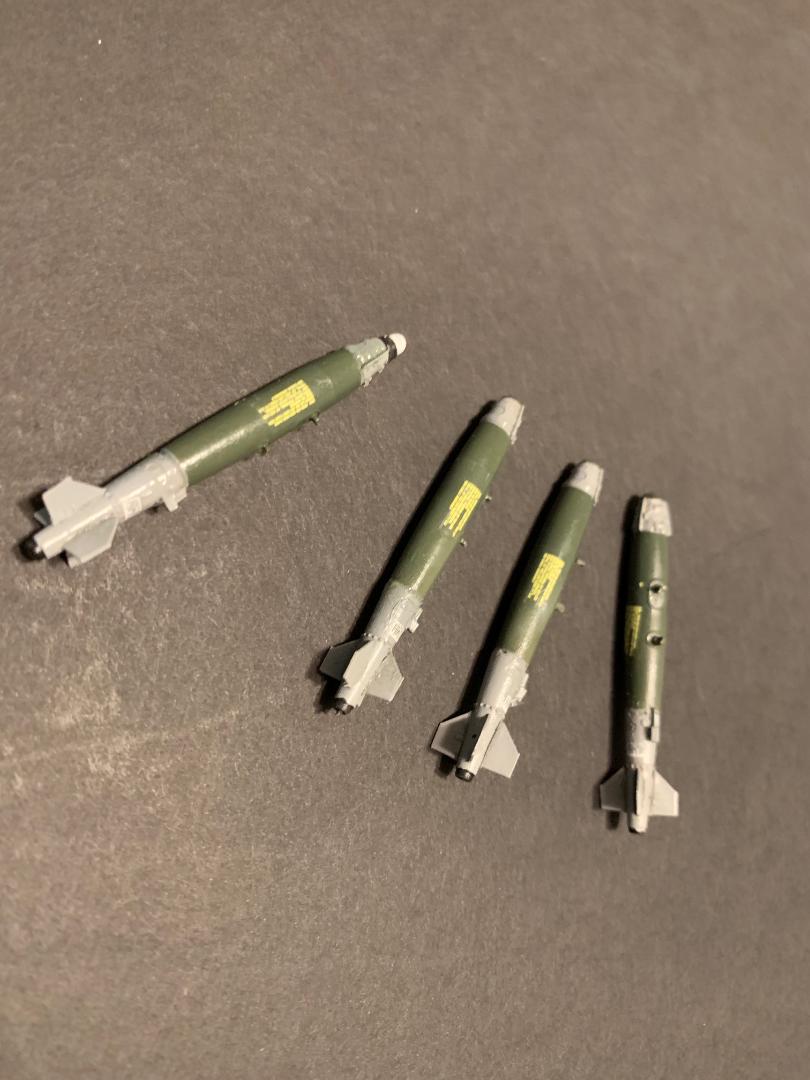
GBU-38 JDAM Bombs
The Joint Direct Attack Munition (JDAM) is a guidance kit that converts unguided bombs, or "dumb bombs", into all-weather precision-guided munitions. JDAM-equipped bombs are guided by an integrated inertial guidance system coupled to a Global Positioning System (GPS) receiver, giving them a published range of up to 15 nautical miles. JDAM-equipped bombs range from 500 to 2,000 pounds . The JDAM's guidance system was jointly developed by the United States Air Force and United States Navy, hence the "joint" in JDAM. When installed on a bomb, the JDAM kit is given a GBU (Guided Bomb Unit) identifier, superseding the Mark 80 or BLU (Bomb, Live Unit) nomenclature of the bomb to which it is attached.
The JDAM is not a stand-alone weapon; rather it is a "bolt-on" guidance package that converts unguided gravity bombs into precision-guided munitions (PGMs). The key components of the system consist of a tail section with aerodynamic control surfaces, a (body) strake kit, and a combined inertial guidance system and GPS guidance control unit.
The JDAM was meant to improve upon laser-guided bomb and imaging infrared technology, which can be hindered by bad ground and weather conditions. Laser seekers are now being fitted to some JDAMs.
From 1998 to November 2016, Boeing completed more than 300,000 JDAM guidance kits. In 2017 it built more than 130 kits per day. As of February 2020, 430,000 kits had been produced
Contents Description
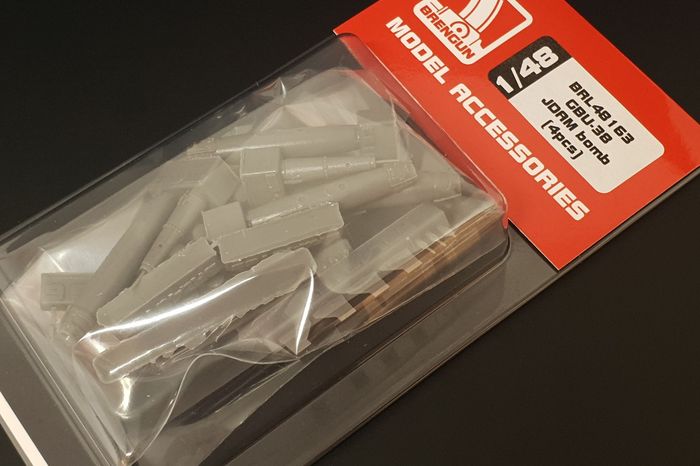
The resin parts are packaged in a blister pack securely stapeled to a card stock backer. A small decal sheet is also included and is enclosed in a separate sealed plastic bag.
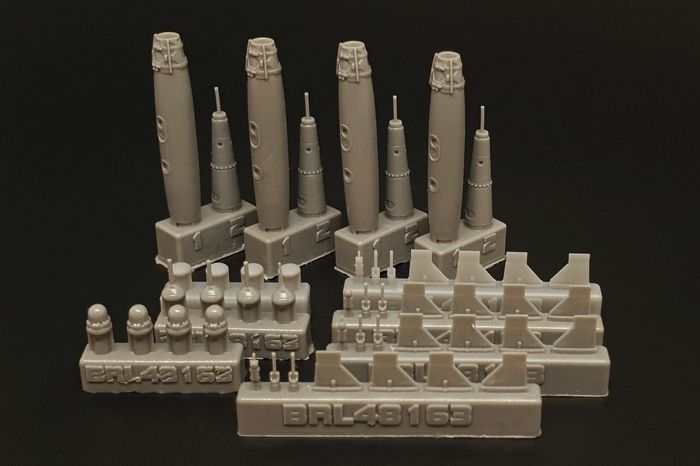
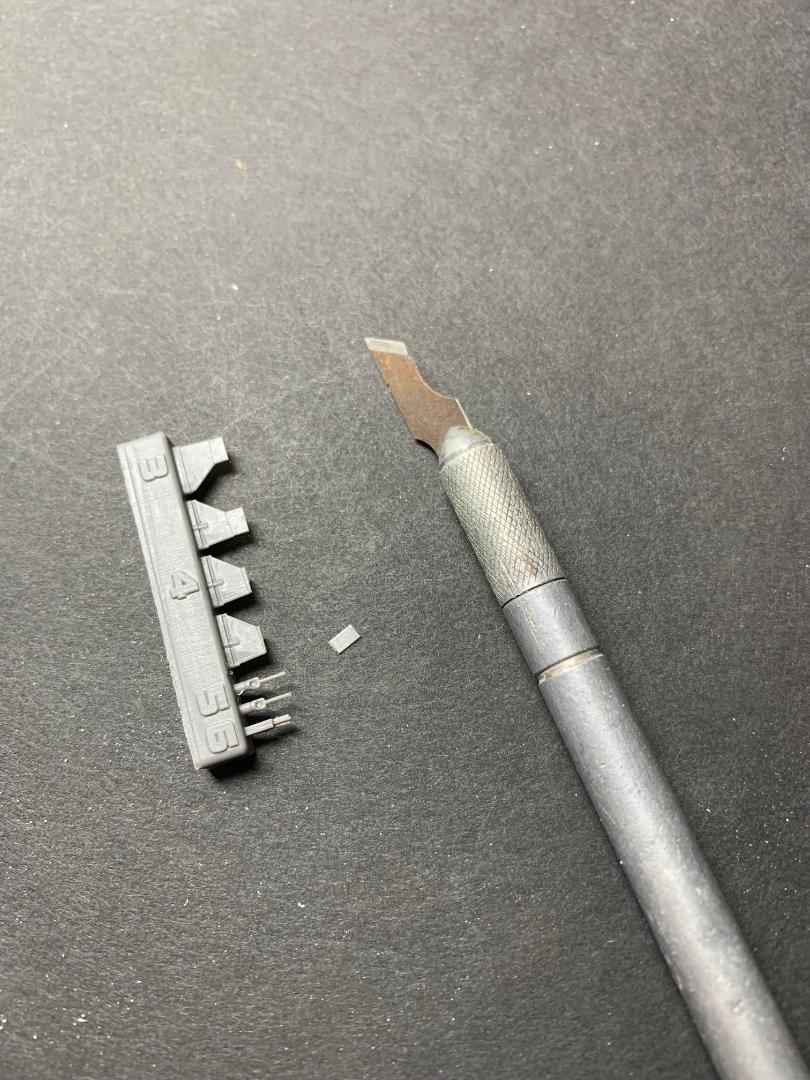
There are four resin castings for the two-part bomb bodies, four castings for the fins and shackles, three separate castings for the different bomb seeker heads. The casting blocks include the parts numbers in raised figures.
Instructions
The instructions are included on a small folded sheet including casting blocks trees, assembly instructions, with choices of bomb seeker heads shown. Paint colors are also noted.
The casting blocks and the surplus resin to be removed from the parts are shown as shaded. The rear body section of the bomb Part 2 have resin "stingers" that must be removed along with a small disc of resin. Each of the fins has a small portion of surplus resin on the tip that also must be carefully removed. The bomb shackles (part 5) also have "mini stingers" to be removed, but not quite yet (see below). And finally seeker head part B also has a small stinger to be removed.
The first step is to study the instructions, as simple as the assembly may appear there is the potential for misaligning the parts.
Assembly
The body parts (1 and 2) were removed from the casting block using a fine razor saw. Cutting the parts free must be done carefully to assure the faces that will be glued together are flat and perdendicular to the centerline of the parts, otherwise there will be kink between the halves. No aerodynamics with that result. I clamped the casting blocks in a work bench vice and used a fine razor saw to separate the two parts from the block. I drilled a small hole in the mating faces of the bombs halves and superglued a short length of styrene rod in the holes to securely fix the parts together. It was still a challenge to get the two parts to properly align while the glue set up. Also, it appeared the two mating faces were slightly different in diameter
Before removing the fins from the casting block the surplus resin from the fin tip was cut off with a new hobby knife blade. The fins were next removed using the razor saw. These steps must be done very carefully to avoid breaking the fragile resin parts.
The shackles are very small and difficul to handle and fit in place once removed from the casting block. I did however leave the small resin "stingers " in place to help with the handling of those small parts. Once the glue had set up the stingers were cut off.
(A personal comment here: The shackles are a nice feature with these weapons, however their placement on the resin bombs' bodies may create a mounting problem wiyh the pylons in the future. I generally like to fix underwing stores to the kit pylons with short lengths of brass rod. The modeler should plan on how the weapon will be fixed to a particular kit's pylons before using the resin shackles.)
Choice of seekers comes last. There are four identical heads on each casting block. The attachment ribs have ribs on opposite sides of the casting block stems. A sharp number 11 blade is required to remove the ribs. A fine razor saw was used to separate the seeker heads from the casting block. Fitting the individual heads to the bomb noses is challenging due to the size of the parts.
Rather than use seeker heads part 7 I used a blob of white glue to represent the part, settting the bomb nose up until the glue cured. I did not attempt to use head part 8 due to it size (just plain difficult to handle). Seeker head part 9 took some effort to get a square mating surface, but I did manage to fit one in place.
I used Gorilla gel superglue to fix all of the parts in place.
Painting
The first thing I did was to temporarily glue the blunt end of a round toothpick into the depression in the nose of each bomb. This would help hold the parts during the painting process.
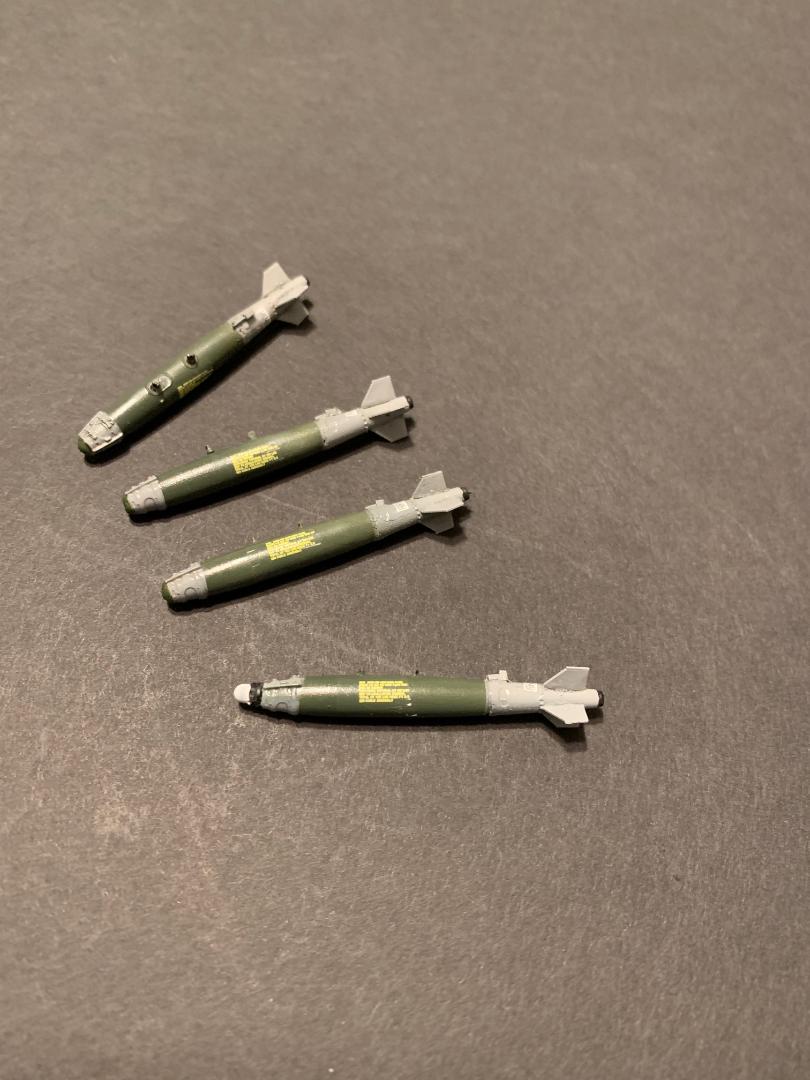
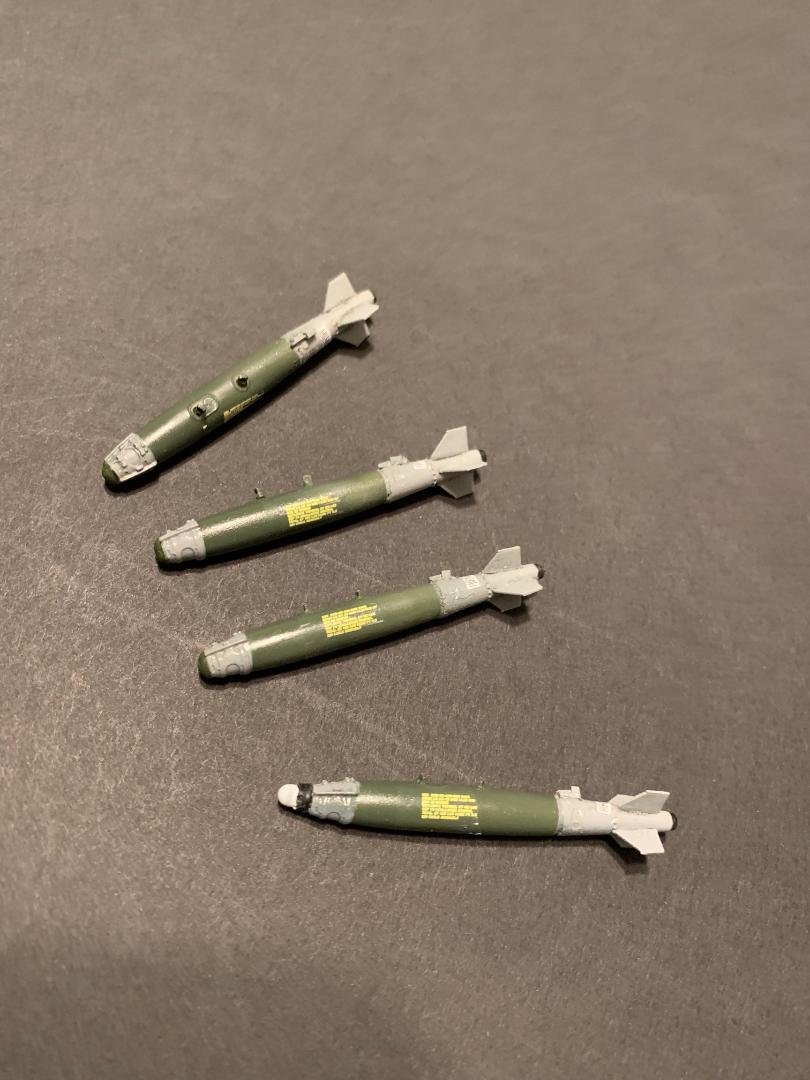
I primed the resin with Tamiya grey primer from an aerosol can. Once cured I masked the grey tail and nose sections with Tamiya masking tape. The exposed section when then painted with Tamiya Field Grey.
The bomb parts were then sealed with a coat of clear gloss.
Decals
There are three markings per bomb. The sheet has five decals for each marking, leaving a spare one of each. The decals are not printed separately, which I learned too late. I could not cut the smaller marking after the backer sheet was wet, so I left those off from the bombs. The decals reacted well to MicroSet and MicroSol.
After the decals were dry i applied a satin clear finish to seal everything in place.
Conclusion
The assembly of these resin bombs is not for anyone short on patience. A lot can go wrong if the builder is not careful. I would have much preferred the bomb body be cast as a single part rather than two. Cutting the parts free from the casting blocks, drilling holes in both faces, placing the reinforcing styrene rod between the parts, aligning the parts while the glue set up, and filling any resultant gap with putty and sanding the surface smooth just added more time and effort to the assembly.
Frankly, I felt that the bombs would be a better product if the bodies and seeker heads were cast as a single part with three separate weapon sets available. Trimming, cutting and fixing the seeker heads to the bombs required more effort than it was worth. There was plenty of room for alignmet problems when fitting the parts together. The fins were nicely cast and were quite thin. The fins did require care in removal from the casting block and fitting to the body for proper alignment, but I was fortunate not to have broken or lost any of the finer resin parts.
Another concern is the shackle arrangement. Depending on the particular model kit's pylons the shanckles may not fit the indentations molded into the pylon, or notches may mave to be added to the pylon.
Overall the detail on the parts is nice, but the assembly effort was more than anticipated for the end result. If you are willing to put the effort into the building of these weapons you will probably enjoy the results.
My thanks to IPMS/USA and Hauler-Brengun for the opportunity to review this product.


Comments
Add new comment
This site is protected by reCAPTCHA and the Google Privacy Policy and Terms of Service apply.
Similar Reviews