
G7101 in German Service with Infantry
Summary
This is a re-boxing of the earlier G7107 1½-ton truck. That kit was reviewed in December 2021 by Mr. Phillip Cavender. I used Mr. Cavender’s review as a “heads-up” for any issues. From reading his review ICM has changed the assembly sequence with this re-boxing. Mr. Cavender noted that the engine is assembled in steps 20-28 after the axles are attached to the frame (steps 16-19). In the current instruction sheet the engine is assembled first (in steps 16-25) and the axles attached after that (steps 26-45).
The only difference with this set is that a new bag with three sprues to create four infantry figures with equipment.
Background
The following is excerpted from the instruction sheet.
What’s in the Box
- 1 large bag with 5 sprues of light gray plastic for the G7107 truck.
- 1 medium-size bag with 3 sprues of light gray plastic for the infantry figures.
- 1 small bag of clear parts.
- An 8-inch by 11.5-inch instruction booklet with a single four view image for painting the G7107 truck and assembly and painting for the four figures and equipment.
The Instructions
The instructions consist of a 32-page glossy 8-inch by 11.5-inch instruction booklet. The front cover provides a brief description/history of the vehicle, including technical data. ICM paint colors and descriptions of the various pictorial symbol/notes are also on this page. Pages 2 and 3 are the parts maps for the five sprues of the G7107 truck. While page 4 is the parts map for the three figure sprues. Pages 6 thru 29 are the assembly instructions for the G7101 truck. The images are sharp and show the assembly as an exploded ¾ view. Page 30 is a single four view painting guide for the G7107 truck. The final two pages (31 and 32) are combined assembly and painting guide for the four infantry figures.
Things to consider before starting
There are two areas where options are available. The cargo bed seats can be built up (stowed) (Steps 109-112) or down (deployed) (Steps 113-116). The other option is to have the windshield closed (Steps 118, 120-122) or opened (Steps 126 – 129). Decisions on what you want can be made at the correct step in the instructions. But once made cannot be undone.
Another item to watch is mold seams. The instruction drawings are actually very detailed. I noticed that after assembly many of those parts where shown in other steps actually show a separation line along the mold or joint lines. So, before going off and removing all mold and seam lines, check references to see if there actually are visible separation lines. Some things, such as radiator hoses and exhaust pipes I did clean up. But most other items I left the seams alone.
As shown in the instructions the front axle is assembled solidly straight. The wheels can be made to operable with some minor effort. I refer readers to the December 14, 2021 review by Mr. Phillip Cavender for details.
Construction
I start all my builds by scrubbing the sprues with an old toothbrush in warm water and dish soap (Dawn) to remove any residual mold release residue.
The G7107 is built as four basic sub-assemblies; chassis/engine/frame, cab, cargo bed and wheels, and final details. Referring to Mr. Cavender’s December 2021 review it looks like ICM has changed the assembly sequence. Mr. Cavenders review the engine is constructed in steps 20-28 and the axles are built and attached in steps 16-19. The current instructions build the engine in steps 16-19 and the axles in steps 26-45.
Use caution when removing the numerous small parts as they are prone to disappearing into the ether if not carefully cut from the sprue.
Chassis, Engine, and Frame Details
Like most vehicle models assembly starts with the main chassis. This is made up of two side rails and four cross‑members. There is also a winch assembly and rear cross-brace that also act as cross members. As with any model with separate side rails keeping the frame true and square is critical to a well fitting kit.
For the engine (steps 16-24) I attached all the parts to be painted steel and painted that unit. I then attached the parts that were black, having pre-painted them. I did not attach the transmission to the engine in step 20. I did attach it to the frame in step 25, though. This allowed me to attach the drive shafts. I also left the exhaust (Steps 35 and 36) off until after painting the frame.
Mold seams on the leaf spring require some careful clean up, but other than that the frame, engine, and axles all build easily.
The instructions build the front axles in the straight configuration. For those who might want to build it to articulate I refer you to Mr. Cavenders December 2021 review.
Cab
Steps 46 - 61 assemble the cab interior and cab walls, and attach the completed cab to the frame. The doors (parts A15 and A16) have 4 mold ejector marks that require filling and sanding. Although it doesn’t show the option to pose the doors open, again referring to Mr. Cavenders review, I believe they can be posed open as the upper hinge for the passenger’s side is still on the sprue.
The seat builds up as a frame, bottom and back cushions. I attached only the frame to the floor, and attached the seat and back but left them off until after painting the interior. This was then primed and painted German Gray. I then attached the seat and assembled the rest of the cab. The roof and rear wall attachments left a seam that needed cleaning.
A nice touch is that all the windows are fitted from the outside. Meaning the cab can be completed and painted without the need to mask windows.
Steps 62 - 74 complete the engine, steering linkage, fenders and hood. The radiator (Steps 64-66) was assembled and painted before attaching it to the frame. The tab on the bottom of the radiator should go BEHIND the frame cross-member or else it has to lean backward to attach to the radiator hoses on the engine. Mr. Cavender noted that the hood lacked molded hinges. This kit has hinges molded to the hood.
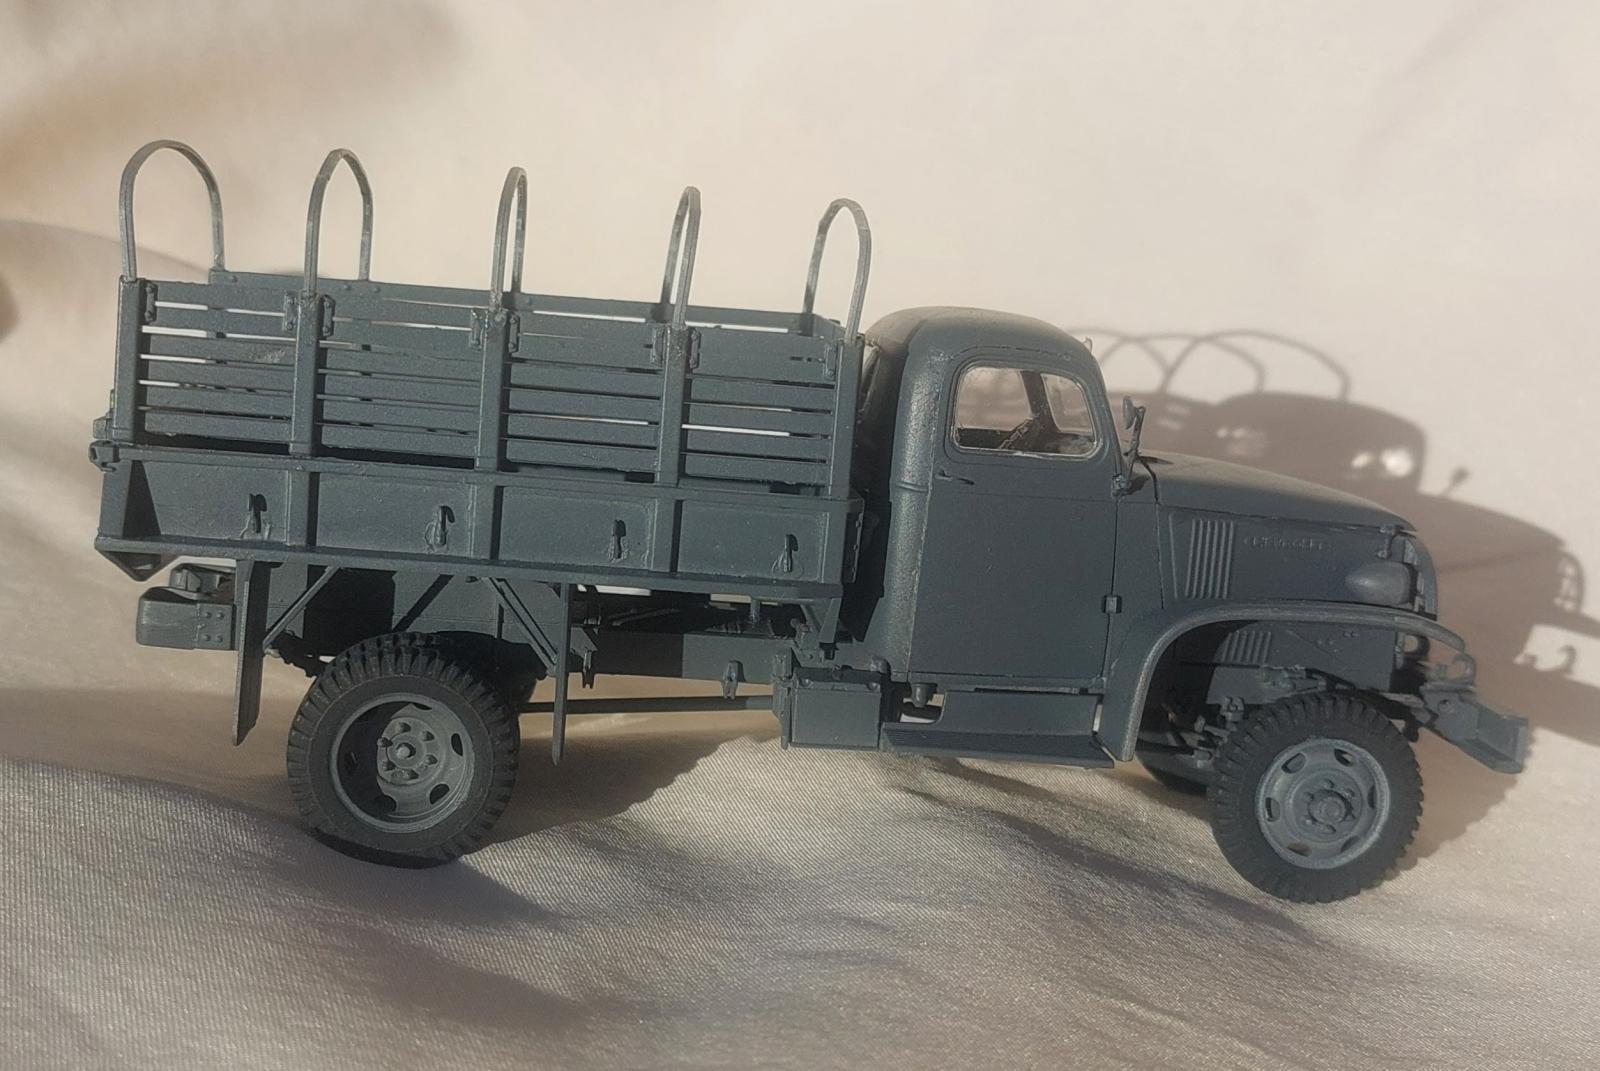
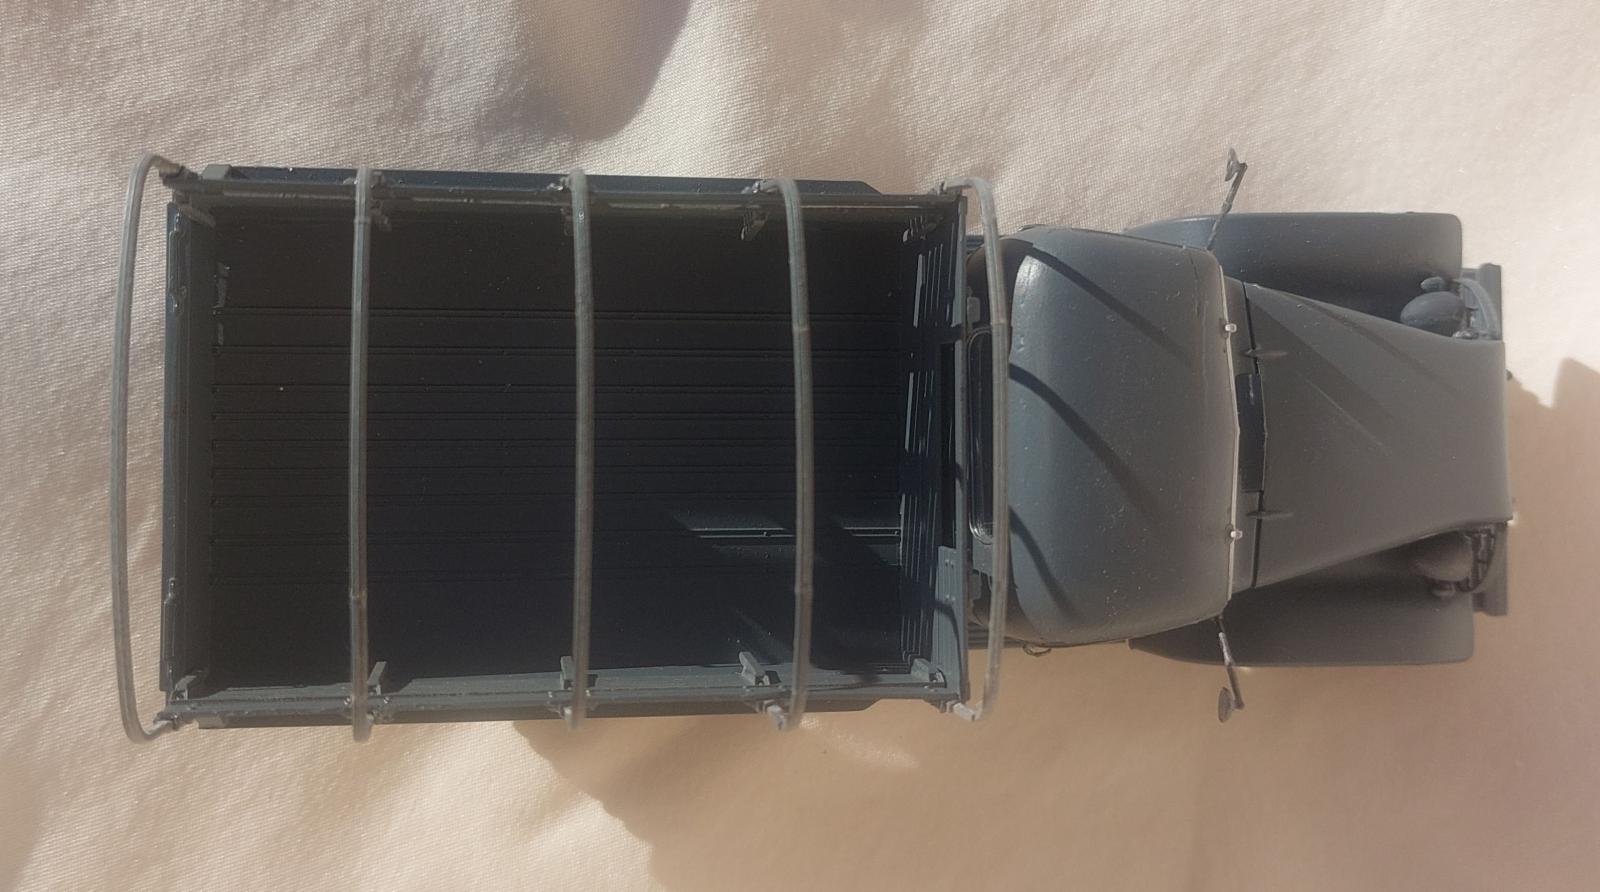
Cargo Bed and Wheels
Steps 75 - 99 build the cargo bed and attach it to the frame. All the reflectors must be removed. I used a chisel blade in an x-acto knife to remove most of the detail, and then finished off by sanding away the remainder. Be careful when removing parts B21 (step 78) and B23 (step 81) as one of the pour stubs is also a tab for fitting the part to the cargo bed. I suggest flipping the sprue over so you can see which stub is the tab. The wooden sides and seats do not have any wood grain detail. I ran a coarse sanding stick lengthwise along the boards to give them a little wood grain detail. The instructions show the fuel filler line installed in 96. I waited until mounting the cargo bed to the frame before running it through front frame (part B24). Attaching the filler line to the fuel tank (step 98 inset) is a fiddly, so take your time.
Steps 100- 108 assemble the wheels and attach them to the frame. With the careful application of glue to the hubs (parts C6) the wheels will rotate. However, I found there wasn’t quite enough axle sticking out for the front wheels to attach just the hub without also gluing it to the wheel.
The seats can be built stowed (Steps 109 - 112) or deployed (Steps 113 -116). As Mr. Cavender points out extreme care must be used when removing the tarp frames (parts C7) from the sprues. Calling these parts “delicate” is a disservice to delicate things around the world. Each frame has eight attachment points to a large T-shaped sprue. I first cut off the top the “T” allowing for more maneuverability. I then used a key-hole saw blade in my x-acto handle to carefully cut each attachment point near the sprue. This released each frame so the pointed sprue clippers could remove the remaining attachment stub. Even with extra caution I still managed to break all but one frame, and those into multiple parts. If this happens to you make sure to keep careful track of which pieces go to which frame.
Final Assembly
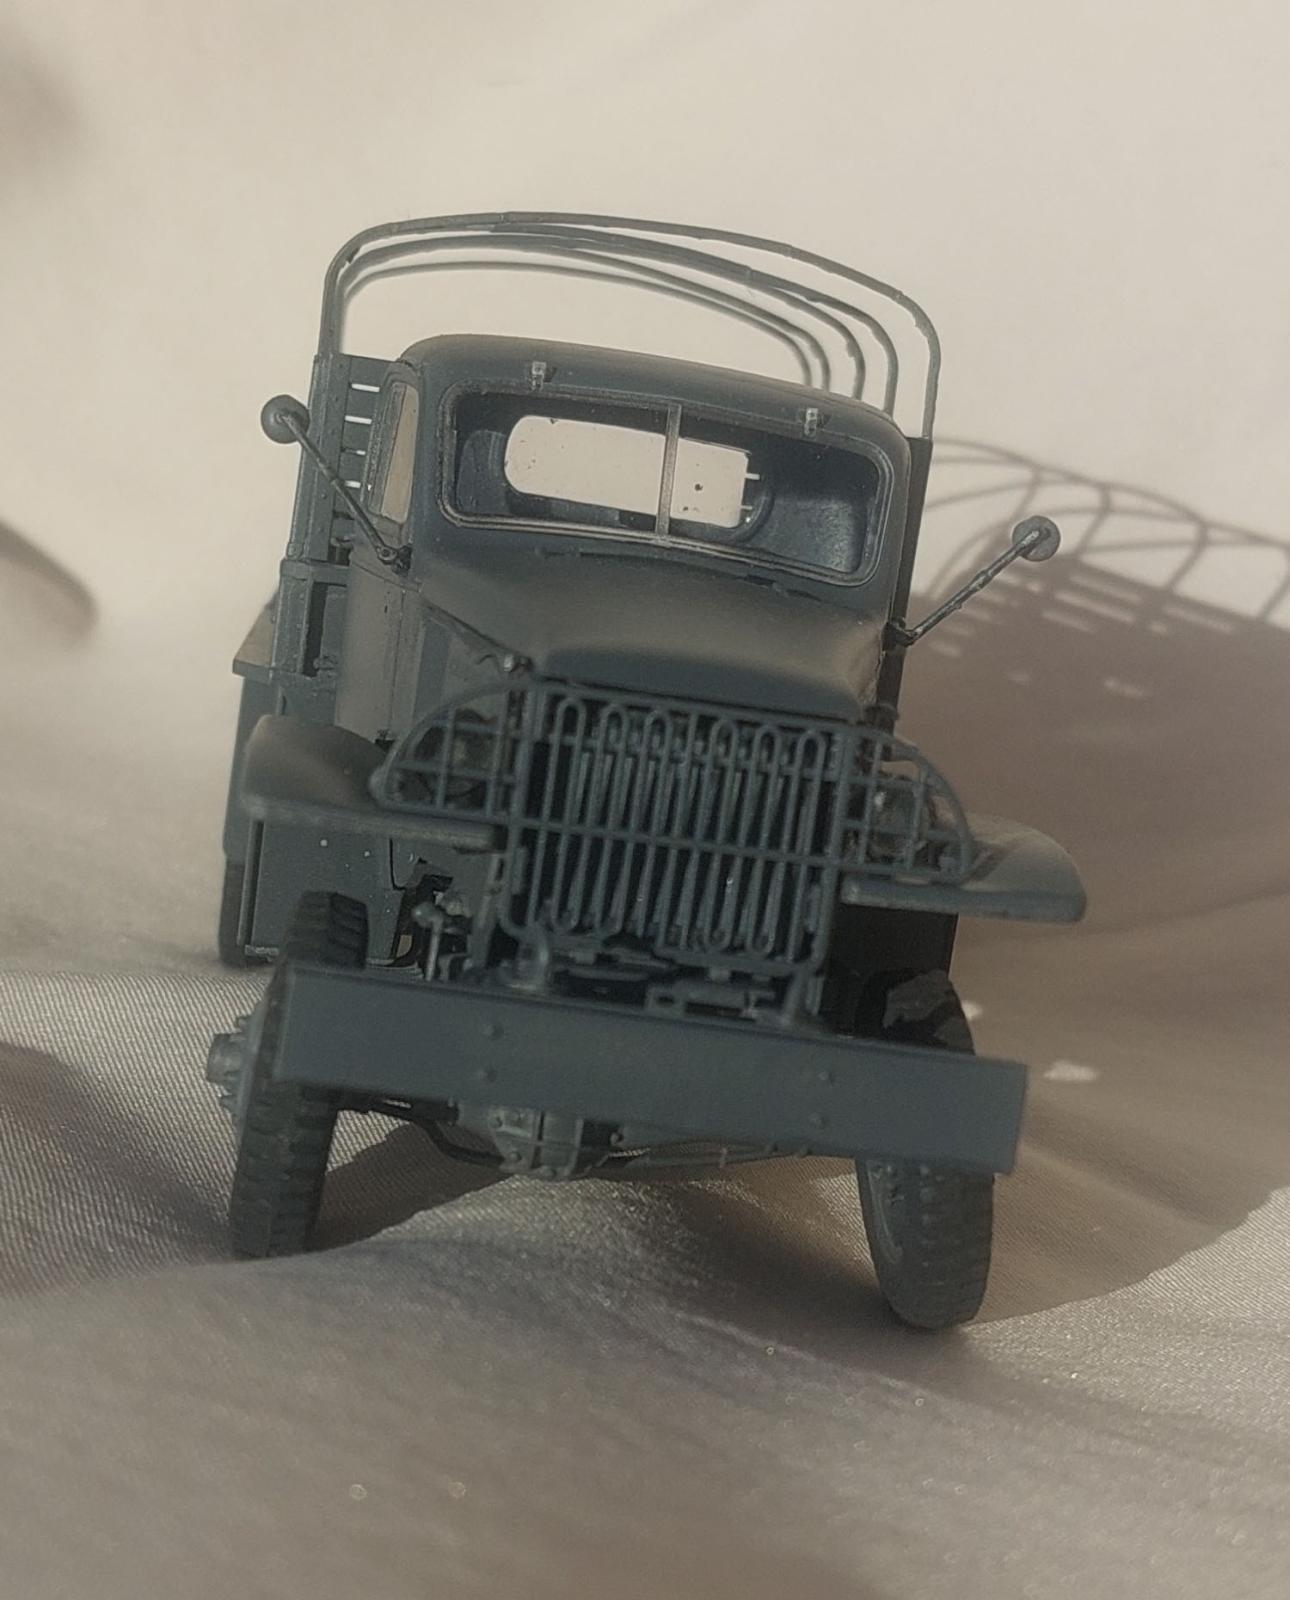
Steps 117 thru 129 are the final assembly. Headlights, black out lights, side mirrors and the windshield are all attached in this process. Note that the windshield can be built closed (step 121) or open (steps 126-129). One must decide how you want to display the windshield before starting the final steps as the braces (parts D2) are installed in steps 119 and 120 for the closed windshield and in steps 128 and 129 for the open option. Separate windshield wipers are supplied for the closed or open version. As noted earlier, although the option to have the doors open is not shown the alternate door hinge for the passenger’s side door is shown as an option in step 125.
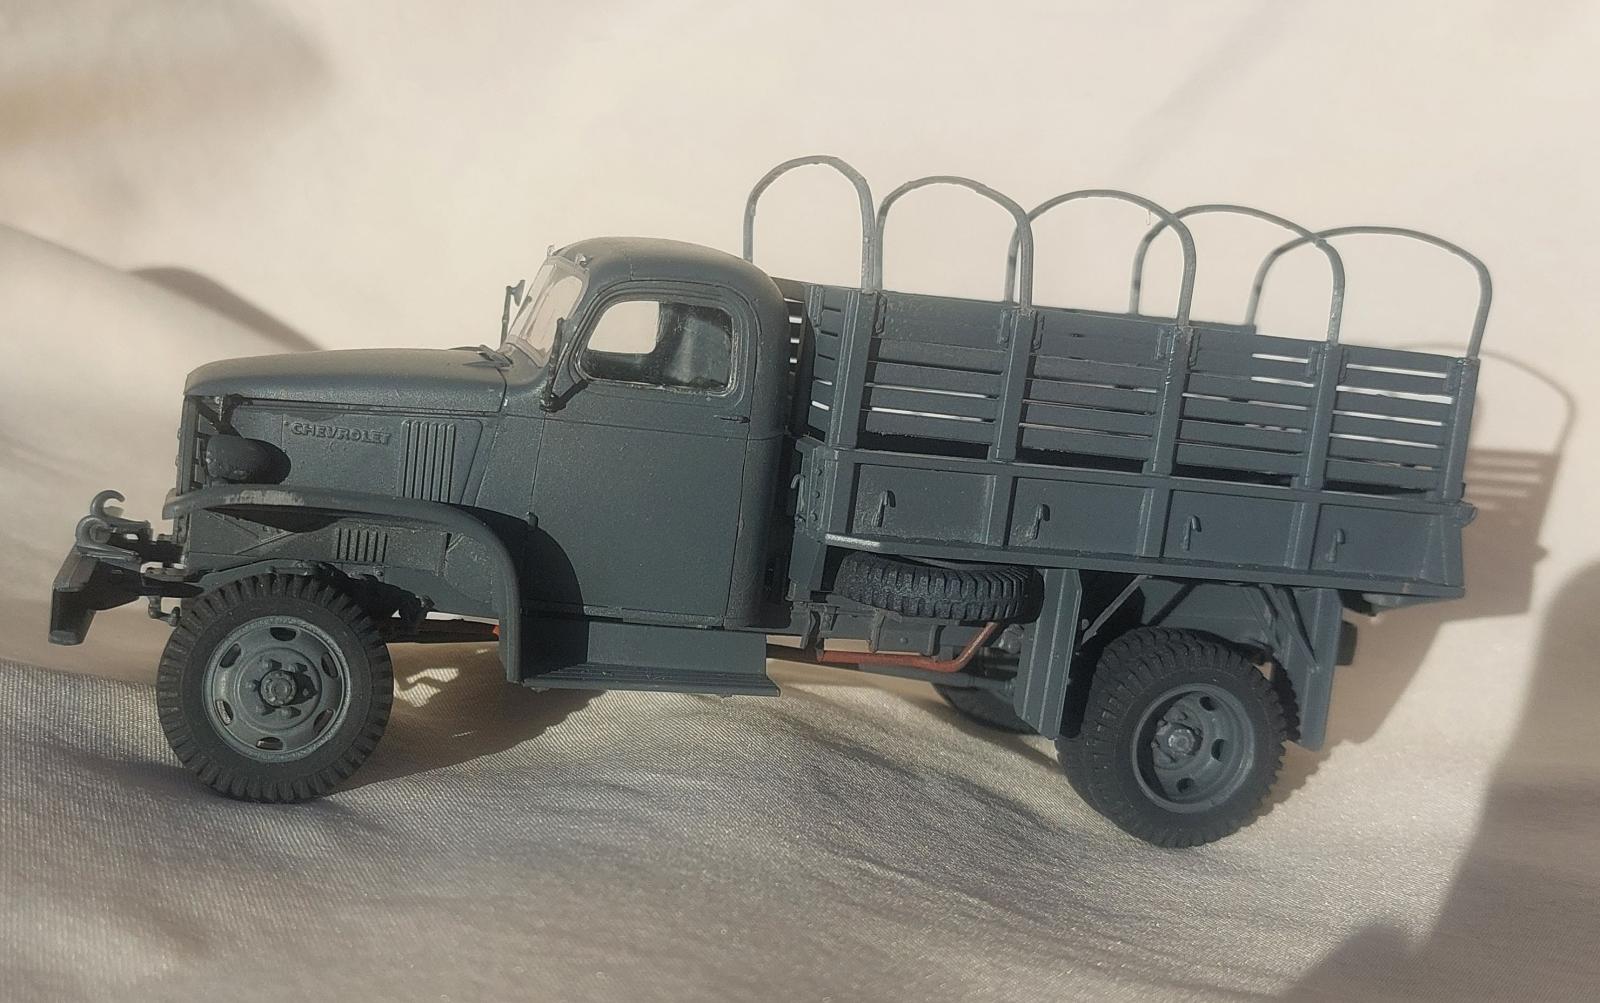
And with that I had a completed model of the Chevy 1½-ton truck.
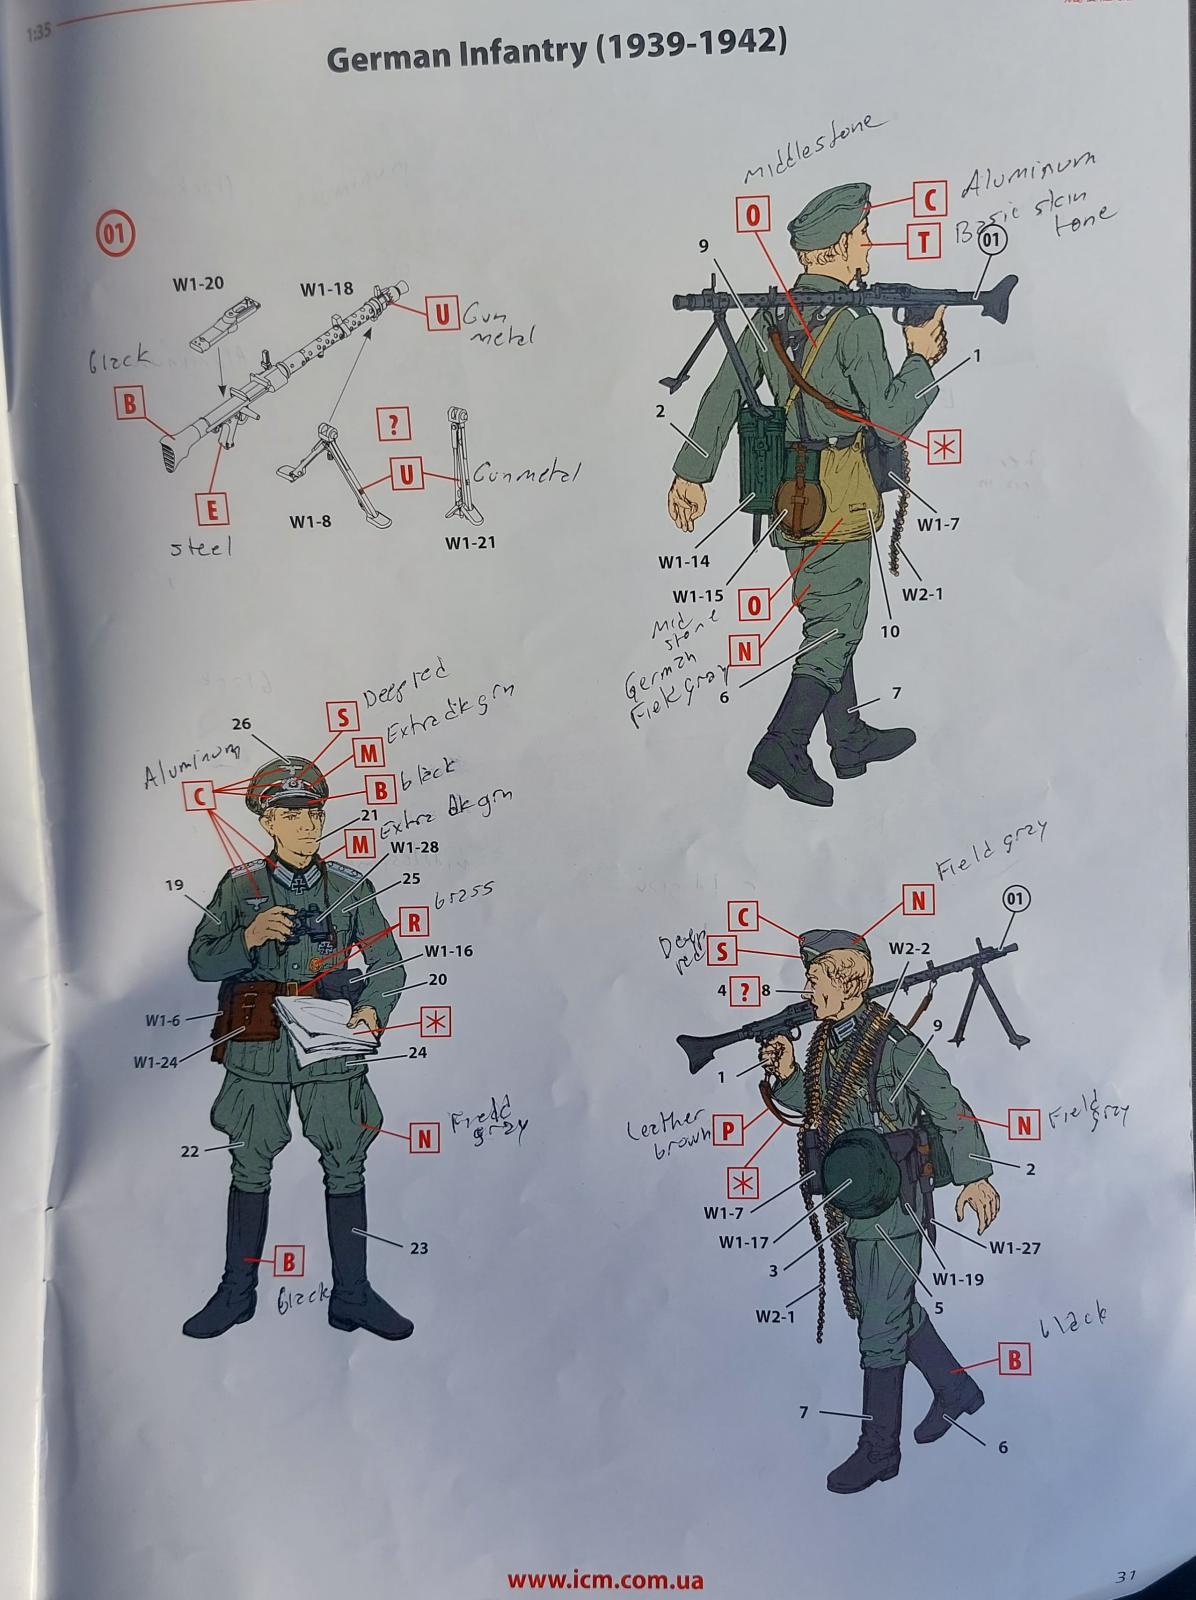
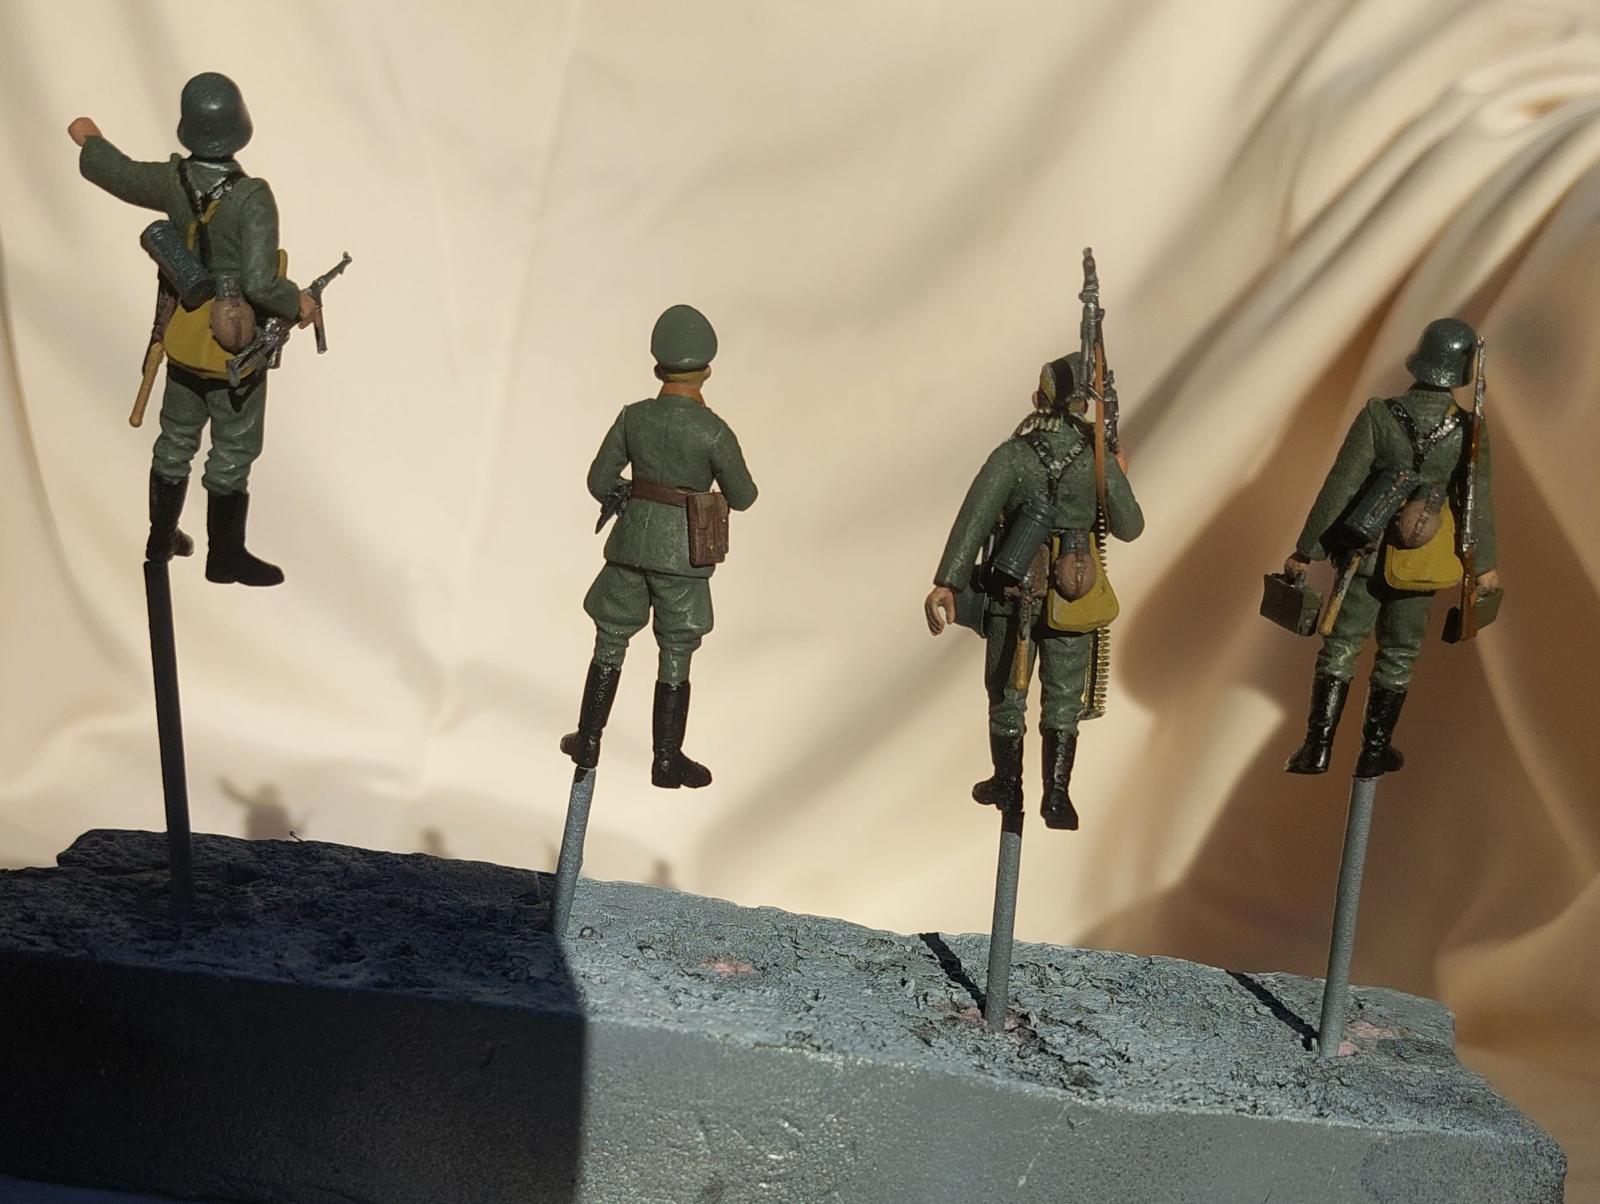
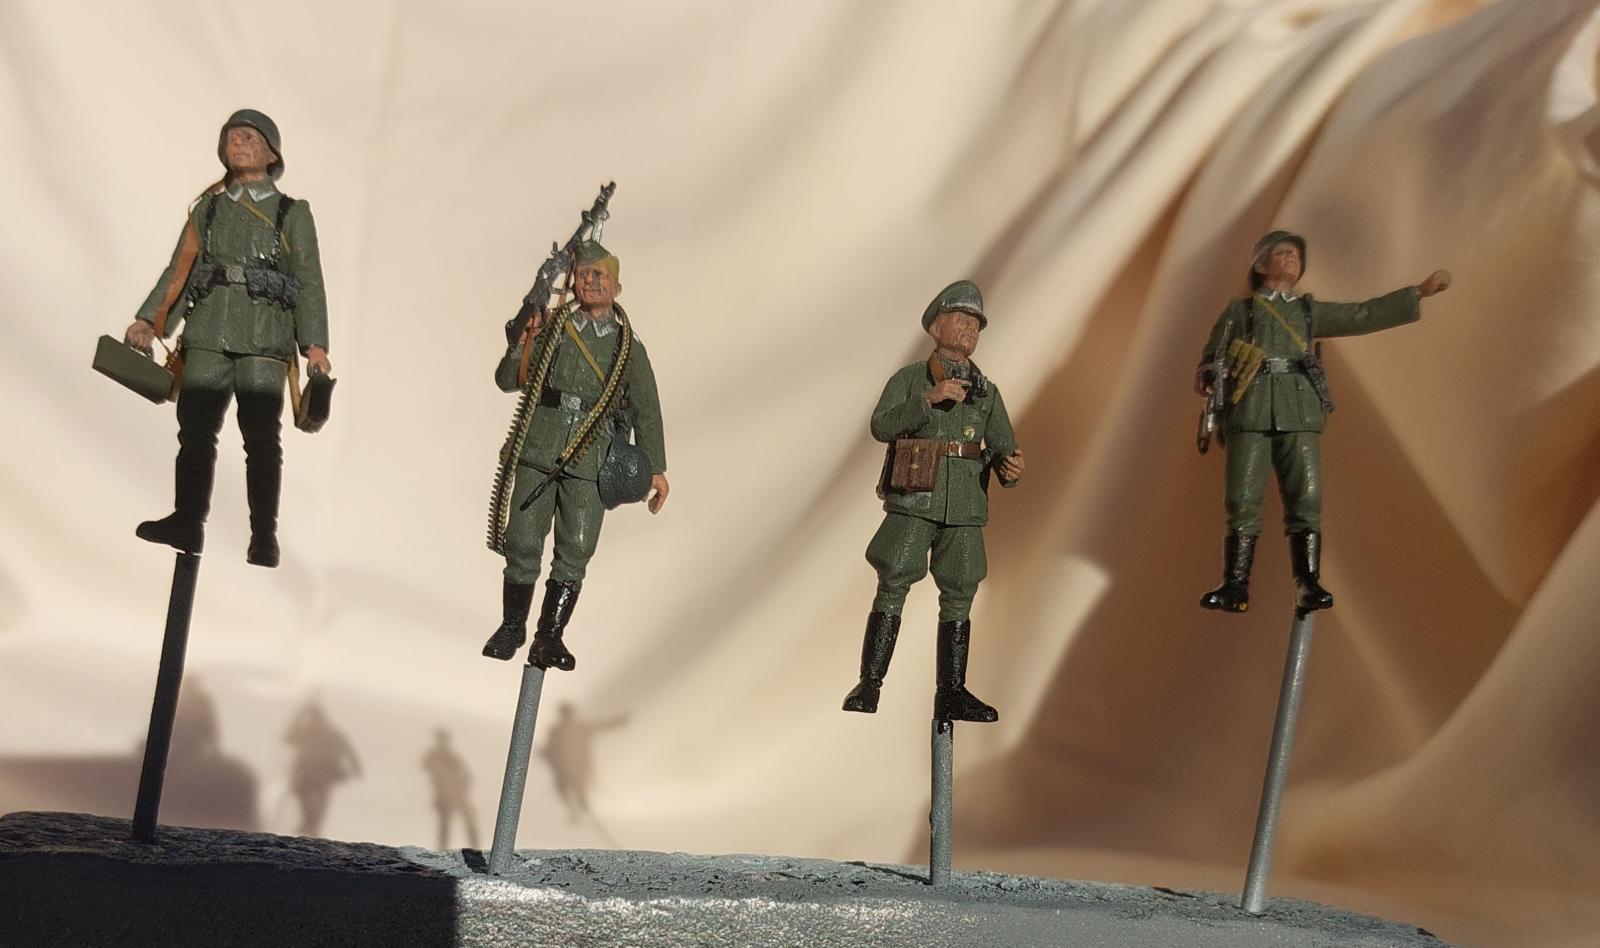
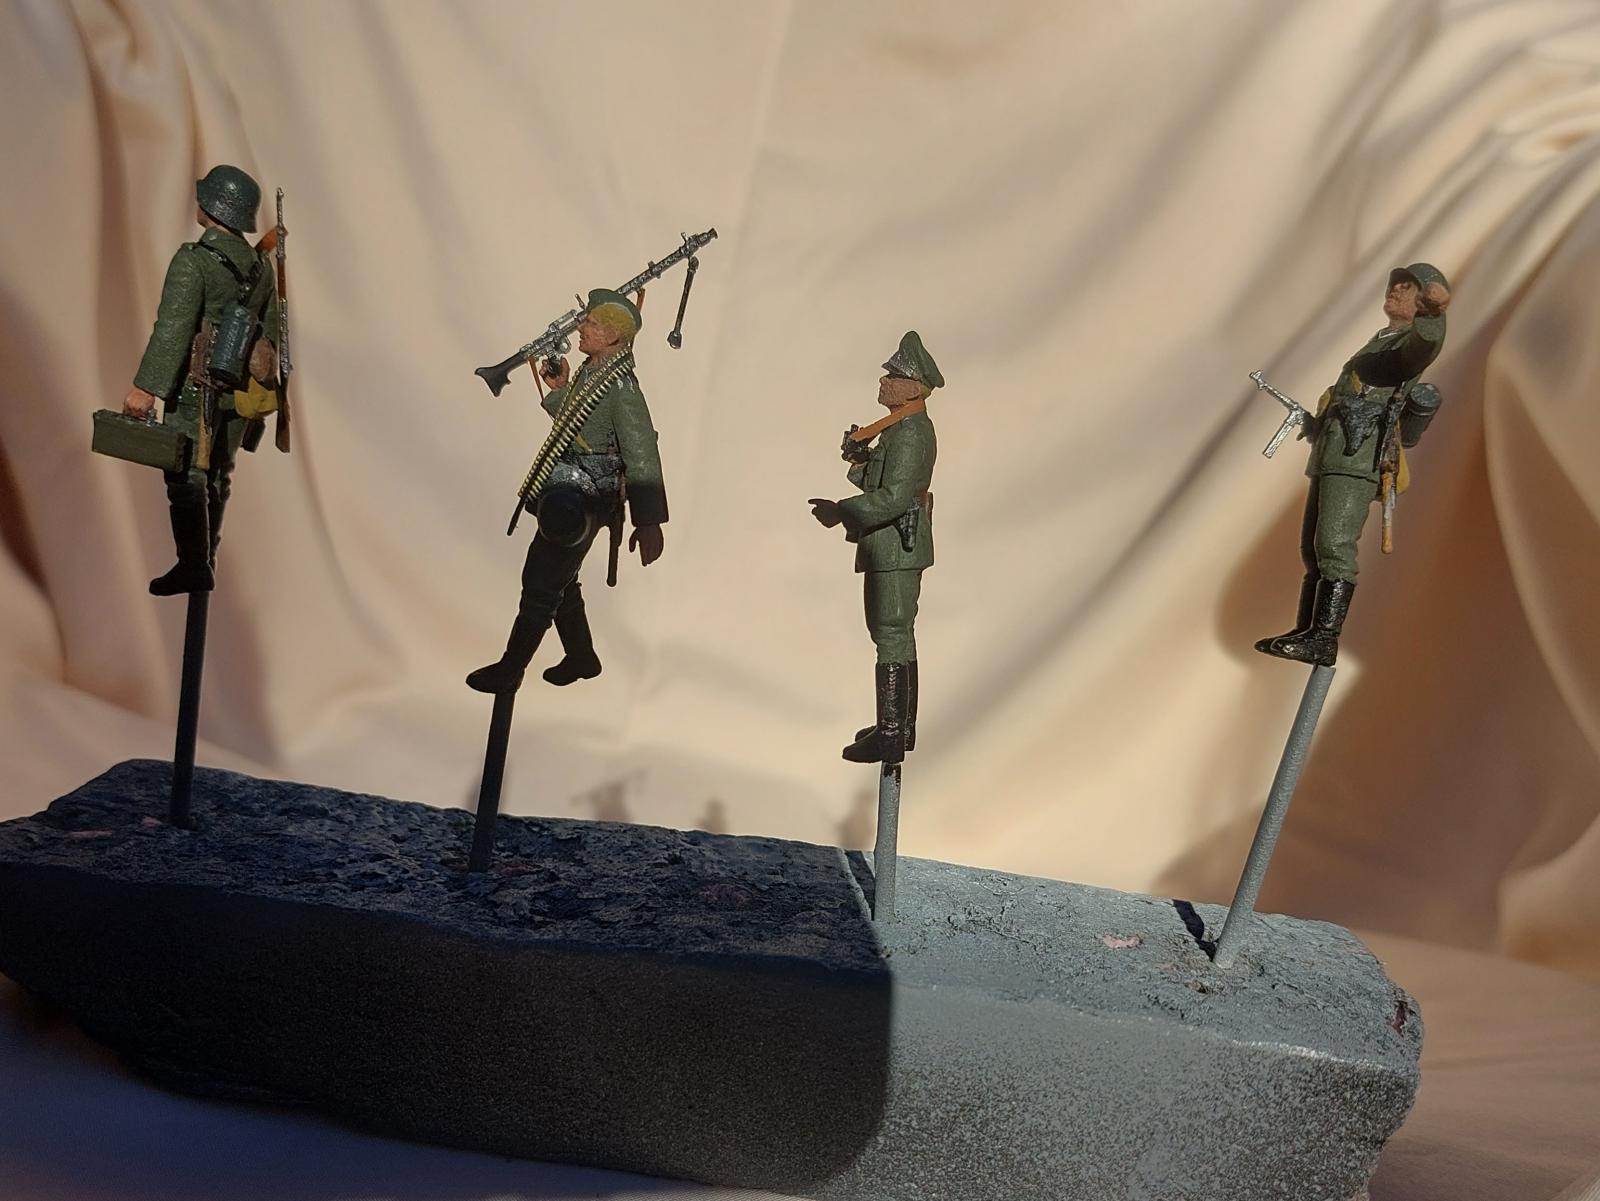
German Infantry
Building the German Infantry figures is much more of a challenge than the vehicle. There are no instructions for the figure. Part numbers and paint call-outs are included on the two color pages. Furthermore, only a few detail items have paint call-outs. Research is required to determine colors for most everything except the uniforms, boots, and insignia.
I don’t know what magic/voodoo ICM has used to mold their figures, but mold seams are almost invisible. And I would swear I made a couple more prevalent after cleaning than if I had left them alone. Another interesting thing I noticed, and I don’t know if this was intentional or not, was when attaching arms and legs. This always seems to leave a gap where they attach. I found that separate legs create a seam that matches a seam line on the clothing. Also, when attaching the arms when rotated into proper position the attachment seam essentially disappears. If the arms are not in their correct positions there is a small gap present.
Another nice feature is that one side of the coat bottom is a separate piece. This allows for some adjustment to hide the leg seam. However, I found that three of these parts were overly thick and required filing to get them to look like they are coming from under the belt.
The only true problem was a “short shot” on the figure holding the MP40 and pointing. The pointing hand was just fist, without detail.
The figures were assembled with legs, arms, heads, and helmets before priming and painting. The individual equipment primed and painted separately and the added to the figures.
Adding on all the gear takes care in that many of them have limited attachment area. There is a two part ammunition bandolier for the MG34 gunner. This is made out of a softer, flexible plastic that feel s like engineering plastic. I use cyanoacrylate glue to attach the two parts.
Also of note is that the straps for the Mauser rifle, MG34 machine gun, and the commanders binoculars must be added by the modeler. I made mine by painting both sides of some tissue paper (used for stuffing present bags) with leather brown, then cutting thin strips for the straps. I attached them with Aleene’s Tack y Glue.
Painting and Finish
Painting the G7107 truck is easy, if it does not have a color callout it is German Gray.
The chassis assembly and suspension (Steps 1-15), transmission and drive shafts (Steps 18, 19, 24 and 25), axles (Steps 26-34), battery box (Steps 37-39), running boards (Steps 40-43), and the steering gear (Step 63) were all assembled first. This major sub-assembly was primed with Krylon Fusion All-In-One paint and primer Matte Glacier Gray. Sprue D was primed with Krylon Fusion All-In-One paint and primer Matte Black. After the primer dried the chassis sub-assembly was painted with Tamiya TS-4 German Gray rattle can.
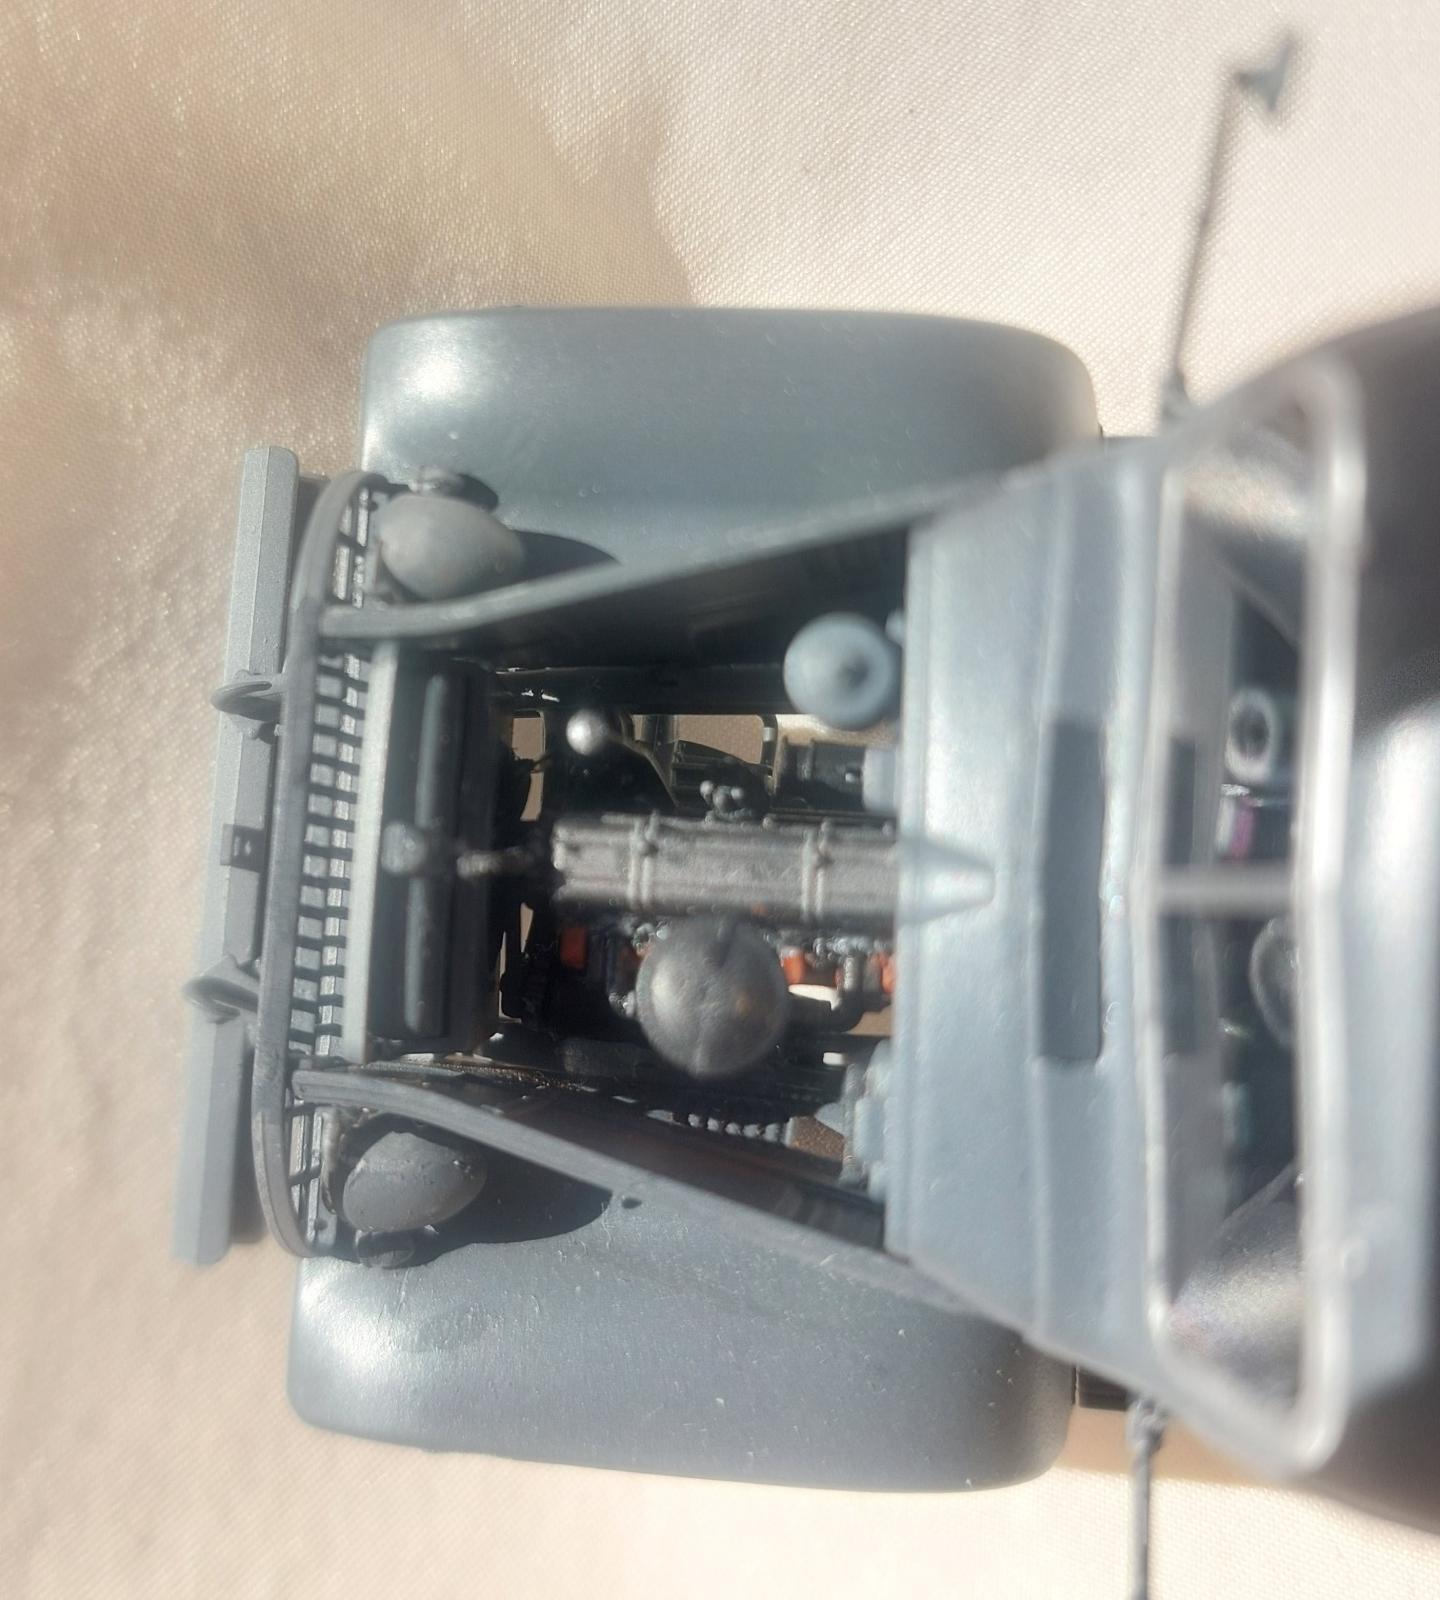
For the engine I attached all the parts to be painted steel (steps 16-24 and steps 44-45 and 62) primed the assembly Krylon Matte Black the brush painted it with Mission Model Paints Cold Rolled Steel (MMM-003). After the paint cured I attached the engine to the frame as well as the exhaust pipe which was painted Life Color Matt Rust 1 (LC32) and textured with Brandon Enterprises rust pigments.
I built the cab interior through step 53, but left out the seat. This whole thing was then primed with Krylon Matte Glacier Gray and sprayed Tamiya TS-4 German Gray. I then painted the rearview mirror (part D5), dials and level knobs. The mirror was chromed with a Molotow liquid chrome mirror effect paint pen. For the dial I used Model Master Enamel Insignia White, while the lever knobs were painted Model Master Acryl Flat Black. The seat bottom and back were assembled and painted Tamiya XF-26 Dark Green.
The painted seat was attached to the painted floor before the cab walls were assembled. The remainder of Sprue A was primed with Krylon Matte Glacier Gray and painted Tamiya TS-4 German Gray. The door and window handles in steps 57 and 58 were painted with the Molotow liquid chrome pen before being attached. The parts from Step 60 were also attached to the cab. After cleaning the roof and rear wall seams I masked all the window openings and repainted the cab Tamiya German Gray.
The radiator (Steps 64-66) was assembled, primed Matte Glacier Gray and brush painted Tamiya XF-53 Neutral Gray for the warm gray areas. The other components were brush painted Tamiya XF-53 German Gray.
The completed cargo bed was primed with Krylon Matte Glacier Gray and sprayed Tamiya TS-4 German Gray before it was attached to the frame. The wheel s (Steps 73 and 100-102) were also primed Krylon Matte Glacier Gray and sprayed Tamiya TS-4 German Gray while still on the sprue. After the wheel s were assembled the tires were brush painted ICM Rubber Black (1039).
Final details on Sprue C were primed with Krylon Matte Glacier Gray and sprayed Tamiya TS-4 German Gray before being attached. Small parts called out as aluminum were brush painted with Mission Model Paints Aluminum (MMM-003), while other parts were brush painted Tamiya XF-53 German Gray.
Figures
Research is needed to paint the figures as only paint colors for the uniform, ruck sack, boots, helmet, insignia, and skin are called out. There are no colors given for the rest of the extensive equipment provided (gas mask canister, canteen, shovel, pistol holster, straps, magazine holders, map case, and bandolier ammunition). Fortunately these are all common items that can be easily researched for appropriate colors. I found a nice reference with Vallejo colors on the PanzerModels website.
The figures received a coat of Krylon Matte Glacier Gray. They were then pre-shaded by spraying them from above with Tamiya TS-27 Matt White. After 24-hours the figures were turned upside down and sprayed with Humbrol Black Matt 33. This yields a nice highlight/shadow effect. The uniforms and machine gunners cap are then painted in glazes of Tamiya XF-65 Field Grey.
Equipment was painted separately on the sprue using the following for the colors: Tamiya X-18 Semi-Gloss Black for boots, Y-straps, belts knife scabbard, holsters, straps on the MP-40 magazine pouches, and details on the personnel shovel; Model Master Acryl Schwarzgrun RLM 70 for the helmets, gas mask canisters; Tamiya XF-61 Dark Green for the Ammunition boxes and the tops of the canteens; ICM 1060 Middlestone for the gas mask canister straps MP-40 magazine pouches, and ruck sacks; Mission Models MMM005 Aluminum for strap and belt buckles, and commanders insignia; Tamiya X‑2 Flat White for insignia, Model Master Acryl Brass for commanders insignia and ammunition bandolier bullets; Tamiya X-10 Gun metal for the metal parts of the Mauser, the MP40, and MG34; Model Master Flat Black for the commanders binoculars, his hat bill, the ammo pouches on the figure carrying the ammunition boxes, and the ammunition bandolier belt; Tamiya XF-60 Dark Yellow for the personnel shovel handles; Tamiya XF-52 Flat Earth for the canteen body; Tamiya XF-10 Flat Brown for straps on the canteens, gas mask canisters, and personnel shovels; Model Master Enamel Leather For the commanders belt and map cases. I went a step further with the MG34 ammunition bandolier and painted the tip of every fifth bullet Tamiya XF-26 Deep Green to represent tracer rounds.
Skin was base coated with Model Master Acryl Skin Tone Warm Tint. Over top of the basic skin tone washes of Model Master Acryl Skin Tone Tint Base - Dark were applied until details became evident. I also dotted the eyes with Tamiya semi-gloss black.
Decals
This was easy as there are none. Thus one may want to raid their decal stash for license plates and unit markings, although research is needed to determine marking locations.
Conclusion
I recommend this kit for experienced modelers. The build is easy and straight forward but there are a number of very small/tiny and very fragile parts to deal with. Even though this is a 1:35 scale kit experience with 1:72 or even 1:144 scale models will help when dealing with the tiny parts.
By carefully reviewing the assembly sequence laid out in the instructions it is easy to see where sub-assemblies can be created to help with painting and masking. This applies to the three main sub-assemblies of chassis and engine, fire hose box, and cab.
I would like to thank ICM for providing this kit for review, and IPMS/USA for giving me the opportunity to build it.


Comments
G7101 in German Service with Infantry
Well written review of the kit, pointing out some changes in assembly from the original release.
Add new comment
This site is protected by reCAPTCHA and the Google Privacy Policy and Terms of Service apply.
Similar Reviews