
Freightliner Heavy Dump Truck
Summary
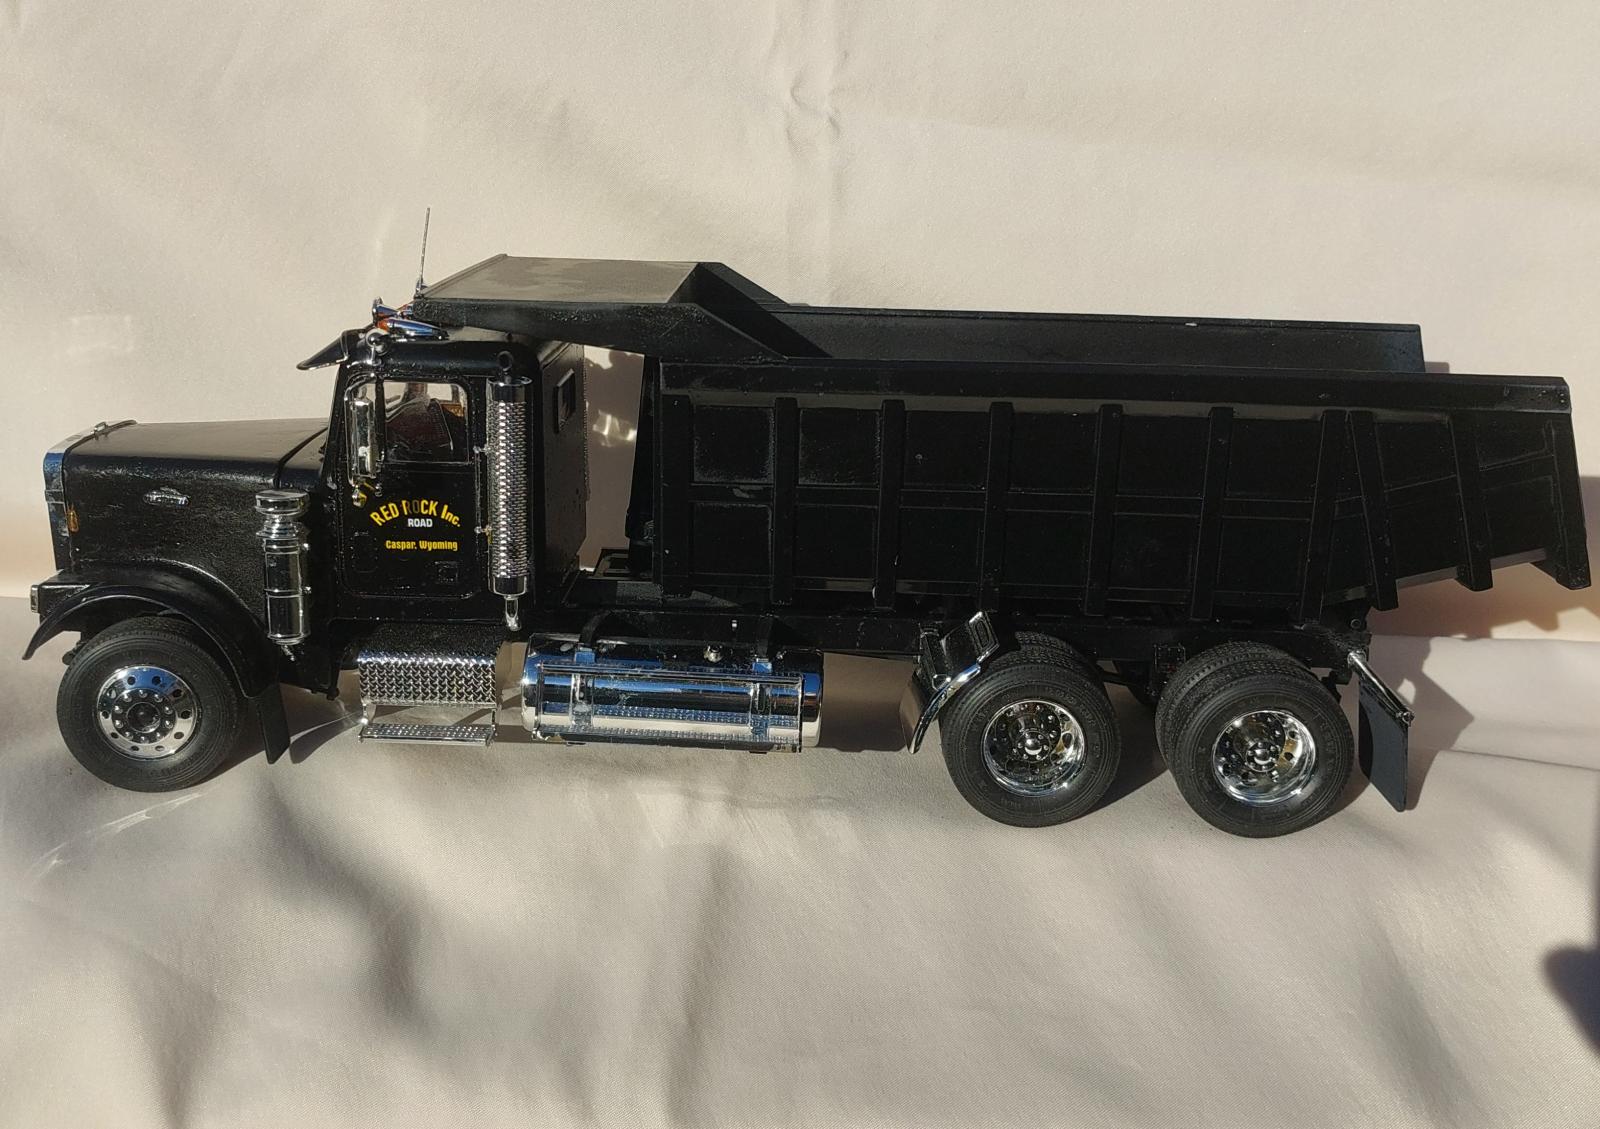
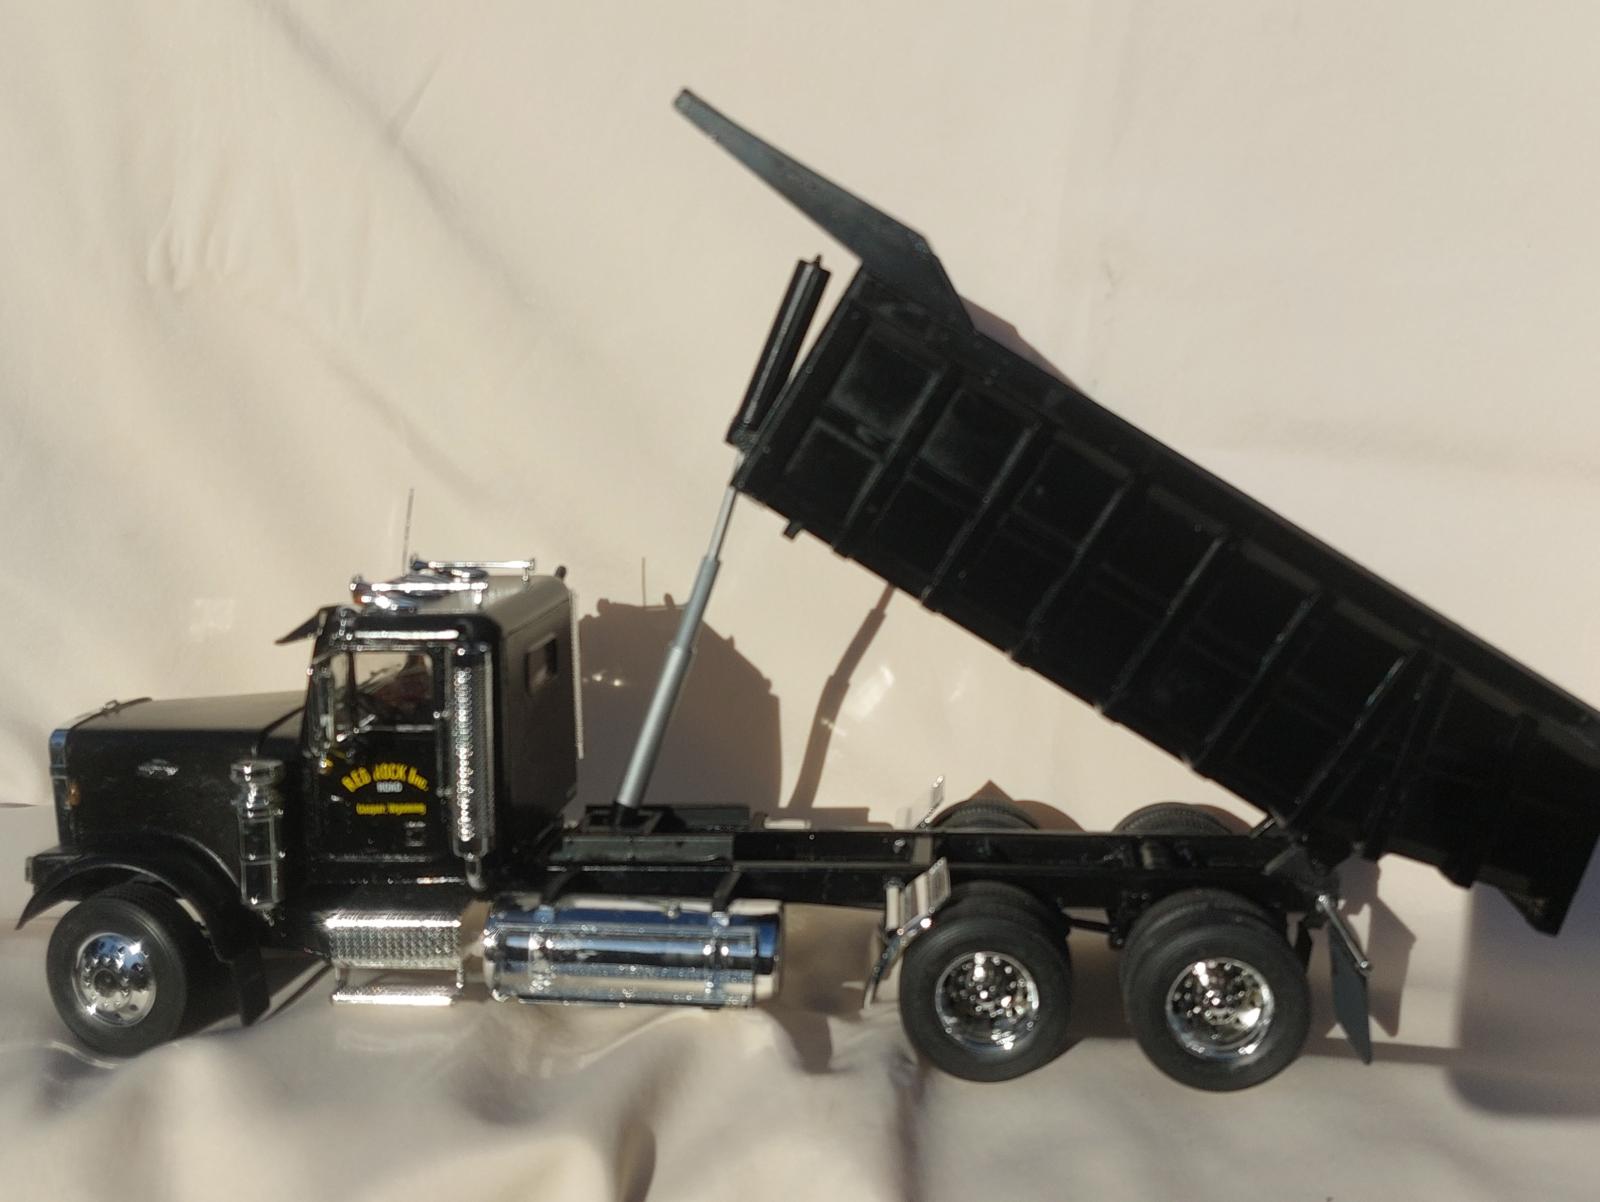
This kit represents a vehicle from the 1970’s-1980’s era as the dump body doesn’t have a rear door and lacks a debris/dust tarp. Today vehicles like this are only seen in use in quarries and not on the road. If one were to include a rear door could easily be scratch-built from styrene sheet and strip and debris/dust tarp made from styrene rod and Kleenex for a tarp.
Background
The following is excerpted from the instruction sheet.
The renowned US Portland-based company "Freightliner Trucks", which operates in the industrial vehicle sector and is owned by the automotive giant Daimler, is mainly known for being one of the key manufacturers of trucks used for "on road" transportation roles. However, it is also important to recognize the versatility and success over time of those Freightliners that were dedicated to "heavy duties" jobs. In fact, market demand for "quarry and construction" vehicles saw strong growth in the late 1970s and early 1980s, subsequently impacting the production volumes of the main truck and heavy vehicle manufacturers. Freightliner designers have worked on the most suitable technical solutions to meet the needs of the construction market, namely, reinforced chassis and rear axles for greater payload, tough and sturdy tipping rear decks, optimized engines and transmissions for demanding loads and steep slopes.
What’s in the Box
- 7 sprues of colored plastic (1 red, 1 silvery gray, 1 chrome, 1 dark gray, 2 black, and a dark gray dump body) each color individually bagged.
- 1 small bag with 1 sprue of clear parts.
- A sprue with 10 rubber tires.
- 1 small sheet of decals
- A 7⅝-inch by 13-inch instruction sheet that folds out four pages wide, printed on front and back.
The Instructions
The instructions consist of a 7⅝-inch by 13-inch instruction sheet that folds out four pages wide, printed on front and back. The first page has a brief description of the vehicle in English, French, Italian, Spanish, German, and Russian. The second page has the assembly warning, a parts map, picture codes, and decal instructions. The assembly warning and decal instructions are also in the same six languages as the introduction. The top of the third page is the parts map for the dump body and paint colors. Colors are given by Federal Standard (FS) number and Italeri acrylic paint number. The bottom of page 2 is assembly instructions 1 and 2. Pages 3 thru 7 are the remaining assembly instructions. The bottom of the last page has customer contact information. The images are sharp and show the assembly as an exploded ¾ view.
Things to consider before starting
For a beginner, because of the pre-colored plastic this kit could be built without painting. Also, observation of actual dump trucks and online references show that dump trucks come in a myriad of color combinations. The instructions simple paint the pre-colored parts the same color. But just about any color can be used. I recommend deciding before you start what color you want your vehicle.
Another item to watch is mold seams and butt joints. This kit is clearly a re-release of an older kit as most parts have prominent seam lines that need to be cleaned up and require more than a swipe of a sanding stick. The kit itself is just a standard Freightliner tractor with the addition of the dump body. There are numerous unused parts that are holdovers from the tractor version (for example the fifth wheel and mounting plate and bed for sleeper) on the sprues.
Construction
I start all my builds by scrubbing the sprues with an old toothbrush in warm water and dish soap (Dawn) to remove any residual mold release residue. The assembly is broken down into four standard sub-assemblies, frame-engine-wheels, interior and cab, exterior details, and the dump body.
Chassis, Engine, and Wheels
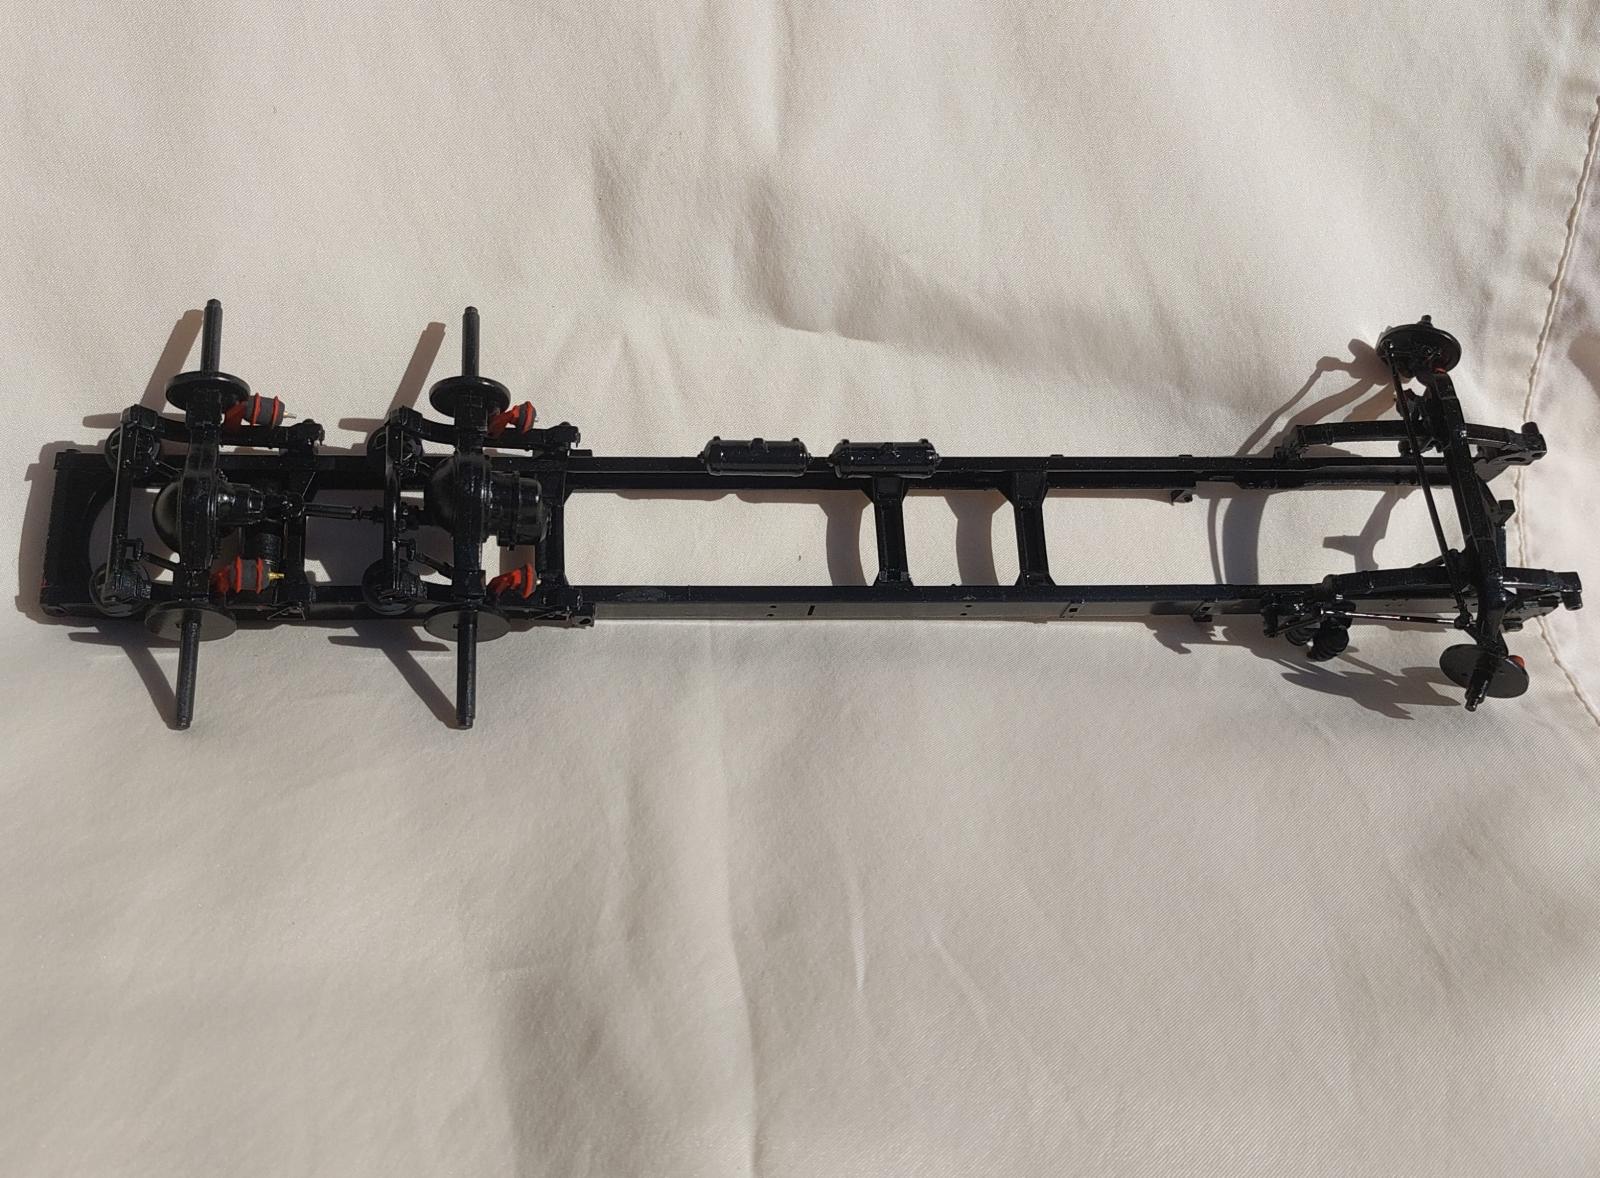
Like most vehicle models, assembly starts with the main chassis. This is made up of standard two C-channel side rails and cross‑members. There are three identical mid-frame cross-members, two more in the rear and one in the front for mounting the engine. As with any model with separate side rails keeping the frame true and square is critical to a well fitting kit.
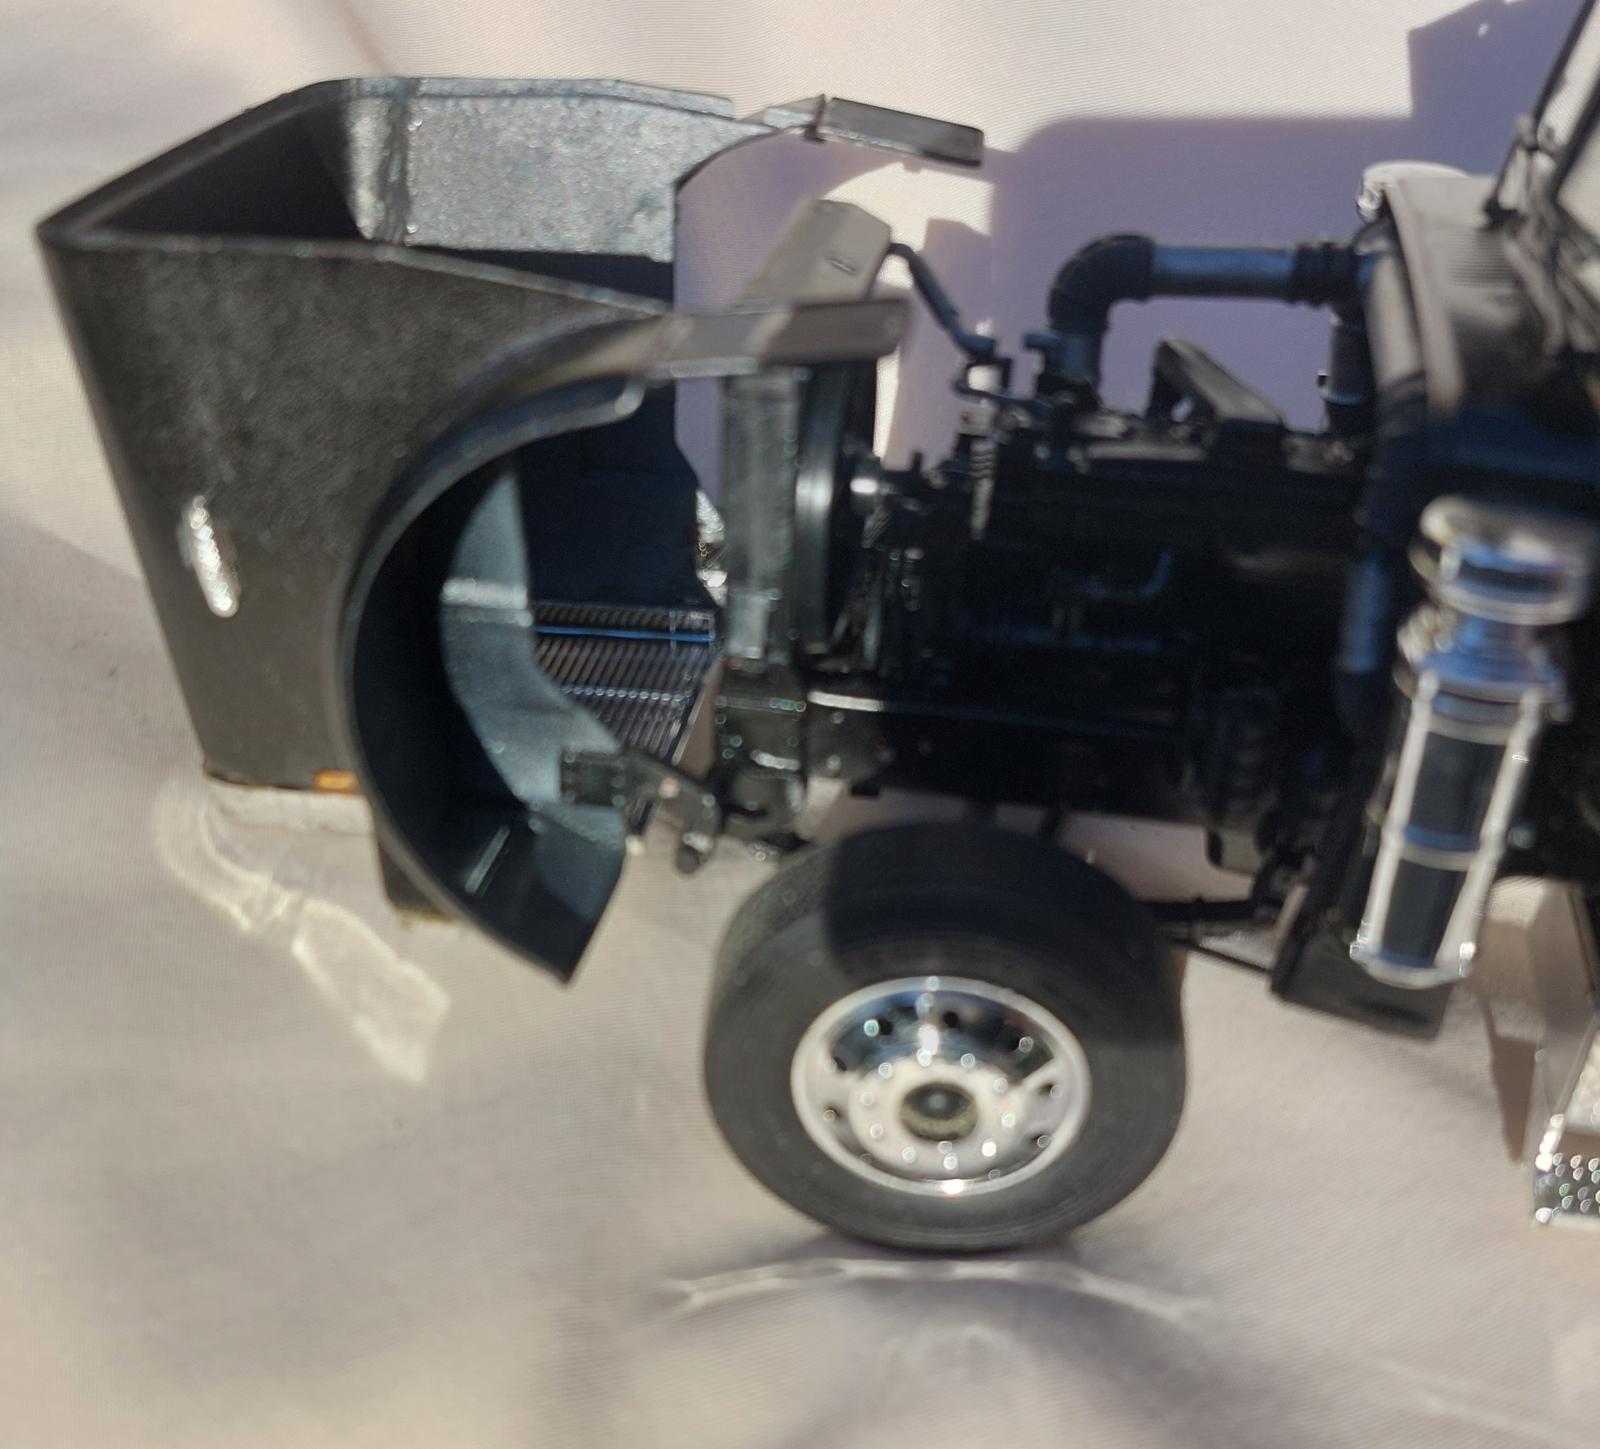
Steps 2 and 3 cover construction of the front and rear axles, respectively. The front axle has several attachments that are heat flattened with a heated screwdriver (or equivalent) to create a steerable front axle. There is plenty of plastic sticking out to get a very solid flat head seal. Watch the orientation of part 18A in the inset in Step 2 as it changes in later steps. It mounts with the elbow pointing forward.
The tie rod (parts 15A, 17A and 22A) goes to the rear of the axle (part 13A). Use care when melting the connections. There is plenty of plastic to allow a good flat head to be formed. I deviated from the instructions and attached the two part radiator from Step 6 at this point so the completed frame and radiator could be painted.
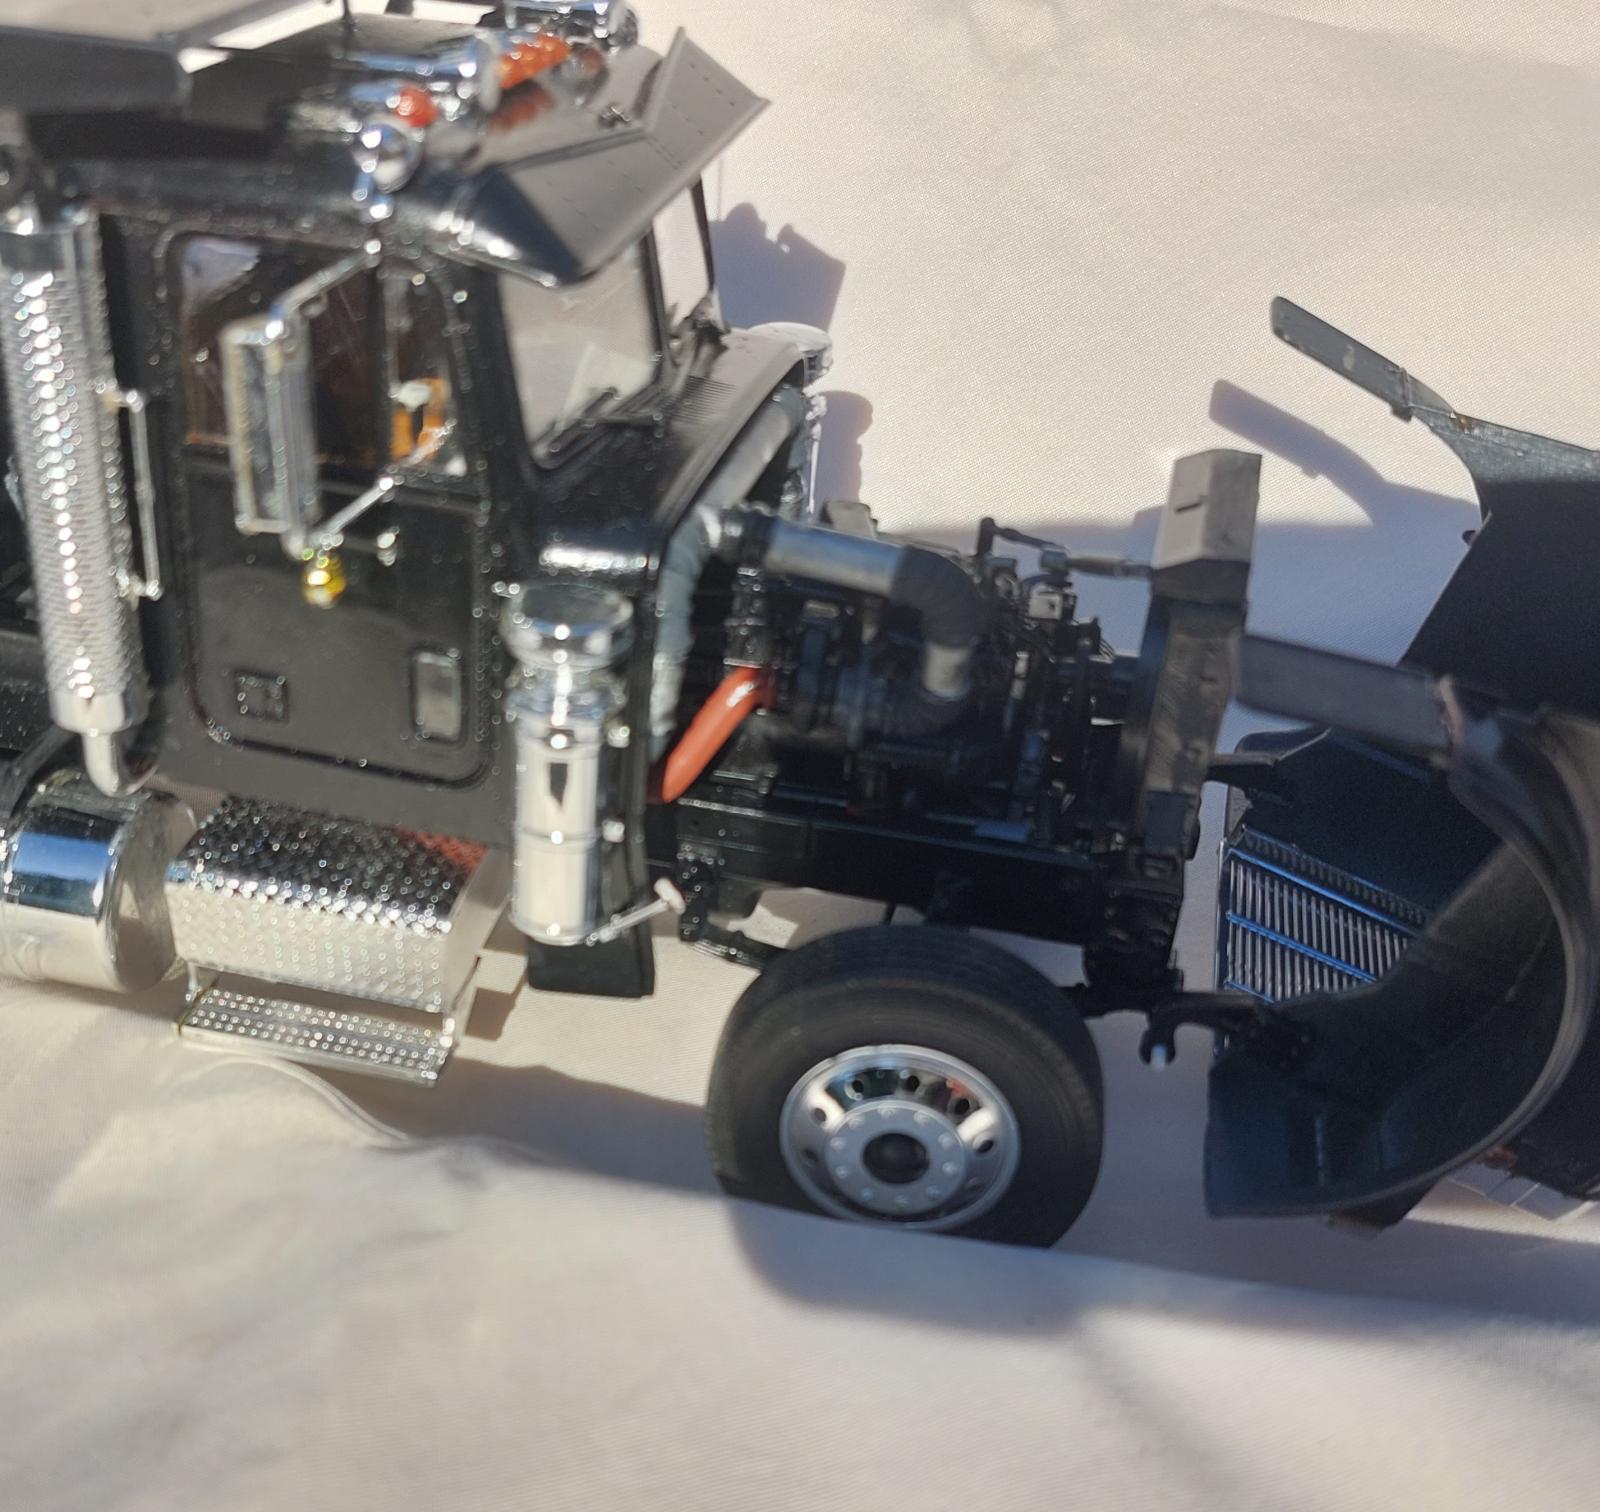
Step 4 is assembly of the engine. The engine has reasonable detail, but diehard truck modelers will want to add wires and missing small parts. Part 77B and 78B attach by way of a half circle pin and corresponding hole. However, this results in the parts either attaching to the engine backwards or to each other upside down. I simple cut and sanded off the pin and glued them as a butt joint. This allowed it to be mounted in the proper orientation. I painted the engine gloss black then brush painted parts called out as other colors.
Step 5 is assembly of the tires. A nice touch here is that the tires are formed with the mold seam offset to one side, so there is no seam down the middle of the tire requiring clean-up. While this removed having to clean up an often contentious seam it does leave one side of the tire with a bit of a square edge instead of a rounded one. I found that putting that edge to the inside it was hardly noticeable.
Steps 6 and 7 mount engine and the remaining frame equipment to the left and right sides, respectively. Most of these parts are chromed and require careful removal of the plating to get and solid glue joint. Also note that the hub covers (parts 108A) are the same color as the cab.
Interior and Cab
Steps 8 and 9 are assembly of the interior and cab, respectively. The floor (part 126D) should NOT be leather as called out. It should be the same color as the interior, as should the steering wheel (part 131B), steering column (part 132B), and gear shift (part 133B). In step 9 the cab ceiling (part 150D) is called out as gunship gray, but references online showed it to be leather like the seats and door panels.
The attachment of the roof extension (part 151E to the roof (part 150D) isn’t clear. Part 151E attaches to the depressed front of part 150D.
I deviated in step 9 by leaving the windows out and only temporarily attaching the interior until after painting. Then I removed the interior installed the windows and glued the interior in.
Cab and Hood Mounting and Exterior Details
Steps 10 thru 13 cover mounting the cab and hood to the frame. In step 10 only cement the end of the hood pins (part 166B) that insert into the frame. In steps 12 and 13 only glue the hood latches (parts 188C) to the cab so that the hood can be opened. Also be careful when removing parts 170C from the sprue as there is a square pin that attaches the part to the cab (don’t ask how I found that out). Again many chrome parts that need to have the plating removed from the gluing surface.
Dump Body Assembly
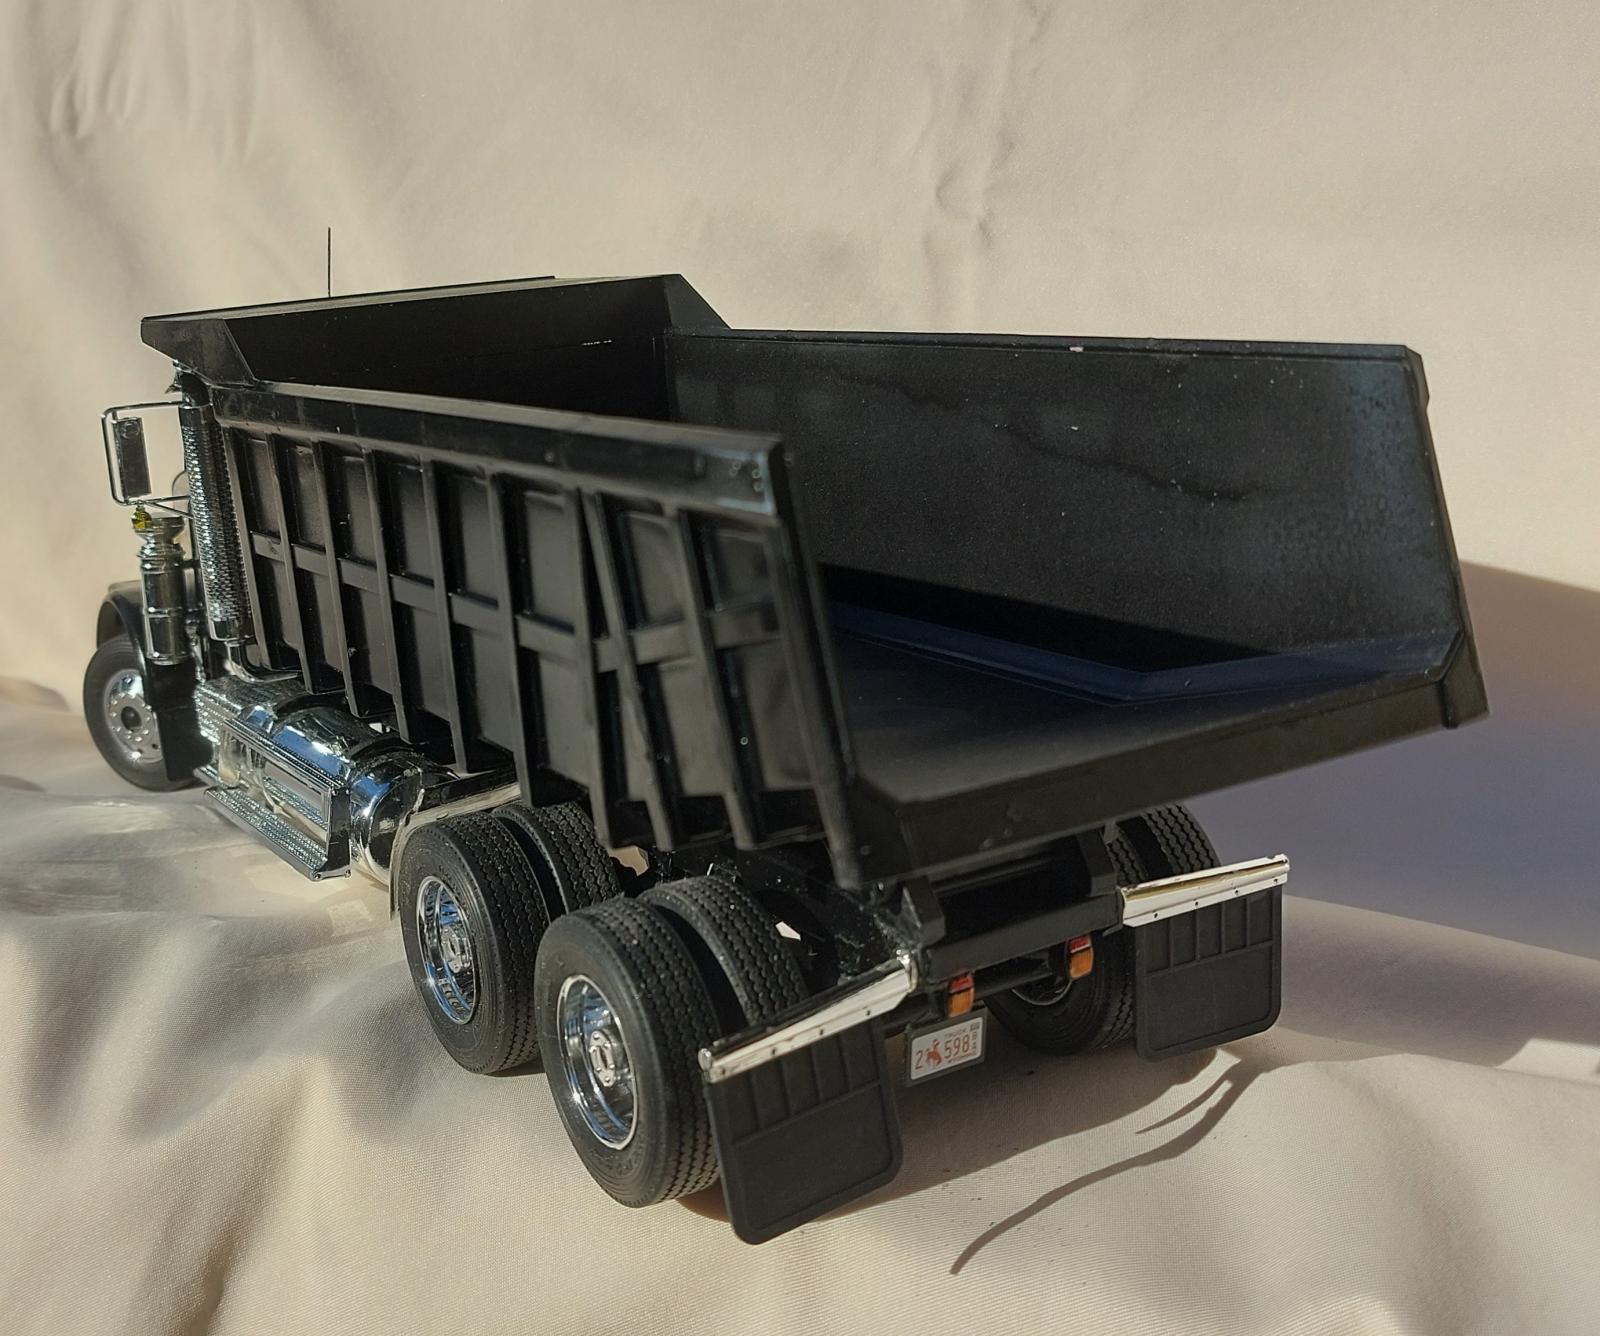
Step 14 is assembly of the dump body and attaching it to the truck frame. I found the sides of the one-piece dump body were slightly warped so I used a chunk of Styrofoam insulation to hold it square while I attached the strengthening ribs. To make sure everything stayed square I glued one side at a time clamped the ribs to the body and let it set overnight. I did both sides first, then the bottom, and finished with the front ribs. I suggest gluing the overhang sides (parts 239M and 240M) to the overhang (part 232M) before attaching the overhang to the body. This made it much easier to impart the slight rearward tilt that the overhang has.
To attach the dump body to the truck frame I first glued the rear hinge (Parts 235M and 236M) to the rear part of the frame. I adjusted the dump body to be square with the truck and left it to cure overnight. Then I glued the piston assembly (parts (251M and 252M) to the frame. Be careful when gluing the piston frame that the piston assembly is either vertical or tilted slightly to back. Otherwise the dump body will not operate properly (again, don’t ask how I know this).
And with that I had a completed model of a heavy duty dump truck that just needs final painting.
Painting and Finish
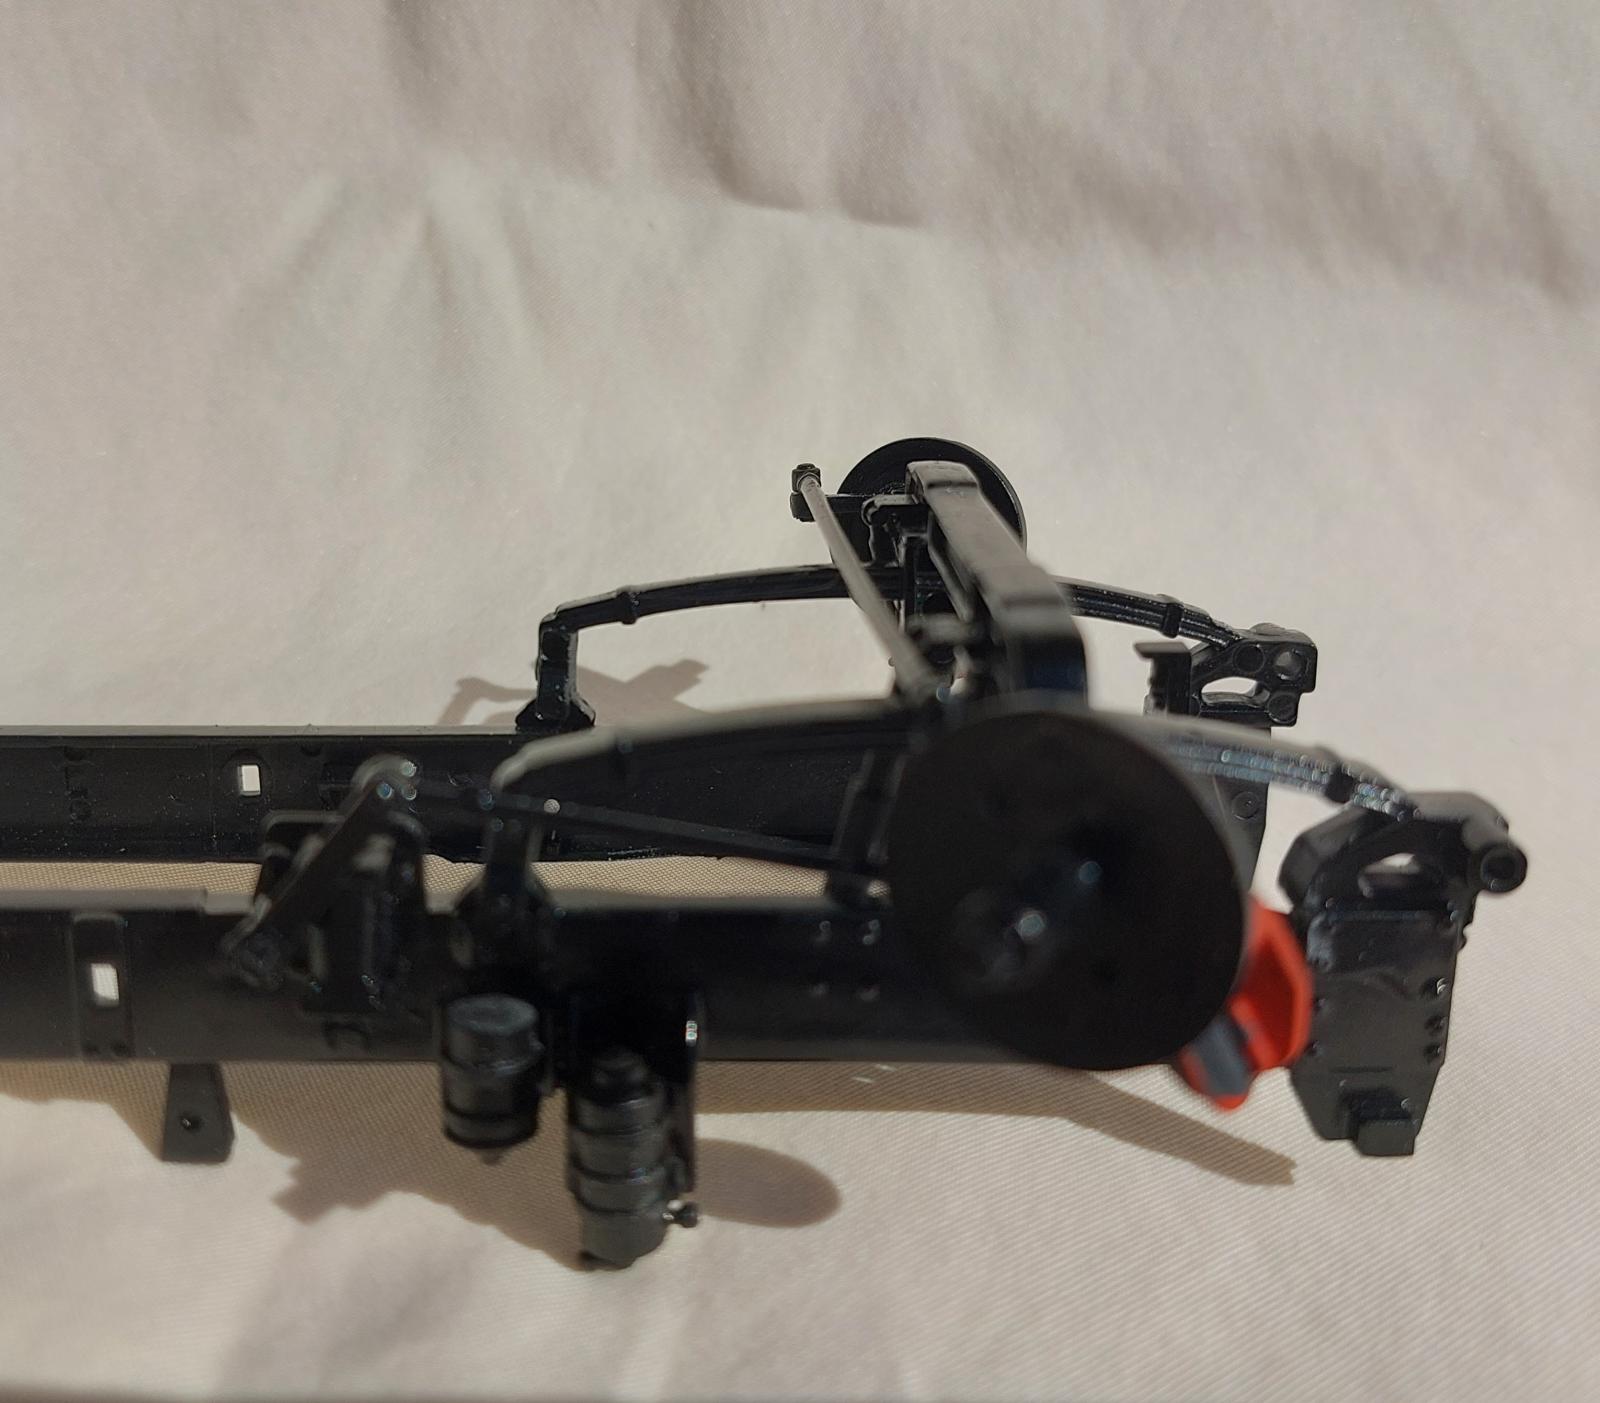
The chassis assembly and front and rear suspension and the radiator were painted as a single unit after completing assembly. They were first primed with Krylon Fusion All-In-One Matte Black paint + primer. This was allowed to cure for 24-hours. Check references as the instructions call for these to be flat black, but I found most truck frames had a semi-gloss appearance. In addition the chassis can be painted the same color as the cab and hood. I painted the assembly Tamiya TS-29 semi-gloss black. After the semi-gloss black dried the red and gold brake cylinders were brush painted. The pneumatic cushions were brush painted a rubber black instead of the called out flat black.
The engine was primed with the Krylon matte black and sprayed with Humbrol Acrylic black gloss 21. Parts in other colors were brush painted.
In step 5 the parts called out as silver were primed on the sprue with Krylon Fusion All-In-One Matte Glacier Gray paint + primer. After the primer cured for 24-hours I painted the parts with Tamiya AS-12 Bare Metal Silver. The front hubs (parts 108A) are painted the same color as the cab. In my case Humbrol Acrylic black gloss 21.
In step 6 the drive shaft is called out as gloss red, but I painted it semi-gloss black to match the rest of the frame. Also the exhaust pipe (part 105B) has no color call out. I painted it Model Master Acrylic Rust 1785. I also painted the exhaust header (part 75B and blower (part 78B) rust. In steps 6 and 7 the fuel tank mounting brackets are called out as silver. Again references showed these to be the same color as the frame so were painted semi-gloss black.
For chrome parts I highly recommend the purchase and use of the Molotow Liquid Chrome paint marker. It is an identical color to the kits chromed parts and is essential for coloring seam lines that have been cleaned up and the chrome removed.
In step 7 the mud flaps (part 125B) and the upper portion of the front mud guards (parts 117C and 118C) were painted rubber black. Taillights are called out as gloss red and gloss orange. Instead of using opaque gloss colors I first used the Liquid Chrome marker to color the light potion of the parts. I then applied Tamiya clear red (X-27) and Model Master Acryl clear orange (4625) over the silver. This gave a much more satisfying look to the lights.
Check references for interior colors. The instructions call out flat black, but references showed interiors from light gray to gloss black. I painted mine Model Master flat gull gray. For some contrast I painted the molded in floor mat flat black. The steering column has no call out but is also the interior color
The inside of the cab is called out as leather. I primed the parts with Krylon Matte Black. This was allowed to cure overnight. I then airbrushed the walls with Model Master Leather. The rear wall (part 141E) is not called out but references show it too is leather. After drying over night the leather was over-coated with Tamiya clear yellow (X-24), giving the leather a satin sheen.
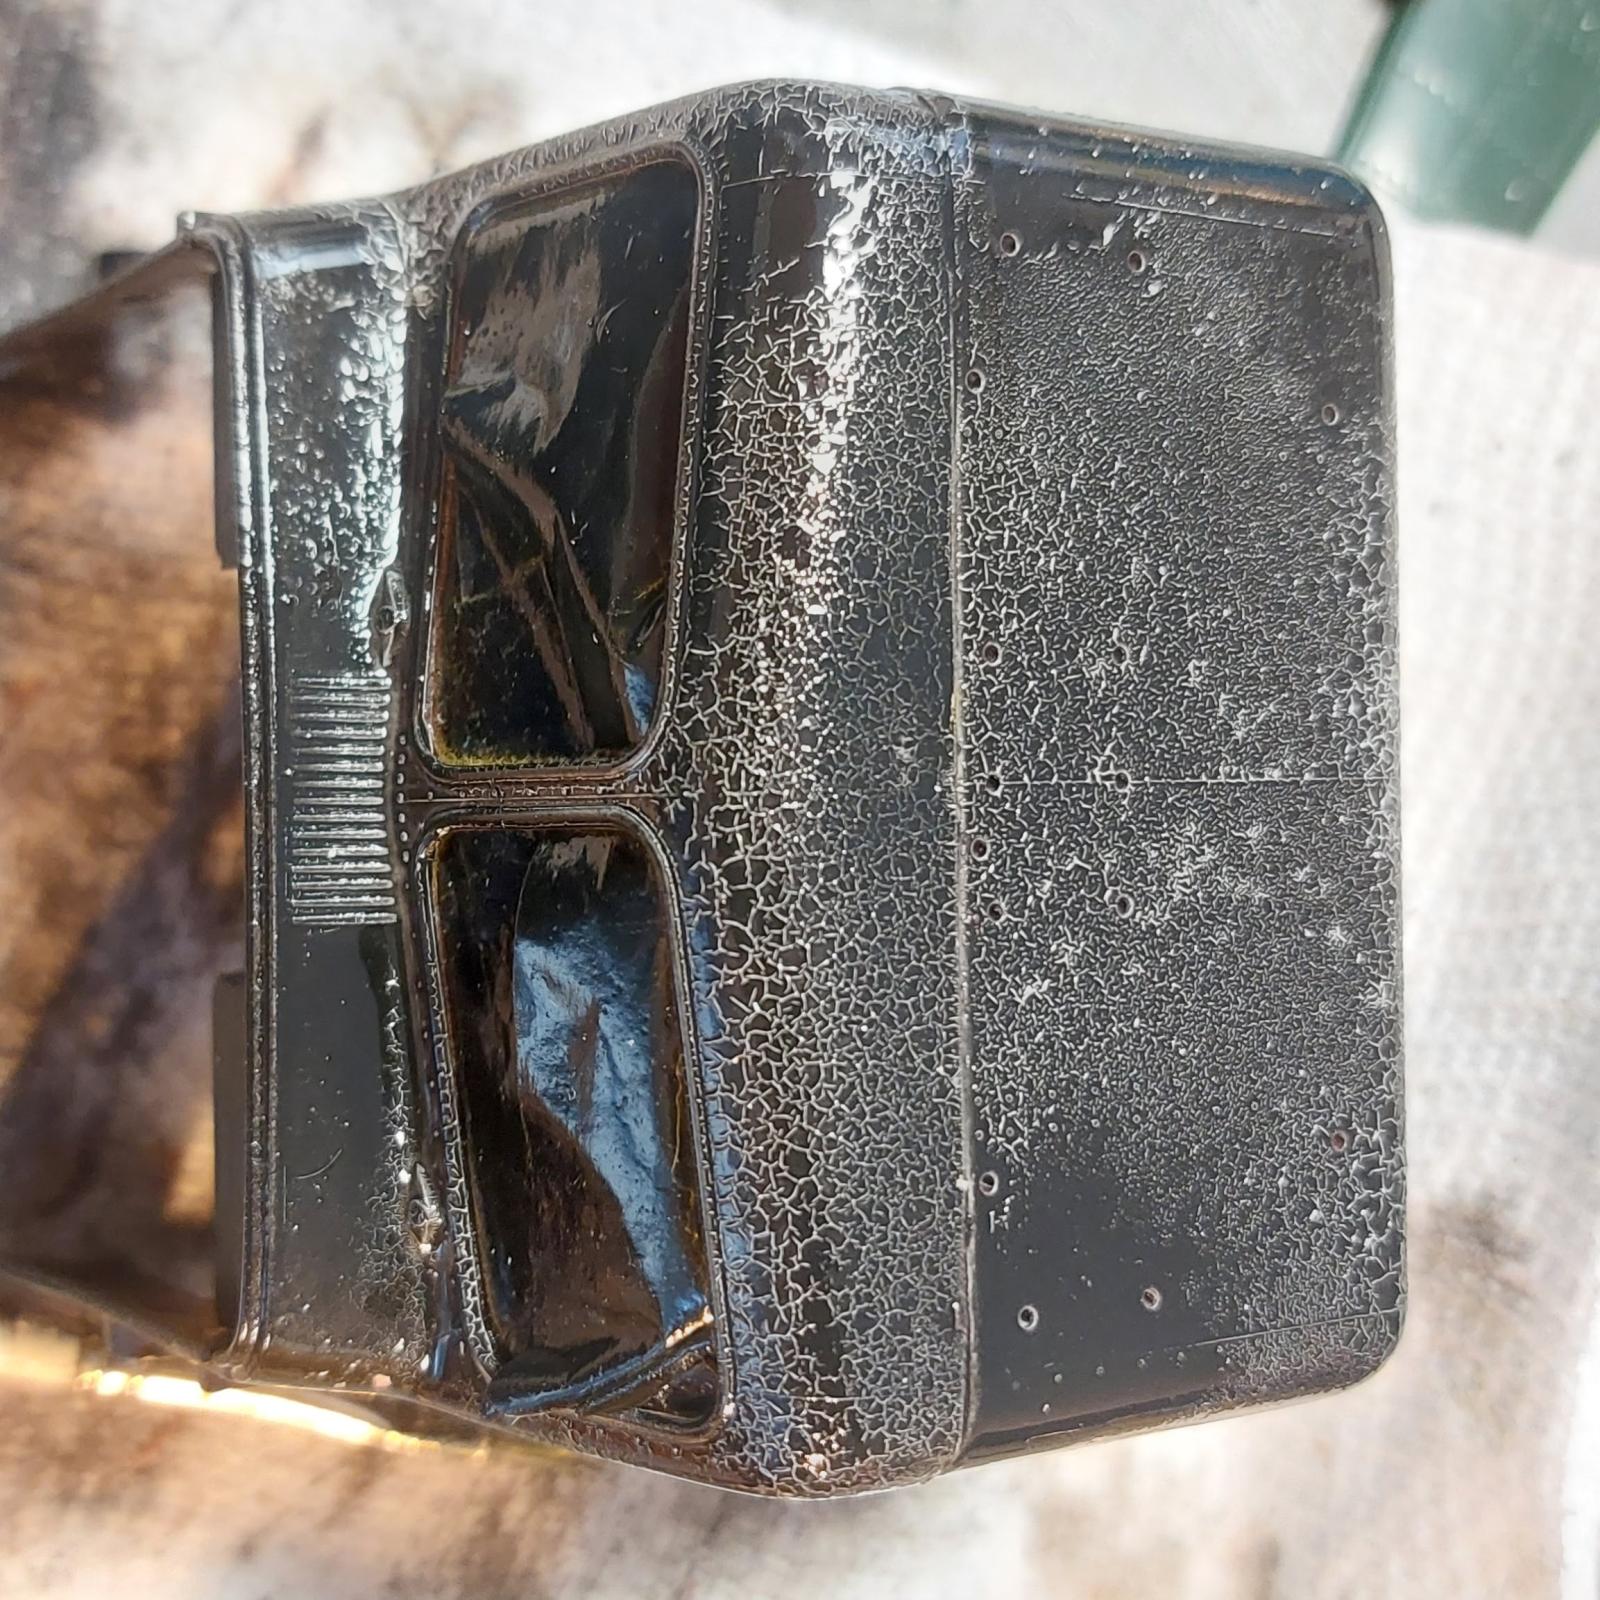
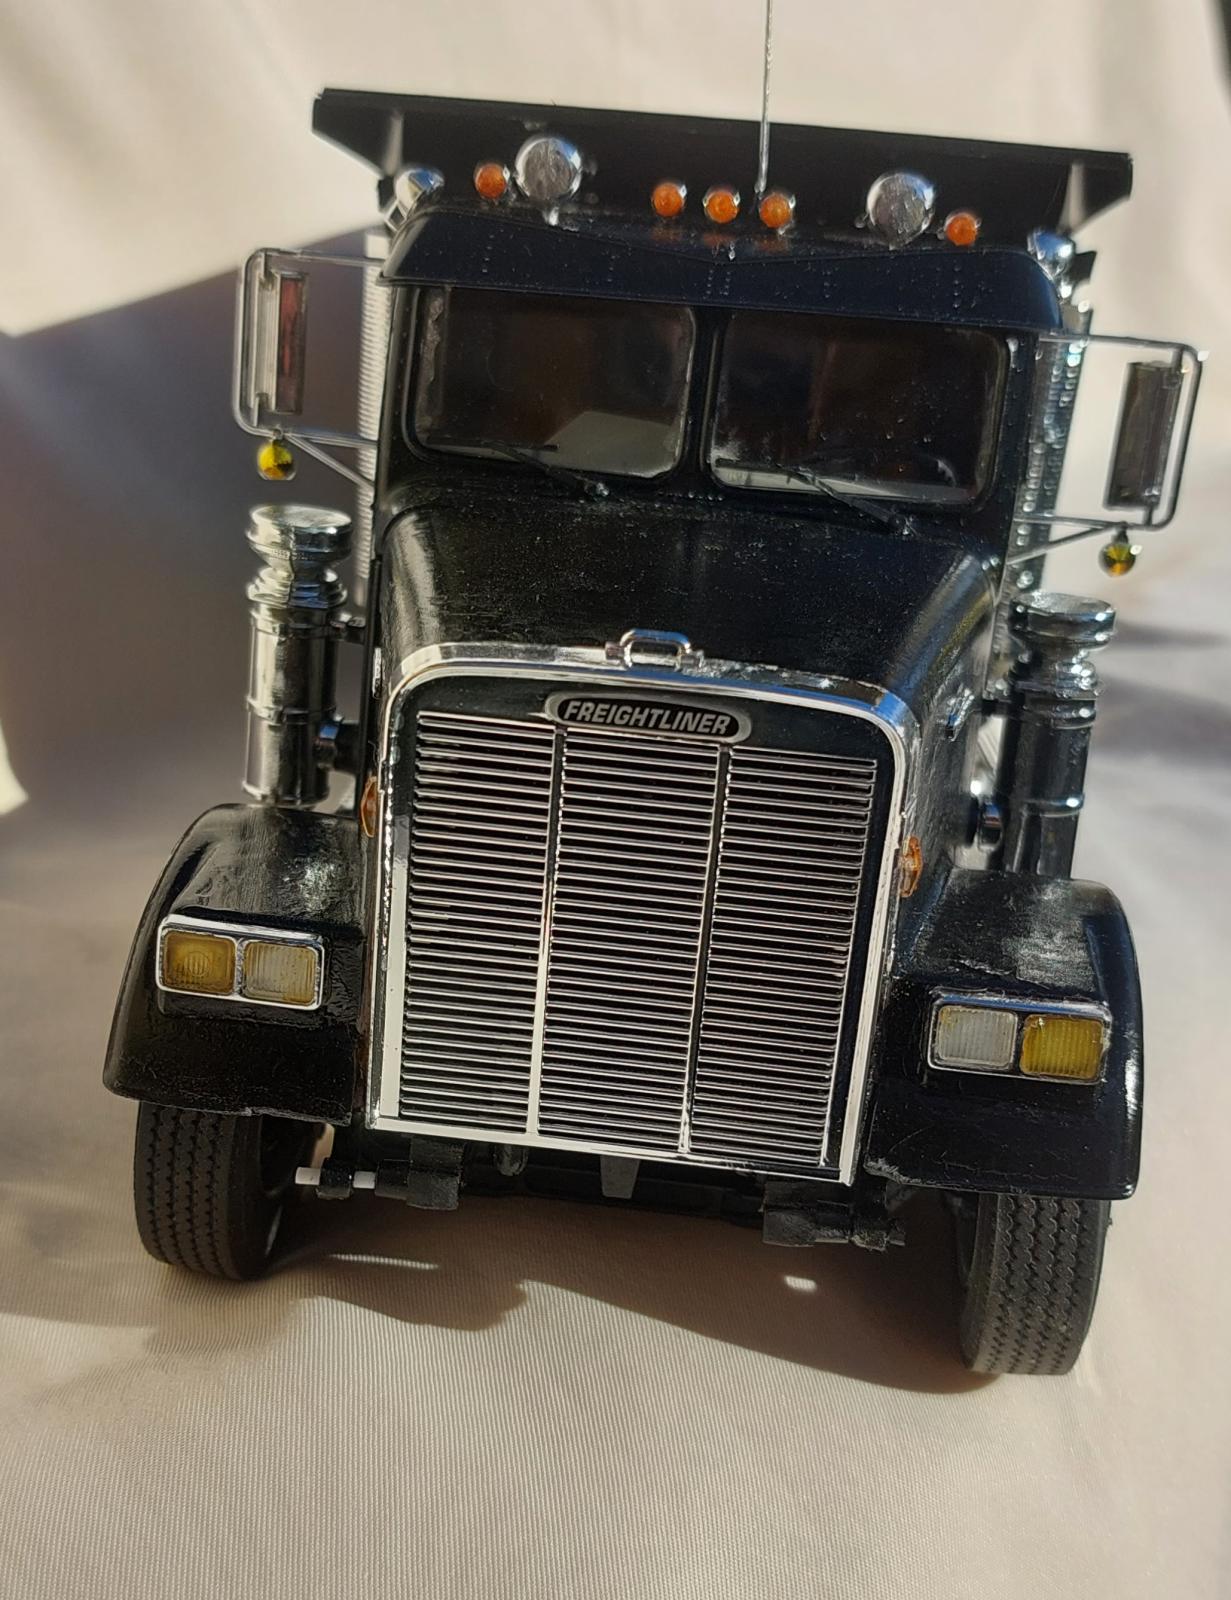
In Step 9 I left the windows out and masked the openings. I also only temporarily installed the interior. I then primed the outside of the cab and the hood (part 152E) with Krylon Gloss Stone Gray ColorMaxx Paint & Primer and let it cure for 24‑hours. I then sprayed on Humbrol Black Gloss 21 … and disaster struck. The gloss acrylic apparently reacted with the gloss primer resulting in an alligator skin type crazing. A really neat effect, but not so much for a glossy truck finish. I had to use Testors ELO to strip the parts back to the original red plastic. I then re-primed with the Krylon matte black, let it cure and applied the Humbrol black gloss 21 with no ill effects.
In Step 10 the front mud flaps (parts 156B and 157B) were painted rubber black. References showed the flex connections on the breather line (attached to the cab and engine in step 10) are also rubber, so they too were painted rubber black. In step 12 part 172C is chrome, but should be painted the same color as the cab.
The dump body was painted in stages. The main body with the ribs attached was primed with Krylon matte black and painted Humbrol black gloss 21. The piston frame (parts 250M-253M) and rear hinge (parts 234M-236M) were also primed Krylon matte black but were painted with Tamiya TS-29 Semi-Gloss Black to match the frame. The upper piston cylinder (parts 242M and 244M) and lower piston cylinder (parts 248M and 249M) were primed matte black and sprayed Humbrol black gloss 21. The pistons themselves (parts 243M, 246M, and 247M) and the portion of the lower piston housing covered by the upper housing were painted Tamiya AS-12 Bare Metal Silver.
Clear light lenses in steps 12 and 13 and the light on the mirror brackets (Parts 189C and 191C) are called out as opaque gloss colors (yellow and orange). Instead they were brush painted with Model Master Acryl Transparent Clear Orange (4625) and Tamiya Clear Yellow (X-24).
Decals
There are minimal decals involved. Only license plates, a company name and a couple of Freightliner decals are all that are included. I used the Red and Blue MicroSol/MicroSet products to apply the decals without any problems. Once dry, I gave the cab and the hood a coat of Humbrol Gloss Varnish to seal the decals.
Conclusion
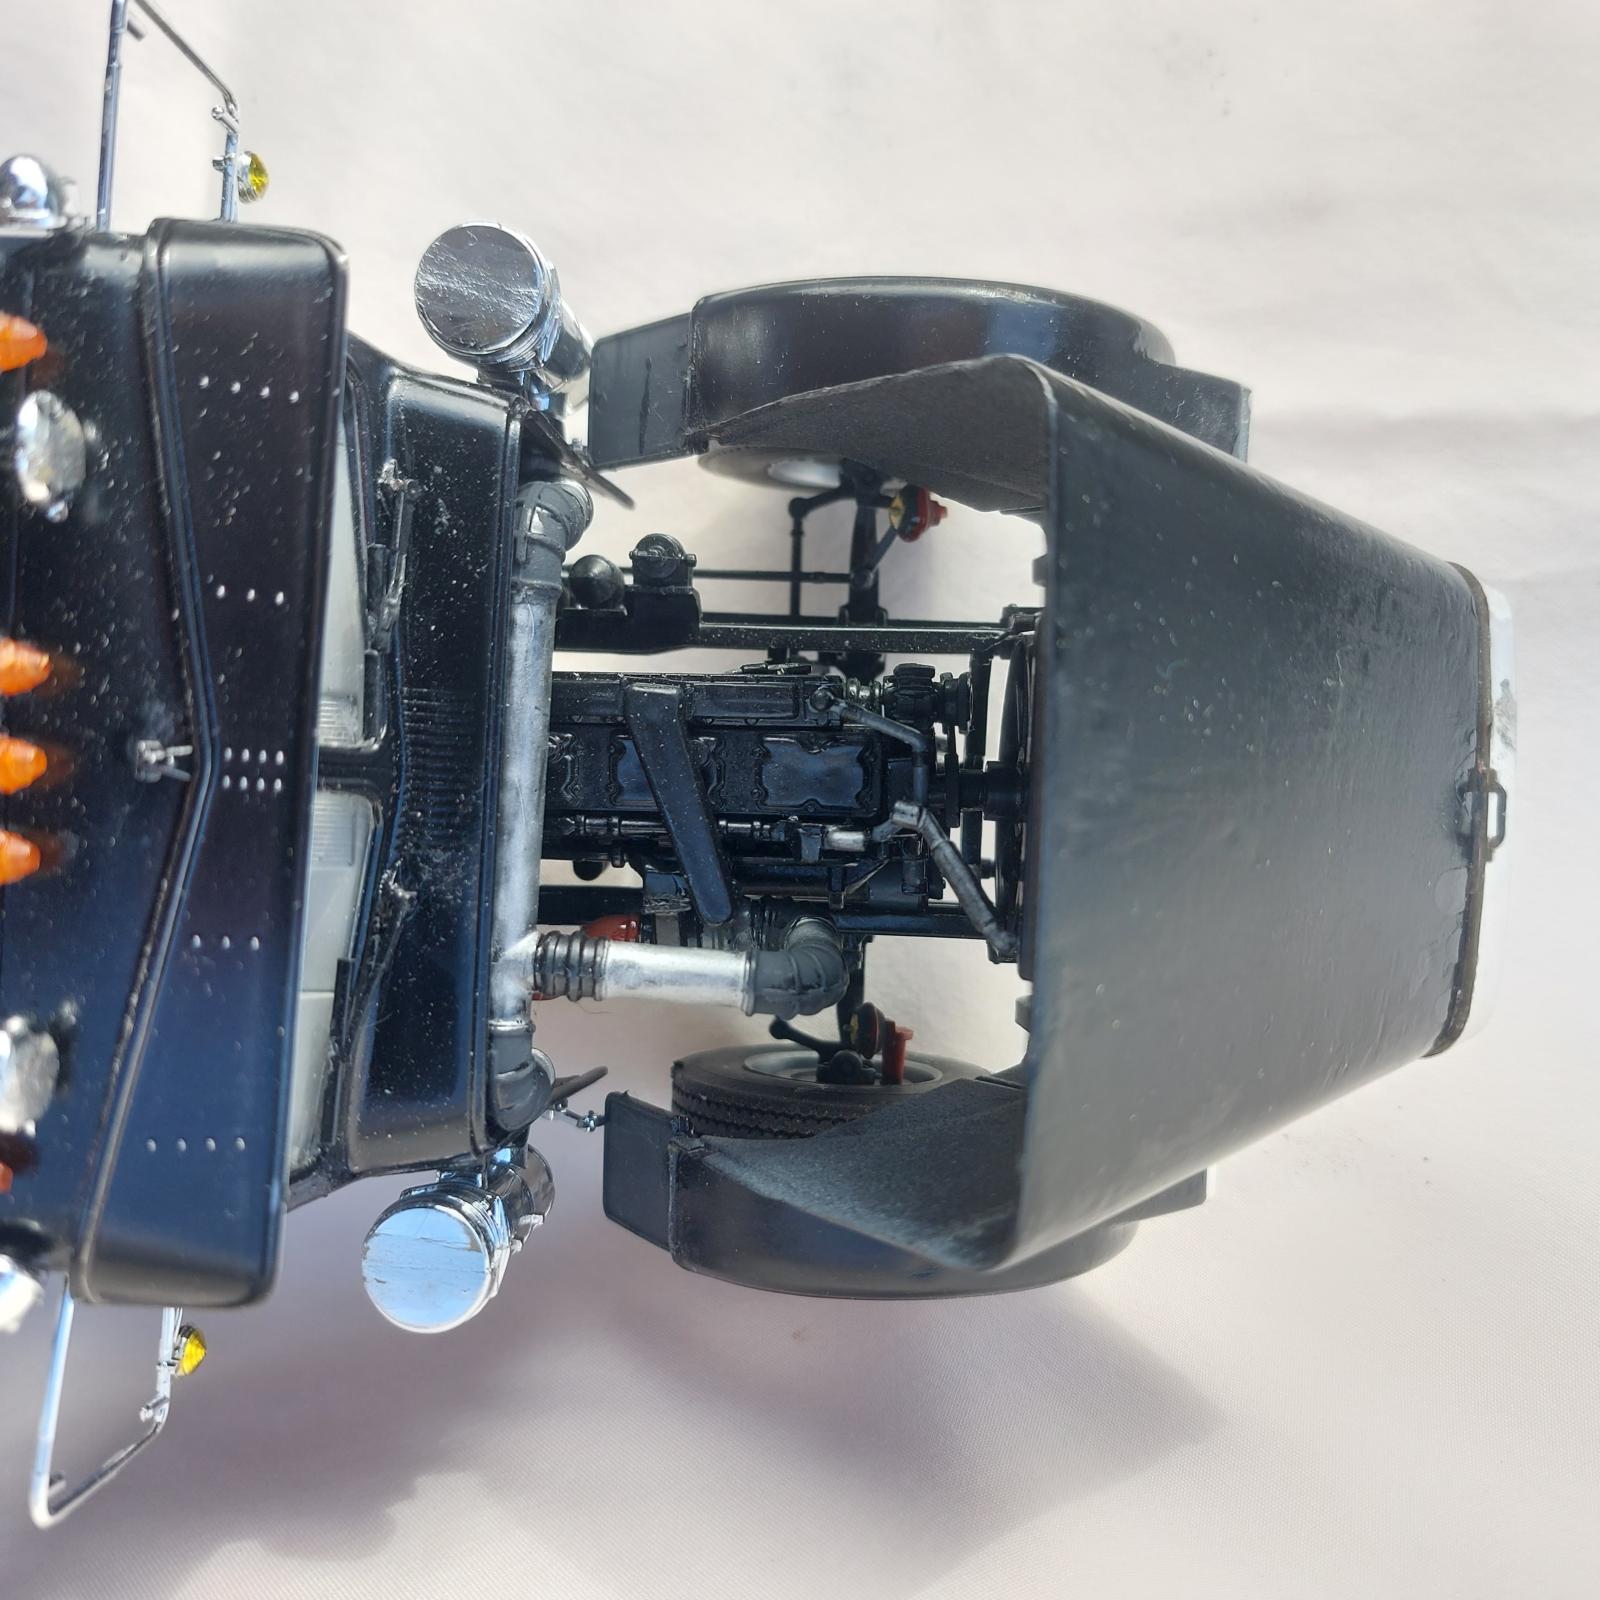
This kit is simply the Italeri Freightliner tractor with the addition of a dump body. This is evidenced by the unused parts such as the fifth wheel and plate, and bed for a sleeper. However, because this is based on an over-the-road truck many of the details are not really applicable to a short haul dump truck. The most obvious being the dual 100-gallon fuel tanks and dual battery boxes. Looking at real trucks and online references the drivers’ side fuel tank could be reduced by half and the passengers’ side fuel tank left off all together and replaced with a simple scratch-built toolbox.
In addition the instruction colors simply repeat the color of the plastic. Dump truck cabs and hoods come in all variety of colors. The dump bodies also vary in color from dark gray to gloss black. And, to top things off, although most trucks have a semi-gloss black frame this is not set in stone. Some trucks have frames the same color as the cab and hood.
I recommend this kit for a modeler at any stage. The pre-colored plastic is great for a beginner just learning about gluing parts. Intermediate modelers will want to paint the plastic the color of their choosing. And an advanced modeler could add detail to the engine and modify the fuel tanks. The build was easy and straight forward with only a couple of easily caught glitches.
I would like to thank MRC for providing this kit for review, and IPMS/USA for giving me the opportunity to build it.


Comments
Add new comment
This site is protected by reCAPTCHA and the Google Privacy Policy and Terms of Service apply.
Similar Reviews