Ford Tri-Motor
History Brief
The Ford Motor Company targeted the new airline and commercial markets with an innovative, all new metal aircraft design. In-fact, it was the first all-metal aircraft and the first commercial aviation transport. Ford first designed and produced the aircraft in 1926; it was affectionately nicknamed the “Tin Goose.” Of the 199 examples built in the United States, approximately 20 survive today, with 11 still flying. The unique corrugated aluminum skin made the Ford a rugged airplane, and it incorporated state of the art features like an enclosed cockpit, brakes, a heated passenger cabin, full cantilever wings, and doughnut tires. The three Wright J-6 900 horsepower radial engines gave the Tin Goose a cruising speed of 110 mph and a top speed of 130 mph.
The Product
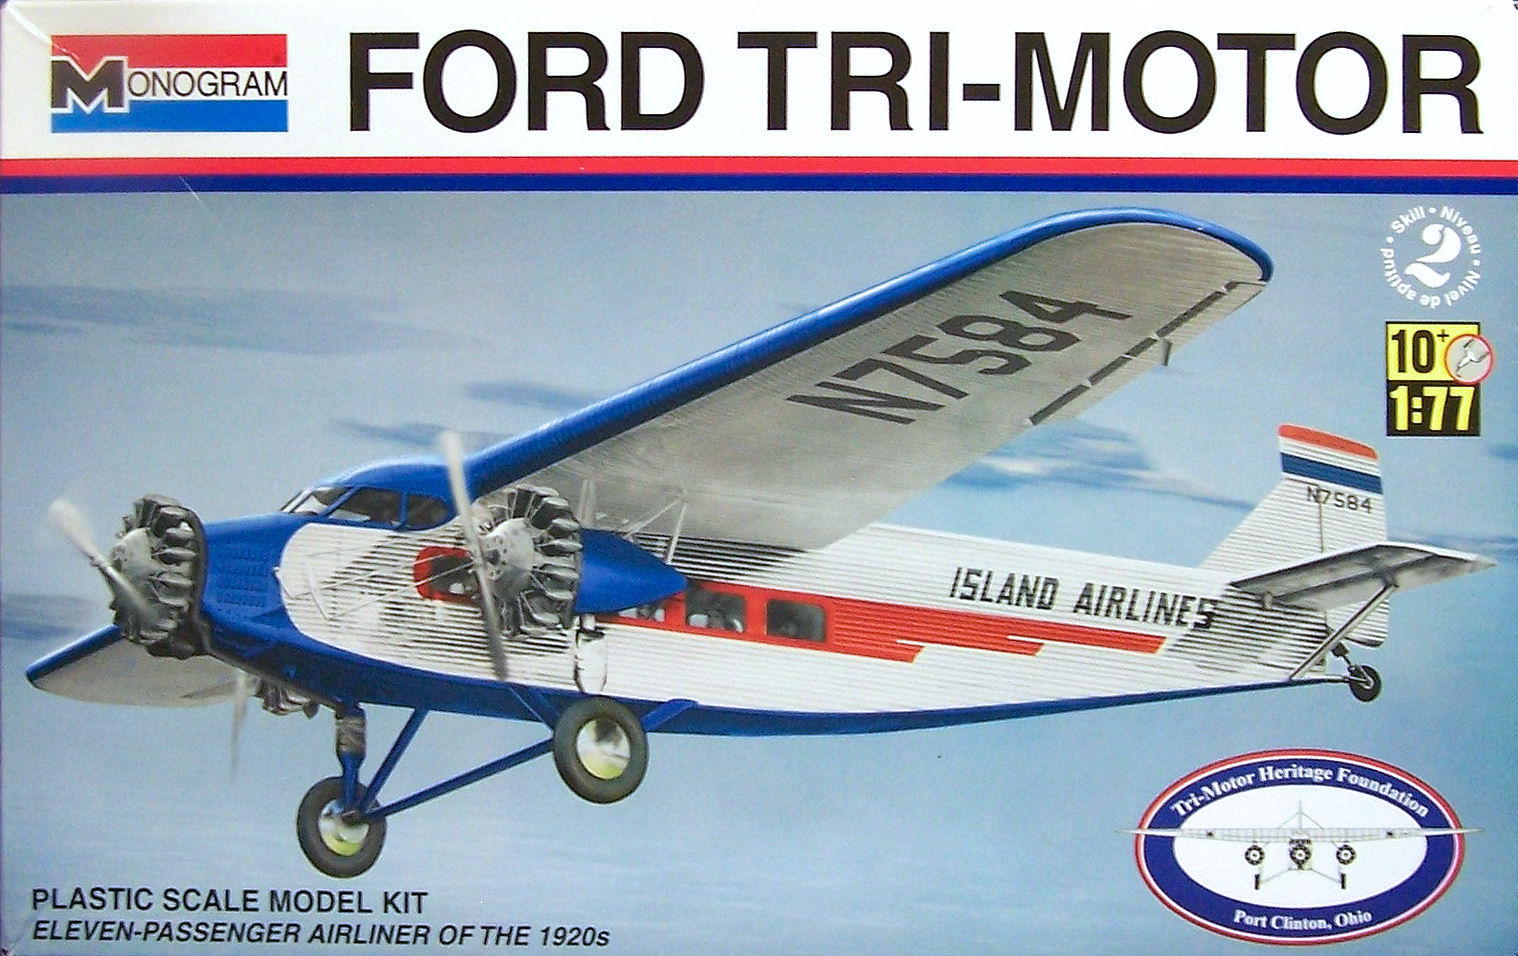
This version of the kit was specifically manufactured for the Tri-Motor Heritage Foundation; proceeds of the sales of this model will go to their restoration projects. It is packaged in the standard Revell/Monogram box sporting a red, white, and blue Ford Tri-Motor completed kit under the Monogram label. I inspected the contents and found that the Monograms vintage plastic injection molds from 1956 have stood the test of time, a testament to the craftsmanship of yesteryear. The detail is what you would expect from the fifties, except the panel lines are recessed, and some flash and injector pin marks are present but not overwhelming. The clear parts are clunky and thick. There is no interior detail and one decal option; however, the kit includes aircraft snow skis along with a three-man dog team with a cargo sled and two workers in foul weather clothing. A one-sheet b&w instruction guide lays out a simple 11-step build process, offering basic tutorials and modeling tips for beginners and decal placement references. Note: the decals are pretty nice.
The Build
Starting with steps one and two, I began by adding the cabin windows to the fuselage halves and gluing the halves together. The problems I encountered were the cabin window were too shallow in the openings, and on the vertical tail fin section of the fuselage halves, the fin halves were warped in opposite directions and proved to be difficult to square up when pulled together. Steps three and four add the horizontal stabilizer with struts, main landing gear strut, and rudder. All fit great but you must carve out a large chunk of plastic from the tail gear section that is molded to the rudder. Steps five and six install the upper cockpit window, add the fuselage bottom, build the wing and attach it to the fuselage, then add the windscreen. Most everything fit great with the exception of the windscreen – it just would not fit, but as luck would have it, I managed to fill most of the opening with it and since it was overly thick I was able to sand it into shape. Steps seven and eight have you construct the engine nacelles with struts and wheels and attach them to the fuselage – great fit, no problems. Finishing up with steps nine, ten, and eleven: props, engines, and exhaust all fit great with no problems. The corrugated wings proved to be challenge to paint, while the decals went down nicely after a dose of Solvaset. I elected to paint out the windows due to the lack of an interior.
The Bottom Line
Great kit and a joy to build. I recommend it to anyone at any age at any skill level.
My thanks to the Tri-Motor Heritage Foundation, Monogram/Revell USA, and IPMS/USA for the opportunity to review this kit.


Comments
Add new comment
This site is protected by reCAPTCHA and the Google Privacy Policy and Terms of Service apply.
Similar Reviews