
Ford GT40 Mk.II ’66, Part 3, Engine
This Part 3 of the review of Meng’s GT40 Mk.II ’66 focuses on the engine and engine compartment of the GT40. A comparison is also made to the Trumpeter version of the GT40.
Ford GT40 Mk.II ‘66
Developed by the Ford Motor Company and Carroll Shelby to end the dominance of Ferrari in the preeminent 24 Hours of LeMans race, the Ford GT40 Mk.II become an iconic American built race car. After failing to finish the race in 1965, the Ford GTs finished 1-2-3 in 1966 to win at Le Mans in a humiliating loss for Ferrari. This also ended Ferrari's five-year-long dominance of this race.
Meng’s GT40 Kit
This MENG RS-002 Ford GT40 Mk.II ’66 is a large 1/12 scale model kit officially licensed by Ford Motor Company. The kit includes complete suspension system, power system, cab interiors, front trunk interiors, openable doors, front trunk cover and engine hood, as well as movable wheels and suspension system.
Comparison to Trumpeter Ford GT40
Another option for the Ford GT40 in 1/12 scale is the Trumpeter version that was released in 2008. I’ll note some of the differences between the two kits as I assemble the Meng GT40.
Part 3 Meng Engine and Engine Compartment Assembly
Assembly of the Meng engine and rear compartment starts in step 21 and continues for 14 pages to step 35. The engine itself comprises 38 parts, the transmission 21 parts, and the rear engine compartment an additional 52 parts.
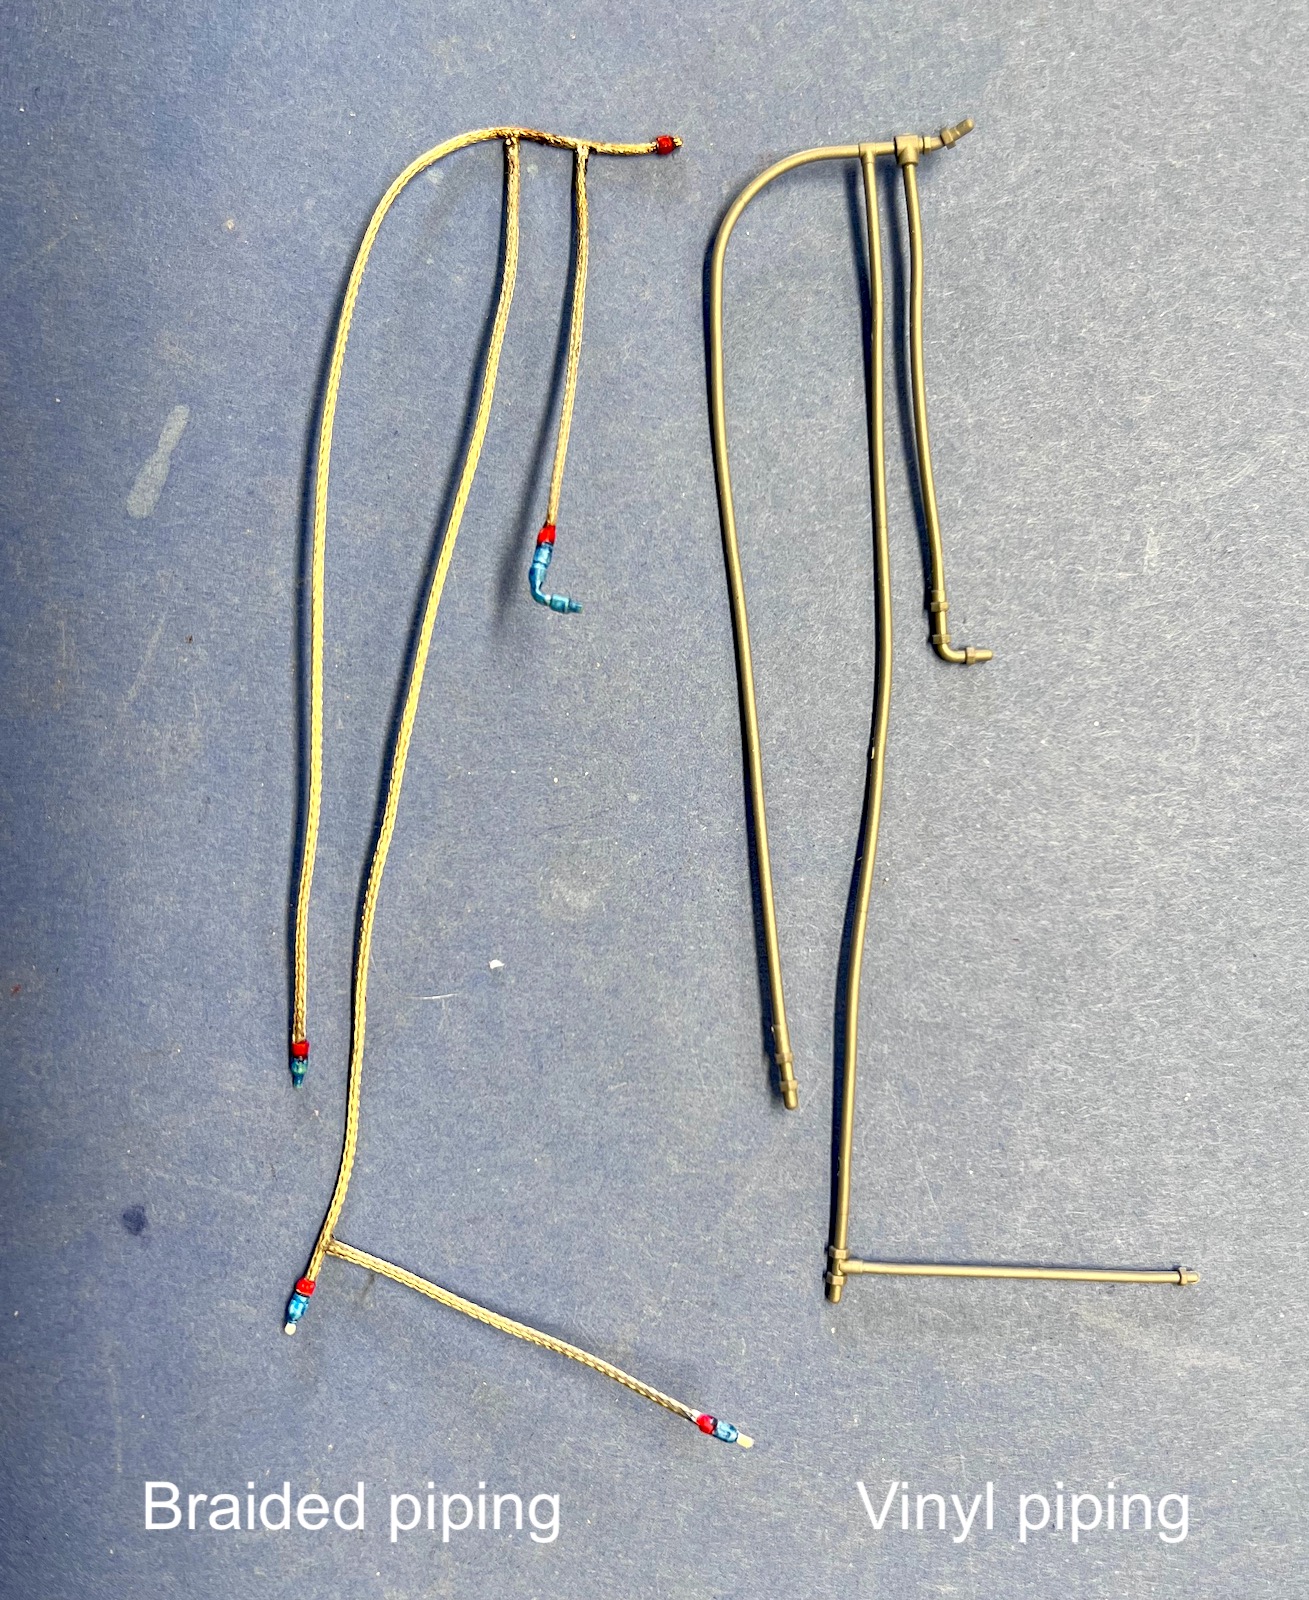
The plastic parts have good detail, although still a little soft for the size of the pieces. The kit provides the numerous hoses in black and gray vinyl, and various pipes in molded plastic. The actual cars used braided steel hoses for the oil and fuel lines. I did replace some of the lines with braided line and connectors from Detail Master
The parts can be installed without glue by press fitting or using screws. I did use glue and clamps on some of the joints to tighten them up.
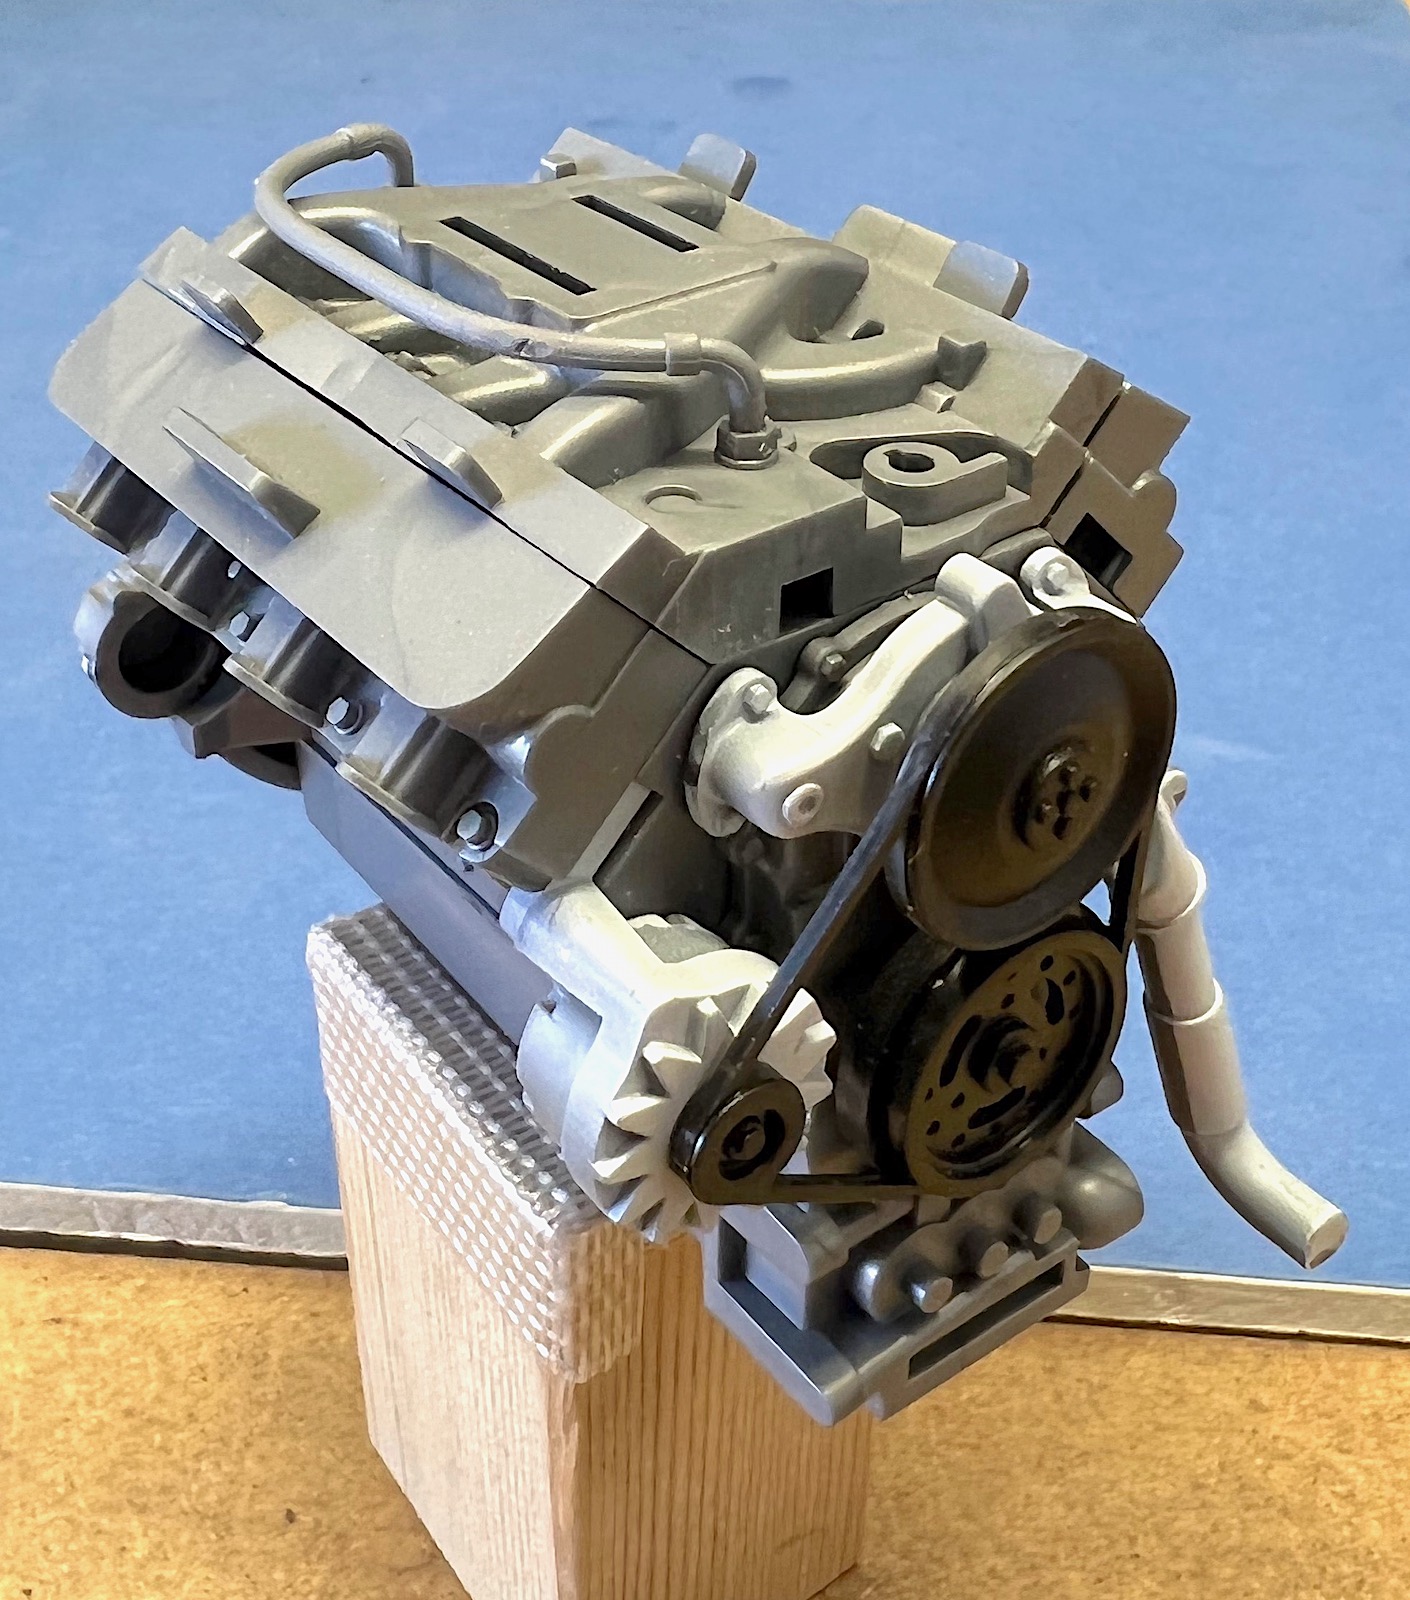
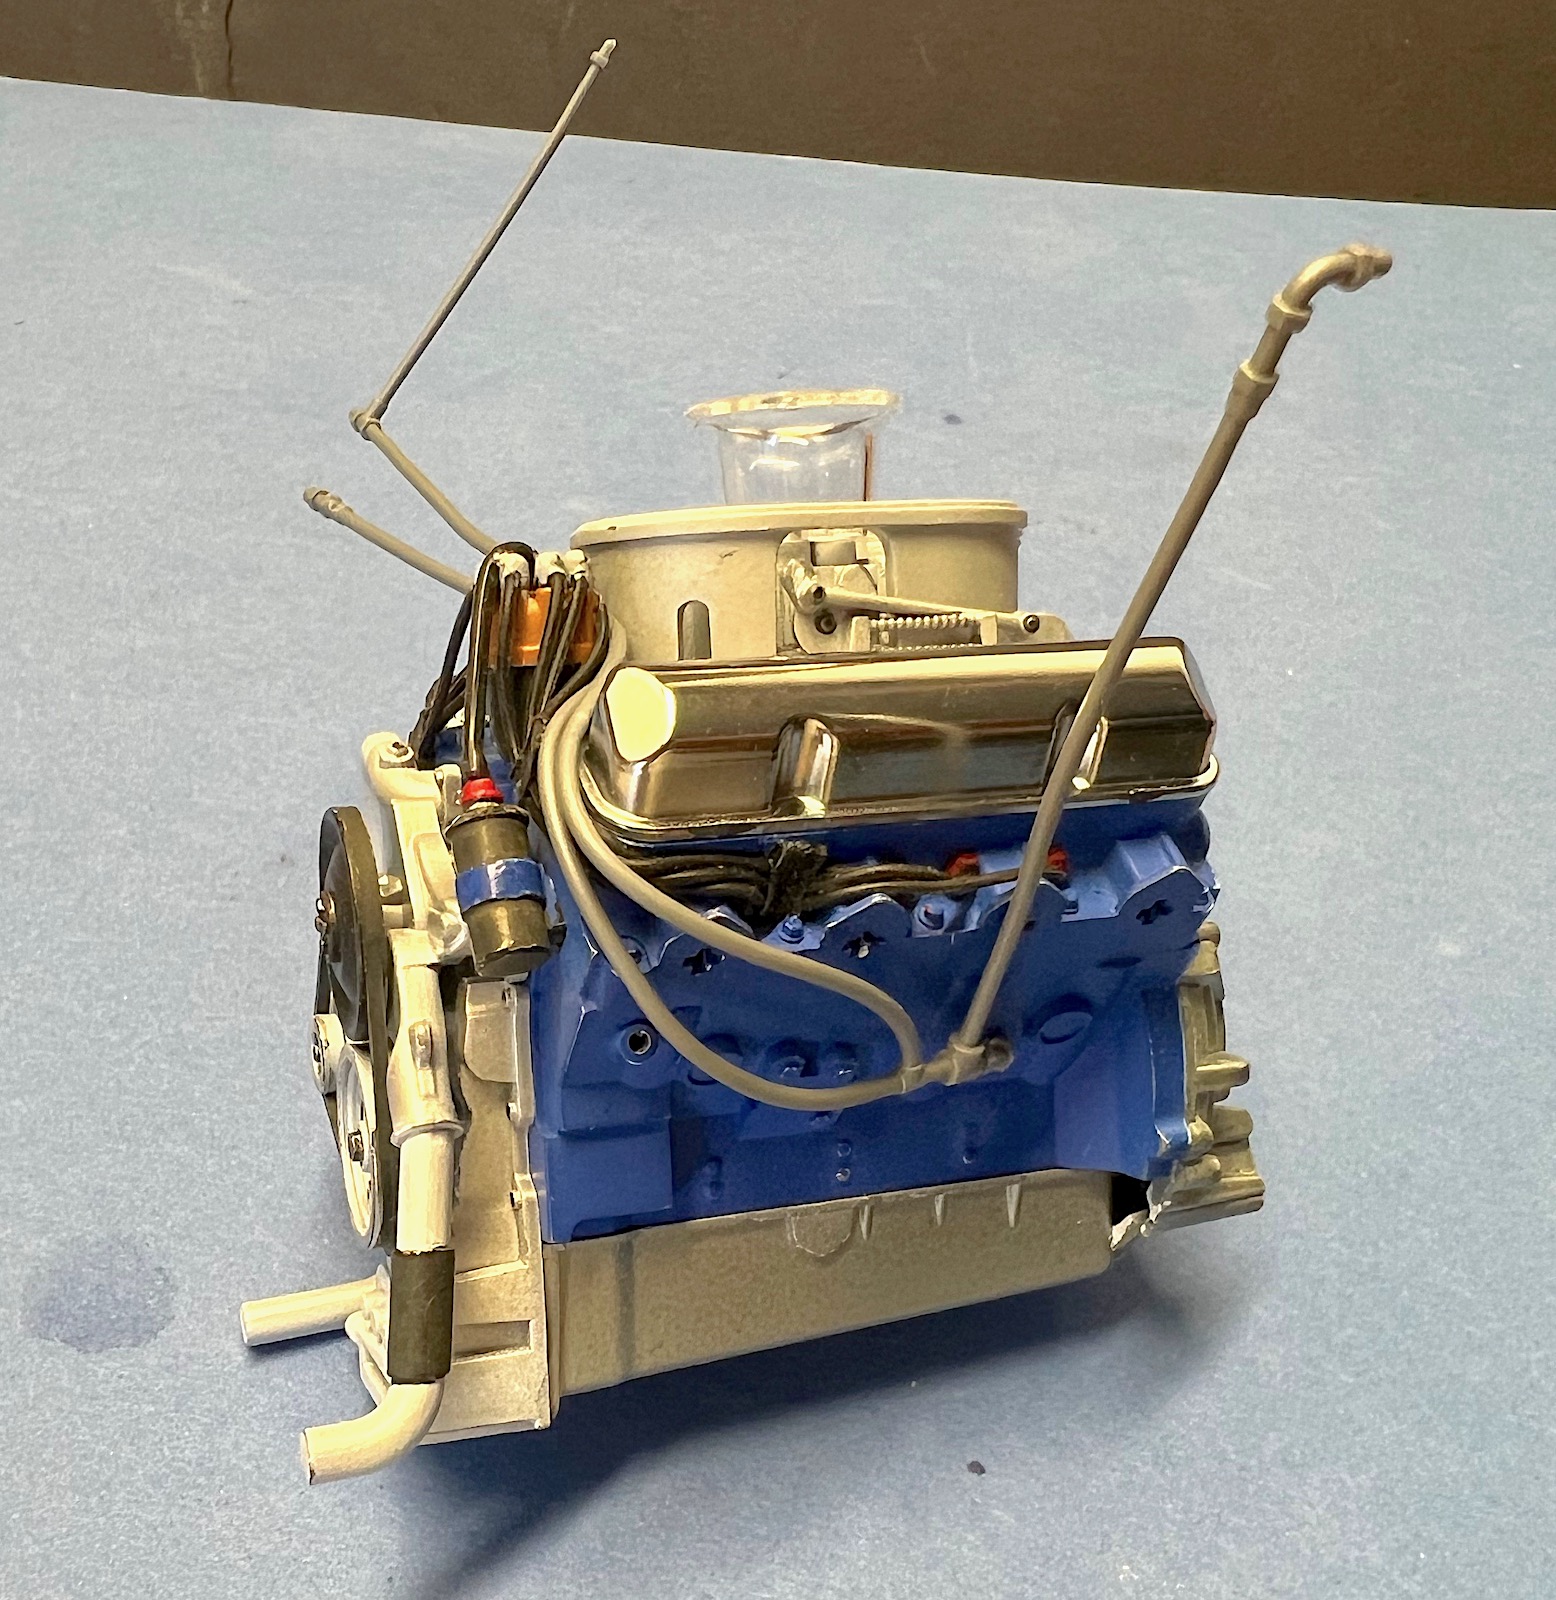
Engine assembly 1, 2, 3, steps 21 through 23.
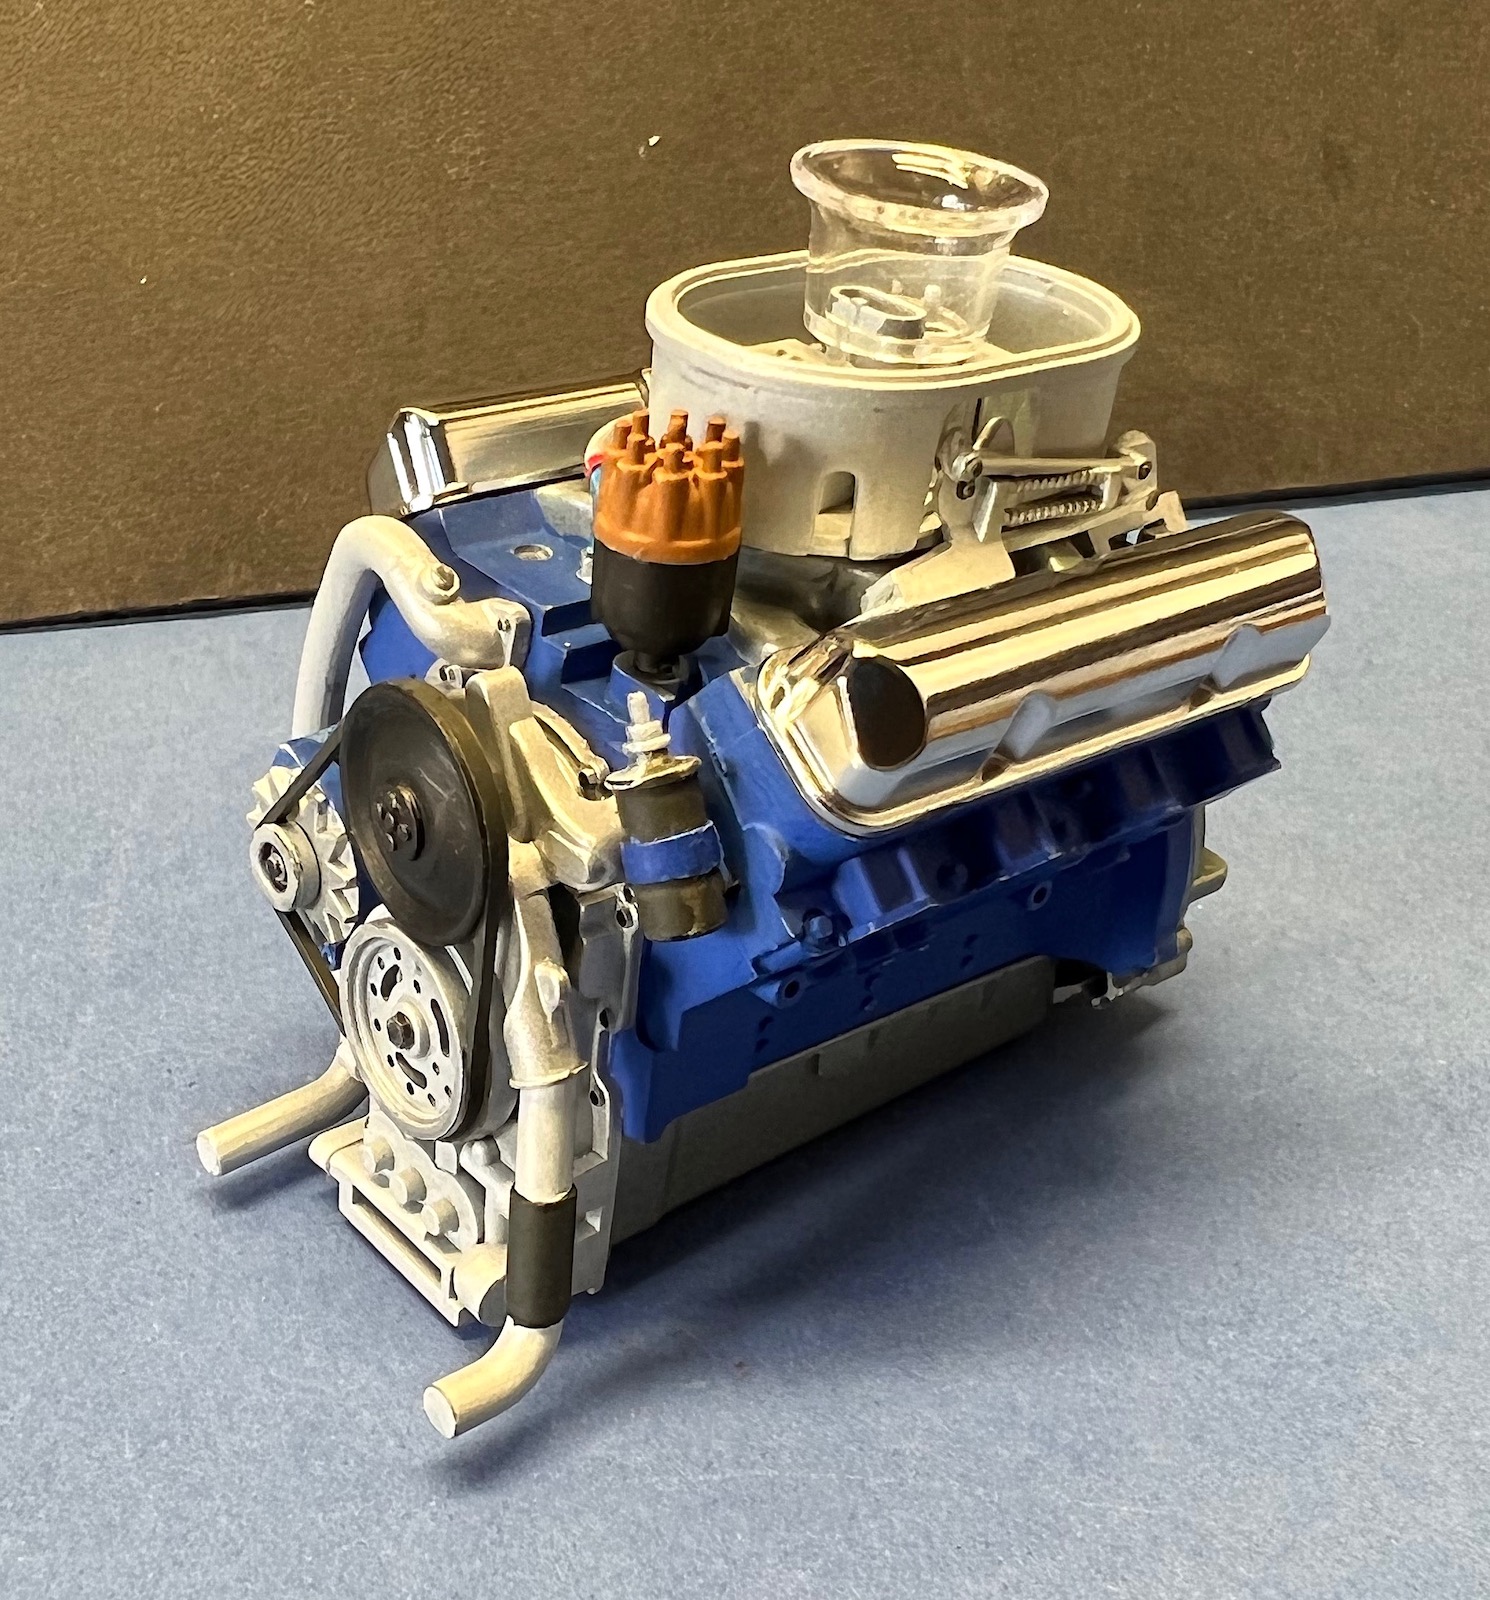
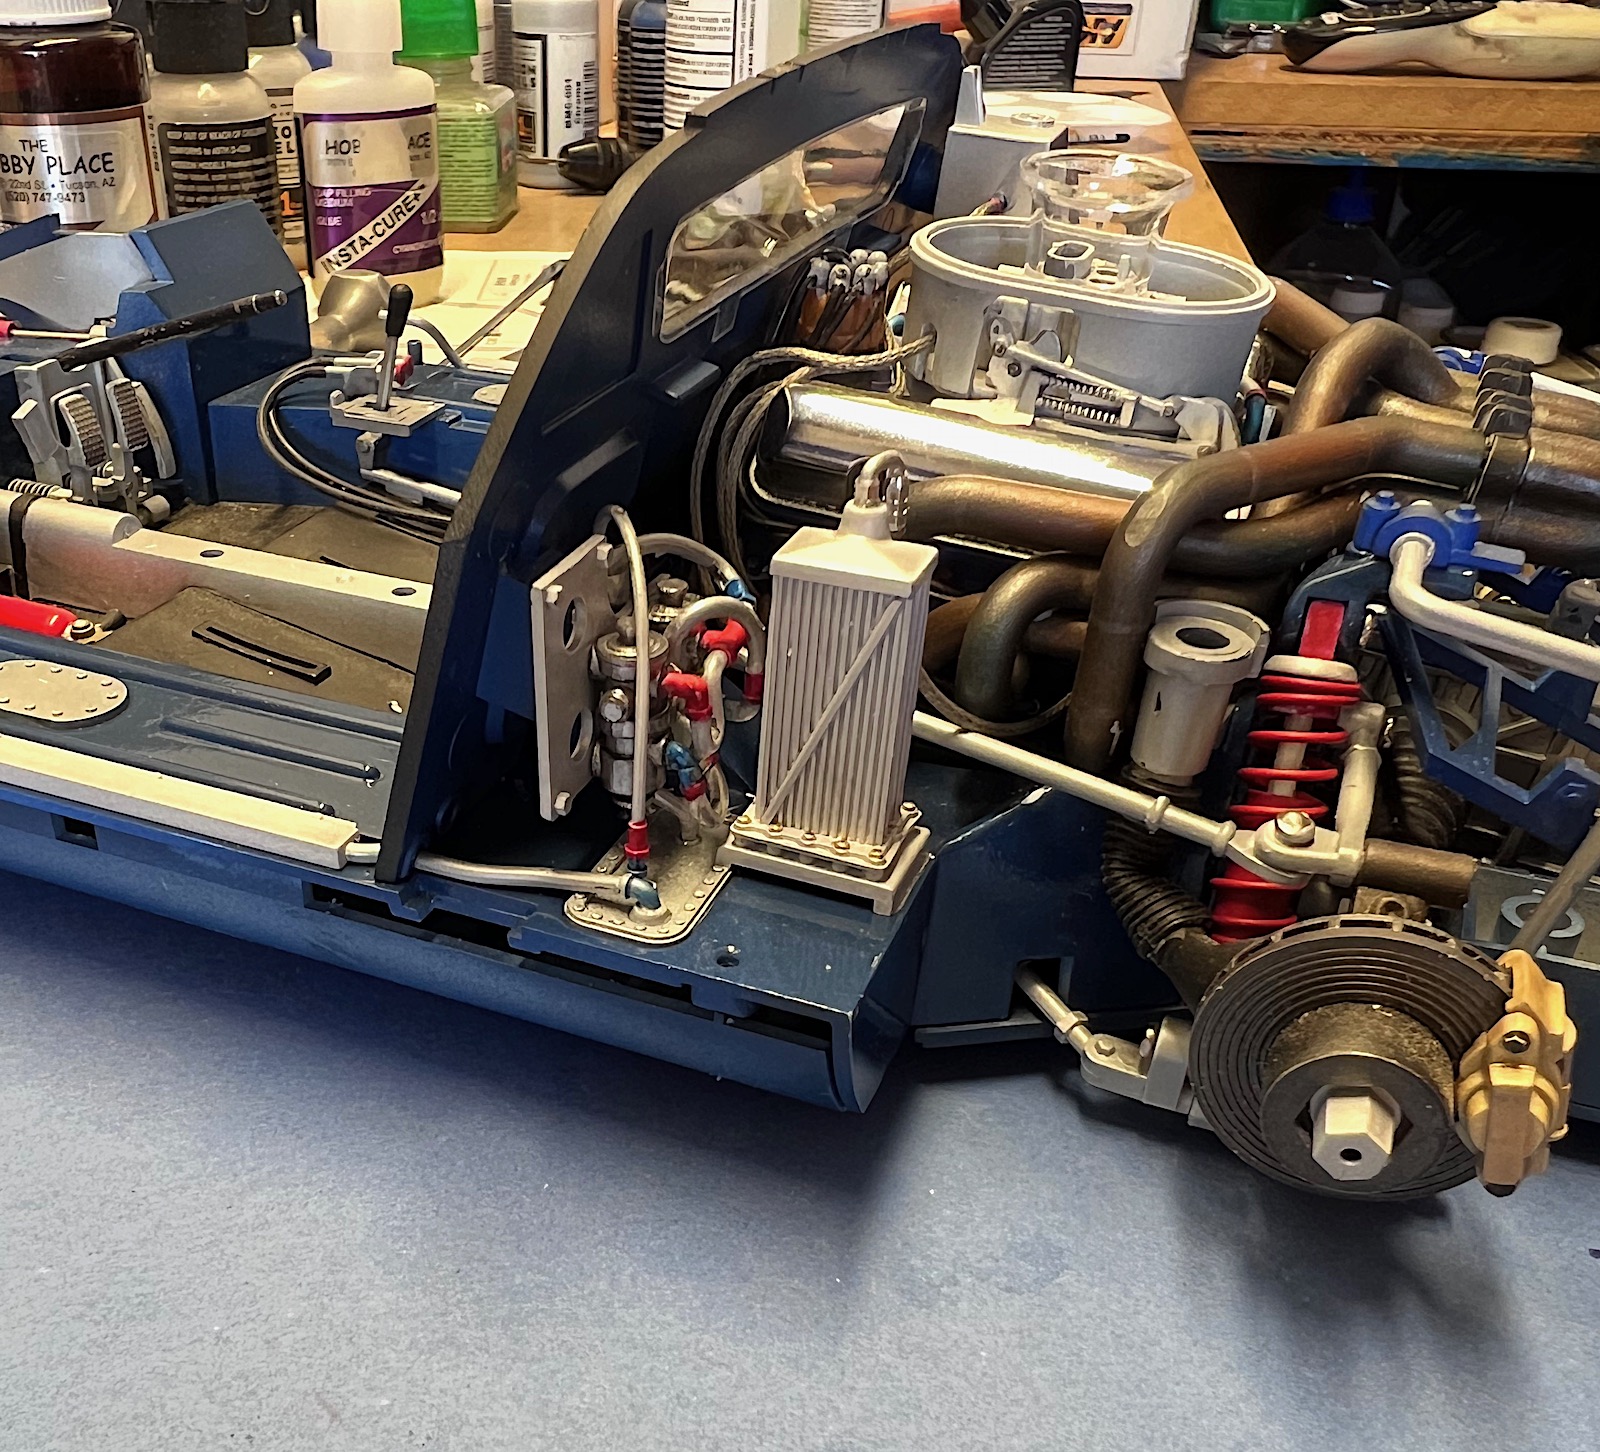
The engine block and heads are fastened with screws, but I did use some glue and clamps to tighten up the joints. The front of the engine with the water pump and fan belt looks nice when assembled but will be hidden behind the engine compartment bulkhead when installed. The carburetor linkage, part C3, is over -scaled and doesn’t have too much detail. The linkage does not actually connect to the carburetor. It would’ve been nice to have some photoetch provided for this linkage as it’s prominently displayed on the engine.
Vinyl wire with harnesses is provided for the spark plug wiring. The fittings at the end press down onto the distributor and the spark plugs with a good fit. The length of the wires fits nicely, and they look good when installed.
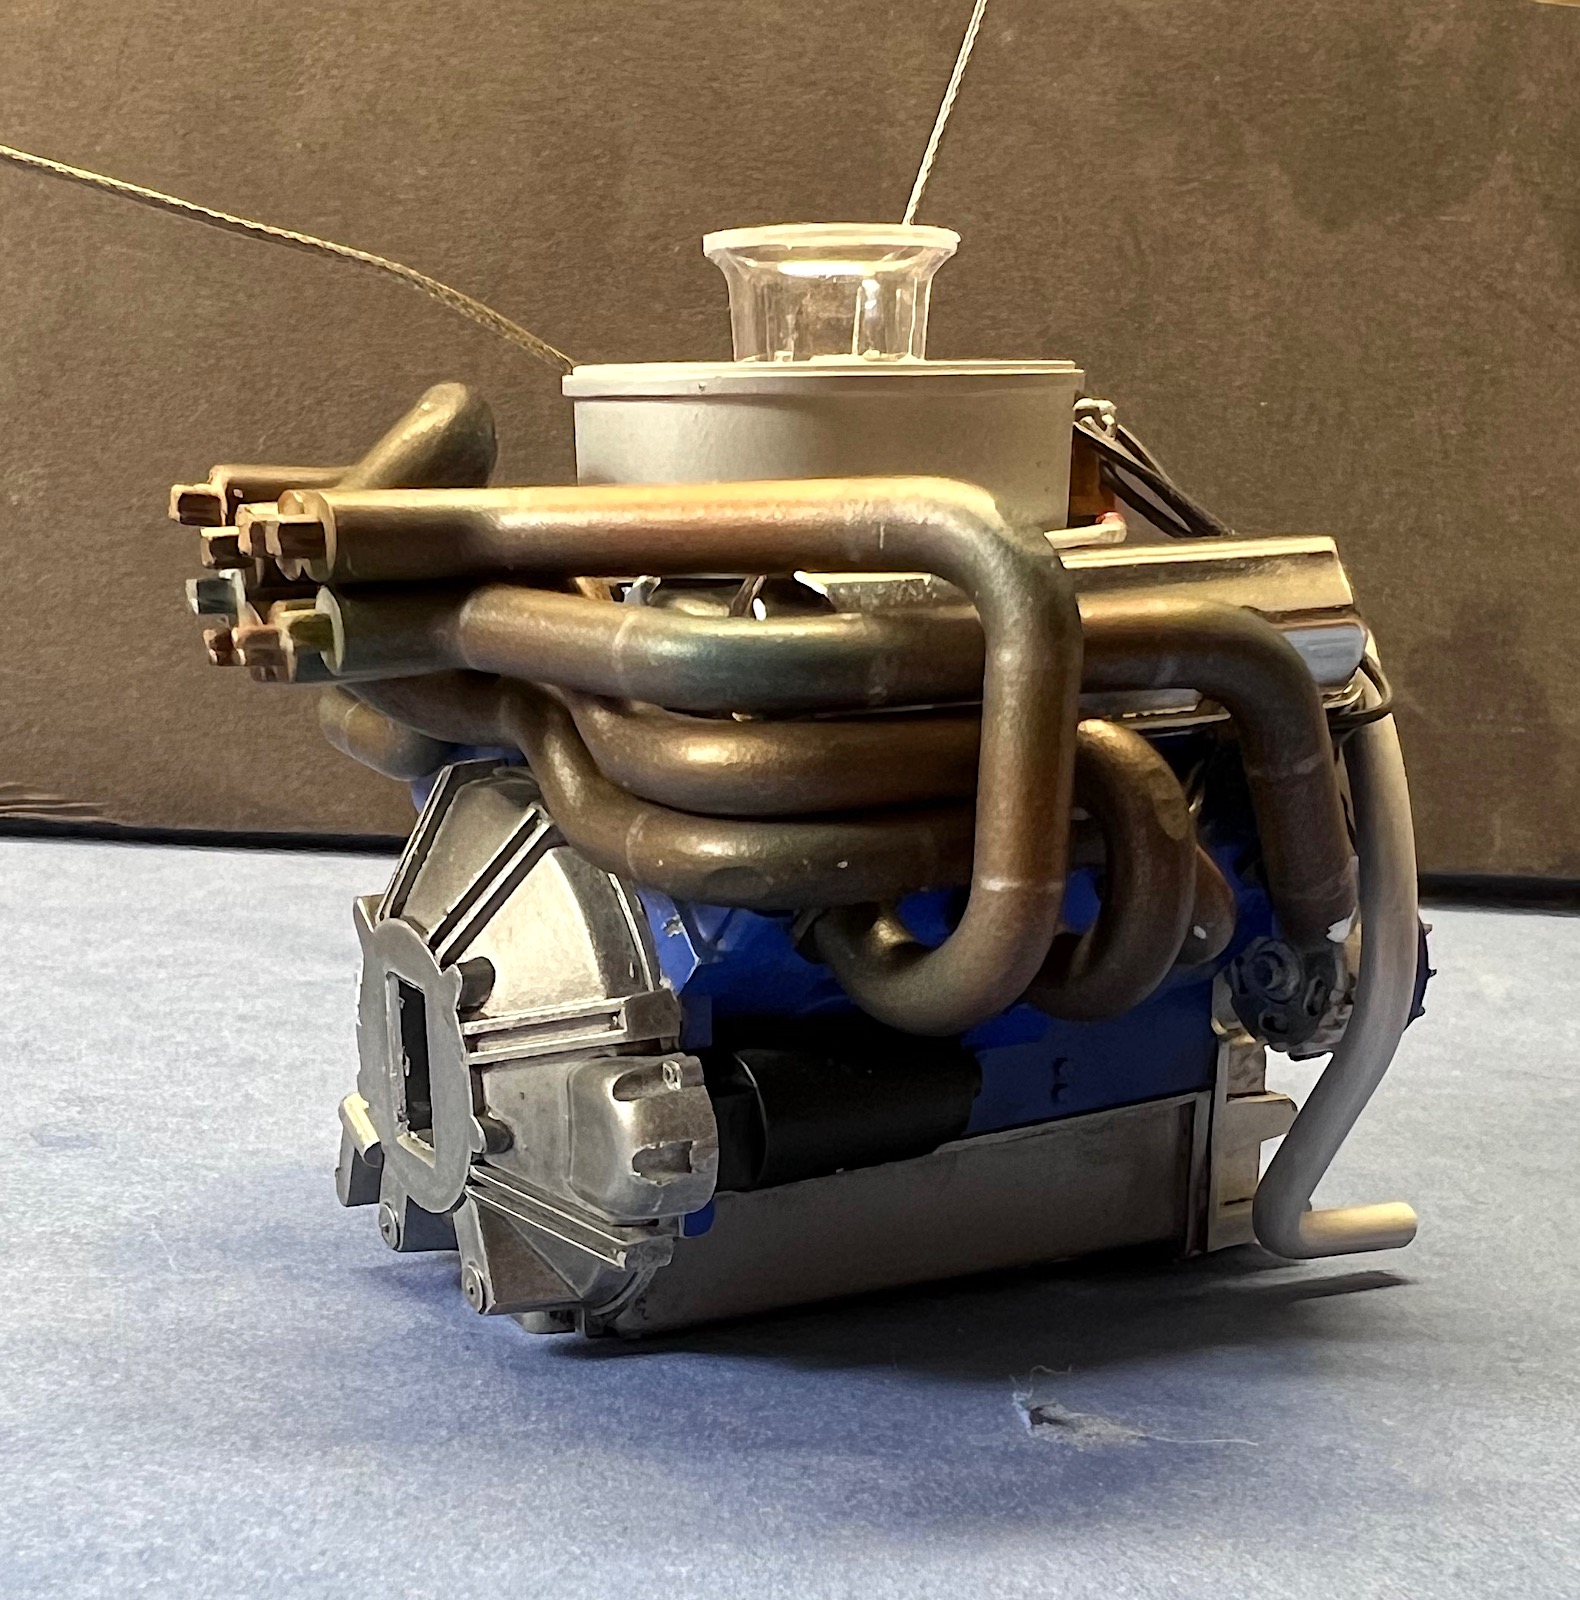
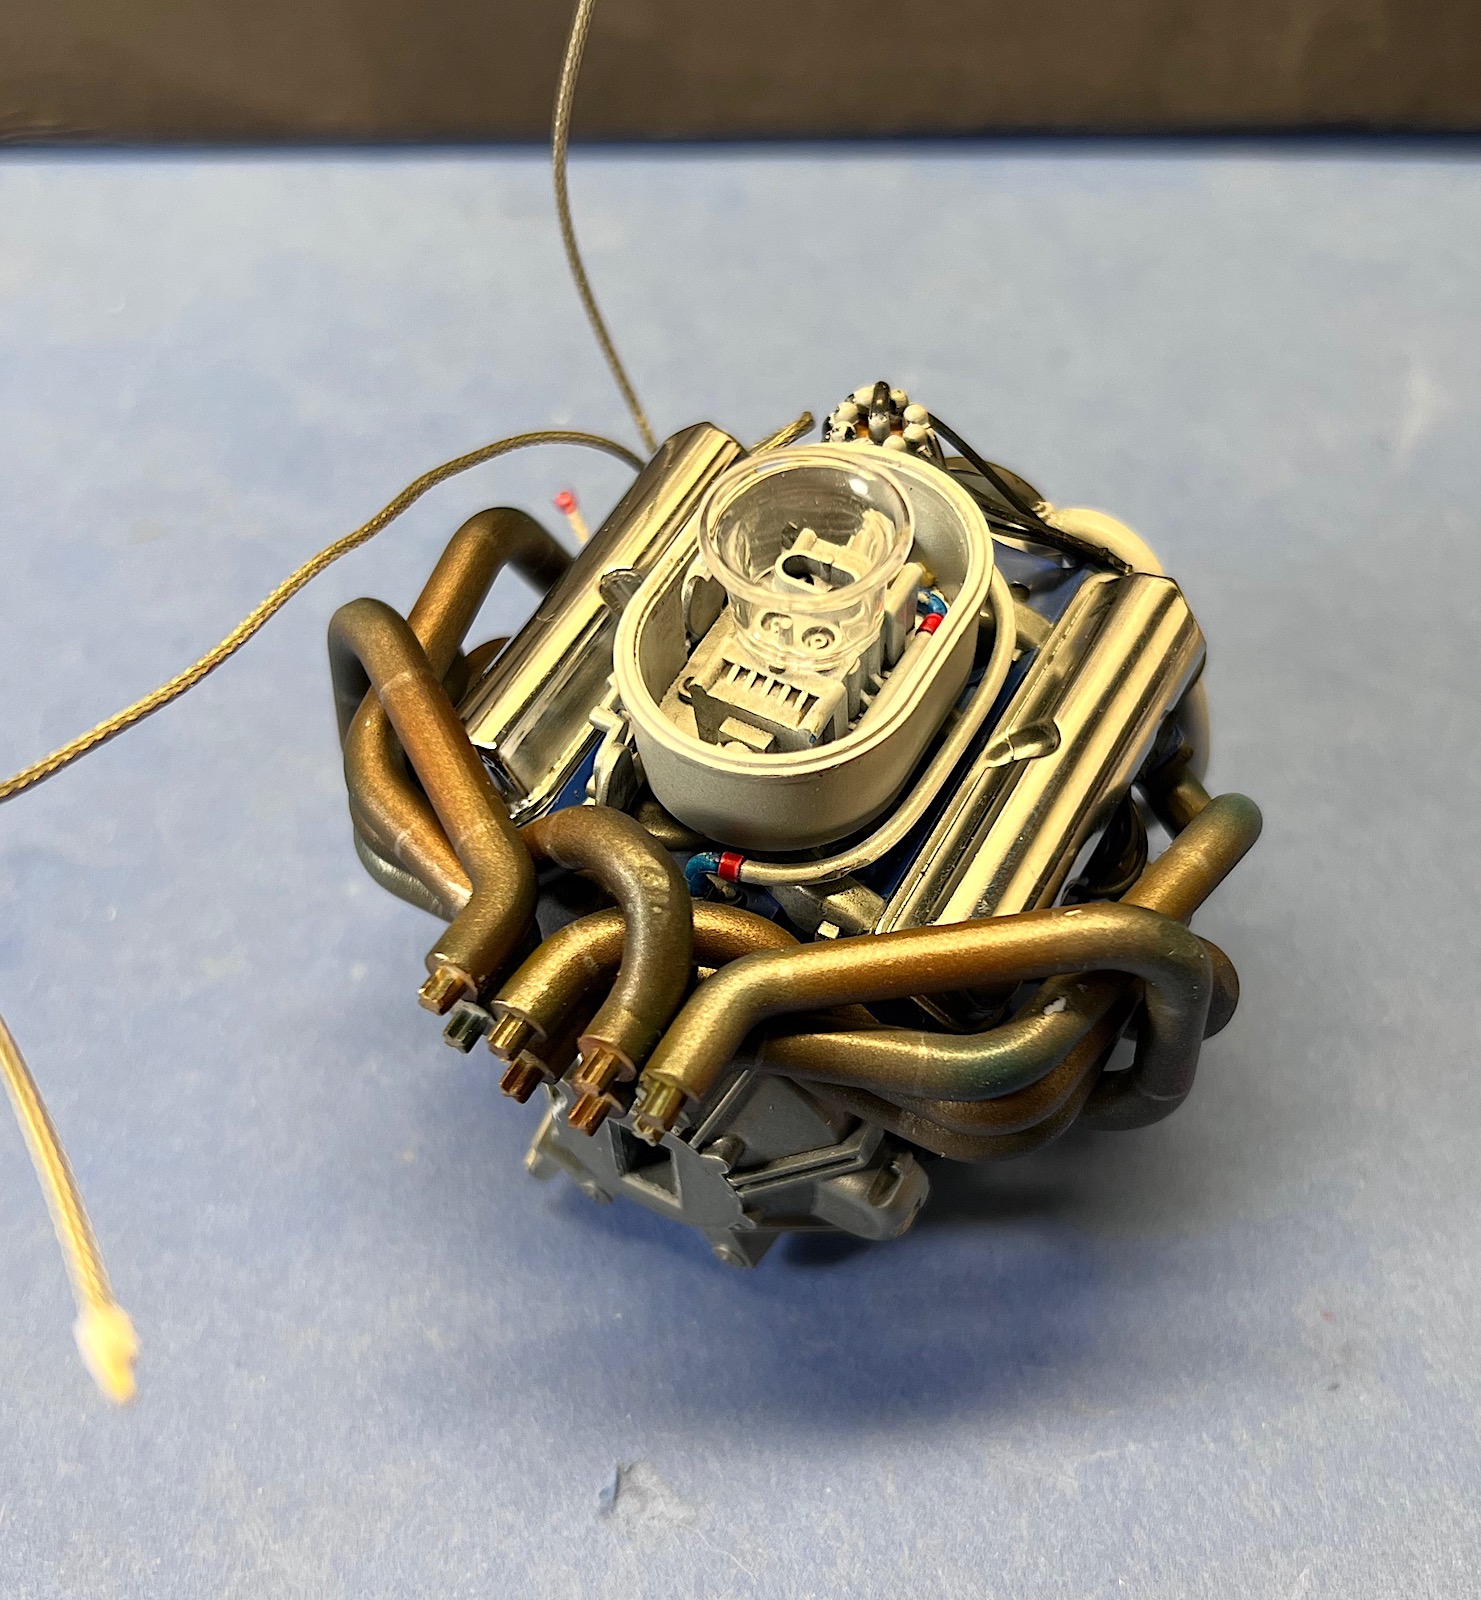
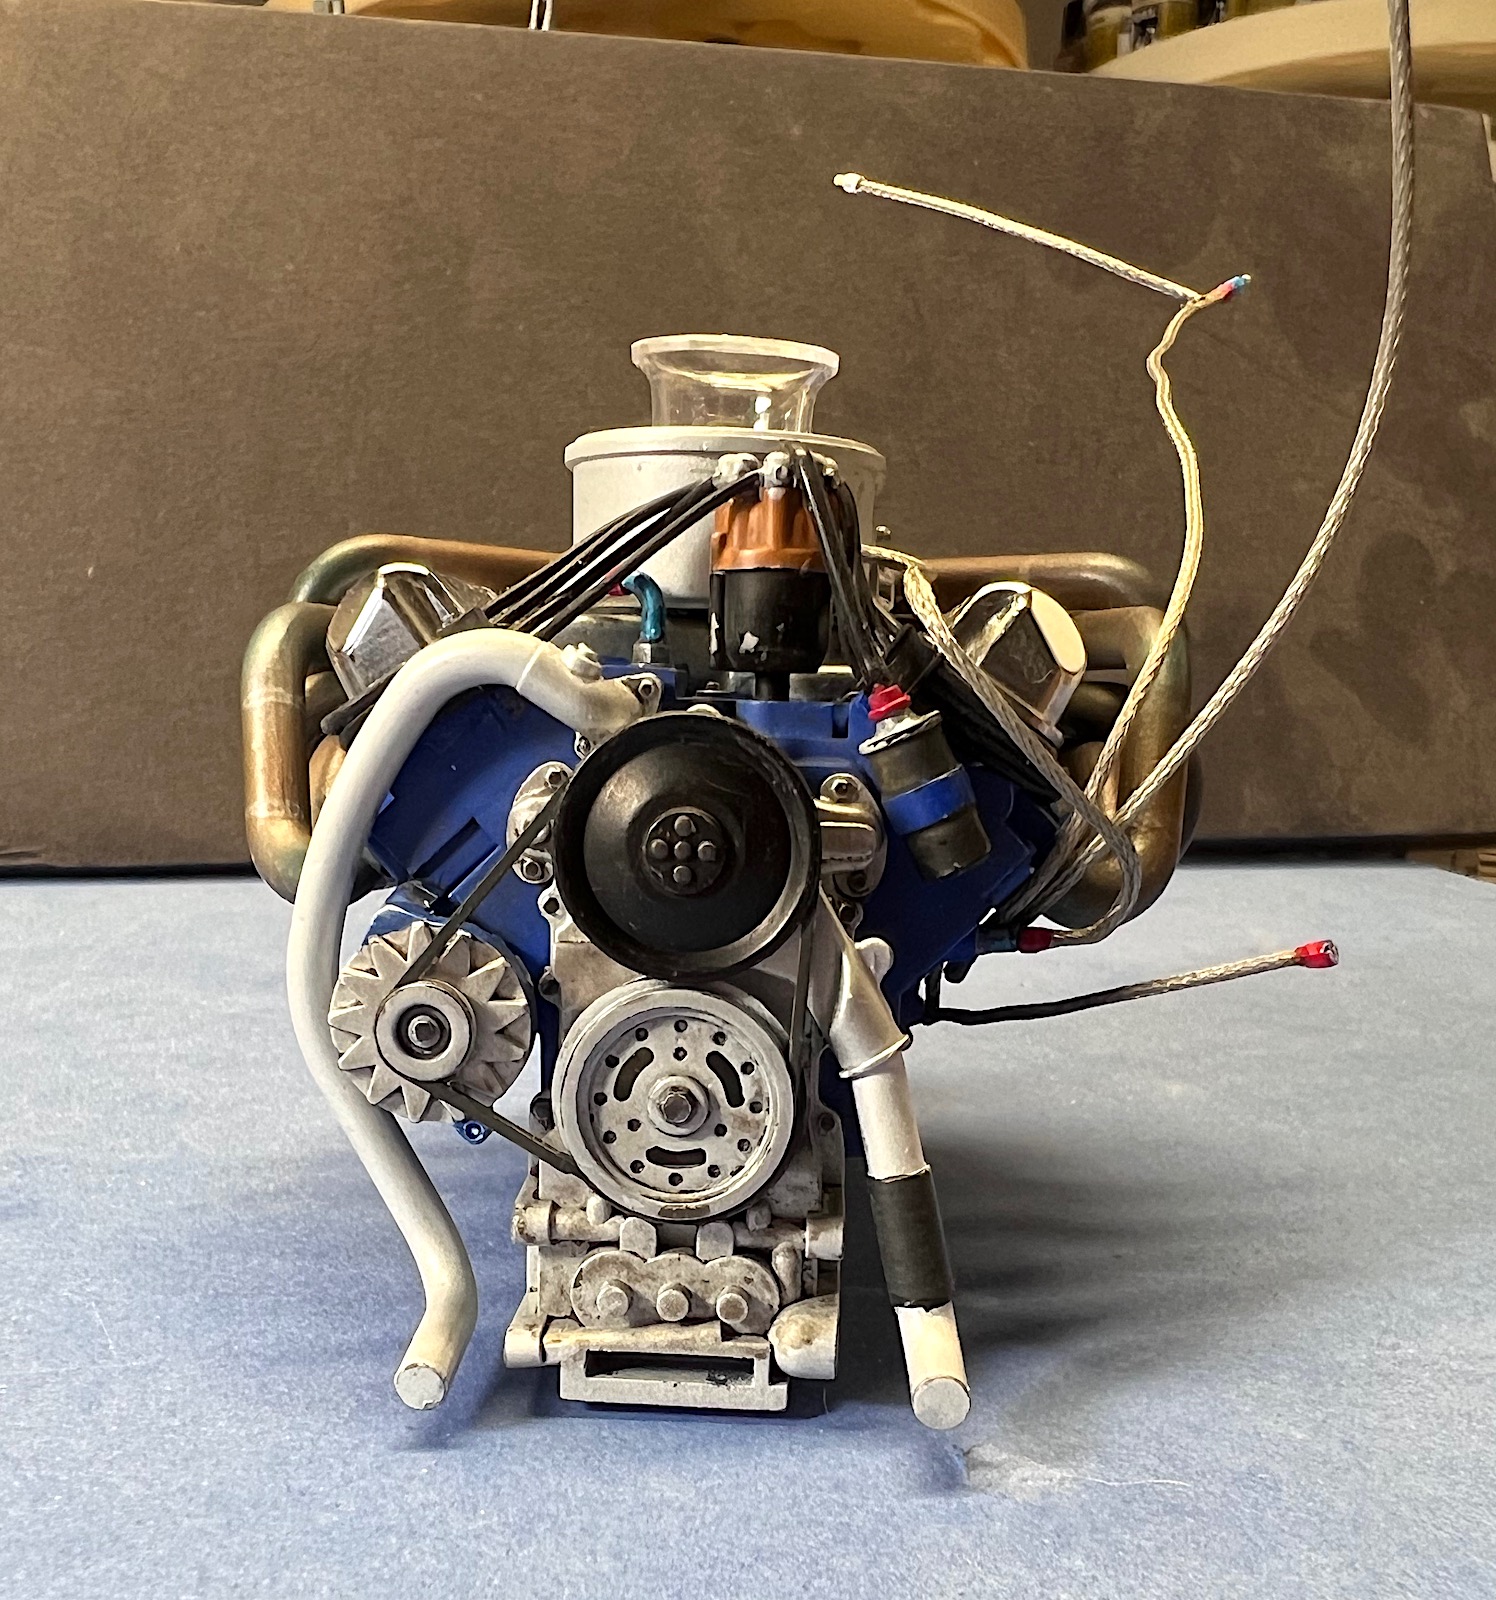
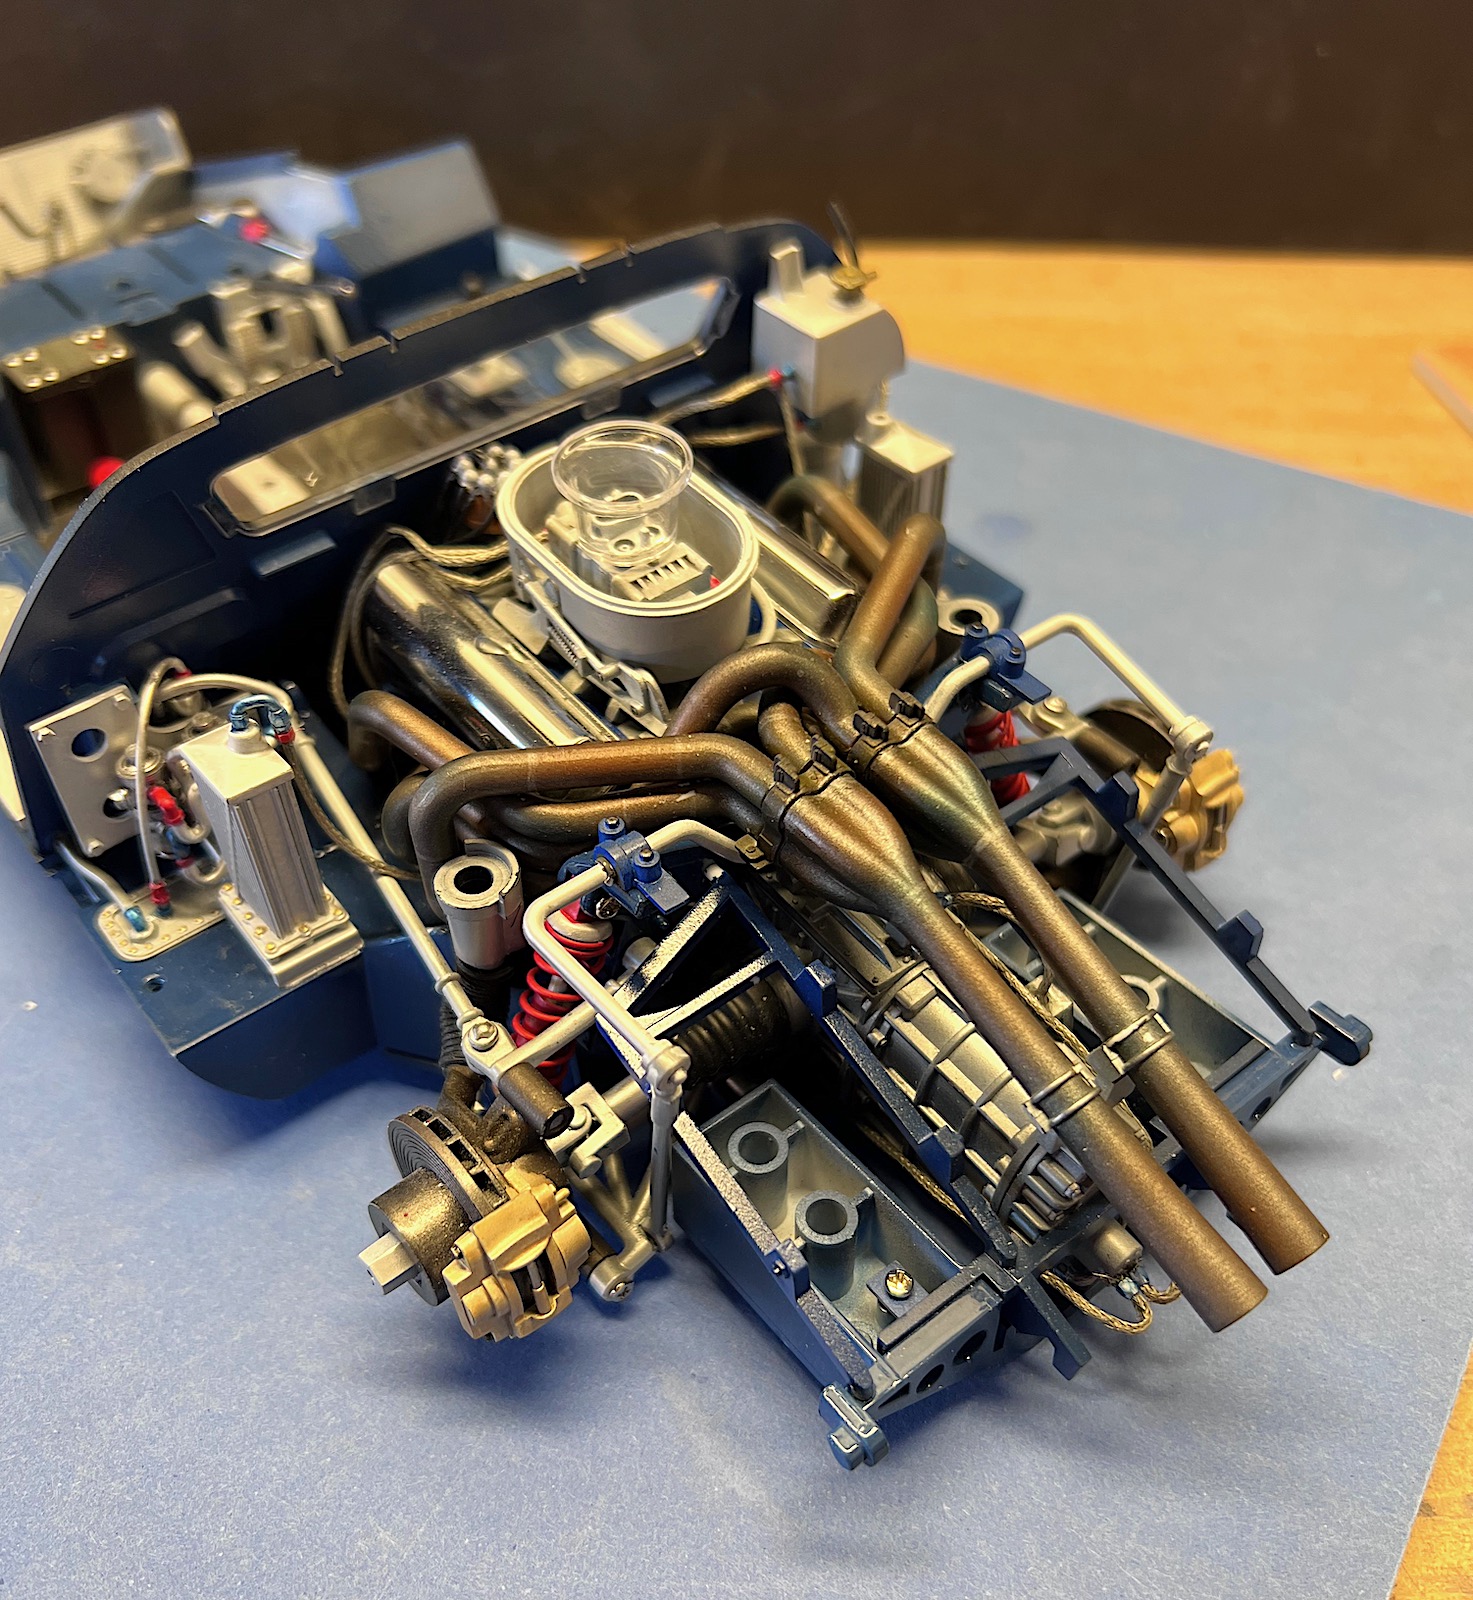
In step 24 the bag of snakes exhaust system is installed on the engine. The exhaust pipes are nicely molded, but have a very faint mold seam that will need to be removed. The cross-shaped pins at each end of the exhaust pipes helps to orient the pipes in the correct position. The color of the exhaust pipes on the actual engine is a burnt iron color with some faded rust. The pipes were made of sections welded together, but Meng does not mold in the weld bead detail. I just used a fine brush to paint a faint silver line at the weld locations.
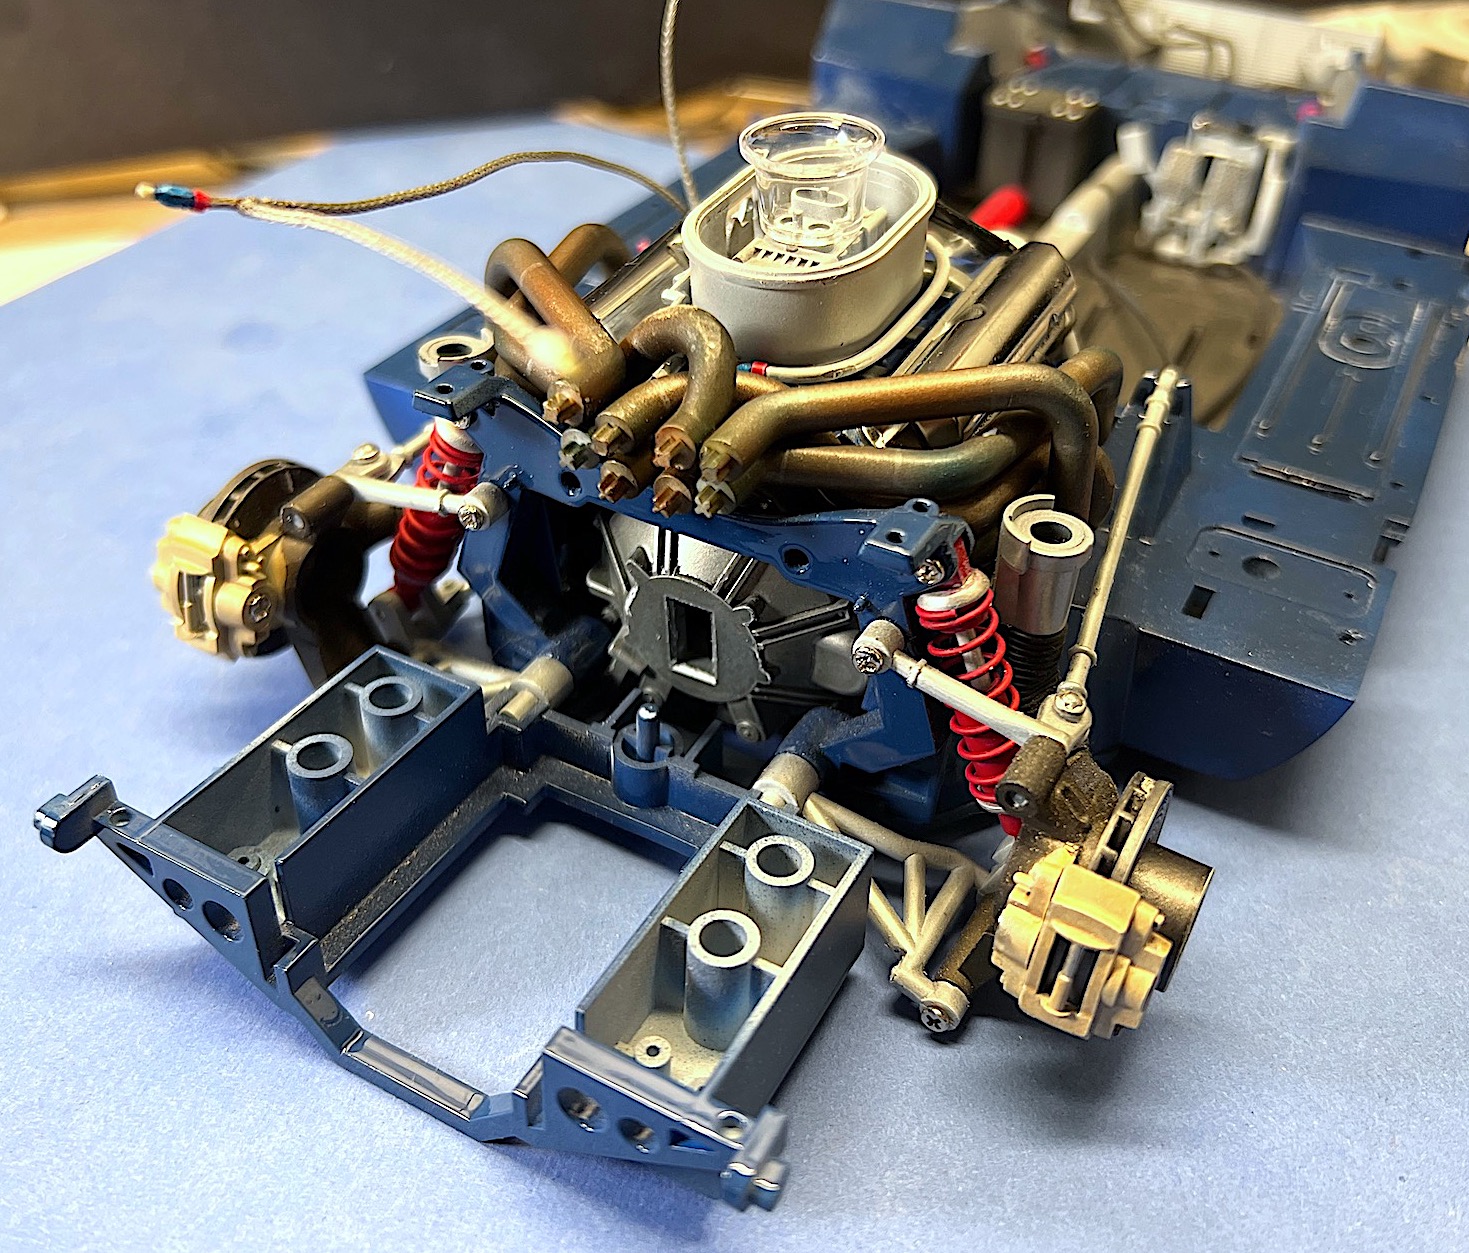
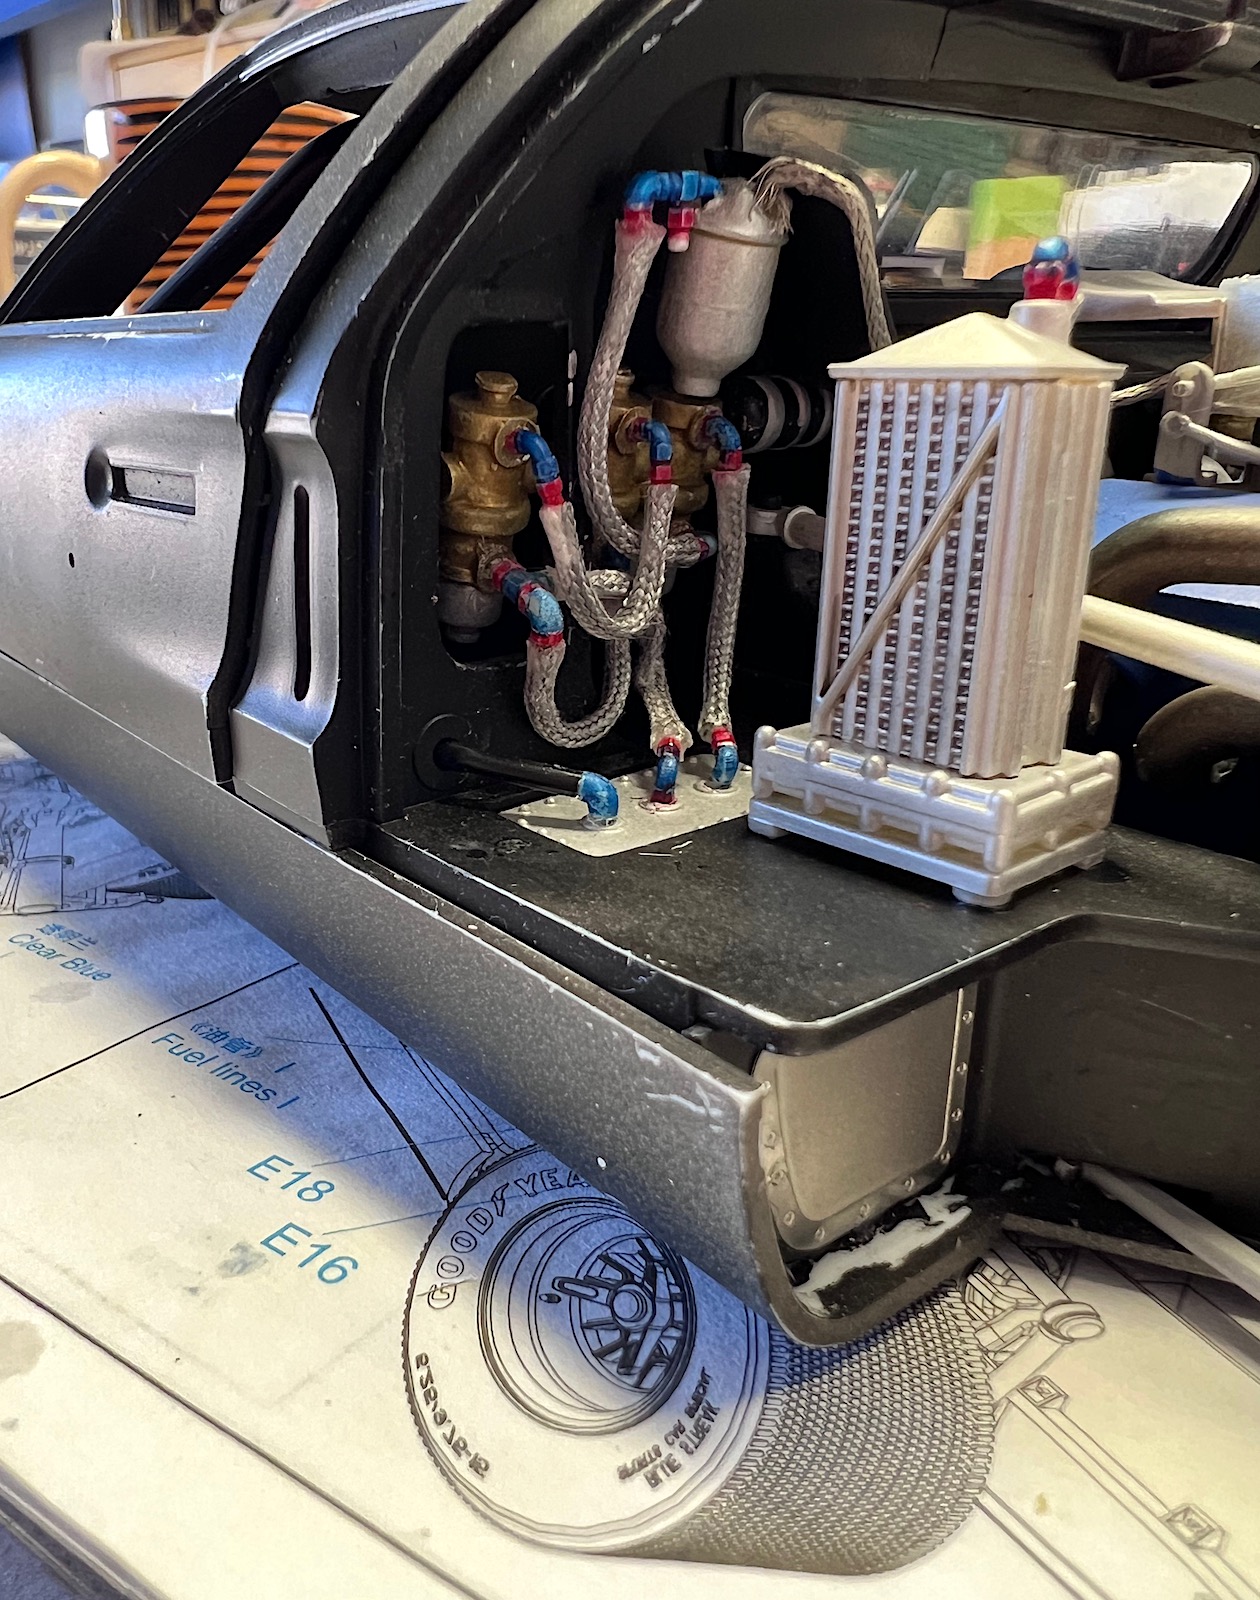
Meng uses molded vinyl for the oil pipelines. The actual lines were braided steel. The vinyl lines also do not maintain their shape very well. I decided to replace the vinyl with braided line and metal pipe fittings. Step 24 also installs the engine in the chassis, which slips into place easily.
Steps, 25 and 26 assemble the transmission and additional piping. The transmission goes together without any problems. Again here, I decided to use braided steel cables for the transmission piping rather than the kit supplied vinyl lines.
In step 27 the transmission is assembled to the engine and chassis. This requires loosening the rear brake assemblies, swinging them out of place, and reattaching. Fitting the transmission is a tight squeeze between the mounting pin and the bellhousing on the rear of the engine. Tipping the engine up slightly helped to get the transmission pushed into place, which snaps in without glue or fasteners.
Steps 29 and 30 install the rear bracket and suspension torsion bar without problem.
Trumpeter Engine & Rear Compartment
Trumpeter begins assembly of the engine in steps 1 through 3. The engine block and transmission are nicely pre-painted in champagne, gold, and steel colors, however my prototype for the number 2 car shows a Ford light blue color for the block.
Trumpeter uses a woven fabric sleeving for the oil lines and other piping which are much more realistic than the Meng vinyl lines. The woven sleeving is hollow so it can slip over the pins on the connecting fittings. Some of the dimensions given for the sleeving are too long, so check the fit before installing. The exhaust pipes fit the as well as the Meng kit.
Trumpeter chrome plastic is too thick, too shiny, has soft detail, and many sinks and low areas. Many of the pieces Trumpeter chromed should actually be satin aluminum or another color. I removed all the chrome plating with oven cleaner and will repaint the appropriate color. The plastic has a yellow color and appears to be different material than the other plastic in the kit.
Trumpeter then skips to steps 30 through 34 to complete work in the engine bay while the chassis and part of the body is assembled.
Trumpeter again uses the woven sleeving with plastic pipe fittings for all of the piping within the engine bay. The sleeving still appears over-scaled, and has some kinking, but is an improvement over the Meng piping. Again, check the length of the sleeve called out as some of them are too long. Trumper completes the engine bay with installation of the oil coolers and suspension torsion bars in steps, 33 and 34. The torsion bars are over-scaled and appear very heavy when compared to the actual vehicle.
A serious omission by Trumpeter is the lack of a distributor and ignition wiring. While it would be very difficult to see, it would be noticeable if the hood is open to reveal the engine.
Part Three Summary
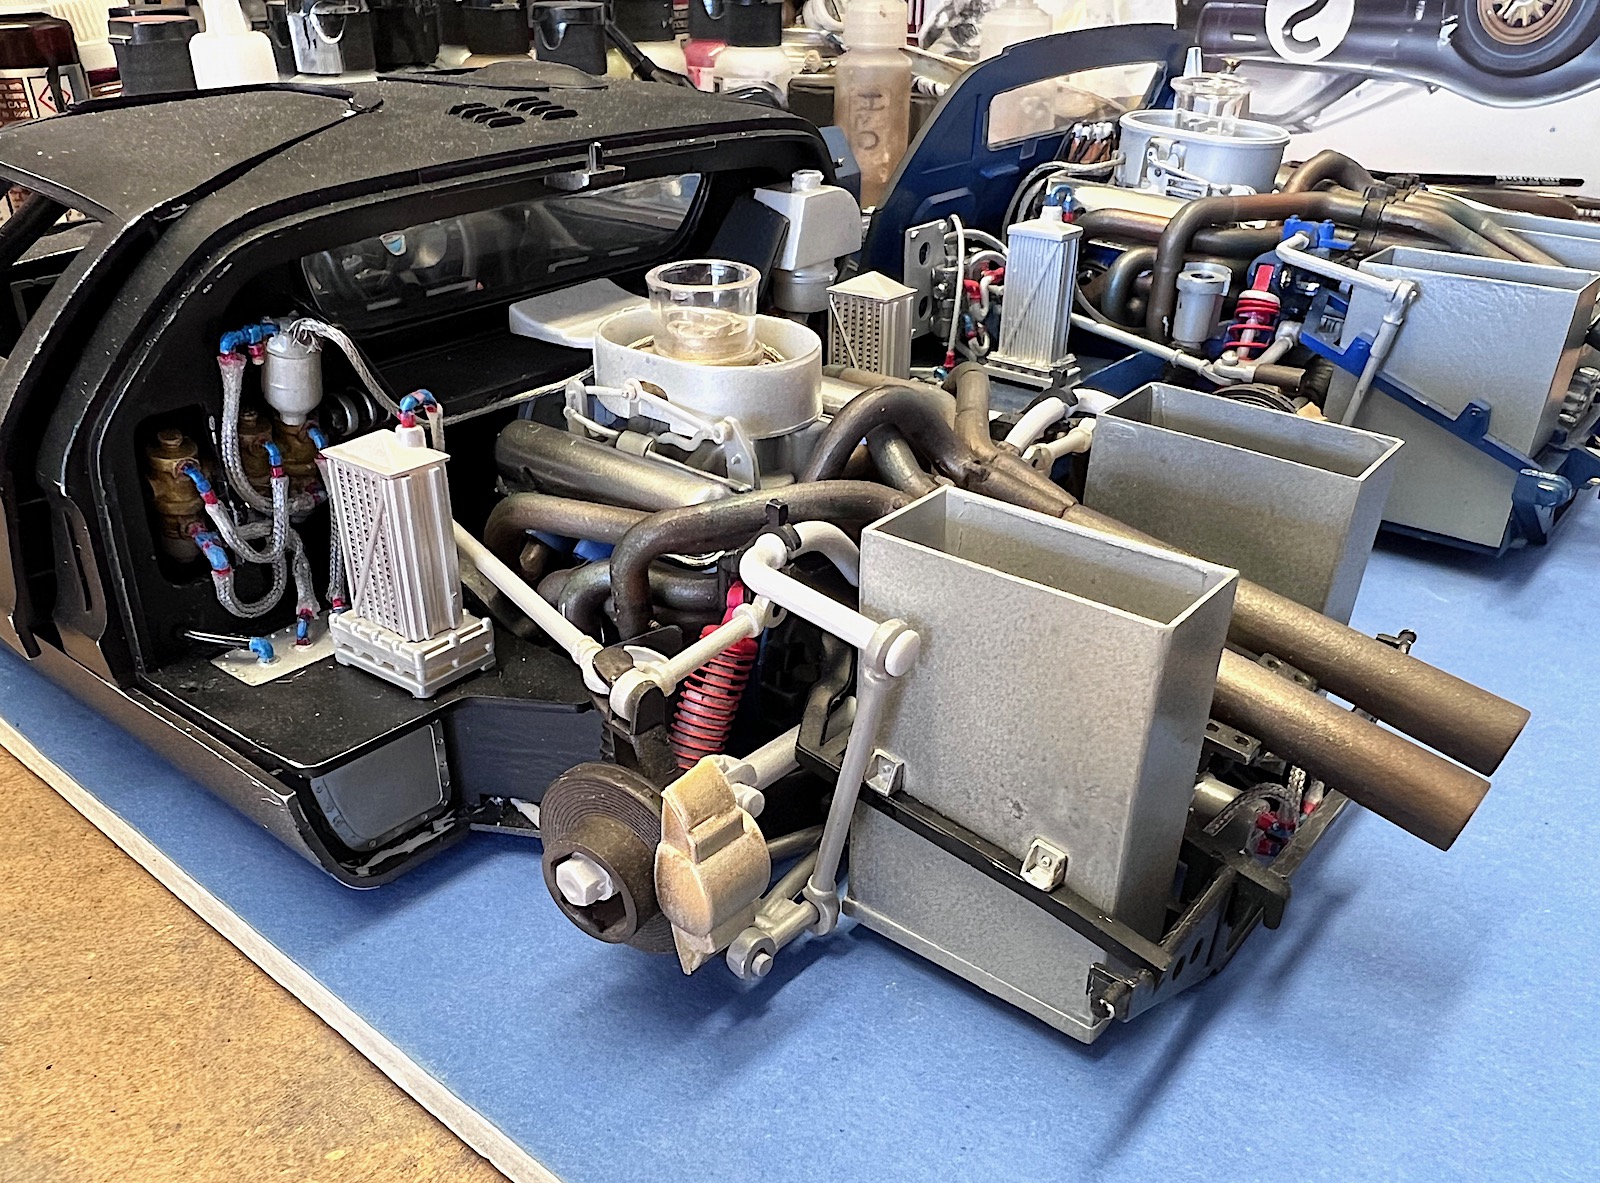
Overall, the engines are nearly equal to each other, with some pluses and minuses for each. The Meng kit has sharper detail so the engine bay looks more accurate, but the vinyl piping is a real drawback. Use of third-party metal cables and fittings greatly improved the appearance of the engine bay. The Trumpeter engine has the advantage of the woven sleeving for piping, but the softer detail and omission of the ignition wiring is a drawback.
I appreciate Meng Models releasing this great kit and providing a review sample to IPMS.
The next, and last, review will move on to assembling the body of the vehicles.

Comments
Add new comment
This site is protected by reCAPTCHA and the Google Privacy Policy and Terms of Service apply.
Similar Reviews