
Ford GT40 Mk.II ’66, Part 2, Chassis
This Part 2 of the review of Meng’s GT40 Mk.II ’66 focuses on the chassis & suspension assembly of the Meng kit. Part 1 of the GT40 review included ‘What’s-In-The-Box’ and a comparison of the Meng kit to the previously released Trumpeter GT40 kit.
Ford GT40 Mk.II ‘66
Developed by the Ford Motor Company and Carroll Shelby to end the dominance of Ferrari in the preeminent 24 Hours of LeMans, the Ford GT40 Mk.II become an iconic American built race car. After failing to finish the race in 1965, the Ford GTs finished 1-2-3 in 1966 in a humiliating loss for Ferrari to win at Le Mans. This also ended Ferrari's five-year-long dominance of this race.
Meng’s GT40 Kit
This Meng RS-002 Ford GT40 Mk.II ’66 is a large 1/12 scale model kit officially licensed by Ford Motor Company. The kit includes complete suspension system, power system, cab interiors, front trunk interiors, openable doors, front trunk cover and engine hood, as well as movable wheels and suspension system.
Chassis Assembly
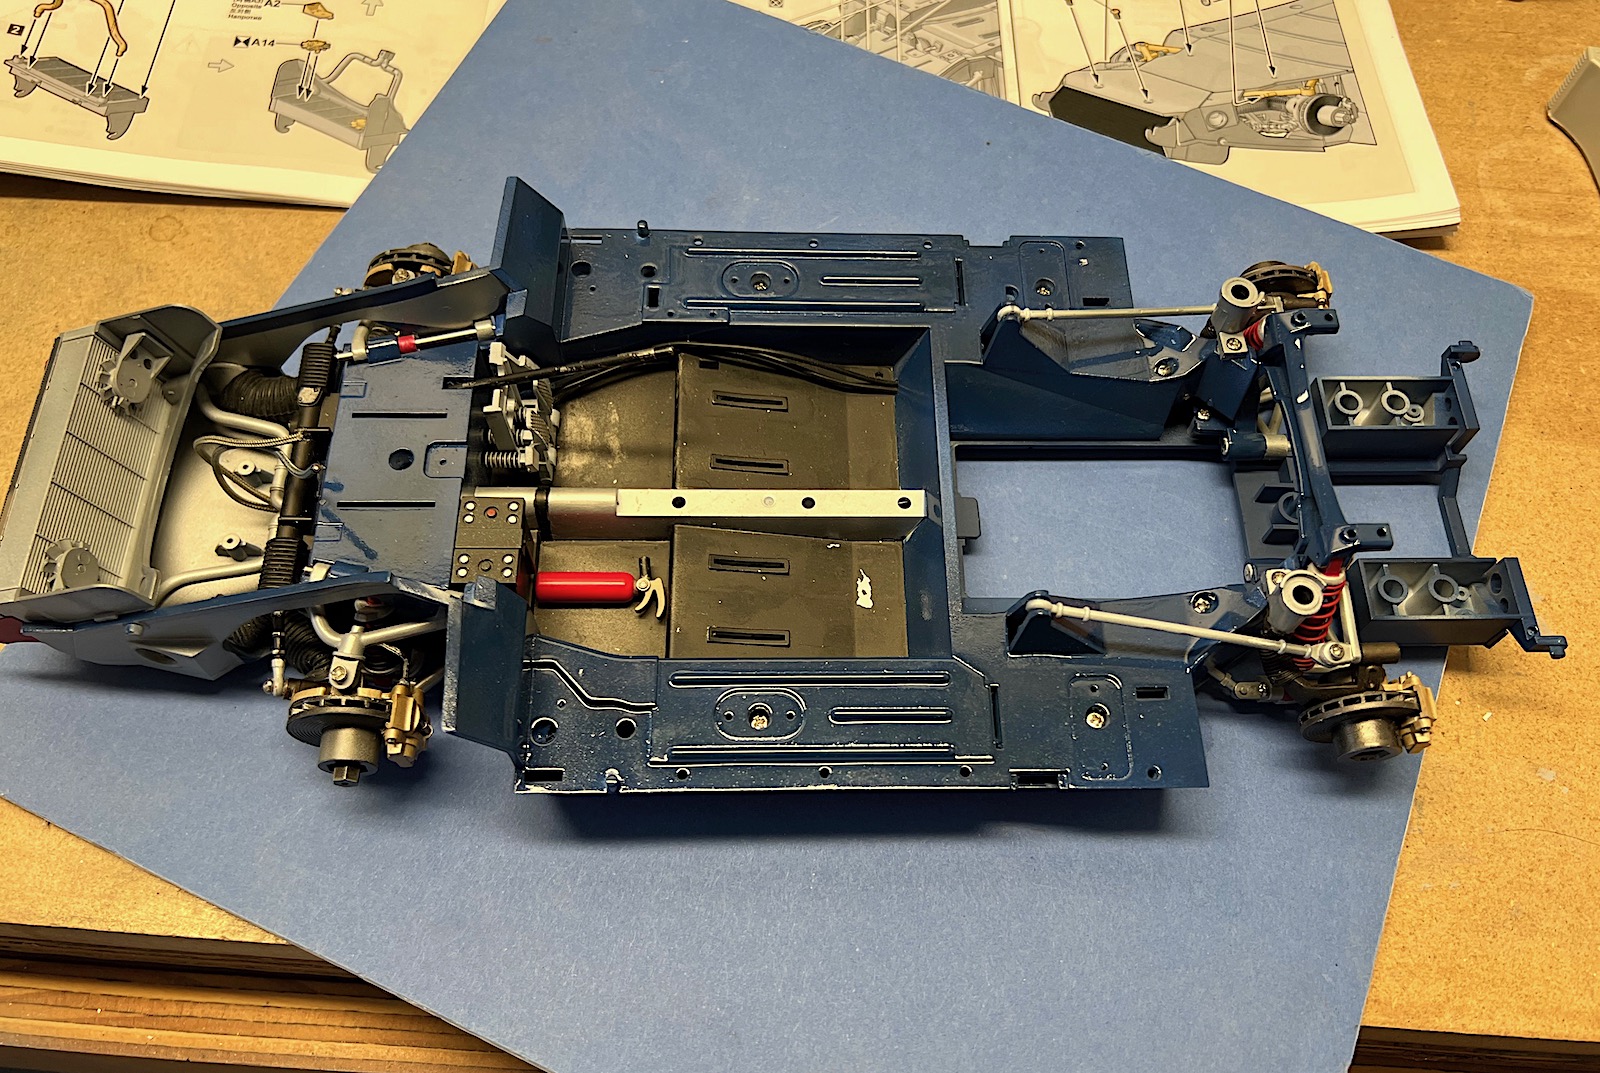
Assembly of the kit starts with the GT40’s monocoque chassis and suspension in steps 1 through 20. The monocoque tub is assembled in a top panel that includes the interior floor, and a lower panel. This would be a good time to paint the monocoque chassis pieces before assembling the suspension parts. The two cars included in the kit have different chassis colors (blue for the #1 and black for the #2) so a determination will need to be made on which car is being built. The kit allows for steering the front wheels, and several pieces of the suspension are not glued to allow some flex in the suspension.
The steering rack is assembled in step number 3. The steering links are attached to the arm with screws, but the other steering parts are assembled without glue. Steering is meant to function with a metal steering rod and plastic rack & pinion to move the steering arm back-and-forth. When I put the assembly together, the steering pinion did not engage the rack and the screws interfered with the front of the chassis tub. This didn’t allow the steering assembly to work properly. I was not interested in having steerable front wheels, so I didn’t take the time to rework the steering assembly to work better.
Rear Wheel Suspension Assembly
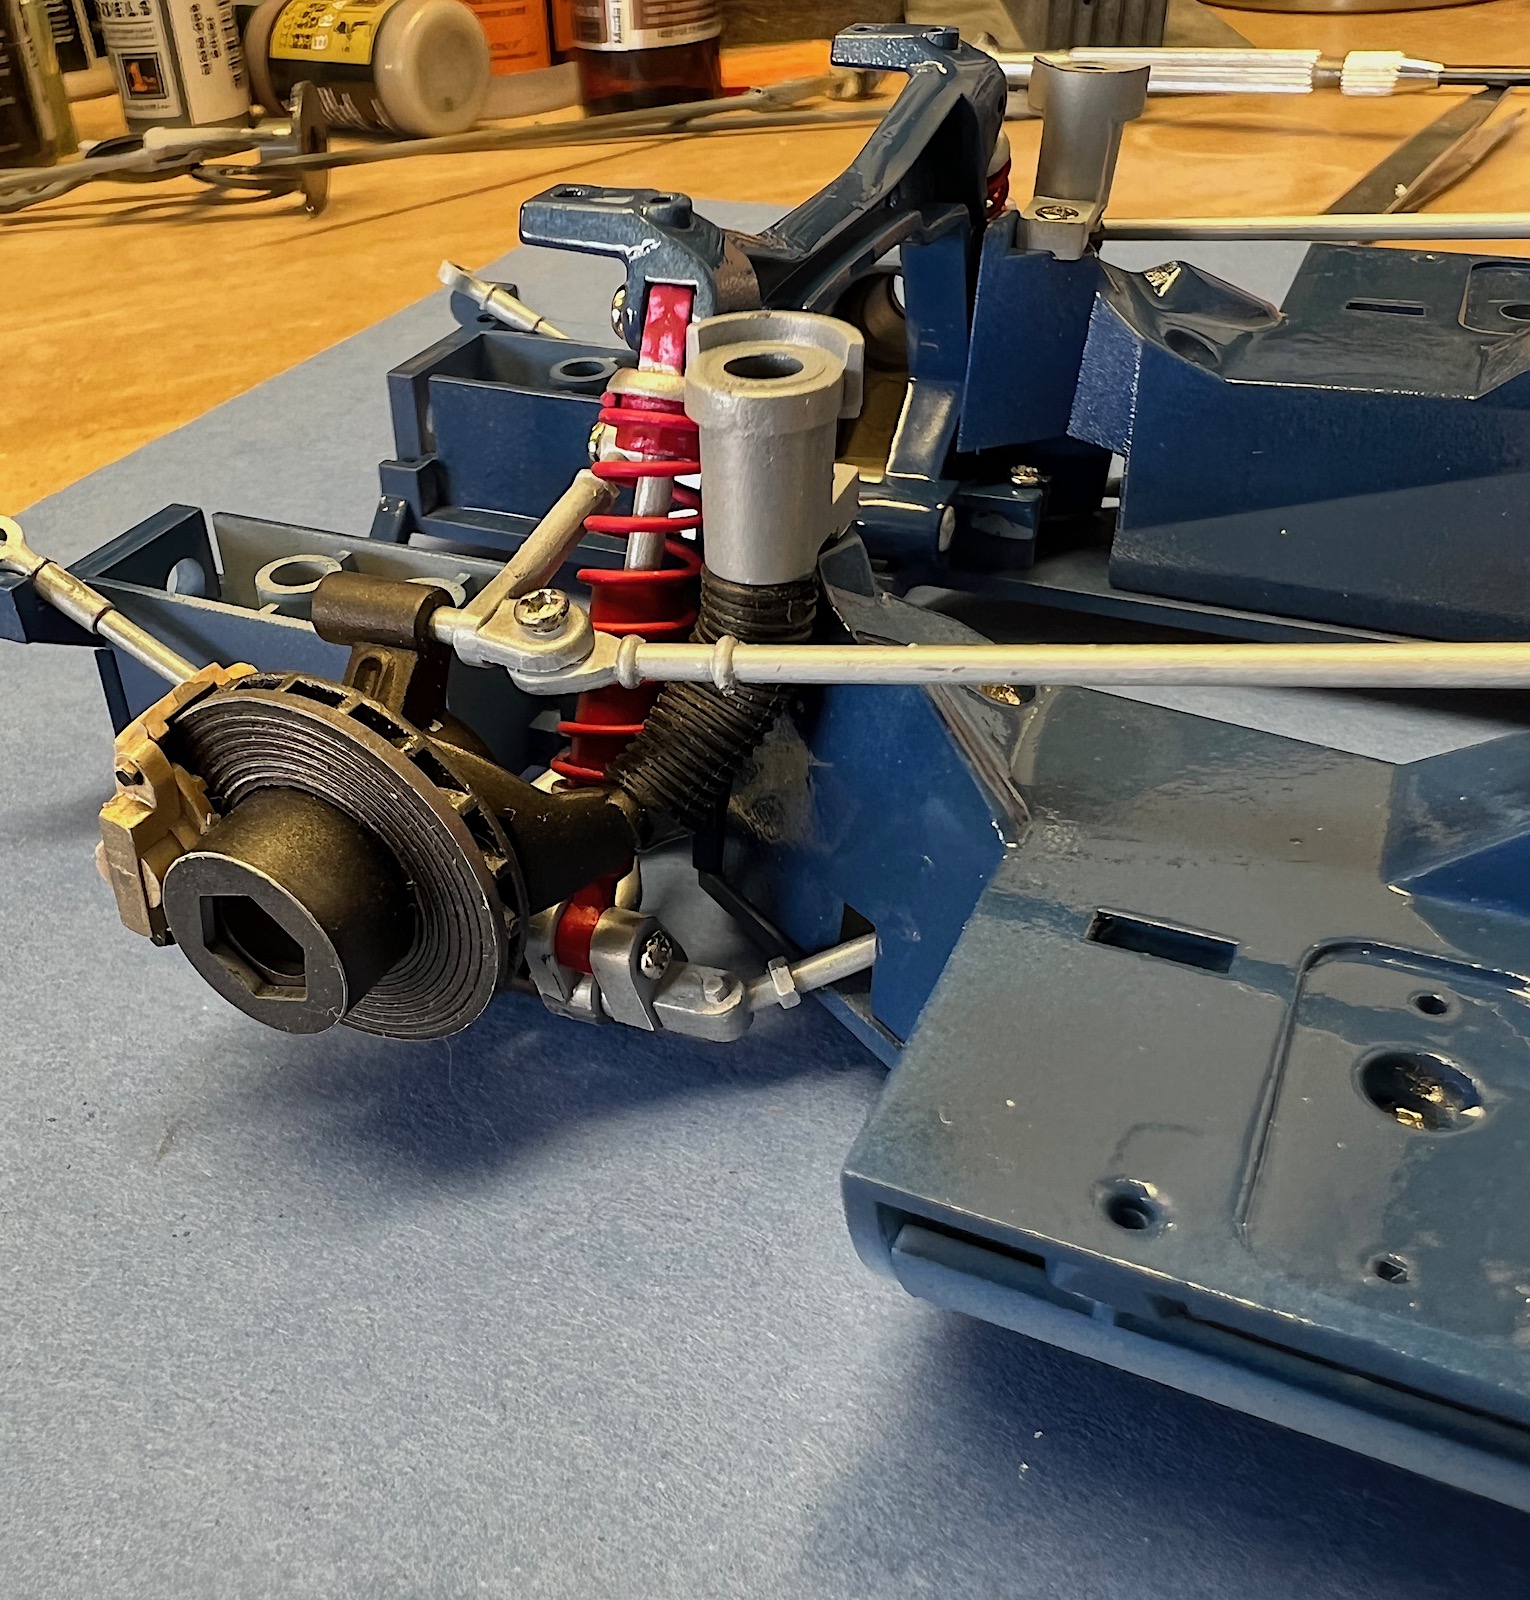
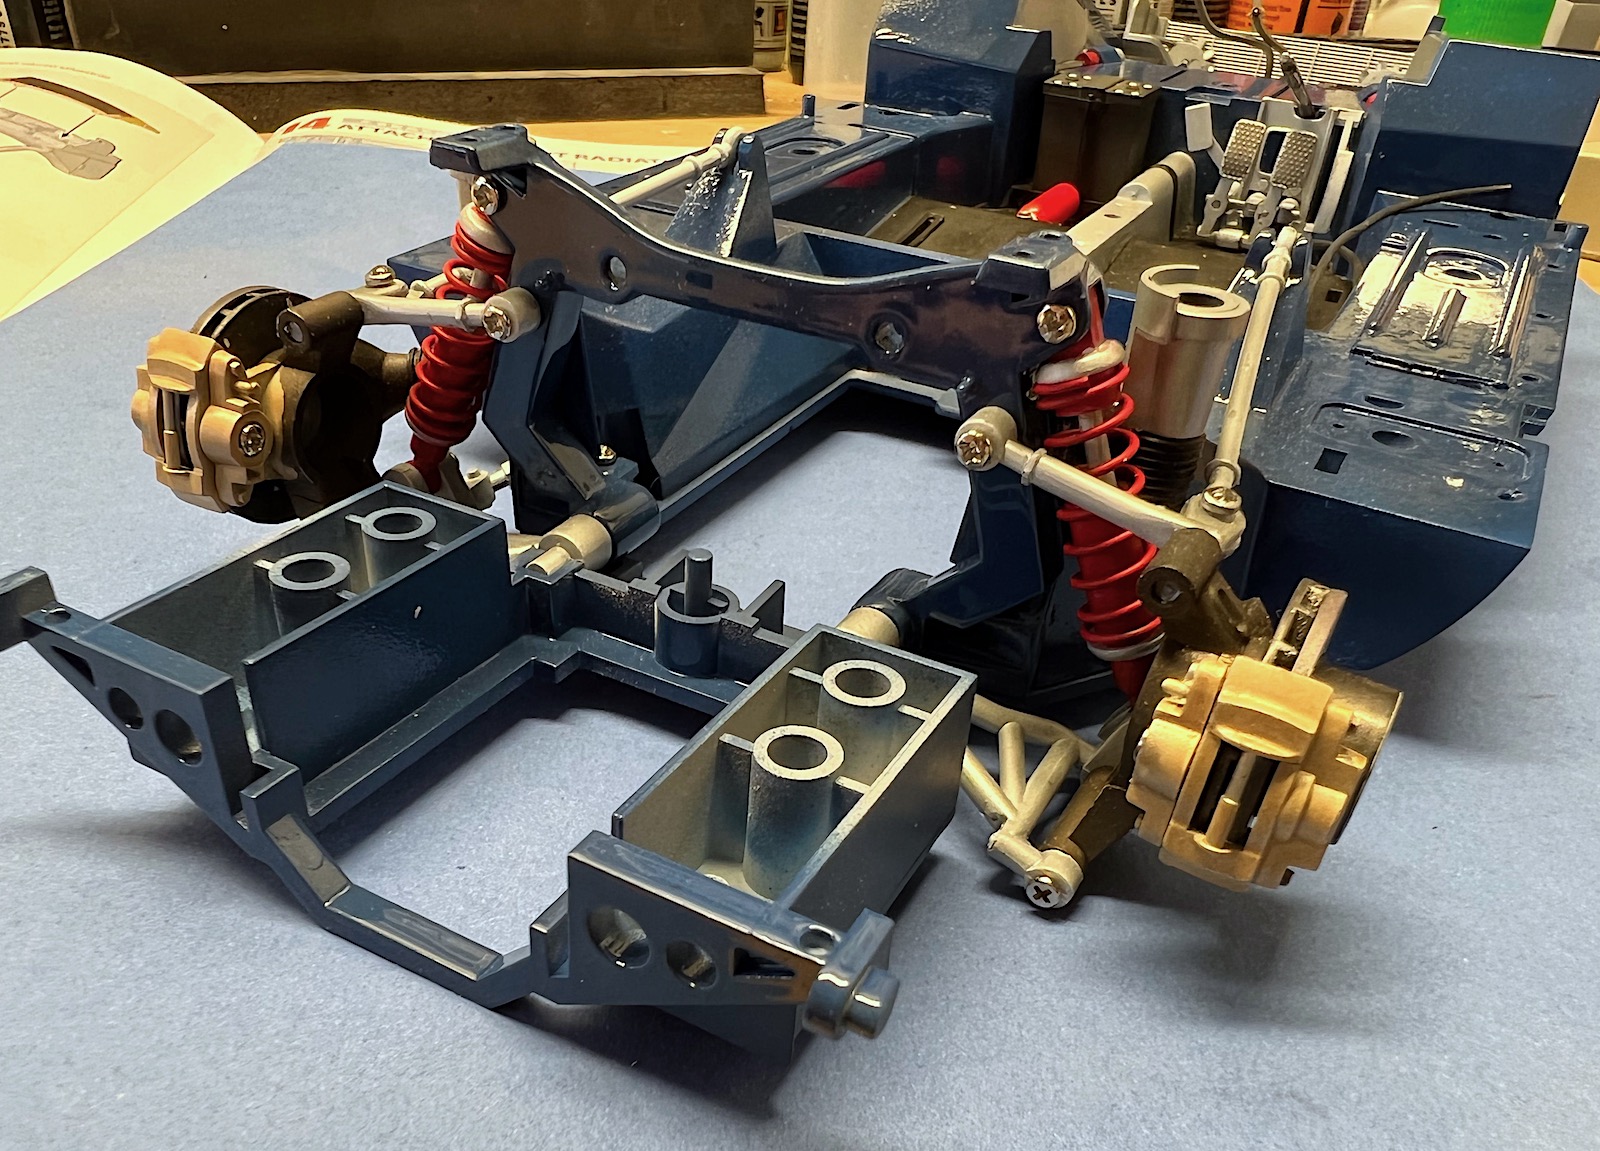
The suspension system for the rear wheels is assembled and installed on the chassis in steps 4 through 6. The suspension assembly is generally consistent with the actual vehicle, but the various kit members are large and over-scaled. Colors are called out for the brake assemblies in step 4, but these are slightly different than reference photos for the number 1 car I am building. Parts G6 and G7 should be a gunmetal or burnt iron color for the number 1 car rather than the silver gold shown in the instructions. Silver gold is correct for the brake calipers, parts G2 and G3. The head of the screwdriver provided with the kit is too large for the screw A shown in step 4 so a smaller screwdriver will need to be used. The brake parts are fairly accurate in their shape but don’t have a lot of detail. The brake discs are thicker than the actual GT 40, and the overall brake and suspension system seems over-scaled . The rear suspension and brake assemblies get mounted to the lower body shell in step number 6.
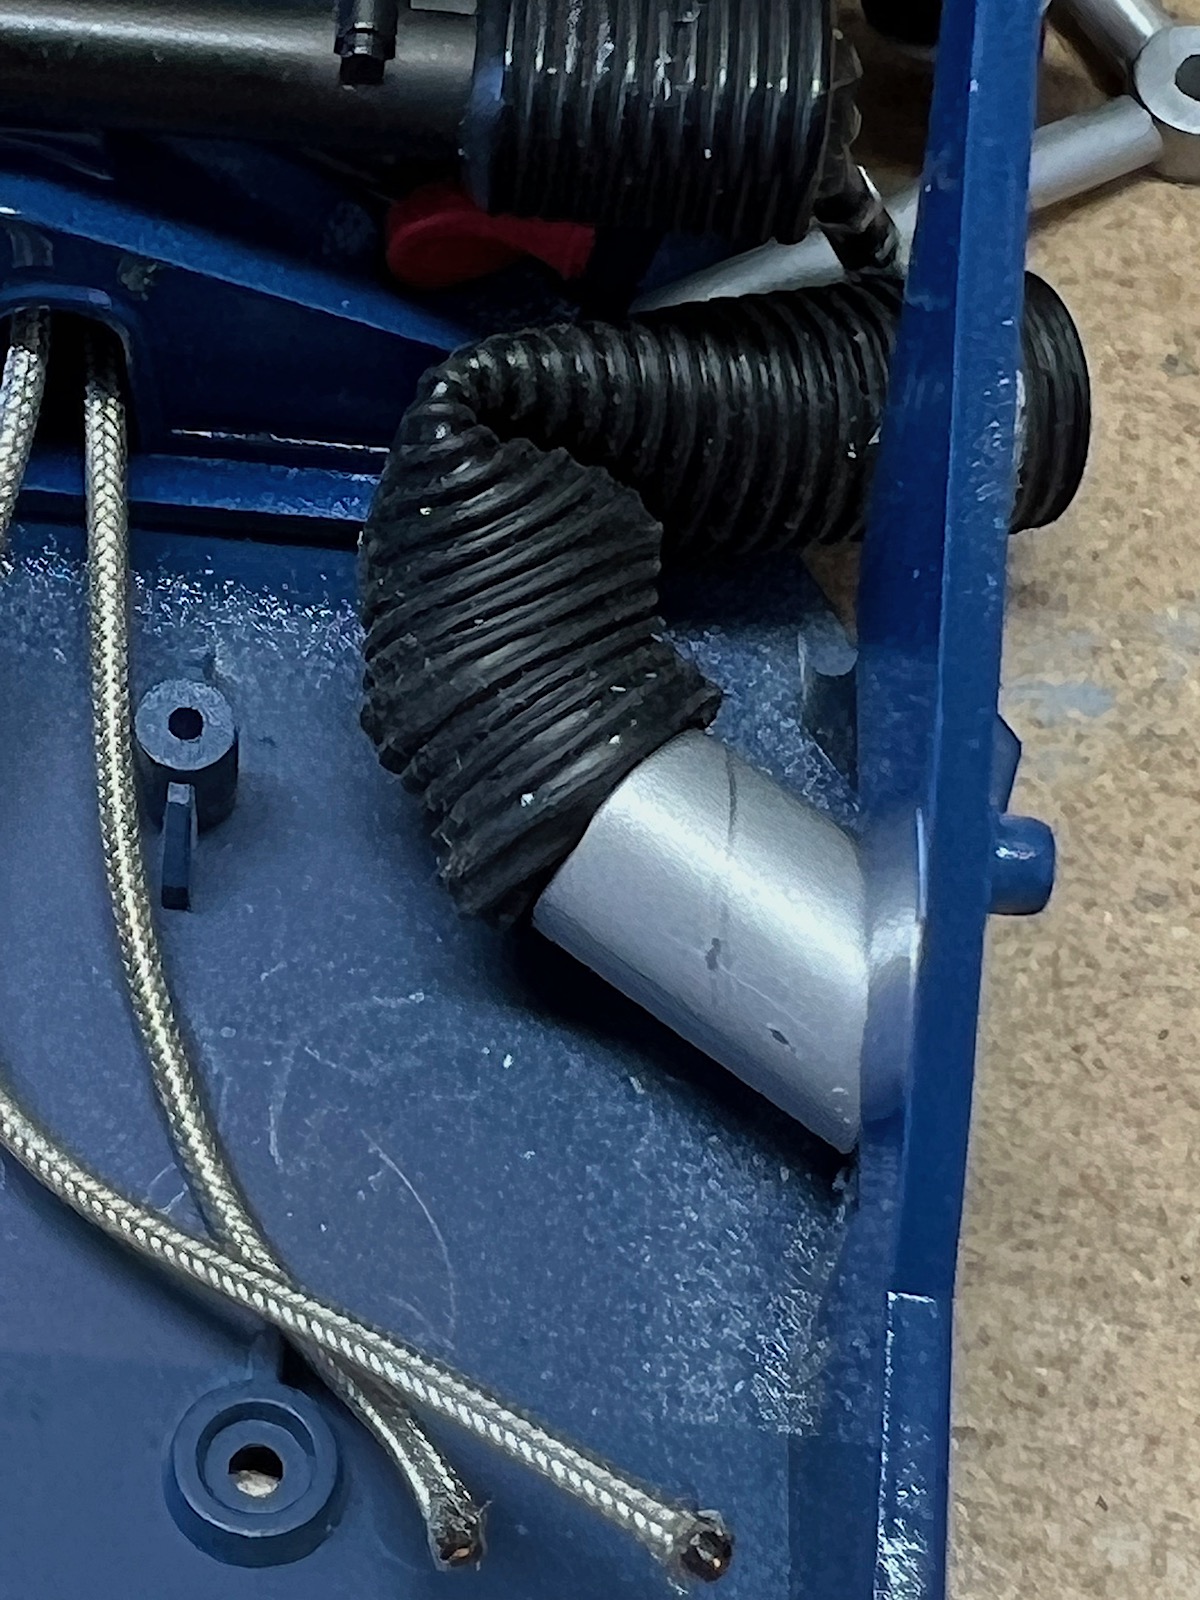
Cooling ducts for the rear brakes are installed in step 8. I found it easier to loosen the brake assemblies to install the rubber ducts before they get screwed to the chassis. I also added a drop of CA glue to hold the ducts in place.
Front Suspension & Brakes
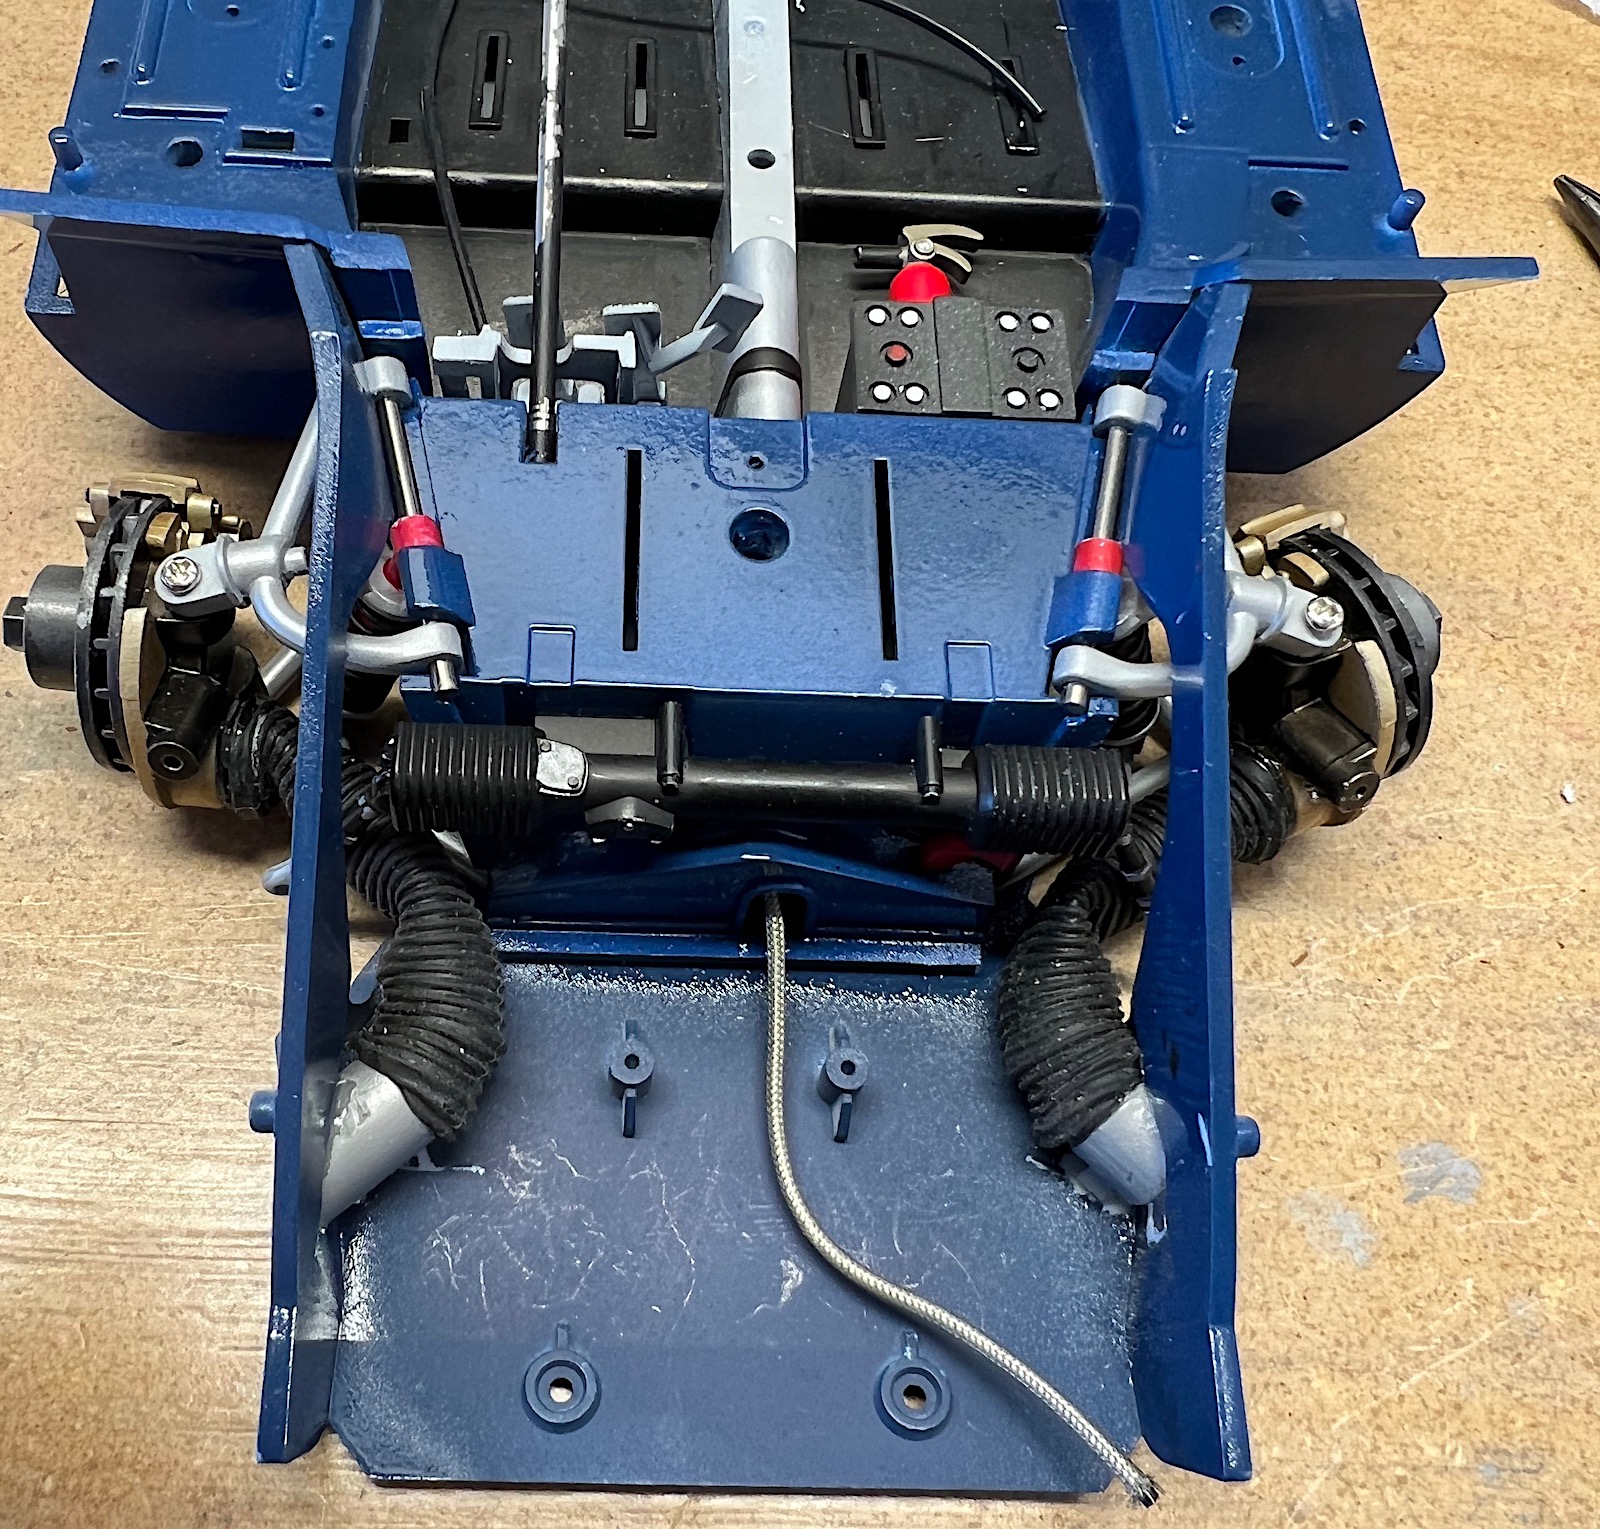
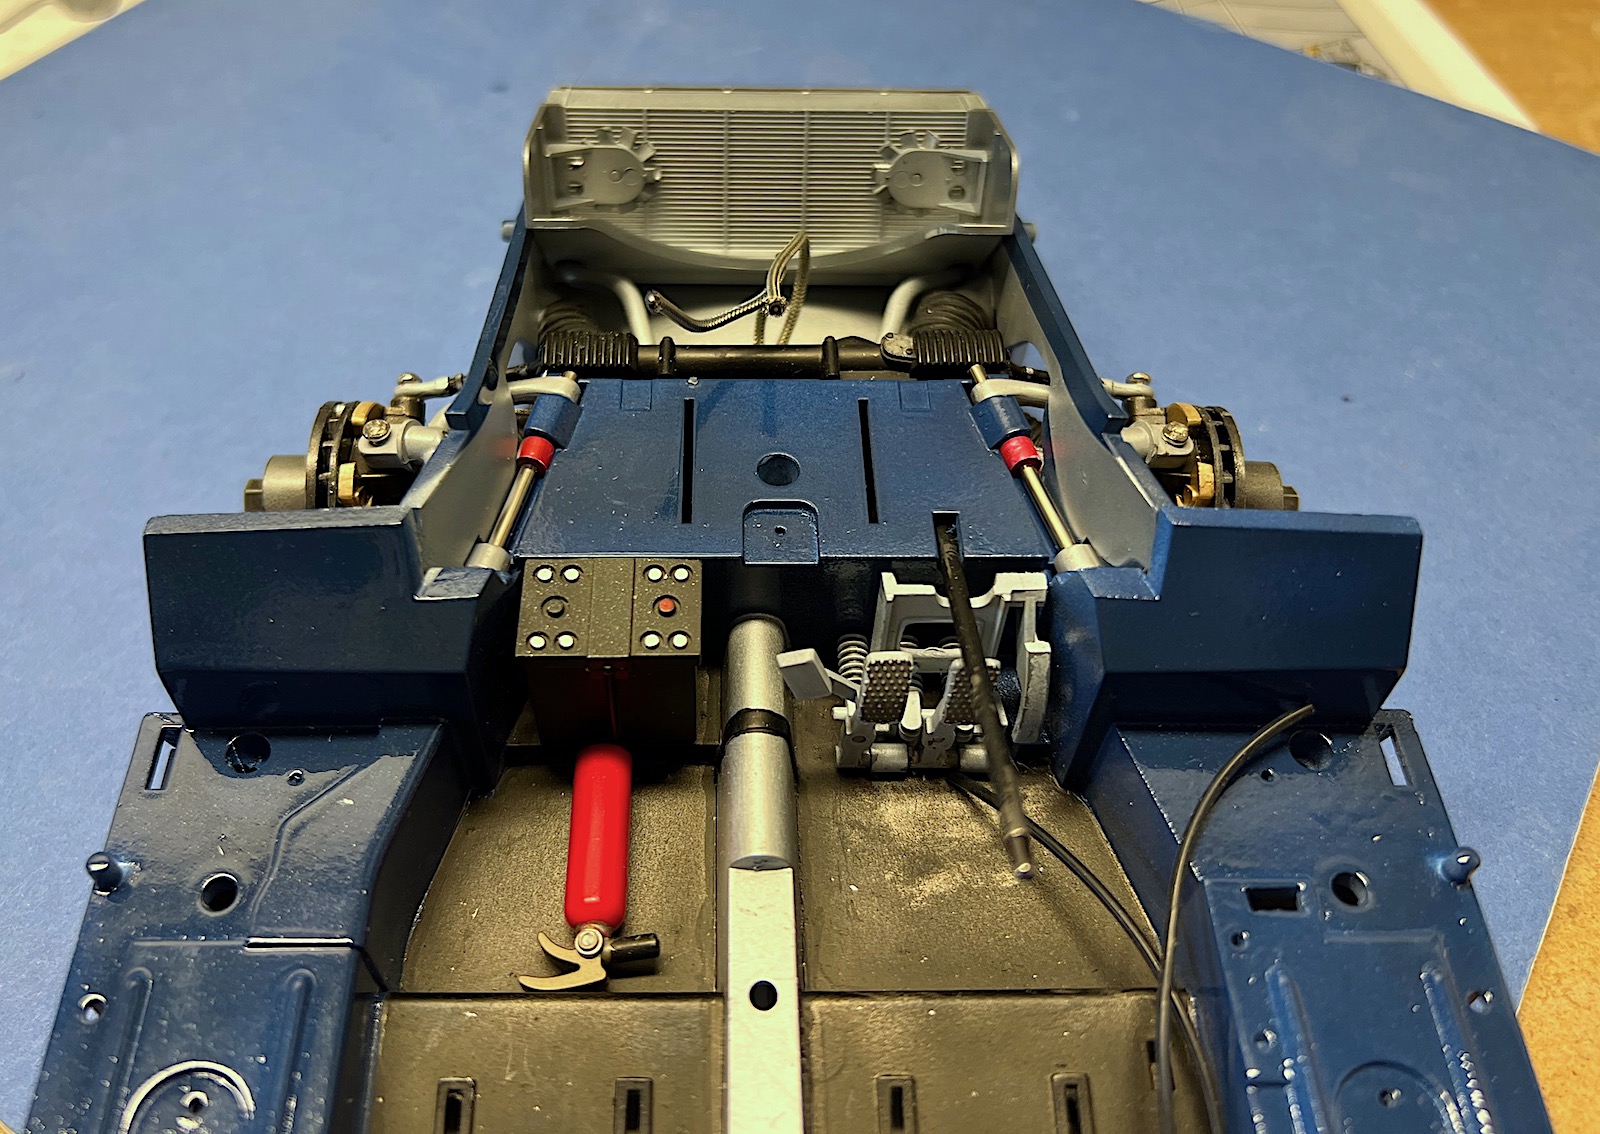
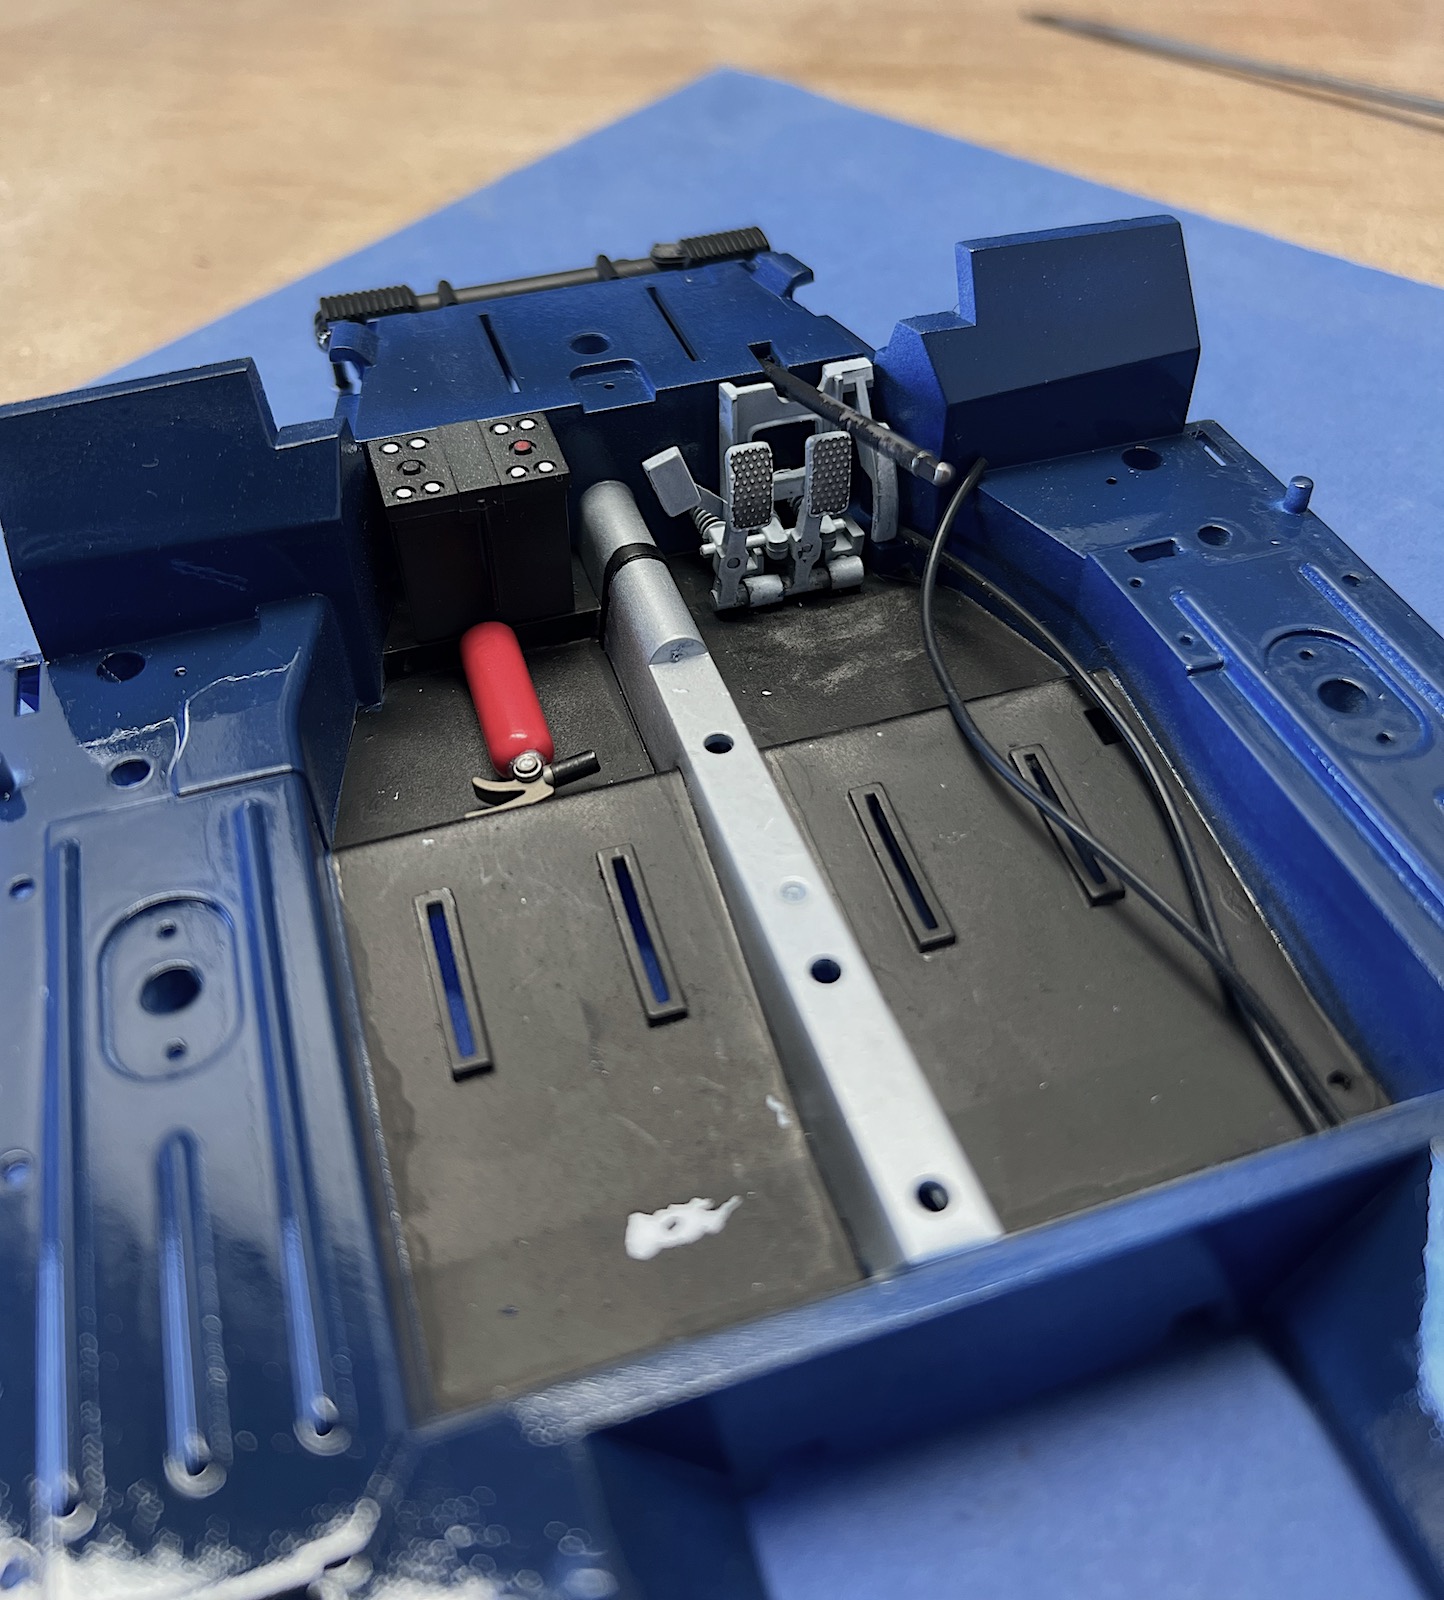
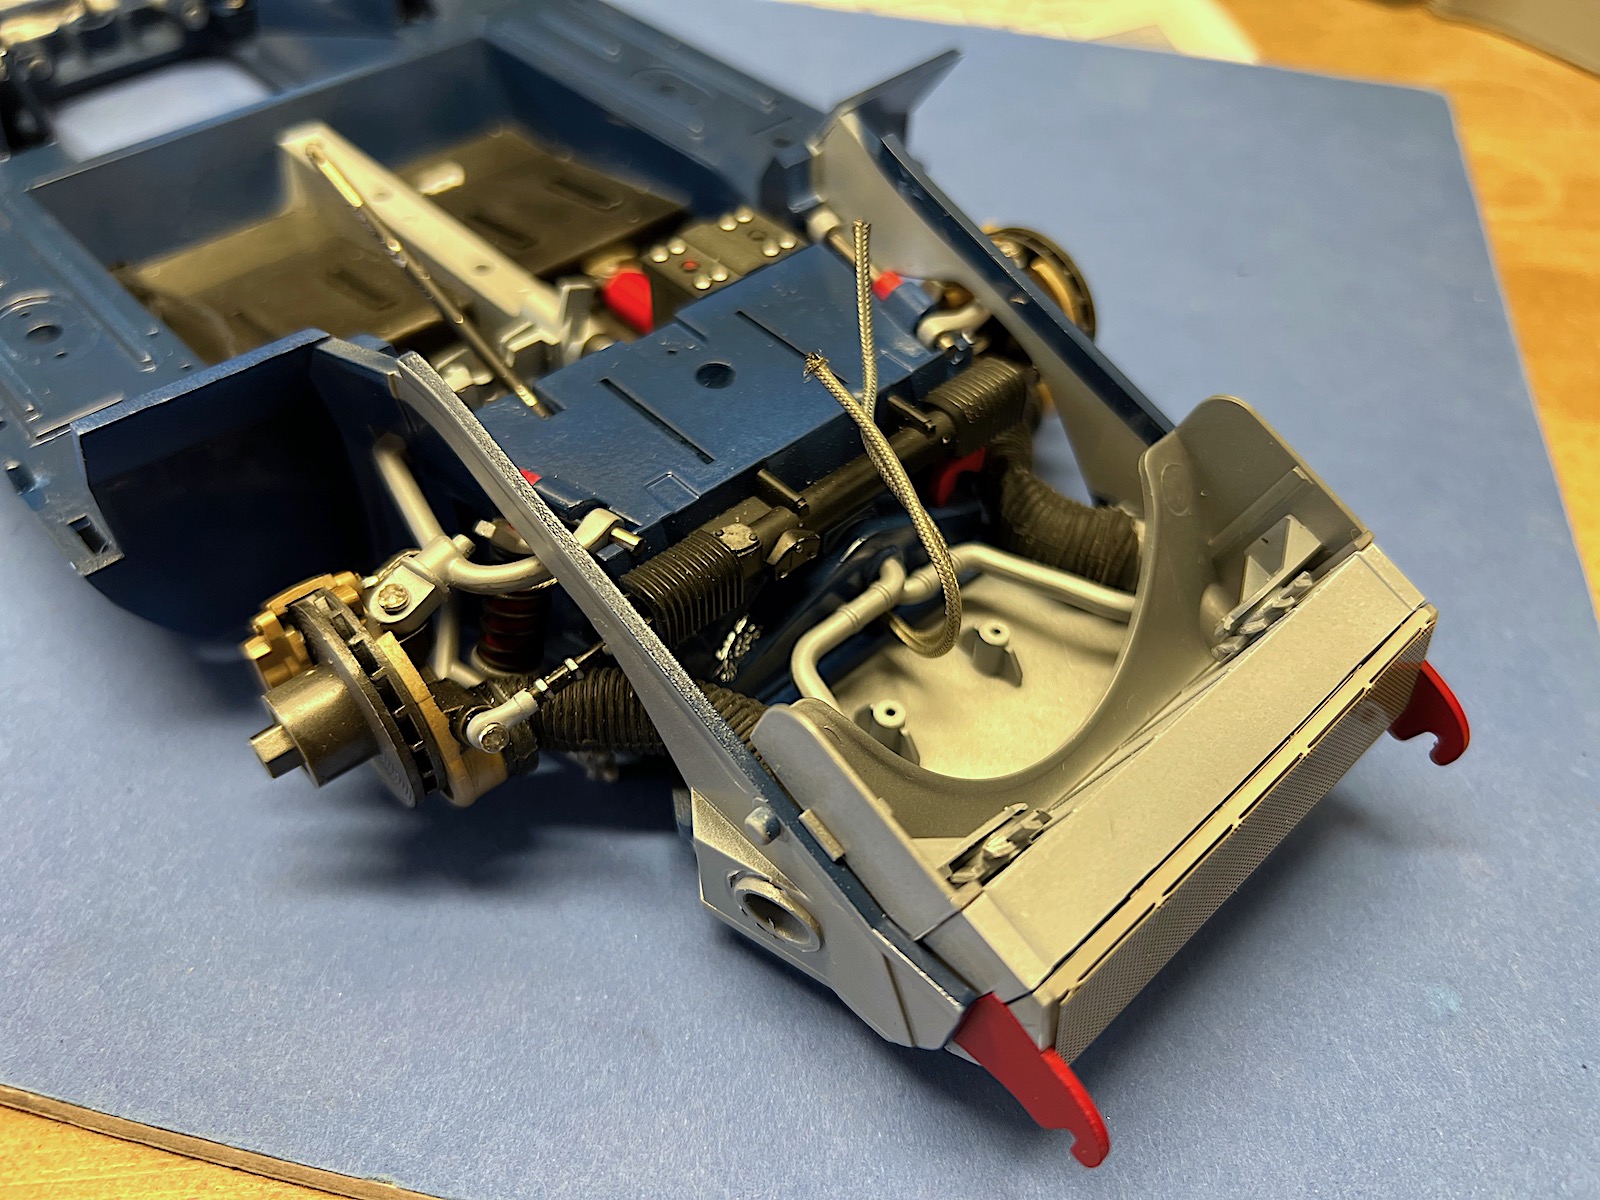
On the front of the lower chassis, Meng uses a solid panel for the sides of the front compartment. On the actual car tubes are used for the front section, with aluminum panels on the outside of the tubes to close off the wheel wells. I masked and painted the tubes chassis color to give the impression of tubes. Oil lines which eventually will connect to the oil tank are attached in steps 6. The reference photos I’m using show braided lines for these lines, so I switched out the kit vinyl hoses.
The upper and lower monocoque parts get attached in steps 7&8, trapping the lower front wishbones, parts C 28 & C 26, in the process. Seven screws are used in step 8 to attach the upper and lower chassis panels. The screws go in with some difficulty so make sure they’re tight to close any gaps in the panels. Most of the screws will be concealed by later construction.
Brake lines for the front brakes are installed in step 9. The actual car uses braided piping for the lines so I switched out the kit’s vinyl pipes.
I had a real challenge installing the cooling ducts for the front brakes in step 12. I could not get the plastic connectors for the ducts, parts C8 & C9, aligned correctly without severely kinking and flattening the rubber ducts. On the passenger side I shortened part C9 to relieve some of the stress on the hose which helped somewhat. On the driver side I tried enlarging the hole in the chassis and pushing part C8 further into the hole to shorten the duct. Both options still ended up with some kinks but were slightly better than the basic kit. I understand the flexibility required in the ducts to allow the wheels to turn, but the kinked ducts really distract from the appearance of the suspension & brakes. Possibly inserting a smaller tube inside the rubber ducts would prevent the kinking. Another option would be for Meng to mold the ducts in plastic, which would prevent steerable wheels, but would have a better appearance.
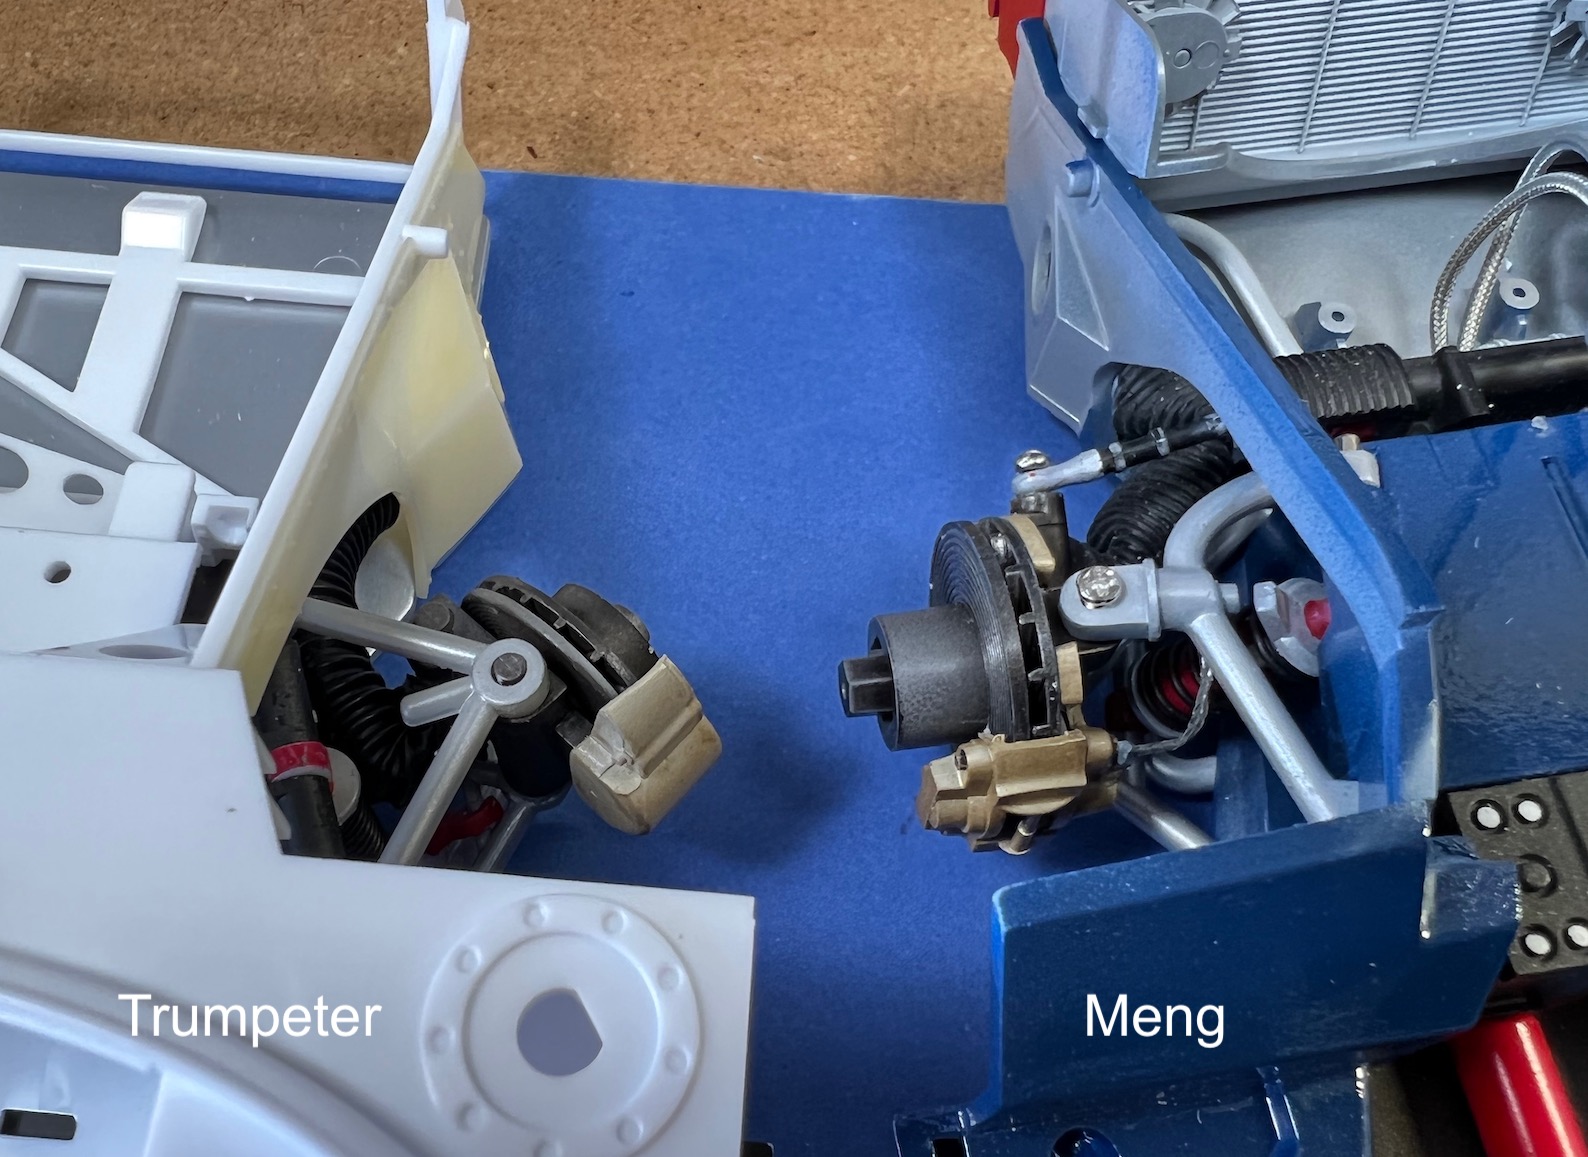
Comparison to Trumpeter Ford GT40
Another option for the Ford GT40 in 1/12 scale is the Trumpeter version that was released in 2008. I’ll note some of the differences between the two kits as I assemble the Meng GT40.
Trumpeter provides most of the suspension parts with a chrome finish, which is not correct. The suspension parts on the actual vehicle are a silver aluminum color with a brushed or matte finish. The only chrome parts I could see on the actual vehicles are the engine valve covers, so I stripped the chrome finish off all the Trumpeter parts using oven cleaner. Some of the chrome was so thick it took four coats of the oven cleaner to remove it. Once revealed, the bare plastic is hard & brittle with a yellow color and soft detail.
Framing for the front end in the Trumpeter kit is more accurate, based on the tube framing used. The Meng kit has flat panels for the floor and sides of the trunk rather than the tubes and panels of the actual vehicle.
Brake calipers on the Meng kit have more & crisper detail than the Trumpeter kit. The rotors on the Trumpeter kit are more accurately thin, but the Meng rotors have a larger diameter, which looks more correct. The upper wishbone arms on the Meng have a slight curve to them. While exaggerated, it’s more accurate than the straight arms on the Trumpeter. The wishbones are connected with screws which are very visible. I filled the most obvious ones with epoxy and painted them silver, which helped to disguise them somewhat. Overall, I think the Meng suspension is more accurate and has better detail.
Part Two Summary
The Meng kit chassis & suspension build up into a nice model of the GT40. Other than the cooling ducts for the front brakes, the kit is easy to assemble. Some of the suspension parts are over-scaled and could use mote detail, but it will still be an impressive model. I think the Meng kit is more accurate than the Trumpeter kit.
I appreciate Meng Models releasing this great kit and providing a review sample to IPMS.


Comments
Add new comment
This site is protected by reCAPTCHA and the Google Privacy Policy and Terms of Service apply.
Similar Reviews