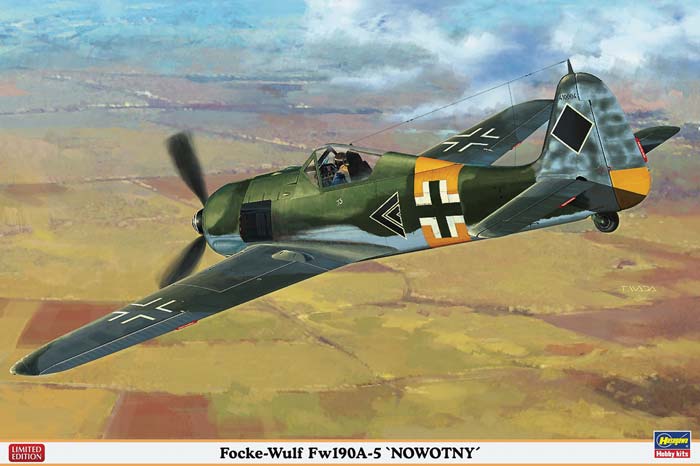
Focke-Wulf Fw-190A-5 “Nowotny”
The Fw-190A-5 was different from earlier versions in that the nose was extended forward 6 inches to help change the center of gravity. This would help with a planned addition to the armament.
The Kit
This kit is made up of 108 parts. It has 5 injection molded grey sprues and 1 clear plastic sprue. The moldings are very crisp and the clear parts are also flawless. The decal sheet is not so flawless. My copy had nicely printed decals that were semi-gloss but had spots of very high gloss over them (like something spilled on it). This worried me just a bit. Looking at the parts, I noticed that Hasegawa supplies the wrong wheels and tires for this type. Resin aftermarket parts are easily available, though.
Construction
The instruction sheet unfolds to show 13 steps, starting with the cockpit. A pretty detailed cockpit is supplied out of the box. One mistake I found was that the control stick was backwards in the instructions. You have the option of dry brushing the detail or using the decals. Normally, I like to paint them but this time I chose the decals and am happy with the results. I did have to cut the instrument panel decal gauges into separate pieces, as they did not quite line up properly. The engine is molded in one piece, but the detail is very good. Dry brushing really brought out the details, but it was for naught. Once you put the cooling fan and prop on, it can’t really be seen! (I know it’s there, though!) At this point you build the cowling around the engine, which for me seemed a bit different. Next came the fuselage and wings. The only problem I had here was not fitting the wheel wells properly. This made the upper half of the starboard wing not sit right. A couple swipes with sandpaper cured it, but I need to pay closer attention next time. Now to add the cowl/engine assembly...I said it was different for me, remember? There is not a whole lot of contact points between the fuselage and the cowl, and test-fitting is a must. Unlike the wing problem I had, this turned out ok! The last 5 steps deal with undercarriage, guns, antenna, and canopy assembly – all went on easily and I had no problems. One thing I should add is that the builder needs to pay attention to the instructions. There are several small boxes throughout showing you where to fill panel lines and holes, and where to open up some holes.
Finishing
I used Model Master acrylics for this build. Not being a big Luftwaffe builder, I’ll use enamels for the mottling next time, as I have better luck with fine lines with them. After letting it set for a day, I brushed 5 thin coats of Future, wet-sanding between coats 2 and 4. The decals, for me at least, were typical Hasegawa decals. Using HOT water they went on easily. Once they cooled, not so easily. The spinner spiral was the unintended victim of this and I had to touch up a couple areas with paint. After a couple days of the model sitting untouched, I dull coated it and vowed to do a simpler scheme next time! The decals did not show any problems from the spots I found on them, so that was a big relief. The only mistake I found here was the instructions show 2 #35 decals. The port side tail #35 should be #27. Interestingly, Hasegawa gives you decals for the yellow wingtips and fuselage stripe but not the lower part of the tail and underside of the cowl. Your best bet is to paint all of these. I opted to use the decals and since mixing paint is not one of my strong suits...well, you get the idea.
Conclusion
I decided to build this out of box and not add anything. Maybe later I’ll add belts, but I wanted to show what you get in the box. This is a very nice kit and I recommend this to anyone but a beginner. It is very well detailed and with a little PE or scratchbuilding can be made into something really nice.
I would like to thank the IPMS review staff for allowing me to do a review (my 1st ever). Also, thanks go to Hobbico and Hasegawa for supplying this kit.


Comments
Add new comment
This site is protected by reCAPTCHA and the Google Privacy Policy and Terms of Service apply.
Similar Reviews