
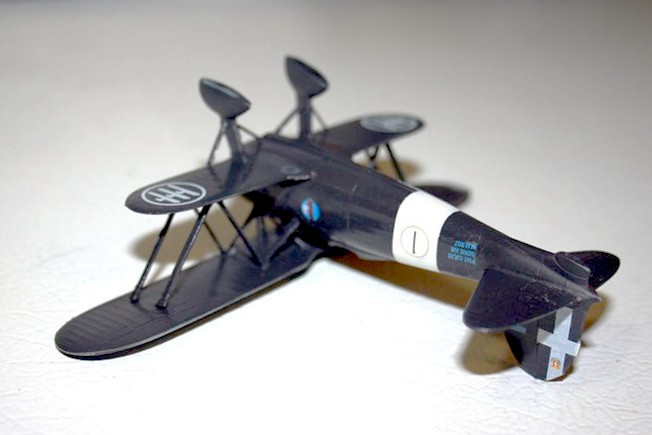
Fiat CR 42CN/J11 Falco
The Aircraft
When the Germans were bringing out the Bf-109, the British had the Hurricane and were bringing out the Spitfire, and the USA had the P-40 and P-39, Fiat introduced the last biplane fixed gear fighter produced in any large numbers. Although the Falco was pretty much outclassed in speed, it was structurally very strong and highly maneuverable. It remained in service through 1944.
The CR 42 remained in production through 1942, and participated in the Battle of Britain. They were used by the Luftwaffe on the Eastern Front and by Italy as night fighters, even though they had no radar or radio. While I’m still doing some research, apparently a Gladiator and CR 42 were in combat in December of 1940, probably the last biplane dogfight.
The Kit
Assembly
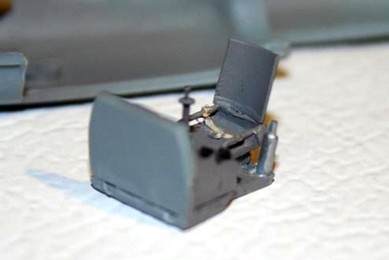
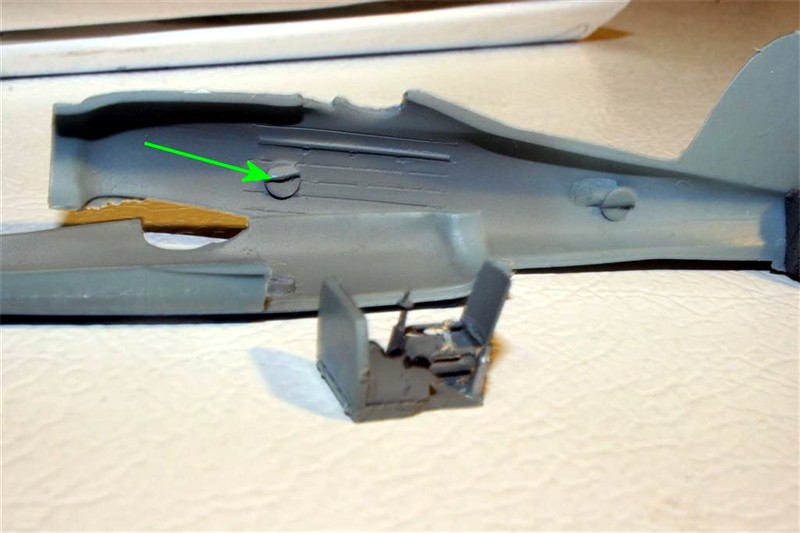
The cockpit is assembled and painted first. It’s a nicely done assembly, with seat belts molded into the resin seat. After painting the details, I found that I couldn’t put the cockpit into the fuselage without removing the two large extensions in the fuselage halves (green arrow). The good news on that is that there are side consoles on the cockpit, so it’s not necessary to do more than a quick saw and knife job, no real cleanup needed.
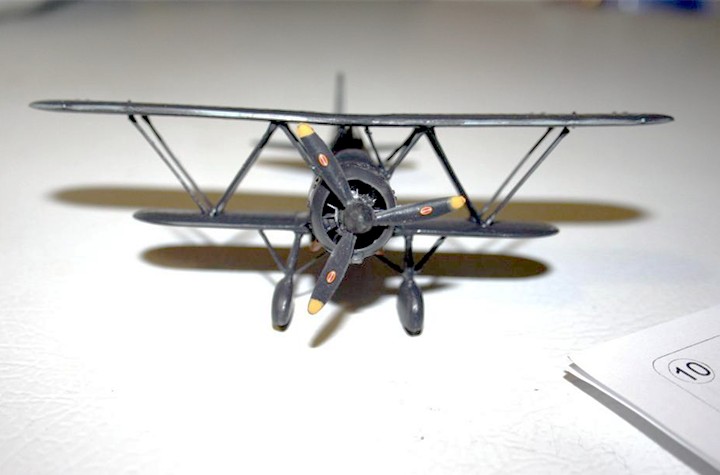
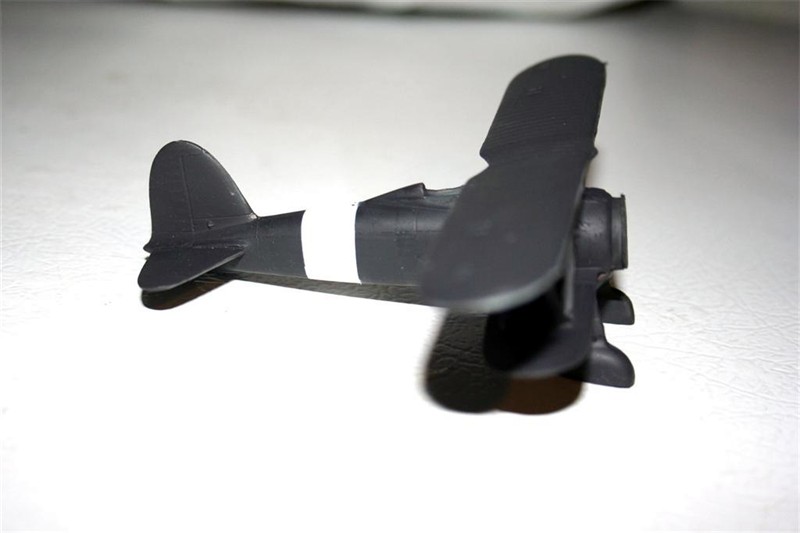
The rest of the fuselage and lower wing assembly went smoothly. I built a tool to hold the upper wing in place while I installed the center struts. Once these were in place the RAF assessment of the CR 42 as a “strongly built aircraft” was validated. The upper wing was solidly in place, which made the insertion of the other struts far easier. I used Testors® Liquid Cement, thickened with tube glue for all of the inter wing struts, as it held the parts in place, allowed working time, and provided a very strong joint.
I added the landing gear assemblies next. They had 2 struts each, also adding to the strength of the assembly.
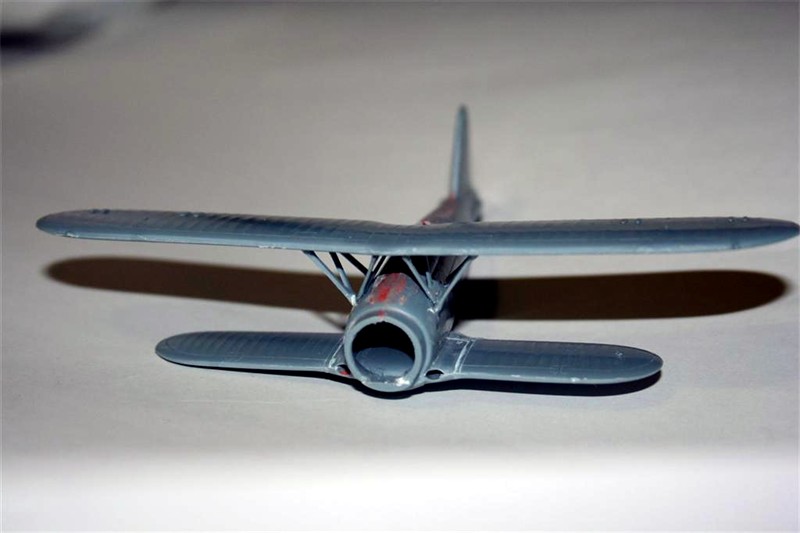
The engine comes as 2 resin parts, nicely detailed. They fit into a resin cowling, with all the bumps in place and with the channels for the machine guns. This all went together well. There’s a plastic firewall which fits behind the engine to facilitate connection to the forward fuselage. The version I chose to do has an intake under the cowling which leads back to a square conduit under the fuselage. I had to “form” the intake slightly to get it to fit the contour of the cowl front.
The prop is a 5-piece assembly consisting of the 3 blades, the hub and the spinner. The hub is resin, the blades and spinner is plastic. The problem I had with these was that my gel type CA wasn’t as thick as I was used to, and I had to use accelerator to get the blades to stay in place, or else they moved on me.
I now had the major assemblies, and I was ready to paint.
Painting
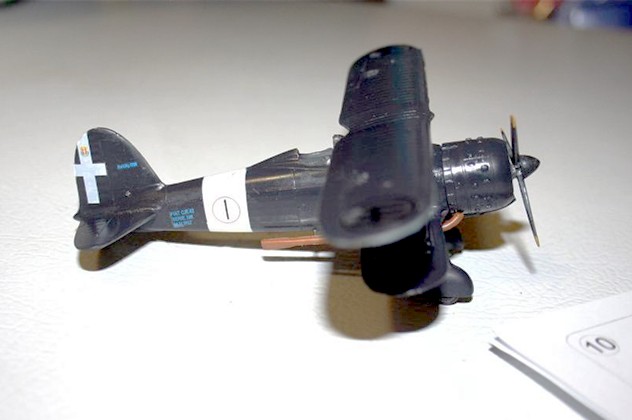
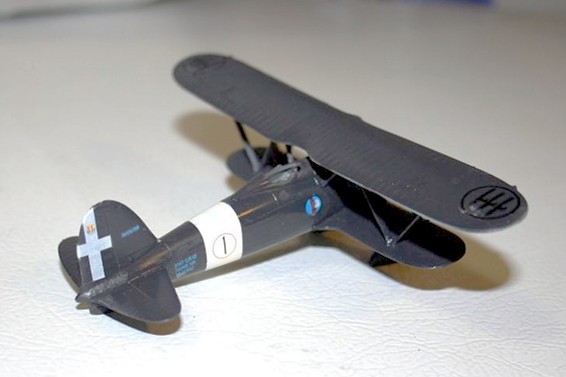
Painting was pretty simple. I used Floquil Grimy Black and painted everything except the interior in one fast application. I masked and painted the white fuselage stripe. If I had this to do over, I would have painted the white stripe first, masked it and painted the black over it. As it came out, the stripe shows some gray areas where the black starts to show through.
I put a coat of Future on the entire aircraft to make the entire finish uniform and prep for decals.
Decals
Markings in this kit are for two Italian night fighters, a Luftwaffe ground attack plane and a Swedish ski-equipped fighter. I chose one of the night fighters.
The decals are good quality. I had some problems getting the white crosses on the rudder to stay straight and lined up. The big thing for me in decals is that they have to be strong enough to stand up to my repeated attempts to get them down and in position. These decals are Aces for that. The upper wing fasces had to fit over a couple of protrusions on the wing surface. This required a couple of cuts with a #11 blade and some Micro-Sol, but they settled down nicely after that.
Finishing up
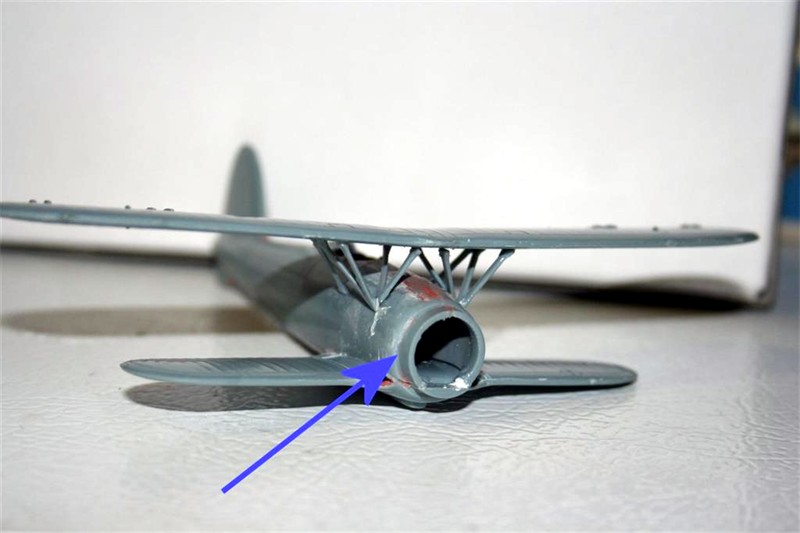
After this, I put on the cowling. Well, I started to. With the engine and fuselage adapter in it, the cowl didn’t come close to fitting to the fuselage. The intake and conduit on the underside failed to meet by about 3/16 inch. I originally thought I had the engine too far back, but when I test fitted the prop; it stuck out about 1/8 inch too far in the front. I got out the debonder and removed the adapter from behind the engine, and thinned it. It helped some. I found that I had to remove the part of the fuselage at the front where it sticks out to meet the adapter. The blue arrow shows the area to be cut down.
I also had to cut down the front of the engine and the back of the prop hub to get the prop close enough to the cowl.
The wheels just fit into the wheel pants. They’re very tight, so be aware that some work to enlarge the opening may be necessary, as well as thinning the wheel. Since the wheel is hidden, it’s not a big deal if some detail is lost. I split the seam on one of the wheel pants figuring out that the wheels are scale, but the plastic can’t be scale thickness.
The windscreen is a bright spot here. I needed a razor saw to remove it from the surrounding vac plastic, but it fit beautifully and the cast-in frames make painting no chore at all.
The long exhaust pipes require stretched sprue supports. I made mine a little long, test fit and cut them down until they fit.
Overall Evaluation
Recommended for experienced modelers. The fit issues for the cowling put this kit into the “Craftsman” area of expertise. On the other hand, I never felt that it was unfixable. There are other kits of the CR 42 out there, but if you’re going to do the Italian night fighters or the Swedish Ski version, this is the kit you want.
Thanks to Pavla for the review kit. Thanks to John Noack and IPMS/USA for the chance to build another little known WW2 plane.

Comments
Add new comment
This site is protected by reCAPTCHA and the Google Privacy Policy and Terms of Service apply.
Similar Reviews