
Fiat 806 Grand Prix, Part 1
Background
From Italeri’s website: The Fiat 806 Grand Prix adopted significant innovations for its time. The Fiat 806 was, in fact, the “progenitor” of the modern Formula One racing cars. Developed and produced by FIAT, the Italian automobile manufacturer in 1927, it could be considered the first Grand Prix car ever built. Thanks to its 180 HP 12 cylinder engine, the Fiat 806 was able to reach and even exceed the speed of 240 Km/h. However, the most important innovations were made in the development of the chassis, mechanics and bodywork. The engine and gearbox unit was, in fact, located between the two chassis bars in order to optimize the performance and the drivability.
The Kit
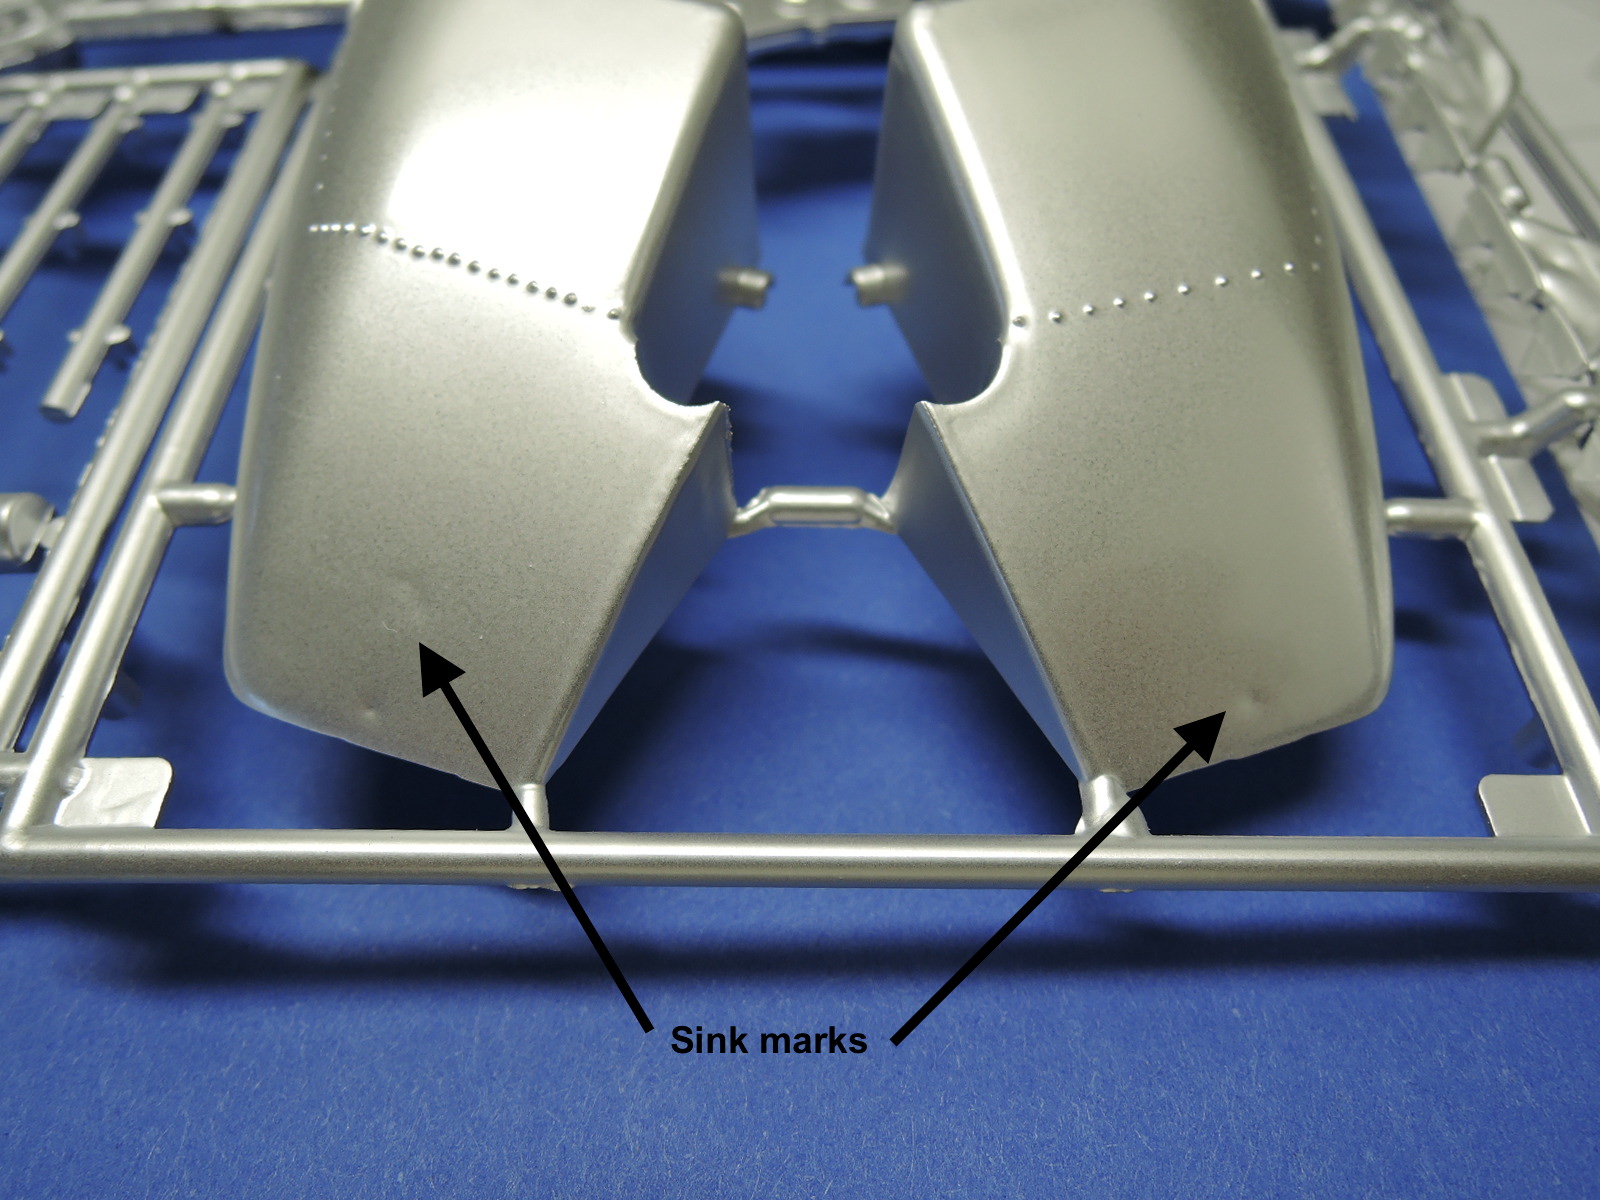
While researching the car, I came across a diecast kit made by Protar. The Italeri plastic parts are identical to the Protar diecast parts, including ejection pins and sink marks. It looks like Italeri used the Protar parts to make their molds, or maybe even used the Protar molds for the plastic parts? This helps to explain some of the rough spots, lack of crisp decal on the parts, and all the nut & bolt fasteners.
The Italeri kit features an opening hood, detailed engine, and promises working steering. This is a new kit, first issued in 2015, that follows Italeri’s Fiat Mefistofele. The box is 11 x 22 x 4.5".
Opening the box displays a nice plastic compartmented case with lots of small bolts, nuts, pieces of vinyl tubing, a length of metal spring, copper wire, a small piece of fabric, and more. The plastic case includes a listing of the parts, that will be real handy differentiating the various bolts.
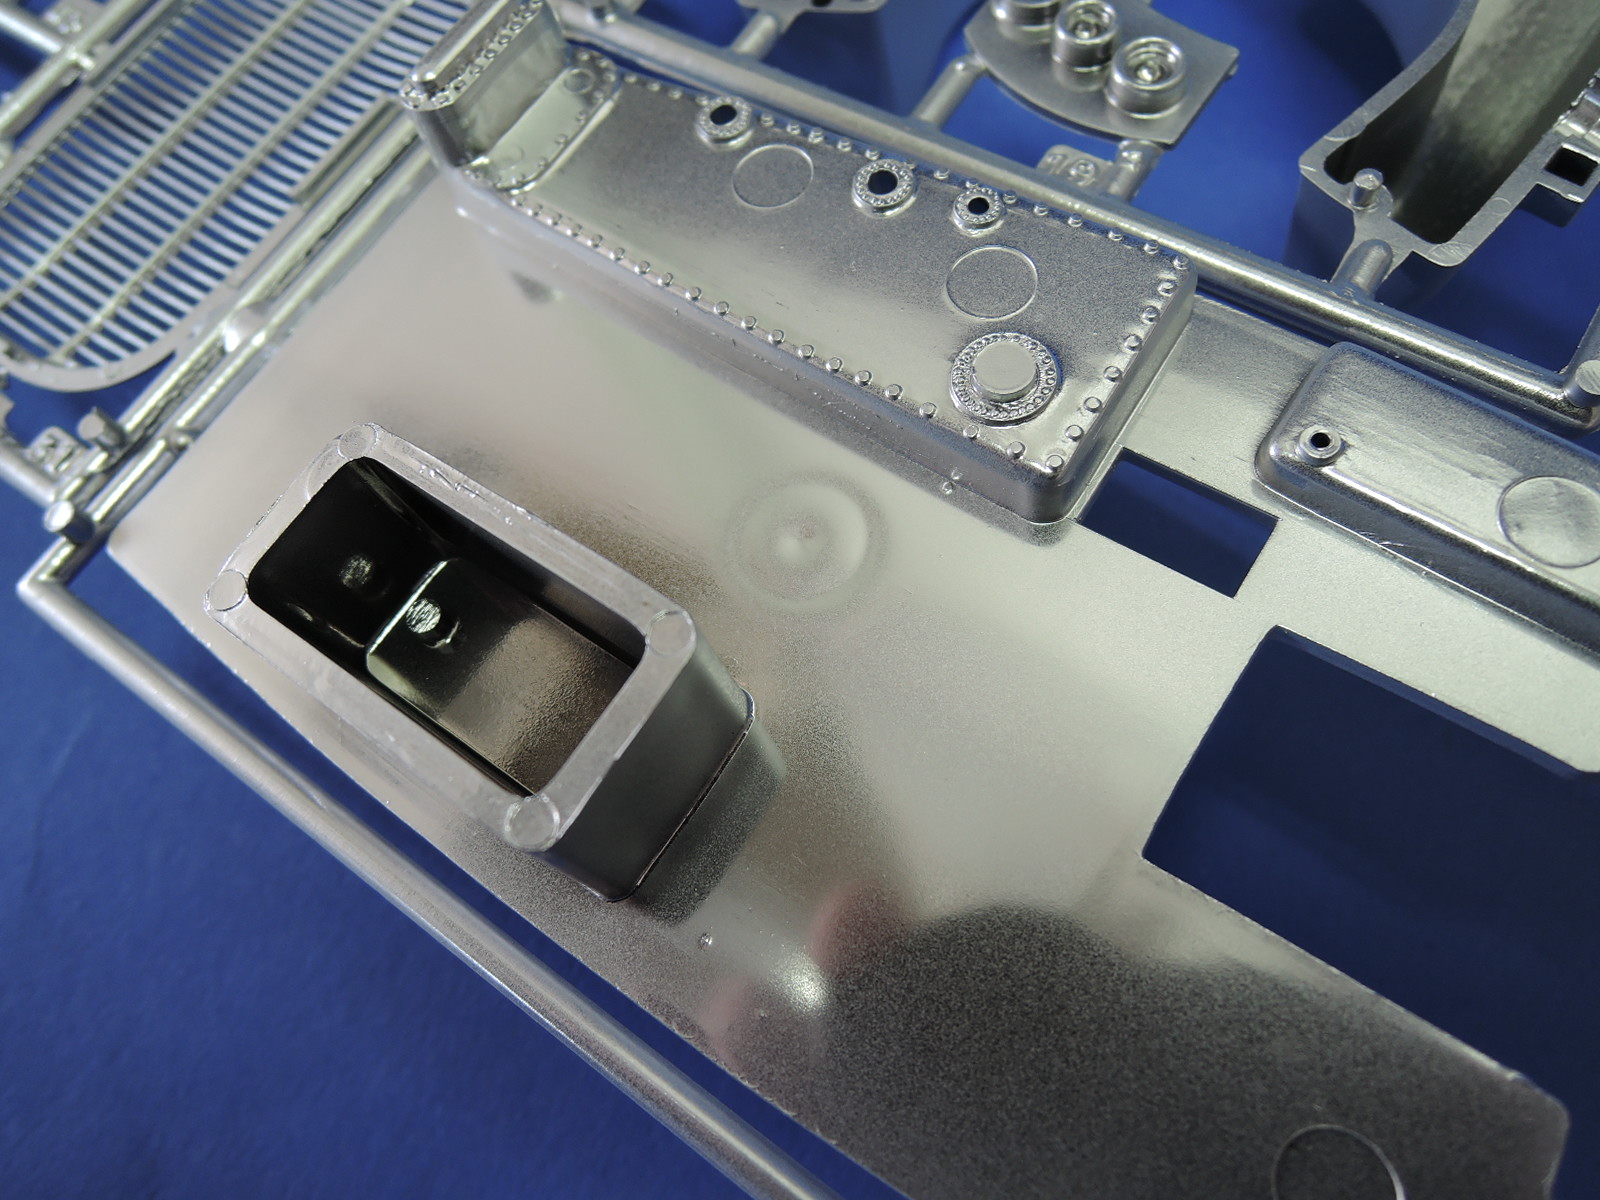
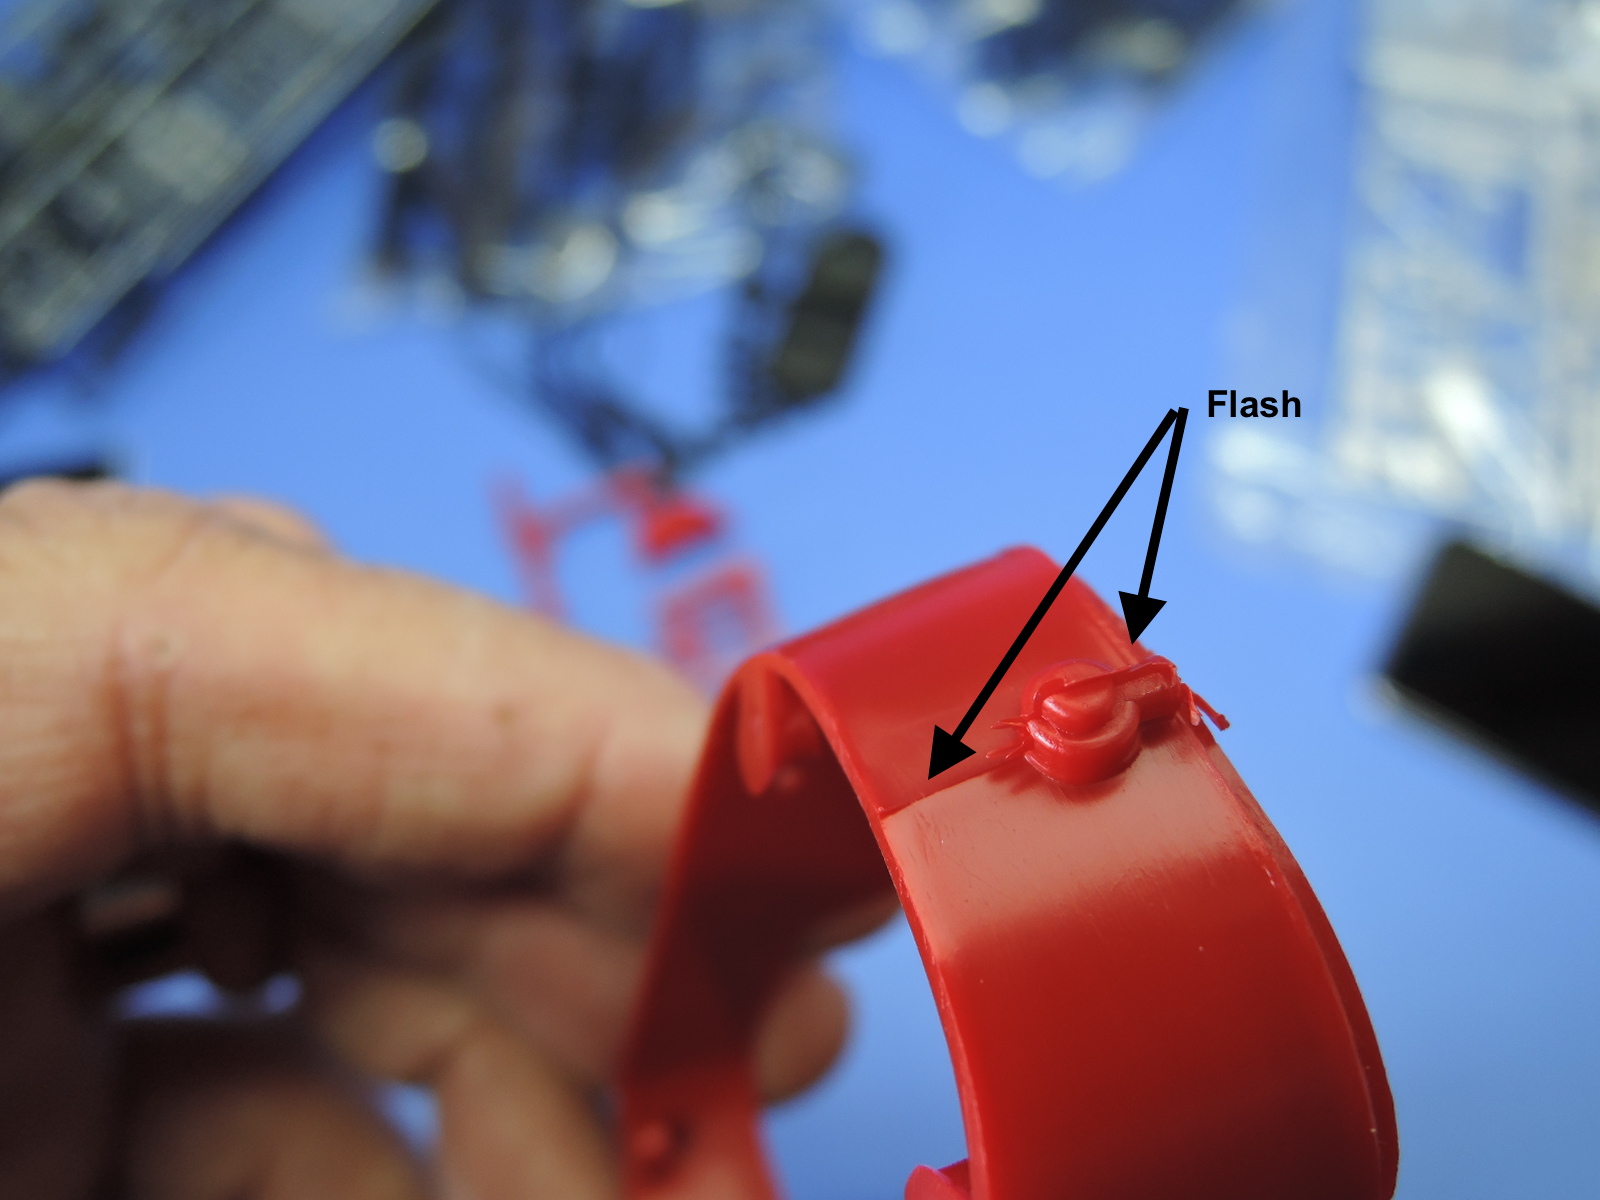
The large body pieces and photoetch fret, decals, and a paint mask are included in a separate compartment from the rest of the plastic sprues. The plastic is packed in seven plastic bags containing eight sprues, plus sprues for the wheels. The plastic is molded in red, black, gray, and chrome plated parts. There are also some rubber hoses, and a rubber seat cushion. A small piece of black fabric is included to wrap the steering wheel. The plastic parts appear to have soft detail for such a large scale kit, and there are lots of mold seams, ejection pins, and sink marks visible. Flash is visible on many of the parts. Some of the gray plastic parts appear to have some fill lines in the plastic. The chrome plating looks to be fairly uniform, but there is some flash, and again, some sink marks in the plastic. The chrome plating has a satin finish and appears to be on the thick side, particularly for the rivets and bolts on the manifolds. The plastic wheel spokes are nice and thin, and don't appear to have too much flash or mold seams. Rubber tires are provided with nice, crisp detail on the tread's and sidewall lettering. There is a minor mold seem on the center of the tread.
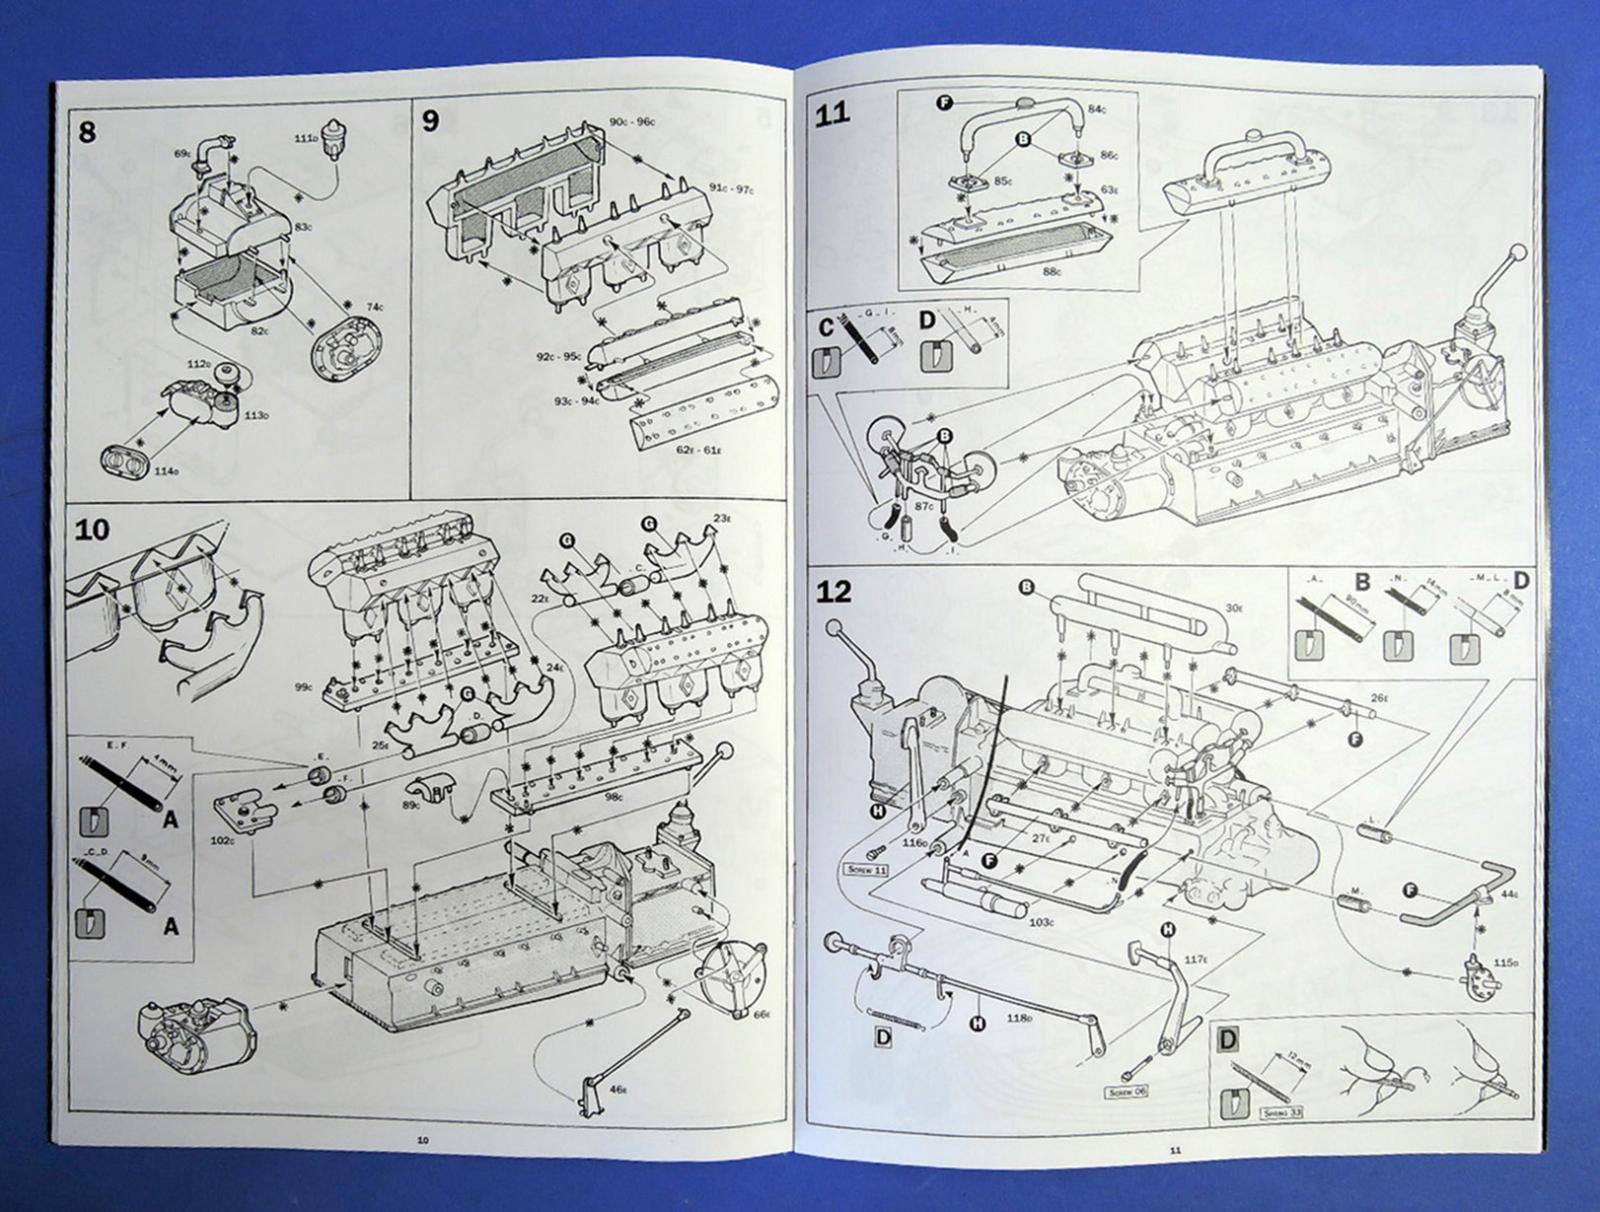
The instructions are in a 6.5 x 9.5" stapled booklet that is 24 pages, plus covers, and includes 32 assembly steps. The instructions include some color photographs of a completed model, some black-and-white photographs of the original vehicles, and brief backgrounds in English, French, Italian, Spanish, German, and Russian. A diagram of each of the nuts, bolts, and vinyl hoses are shown. A small plastic wrench is included for some of the nuts. Paints are called out in Italeri acrylic paint colors. Detail paint colors are called out in the assembly steps. There is also a diagram showing each of the sprues, masks, photoetch, and clear film. Assembly instructions are shown in exploded view diagrams that appear to be fairly clear. The diagrams also label the bolt numbers and lengths of the vinyl tubing where appropriate. There is also a reproduction of an early mechanical drawing of the vehicle.
Looking at the instructions, it appears the most complicated part of assembly will be the engine and suspension members. With the molded plastic colors it would be possible to build a reasonable model without doing any painting, except for the photoetch.
Assembly
Pay particular attention to the assembly notes on page 2 of the instruction booklet. These notes show the symbol for where plastic cement and superglue is to be applied to the parts. Looking through the assembly instructions it appears that most of the assembly is done with the screws and very little cement is used.
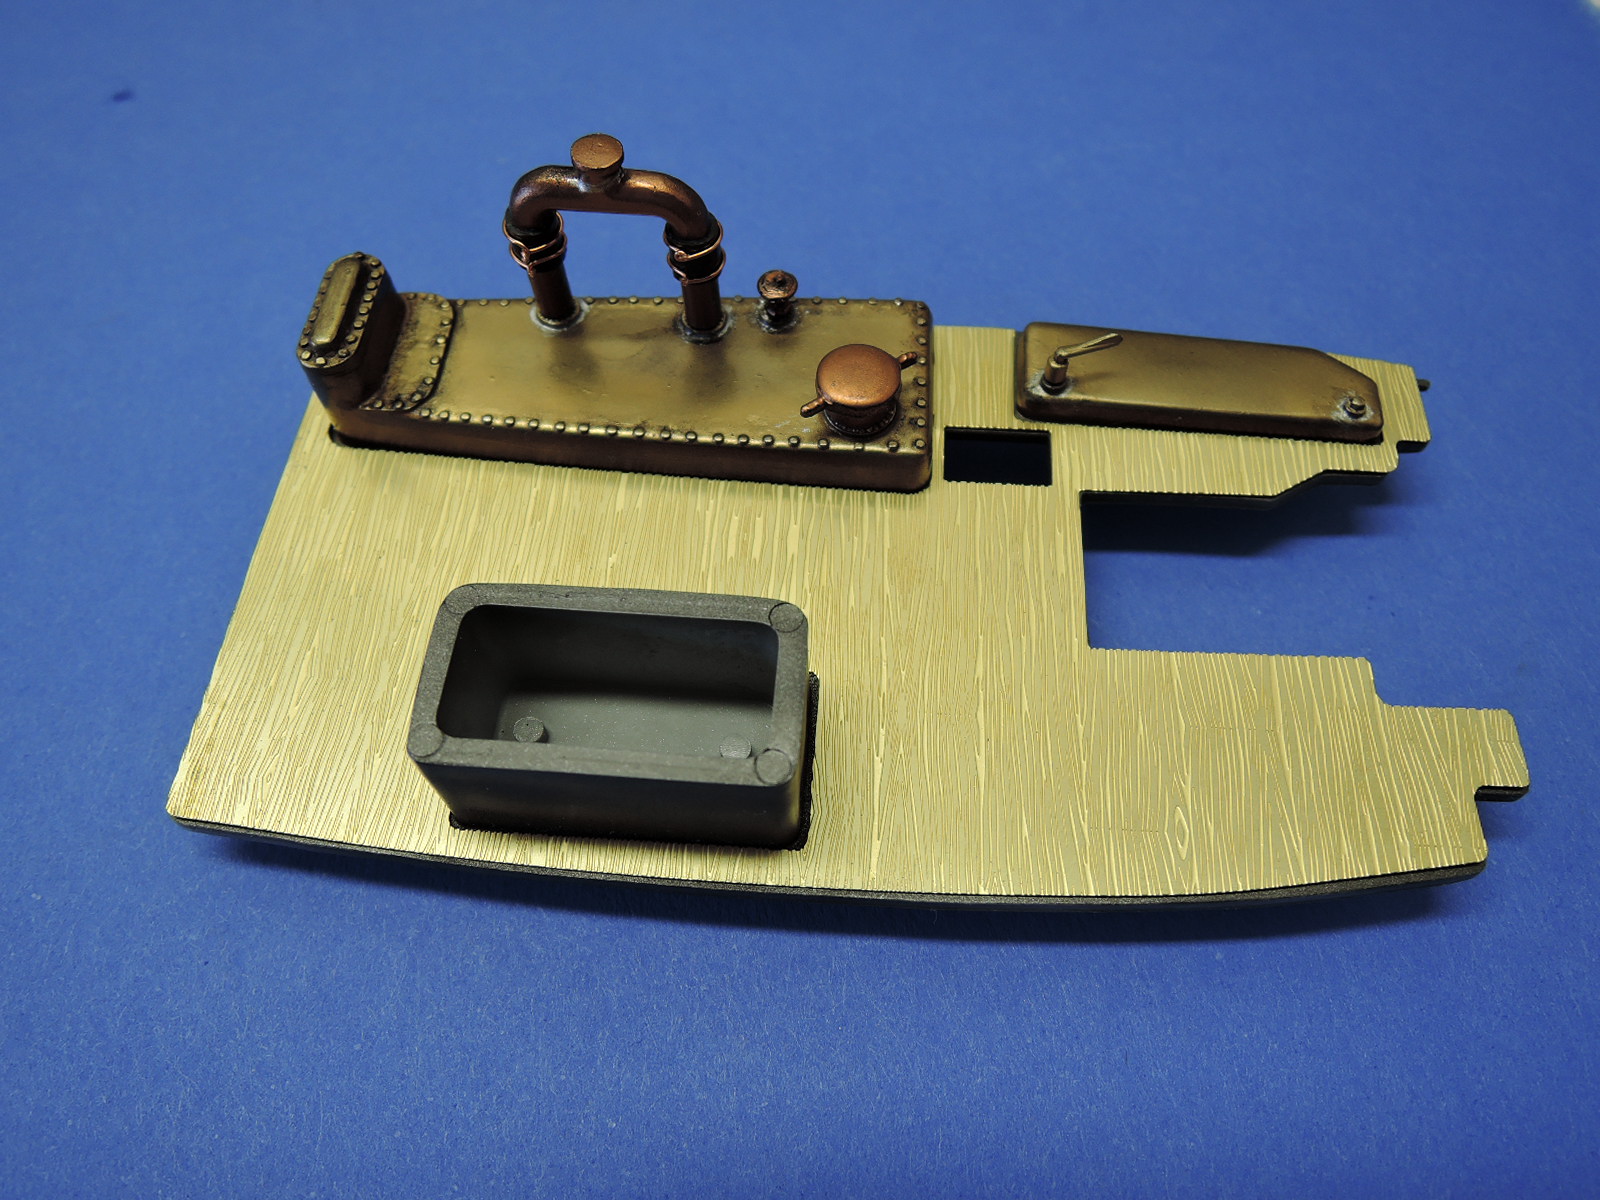
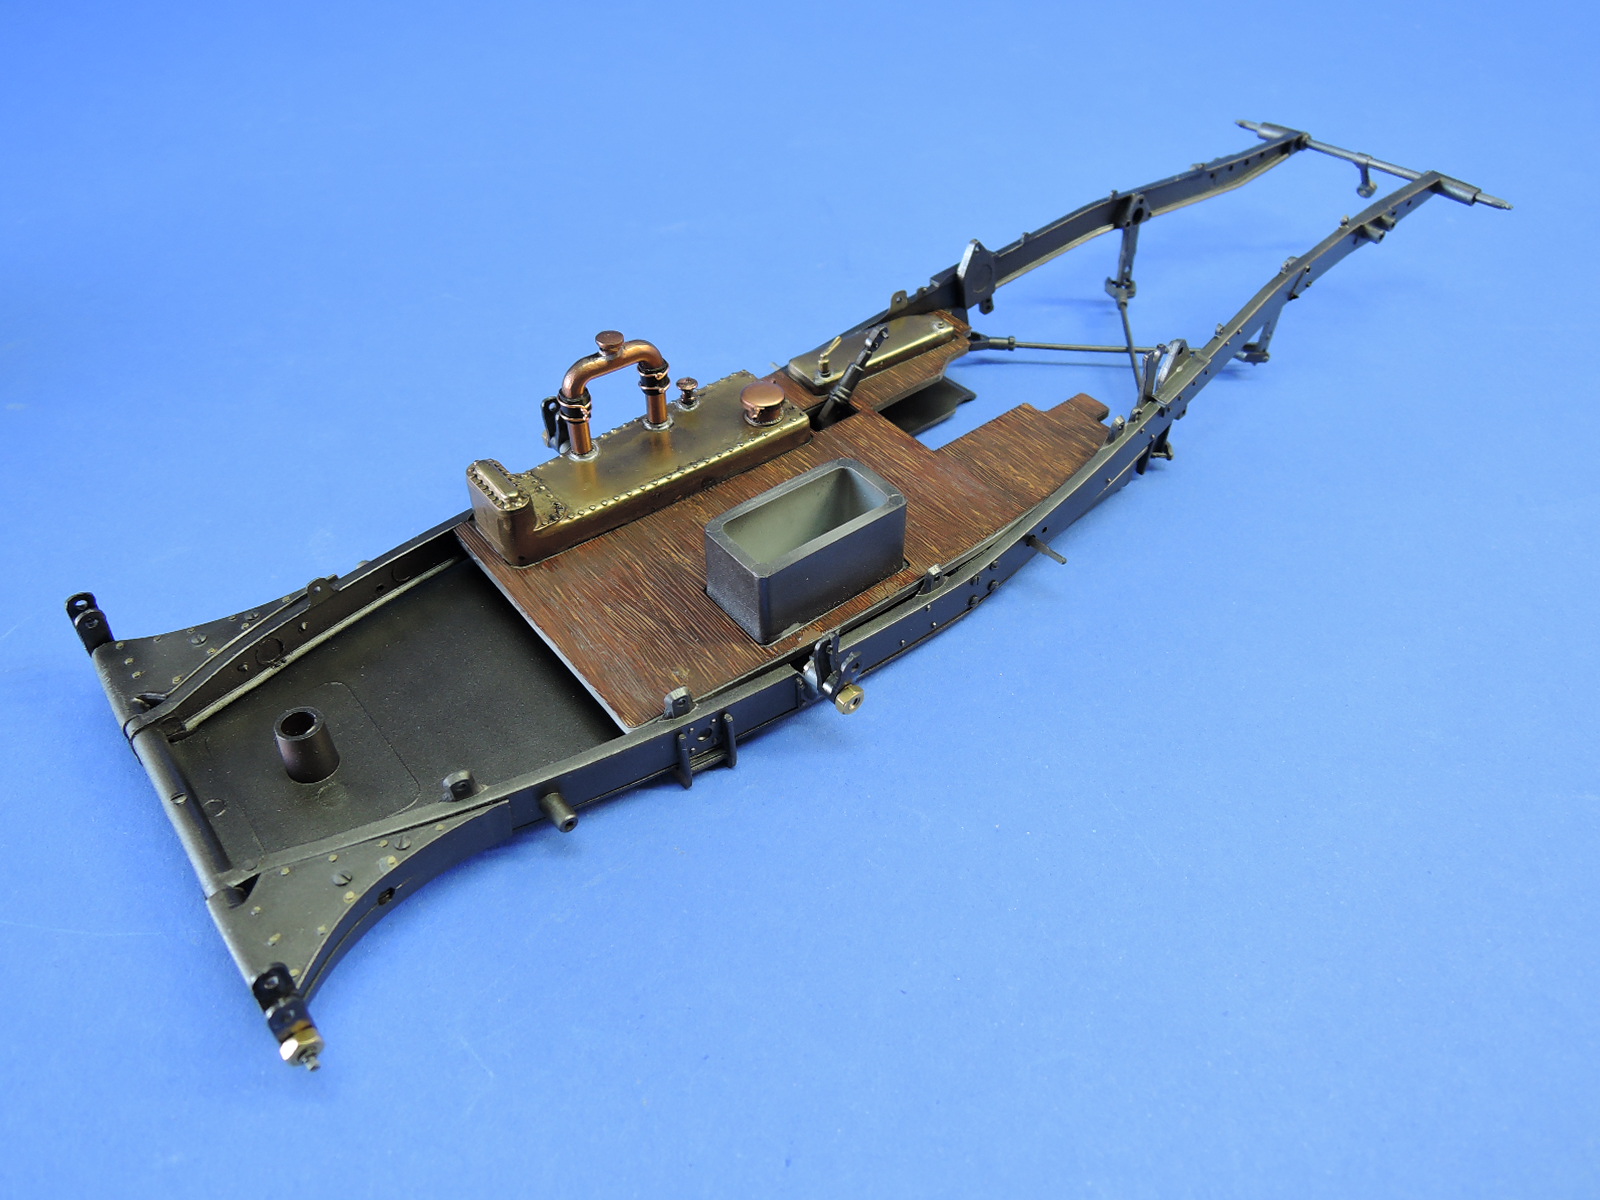
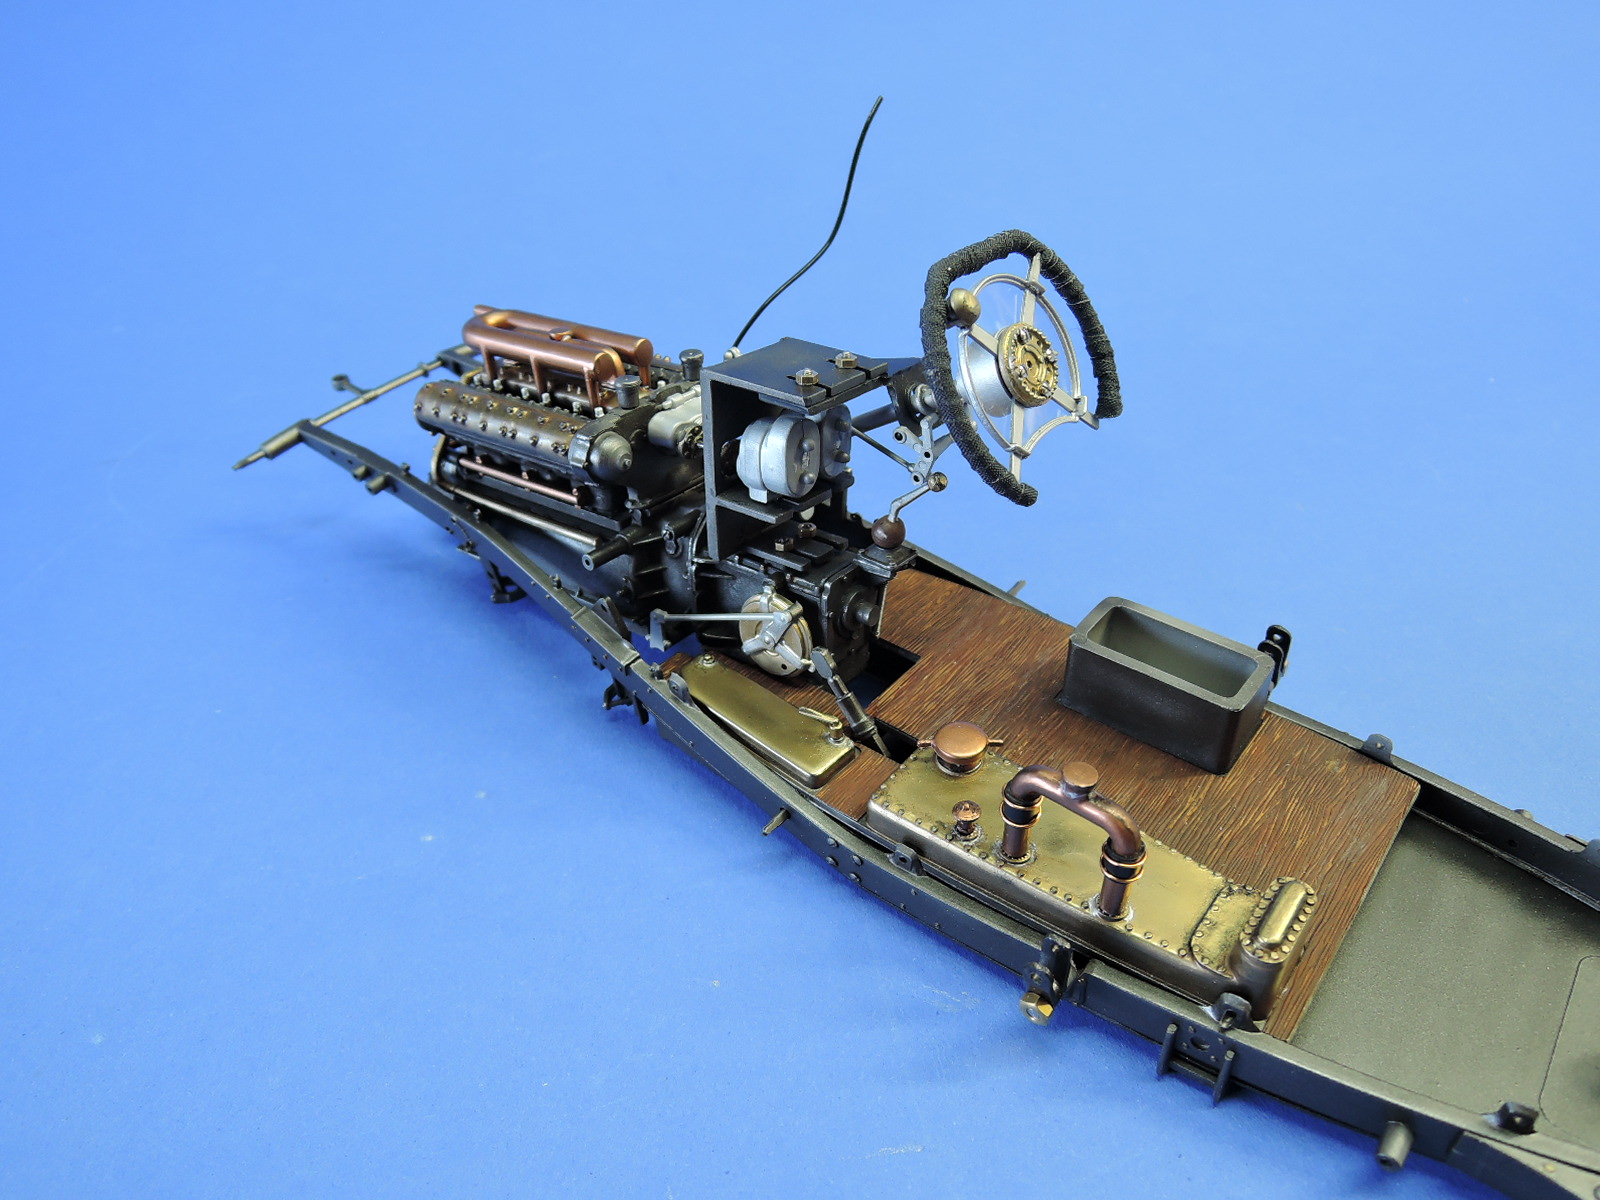
The first assembly step is the chassis, and it immediately becomes apparent there is a considerable amount of flash on the plastic parts. There are also considerable ejection pin marks on some of the chassis cross member pieces. The entire chassis in this step is held together with eight screws, four on each side of subassembly B. The underside of the body is also held to the chassis with two screws. My build of this kit will have a steampunk character, so I painted the underbody panel in a steel color rather than the Fiat red.
The next few steps, three and four, install the bottom of the cockpit. Italeri provides a large photoetch piece simulating the wood panels on the floor of the cockpit. I had originally planned to leave off the photoetch and paint the bottom of the cockpit steel, but after painting the photoetch which with wood colors, the grain looks very nice and I decided to use it.
Step five begins the assembly of the engine with the gear selector. A spring is provided for the gear selector and the instructions show to bend the ends over. I found this to be quite difficult due to the stiffness of the springs.
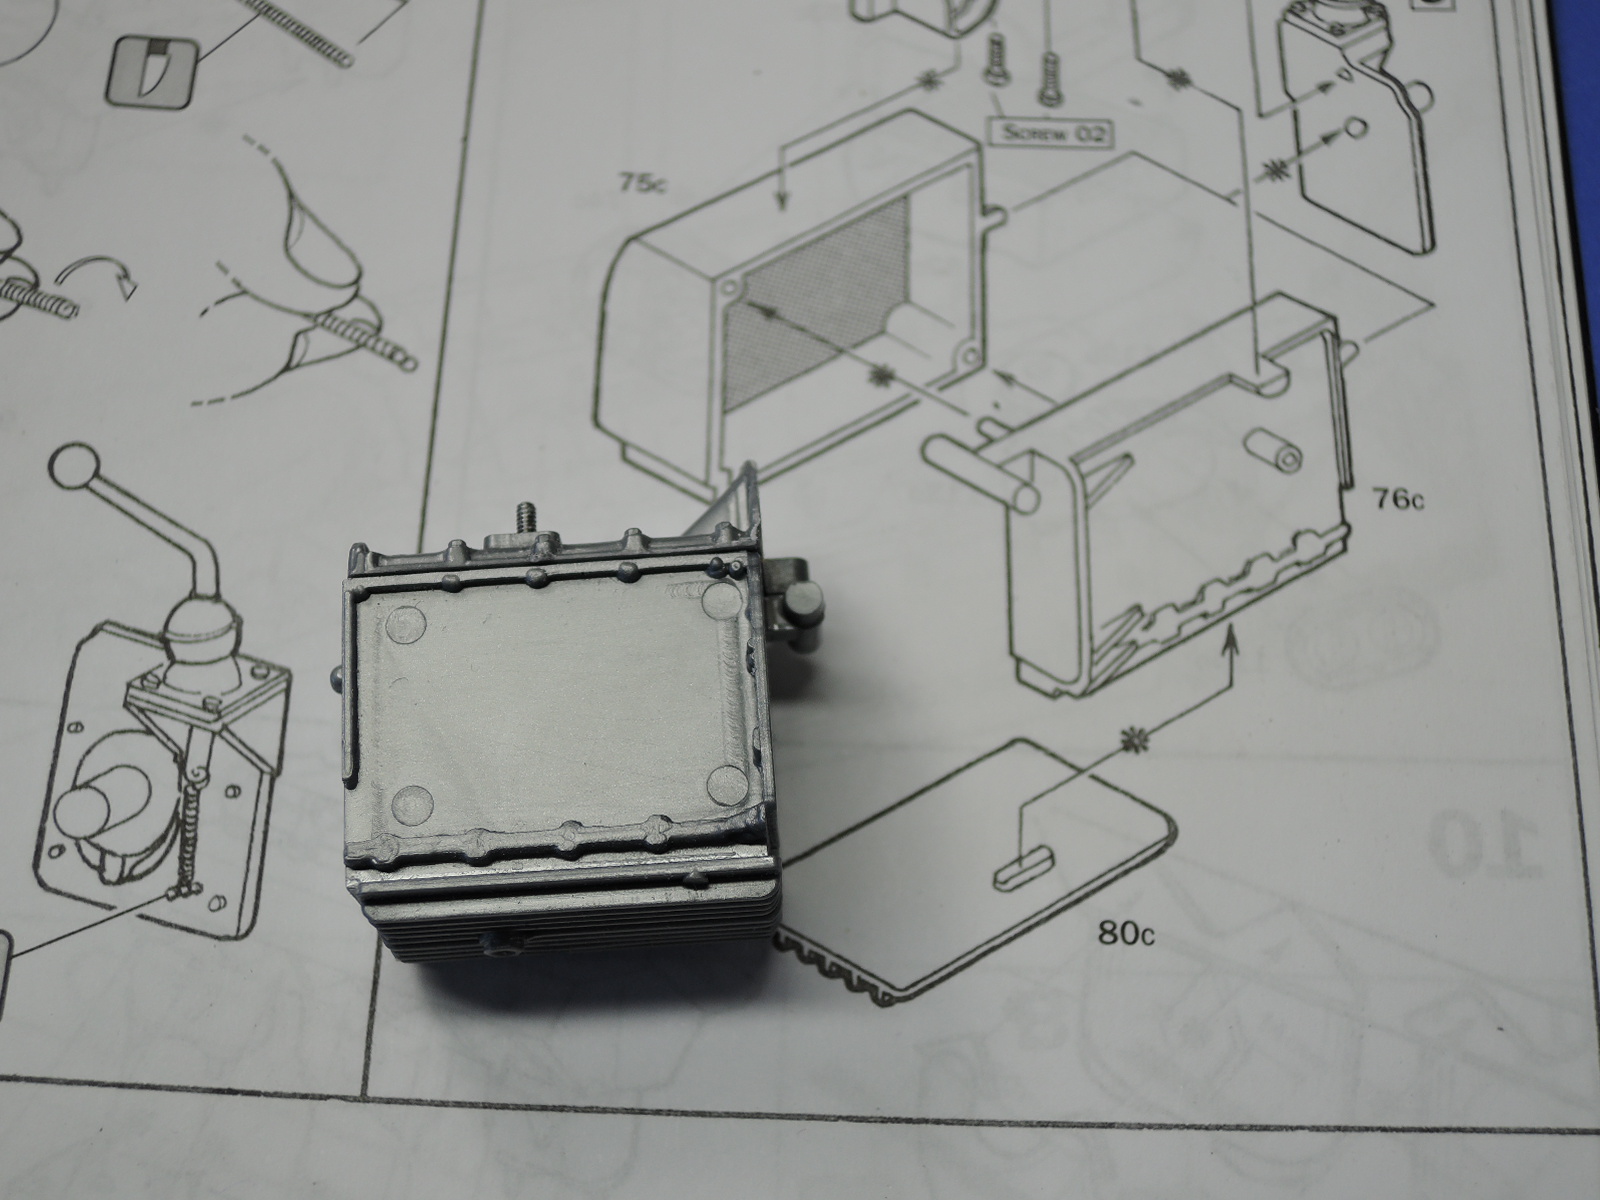
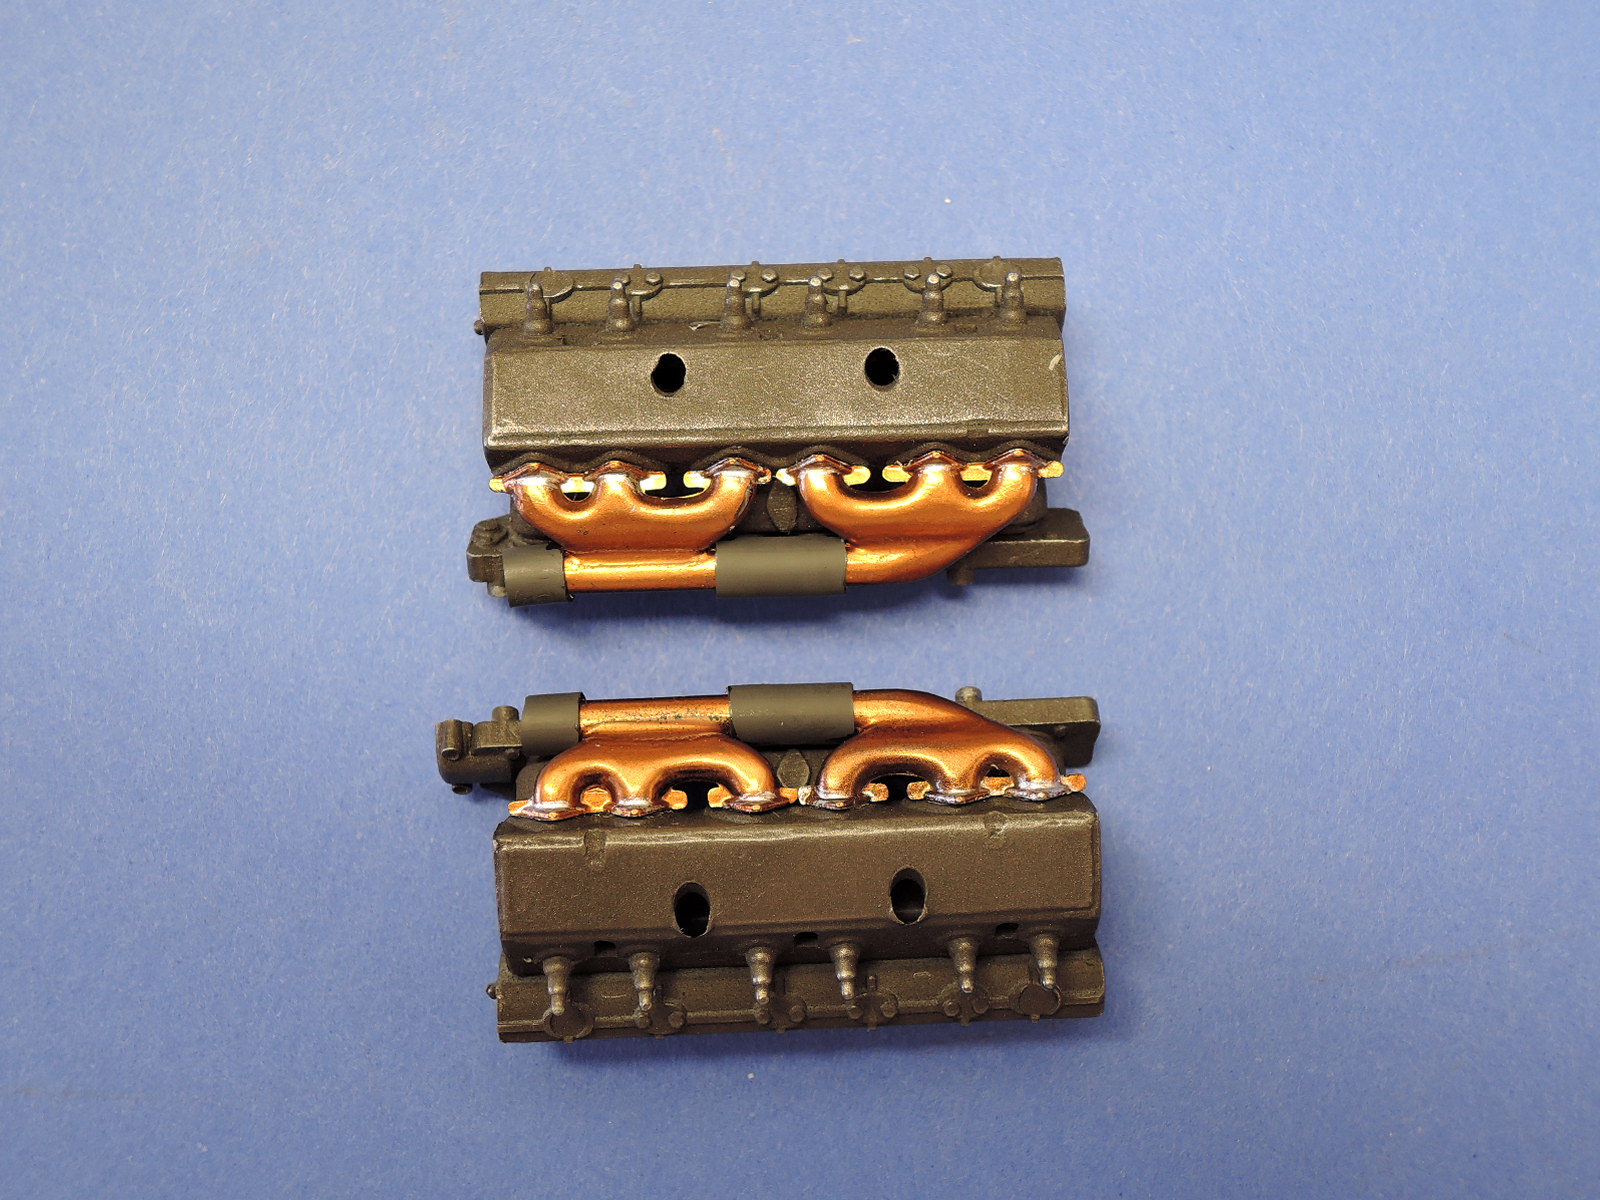
The large pieces of the transmission and engine block all had numerous ejection pin marks and a ragged finish. I decided to stipple them with liquid cement to conceal the roughness and provide a cast-iron look. The fit of the parts is loose and requires lots of cleanup after parts are assembled. Step ten installs the manifolds on the inside of the cylinder heads. I gave them a nice copper patina, but then found these headers are virtually invisible after installation. The linkage part 46E does not fit into part 66E as shown in the instructions, as the linkage is too long. This looks like it will be a problem attaching to part 104D when the engine is installed in the chassis. I was painting the parts as they were assembled, but as mentioned earlier, this kit could be assembled without painting.
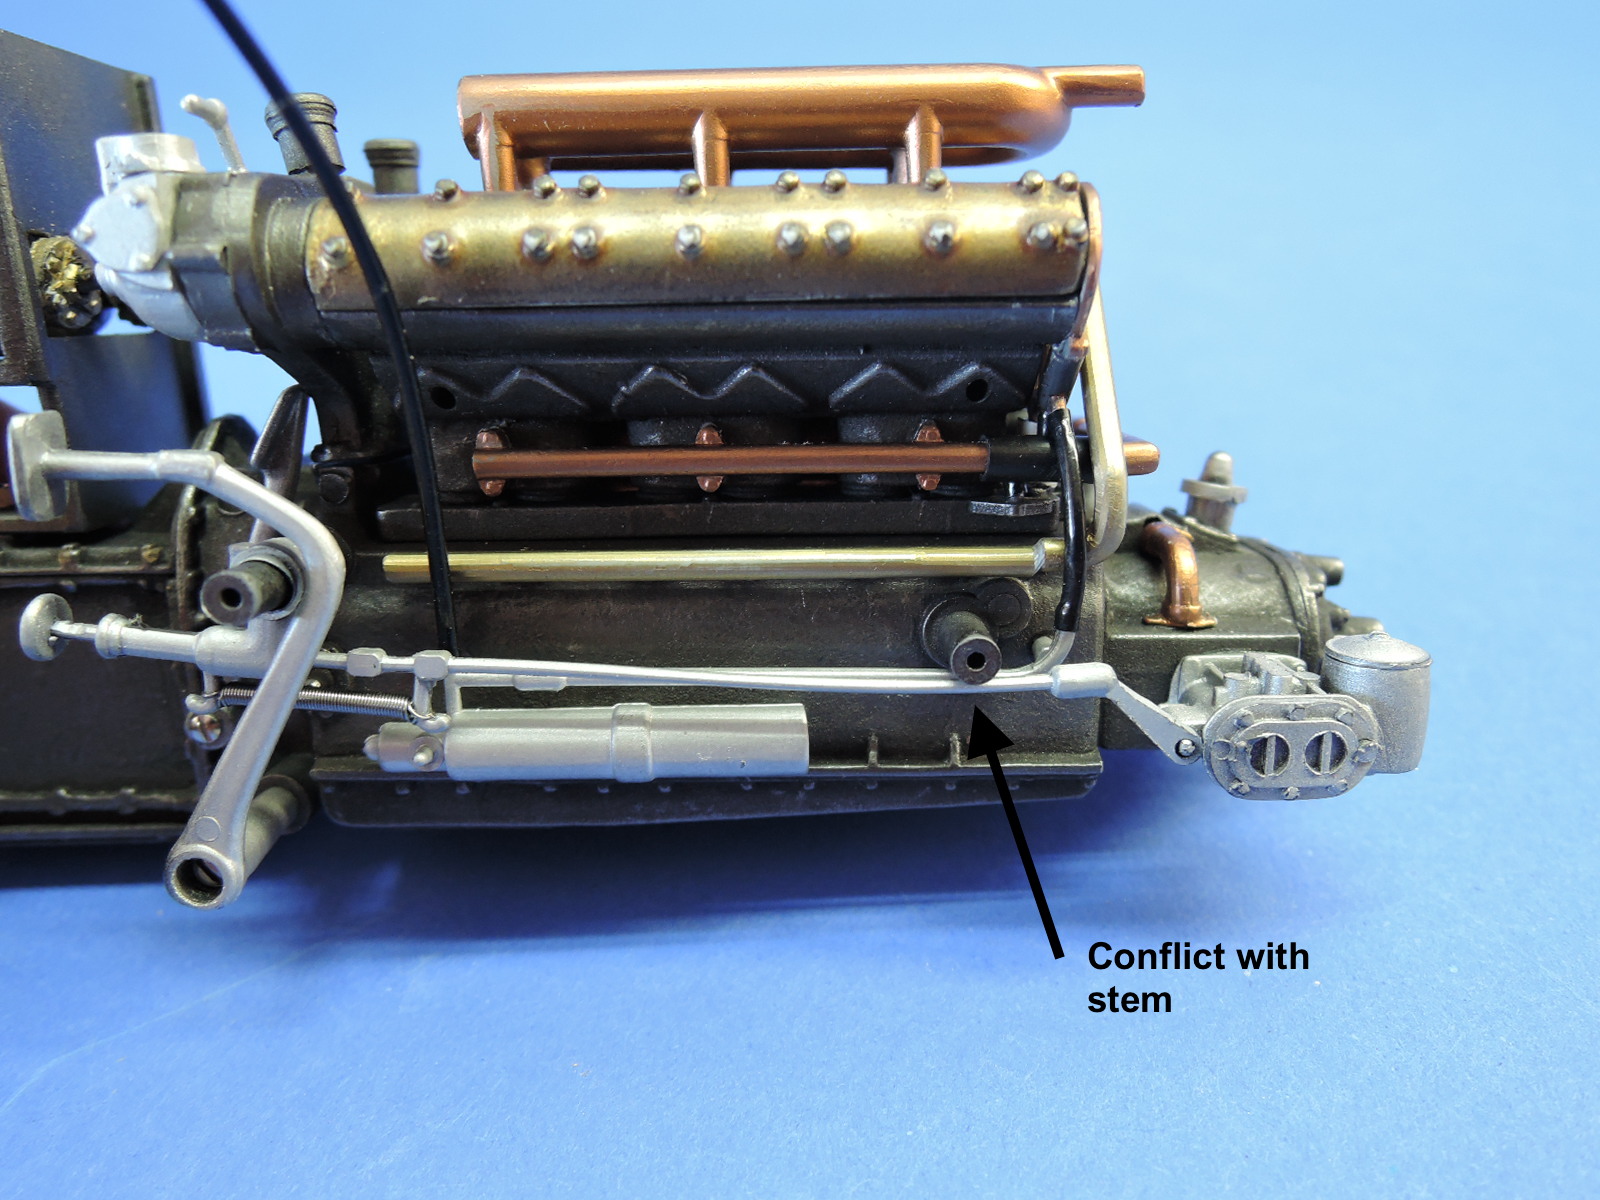
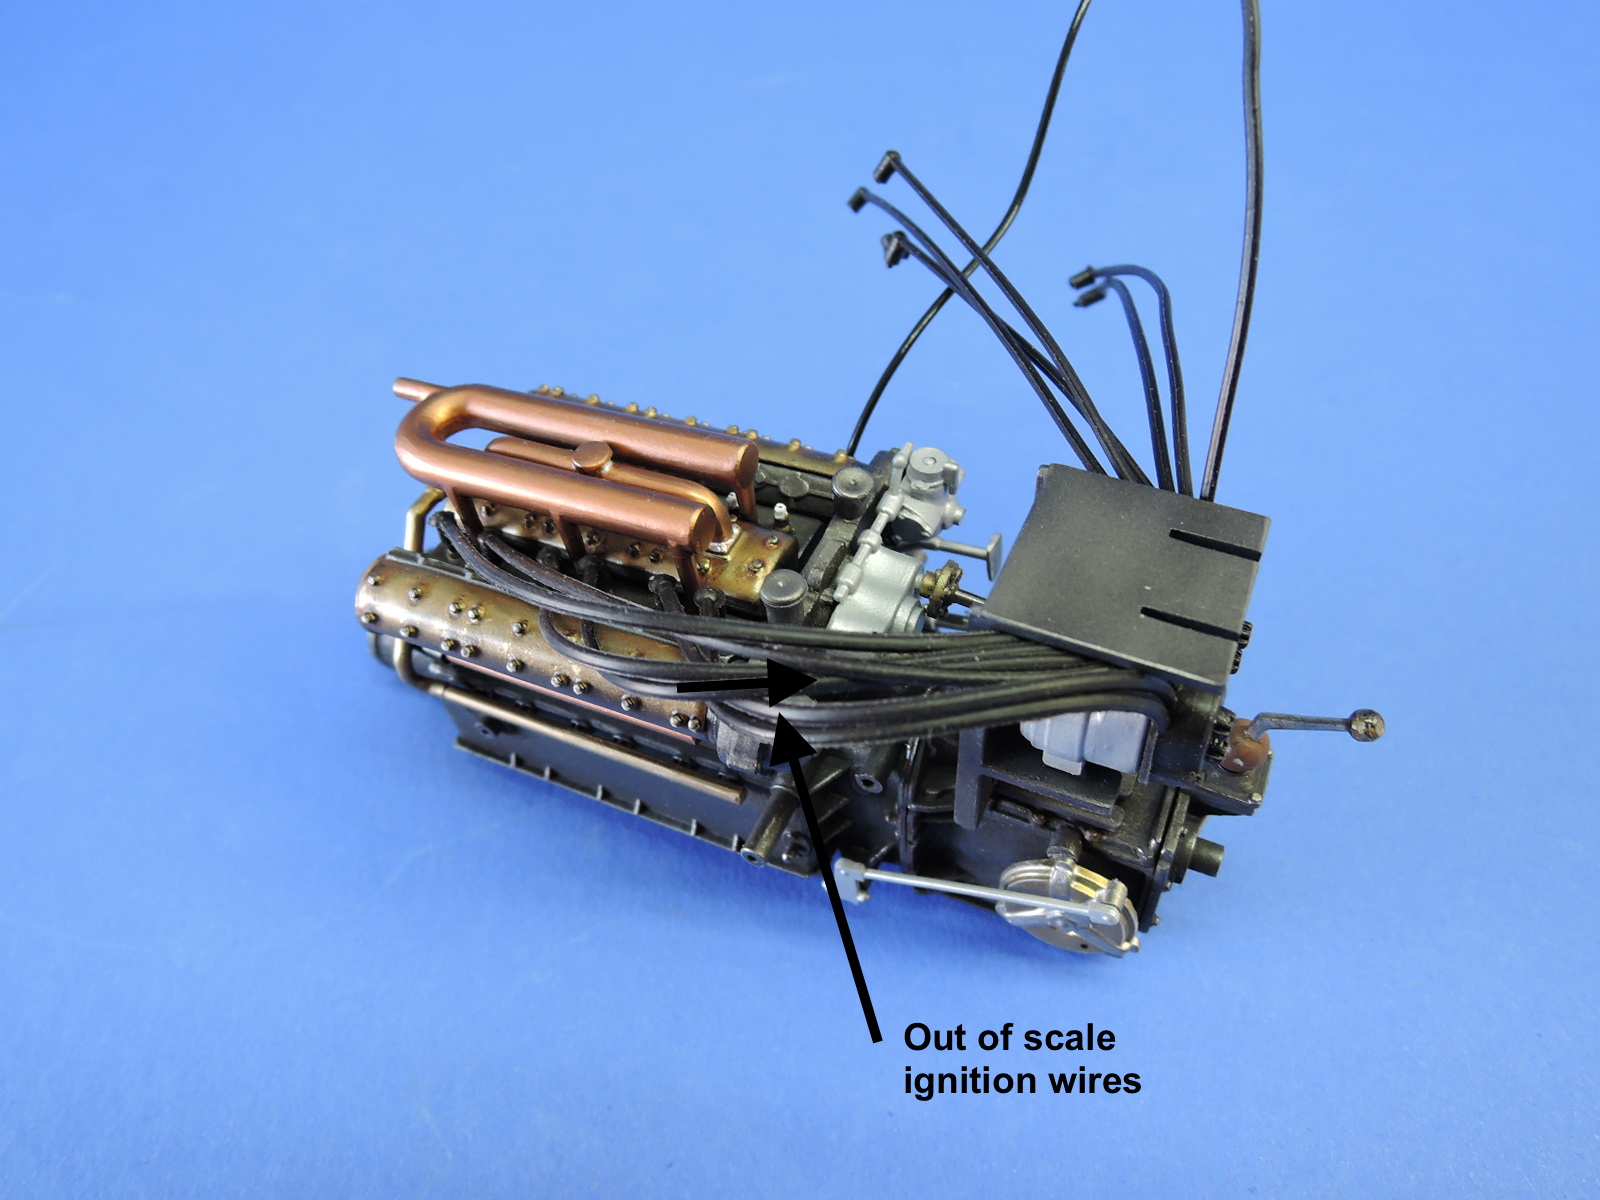
Step 12 installs part 118D, which appears to be a choke lever. This conflicted with the mounting stem on the engine block. Step 14 installs a large bracket for mounting what appear to be magnetos to the transmission. The bracket seems large and out of scale compared to the rest of the engine. The covers for the magnetos and the ignition wires, parts 2K and 1K, are grossly out of scale with the engine and have no organizing harnesses. The few reference photos I found show the ignition wires organized in a brass tube which is more typical. I won't be using the kit supplied ignition wires, but will use wire and a brass tube installed in the later stages of construction.
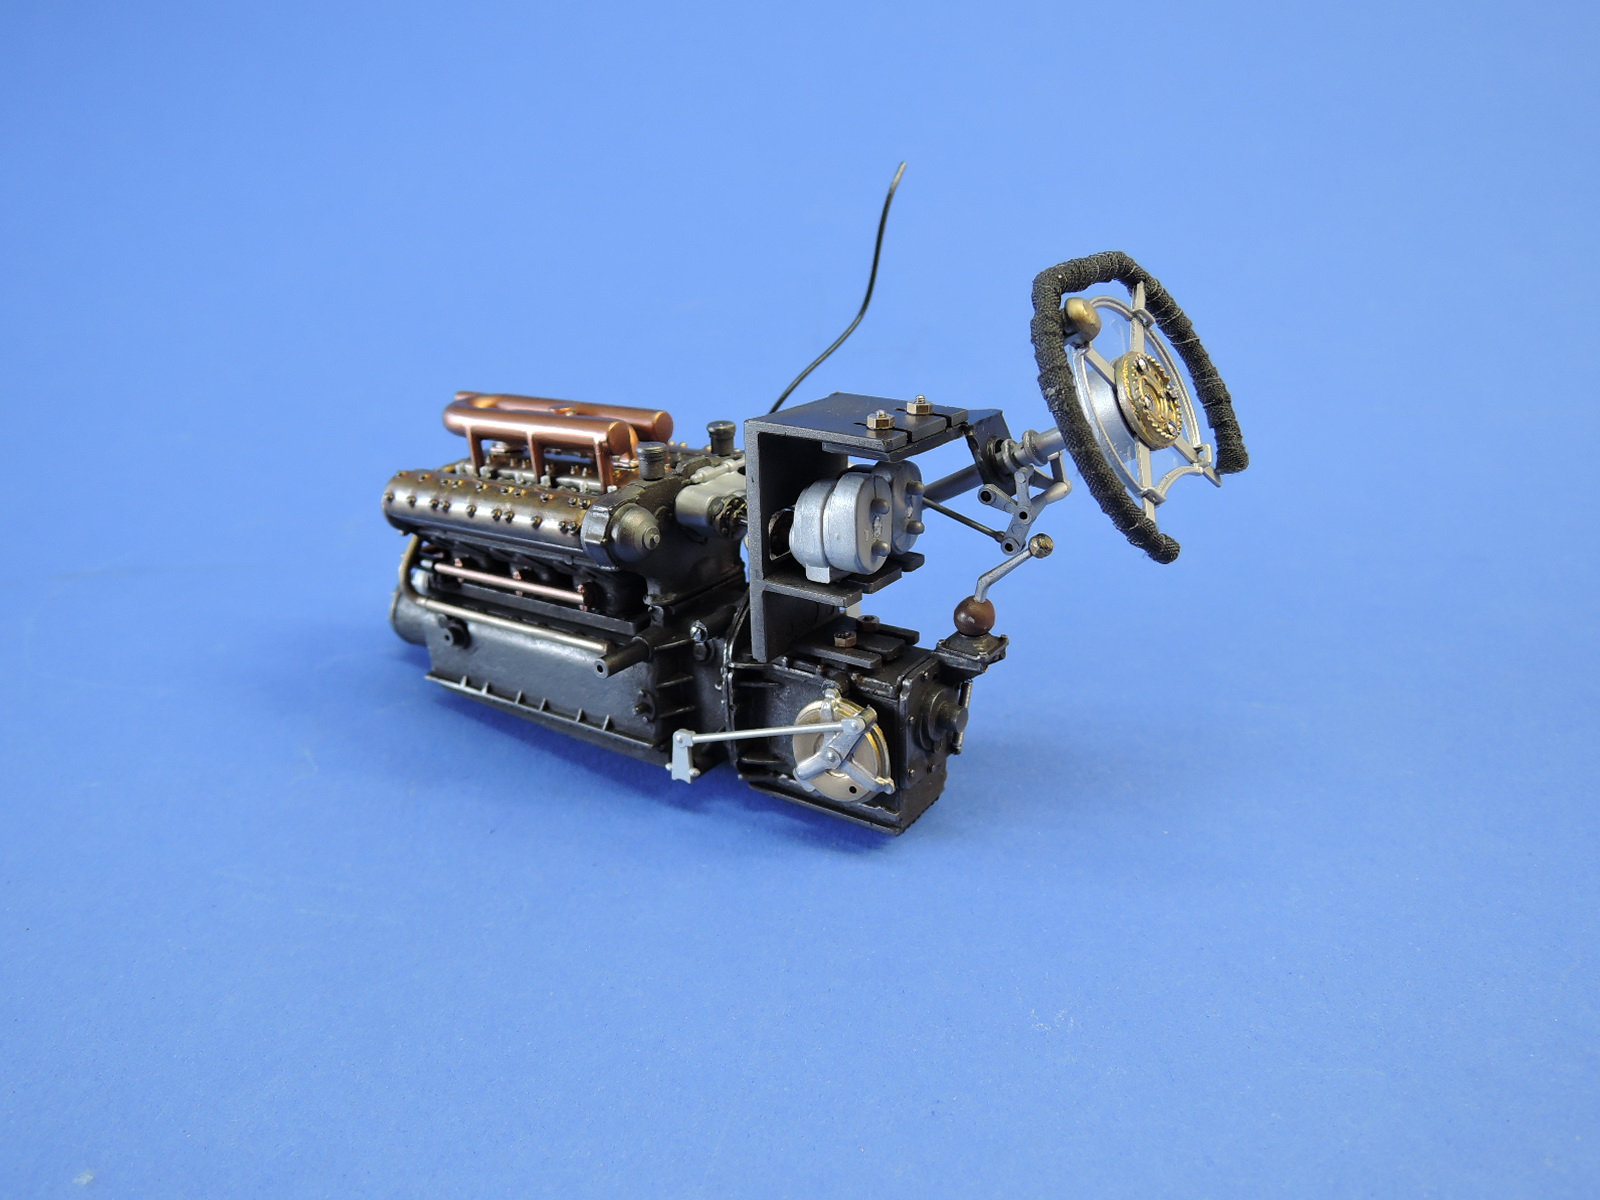
The steering wheel & column is installed in steps 15 and 16. The fabric supplied with the kit is cut in strips and wrapped around the steering wheel to simulate leather wrap. I found it fairly difficult to wrap the fabric without creating bulges and wrinkles. More flexible fabric would've allowed a tighter wrap of the steering wheel.
Step 16 completes the engine subassembly, and future steps continue with the chassis assembly.
Summary
The kit has many rough edges and some fit issues with assembly, but is an interesting kit and fun to build. Less experienced modelers can assemble the kit out of the box, even without painting, while more advanced modelers will have lots of opportunities to make a striking car model. I enjoyed building the model so far, in spite of the many mold problems and fit issues.
Thanks to Italeri for producing these large-scale automobile kids and to Hobbico for providing the review sample.


Comments
Add new comment
This site is protected by reCAPTCHA and the Google Privacy Policy and Terms of Service apply.
Similar Reviews