
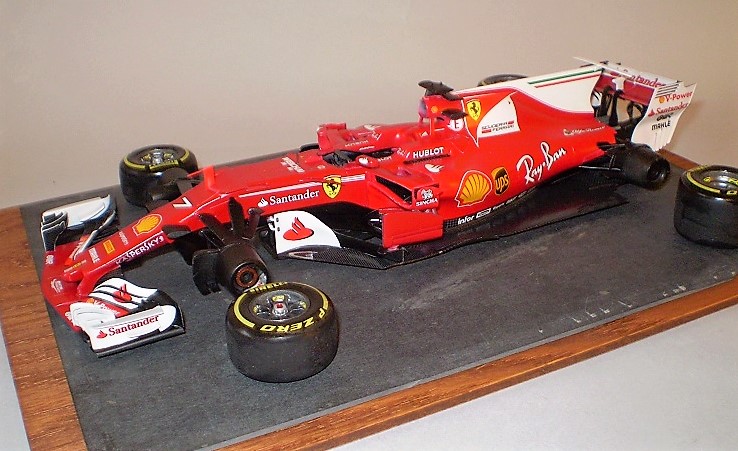
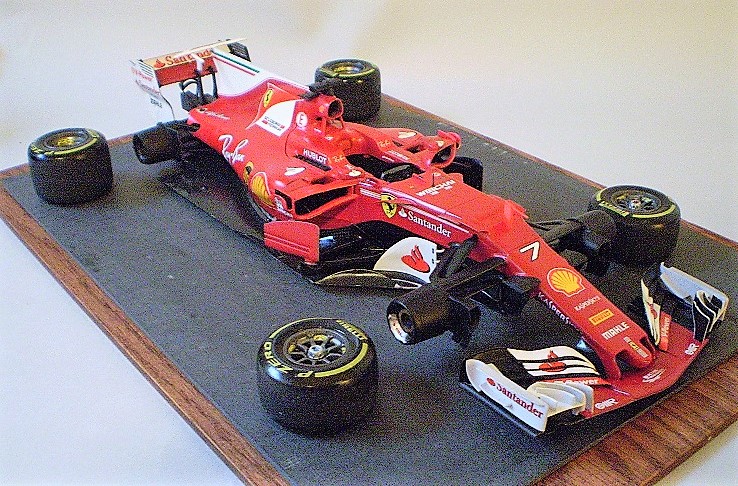
Ferrari SF70H
From the Tamiya America website:
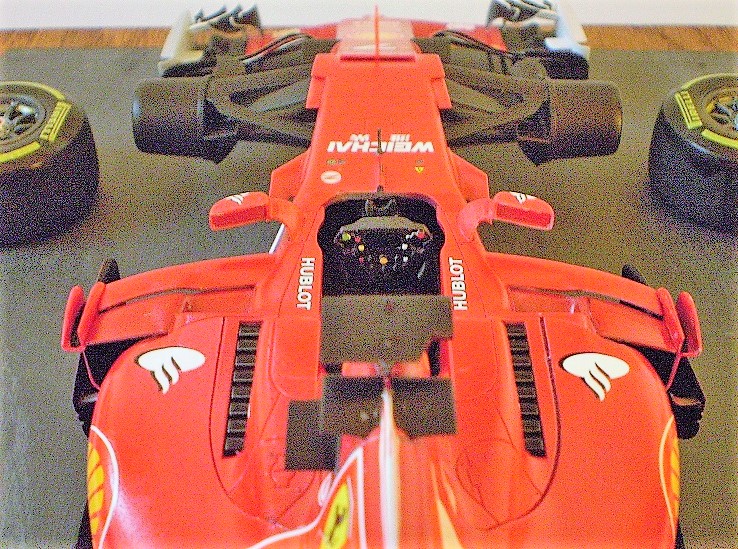
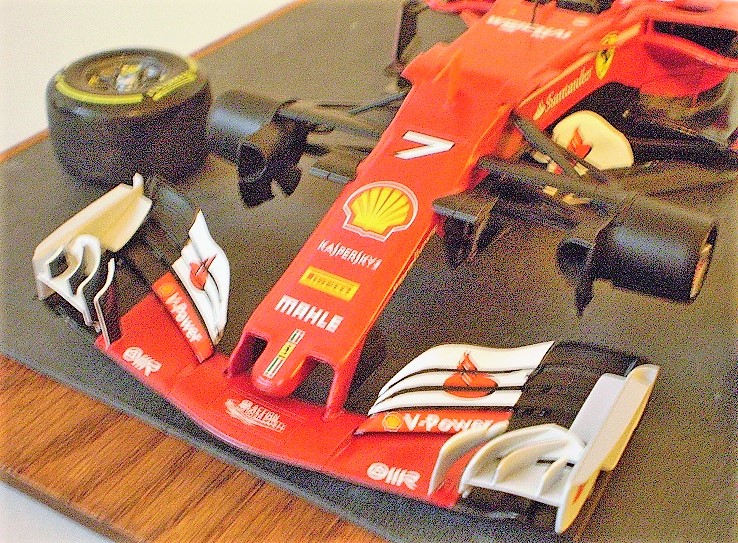
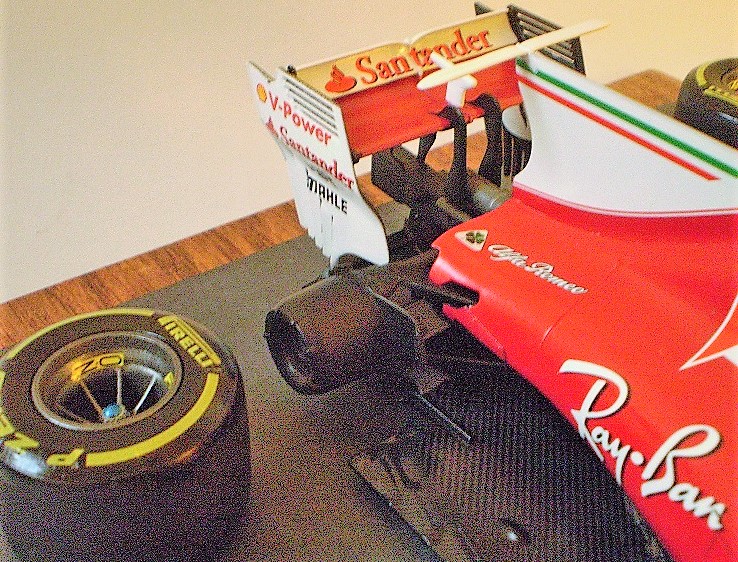
The SF70H, the 63rd single-seater designed and built by Scuderia Ferrari, was born out of major regulation changes, with wider tires and cars, plus larger diffusers, meaning that the cars have more aerodynamic down force and greater mechanical grip. Fittingly for the hybrid machine named to commemorate Scuderia Ferrari's 70 years of racing, the SF70H showcases the team's innovation throughout its design. A lengthened nose and arrow-shaped front wing are a consequence of the regulations, as are the fin on the engine cover, and aero appendages ahead of the air intakes on the side pods.
Behind the driver the roll-hoop, which incorporates the engine air intake, was completely redesigned. Sebastian Vettel started 2017 in style with victories in the season-opening Australian Grand Prix and in Bahrain. He and Kimi Räikkönen also recorded 1-2 finishes in Monaco and Hungary. While ultimately pipped to the season's Championship titles, the SF70H was the focus of attention for millions of racing fans across the globe including Ferrari's loyal Tifosi.
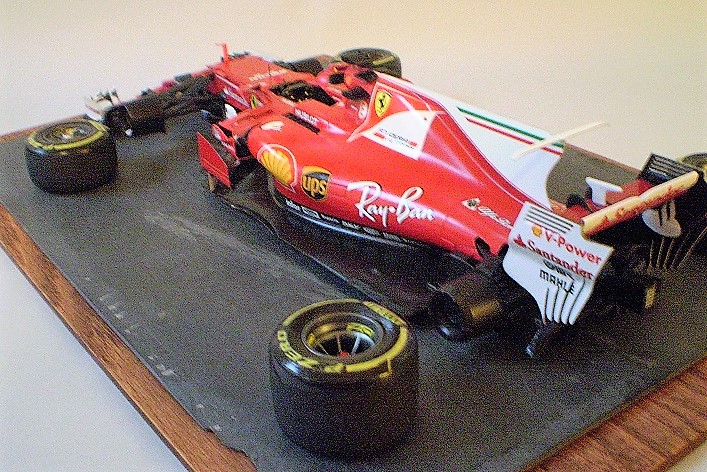
This is a 1/20th scale plastic model assembly kit. The overall dimensions of the completed model are 271mm(length) x 100mm(width). This model depicts the Ferrari SF70H as raced at the 2017 Australian Grand Prix, which was won in style by Sebastian Vettel.
Some of the features of this kit are:
- Complex aerodynamics are accurately recreated in 1/20th scale
- Can be assembled as Vettel or Räikkönen car
- Separate wheel nut parts for a detailed finish
- Under tray/Under body is affixed to body using 5 screws (Screw driver included.)
- Side mirror surfaces are recreated using metal transfers
- Includes decals for car sponsors and markings
- Masking stickers are provided for use when painting the model
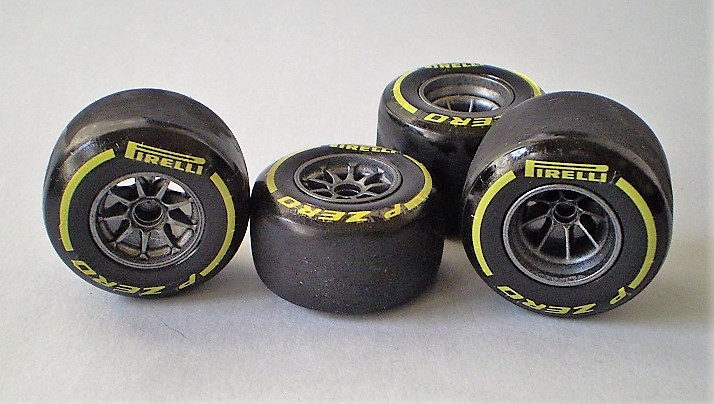
Some noteworthy items that Tamiya doesn't mention about this model are the 154 multi-colored (red. white, black) plastic parts, carbon fiber decals for the under tray/under body, and reverse water-slide markings/badges for the four rubber tires. I have had some issues with those tire markings before, so it will be interesting to see whether or not I can make these work. The Tamiya Ferrari SF70H is an open wheel, competition automobile model and those tire badges/markings will be missed if I muck it up. Stay tuned.
The thirty assembly steps are laid out in typical Tamiya fashion, which is to say, easy to comprehend and execute. Some of the painting suggestions called for during assembly need to be done at the time as access to certain areas will be limited once the model is completed. Do familiarize yourself with the assemble instructions so you don't forget to paint a particular part before assembly. You will rue the day if you don't.
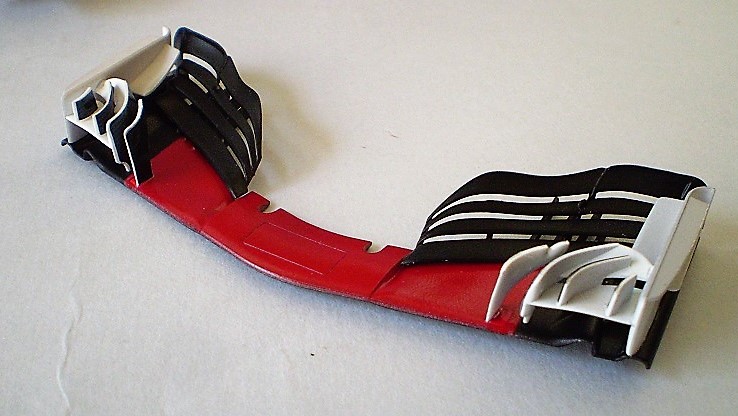
As long as I am on the subject of painting, the real car has a three-tone paint scheme for the main body. The lower portion of the car is gloss black with the upper portion being gloss red. Some portions of the rear body and the front and rear wing are gloss white.
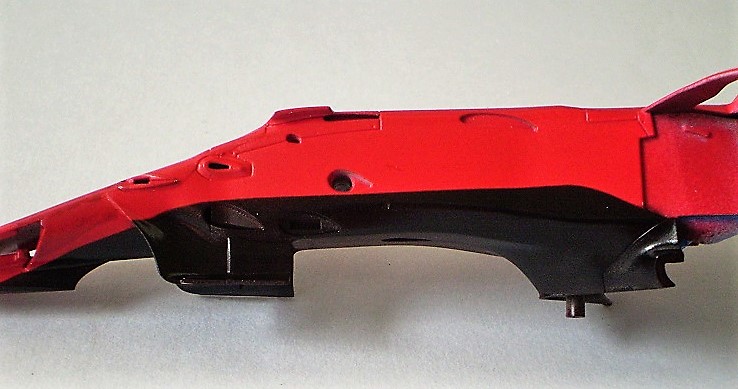
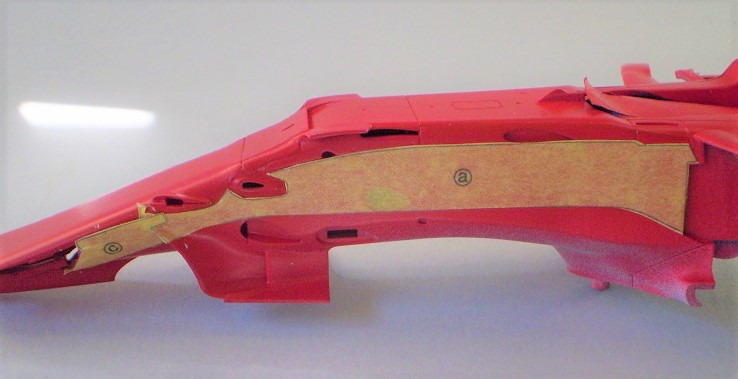
Tamiya provides some painting masks to aid in getting the scheme just right. It should be noted that the paint masks are not pre-cut. Stay calm. These masks are printed on what amounts to a large sheet of Tamiya masking tape. Just follow the printed outline and all will be right with the world. If you kept that french curve from your mechanical drawing class, now is the time to use it. One thing that is unusual and helpful is that all the appropriate body parts on this kit have a fine, raised cleat line modeled on them to help with getting the aforementioned masks in just the right place (see photo).
Assembly begins with the monocoque. [Technical note: monocoque is cool racing car talk for a vehicle structure that is part of the chassis and integrated with the body of the car.] The two sections of the forward monocoque get glued together and that gets attached to the upper body. All of this structure gets painted with the aid of those aforementioned paint masks. There are some areas not covered by the masks, but your own ready supply of masking tape will solve that problem. All of this is nicely laid out in the instructions.
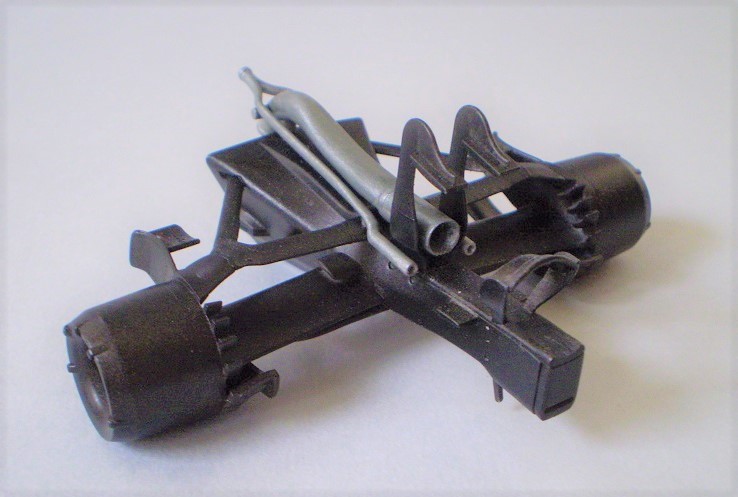
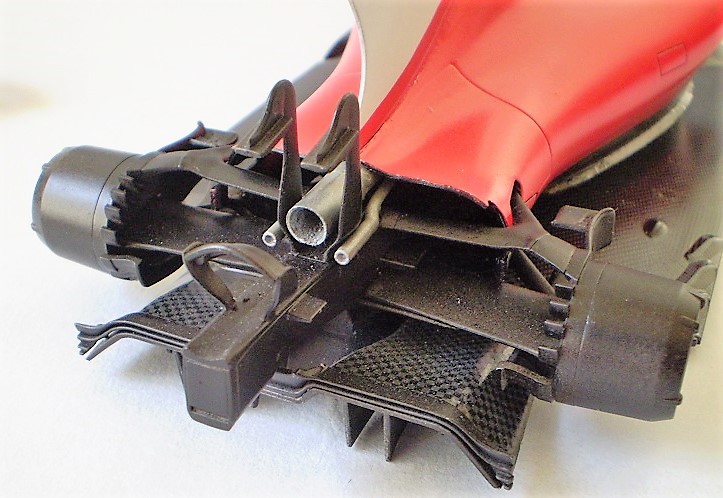
Tamiya builds this Formula One car from the front to the rear of the monocoque/chassis. You add the side pods, air induction pod (air scoop), forward suspension (front arms) and brake drums (front uprights) to the chassis. The assembly instructions move on to the rear gear box which holds the rear suspension arms and uprights. From there the rear cowling pieces get assembled and painted, again with the help of some of those handy painting masks, and all of this gets assembled and attached, en masse, to the undertray.
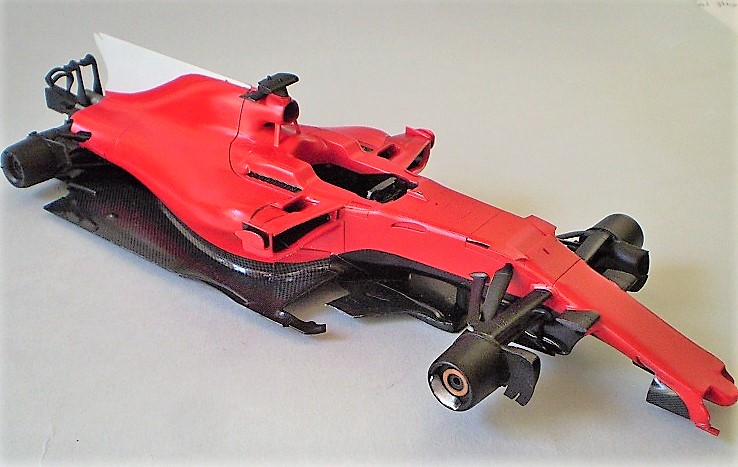
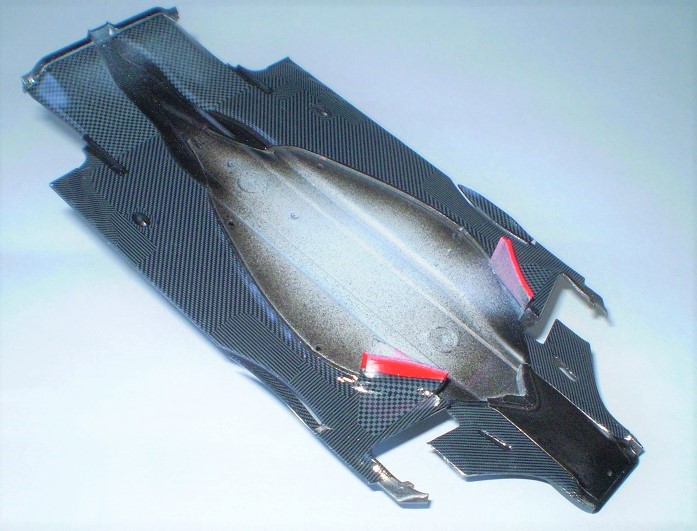
The undertray can be thought of as a chassis. On Formula One cars the undertray provides the car with aerodynamic down force, which is to say that all the vanes, tunnels, and venturi on the undertray help hold the car to the road. There is an amazing amount of science stuff involved with these cars. Even the skid plate on the bottom of the undertray gets into the act of creating down force. Tamiya has faithfully reproduced the undertray on their 1/20th Ferrari SF70H.
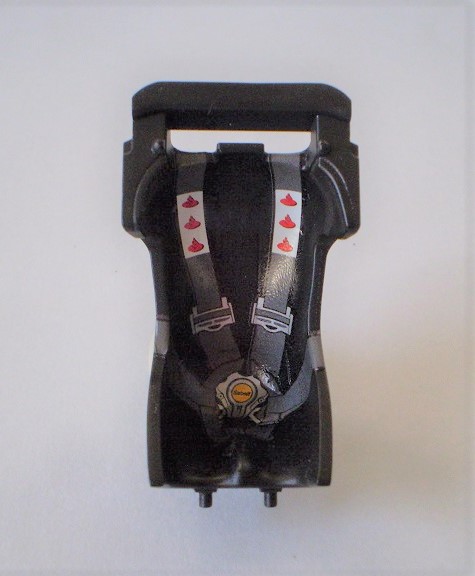
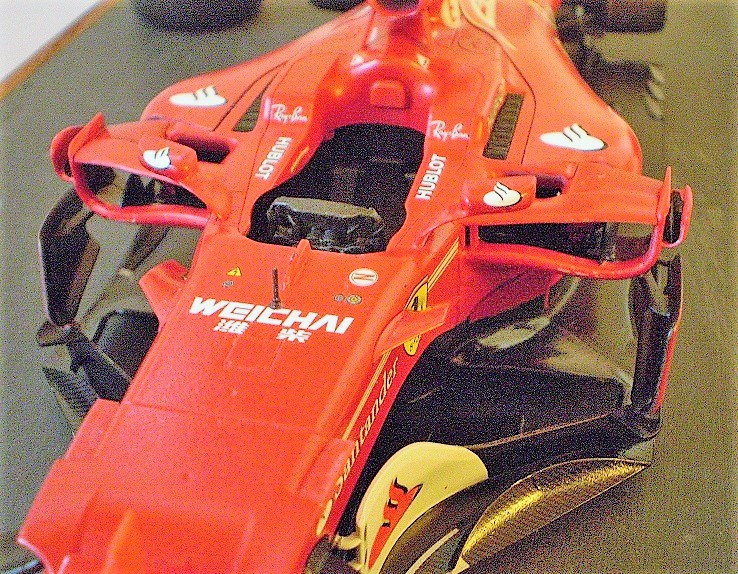
The model may be built as either Sebastian Vettel or Kimi Räikkönen's car. Those differences are minor and confined to the driver cockpit, specifically the headrest, various airflow winglets, and the configuration of all the buttons on the steering wheel. A Formula One car has a slew of controls mounted on the steering wheel, everything from a drink button to adjusting the brakes. There is short YouTube video explaining the 27 different buttons, switches, and paddle shifters typically found on a Formula One steering wheel.
Tamiya provides a detailed painting guide for the specific car (Vettel or Räikkönen) that you're modeling. They have also provided some decals, in lieu of painting the steering wheel. As you like.
Tamiya also provides some nice decals representing the carbon fiber parts found on a typical Formula One car. Some decals will need to be applied as you work through the assemble sequence. One notable assemble step (#7 & #8) involves the side pods for the car. The side pod parts will need to be assembled, painted, and the carbon fiber decals applied before you add the final plastic bits to each pod. The intricate side pods are made up of seven separate parts, so this kit may not be a good choice for the novice builder. While some portions of the build may seem daunting, Tamiya has laid it all out nicely in the assembly instructions. Just pay attention, follow along, and all will be right with the build.
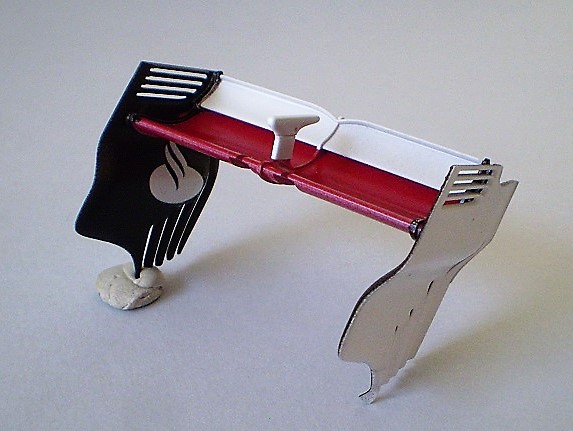
After finishing with the decaling and painting of the undertray, the entire upper portion of the car gets attached with some screws. Tamiya even supplies the screw driver. You'll be glad they do, as the screws are itty bitty. Try not to lose them. The last couple of steps are all about the front and rear wings, attaching some more airflow conditioners, and adding the rubber tires.
There isn't much else I can tell you about assembly. This being a Tamiya kit everything fits just like it’s supposed to. I was impressed with the overall fit of the parts, some of the rear struts just click into depressions on the main body of the gearbox assembly (step # 14). All plastic models should be this nice.
Tamiya has also engineered the parts in such a way that most, if not all, of the seams and ejector pin marks, are hidden or dealt with by placing another part directly over the offending area. One seam problem I did encountered was with the induction pod (engine air scoop). Like most intake trunks there is a seam running down the middle of the parts. A sanding stick and the gloss black interior solved the problem.
While it's not a seam issue, per say, there are a number of ejector pin marks on the topside of the undertray (part D40/step #20) that must be addressed. The marks are shallow and do go away with the whisk of a sanding stick. Just make sure you get them all. When the carbon fiber decals are applied any missed imperfections are going to be readily apparent. (You'll never guess how I know this.)
One of the final assembly steps places a few telemetry antennas on the car along with the rear view mirrors. Tamiya provides some metallic stickers to represent the perspek used in race car mirrors. Perspek is a shatter resistant substitute for glass and the supplied stickers mimic this material beautifully.
All that is left to do is apply the decals for the particular car you're modeling. Don't panic...it only looks like a lot and they mostly go down “easy...like Sunday morning.” (My apologies to The Commodores.)
I did have some issues (operator error) with the large Shell logos on the sides of the monocoque. The site for them involves lots of curves and proper placement is crucial to getting to lay down nicely. Be sure and consult your references.
The decals provided are for the Ferrari SF 70H's that entered the Australian Grand Prix in 2017. Once you get all the common markings on, the only markings that differentiates one car from the other are the entry number (# 5 or #7), the driver name plate, and a little fin flash on the air vane on top of the air induction pod. The assembly instructions would have you completely assembly your Ferrari SF70H before applying the decals.
I choose a different route. I placed the decals to the front/rear wings and chassis separately before assembling the whole thing. A 'tip of the hat' to Tamiya, the decals have an added benefit of hiding the odd blemish here and there. Placing the tires on the chassis is the final step. [Note: The tires rotate, so you can push your model across the floor...if you want.]
As one can see, I did have some issues (tire badges/logos are supposed to be on both sidewalls) with those pesky tire badges but managed to get some of them applied. Turns out there is a trick to it. If you already know how to do this, skip ahead.
Otherwise, step number one is to gloss coat the tire surface. Then cut out the decal as close as you can to the design. The decals are reverse printed. Remove the protective paper and place the backing paper circle in the desired position on the tire. Thoroughly wet the paper and wait for the decal to separate from the backing paper. Wet the paper again and wait some more. Carefully remove the backing paper. Viola! You now have cool looking tire badges on your ever-so-cool looking rubber tires.
If you haven't built many car models in your illustrious modeling career I must say that should you choose to add a Formula One car to your collection than this kit is for you. As you may already know, Tamiya has a well-deserved reputation for the fit and finish of their kits parts. This kit is no exception. Couple that with ease of assemble and simple, concise instructions and you are in store for a satisfying build of this Ferrari SF70H. Tamiya even advises you to remove sprue attachment nibs throughout the assembly instructions for a more precise fit. (A lot of the body parts are molded in red plastic and I found this tip most helpful.)
You may find that you spend more time painting individual parts than on assembly but that is a minor thing when you consider that Tamiya's 1/20th scale Ferrari SF 70H kit will make a stunning addition to your collection. About the only real fault I could find with this kit is the exclusion of a pair of RayBan sunglasses.
My thanks to Tamiya America and IPMS/USA for the review copy.

Comments
Add new comment
This site is protected by reCAPTCHA and the Google Privacy Policy and Terms of Service apply.
Similar Reviews