
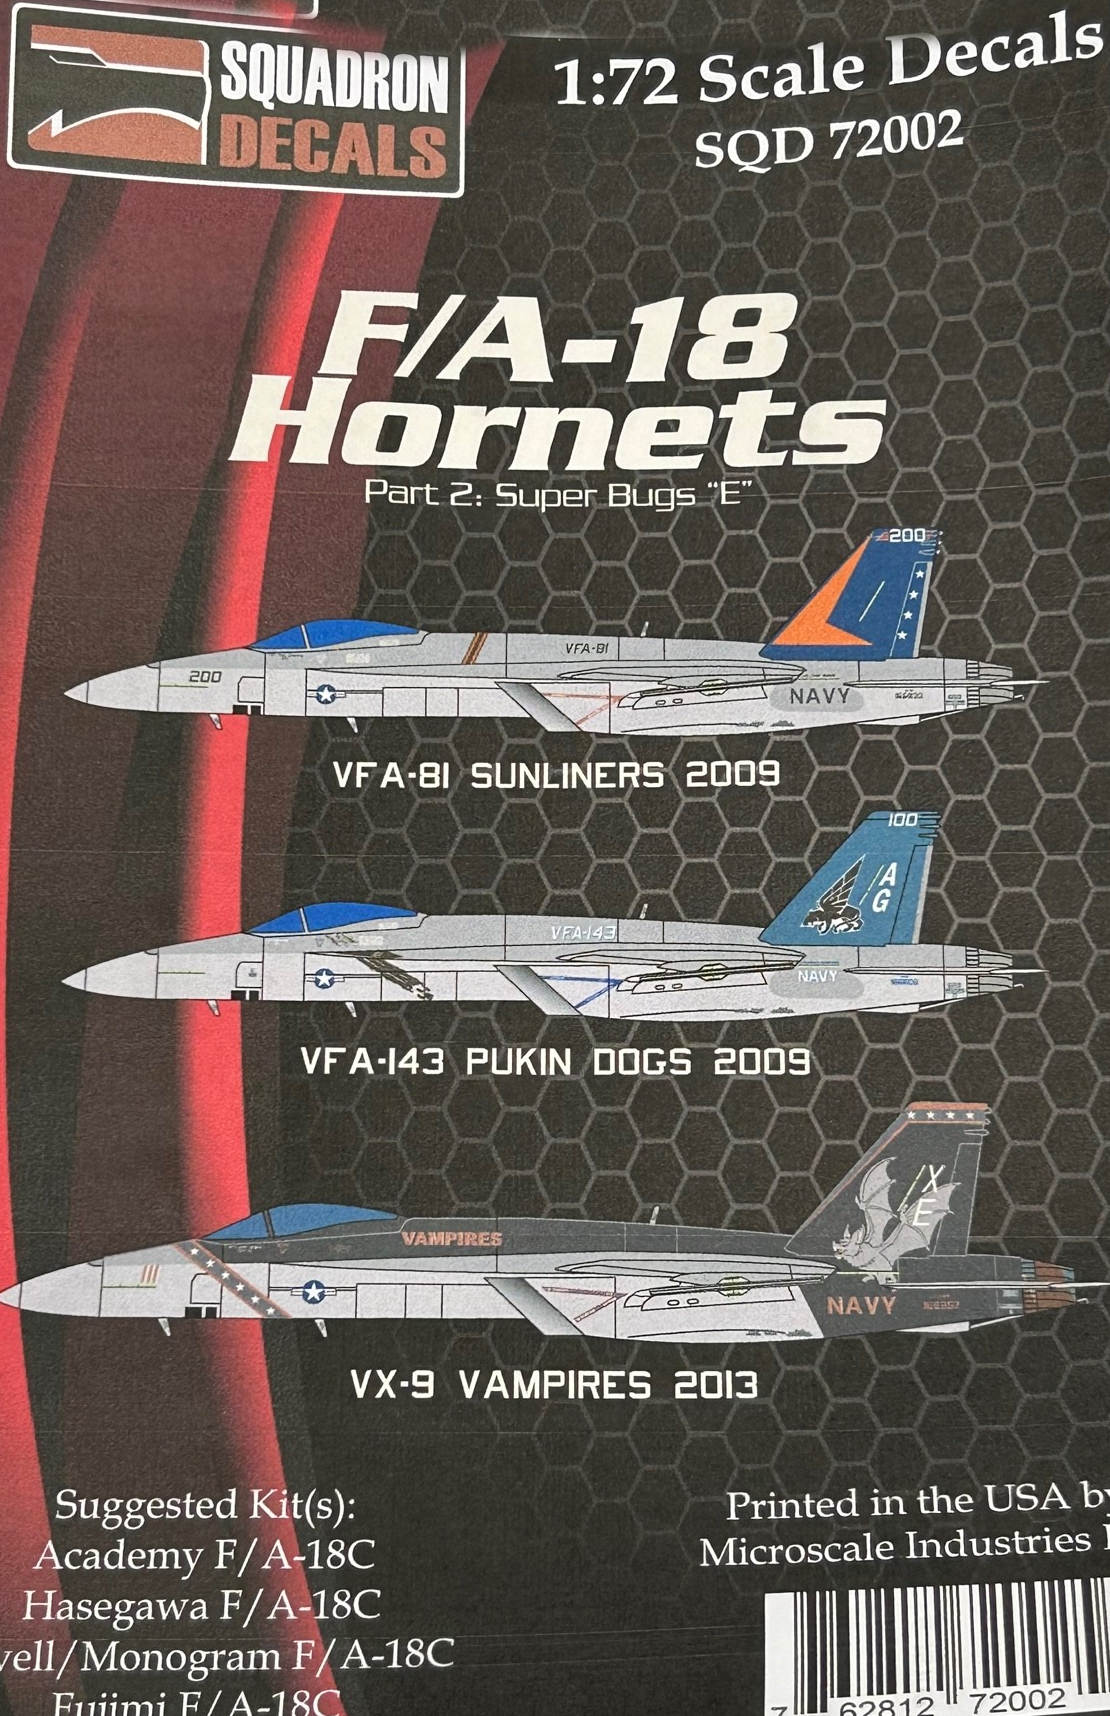
F/A-18 Hornets Part 2: Super Hornets Decals
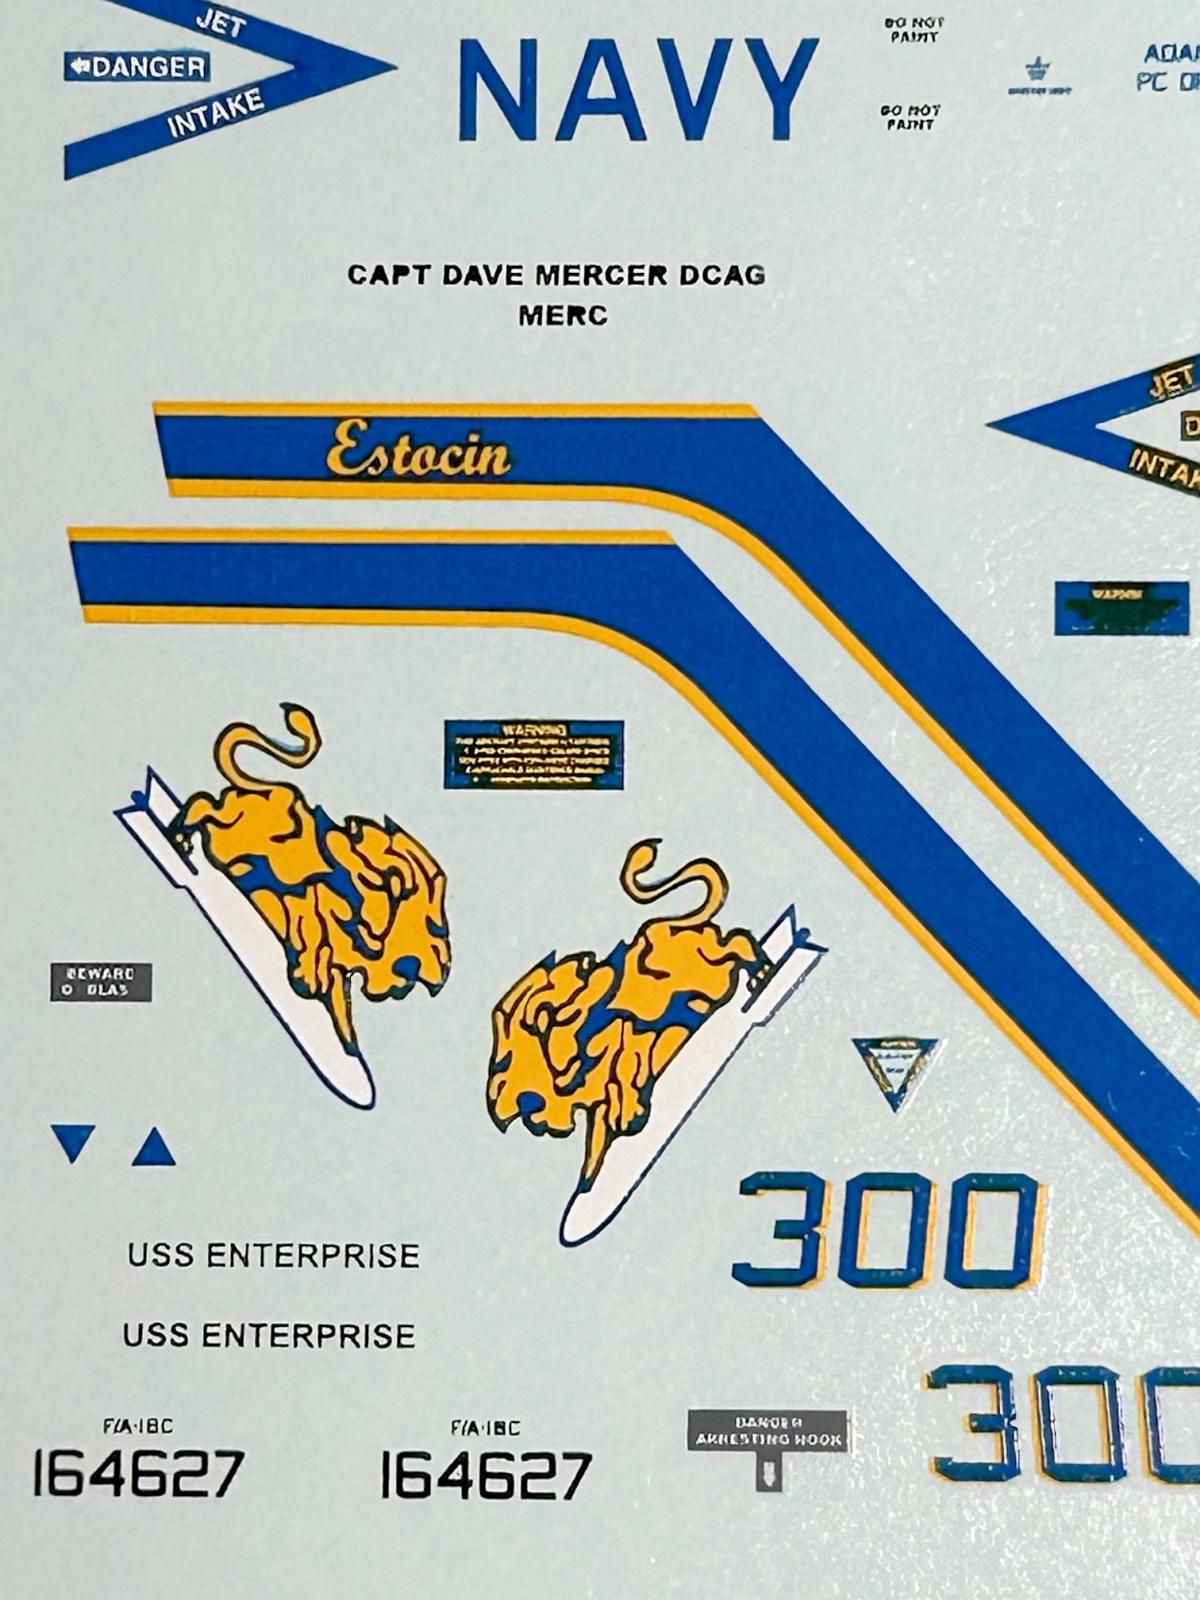
Last summer Squadron Hobbies released three sets of decals for the F/A-18 Hornet and Super Hornet family. Set 72002 provides decals for three Super Hornets in high-visibility schemes – two CAG (the carrier air wing commander) aircraft from VFA-81 Sunliners (2009) and VFA-143 Pukin Dog (2009) and an aircraft from VX-9 Vampires (2013).
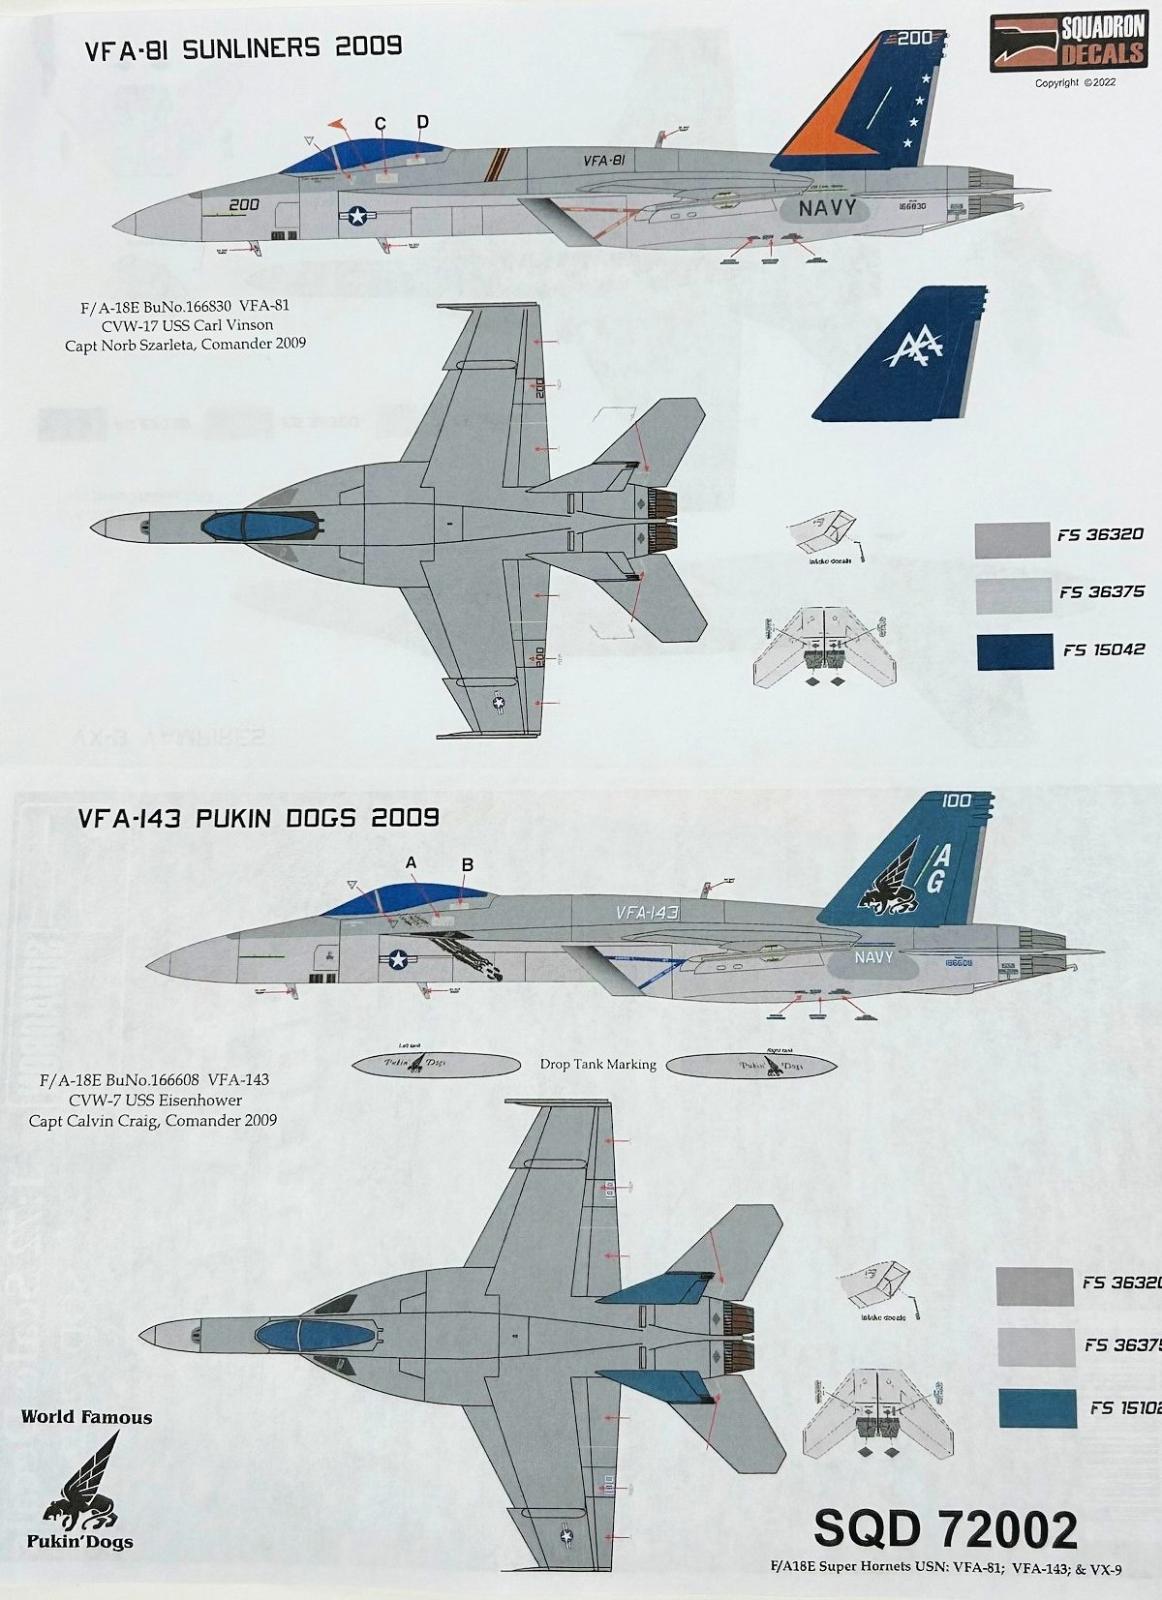
The instructions include a full dolor profile view of the left side of each aircraft and full color overhead view along with a color key listing the FS numbers for each color. There is also a small detail drawing of the inside of the starboard intake showing the placement of the decals that go inside of the intake and one of the underside of the aft end of the jet showing the placement of several decals including the ones simulating the diamond shaped screens immediately in front of the exhaust nozzles. The VFA-143 drawing also shows the placement of VFA-143 logos and squadron name on the centerline drop tank. The VFA-81 and VFA-143 drawings also illustrate the placement of common markings such as stab walkways and stencils on fuselage and on the top of the flaps and ailerons. Unfortunately, on my copy the illustrations of the stencils and these other markings were not as sharply printed as the main markings, so it is hard to determine in some cases what goes where, so you may want to do a bit of research for the placement of the stencils.
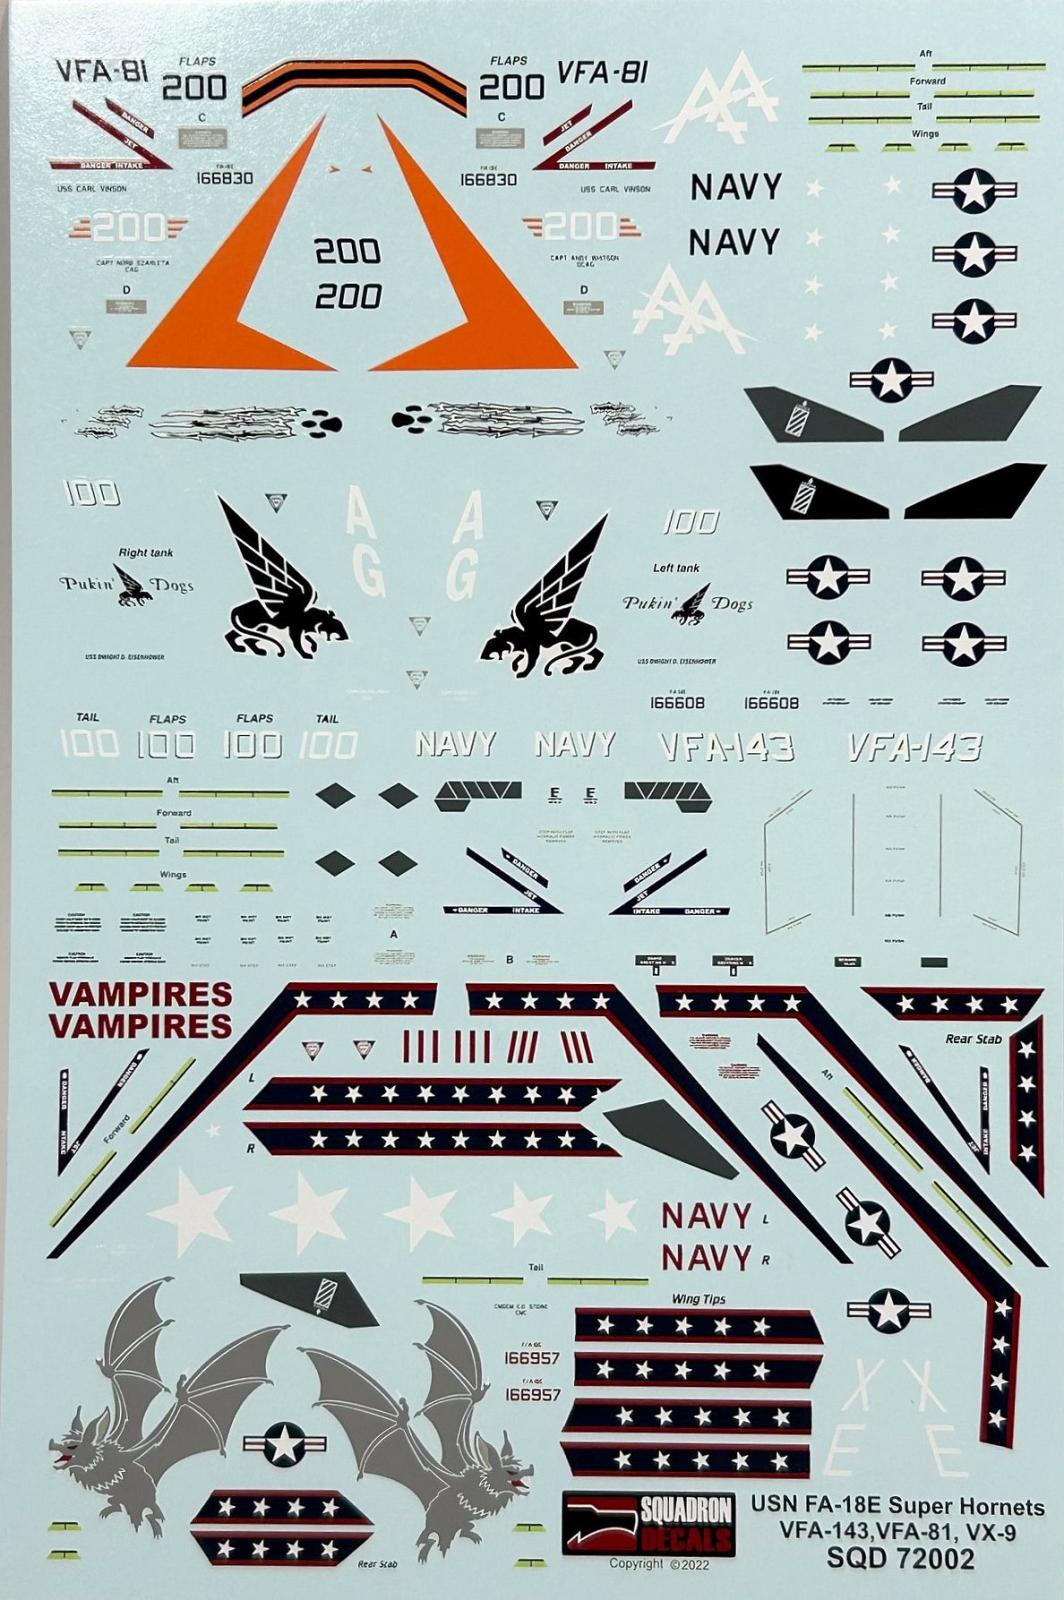
The decals are very sharply printed with no offsets or misprints. Colors are nice and crisp and for most of the markings, the carrier film is pretty minimal being cut close to the edges of the decals themselves. The set includes the main markings for all three aircraft, along with three sets of intake warning triangles (red for VFA-81 and dark grey for VFA-143 and VX-9) There are also three sets of the walkway markings for the forward end of the leading edge extensions – again in different colors, so you will need to double check to see which color is appropriate for the aircraft you are modeling.
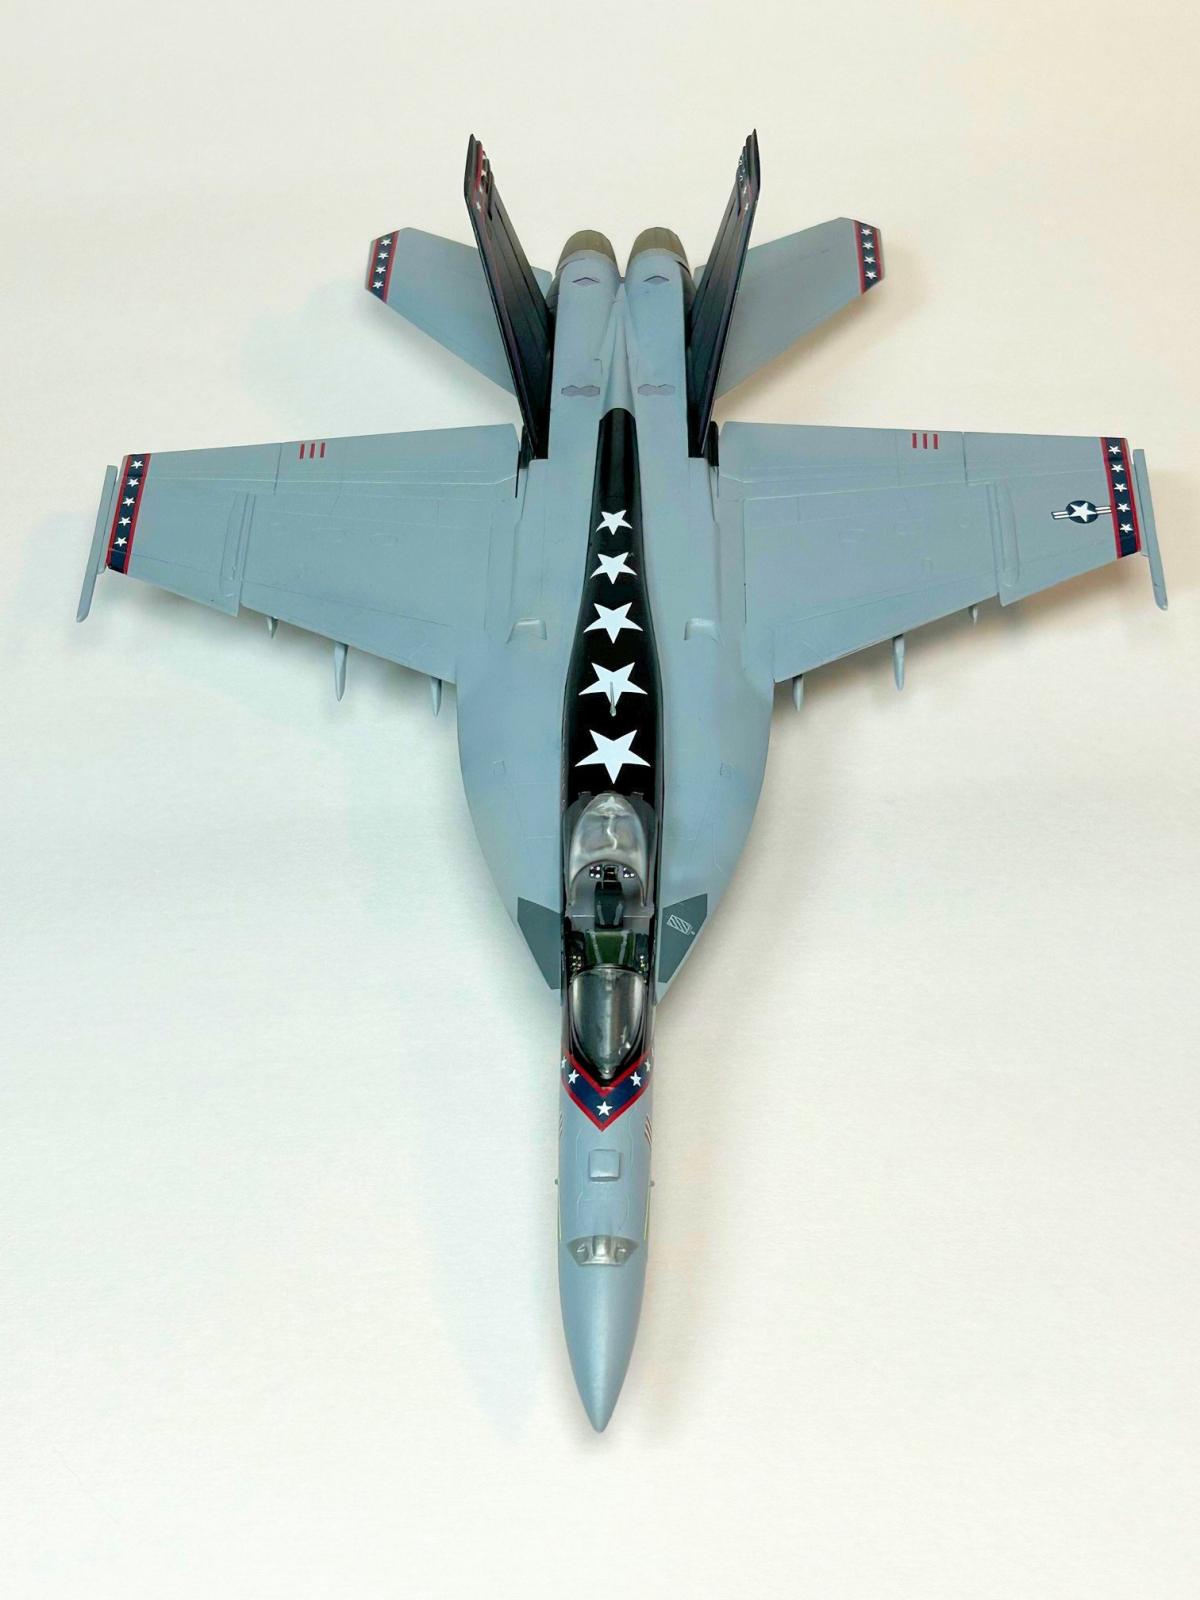
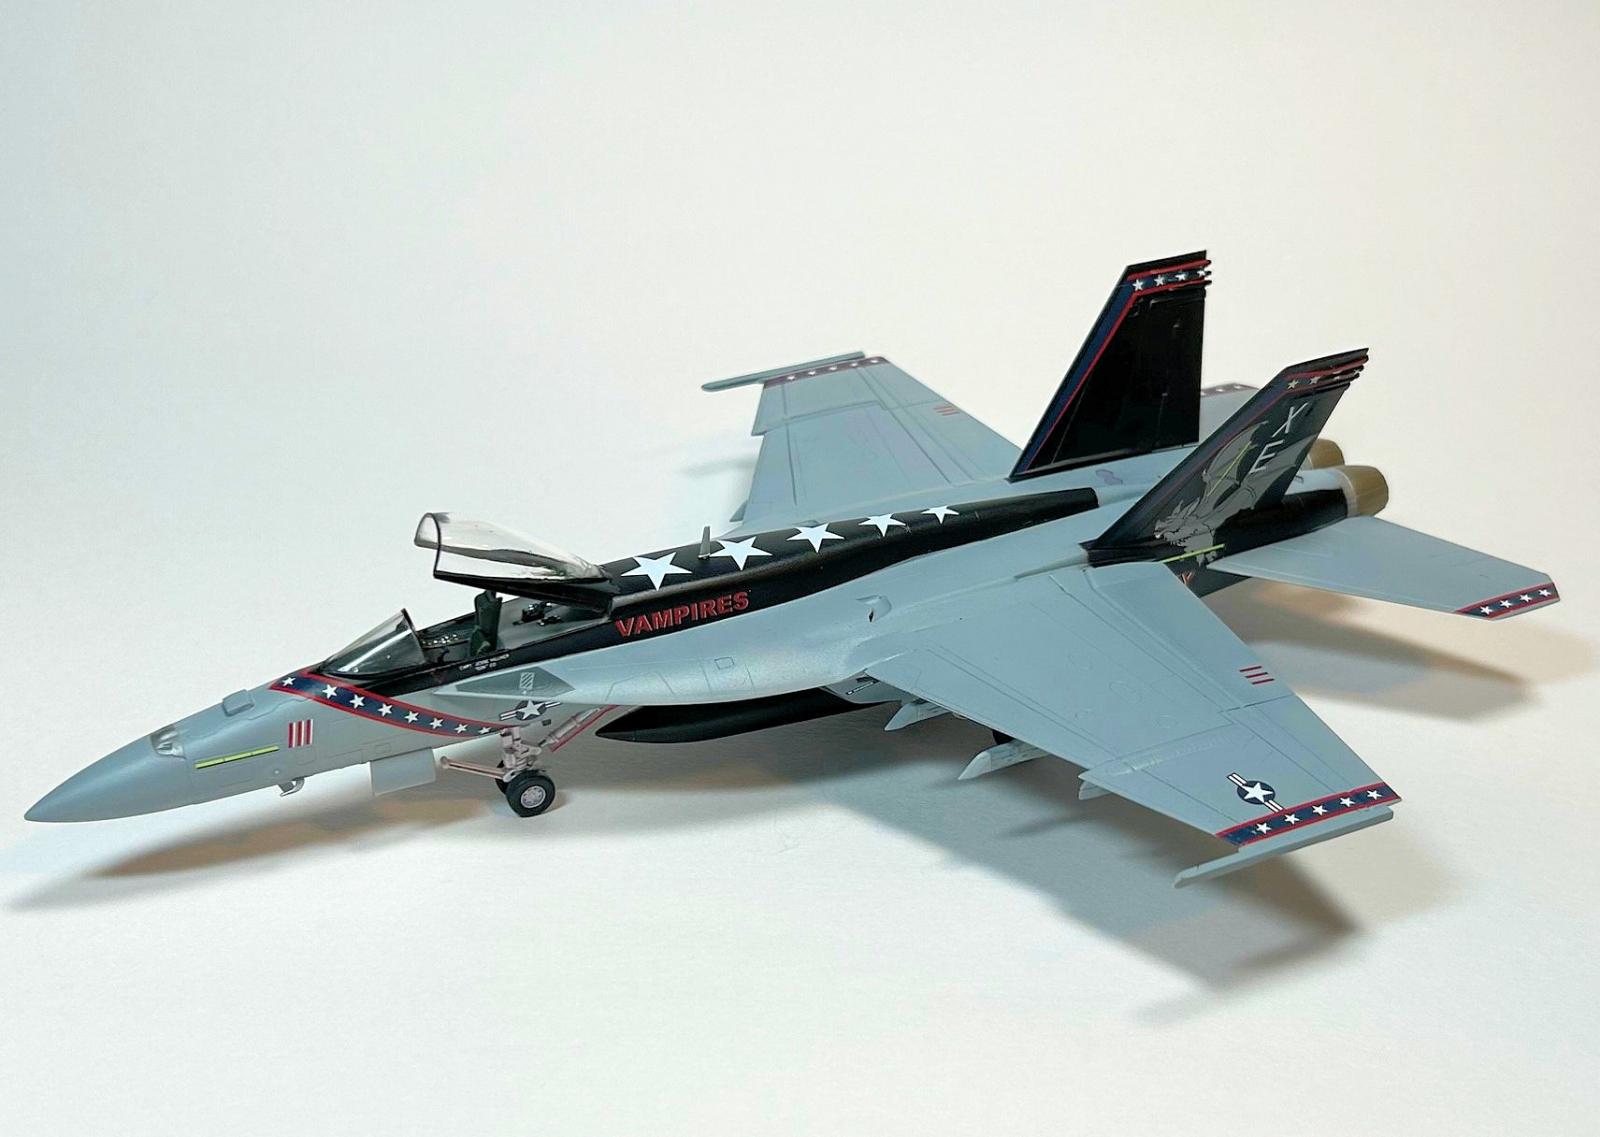
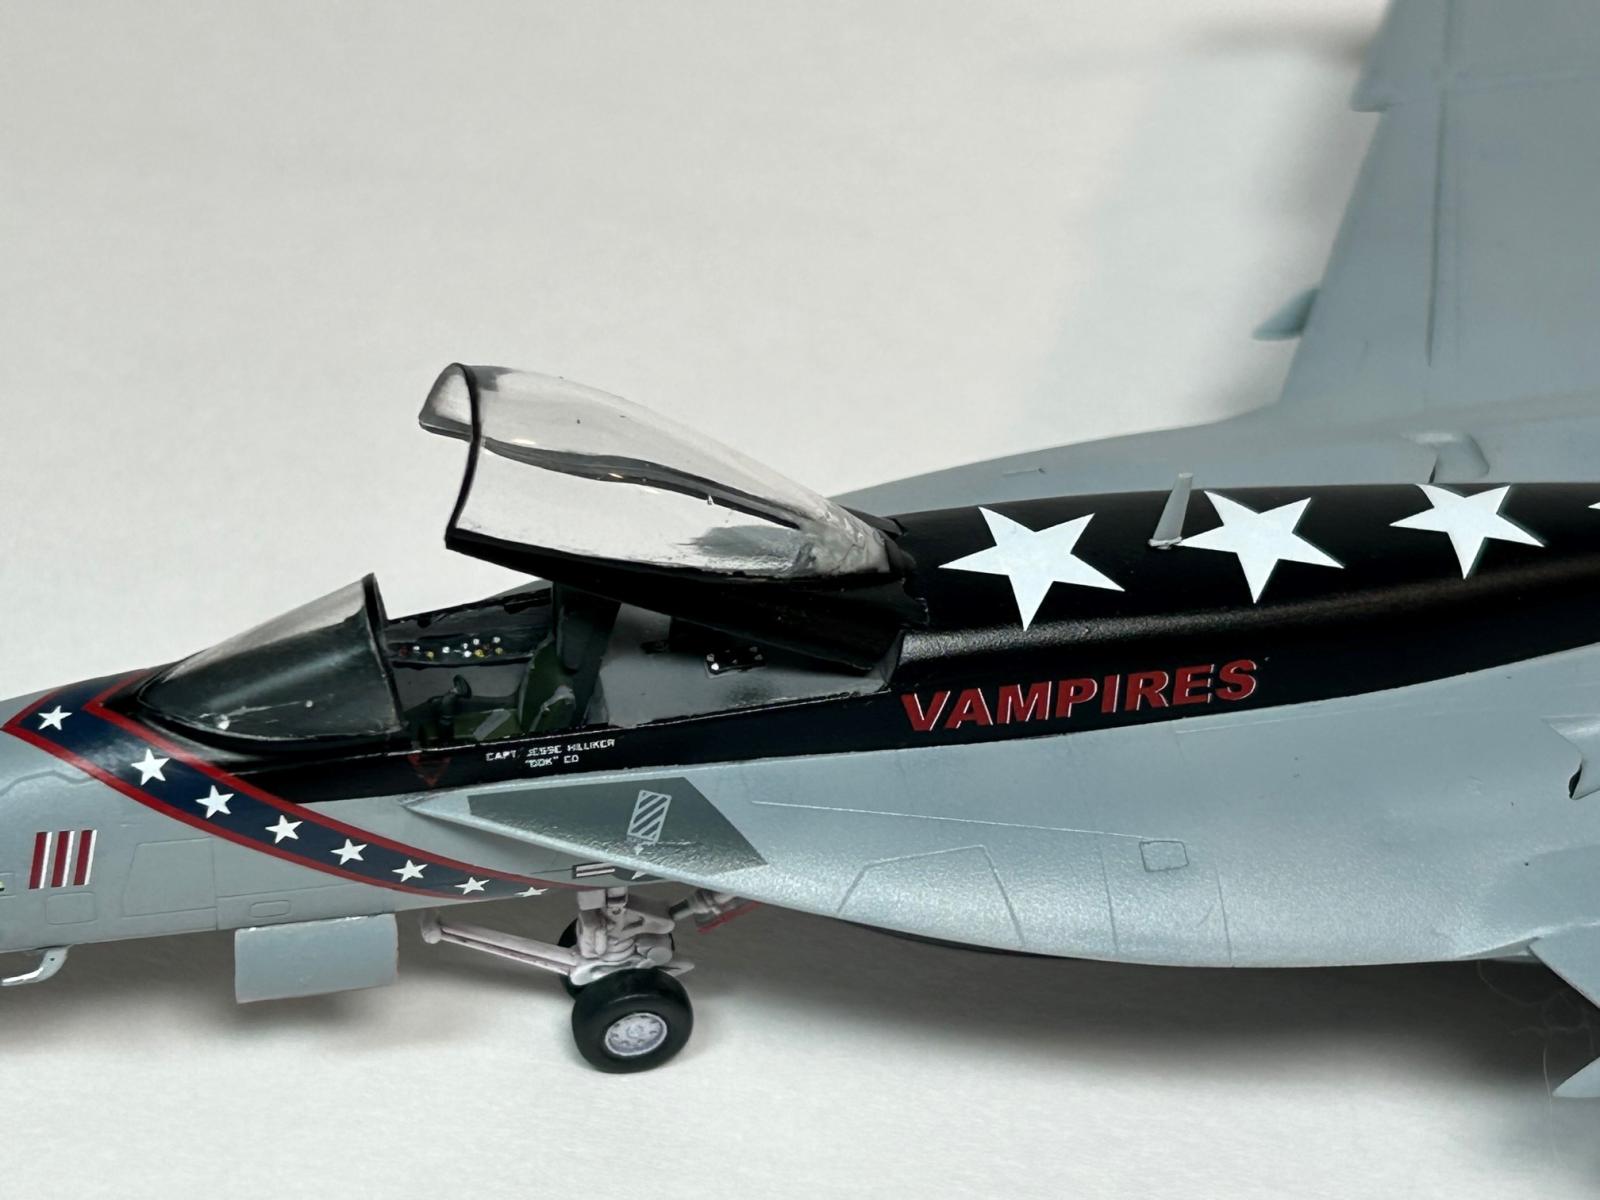
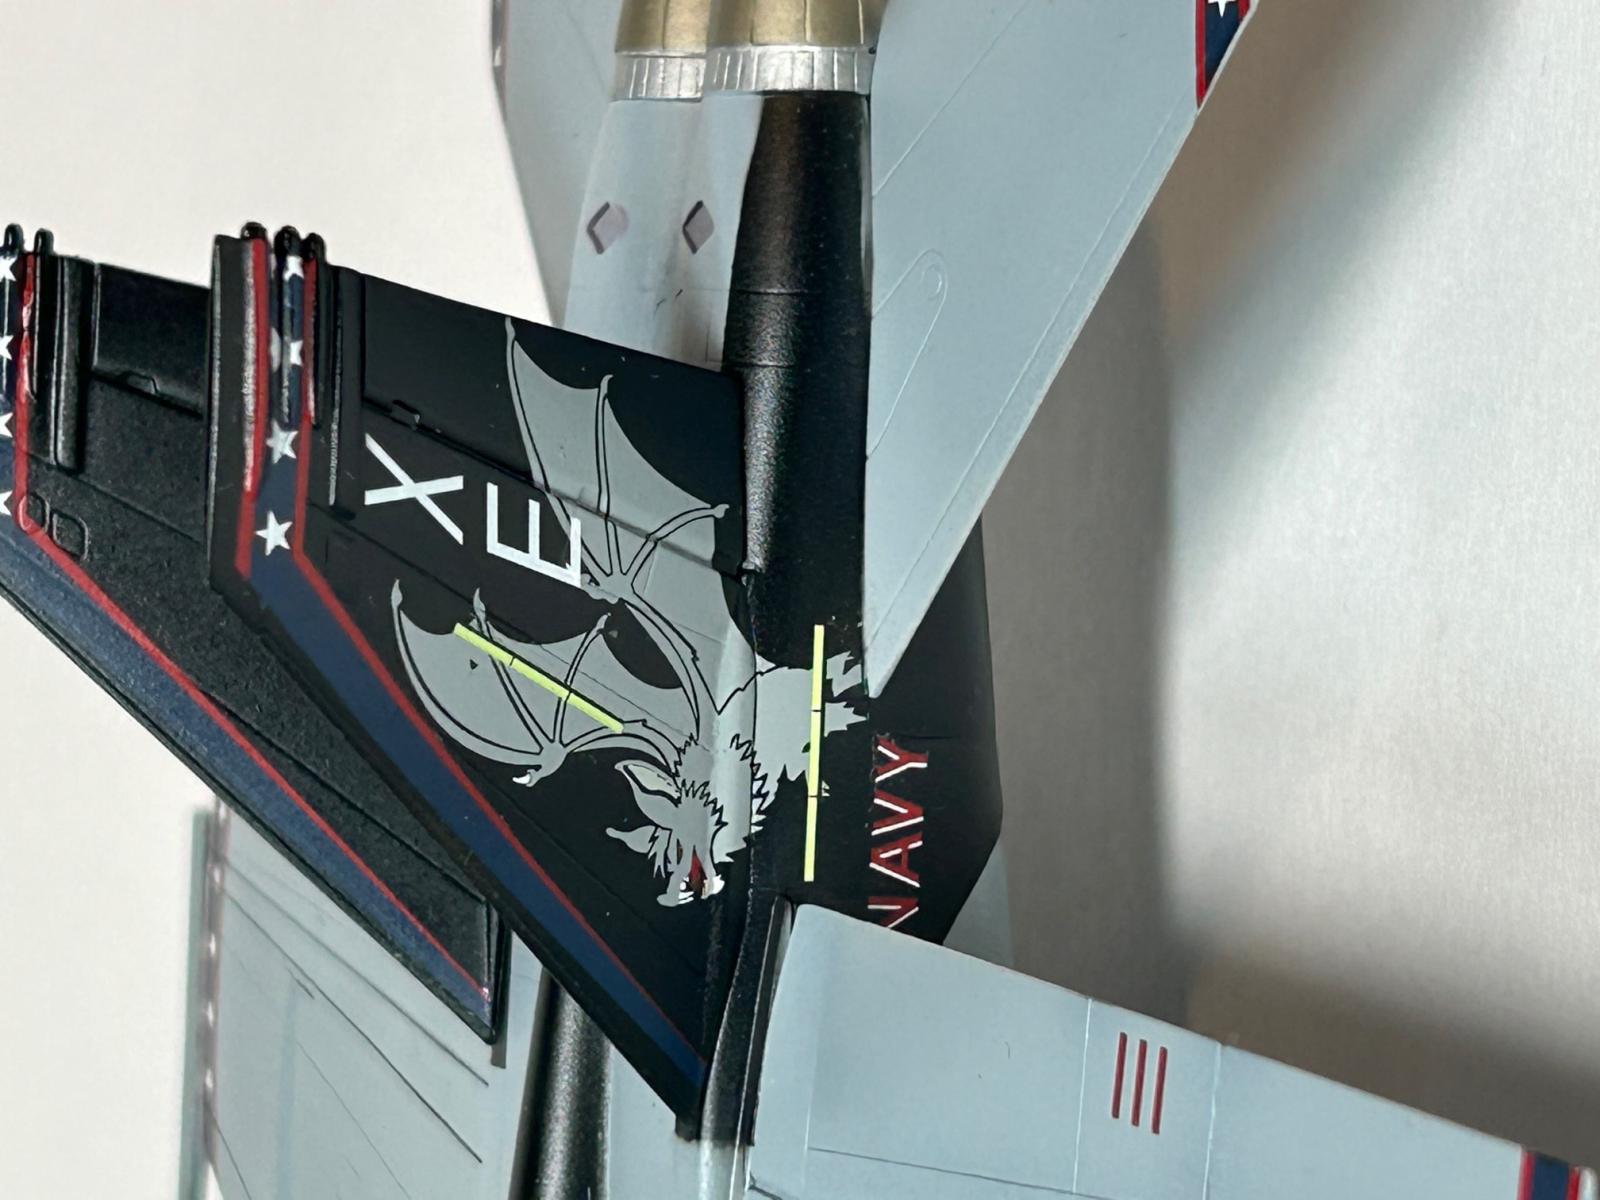
I selected the VX-9 Vampires aircraft, primarily due to the large bat logo on the tail, but also because it part of the rear of the jet along with the vertical stabilizers and spine are semi-gloss black. The large white stars down the spine of the jet and the black and red nose stripe with white stars did not hurt either. The only issue I had with this jet was that as there was no underside view, I could not tell how far under the jet the black went on the aft section. I found several pictures of the jet online and made an educated guess as to how far under to go with the black.
Once the model was constructed and painted, I sealed it with a couple of coats of Alclad Aqua Gloss to prepare the surface for decaling. I used MicroSet and MicroSol to apply the decals and to get them to settle into the recessed details. I trimmed the clear carrier film from the edges of the wing and stab stripes to ensure it would not interfere with the companion stripe on the other side of the wing/stab. As the kit I used was an older release from Revell, there were slight differences between the shapes and dimensions of the wings and the stabs, so I had to do a few touchups with Tamiya Sea Blue for the blue portions of these stripes. The nose stripes comes in left and right sections that meet up forward of the windscreen and as there is a single star where they meet, Squadron wisely decided not to put half a star on each stripe, but instead included this star as a separate decal to be placed after your line up the side stripes.
With the exception of the flashes on the vertical fins, the decals snuggled right down and conformed to the kit parts, even the large grey bat on the tail conformed to the bulges at the base of the vertical tails. Unfortunately, I just could not get the fin flashed to conform to the lumps and fairings on the vertical tails. I suspect that these decals are thicker than most of the others as they have white, red and blue layers. Once MicroSet and MicroSol had done their best, I ended up cutting the fin flashes and using more Micro Sol to get them to snuggle down to the tails, but I ended up with some gaps as shown in the photos. I don’t really have a solution for this issue as the Hornet tails have a number of fairings and bumps, but I wanted to give you a head’s-up that will most likely have some remedial painting to do after decaling to repair the fin flashes.
As the decals are printed by Microscale for Squadron, they are easy to work with and work extremely well with MicroSet and MicroSol, I was very pleased to discover that I had no silvering of the clear decal surrounding the large bat or on the nose stripes. I had a little on one of the wing stripes, but that was due to not having a smooth surface there after painting.
There is a misprint on the cover page of the instructions as it lists F/A-18C kits rather than F/A-18E kits as being the suggested kits. I know Hasegawa, Academy and Revell all have F/A-18E kits, but I am not sure about Fujimi.
This is a really nice set of decals from Squadron and brings me back to my early days of modeling as I eagerly awaited the next catalog to see what the new Microscale sheets would be.
Highly recommended.

Comments
Add new comment
This site is protected by reCAPTCHA and the Google Privacy Policy and Terms of Service apply.
Similar Reviews