
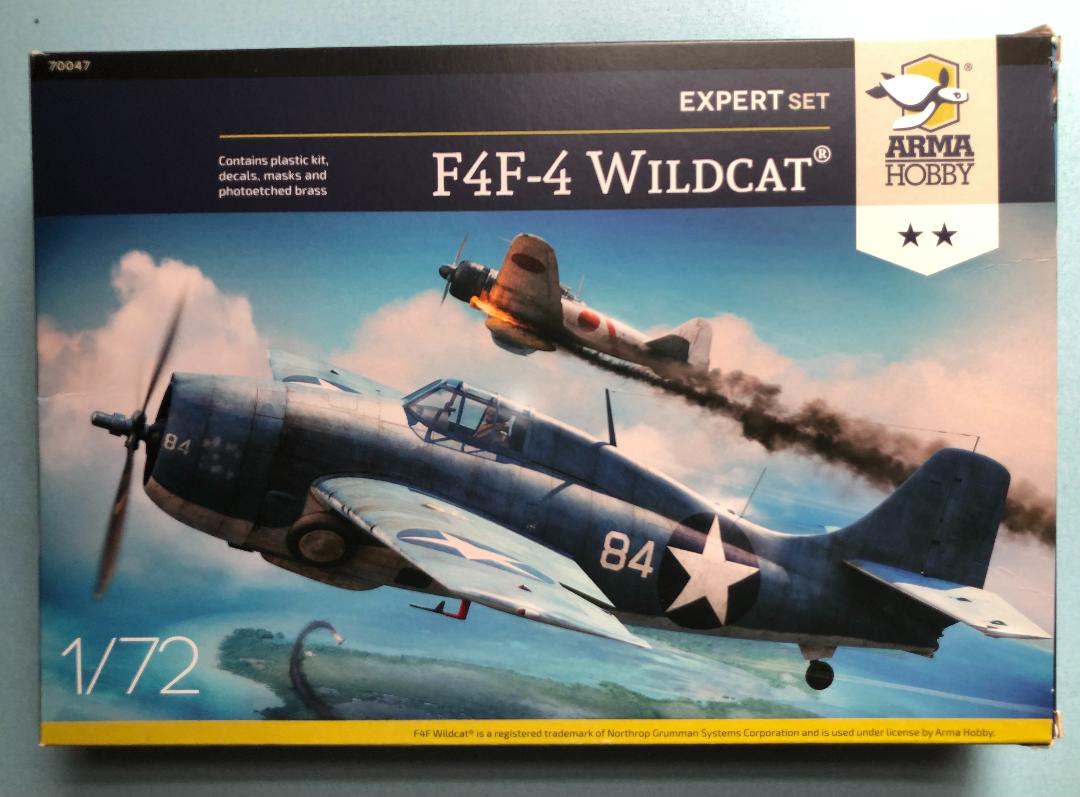
F4F-4 Wildcat – Expert Set
While Arma Hobby has been in business since 2013, they are a newer company to me, and this was my first opportunity to build one of their wonderful kits. Their mission is to manufacture the highest quality plastic kits that offer both extreme surface detail and are easy to build. While I will agree on the fantastic surface detail, I am not certain that I would call this kit easy to build. While I do highly recommend this kit, I do recommend that the builder have some experience before taking on a project like this.
As a follow-up to the F4F-3, the F4F-4 began to see service in 1942 and added the ability to fold the wings aboard ship along with two additional .50 caliber machine guns. Other changes included the “L” shaped pitot tube, a carburetor scoop and eight flaps on the cowling, and removal of the windscreen frame. While not as maneuverable as the Japanese Zero, the pilot protection, self-sealing fuel tanks, and rugged design allowed the planes to show success against their adversaries. Production would later be turned over to General Motors Easter Aircraft Division as Grumman ramped up their production of the Wildcat’s replacement, the F6F Hellcat.
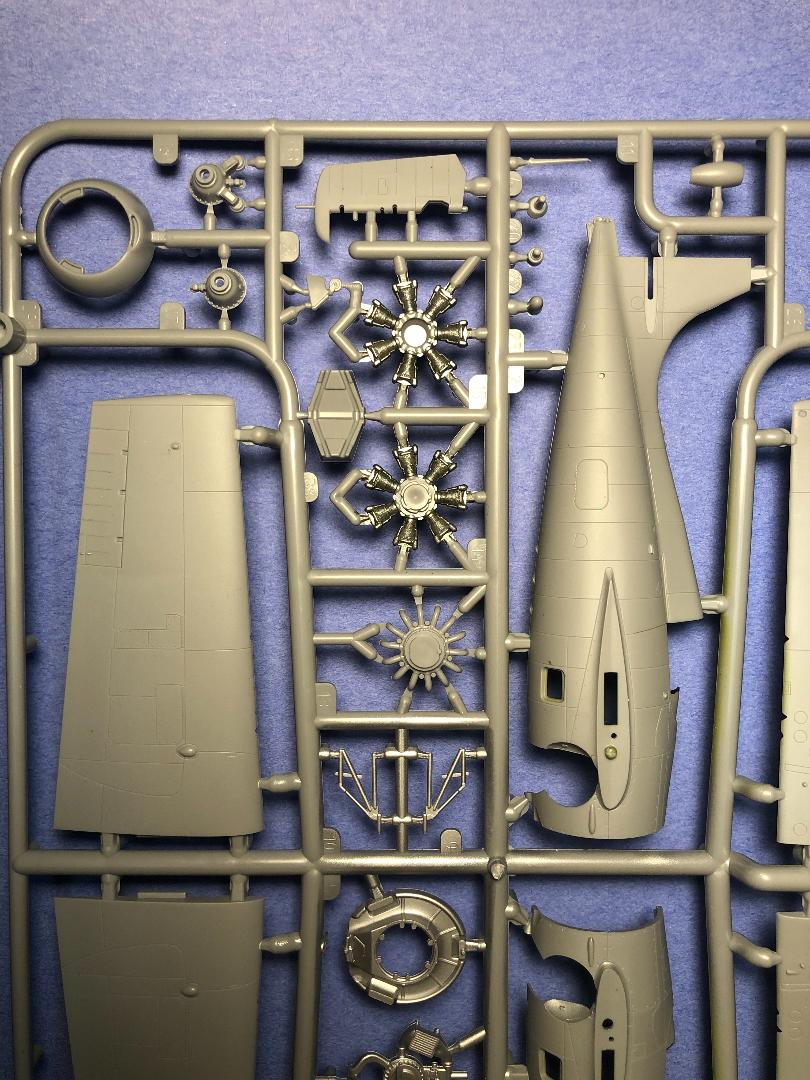
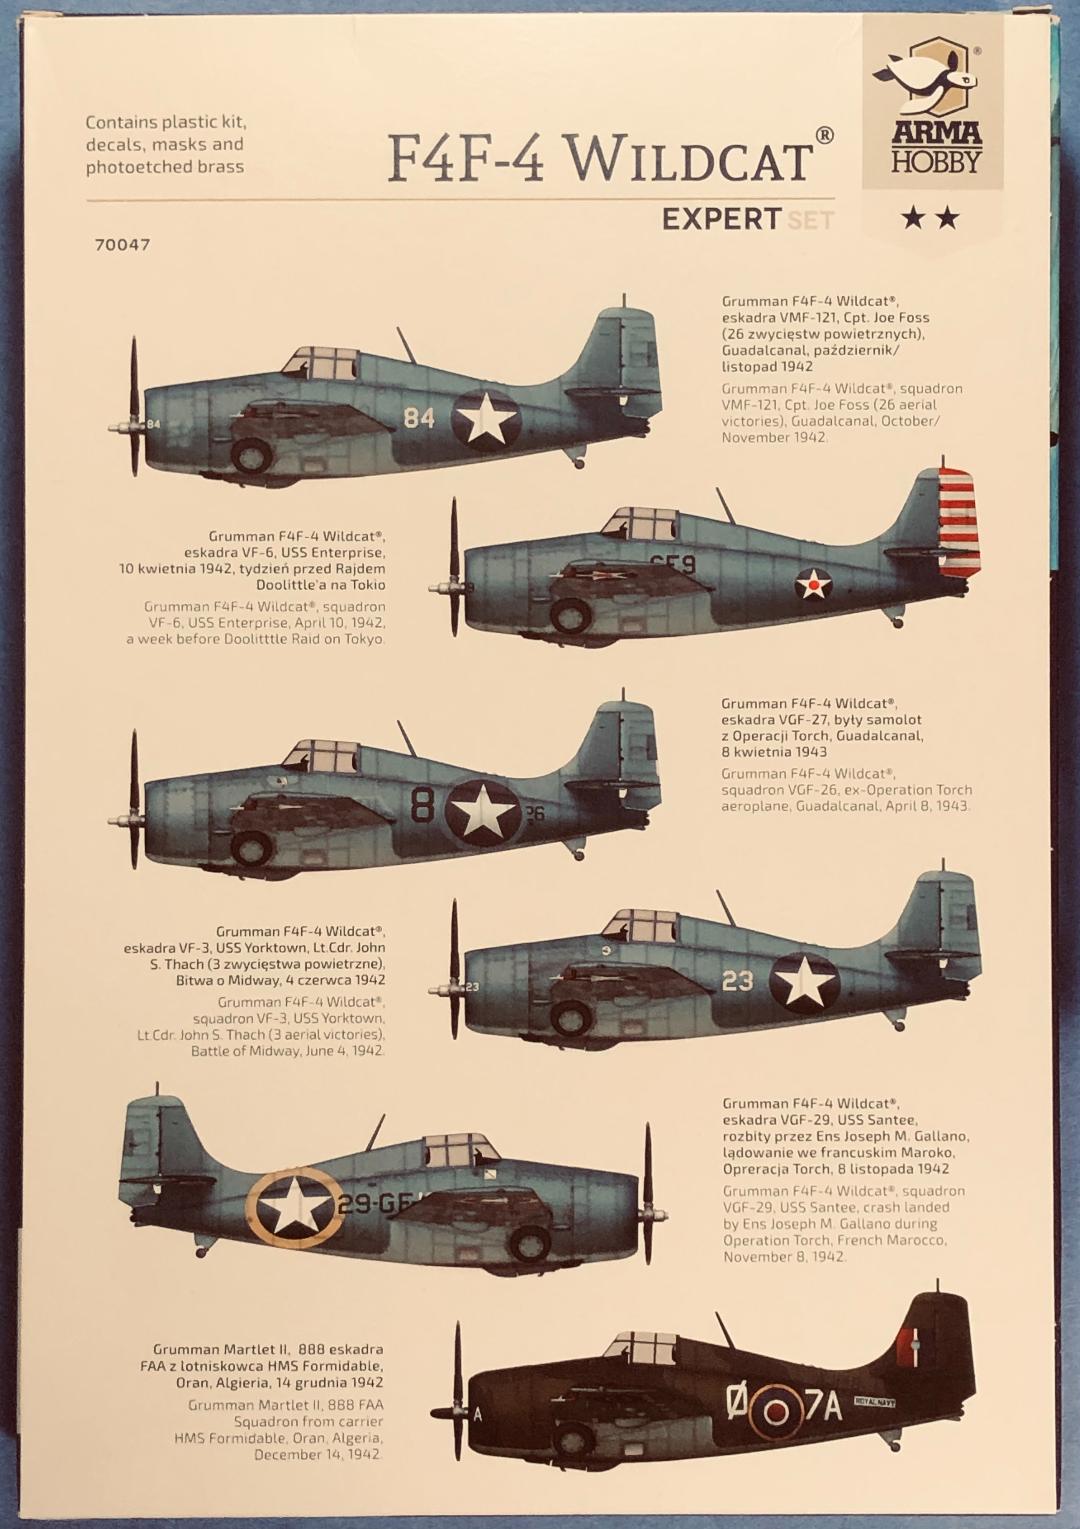
Being an Expert Set kit, upon opening the box you will find two light gray plastic sprues, a photoetched brass fret, masks, and a nice sized decal sheet. While the box mentions marking for six aircraft, the instructions mention the four bonus sets of markings, making ten options for the modeler. From the Arma Hobby site, the markings are as follows:
Markings options:
- Grumman F4F-4 Wildcat, white 84, squadron VMF-121, Cpt. Joe Foss (26 aerial victories), Guadalcanal, October / November 1942.
- Grumman F4F-4 Wildcat, black 8-26, squadron VGF-27, ex-Operation Torch airplane, Guadalcanal, April 8, 1943.
- Grumman F4F-4 Wildcat, black 6-F-8, squadron VF-6, USS Enterprise, April 10, 1942, a week before Doolittle Raid on Tokyo.
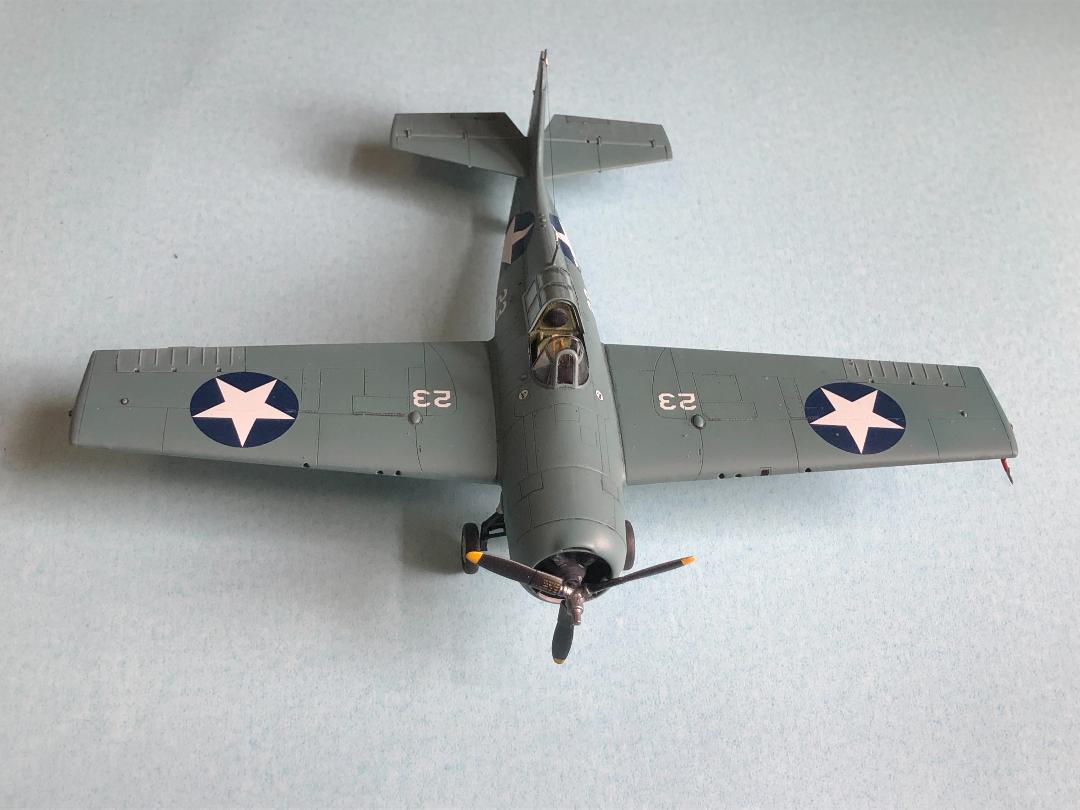
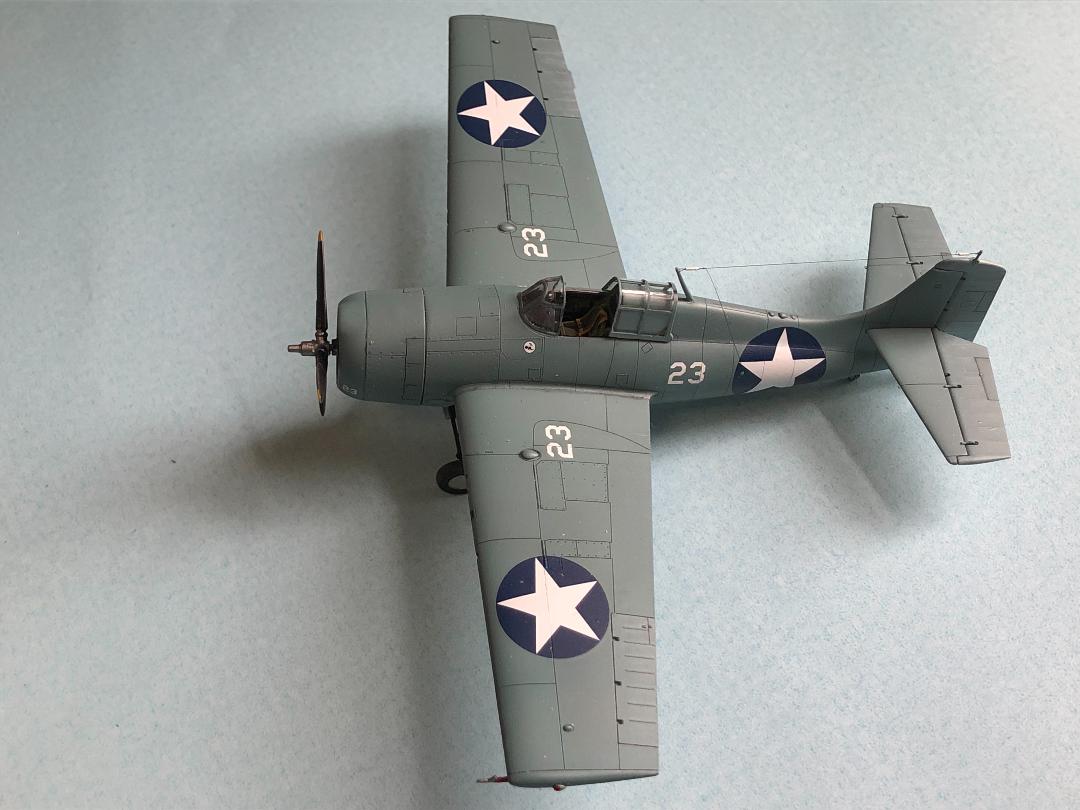
- Grumman F4F-4 Wildcat, 5093 / white 23, squadron VF-3, USS Yorktown, Lt.Cdr. John S. Thach (3 aerial victories in first mission), Battle of Midway, morning June 4, 1942.
- Grumman F4F-4 Wildcat, 3512/29-GF-10, squadron VGF-29, USS Santee, crash landed by Ens Joseph M. Gallano during Operation Torch, French Morocco, November 8, 1942.
- Grumman Martlet II, AJ148 / Ø-7A, 888 FAA Squadron from carrier HMS Formidable, Oran, Algeria, December 14, 1942.
- Bonus Markings:
- Grumman F4F-4 Wildcat, black 53, squadron VMF-121, Cpt. Joe Foss, Guadalcanal, October/November 1942 and January 1943. The first Foss’s airplane, who flew it to Guadalcanal with black 13 number. The number was changed to 53 to avoid confusion with Cpt. Marion Carl’s airplane.
- Grumman F4F-4 Wildcat, white 50, squadron VMF-121, Cpt. Joe Foss, Guadalcanal, October/November 1942.
- Grumman F4F-4 Wildcat, 5171/ white 1, squadron VF-3, USS Yorktown. Airplane flown by Lt.Cdr. John S. Thach when he shot down Cpt. Tomonaga from IJN Hiryu, Battle of Midway, afternoon June 4, 1942.
- Grumman F4F-4 Wildcat, 03511/29-GF-1, squadron VGF-29, USS Santee, Lt. Cmdr. John T. Blackbourn, Operation Torch; November 8, 1942.
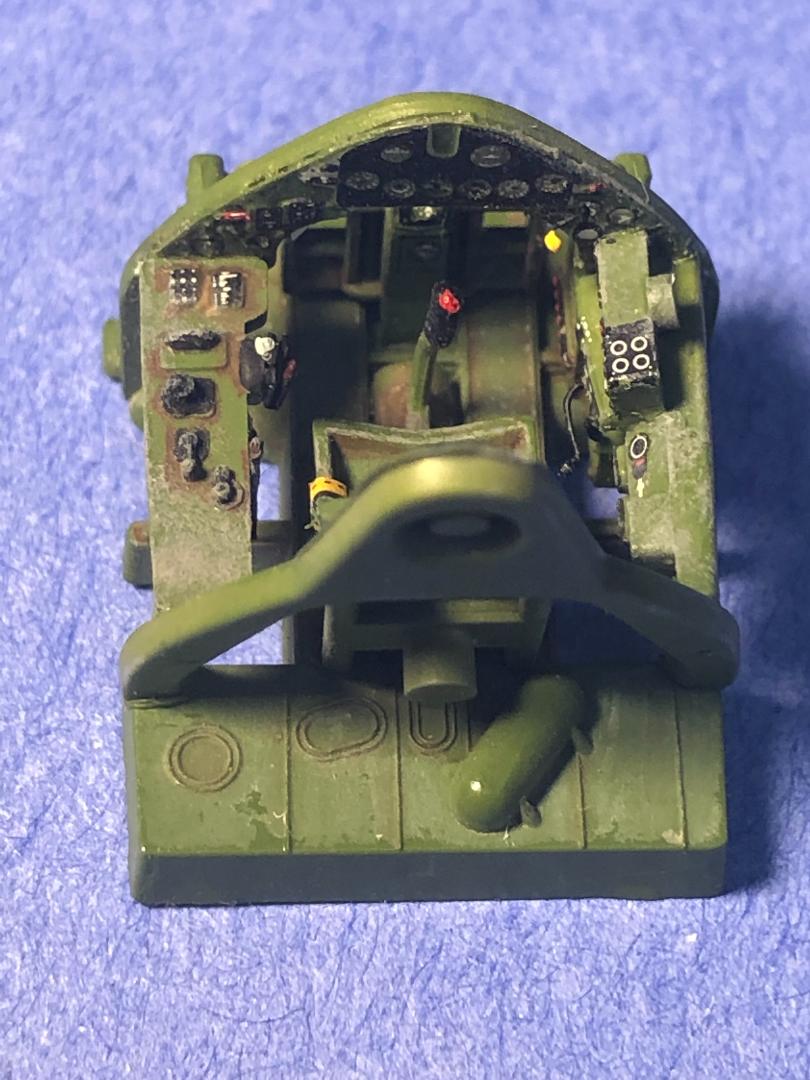
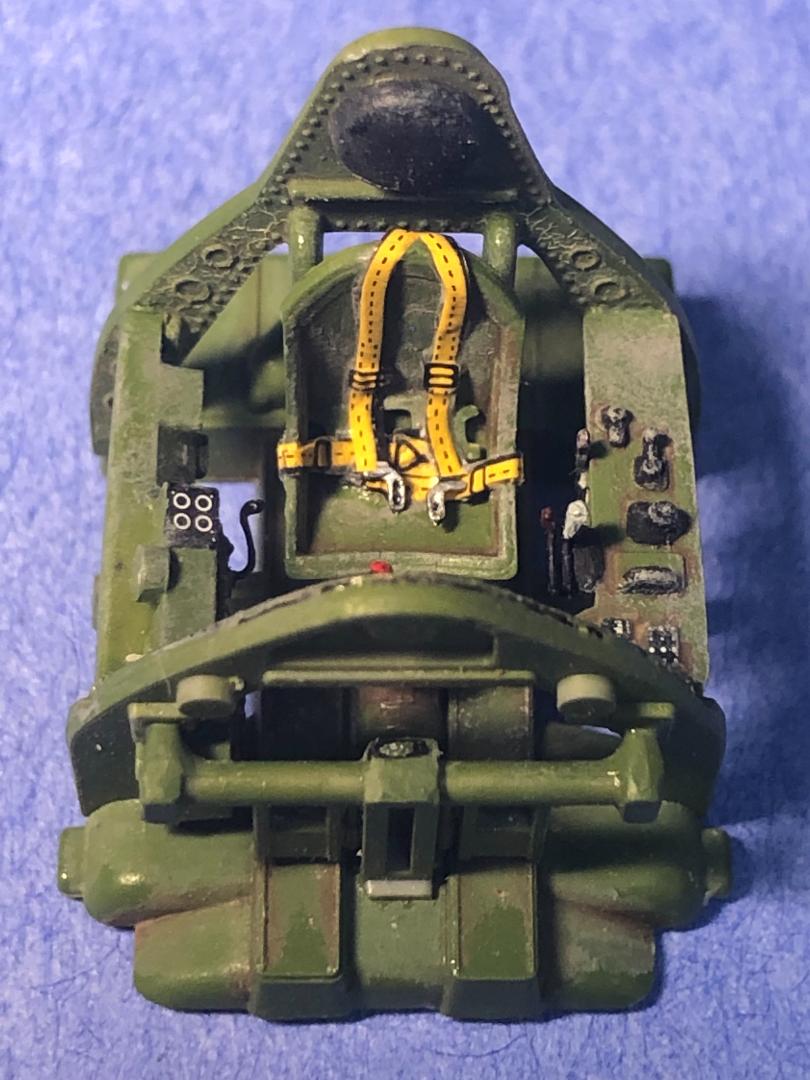
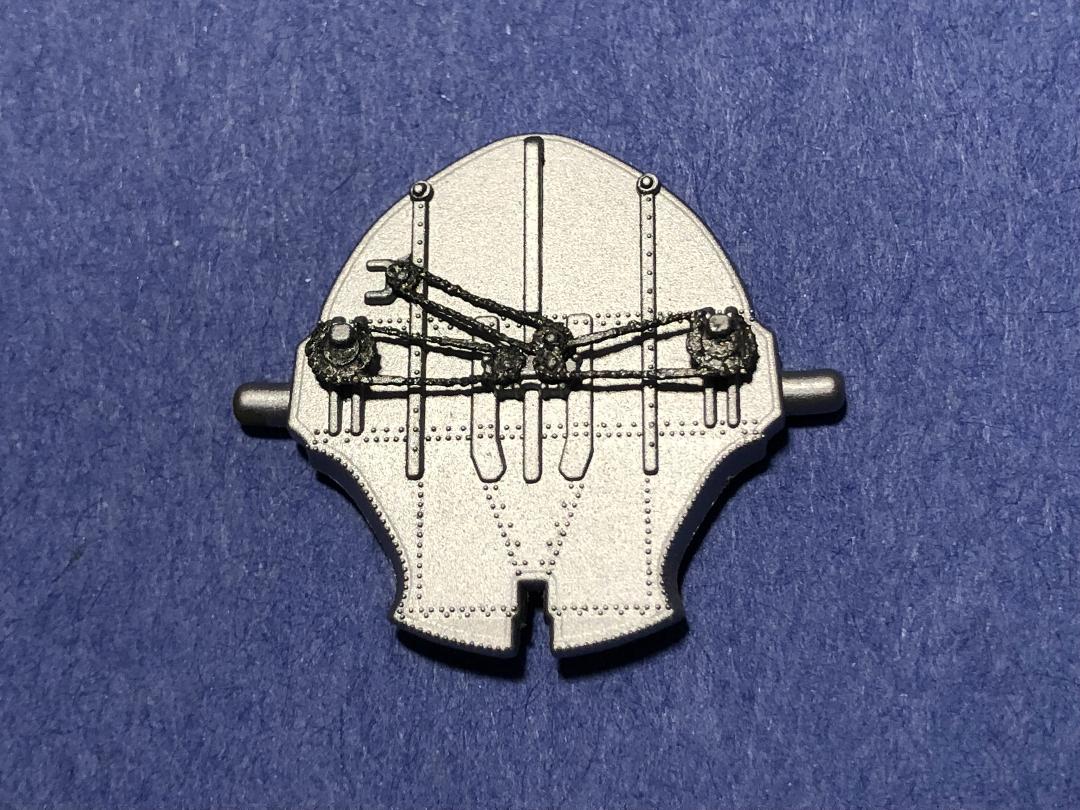
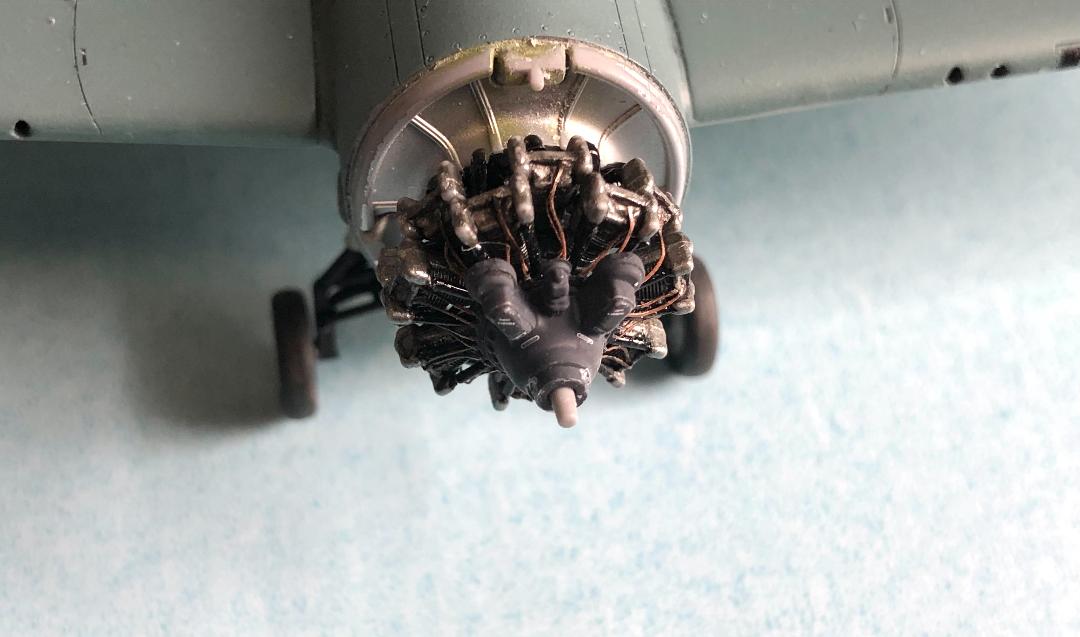
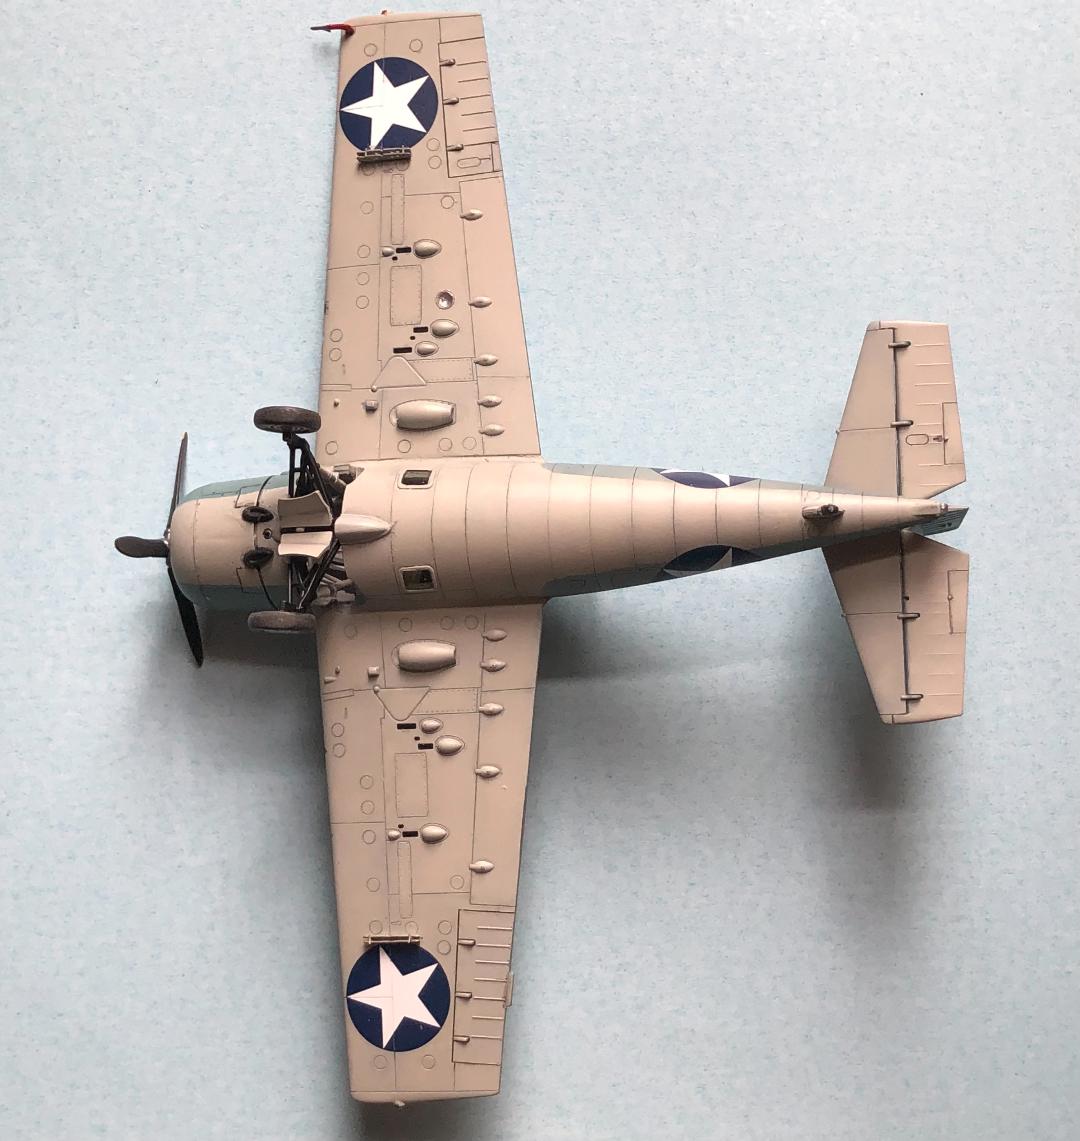
As with most aircraft models, construction begins with the cockpit, and in this case, removing the molded instrument panels for replacement with photoetched alternates. Photoetched controls and seatbelts along with decals yield a great looking cockpit in the end. There are photoetched chains for the firewall, making a convincing representation of the equipment used to actuate the main landing gear. The engine is wonderful in my opinion, with a high level of detail that includes photoetched ignition wires. A small jig is provided on the sprue to aid in setting the angles on the main landing gear, which consists of eight individual parts. While the construction of this landing gear is rather complex, a little time and patience will pay dividends. While two external fuel tanks are provided, I elected to leave them off my plane, and did not open the holes needed for their installation.
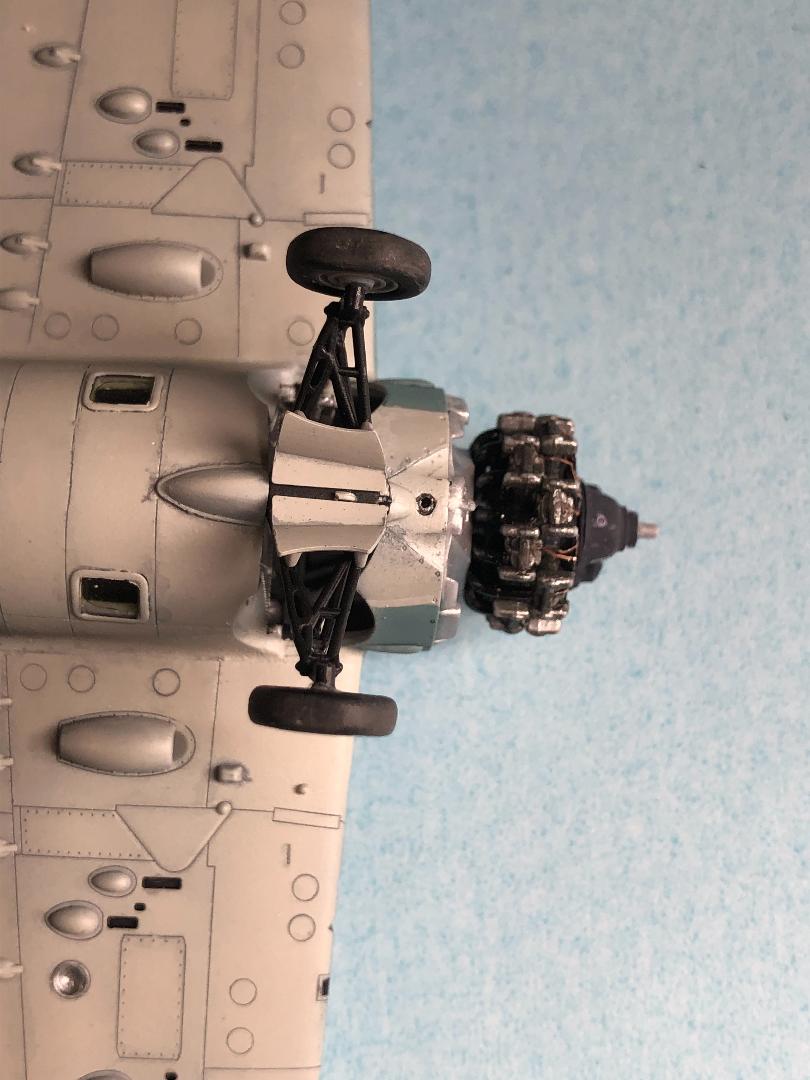
Regarding construction tips, I painted the main landing gear separately and installed the assembly after painting the exterior. This allowed me to mask the wheel bay with foam ear plugs during painting and supported setting the wheels properly (the included wheels have slight bulges molded in) after the assembly was in place. My clear parts had a pattern on them but dipping them in Pledge Floor Gloss made them shine. I ended up replacing the aerial on the tail with wire (I broke the part off during weathering of the tail surfaces) and thought the lens cover for the light under the wing was a bit thick and replaced it with acetate cut with my punch and die set. While nearly all the fits were tight and only minimal filler was needed, my propeller was loose on the engine shaft and required gluing in a piece of styrene rod then drilling it out to a proper diameter. I also ran into an issue with some of the decals as the first ones used settled perfectly with Micro Set and Micro Sol, but I ended up needing Solvaset on the fuselage markings.
To finish my plane, I used Model Master Acryl Interior Green, Engine Gray, and Flat Gull Gray, Model Master Enamel Military Brown, Model Master Lacquer Aluminum (Non-Buffing), as well as Vallejo Dark Blue Pale (FS 35189), along with Stynylrez Black and Gloss Black. Tamiya Clear Red and Green were applied over Molotow Chrome for the wingtip lights. Tamiya Gray Wash, Mig Dark Sea Blue and Blue-Black Panel Line Washes, and Mig Oilbrusher White were used during the weathering process.
As far as my hits are concerned, the molding detail is fantastic for 1/72 scale as this is one of the finest kits I have ever built. The additional items provided in the Expert Set edition make a great kit out of the box without any additional detail sets being necessary. I also appreciate the plethora of marking options provided by Arma Hobby, which can make choosing just one a challenge. The detail inside the main wheel bay is above what is contained in one of the 1/32 scale kits in my stash, which says quite a bit. The canopy masks worked well and were appreciated; I did elect to paint the wheels by hand, so I did not use those masks.
As far as my misses are concerned, I found that with the photoetched chains installed on the firewall that the posts used for the main landing gear struts were taken, making their installation a bit of a challenge. Some of the attachment points on the sprues were large, which surprised me for the detail contained on the individual parts. As an example, even though cutting away from the attachment point, I ended up with a divot in the top of the fuselage when removing one of the halves. I also found the large decals challenging to work with as mine were somewhat brittle and did not move well once on the plane. As mentioned previously, I ended up using Solvaset and running a curved scalpel blade over a few panel lines to get them to settle (this was after trying Tamiya Strong and Ammo by Mig Decal Fix solutions).
In conclusion, this is really a fantastic kit, and I highly recommend it to experienced modelers wanting to add an F4F-4 Wildcat to their collection. The detail is incredible, and the Expert Set provides all that you need to produce a great looking plane out of the box. My thanks to the folks at Arma Hobby for providing this kit to the IPMS USA for review, and to Phil Peterson for allowing me to perform this evaluation!

Reviewer Bio
Scott Hollingshead

Scott retired from the commercial nuclear industry with over thirty years of experience in Maintenance, Engineering, and Training. Prior to that he served on two aircraft carriers during his time in the U.S. Navy. He has been building models for over 50 years with his first kit being purchased with money from his grandparents for his sixth birthday. With a stash that consists of more aircraft than anything else, Scott still enjoys building a little bit of everything (including but not limited to tanks, cars, show cars, military vehicles (aside from tanks), ships, figures, real space, and some science fiction), which keeps his stash growing. Scott and his wife Fern reside in southwest lower Michigan, not far from South Bend, Indiana, and have three adult children and currently three grandchildren as well as a small dog and a large cat.
Comments
Add new comment
This site is protected by reCAPTCHA and the Google Privacy Policy and Terms of Service apply.
Similar Reviews