
F-5E Canopy Mask
One of the most tedious, but necessary tasks to aircraft modelers is masking canopies for painting. This is further complicated with modern aircraft, as many have an additional light yellow or gray rubber seal around the canopy glass. Trying to cut strips of tape, parafilm, or foil is tedious and time consuming to line everything up just right.
Eduard has come to the rescue for the past several years with sets of canopy masks made of Kabuki tape that is thin, flexible, and very easy to apply. Tamiya tape is the same material. Keeping up with the latest releases, Eduard put out a set for the new AFV Club 1/48 F-5E. This set would also work for the recent F-5N release as well.
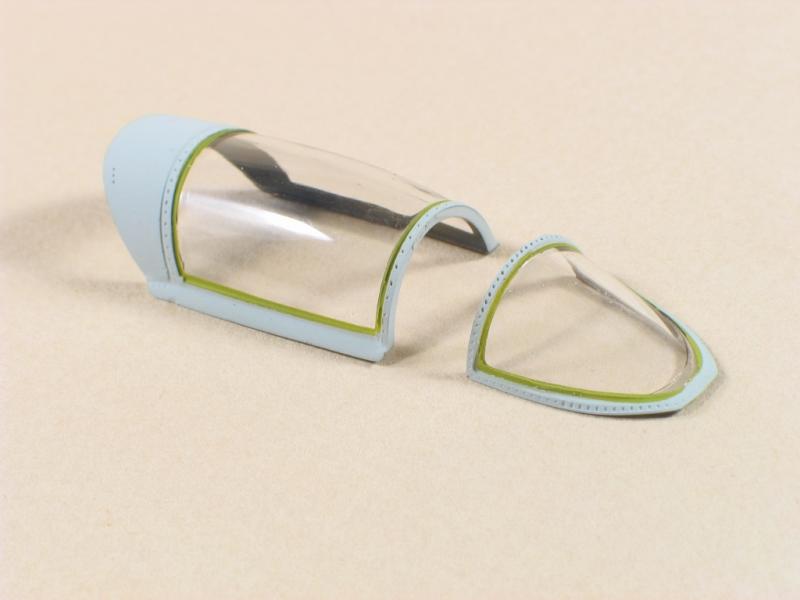
To prep the canopy, I removed it from the sprue, polished it a bit, and gave it a dip in Future (now Johnson’s Pledge with “future shine”).First step is to pay close attention to the instructions, and orient the mask in front of you the same as the instructions. Reason for this is that there appears to be two sets of masks, however one is slightly smaller than the other. We start with the smaller one first, applying it on the inside of the line where the rubber seal would be on the canopy. The mask fits perfectly, and even overlaps a bit at the top. Eduard recommends using liquid mask to fill in the area not covered by the Eduard mask; however I just used a few pieces of Tamiya Tape.
With the canopy masked, I first sprayed a dark gray (Floquil weathered black in my case). This color would be seen through the canopy into the interior. If you do not do this step, the color seen will be the light yellow color used for the rubber seal. After spraying the dark gray, I then used Testors Zinc Chromate Yellow (in the small square bottle) to do the yellow rubber.
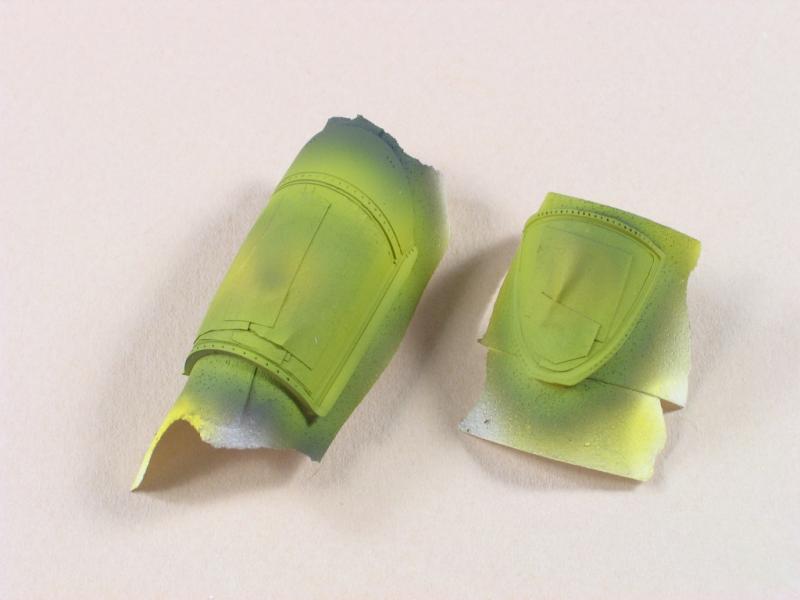
Once dry, I removed the masks. If you are careful, you can at least get one more use out of them, just return the used mask to the mask sheet. Now we move on to the second set of masks, applying these on the inside of the frame line, but covering the previously painted yellow rubber. On my sample, these didn’t fit exactly right (possible operator error), so some small strips of Tamiya tape covered the exposed areas. I then sprayed the exterior camouflage color which in my case, Model Master FS36495 for a VMFT-401 adversary bird.
Normally, I paint and weather the canopy the same time as the rest of the airframe. This time I painted the canopy of an un-started kit for the sake of this review. So, while I still had the masks on, I applied a coat of Future, and then later sprayed Testors Dullcote as per my usual finishing steps. This ensured that the paint hue on the canopy would match the rest of the model when I paint it.
Once everything was dry, I pulled off the masks and admired the perfectly painted canopy.
Masks are also provided for the landing gear wheels. For these, spray the landing gear color, and then mask the hubs using the Eduard mask, and then spray the tire color.
After building several models using Eduard masks, they are almost a necessity for me. They save a huge amount of time, and turn something that would be tedious, such as this double masking for canopy seals, into a quick painless process. Now one of the activities that I enjoy least while building a model is done and the canopy is ready to be installed. Highly recommended! Thanks to Eduard and IPMS USA for the sample.


Comments
Add new comment
This site is protected by reCAPTCHA and the Google Privacy Policy and Terms of Service apply.
Similar Reviews