
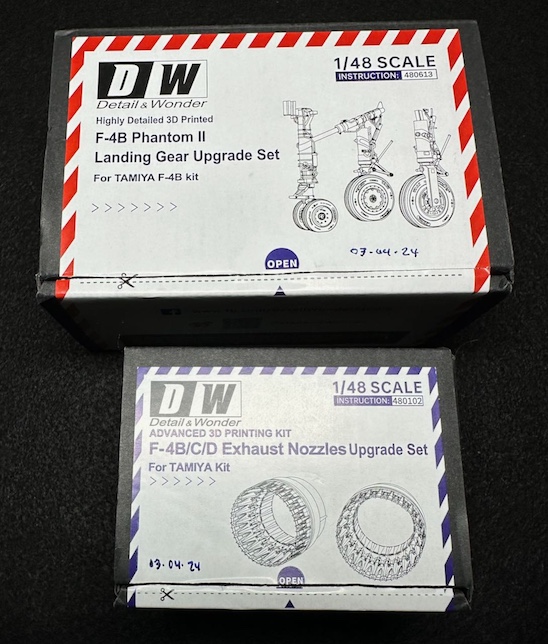
F-4B Phantom II Landing Gear Upgrade Set and F-4B/C/D Exhaust Nozzles Upgrade Set
3D basics: I really fell down the rabbit hole in this respect and very quickly found a whole bunch of information about the ‘art’ of 3D printing and other basics. While I can’t say I’ve mastered anything, I suggest that you consider these URLs as a jumping off point: Tom's 3D for basic information and 3D Printer Anatomy: 50 parts in 5 minutes (Basics).
Reviewer's Observations
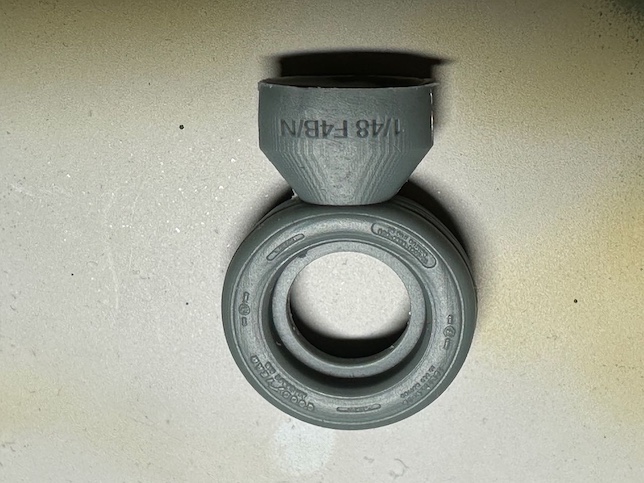
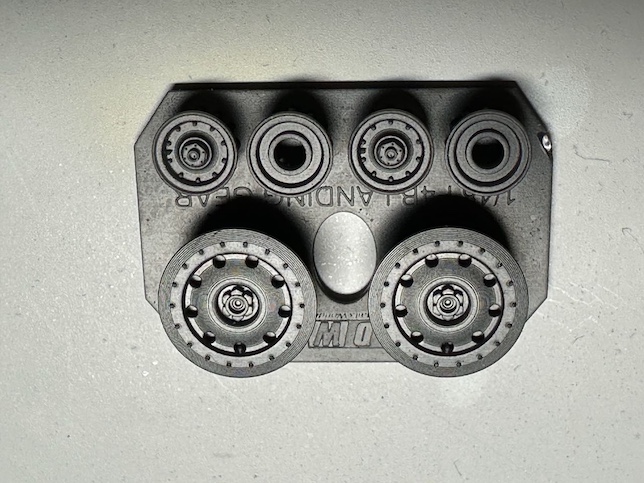
It should be noted that these two aftermarket sets are intended for the Tamiya F-4B kit (#7600). This is important as the locating holes are intended for this Tamiya kit and in the case of the exhaust nozzle upgrade set, the DW set is potentially intended for additional ‘C’ or ‘D’ versions as well. The great advantage is that this upgrade nozzle replaces the seven part one in the Tamiya box.
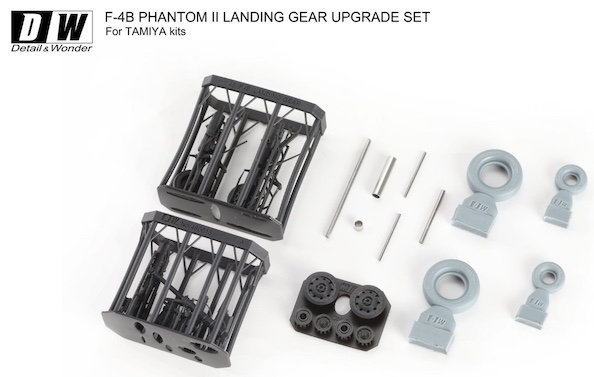
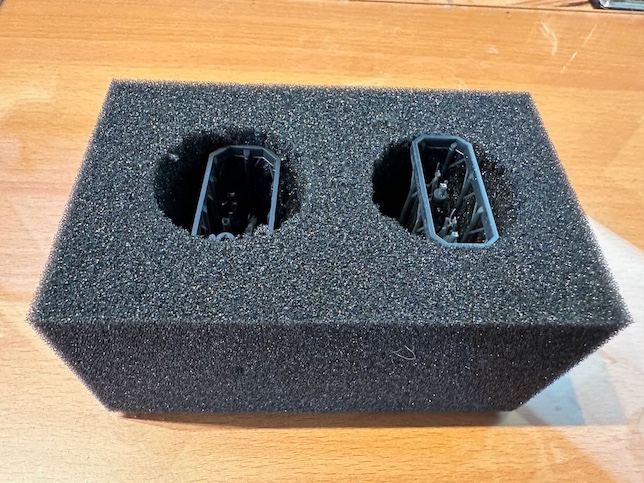
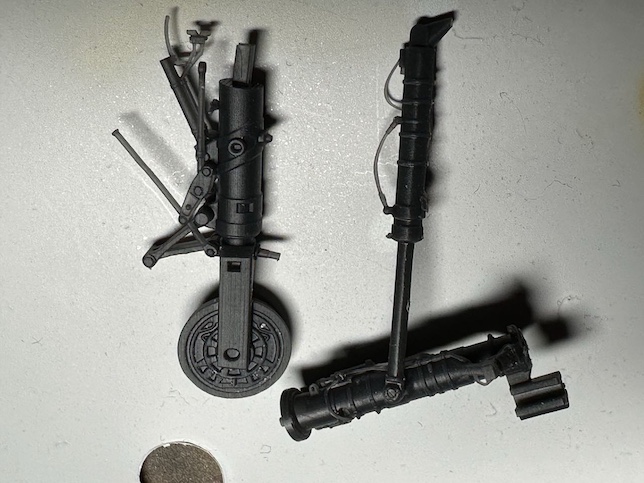
Upon initial opening these two boxes appear small, however that’s where I misjudged both upgrade sets. If you’re new to the 3D world you are in for a treat. The box itself packaged very securely with the 3D parts containing the wheels, tires, and metal strut parts in separate small zip lock bags. The metal strut pieces are not intended to be glued allowing for the nose gear to be individually rotated and positioned as you choose.
To begin, the instructions are a very thorough and detailed four-page description of the landing gear upgrade set. There isn’t any detailed information for the nozzle set as it’s not required (as there are only the two nozzles in the box and no detailed instructions are necessary).
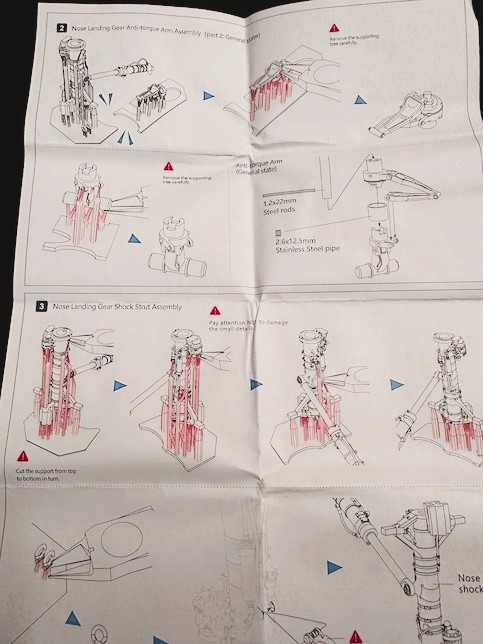
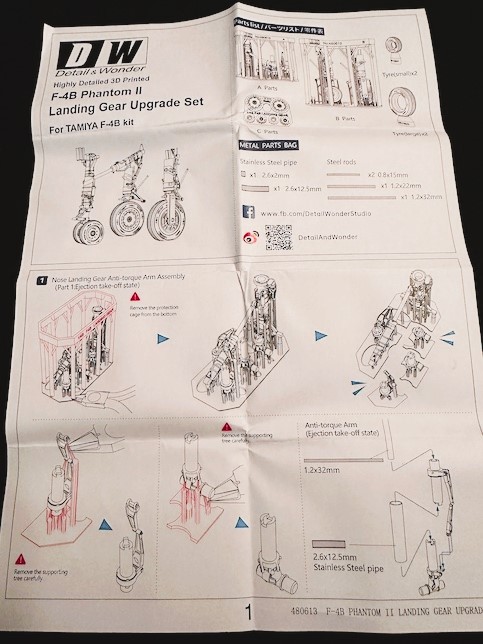
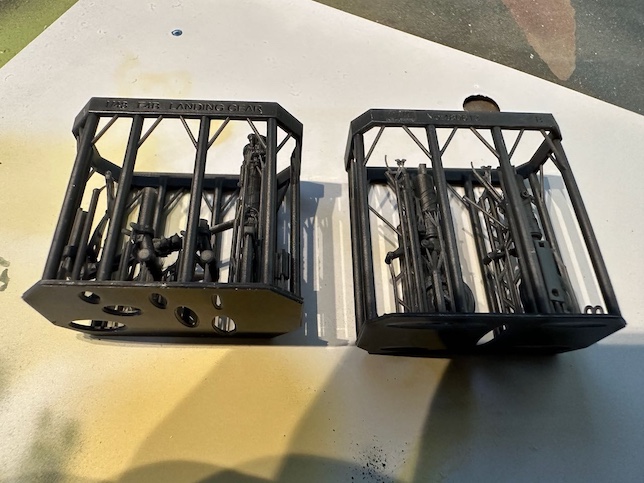
The instructions are some of the best-laid out ones I’ve ever witnessed using three colors to visually work your way through the full assembly process. These guide you through how to remove the outer 3D frame and exactly where to clip the ejection parts. These 3D parts are jewel like and very accurate. As I hope you can see from my amateurish photos, they are ‘printed’ in a black color. Throughout this project, I used Instant-Cure+ Gap Filling Medium cyanoacrylate glue (#BSI-107) and tried several modelling glues and found they would not adhere to the resin (or plastic) from the 3D printed materials.
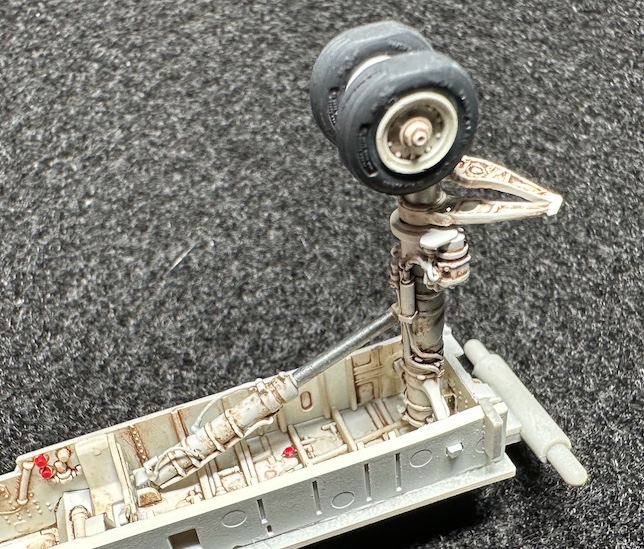
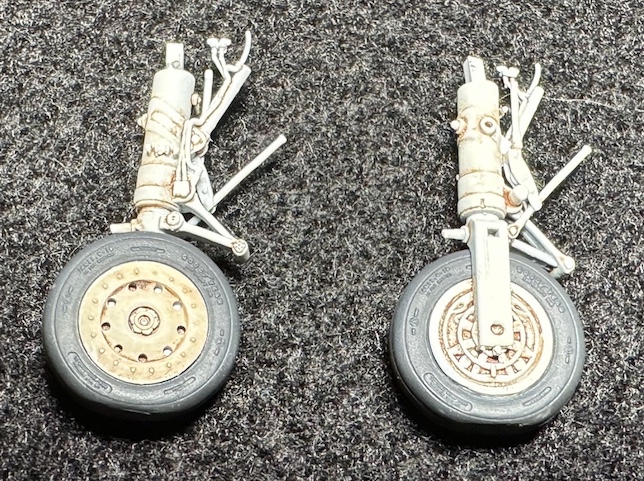
While I’ve previously built several of the Tamiya F-4B kits, I also constructed and painted the nose gear box to check the fit for these 3D parts. They fit and replaced the kit parts perfectly. You may also notice that the 3D printing includes both the nose tire markings and even the small hydraulic lines around the sleeve for the strut and each wheel is shown in the depressed or flattened condition. In the engine exhausts, you (hopefully) notice the incredible details shown both on the outside and inside of both exhaust nozzles.
Initially you are confronted with two options: either (1) the ‘ejection take-off state’, or (2) the ‘general state’.I’ve searched several older F-4 images and believe either the longer or fixed nose gear strut is often seen. Step #1 and step #2 both illustrate where the various pieces of steel rod and stainless-steel tubing is used; true to form all the necessary pieces are enclosed.
Painting Notes
I used the following paints and treatments. Overall gear colors: AK Real Color Insignia White FS 17875 (#RC 222); tires: Mission Models Worn Black Grey Tires Camo (#MMP-105); Alclad’s Aqua Gloss Clear (#ALC 600), over the base color, and 502 Abteilung Brown Wash #ABT080 to provide some depth and ‘worn look’ and finally a small amount of Flysea Liquid Chrome (#FS 743) paint for the nose shock absorber rod. I completed these accessories with a final finish using Testors Dullcoat Lacquer (#1160).
Summary Recommendation
As I embarked on this review, I had very little hands-on experience with the 3D industry. Even the step-by-step process of removing the supporting structure from around each piece or structural piece impressed me greatly. For those of you have been working with 3D printed objects, I suspect this will be nothing new. As for my images: I intend to provide those of ‘newbie’s’ a bit of close-up details such as the excellent 3-dimensional hydraulic lines, more details than the Tamiya kit itself and the wheel hub details. What I am seeing in the DW product is gem-like quality and attention to detail I’ve not encountered with any kit, which I am attempting to improve. An additional benefit with these 3D sets is that the often-tedious task of having to scrape, file or sand the seam lines is a thing of the past as they are no seams.
I unequivocally recommend these two aftermarket sets and thank the Warspite Model Company for the opportunity to review them.

Comments
Add new comment
This site is protected by reCAPTCHA and the Google Privacy Policy and Terms of Service apply.
Similar Reviews