
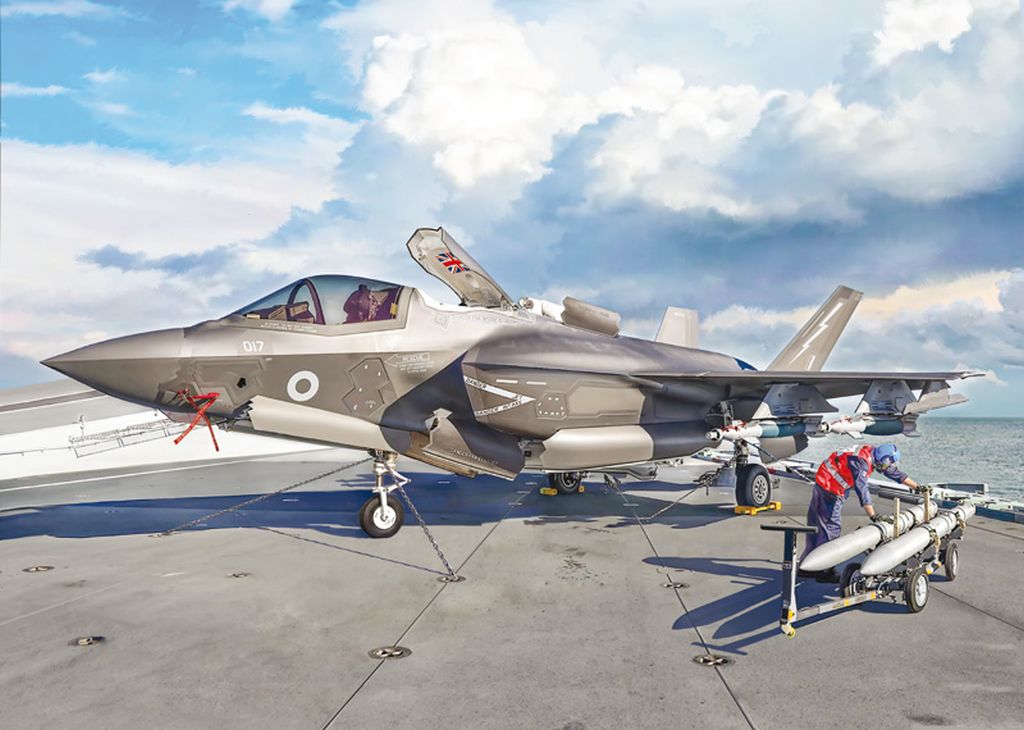
F-35 B Lightning II
Italeri has released a brand new mold F-35B, the STOVL (short-take-off and vertical landing) version of the F-35 family currently in use by the Italian Navy, Royal Navy and US Marine Corps.
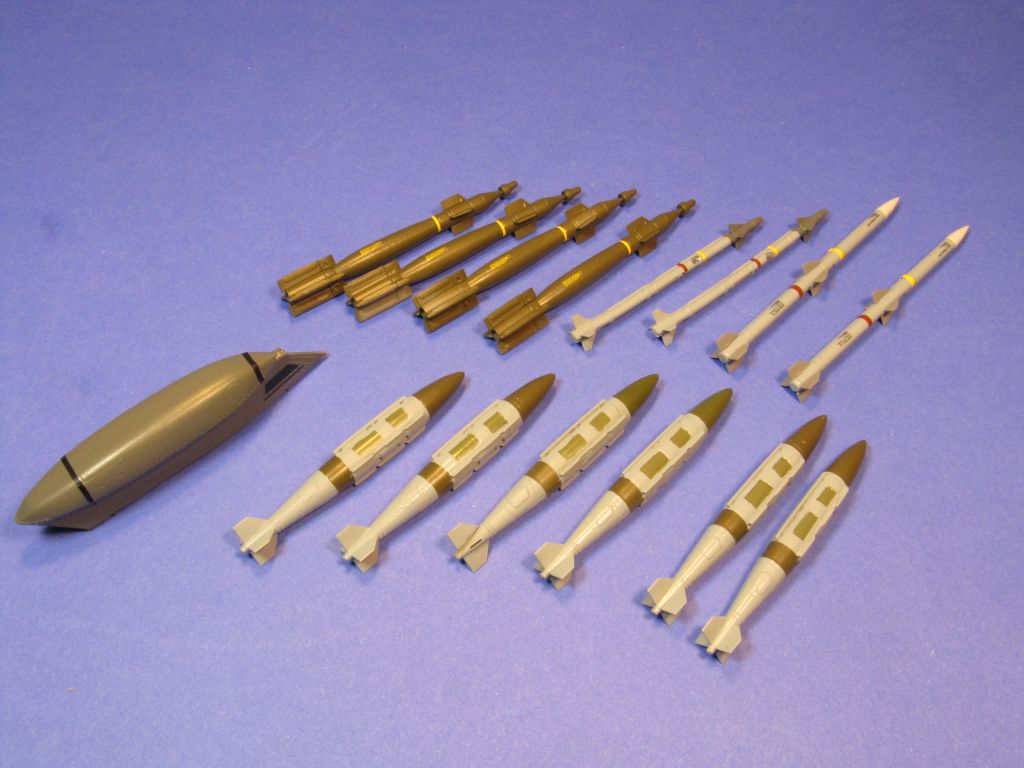
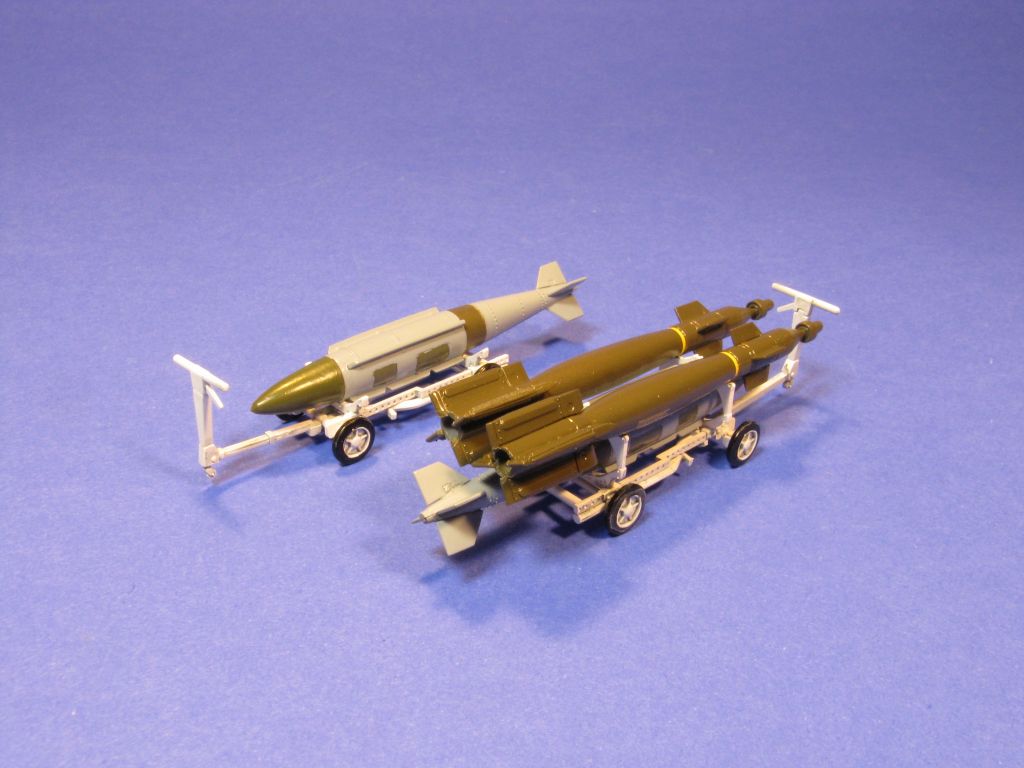
Current military planning assumes that in any conflict, stealth capabilities are needed during the first few days of combat which will see action against enemy radars and later on aircrafts can trade-off “stealthness” for payload by using external pylons. When the F-35B is carrying a full payload -ie with external pylons-, it is known as “Beast” mode and Italeri provides you everything you need to have your model in “Beast” mode, even adding a couple of trolleys to show the extra ordnance in a mini-diorama or vignette, but no figures are included.
Upon opening the box, you find 11 sprues (two clear, one of them with a small hint of tint for the canopy), two instruction books (one for assembly, one for markings), a small photoetch fret and an extensive high-quality decal sheet for 5 markings including US Marine Corps, Royal Navy, and Italian Navy.
This kit is listed as “Skill 5” and with a total of over 250 parts and 36 building steps, I would consider it an intricate kit but not a difficult one to assemble given the pretty good fit of the parts.
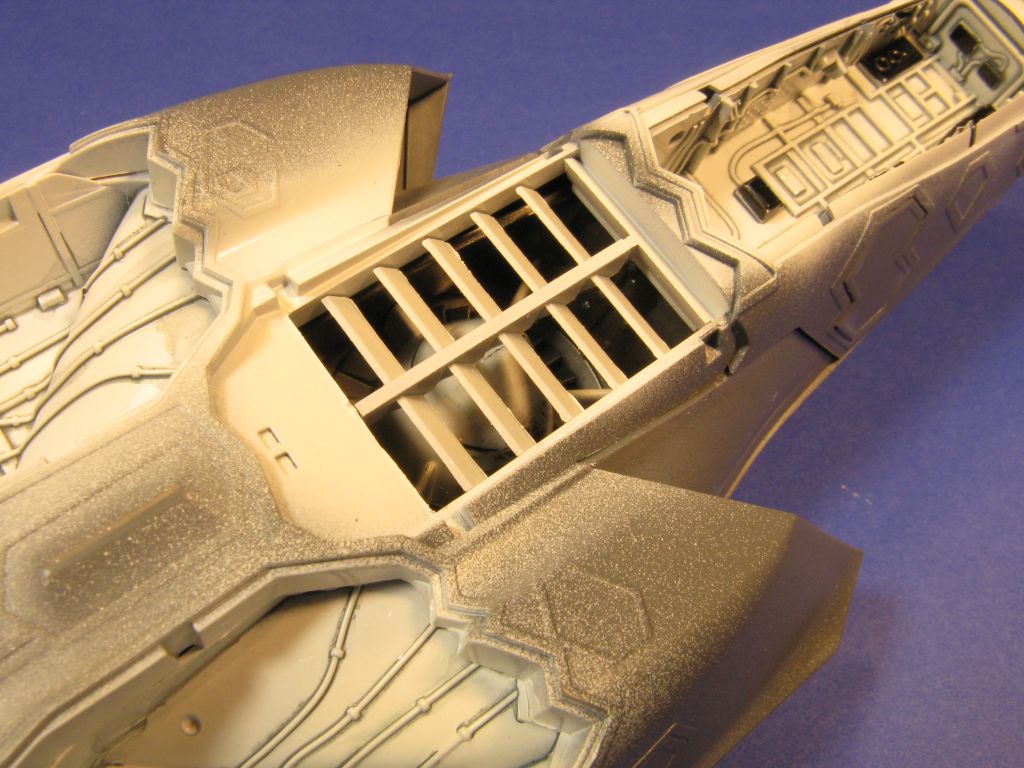
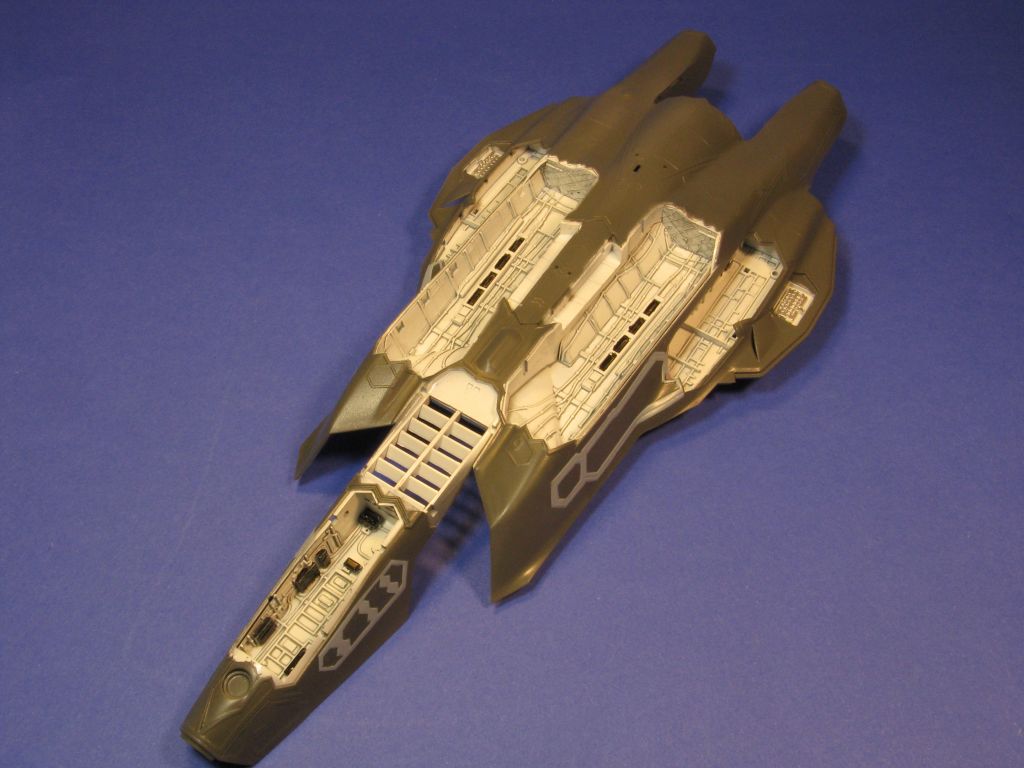
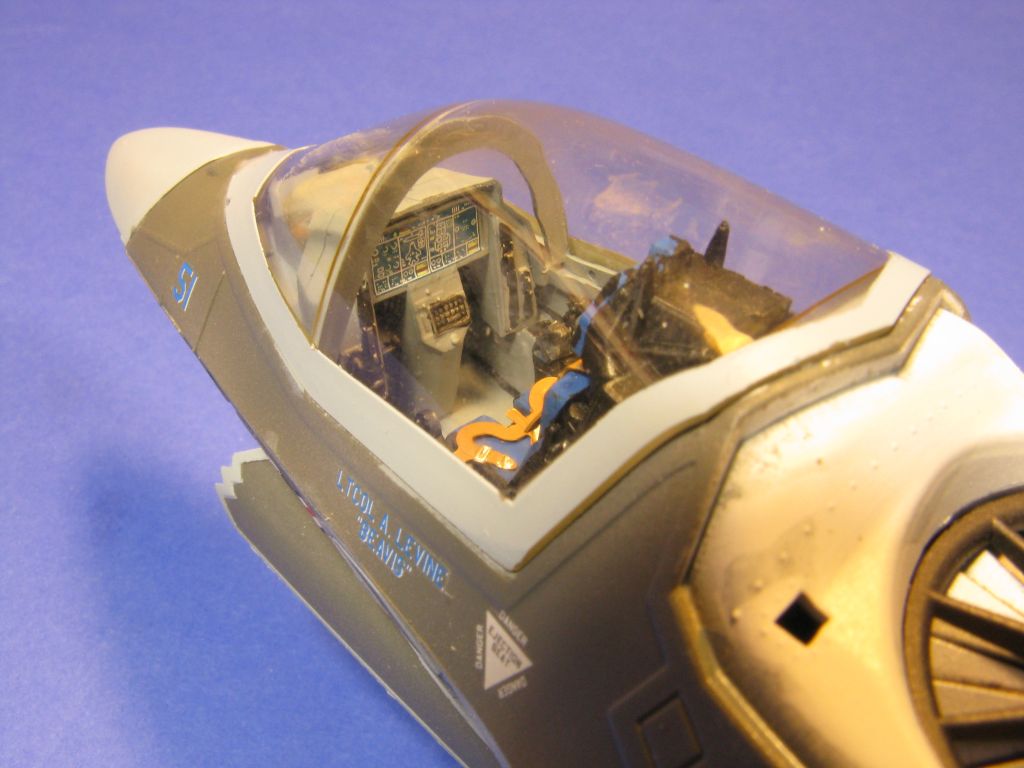
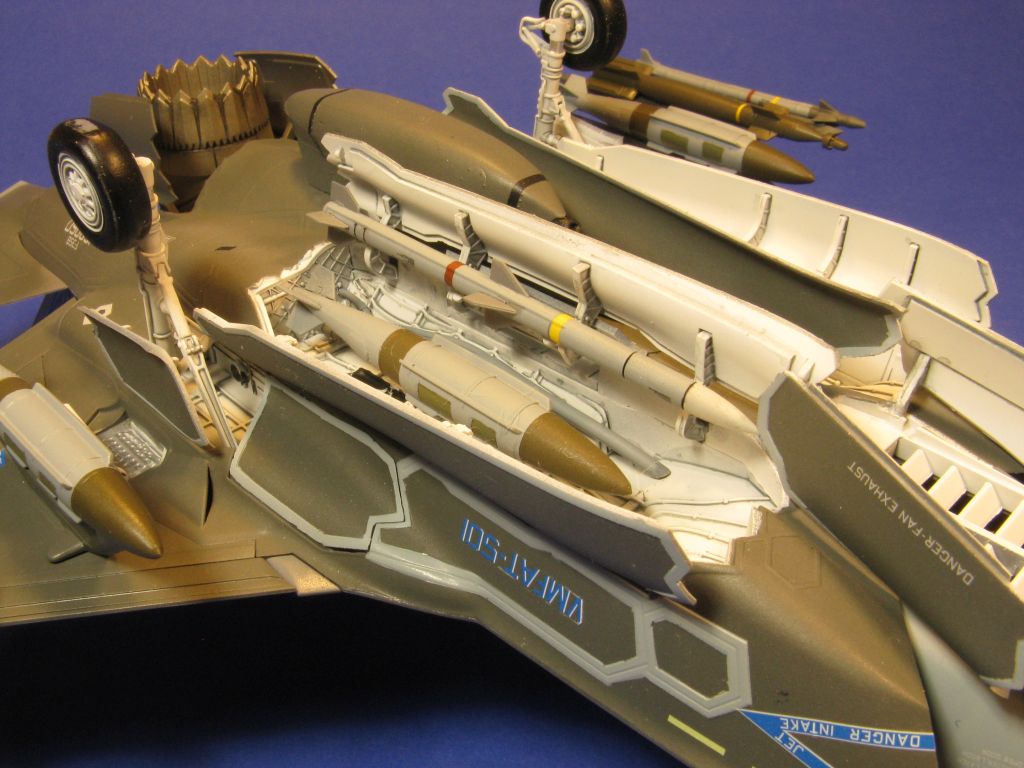
Construction starts with the interior components which consists of cockpit, full air-ducts, upper fuselage air intake, vertical lift fan plus casing, main engine -which includes front compressor and exhaust-, two weapon bays and two landing gear bays, all of which are small kits on their own. They deserve careful painting and weathering to highlight all the detail Italeri packed on them.
The only area that could have had more detail is the cockpit. By no means it is a bad cockpit and under the canopy it will look good but I’m sure at some point there will be aftermarket sets for it.
As I was working on the interior subassemblies, I started planning the rest of the assembly and I was starting to consider that I might have to build and paint the upper and lower fuselage parts before assembling them. That is due to the relatively complex paint job required as no masks, nor decals are provided for the RAM (Radar Absorbing Mask) tape areas.
Hence, after assembling, painting, and weathering a total of 9 interior sub-assemblies, I presented them all to the upper and lower fuselage parts wondering how it would all come together. I was gladly surprised to find out that everything fits perfectly and requires no putty anywhere.
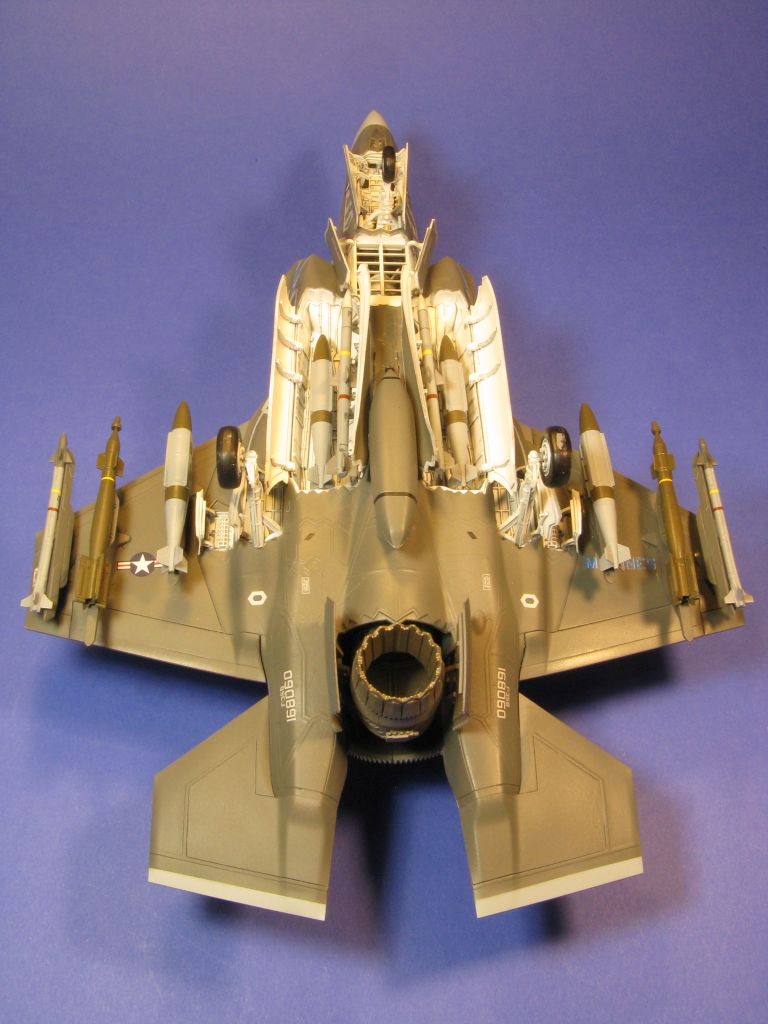
As the fit was so good, I was set on my plan of build and paint the upper/lower parts of the fuselage. While I was at it, I decided as well to treat the twin rudders as subassemblies to assemble, paint and decal them before gluing them to the upper fuselage. As mentioned before, there are no masks nor decals for the RAM tape, so you must painstakingly mask each section that would then be painted to reproduce the RAM tape finish. The most obvious area with RAM tape is the fuselage top but you have to consider that also the edge of each cover -and there are 16 of them!- also has RAM tape, so doing all the masking and painting took around 20 hours.
When the top and bottom fuselage were painted (including the RAM tape sections) it was time to start bringing it all together. Once again, fit is so good and positive that it made possible to align all the subassemblies and close the fuselage in a way that no putty was needed anywhere.
It was time I started focusing on all the weaponry. You are provided with 4 air-to-air missiles and 10 laser-guided bombs plus a cannon pod. As I wanted to display the model in the Beast mode, I spent plenty of time assembling, painting, and decaling all the weaponry. The level of detail is pretty good on the ordinance, so take your time and treat them as small kits on their own. Given the two ordinance trolleys, not all the weapons will be displayed on the model and a few bombs needed to be slightly modified to be displayed in the trolleys by filling in the mounting holes that normally would be used for mounting on a pylon. In hindsight, that was the only place where I used putty in this kit.
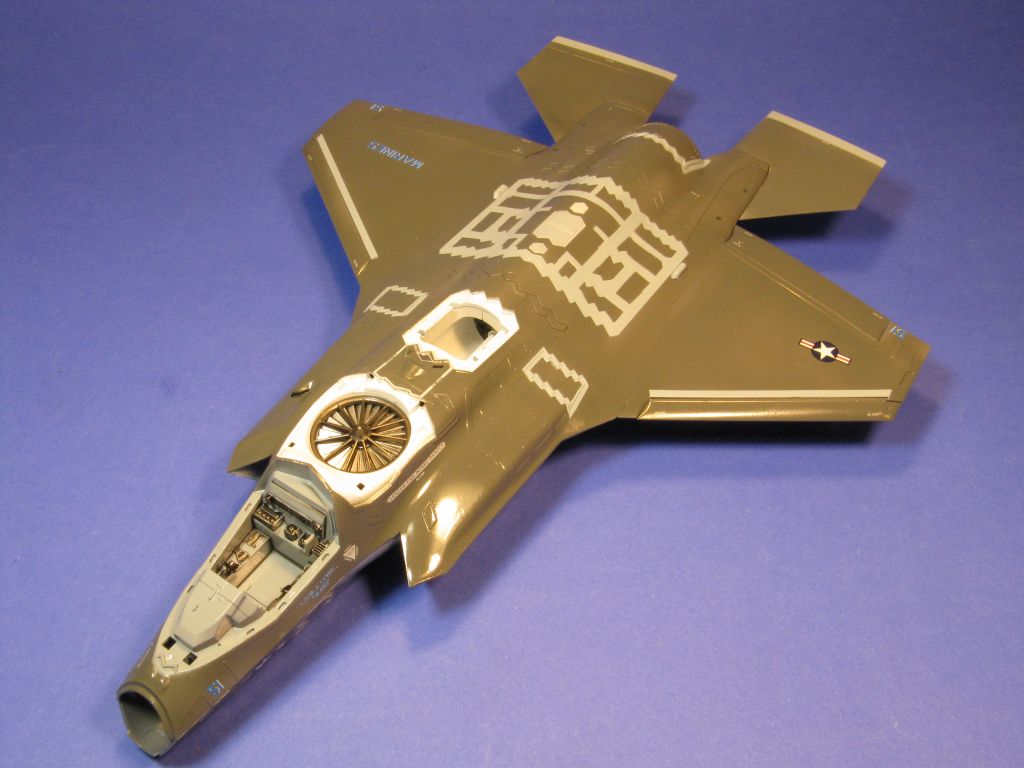
At this point I had basically an almost fully assembled and painted model (minus weapons) so I could start working on the decals. I have very little to say about the decals other than they behaved very nice. Using standard Micro-Set/Micro-Sol they conformed to the surface detail without any problem.
After the decals it was time to assemble the landing gear, weaponry, and all covers. I was a bit worried as to how to bring it all together, but I simply started by the center of the fuselage (i.e., the cannon) and started moving outwards, by doing covers, landing gear, pylons, weapons, etc., until I had all the parts glued in place.
I did notice that the lower fuselage lift-fan exhaust covers and the bomb bay covers might actually interfere with each other if they ever cycle from open to close. They don’t interfere with each other in the model when fully open or fully closed but the size of them is such that I am not sure they would open/close without bumping into each other in the real airplane. Is that an issue with the model? Are the size of the covers wrong? Do these covers have some special way to cycle in a way they don’t interfere with each other in the real world and the model had the size of the covers right? I truly don’t know.
Finishing this kit took me about 75 hrs. over 3 months, with about 20 hrs. devoted to the intricate masking and painting of the RAM. Given that it is a review kit and have a deadline, I had to force myself to keep working on it once or twice (or more) even when I just wanted to take a break. And truly, I did take a break and assembled another low-part model in parallel with the F-35B as to give me some breaks from it. Let me be clear, I never felt like boxing the model and forget about it. I just felt the need to pace myself.
I also probably challenged myself by wanting to build the model with all covers open and in the Beast mode. If you leave out the pylons and extra weapons and button up most of the covers, the assembly goes much faster. By the way: I did some fit tests and all covers fit perfectly in the closed position if you want to go that route. Great engineering Italeri!
In summary: This kit has superb fit and great surface detail. It is quite intricate on its assembly and not difficult to assemble. It just takes time. Probably, the largest drawback is the lack of decals/masks for the RAM tape. Very likely there will be aftermarket sets soon. And if not, you only need to take your time and you will be fine.
Highly recommended to intermediate to advanced modelers.
I would like to thank Italeri, Model Rectifier Corporation and IPMS/USA for the review sample.

Box Art

Cockpit assembly
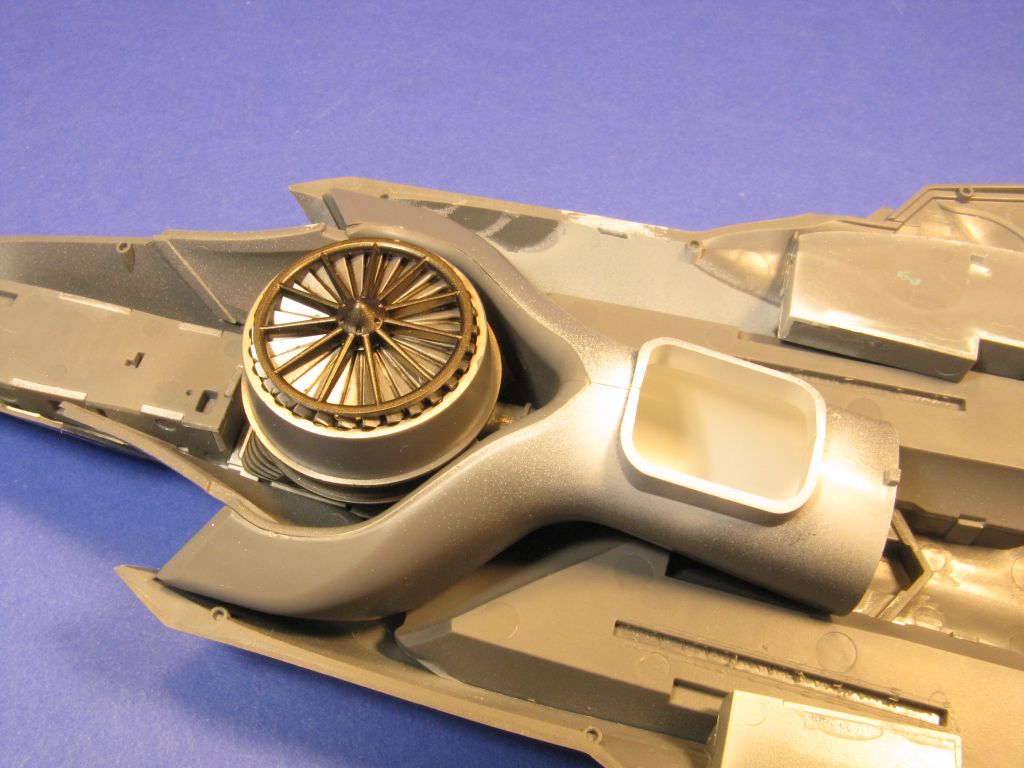
Vertical lift fan

Assembling top fuselage
Fuselage underside
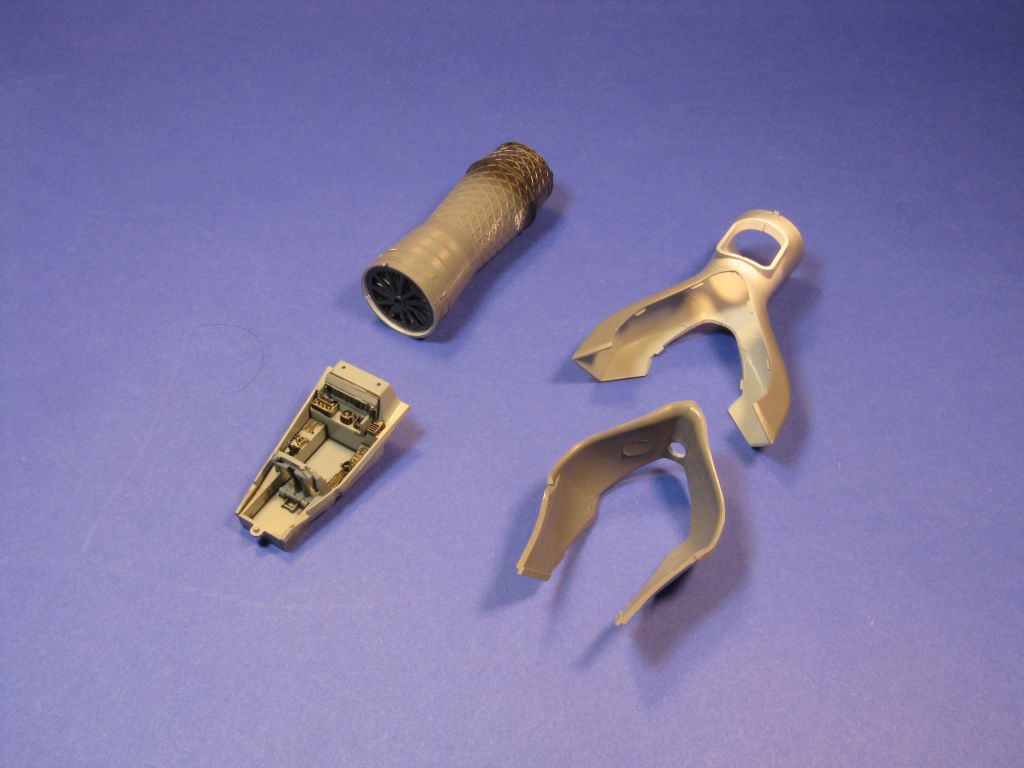
Engine assembly
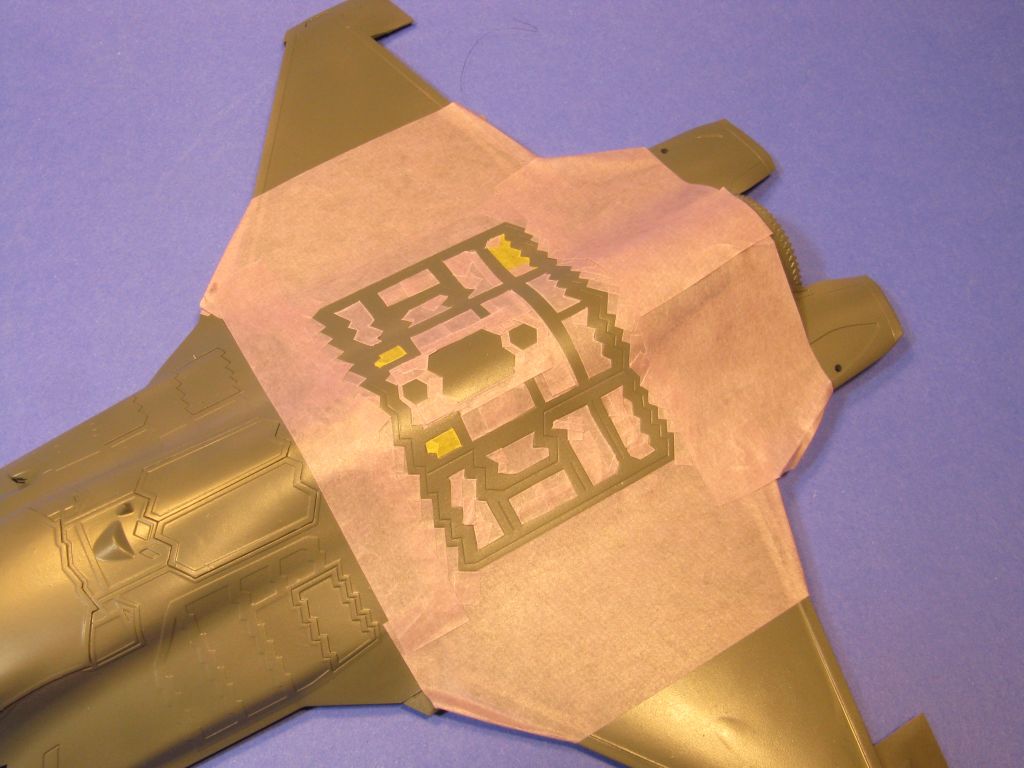
RAM tape
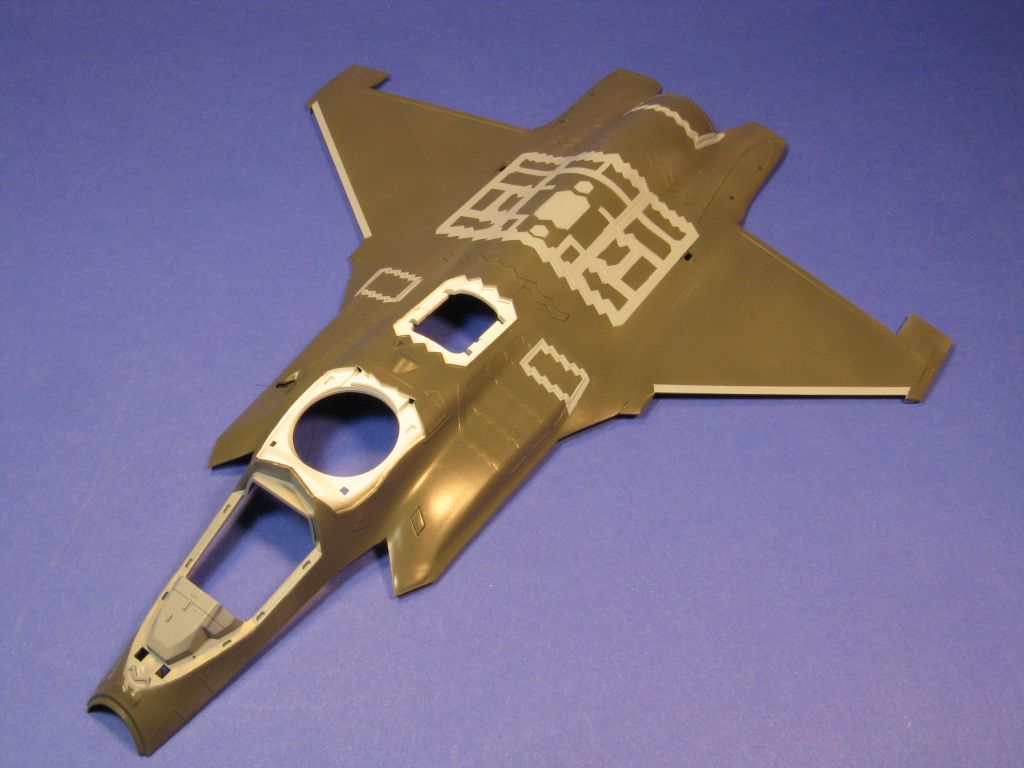
Painting fuselage top
Painting fuselage bottom

Lift engine detail
Fuselage top
Weapons

Completed top view
Cockpit detail

Cockpit & fan detail
Bomb bay detail
Completed underside

Completed left side
Comments
F-35 Review
It’s spelled “O R D N A N C E”!
Add new comment
This site is protected by reCAPTCHA and the Google Privacy Policy and Terms of Service apply.
Similar Reviews