
F-22A Raptor - Part 2
Part II - The Build
First, for any of you who may have been waiting for part two of this review to help make a decision on whether to buy the Hasegawa kit, or one offered by another manufacturer, I apologize for the lengthy build period on this one. But, for those who have been waiting, read no further. BUY THIS KIT! If it is sitting on the shelf down at your favorite hobby shop, GO BUY IT NOW! Don’t wait to buy it on the internet, go pay the folks at your local hobby shop their more than reasonable mark-up to have this kit sitting there waiting for you, because YES, IT IS THAT GOOD!
Now, to be fair to the other manufacturers, I haven’t got first hand visual on the Academy kit, but from what I’ve seen in publication reviews, there is no real comparison. Even if you get the aftermarket surface detailing kit, unless you do those sorts of things on a professional basis, the result will be far less convincing than the molded in detail on this kit. I thought it to be too heavy in my initial look at the parts, but Hasegawa has gotten this one right.
Did I say THIS IS A NICE KIT!!!!!?????
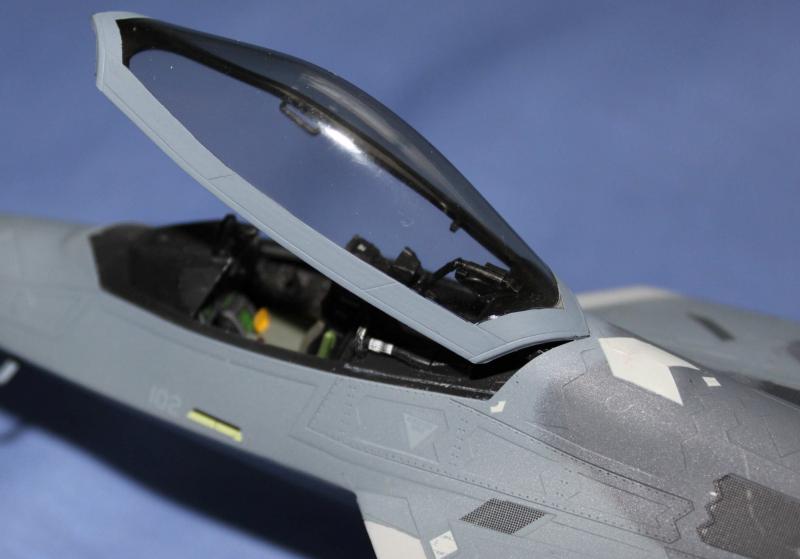
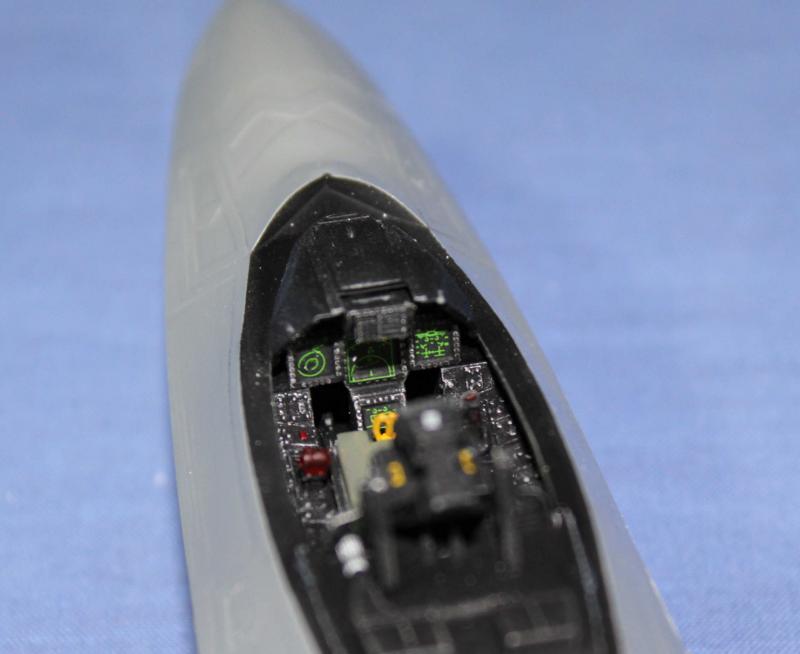
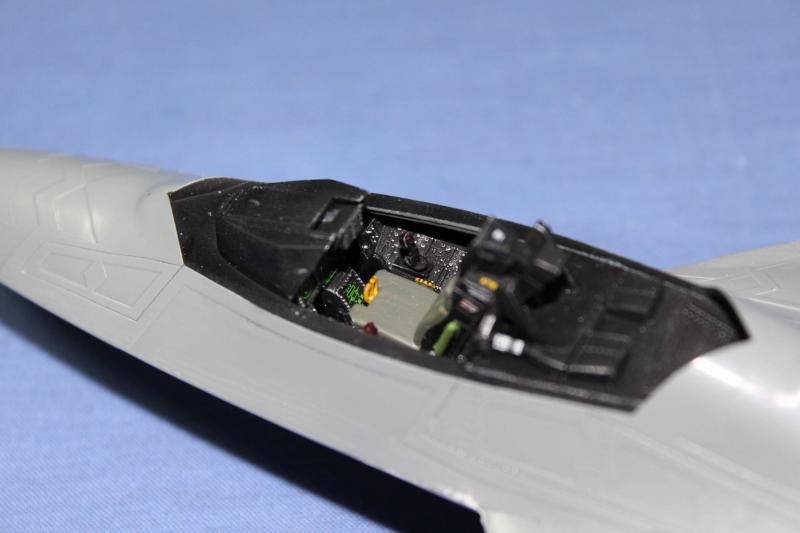
Okay, enough with the exclamations, and on with my chronology of the build. I began with the cockpit, of course, and was very happy with the basic kit detailing. The CRT screen decals are the perfect touch for this scale. I was not able to find any photo references of a Raptor office on the net, but frankly I didn’t expect to, so I can’t vouch for the accuracy, and my guess is neither could Hasegawa. After application of the specified colors, and a light drybrushing of aluminum to bring out the raised detailing, the result is very convincing without devoting two or three evenings to an aftermarket resin and brass set. The supplied decals for the rocket assisted office chair are also a nice touch.
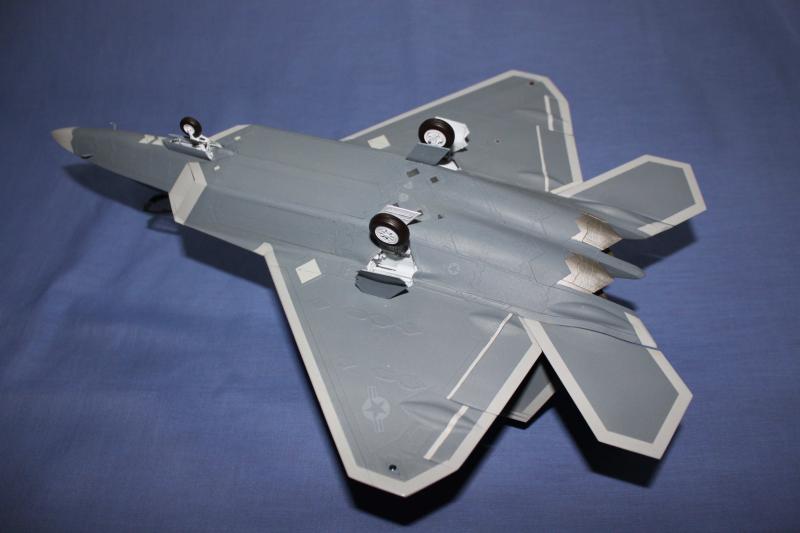
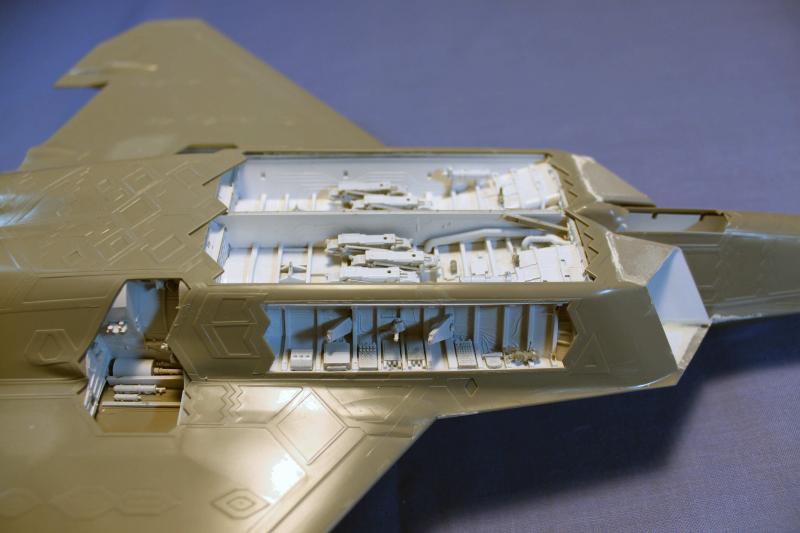
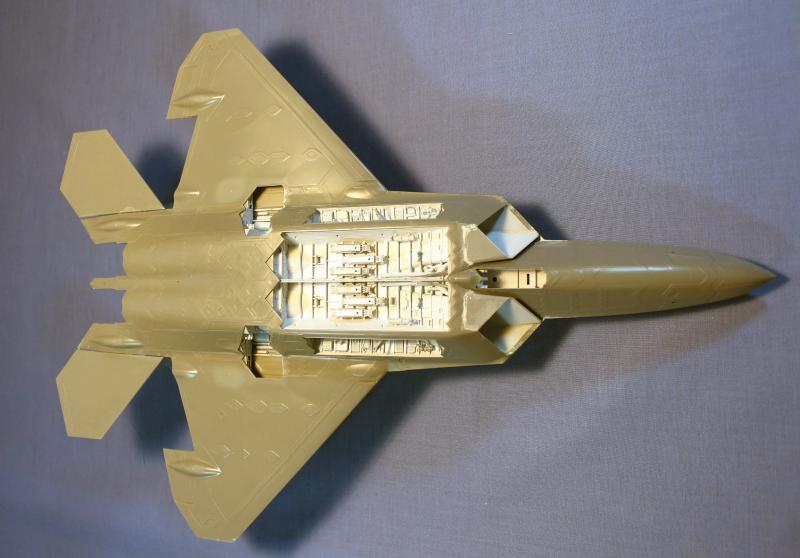
The next few evenings were spent assembling and painting the inlet trunks (a major leap in engineering design, by the way), landing gear bays, and the well-detailed weapons bays. There are a lot of parts involved in these things, and if you really want to go all out and open the bay doors, and display the camel prods and dung spreaders, you will be very satisfied with the results. I know, I almost got there (more comment on this later). After several nights of (I thought) carefully following the step-by-step assembly of some twenty or thirty (seemed like many more) parts, I set them aside to dry after a last touch-up coat of semi-gloss white.
I couldn’t wait to assemble the main fuselage, so I decided to wait on the detail painting of the bays, and had at it. There are several inner bracing struts to install for strengthening the fuselage assembly. Pay close attention here, as the alignment is a bit tricky. Also, there is no need to paint these things white, as I did. There are alignment holes in the upper and lower fuselage, and the purpose of these hidden parts is to give some strength and rigidity to the fuselage assembly. It works! I managed to accidently launch the completed fuselage off the side of my hobby desk scrambling for a phone call. After explaining to my caller why I answered “Oh S&*T”, instead of “Hello”, I inspected for damage. Not even a split seam! Other manufacturers take note of this excellent engineering feature.
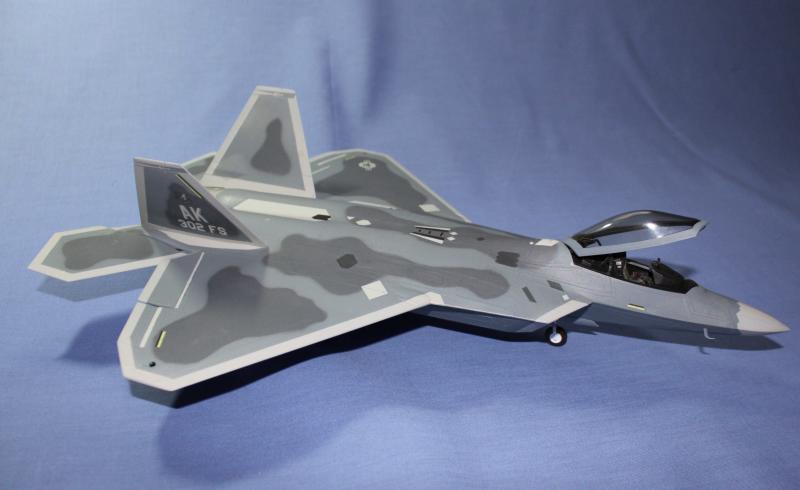
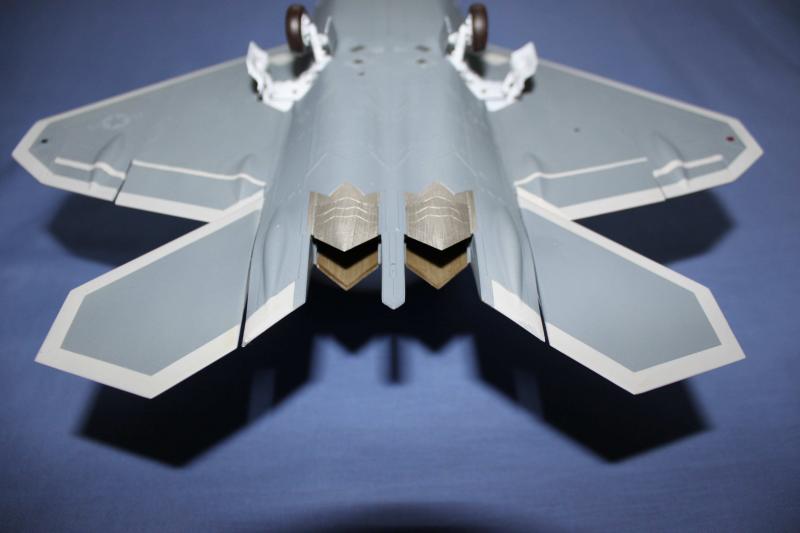
Okay, now for my admittance to occasional bouts of dyslexic dumba$$ syndrome. I discovered I had installed the weapons bays upside down and bass backwards. All that beautiful detailing would require a double jointed gymnastic move to see. After I got done flogging myself, I decided I would just pose the thing closed up and ready to strike fear in the hearts of skyward gazing polar bears and caribou (AK markings discussed below).
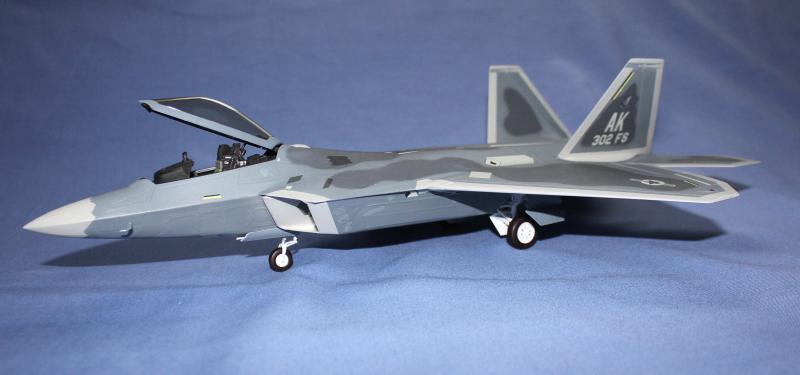
A word of advice … don’t install the horizontal or vertical stabilizers until painted and you’re doing final assembly and detailing. It’s not that you can’t paint them convincingly when installed, but my experienced advice on this matter should save you several masking and painting steps and some really awkward cutting angles. The fit of the verticals is good enough to avoid seam filling, and the horizontals literally plug-in to some neat little soft plastic washers that are installed in the fuselage assembly. Same technique is used for the main gear wheels. Slick! Other manufacturers should take note of this neat little trick, too!
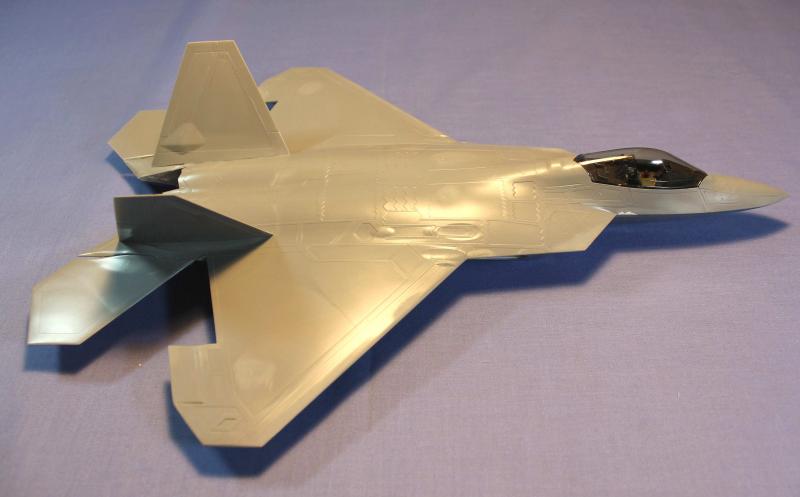
After priming and some self-inflicted join sanding and clean-up, I stopped the build. I was ready to paint, and I was, quite frankly intimidated. I needn’t have been, but I was. This is such an awesome kit of such an awesome aircraft, and I didn’t want to screw this up, as this paint job is unlike any other aircraft. Suddenly, I thought I might rather tackle that Saab splinter scheme …. So I researched. I tried to assess the kit’s mixing instructions for Gunze Aqueous Hobby paints. They have you apply some “super metallic” mixes to the base colors. I’ve never used these paints, and was in no mood to experiment. I re-read Jim Rotramel’s excellent ARC build article of the RoG 1/72 Raptor. His metallic overspray method seemed much easier, even if an extra painting step is involved. I looked at countless photos of Raptors online. What’s this?? There appears to be a couple of different variations of the camouflage paint applied to these things, and of course any factual tech data is probably impossible to come by. Okay, let’s just paint and see what happens.
I loosely followed Jim Rotramel’s painting steps from the ARC article. I used Testor’s Model Master FS 16220 – Gloss Gull Gray for the leading and trailing edges, intakes and radomes. Skip my advice on the stabilizers, and you’ll see what I mean about the masking issues at the base of the verticals! I also skipped painting and masking the leading edges of the flaps and ailerons at this step. Don’t do as I did. I have a pretty steady hand, but not steady enough for this. They’re not as wide as you think they are. Masking the radome is a challenge, following the sawtooth edges. Use a sharp blade and cheat a bit with the edge of a pencil lead to find the raised detail here, and you’ll do fine. The results will be worth it. There are some fine raised panel lines to guide you on the width of the leading and trailing edge masking. It was time-consuming, but not difficult. I recommend Tamiya masking tape for this project, as it lays down well, and conforms well to the odd curves and angles.
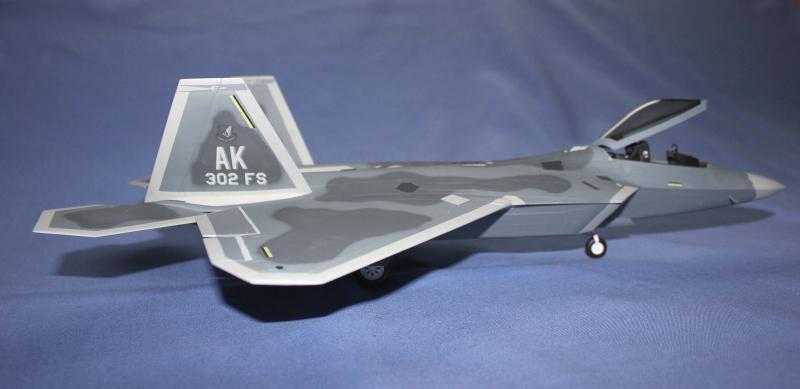
Next I tackled the main overall gray color. After much vacillating on which gray color looked “right”, I settled on Testor’s MM FS 36176, which is the darker bluish gray used on the newer Mod Eagle F-15 camouflage schemes. I thinned the flat paint well, and sprayed two light mist coats, and one slightly heavier coat to cover. So far, so good. As the paint cured, I spent an evening cutting some masks for the dark “blotch” areas from scale copies I made of the instruction sheets. A few nights later I taped down the copier masks, and shot the “blotch” areas with Model Master FS 36118 – Gunship Gray. I removed the masks and shot the edges of the “blotches” free-had to soften the mask lines. All looks good. I removed the tape from the leading and trailing edges and radome, and my heart sinks! The Raptor seems to have a bad case of the blues! It looked great until I exposed the leading/trailing edges. I feared the choice of FS 36176 for the main color was wrong, and had too much of a blue tint. I set the project aside for a few days to regain my composure.
After the shock subsided, I reviewed some on line photos of the darker of the two different paint schemes I’d been studying, and decided my choice wasn’t that far off. Maybe the flat coat would take care of the issue. I shot a couple of light coats of Future in preparation for decaling, and set the plane aside to cure.
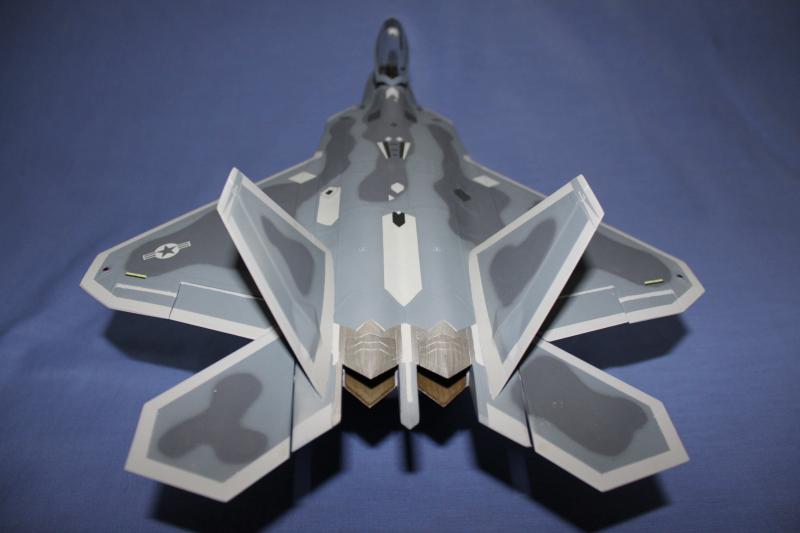
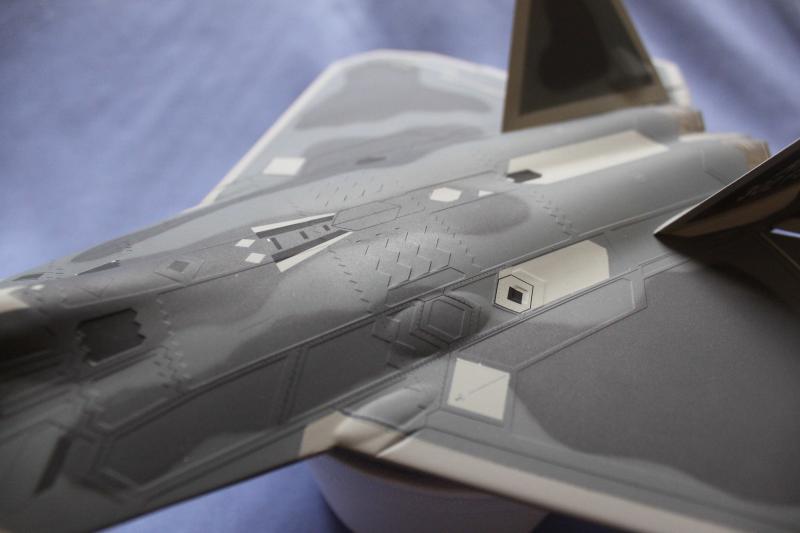
I spent a couple of more days researching unit marking choices. There are four choices in the kit for birds from Langley (2), Eilson, and Hollomon. I chose the AK markings, for no particular reason other than I had already built aircraft from both Langley and Hollomon. I could probably go on another page or so about the excellent decals in this kit. Beware. There are a lot of marking for this aircraft. Not all the decals are markings. Some are very convincing “screens” that go in the intakes and various other spots on both upper and lower fuselage surfaces. The formation lights have a realistic color to them. That dull yellow-green is hard to get right. Be sure to put the ones below the canopy below the fuselage half chine. I got mine placed incorrectly. Another light coat of Future to set things in place, and I pondered the final step in this painting challenge.
I read Jim Rotramel’s article one last time to be sure I got it right. I deviated just slightly, and used Testor’s Semi-Gloss Clear coat instead of either gloss or flat clear coats for this step to give myself one last chance to correct things if I needed to. I thinned the stuff by about half with Testor’s airbrush thinner, and added several drops of Testor’s “Buffing Aluminum Metalizer” to the mix. I made several passes on an index card to see what happened. The results seemed a bit too dull. More Aluminum to the mix. Another trial. It looked about right. Now for the moment of truth. I sprayed the mixture on the lower surface of a horizontal stabilizer, and let it set. It looked pretty good. I sprayed the rest of the airframe and gear doors and kept my fingers crossed. I set the kit aside and worked on the landing gear and exhausts to get ready for the final detailing assembly.
The next night I reviewed the results of the metallic sheen coating, and decided to proceed with the flat coat. I shot well thinned Testor’s Model Master Dullcoat in a couple of light misted coats, and wow, talk about dead flat results! The interesting thing is, if you look at the plane from an angle across from the light source, the metallic sheen is still there (just like Jim Rotramel said it would be!). It also toned down the blue tint of the FS36176. The article photos here don’t do it justice. You really have to see the effect in person. It’s … very interesting. If I were to do it again, I’d stick with a semi-gloss final coat that was more semi than gloss, or perhaps add a bit more aluminum to the previous step mixture. I think it would be a more convincing finish to that of the real aircraft.
I installed the gear and doors … lot’s of little actuator pieces here so pay attention. I installed the pitot’s and added the canopy as the final step. Glue the actuator arms (part # C-1) in place during the cockpit assembly. It’s difficult to fit them in place after the cockpit is installed in the fuselage. I used the smoke tinted glass, but most photos I saw were clear. I just thought it looked cool. Oops, I forgot the HUD glass. A quick slide through some clear part cement, set it in place, and after a few minutes a little dab of flat black, and there she sits.
So that’s it. Did I say THIS IS A NICE KIT!!?? Go buy one! You detail nuts will love the weapons bays. The ordinance is well done, too. Take advantage of avoiding my mis-steps here, and you’ll be rewarded with a very nice replica of the USAF’s current front-line badass bird. See one at an airshow near you soon. It’ll make you proud to be an American … or scare the hell out of you if you’re on the other side!
Thanks to Hasegawa, Hobbico and the boys at IPMS National for the review kit.

Comments
Add new comment
This site is protected by reCAPTCHA and the Google Privacy Policy and Terms of Service apply.
Similar Reviews