
F-16XL Experimental Fighter
NEWS FLASH!! If you have one in your stash, throw away that awful old resin 1/48 F-16XL conversion set! You need not wait until you achieve master modeler skills levels to finally attempt the advanced surgery necessary to produce an example of this rare aircraft from those hunks of resin. Skunkmodels Workshop has finally come to our rescue with an affordable, 1/48 scale, injection molded F-16XL.
Two F-16XL airframes were built by General Dynamics in their Fort Worth plant in the late seventies. One single-place and one two-seat example of this truly beautiful airframe were completed. They competed unsuccessfully against the F-15E Strike Eagle in the enhanced Tactical Fighter competition in the early 1980’s, and the two examples were then turned over to NASA for research.
After waiting for this subject in a 1/48 scale kit for many years, I ordered one for myself as soon as they were announced as available on LuckyModel.com. I took a look at the numerous sprues as soon as the package arrived, and tucked away the box into my “queue” area after spending some time plotting out the minor surgery that would be necessary to do the two-seat version I had in mind. A few weeks later, the same kit arrived in the IPMS review coffers. I had a long-standing request into the staff for this kit if it ever became available, so I got the call. Double luck! Having already familiarized myself with the kit, I jumped right into the build.
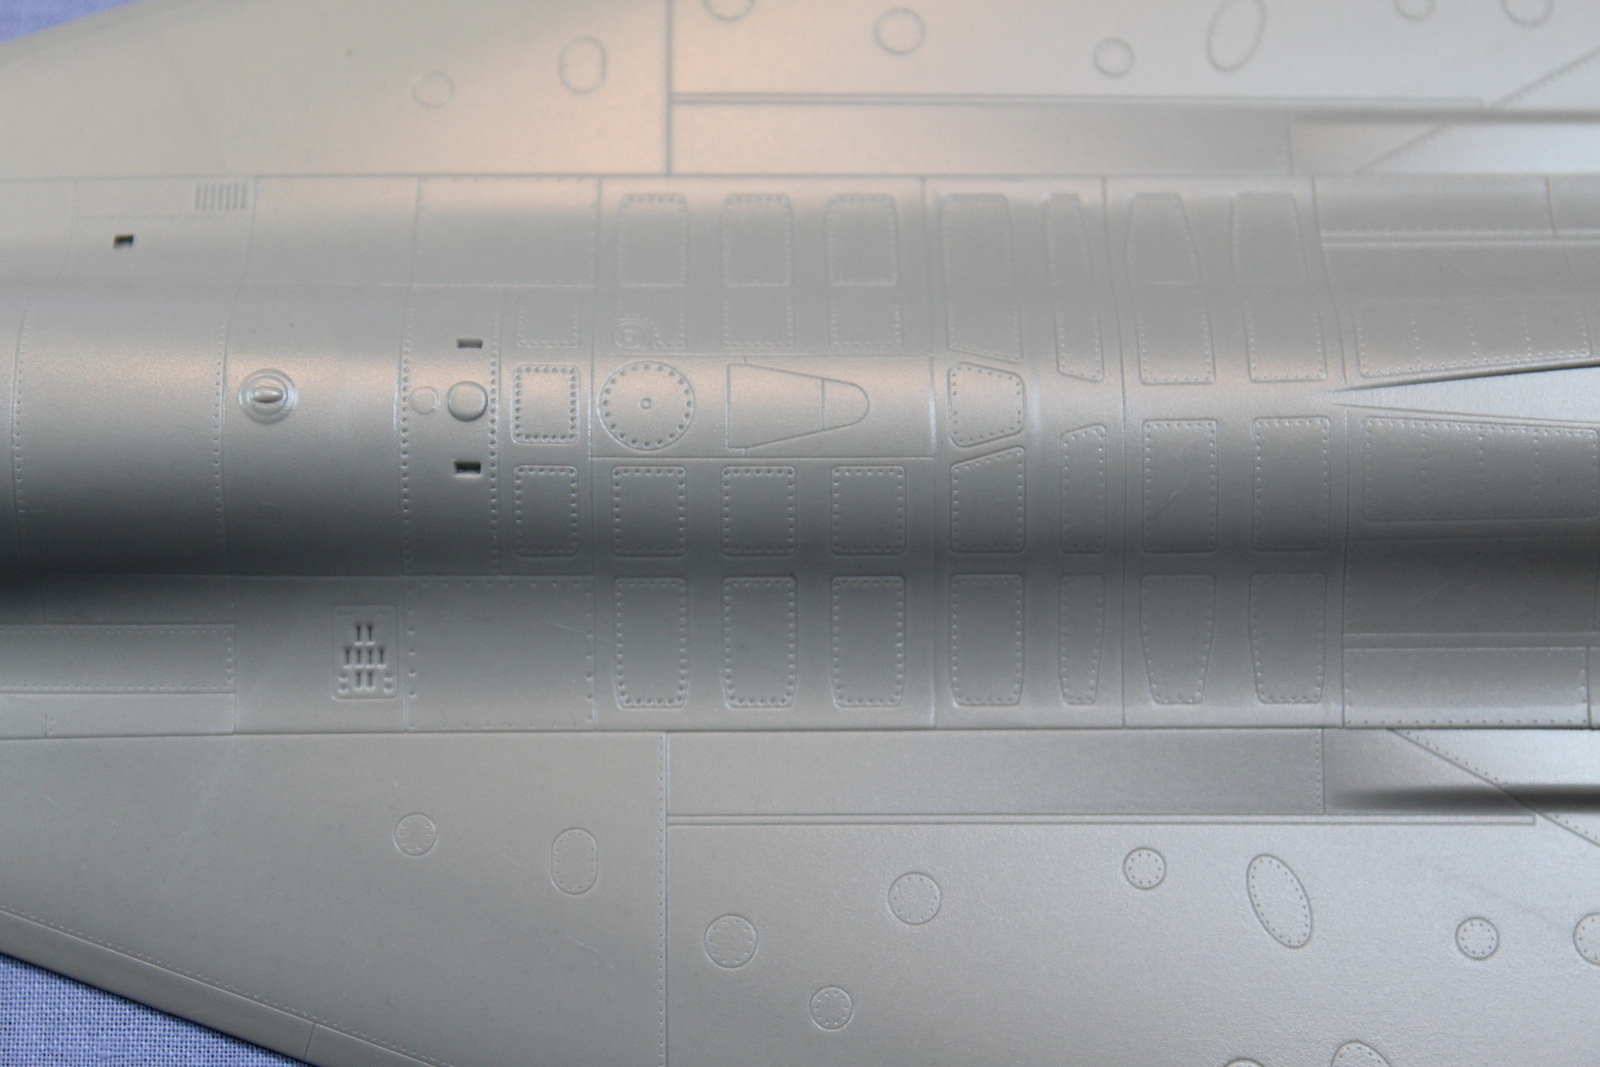
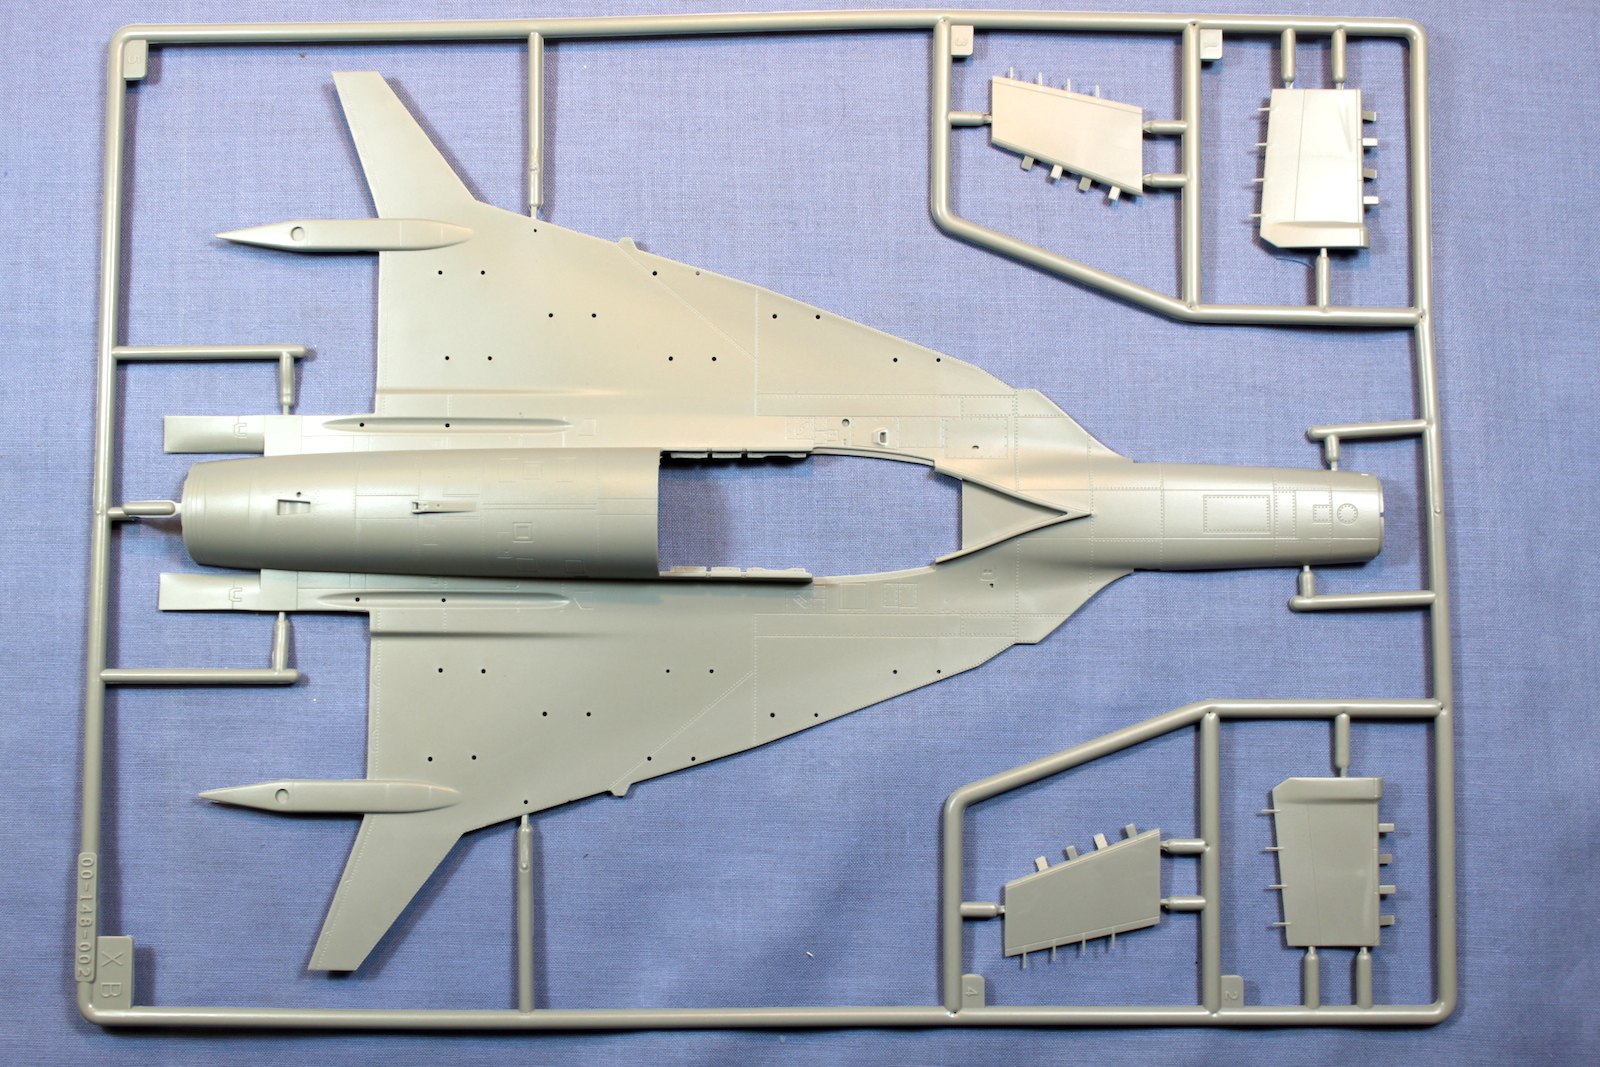
There are 10 sprues of soft gray plastic and two sprues of clear parts. Two large sprues contain the upper and lower fuselage/wing halves and the radome halves. There are no less than 4 separate sprues of weapons, enough to arm several aircraft, depending on the configuration you choose. There are photos of the real XL demonstrator carrying 12 Mk 82 slicks! The box holds nearly 300 parts, and detail is somewhat soft, in my opinion, but plentiful. When you’re finished, there is substantial amount of leftover plastic for your F-16 spares box, as seven of the sprues are common to Kinetic F-16 kits.
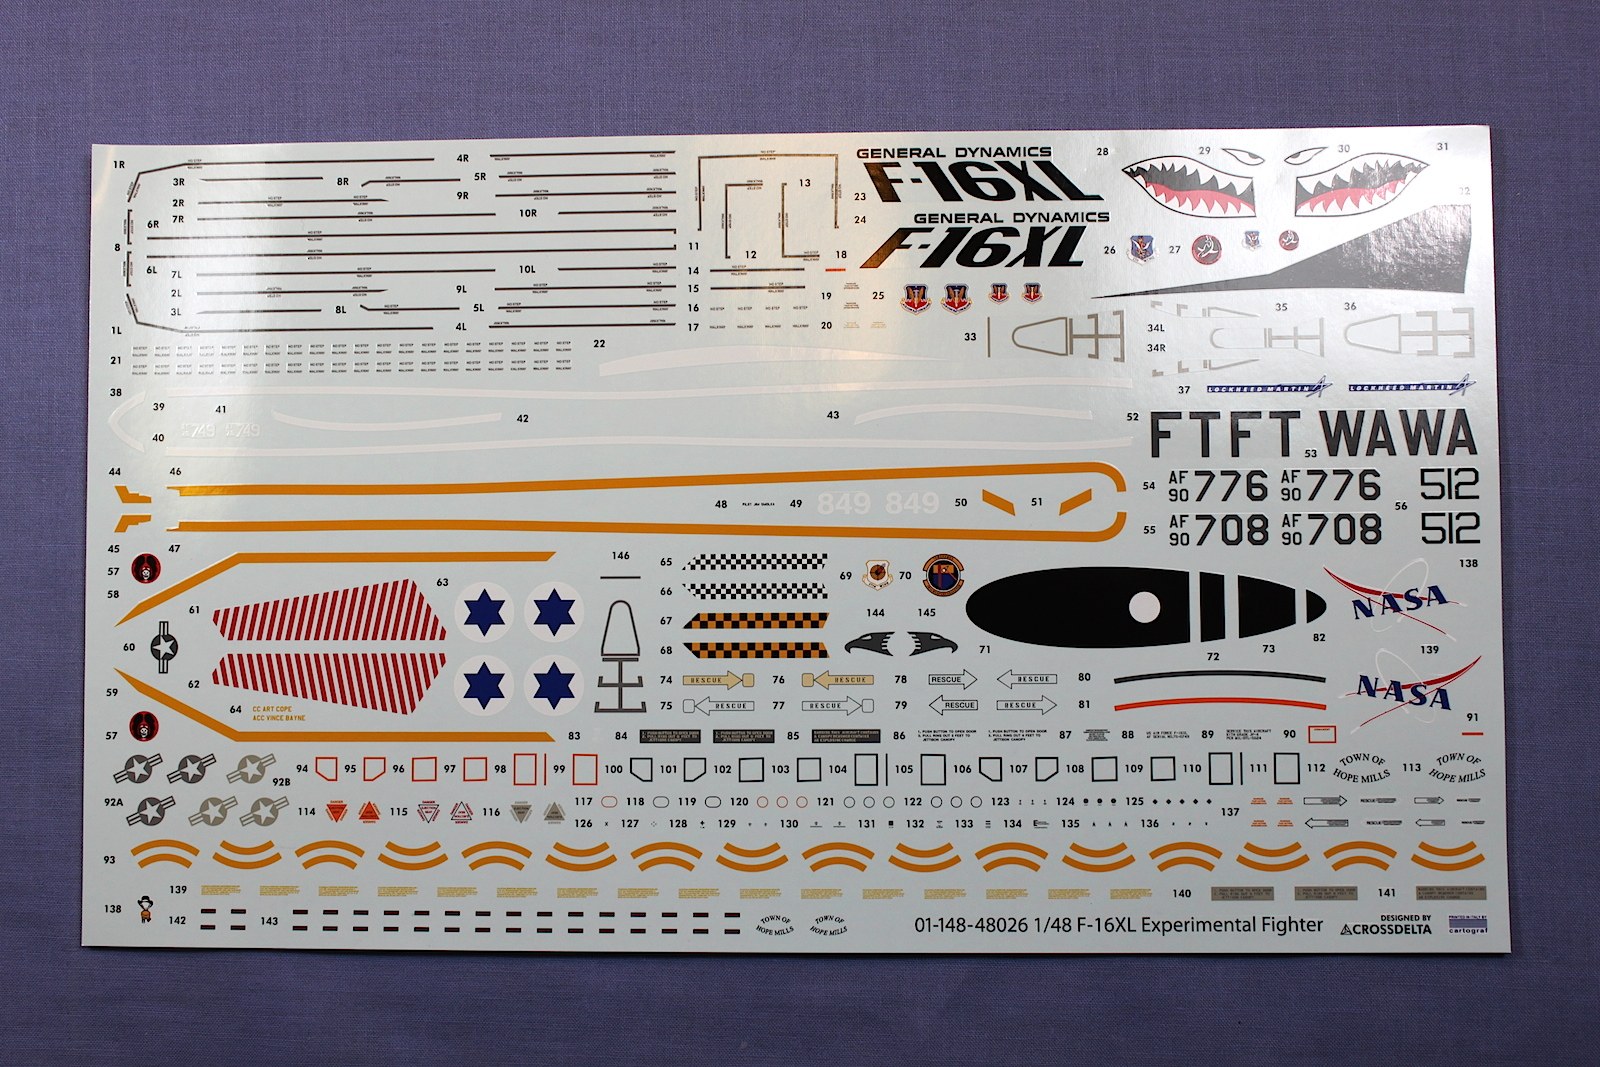
Decals are designed by Crossdelta and printed by Cartograf, and the markings are provided for three fictional and two actual in-service aircraft for General Dynamics demonstrator and NASA versions:
- General Dynamics F-16XL Prototype Scheme 1982.
- F-16XL NASA Scheme 1992.
- F-16XL of the 75th Fighter Squadron, 23rd Wing “Flying Tigers” (fictional)
- F-16XL of the 16th Weapons Squadron, 57th Wing USAF (fictional)
- F-16XL 101 Squadron - Israeli Air Force (fictional)
Work starts in the cockpit. Detail is raised, and is a little less than average for this scale. This is one of my few nit-picks at this kit. AMS sufferers will want to substitute one of the numerous F-16 aftermarket cockpit detailing sets, and at the least, you will want to replace the kit seat with a more refined resin example. I suppose that manufacturers these days are well aware of the excellent aftermarket sets that are available for F-16s, and choose to focus on the airframe detail. The assembled cockpit fits to the upper fuselage half, and is set aside to dry. Decide what version of the aircraft you are going to do, and scan the instructions for alternate pieces that may apply to the factual NASA versions, as opposed to the “what-if” possibilities, such as the gun fairing, antennae fitting, etc. They are not clearly indicated, so pay attention to your reference photos.
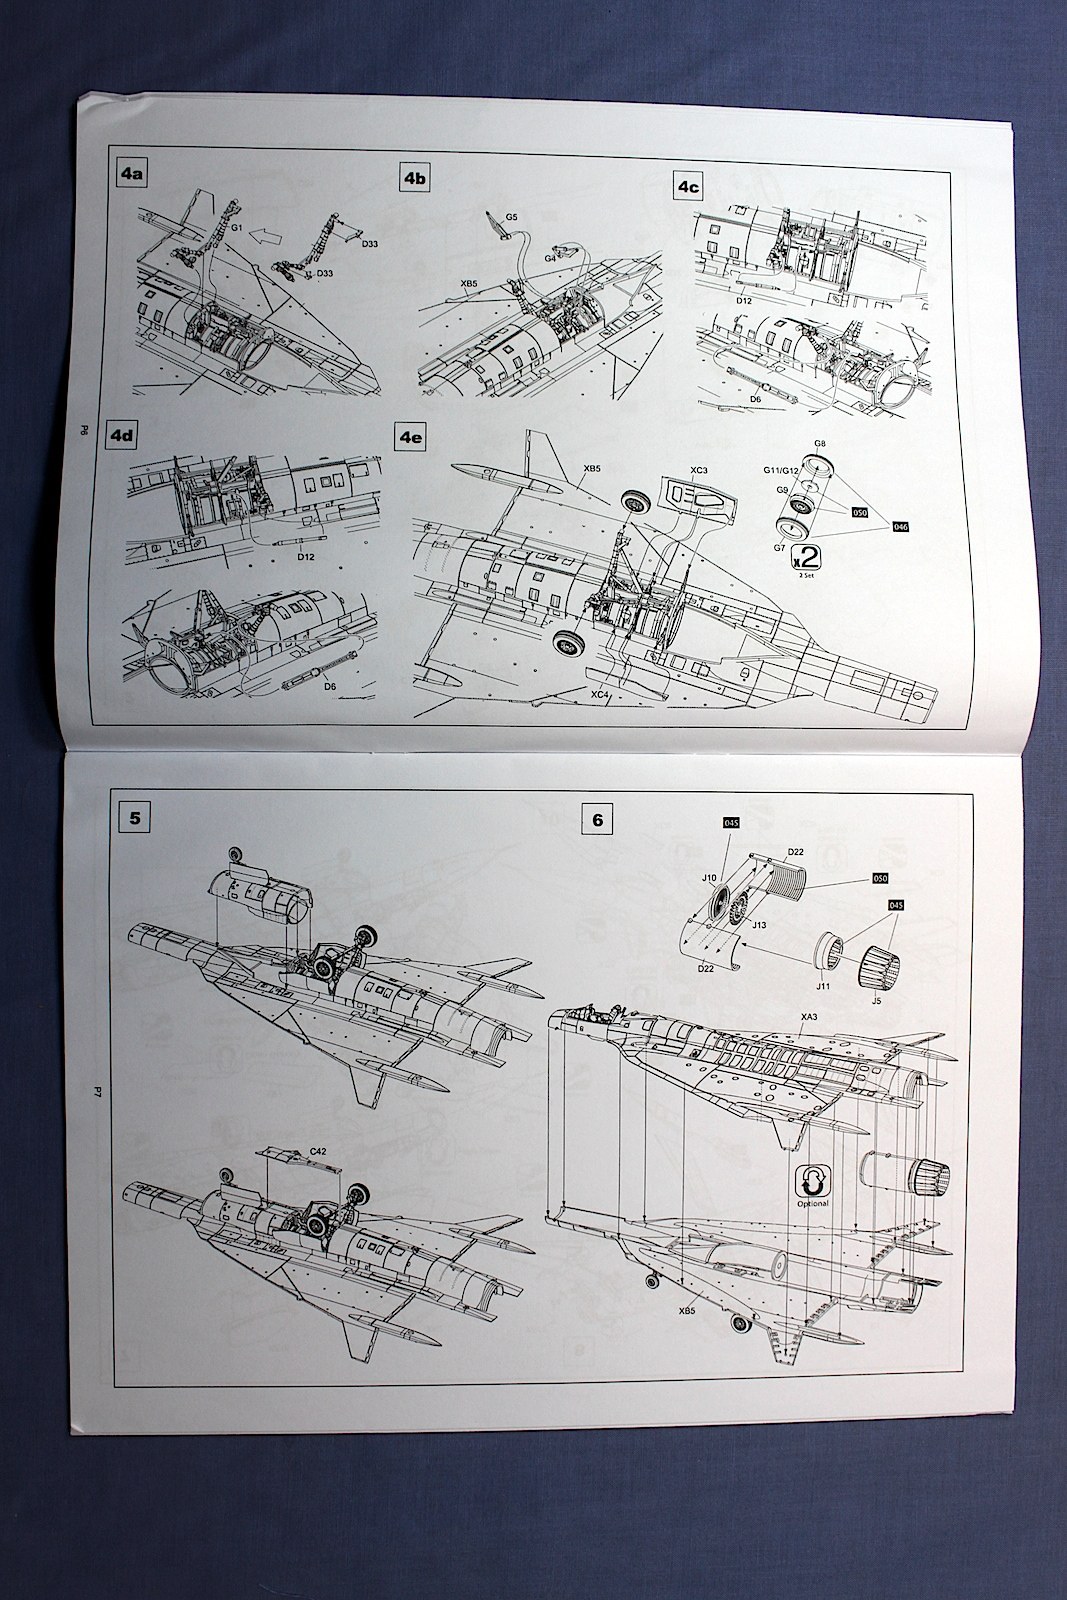
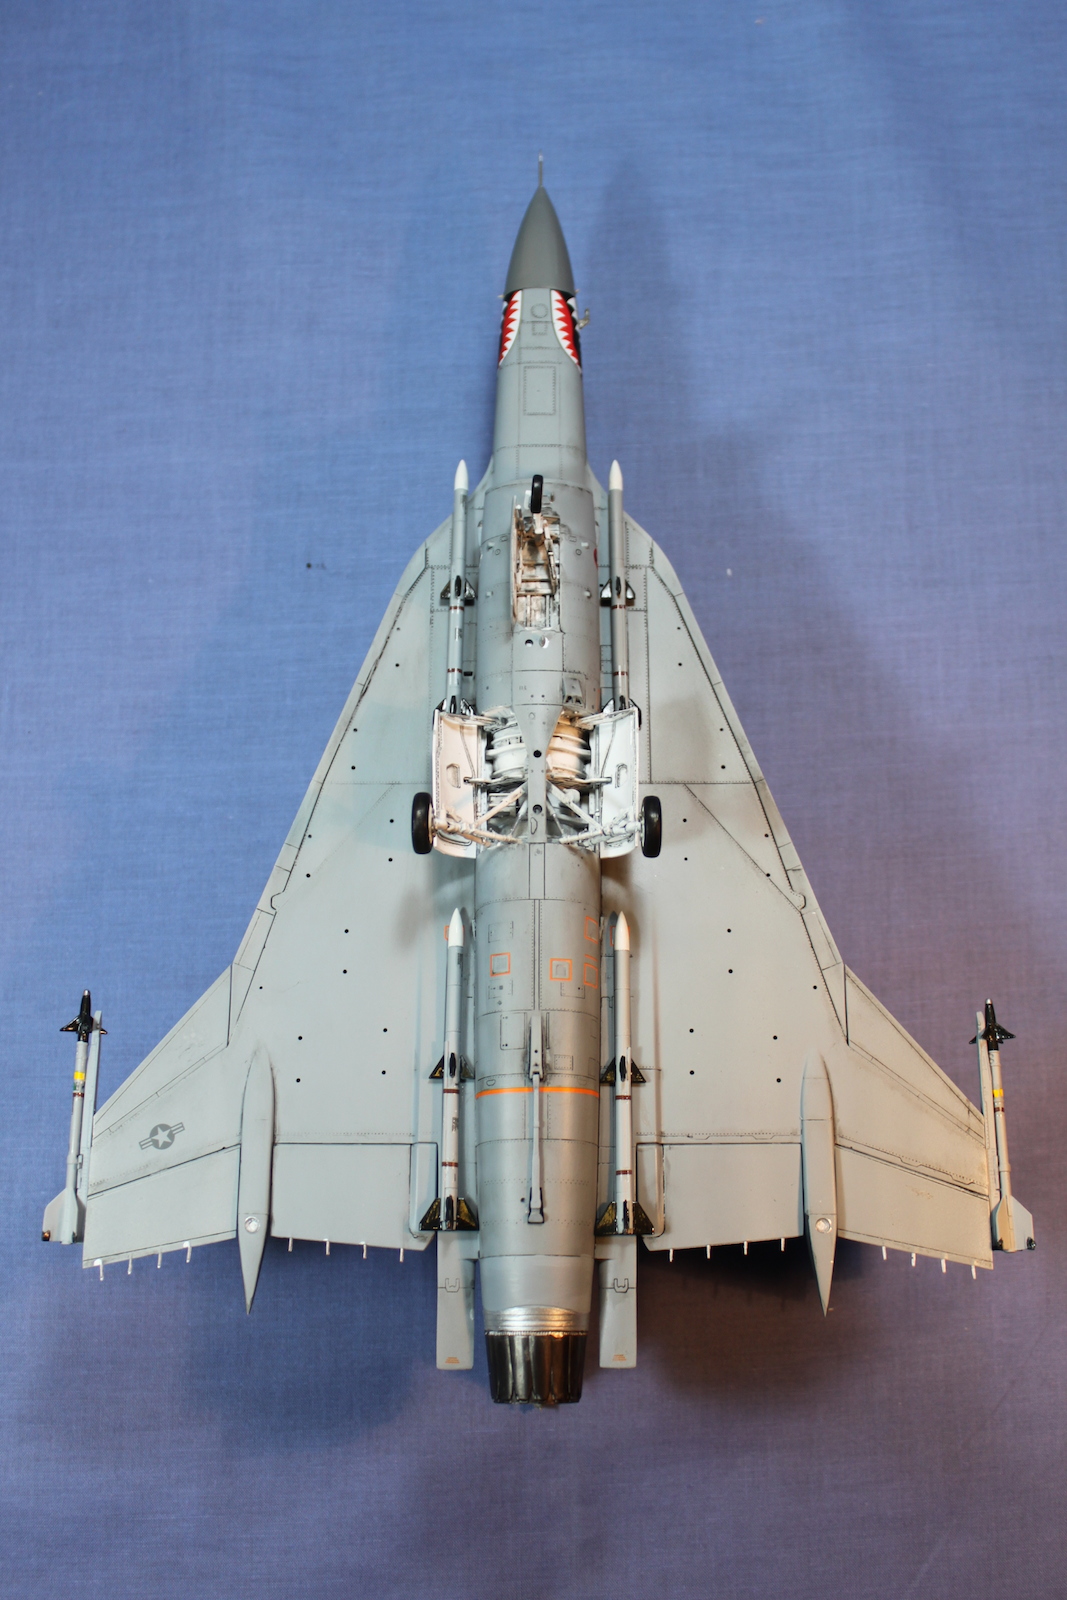
The next step fits together the intake, nose gear and main gear assemblies, which all go together according to the instructions without any problems. I suggest pre-painting all the gear and well parts flat white before assembly, and then doing some touch-up after the build is substantially complete and the exterior painting is done. Resist the urge to wait until the end of the build to install the main gear. I got well down the road before realizing that you can’t do this. Don’t despair, as the main gear assembly is substantial enough to take some handling after it is fully assembled, and the glue sets. The nose gear is quite fragile though, and I broke the curved wheel mount right away. Not an uncommon occurrence at my hobby bench! Leave the gear doors until final assembly.
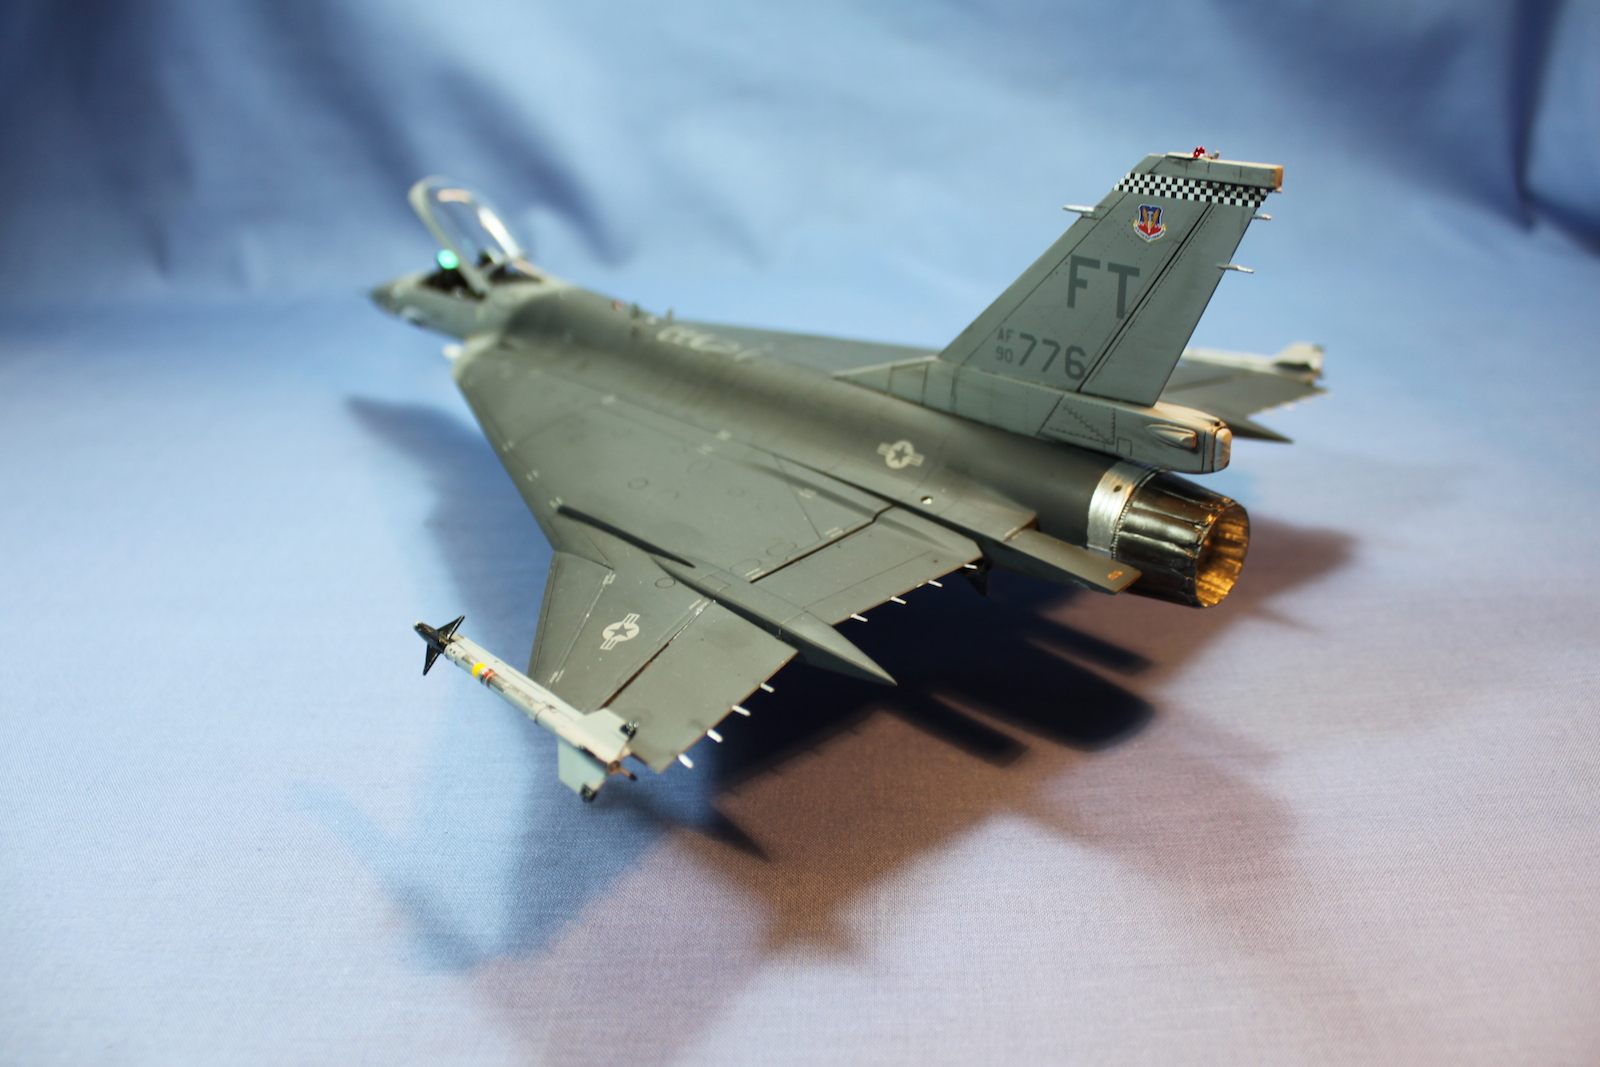
Use some care when assembling the business end of the power plant. I got some things in the wrong place, and had to disassemble it and start over. The flame ring goes to the front of the structural detailing. Before assembly, pre-paint the exhaust petals, the engine housing at the rear of the fuselage halves, and the engine interior with your favorite metallics. Mask the exhaust petals before installing the assembly in the fuselage. I wanted to wait to install the engine parts until later in the build, but the assembly is too large to slide into the opening. A final nit-pick here – the exhaust assembly detailing is very soft and mushy looking. A resin aftermarket replacement will enrich this area considerably. I will replace it or fashion a tissue cover/plug for mine before entering it in any serious competitions.
At this point, DRY-FIT all of the intake and engine parts into the fuselage halves. Use some masking tape pieces to hold things together, and be sure of a good fit all around before committing the glue. This is a tricky assembly point, but going slowly, and working a seam at a time will ensure a good strong assembly.
Next step is to assemble the remaining fuselage and wing moving parts. There are tabs for attaching the leading and training edge slats and flaps in neutral or resting positions. Remove the tabs that are not applicable. Use care while attaching them, as the tab locations need a little “adjusting” to fit correctly. The vertical stabilizer assembly is straightforward, although pay attention to the seam behind the leading edge. You may need to remove some of the thickness of the rear part from the backside so that it doesn’t stand proud of the leading edge wrap.
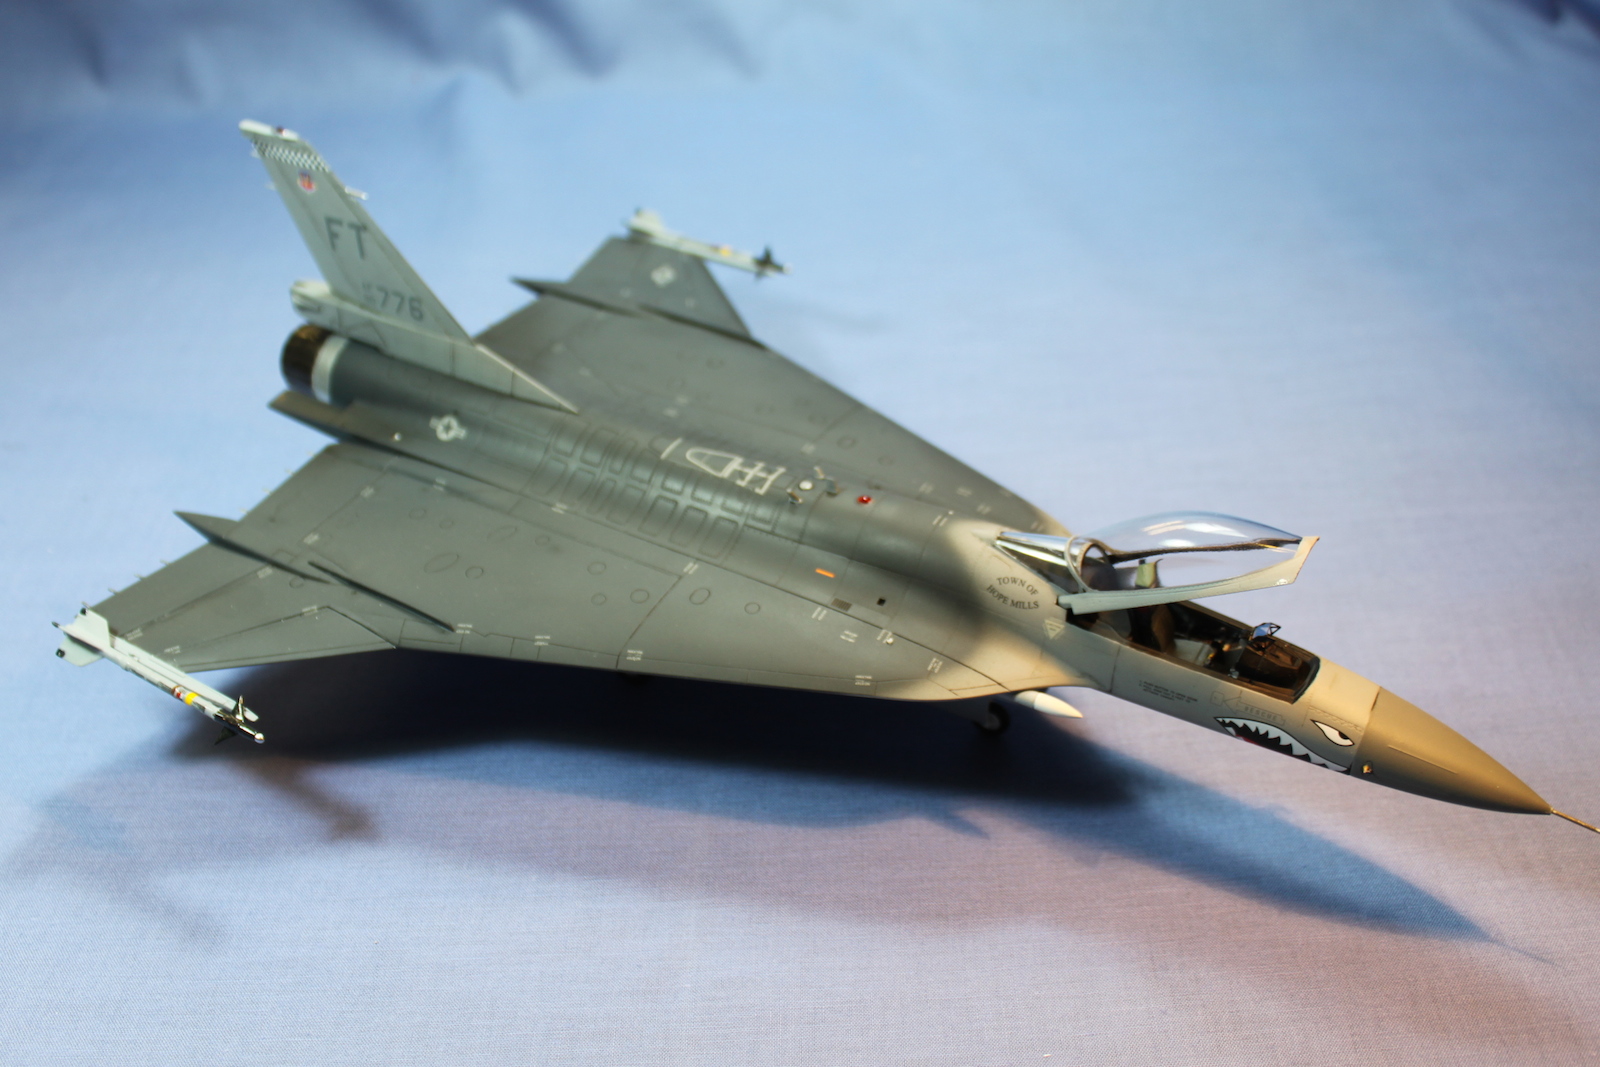
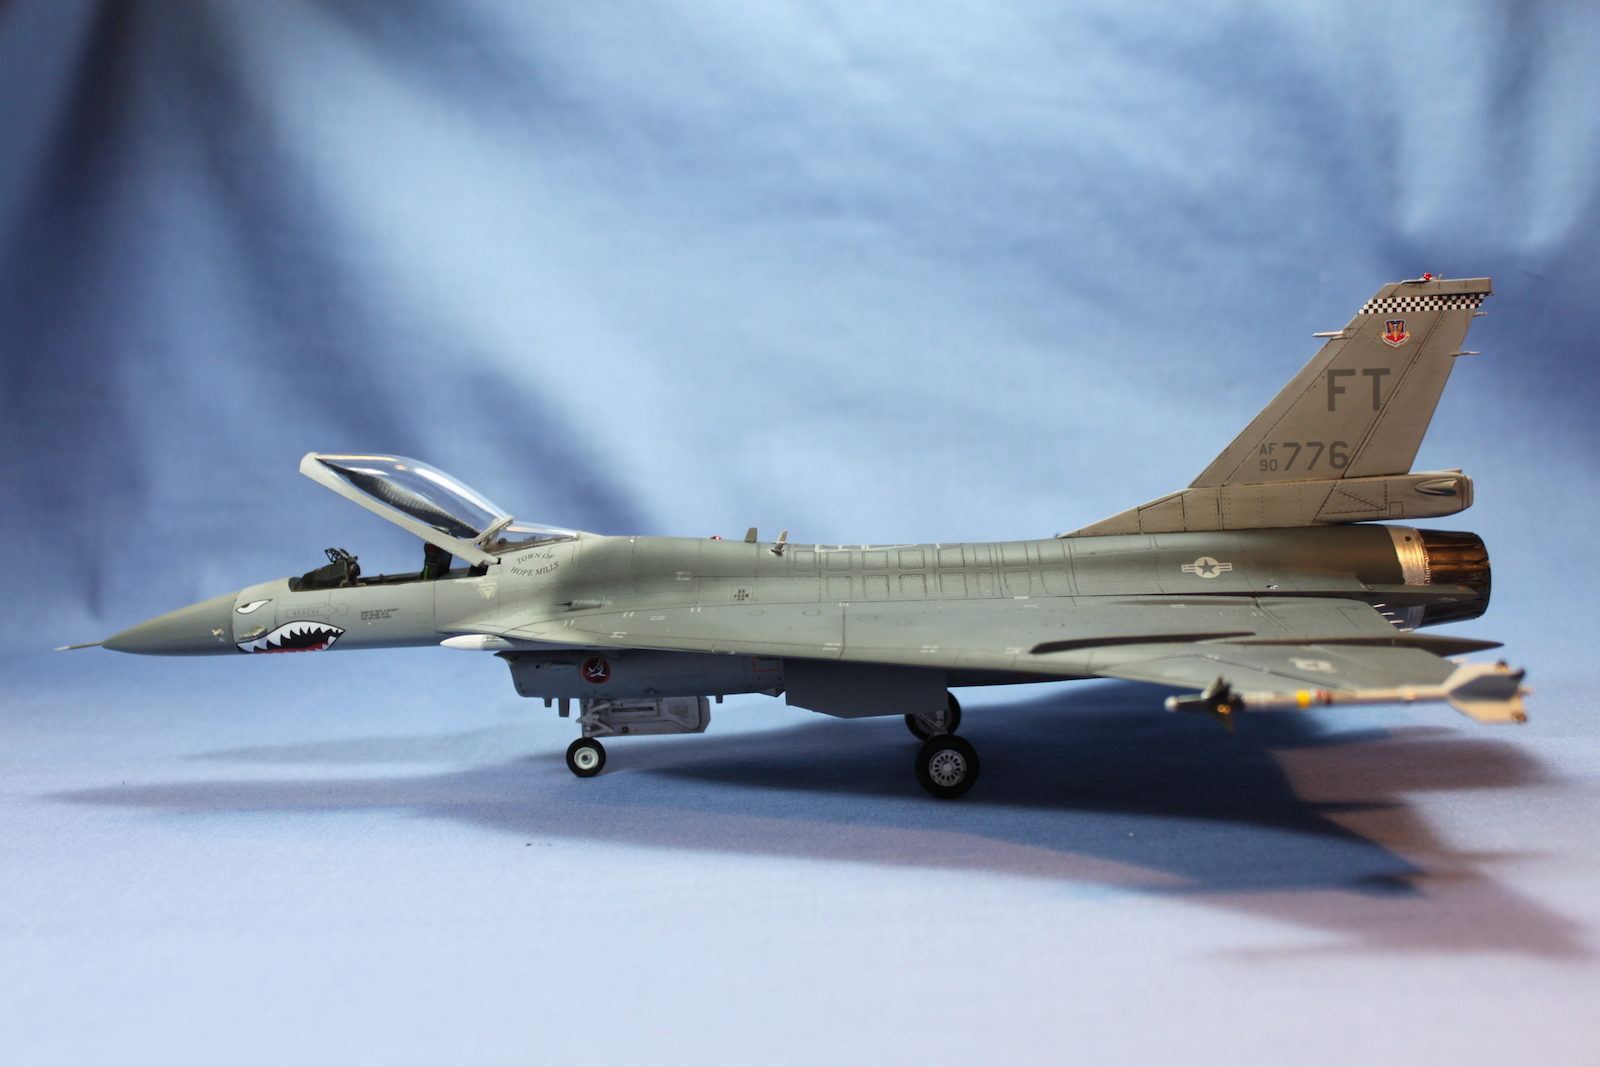
You’re now ready for the paint shop. Being a founding member of the IPMS “Tex” Hill Chapter, I naturally chose the fictional 23rd FW, 75th FS “Flying Tigers” markings. This build will become a “what-if” part of our “Tex Hill Collection”. I used Vallejo Model Air acrylic paints to approximate the required FS 36118 – Gunship Gray and FS 36270 – Medium Gray over FS 36320 – Dark Ghost Gray camouflage scheme. I primed the entire model, including the gear and wells (again), first with Tamiya White Surface Primer, followed by a light misting of PFS on the gear and in the wells. I then carefully masked off the gear and wells, and applied the camo paints.
After a day or two to dry, I sprayed a few light coats of PFS to gloss things up for the decals. When set, I applied the shark’s mouth, insignia, and squadron markings, along with the plethora of maintenance and “no step” stencils. The decals went down just fine with little to no noticeable carrier film remaining, and no silvering. This was followed by a final couple of mist cots of PFS to set the decals. After applying a wash of thinned artists oils to make the recessed details, gear and wells “pop”, when dry, a thinned coat of Vallejo Matt Varnish acrylic was airbrushed to flatten things out.
I finished by installing the wheels, antenna and other “fiddly bits”, and finally removing the exhaust masking. Lastly, navigation lights, etc., were defined with Tamiya clear and tinted acrylics.
This kit fills a long-standing void in the aircraft sector of the hobby. This is the only injection molded F-16XL in 1/48 scale, and we have waited a long time for it. It is more accurate than the 1/72 or 1/32 scale offerings by other manufactures by a long shot. All in all, this is a fine kit, and a vastly superior effort than trying to mate the ancient Attic Resins conversion to a standard F-16 kit. Like any current state-of-the-art kit, one can nit-pick the details here and there. But then again, if you always start with a perfect shake and bake kit, your modeling skills will deteriorate, and you’ll never tackle another old kit again. The price point is certainly reasonable, and I highly recommend it to any aircraft enthusiast with intermediate level modeling skills. AMS sufferers have several options available for modeling actual demonstrator and NASA test-bed airframes, as both airframes are well documented in several configurations and paint schemes.
Many thanks to the IPMS Reviewer Corps and LuckyModel for the opportunity to review this kit.


Comments
Looks great, Wingtip Rails & AD probe
Nice build and one of my favorite subects too. Looking to do the NASA version myself, but will need to add the spin chute bracketing.
Heads up on the wing tip launchers: they are installed wrong. The mating side is the opposite and the Air Data probe goes on the right side.
Cheers
Add new comment
This site is protected by reCAPTCHA and the Google Privacy Policy and Terms of Service apply.
Similar Reviews