
F-104C Vietnam War
In the Box
Instructions: The instructions were divided into six pages of clearly marked parts and their construction sequence. There was also a page for the four different paint schemes.
Sprues: 3 molded in gray plastic
Clear plastic: 1 sprue
Decal Sheet: With markings for three different countries United States, Japan and Taiwan.
Building the Model
Cockpit
The cockpit was assembled along with other parts into the forward parts of the fuselage sides (the whole fuse is in four different sections). Assembly was not an issue, make sure you get the pilots seat frame and bulked slotted firmly in the cockpit floorboard because the top of the fuse interlocks with the bulked and if the seat is not completely down, the top of the canopy will not fit. Details in the cockpit were not all that pronounced and the instrument panel did not have a decal.
The seat can be built in two different versions and had molded seat belts into it.
I painted the cockpit and seat and then came back and dry brushed light grey on to it to try to bring out some details.
The canopy frame was painted and applied to the aircraft after overall painting was completed. I glued the canopy with PVA glue.
Canopy
The canopy was clear with no flaws, so I decided to clean it with IPA and then dip it into Future. The canopy had no seam in it that needed to be eliminated.
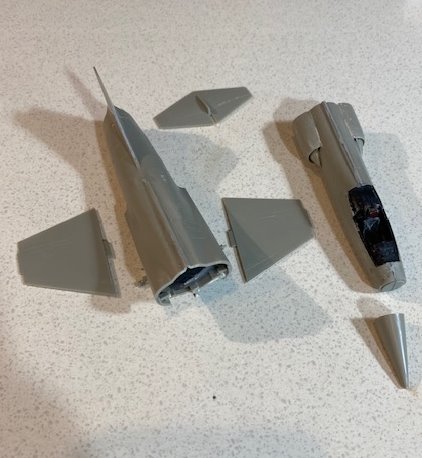
Fuselage
The fuse was assembled in 4 sections two sides front and back. I painted the interior with Dark Grey and weathered it with a light grey wash.
To assemble the fuse, it had to be built with the front and rear sections separately. There is a fuse rear support that needs to be installed as the rear fuse comes together. There was no engine to build, so the only indication was the burner unit in the tail.
As the front and back halves of the fuse come together there is a plate that serves as the landing gear bay that forms the internal connection for the front and the back. Pay particular attention to how the plate is installed because the main landing gear is installed onto it and that will set how level side to side the aircraft will sit on the landing gear. I would suggest once the plate is installed that the main landing gear struts be installed also. You may need some wiggle room to get the landing gear strut and plate aligned with the fuse.
When the fuse is joined front to back there is a butt joint that was a little difficult to align (remember that the landing gear bay plate also is attached to the fuse). Once the whole fuse was assembled, I had to sand down the join joint for the front and back fuse and then re-scribe a panel line.
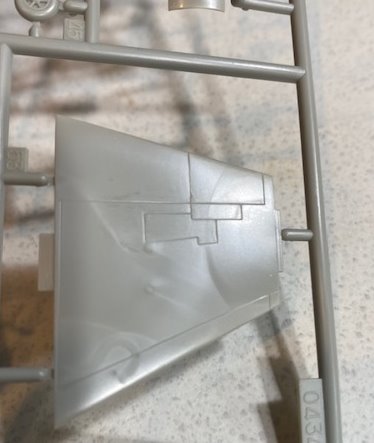
Wings
The wings on this aircraft are so thin that they are molded in one piece. During the molding process some marks were left on the wings that I would assume that they may hinder one’s desire to do a Natural metal finish. I gave them a light sanding and got rid of most of the issue. The fit for the wings was very nice and alignment was good. Panel lining was not that deep except for the areas of ailerons and flaps.
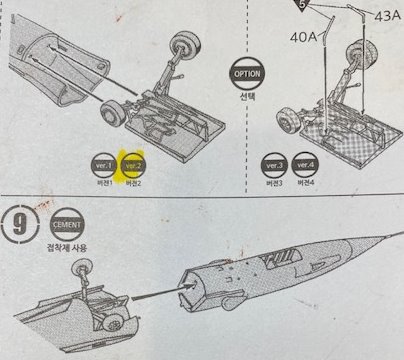
Landing Gear
The airplane can be built with the landing gear extended for runway activity or the model can be built with the landing gear in the up position and there are two different variants of landing gear doors. I chose to build the model with the landing gear extended. The gear attached to the underside of the fuselage with little support for the gear attachment to the fuse, so the airplane is very brittle when sitting on the landing gear.
Landing gear door application was a little tedious, with the main gear doors taking a little more effort because of a cramped space from the top of the gear to the bottom of the wing.
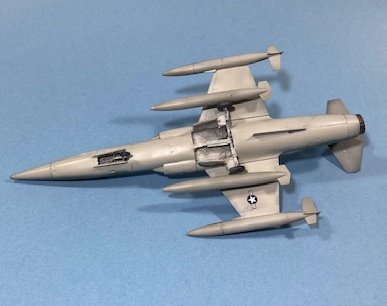
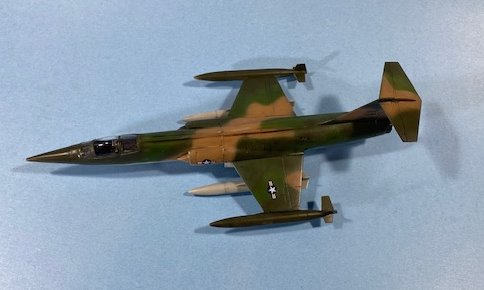
Painting
The model can be built in three different paint schemes, Natural Metal Finish, Vietnam Camo and a Two Tone light blue scheme from Japan.
I chose the Vietnam Camo paint scheme for this model. I wanted to try a freehand airbrush paint camo pattern and I think it came out well.
I used AK real colors for the paint using AK’s FS numbers for the four different Vietnam colors.
Panel line detail was very soft except for the working panel lines. I debated not using a primer paint as to not cover some of the panel details on the wings and fuse.
Final Assembly
As the fuselage came together, I had to work from the aft end to the front. I taped the whole fuse together and glued the seam. The tricky part of the assembly was the need to line up the fuse sections, landing gear bay plate and get them straight and level.
Decals
The decals I applied were the ones depicting an aircraft from the Vietnam War.
After the decals were applied, I sprayed two coats of Mission Models CP 30 (Mission thinner mixed with 30% Mission clear primer) to blend the edges of the decals. The mixture creates one of the best durable clear coats I have ever used. I let the clear coat cure overnight and it stand up to any decal fixer I have used.
After applying the decals and covering them with the CP30 clear coat, the decals still stood out from the paint scheme, so I applied a second coat of clear. The decals had a standout new brightness to them and stood out from the paint scheme, so I took some white oil paint and blended it over each decal to give them a faded look.
Weathering
Tamiya Black panel liner was used for the edges of flight controls. Panel lines access hatches and covers were highlighted with Tamiya dark brown panel liner.
A mixture of brown and black dry pigments was used to indicate exhaust stains from the engine
Finally, I sprayed AK’s acrylic clear flat over the whole model.
Summary
The model went together well, the only tricky part were the parts and alignment with the front fuse, the rear fuse and the landing gear bay plate. All the parts were clean and needed very little sanding when cut from a sprue.
I want to thank MRC and IPMS USA for the ability to review and build this model.


Comments
Add new comment
This site is protected by reCAPTCHA and the Google Privacy Policy and Terms of Service apply.
Similar Reviews