
F-101A/C Voodoo
If you are like me, natural metal aircraft give you the shakes. But they are so awesome looking and the color schemes are fantastic, so when the KittyHawk Model F-101 came out, I could not resist. Let say a few things up front. If you are looking for review saying things are silly or ridiculous with the kit or how the third minor inlet was left off, you might want to go elsewhere. I am not going to use childish language in a review of the kit. On the other hand, if you want to find out how it fits, how to correct some issues, and how to get some paint on the plane, let’s dive in together.
KittyHawk’s kit comes on seven light-gray styrene sprues which have great surface detail, however, there are large sprue gates, and the plastic is fairly soft. In the box there are also kit decals, a photoetch seat, and a clear sprue. Looking at the parts breakdown, more variants are definitely coming. There are also several options for the modeler:
- Open or closed refueling probe
- Decal or photoetch cockpit details
- Open or closed speed brakes
- Open or closed radome with radar
- Fuel tanks and weapons
I wanted my Voodoo as clean looking as possible, so I chose to build it with no weapons and a closed radome and refuel point, but I did leave the speed brakes open to show their red side. I also posed the flaps in a dropped position.
Construction starts with the cockpit. The seat is a decent representation of the Weber seat and builds up from five parts with two photoetch pieces. The supplied photoetch seat belts look OK but are a little generic. All in all, the seat fills the bill until a resin one comes out. The cockpit tub is a single piece. You have a choice of photoetch instrument panels, decals or both. I used the decals over the photoetch for a little depth. The rest of the cockpit involves adding rudder pedals, a throttle, and the stick.
The next part of the build is the front wheel bay, which builds from three parts and would have you trap the front gear in place. I elected to leave the gear out until later and built the landing gear bay by itself. The detail in the bay is nice. The only difficulty was that the sides are two parts which leave a seam up the front and back sides which need attention. The finished bay was attached to the cockpit bottom.
The next step is to assemble the front fuselage. The two sides locate well to the cockpit and fit well. The plastic is admirably thin, but in this case allows the softer styrene some flex when joining the parts. A simple fix is to add strip to the bottom to allow a better gluing surface. The front part with the refueling probe is next. Even if you are gluing the probe closed, add the box it goes into for stiffness. This is a step where taking a little extra time dry fitting really pays off. Once the front two parts are glued and dry, test fit them to the main fuselage. When satisfied with the tests, glue slowly and the fit will be good. Then, get the side panels aligned, slowly glue them, and then leave it alone. Seriously, once things are aligned and looking good, let the glue dry thoroughly for a day or so. The radar can be added if desired; it is a nice representation. I wanted clean lines, so it was time to add the radome. It was a little oversized, but I sanded it back slightly and it took a minimum of putty for a good fit. The instructions call for instrument panels, antennas, and the like to be added; these could easily be broken off, so they were added later.
Next up is the intake trunks. There are no special issues with this except to say that some of the parts are left or right handed, so watch which side is which. You will have to sand the outer part of each trunk and color it white, but there’s enough room and it isn’t hard. The inner part is not easy to see, so I gave it a quick sand and called it good. The exhausts trunks are multipart, but with the front and back covered, the seams are invisible.
The next step is to glue the rear fuselage together. There are no special concerns, just follow the directions on adding the intake and exhaust trunks. The bottom-aft portion, similar to where the exhausts are on an F-4, is added along with a two-piece insert at the bottom. Get this seam fixed before attaching the assembly to the plane. I used Mr. Surfacer on it and got a nice finish after a couple tries. Once this was joined, the top fuselage was glued in place. Most of the side seam was wing root. You might want to reinforce the area at the back by the exhaust cans as it needed sanded and was a little weak.
The exhaust cans are next and have a photoetch component on the inside. Anneal this part and it will fit very well, give a nice texture, and replicate the arms in the exhaust nozzle. One difficulty here was that the main assembly of the burner can consists of four parts that wrap around the inside. While the fit is decent, getting all four aligned for a clean metal finish took some work and sanding. In the end, the part looks every bit like the real thing. These can be painted and added at the end.
I have very little say about the wings. They have separate flaps and ailerons and go together simply. I did cut the tabs from the ailerons to make the fit better and got one a little off level. The detail in the wheel bay and flaps is more than adequate. The hardest part of this step is adding the splitter plate for the intake and its seven PE struts. The splitter plate’s fit to the top and bottom is fair, and several applications of putty were needed. The PE braces are very delicate so add them last. Another hint here is that I left the landing gear off and added it later. In hind sight, I think I would have added it at this stage. The attachment points are fairly small, and adding it now would have let the glue really bind it tight. This plane is large, and because of that, I used the SAC gear which is reviewed elsewhere on the IPMS/USA site.
Next up is the tail, and there is nothing tough about it if you take your time. After that, it is time to bring all these parts into a single airframe. Not following the instructions, I wanted to join the front fuselage to the rear. Due to the softness of the styrene and the size of the plane, the fit is less than stellar. However, it is simple to fix. I decided to spread the front fuselage in height by using sprue. I cut a piece slightly longer than the height and wedged it in temporarily. I then mated the fuselage front and back. It took about 4 attempts before I was very close, then I glued my wedge in place, and finally joined the fuselage together. Most importantly, I let it sit overnight to dry. The wings were added and the roots needed a little sanding but fit well. Lastly, the tail was added and I did need a band of Mr. Surfacer around it. As a note, there were a couple sink marks near the back, by the tail, that were filled also. The rest of the parts and the horizontal stabilizers were left off to make painting easier.
To prep for paint, I used Mastercaster sanding sticks, Micromesh polishing pads, and water. I started by sanding and polishing the model completely. I coated the entire model with Tamiya Gloss Aluminum TS-17 decanted from a rattle can and then sprayed on the entire airframe, after the cockpit and wheel wells were masked, naturally. I like using this method for several reasons. First, it shows every problem on the surface that needs addressed. Second, it acts like a filler and smooths scratches and small divots. Third, the Tamiya lacquer dries quick and incredibly hard. Lastly, it is very close to Alclad Aluminum, which is a great base coat to start with when applying metallic finishes. This process took three rounds, and in the end, I had a hard, very silver plane. Then it was time to replicate some panel differences. From my experience, you need to be fairly subtle and reference good black-and-white pictures that show the differences well. I started in the rear where the exhaust area is and masked and shot Alclad Steel. The top of the fuselage was masked and shot with Gold Titanium for a corrosion resistant look. Various other panels were highlighted with White Aluminum and Dark Aluminum, at which point the aircraft looked decent and was ready for decals.
The kit decals have a few errors on them; for example, the FR code letters should be FB. IPMS was lucky enough to have the Caracal Models sheet arrive for review at this point, so I used them. Once thing to note while applying decals to a natural-metal finish, some of the Alclad colors do not react well to some of the decal setting solutions. I used water to get the decals in place and dabbed them dry. Since some of them required setting solution, I put the solution on a Q-tip and applied it only where needed, slowly working the decals into place. With a little Solvaset and time, the decals snuggled down nicely.
Finally the fun really begins. All the little pieces were built and finished: landing gear, gear doors, canopy, antennas, flaps, and horizontal stabilizers. Each one of these was painted in turn, with the outer parts being coated with Tamiya Gloss Silver and interior parts being coated insignia red. I weathered the red with a black wash and flat coated the parts. The canopy was painted Tamiya Gloss Black, thinned with lacquer thinner, and then over-sprayed with Gloss Aluminum. Once dry, all of the remaining parts were added and a satin coat was applied to the decals to dull the shine some.
So, what do I think of the kit? It is very good, and it is easily the best Voodoo out there. There are two nits to pick with it. One is the decal errors which need fixed, and the second is the comparatively soft plastic. It is easier to get a high shine one somewhat harder plastic. That being said, the kit looks every bit a Voodoo. The fit is good, as long as you use a spacer on the fuselage joins. I do recommend the kit for those reasons.
My thanks to Glen Coleman and the fine folks at KittyHawk for the review sample.

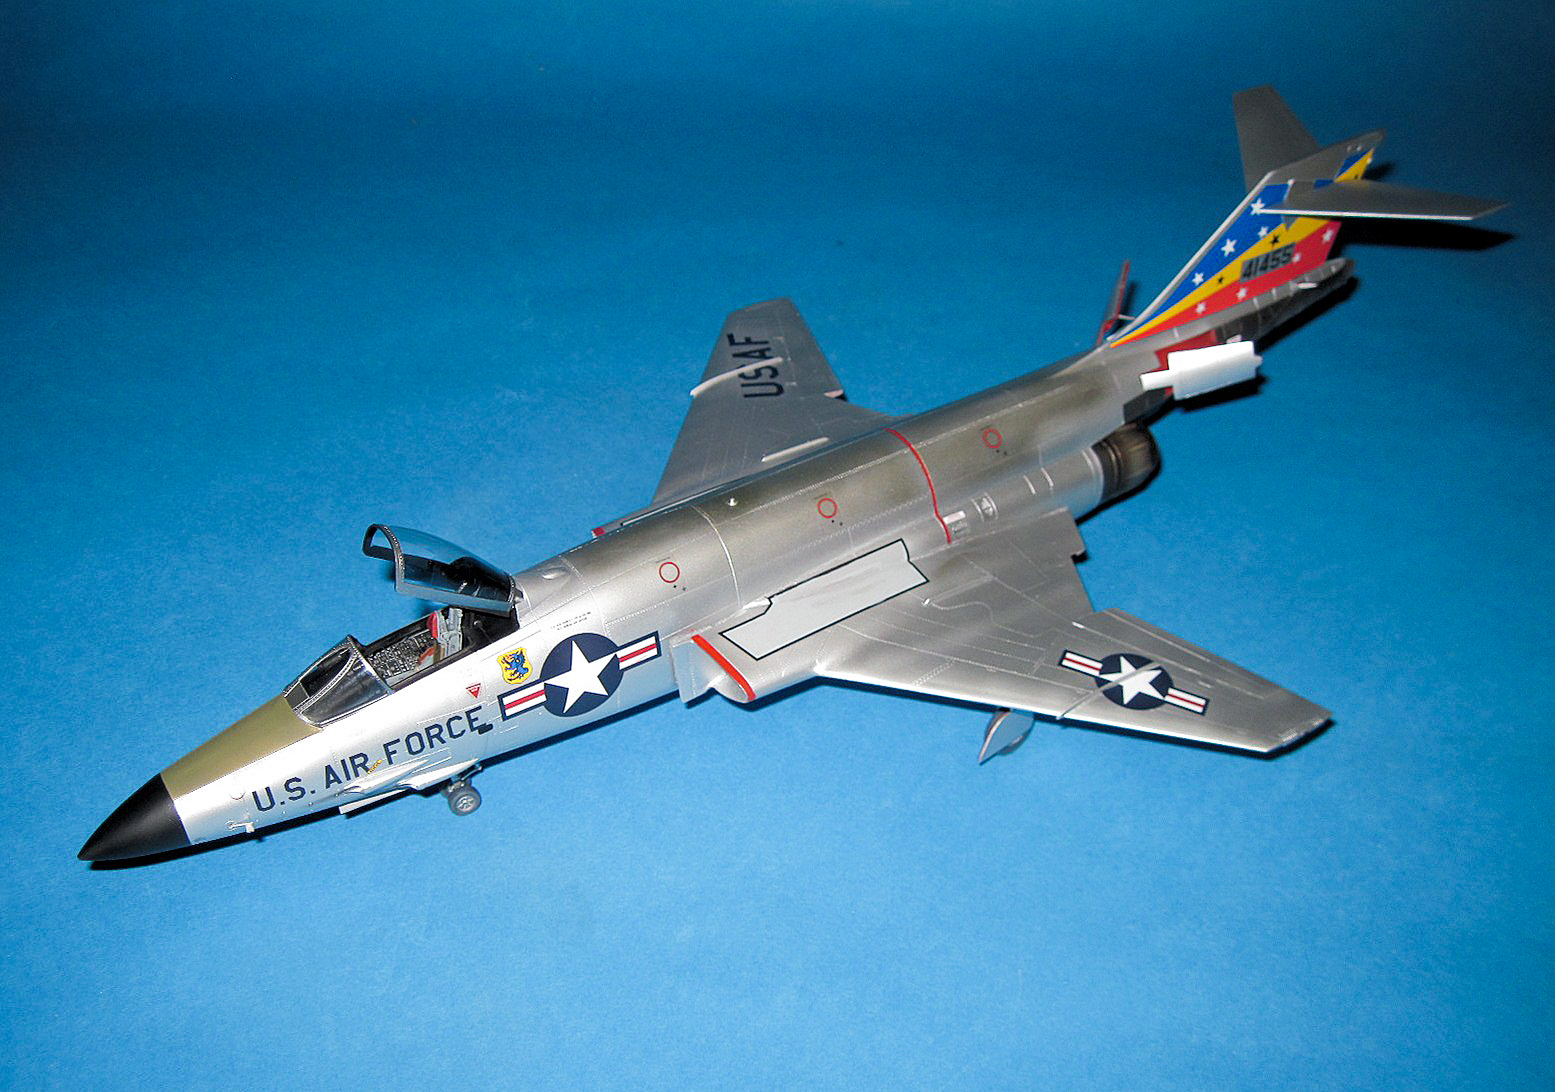
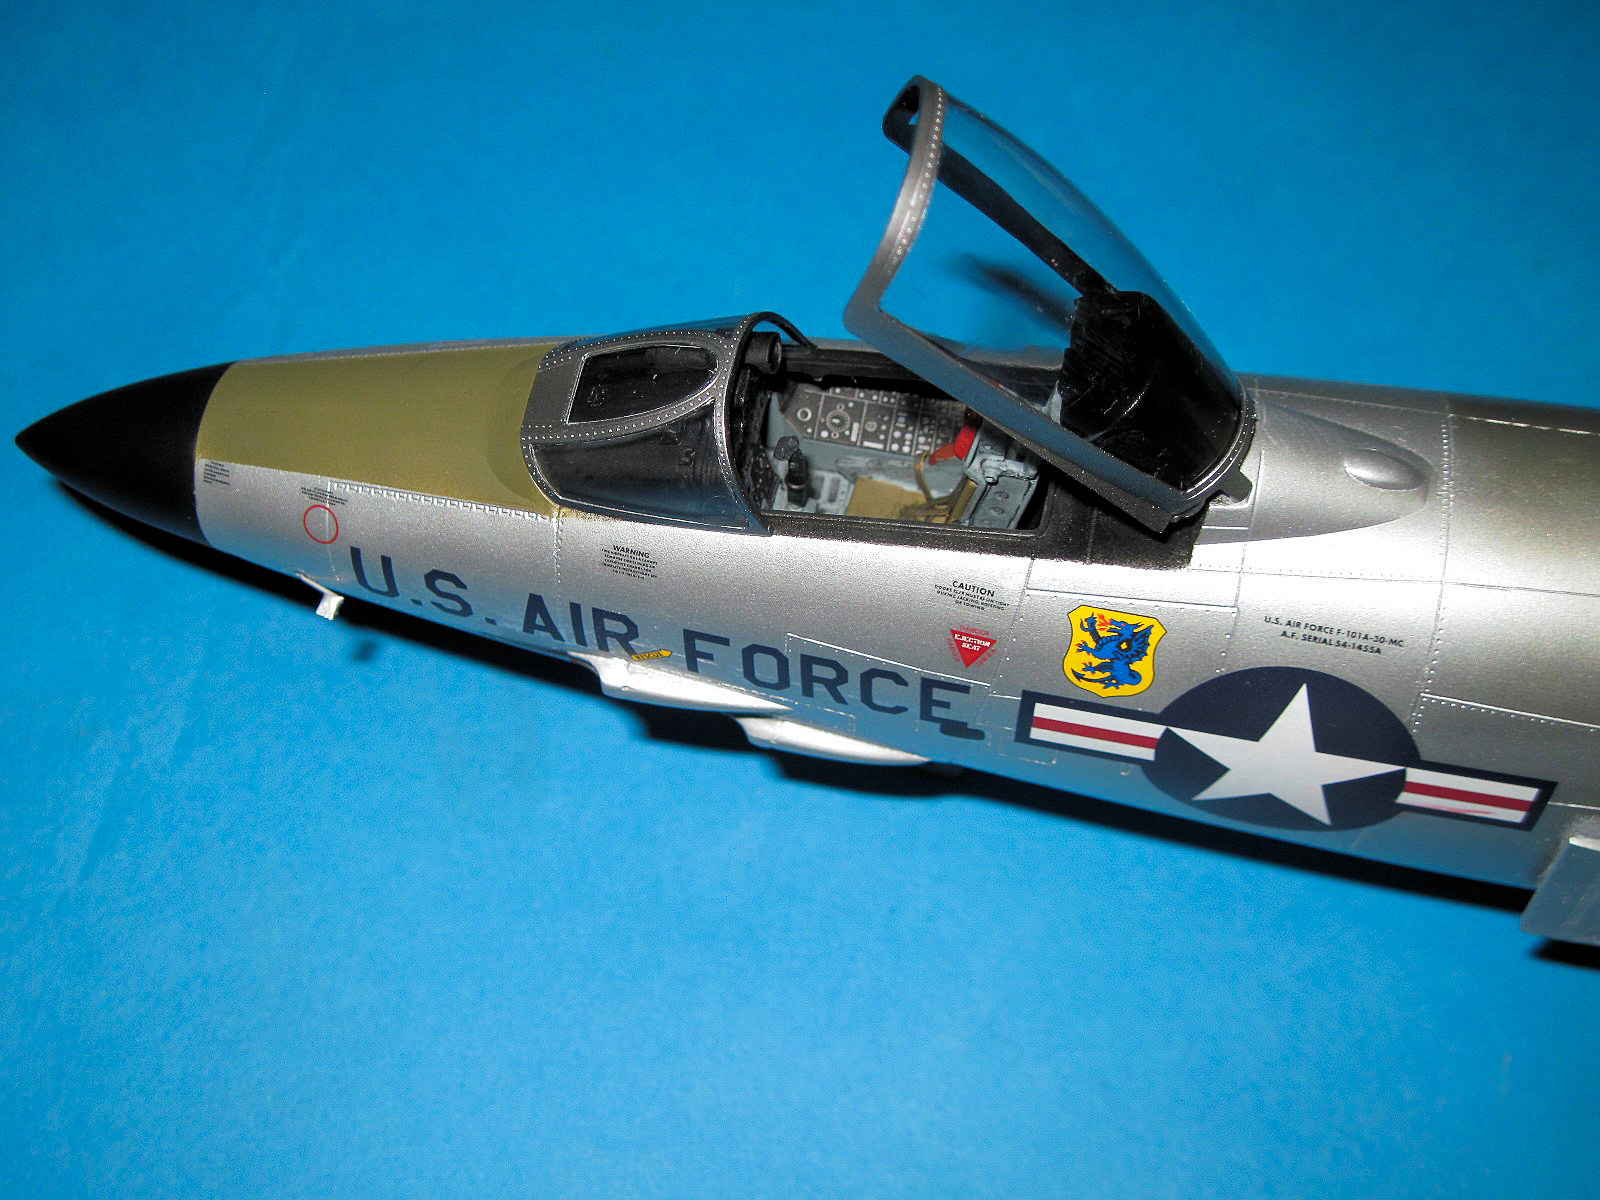
Finished Model - Left Front
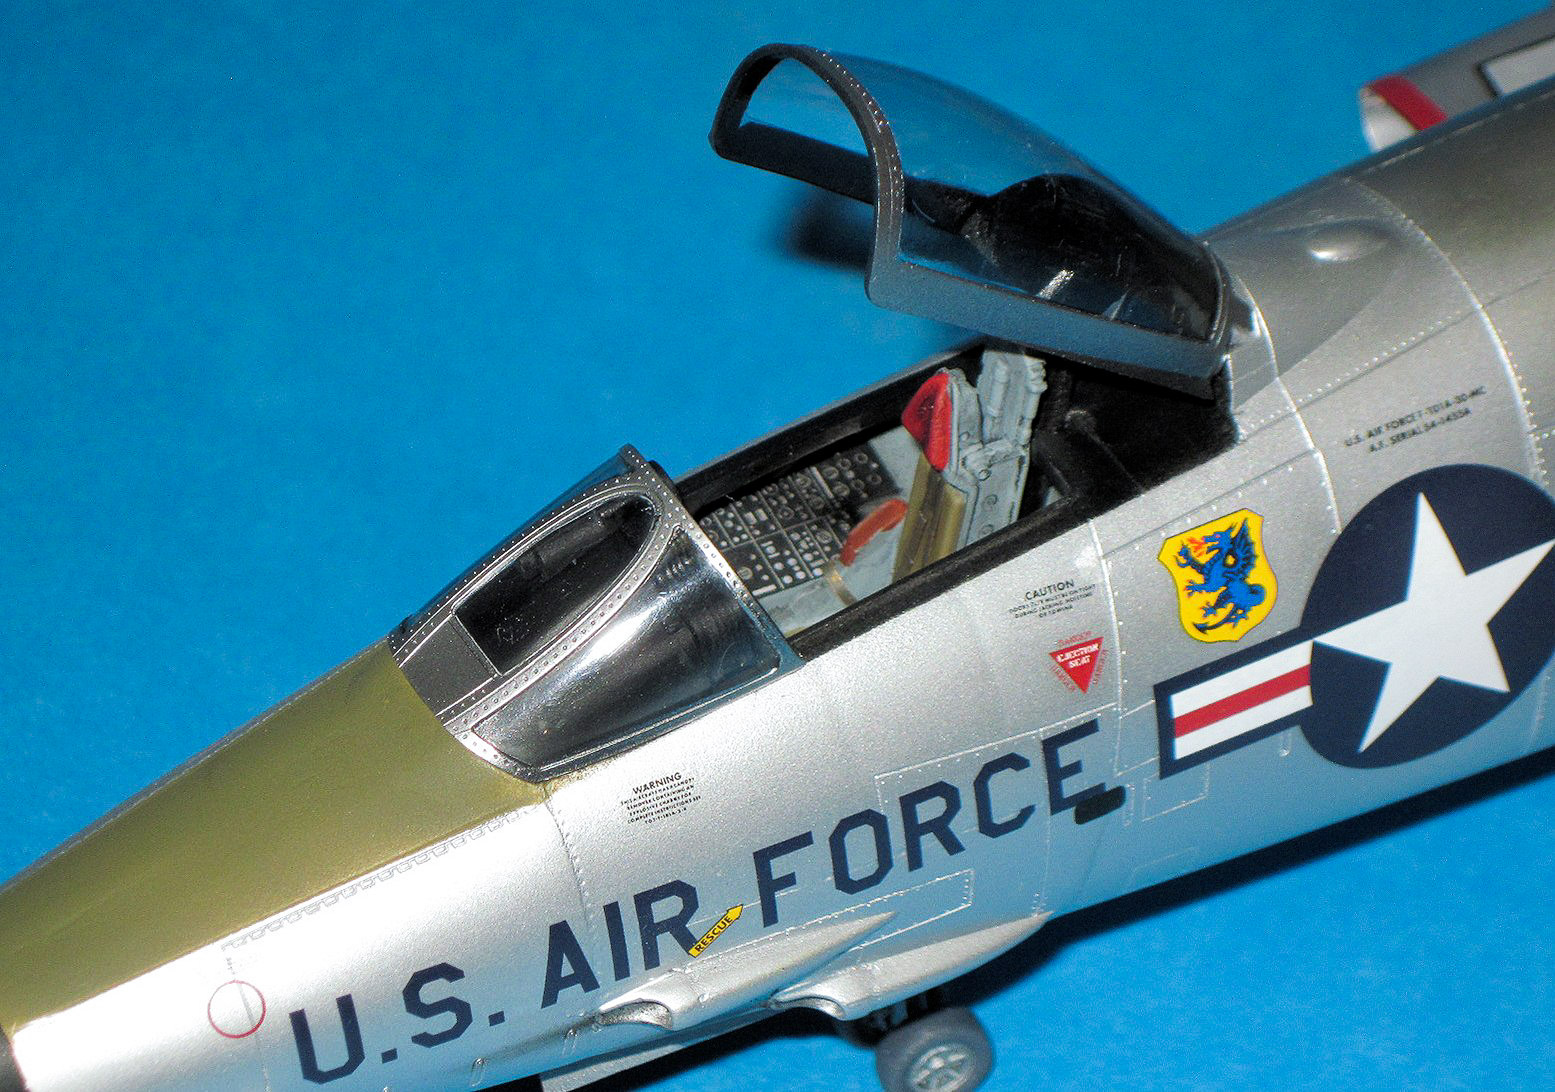
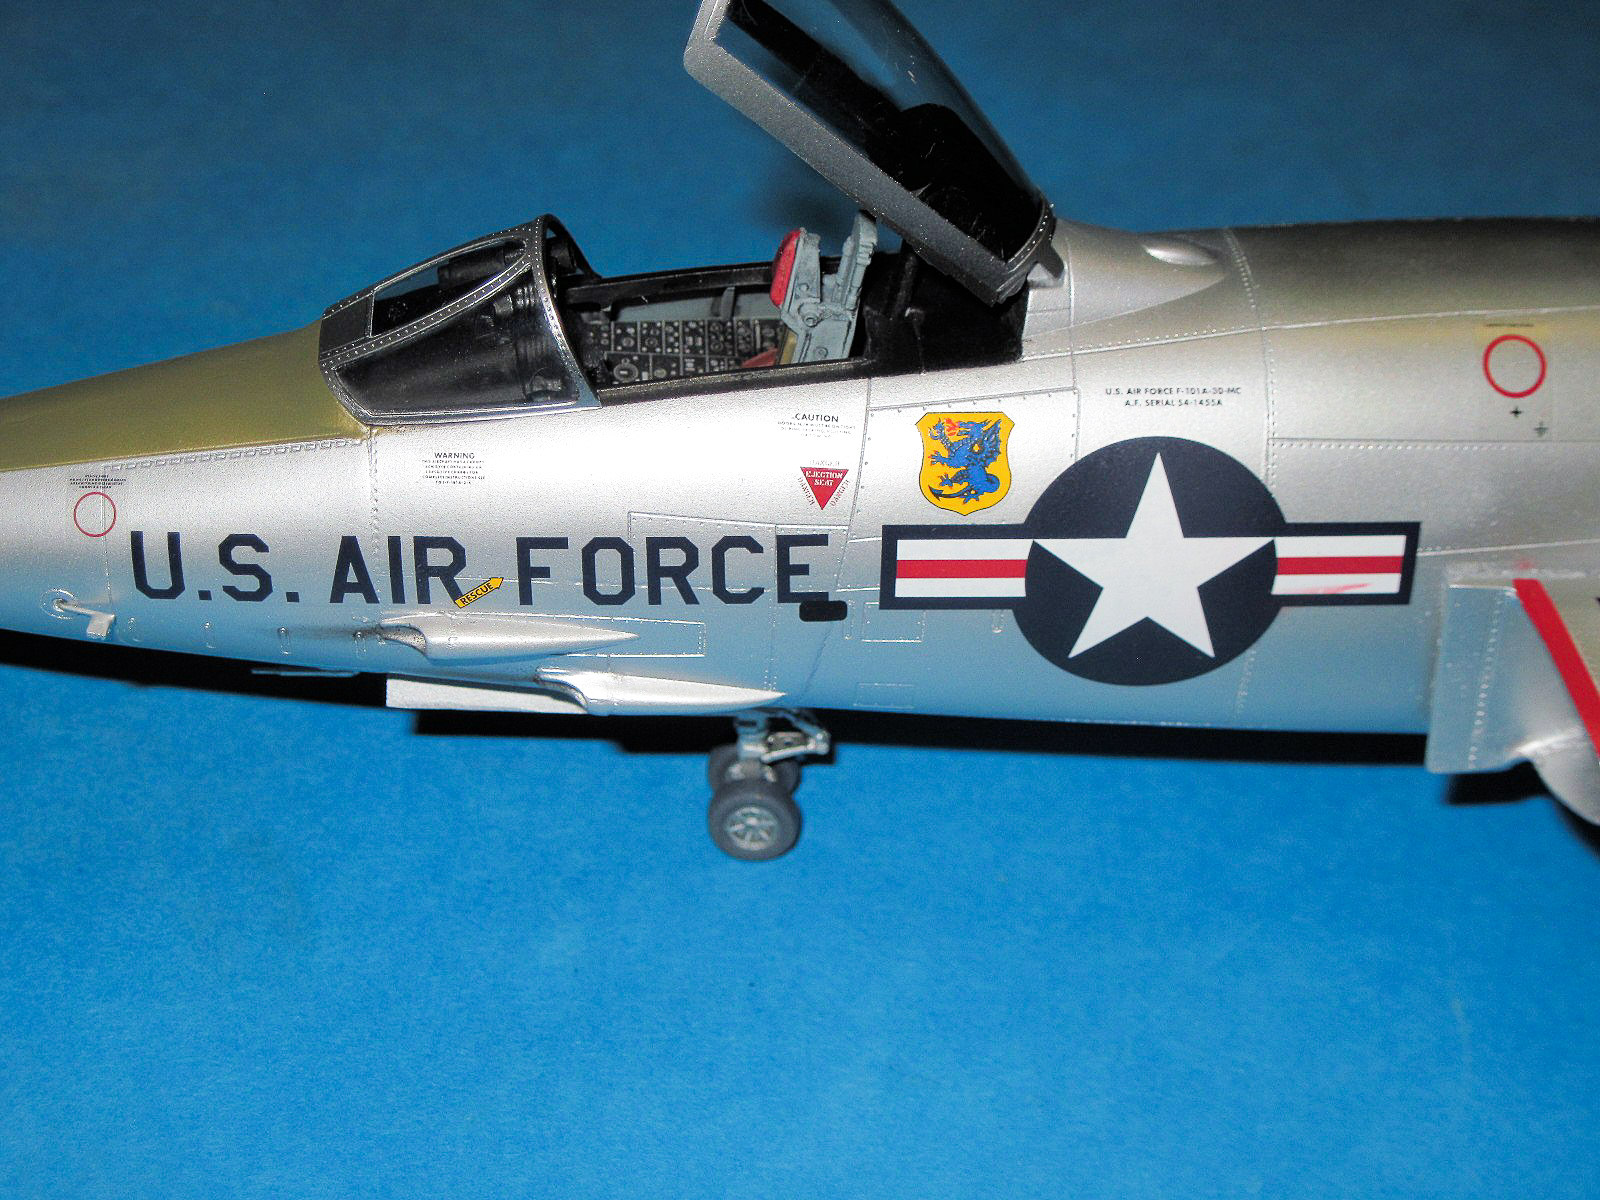
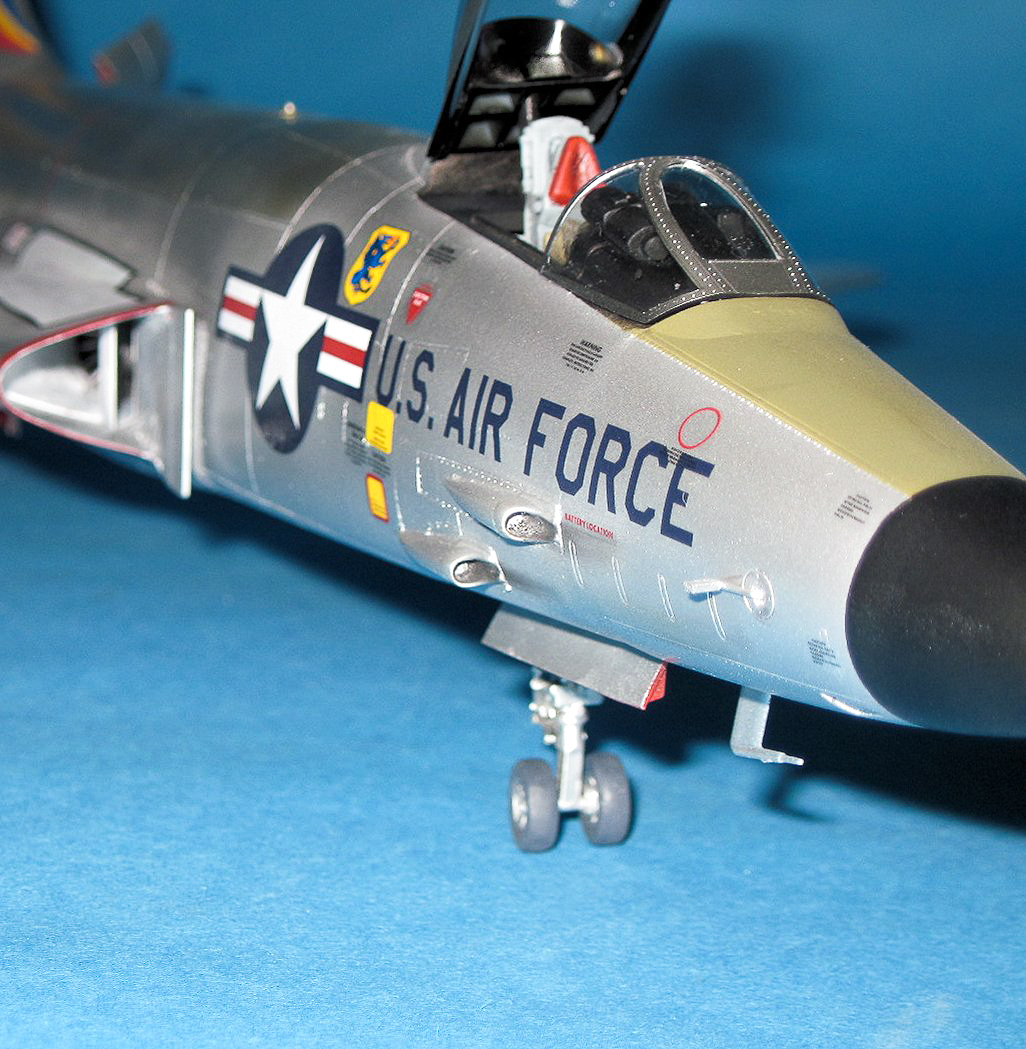
Finished Model - Canopy and Cockpit
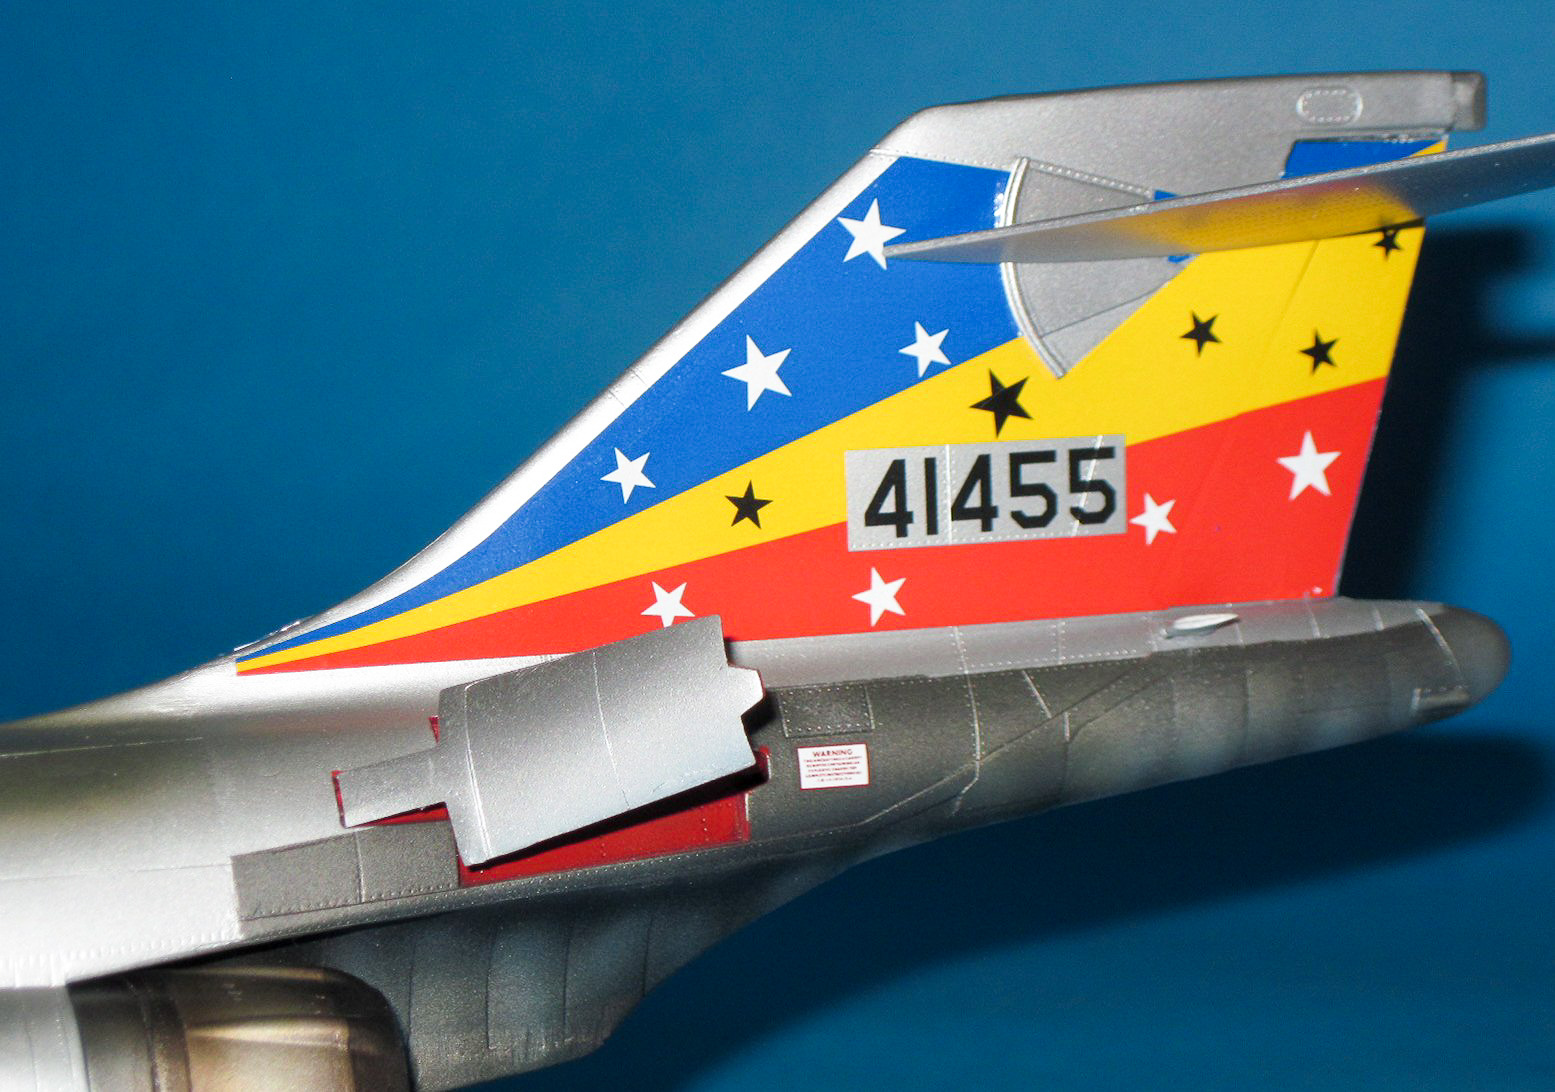
Finished Model - Tail
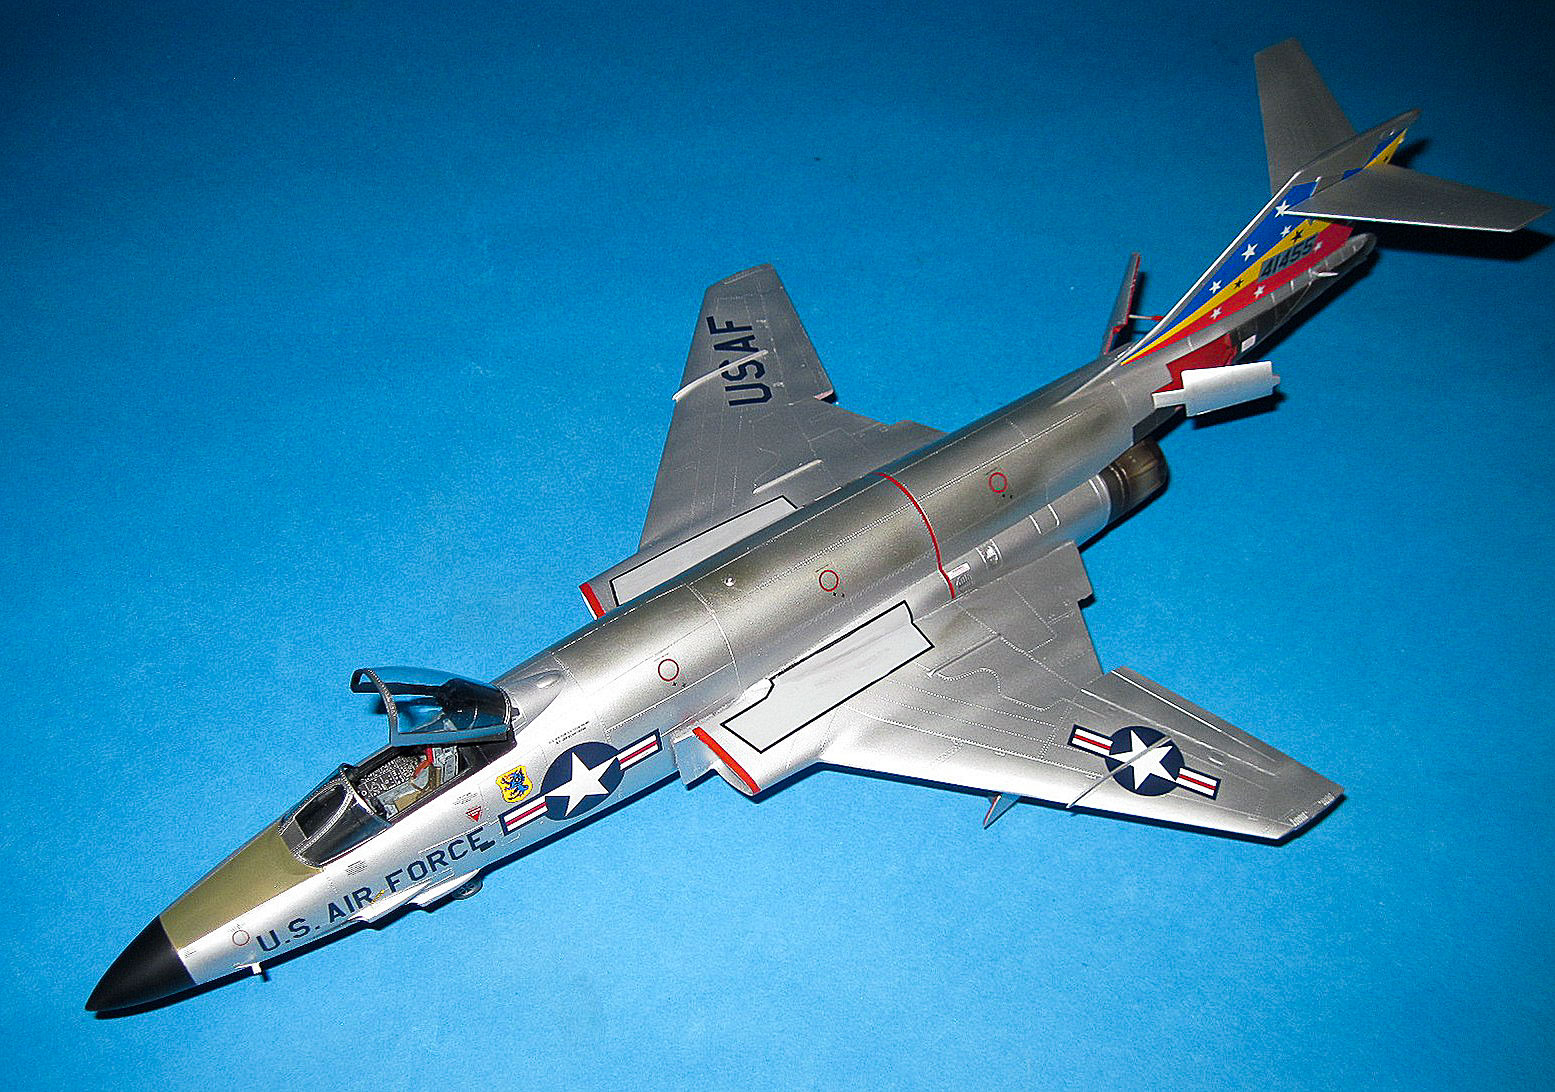
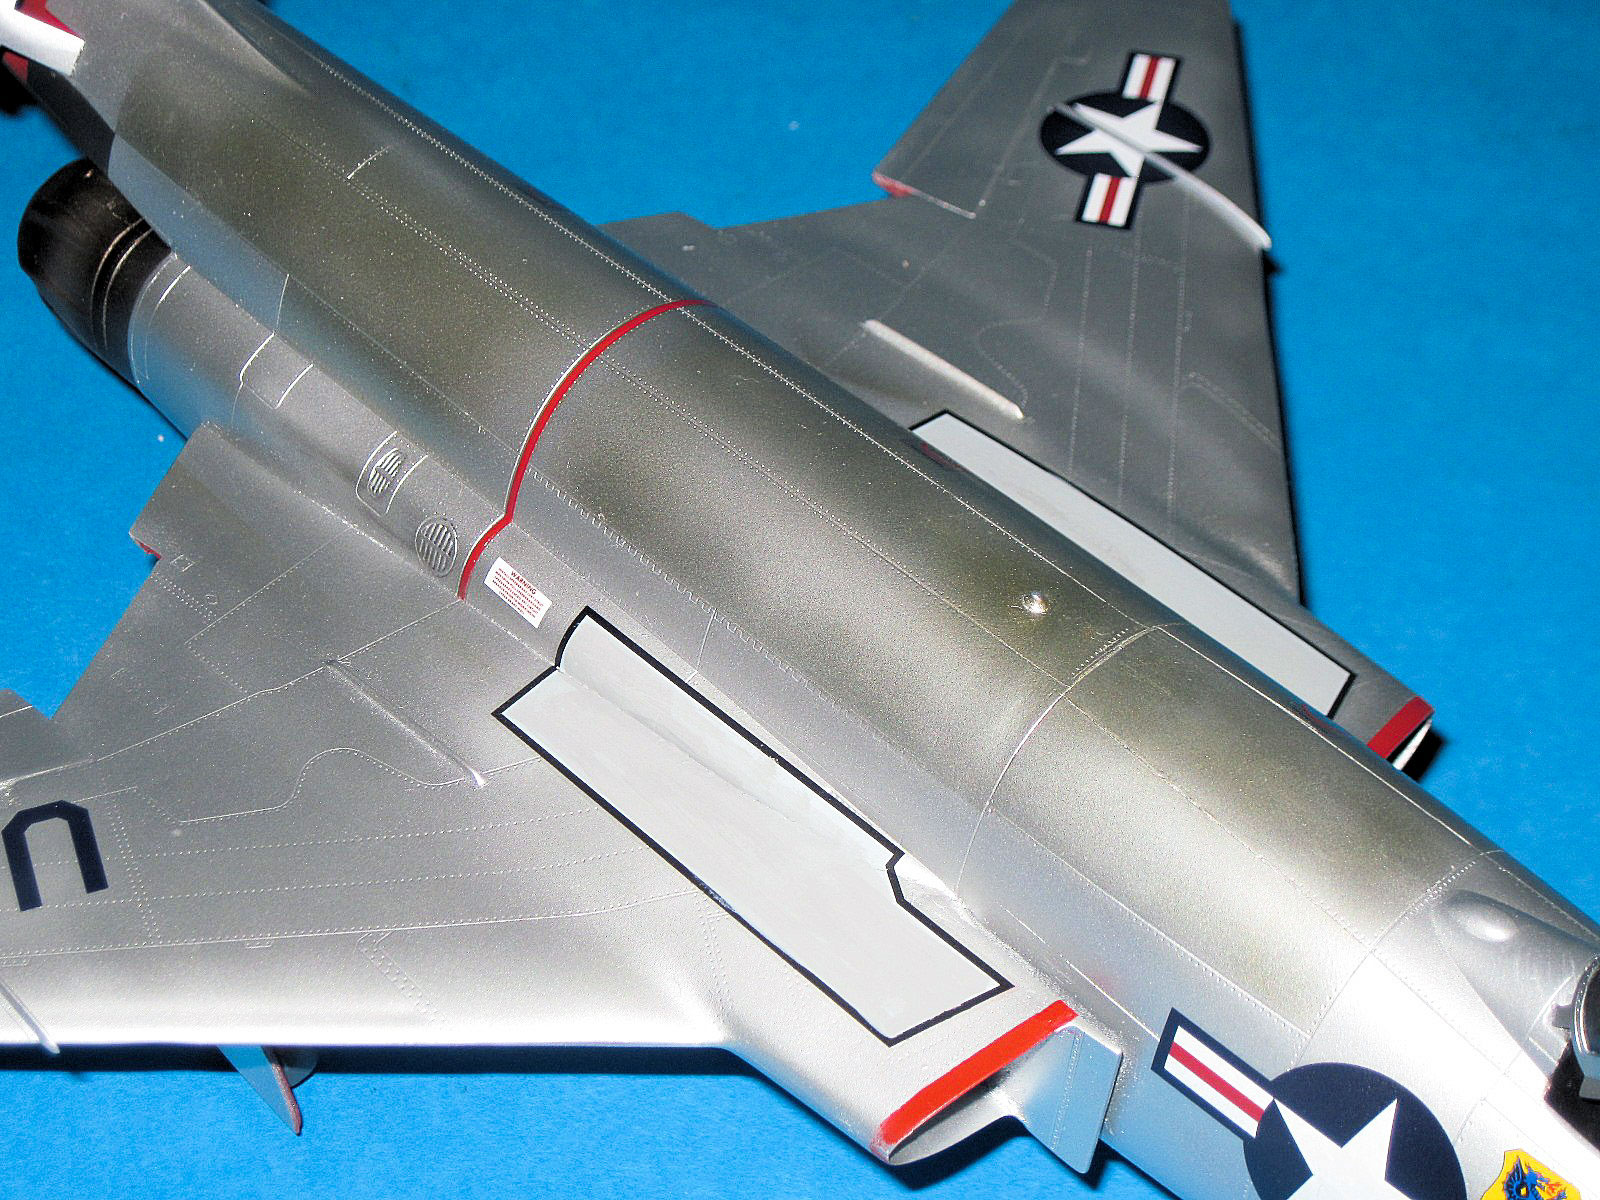
Finished Model - Top
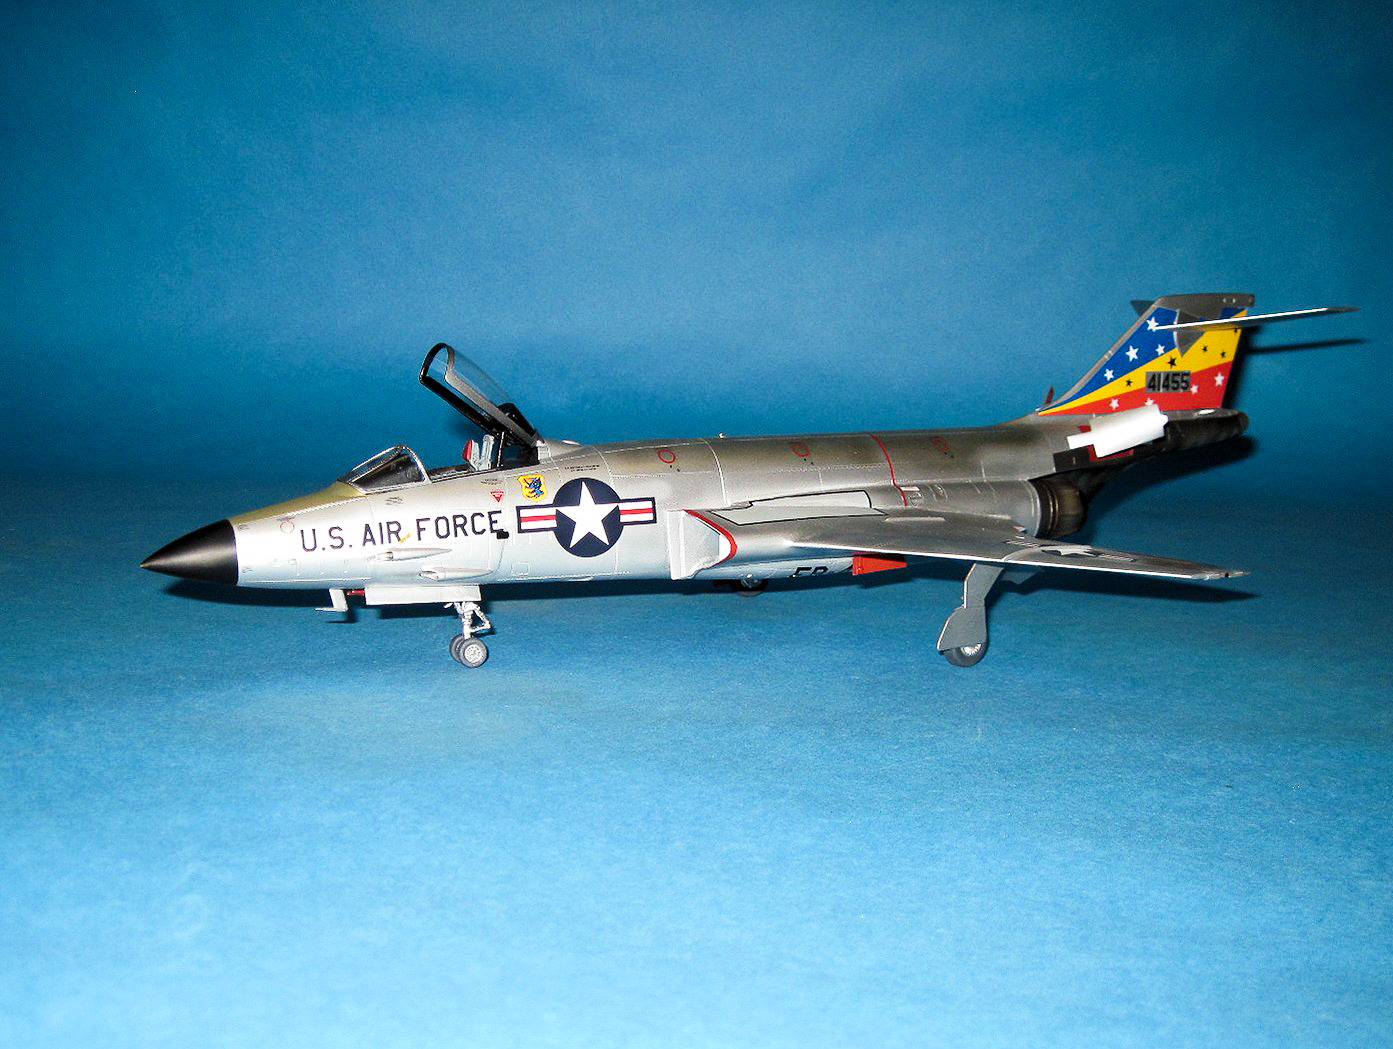
Finished Model - Left Side
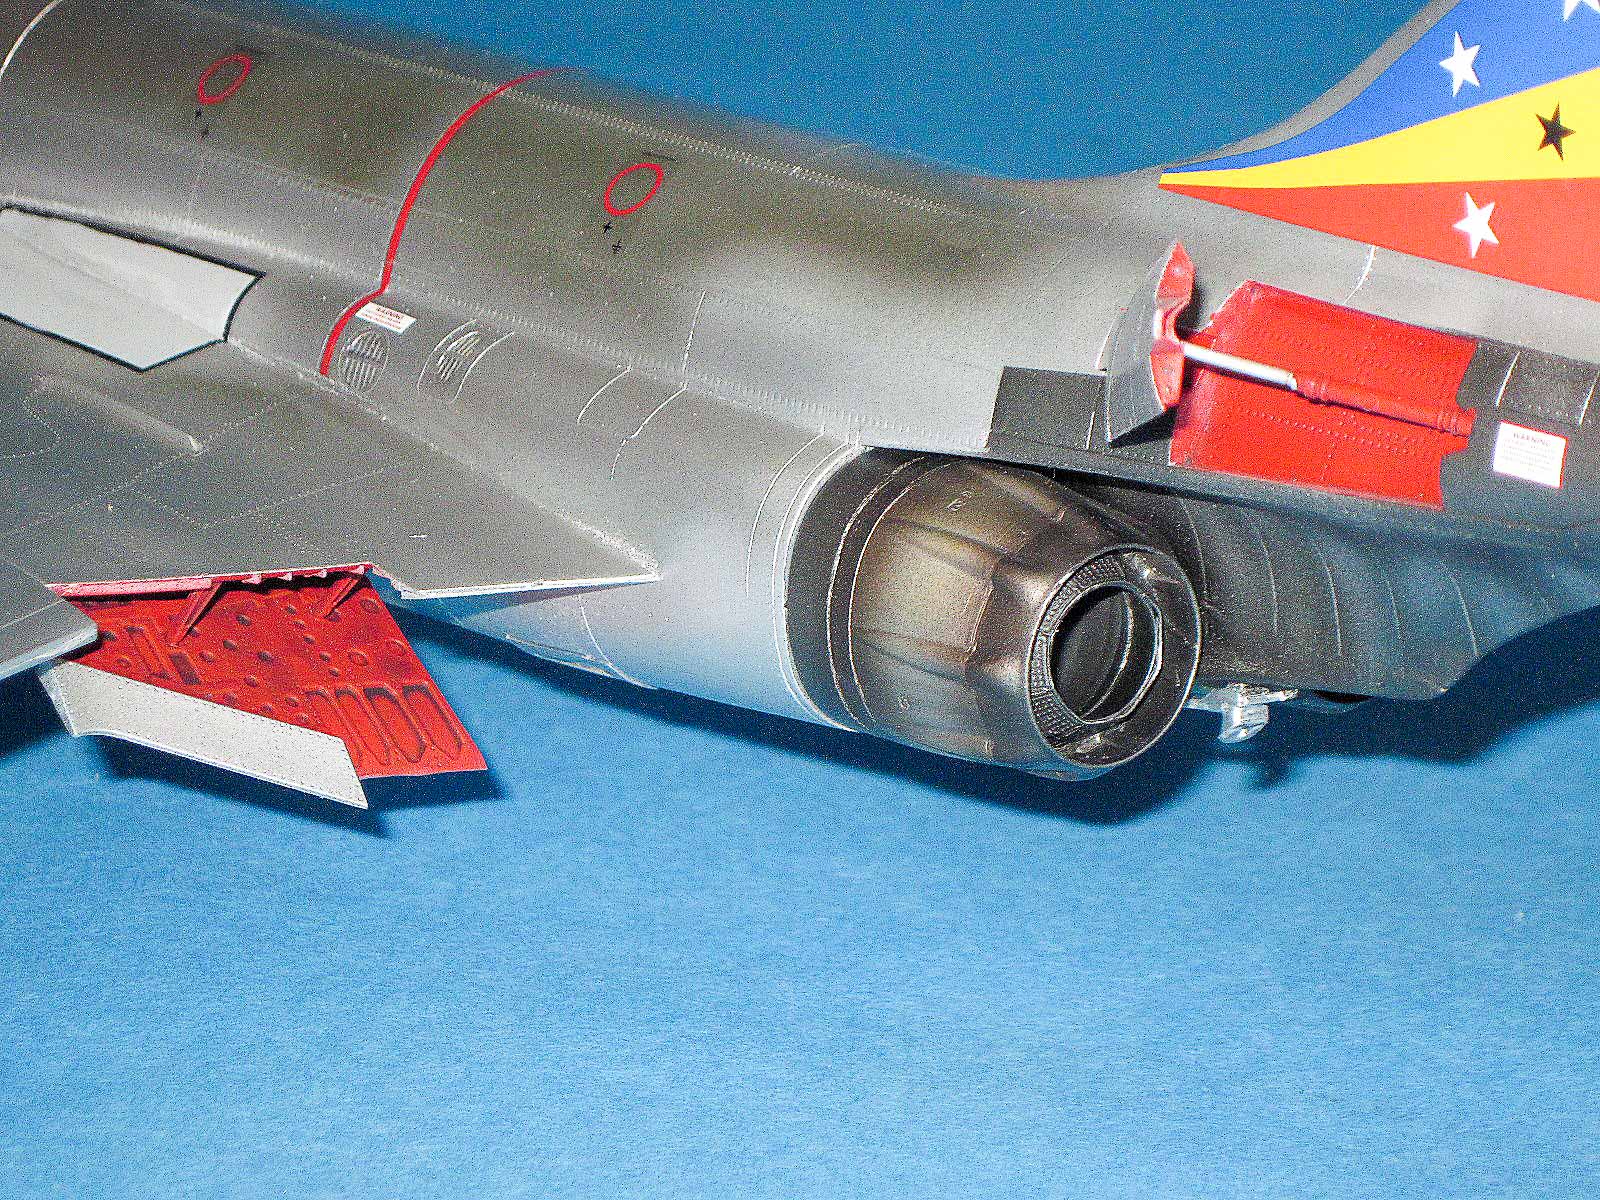
Finished Model - Exhaust Nozzle
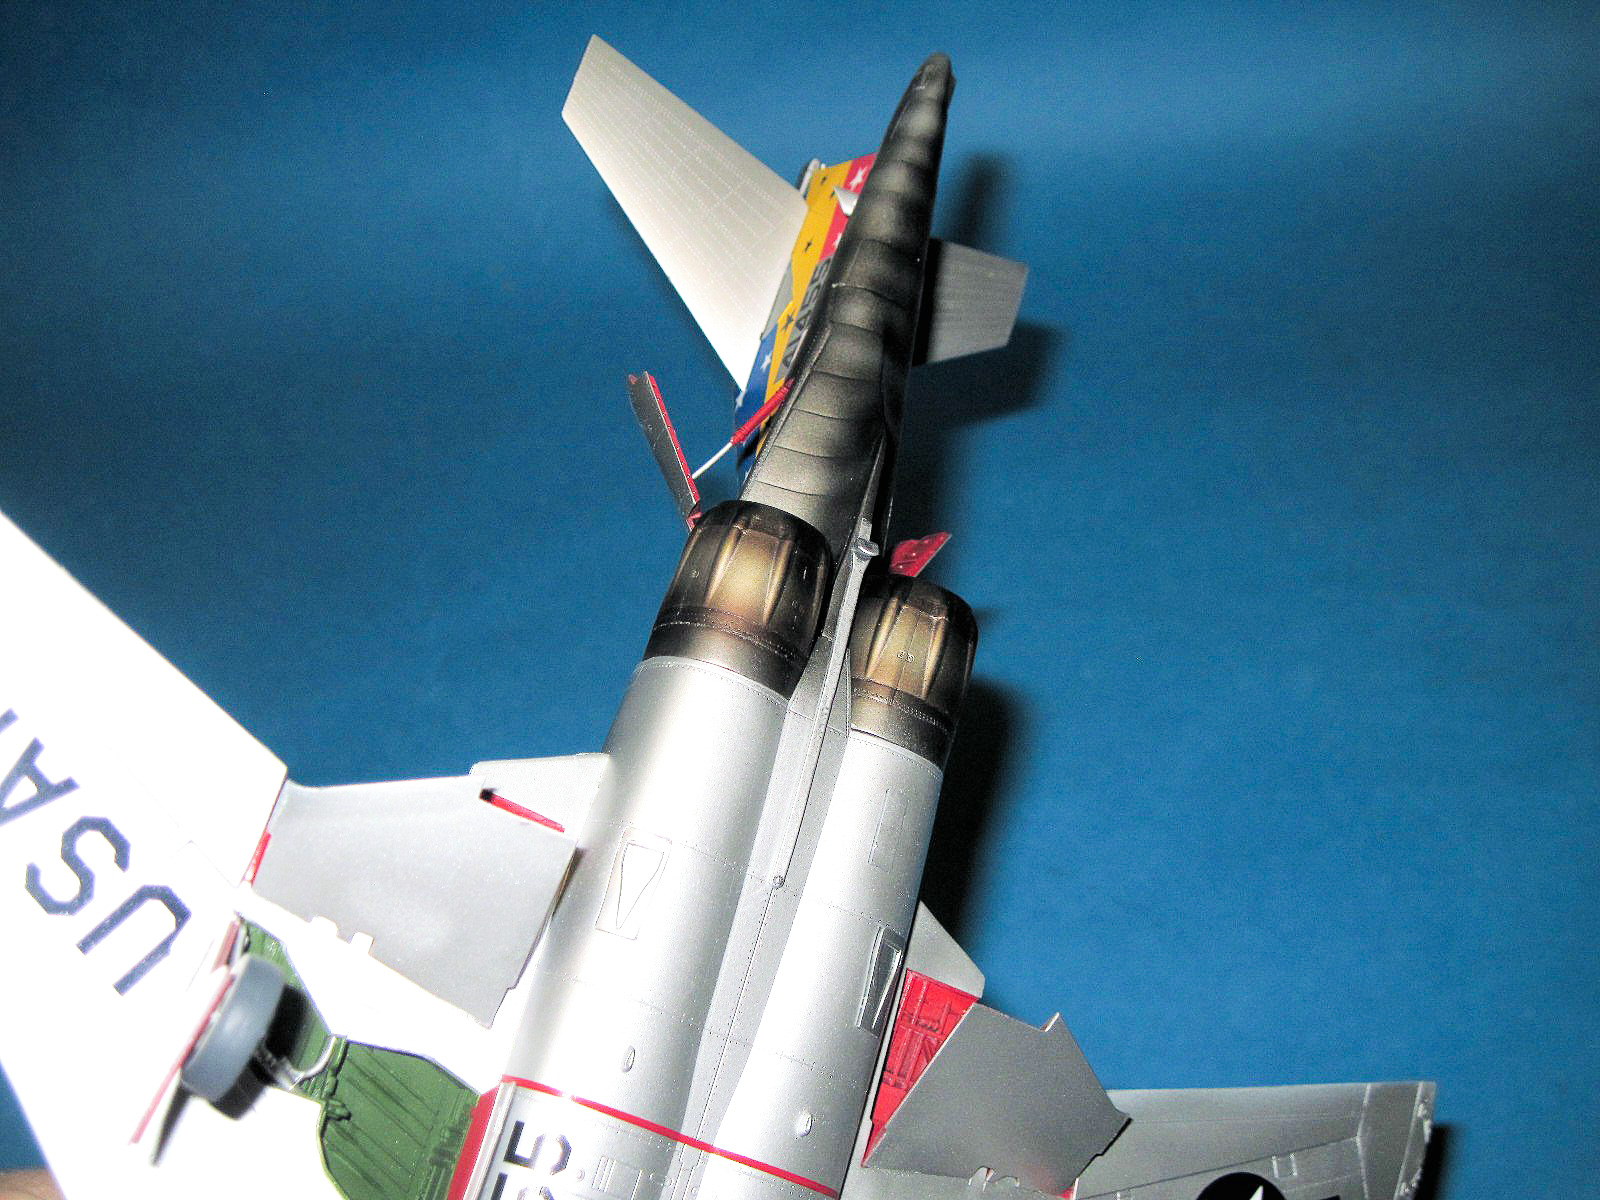
Finished Model - Exhaust Underside
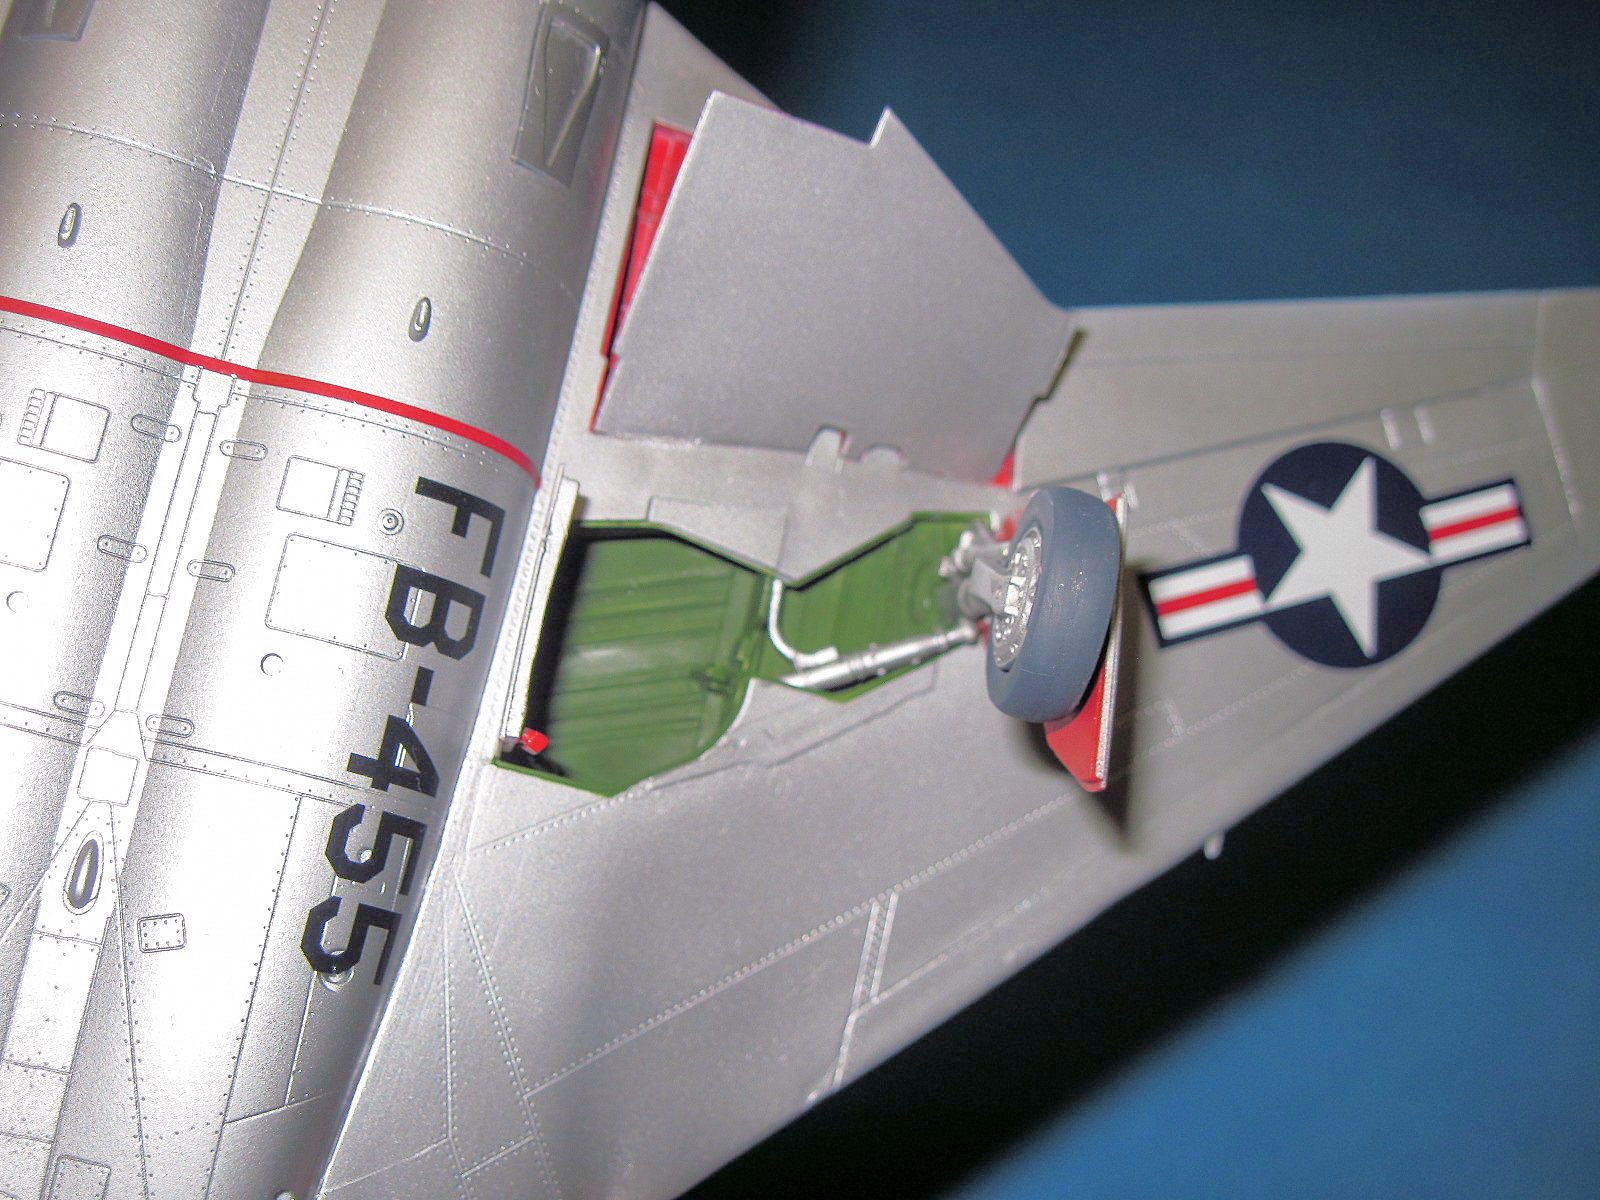
Finished Model - Main Gear Well
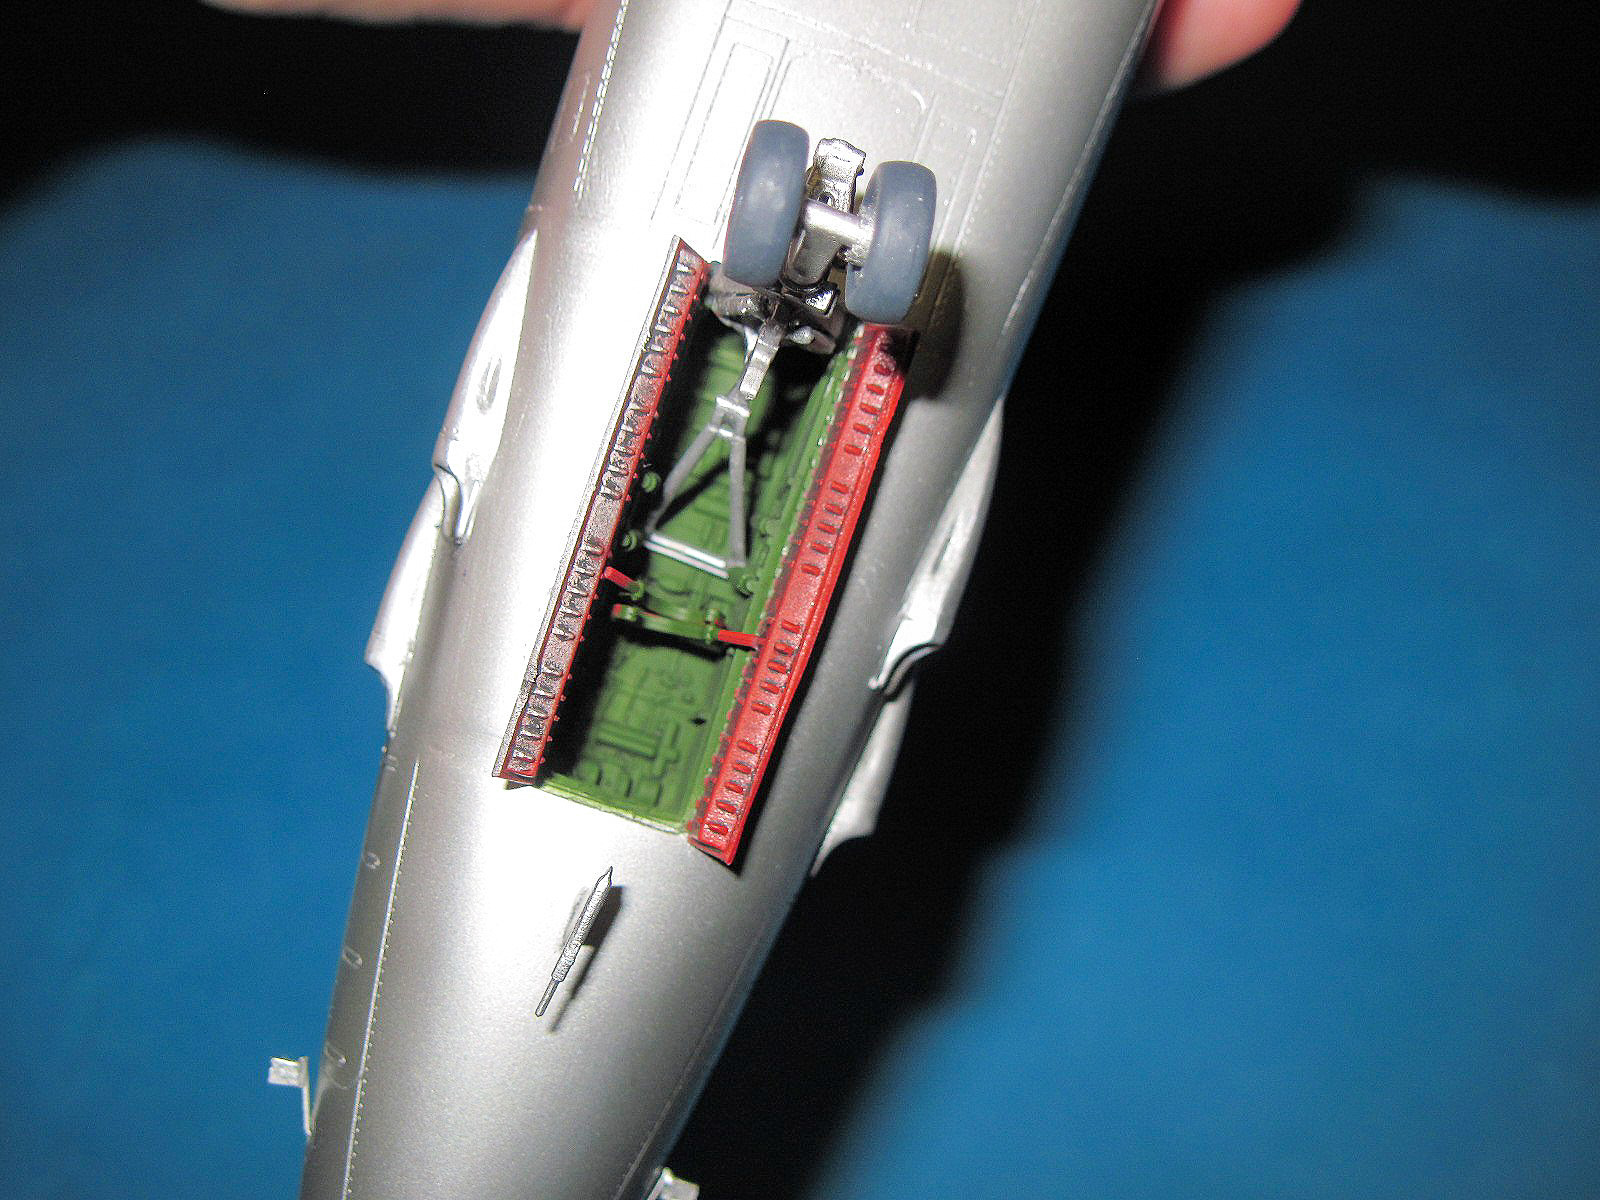
Finished Model - Nose Gear Well
Finished Model - Cockpit Closeup 1

Finished Model - Cockpit Closeup 2
Finished Model - Cockpit Closeup 3
Finished Model - Front
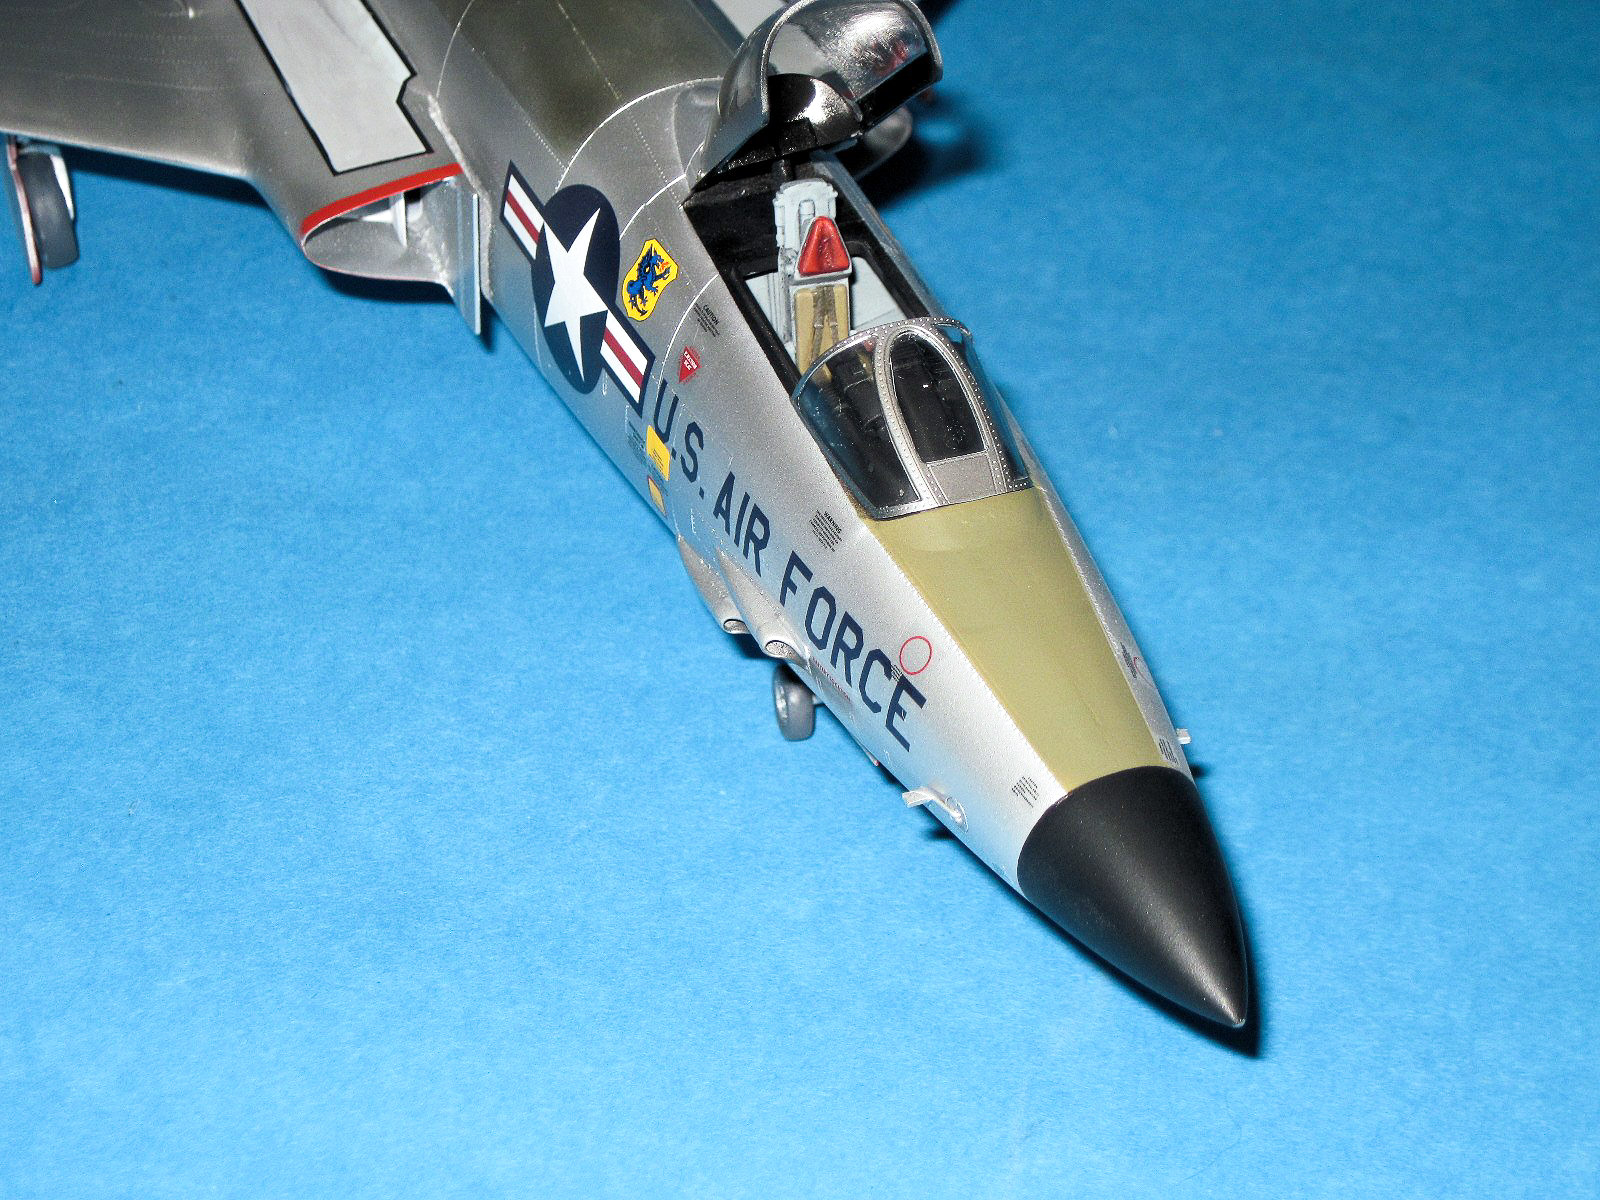
Finished Model - Nose Closeup
Comments
Add new comment
This site is protected by reCAPTCHA and the Google Privacy Policy and Terms of Service apply.
Similar Reviews