
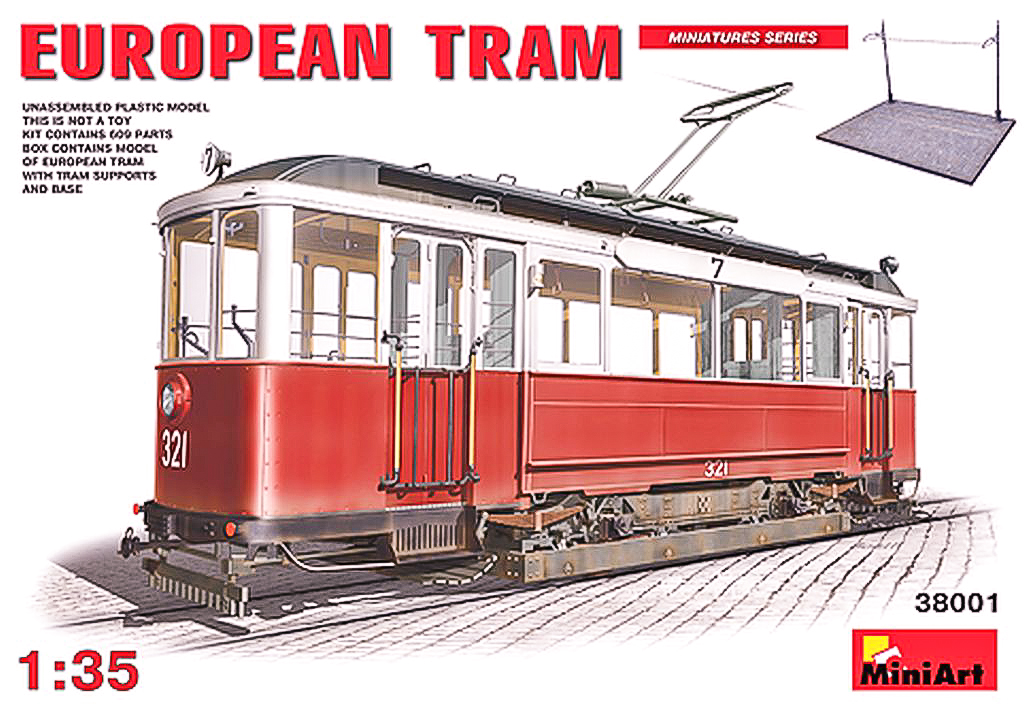
European Tram - Part 1
While growing up, I always had a soft spot for street cars, so I jumped at the chance of building and reviewing one as soon as I had the opportunity. MiniArt provides you with a “full meal” model of a European Tram: over 600 parts (on 25 sprues), including a very nicely detailed vacuform base with tracks, and two power poles. Before you open the box, just know that it is fully packed with parts. As soon as I opened the box, it was impossible for me to get all the sprues back in. I ended up using an empty model box for storage of some extra sprues.
The model features a full interior with two positions for the driver, one at each end of the tram, and all of the doors can be posed open or closed. As all of the interior detail is going to be painted in wood colors you can have a field day with painting and weathering. I am not aware of any aftermarket detail sets for this kit, and I don’t believe that there will be much of a need for any. Perhaps a driver and some passenger figures, and maybe some posters/ads to dress it up would be nice to have.
The construction booklet is probably the most elaborate I have ever seen. There are a total of 52 steps, and most of them are actually “x2”, meaning building two sets of each step. In fact, the whole tram is basically a mirror image of itself, reflecting the engineering of actual trams.
To ensure fully molded parts, it is common to have six, and up to 12, attachment points from the sprue to each part. Although that is good for ensuring fully molded parts, it is time consuming while building, as each part needs to be cleaned and prepared in multiple locations. Be prepared for many, many hours of modelling here!
As this is a complex build (both in the number of parts and the painting), I’ve decided to provide regular installments on my build to provide both an in-depth review and a timely response to the sample provider. Thank you Model Rectifier Corporation!
Part 1: The Running Gear and Undercarriage
I decided to start the construction from the bottom up, from the running gear, instead of starting with the interior as the instructions suggest doing. As they are different subassemblies, there is no risk of making a mistake by starting here.
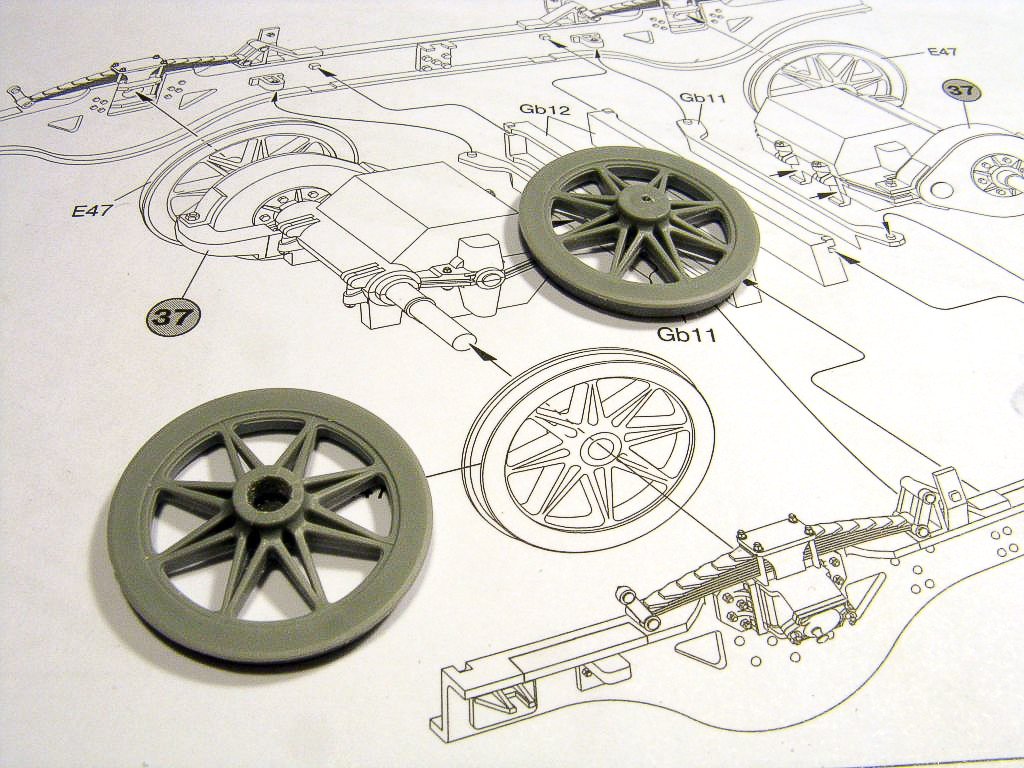
The instructions are very clear on what needs to be done at each step. As I’ve mentioned before, the whole construction is mirrored front to back, so be prepared to do every step twice. The running gear goes together easily, and I actually found it more challenging to find the parts among the 600 pieces than building the assembly itself. The only thing to point out is that you will have to drill the holes in the wheels for the axels. For some reason they were molded closed and the instructions do not point this out.
I only needed to use putty in selected spots, and this was most likely because I did not clean the parts properly. I’ve learned pretty quickly in this build that it is important to have all parts properly prepared. At the same time, it is a good idea to identify which sprues you will be working with, usually only two or three (good engineering there), and have those handy while the rest are put away. This will reduce the time you spend going through all the sprues, and will accelerate construction.
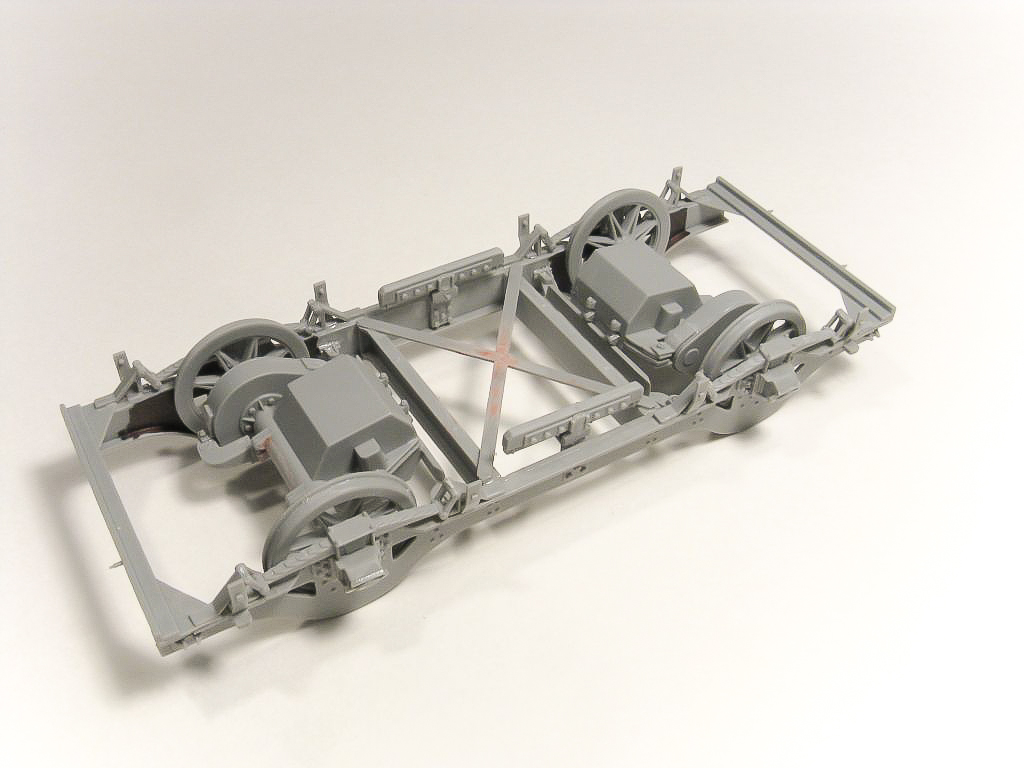
Once you have the entire running gear assembly built and ready for paint, there are approximately 100 parts involved (more than in a typical 1/48 scale single-engine airplane). I needed three painting sessions to get all the parts properly painted. This was due to how all of the different parts obstructed each other once assembled. Maybe smaller subassemblies would have been better for painting, but again, three painting sessions for this elaborate of a subassembly is not bad.
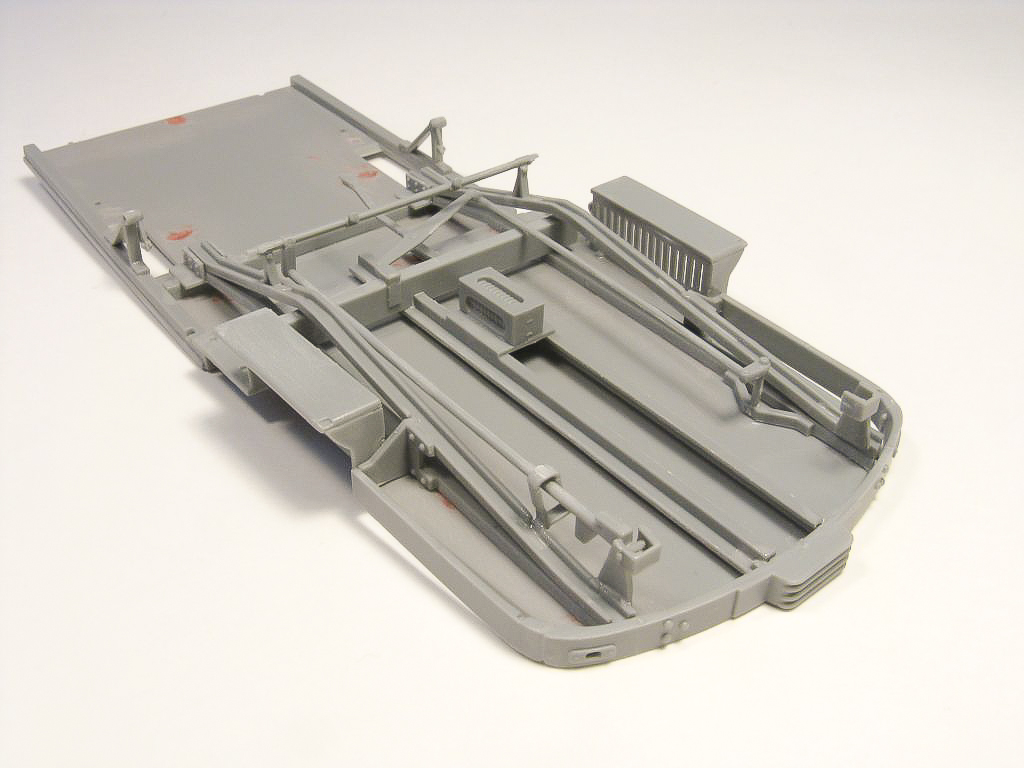
Once I had the running gear painted, I started working on the undercarriage and the boarding steps. Again, this subassembly is a mirrored front to back. These parts needed some serious preparation work as there were no less than 16 ejector pin marks that needed to be removed and sanded flat. Not difficult to do at all, but a bit time consuming.
At this point in the construction (about 20 hours in), I had my system of pre-sorting which sprues I would be working with down pat, and I had learned to make absolutely sure the parts were completely cleaned up before gluing them. These tricks certainly expedited the whole process of assembly.
For the most part, there are no difficult steps. However, there are a few areas to pay attention to while building. In step 4, be sure to open the square holes marked on the lower side of the undercarriage by the boarding steps, as you will need them later. I would recommend assembling part G5 in step 6, rather than in step 5. A final word of caution, when gluing the front and back parts together, adding some reinforcement strips would be a really good idea. The joint is very flimsy on its own, and I’ve added a square piece of flat styrene to the bottom area to reinforce the joint.
Conclusion of Part 1
This is an elaborate model. Not difficult, but certainly made more challenging due to the high part count, and the need to carefully clean and prepare each part. From my initial impressions and construction, I would recommend this kit to the experienced modeler.
So far I have spent over 30 hours working on MiniArt’s European Tram, and I am nowhere close to completion. At the same time, I find myself very engaged with the build, and I am not tempted to put it down or box it up to finish later. That said, I will admit to having a few other projects to work on in parallel with this build, simply to avoid ‘burning out’ on this one large project.
I would like to thank MiniArt, Model Rectifier Corporation and IPMS/USA for the review sample. Stayed tuned for future installments.


Comments
Add new comment
This site is protected by reCAPTCHA and the Google Privacy Policy and Terms of Service apply.
Similar Reviews