
English Electric Canberra B(i).6/B.20
History
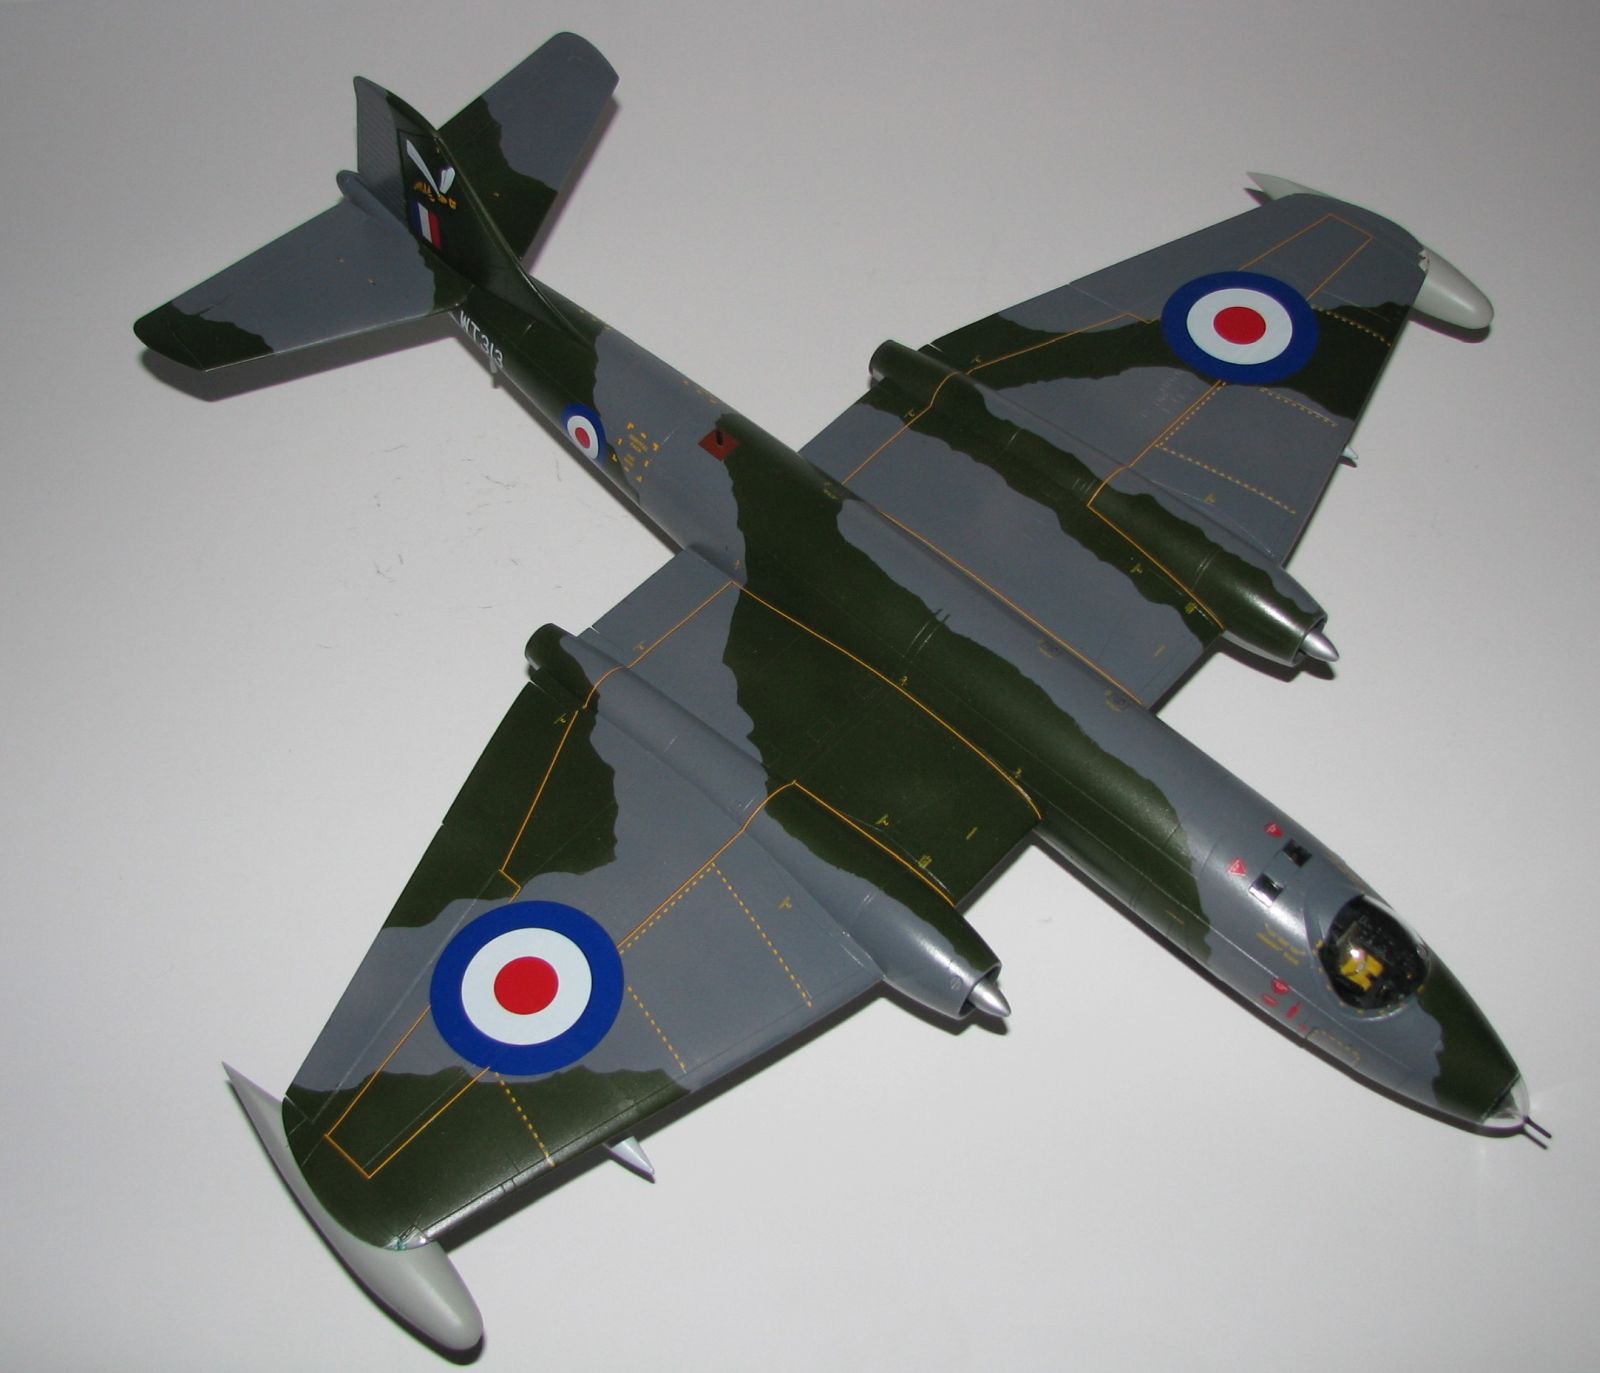
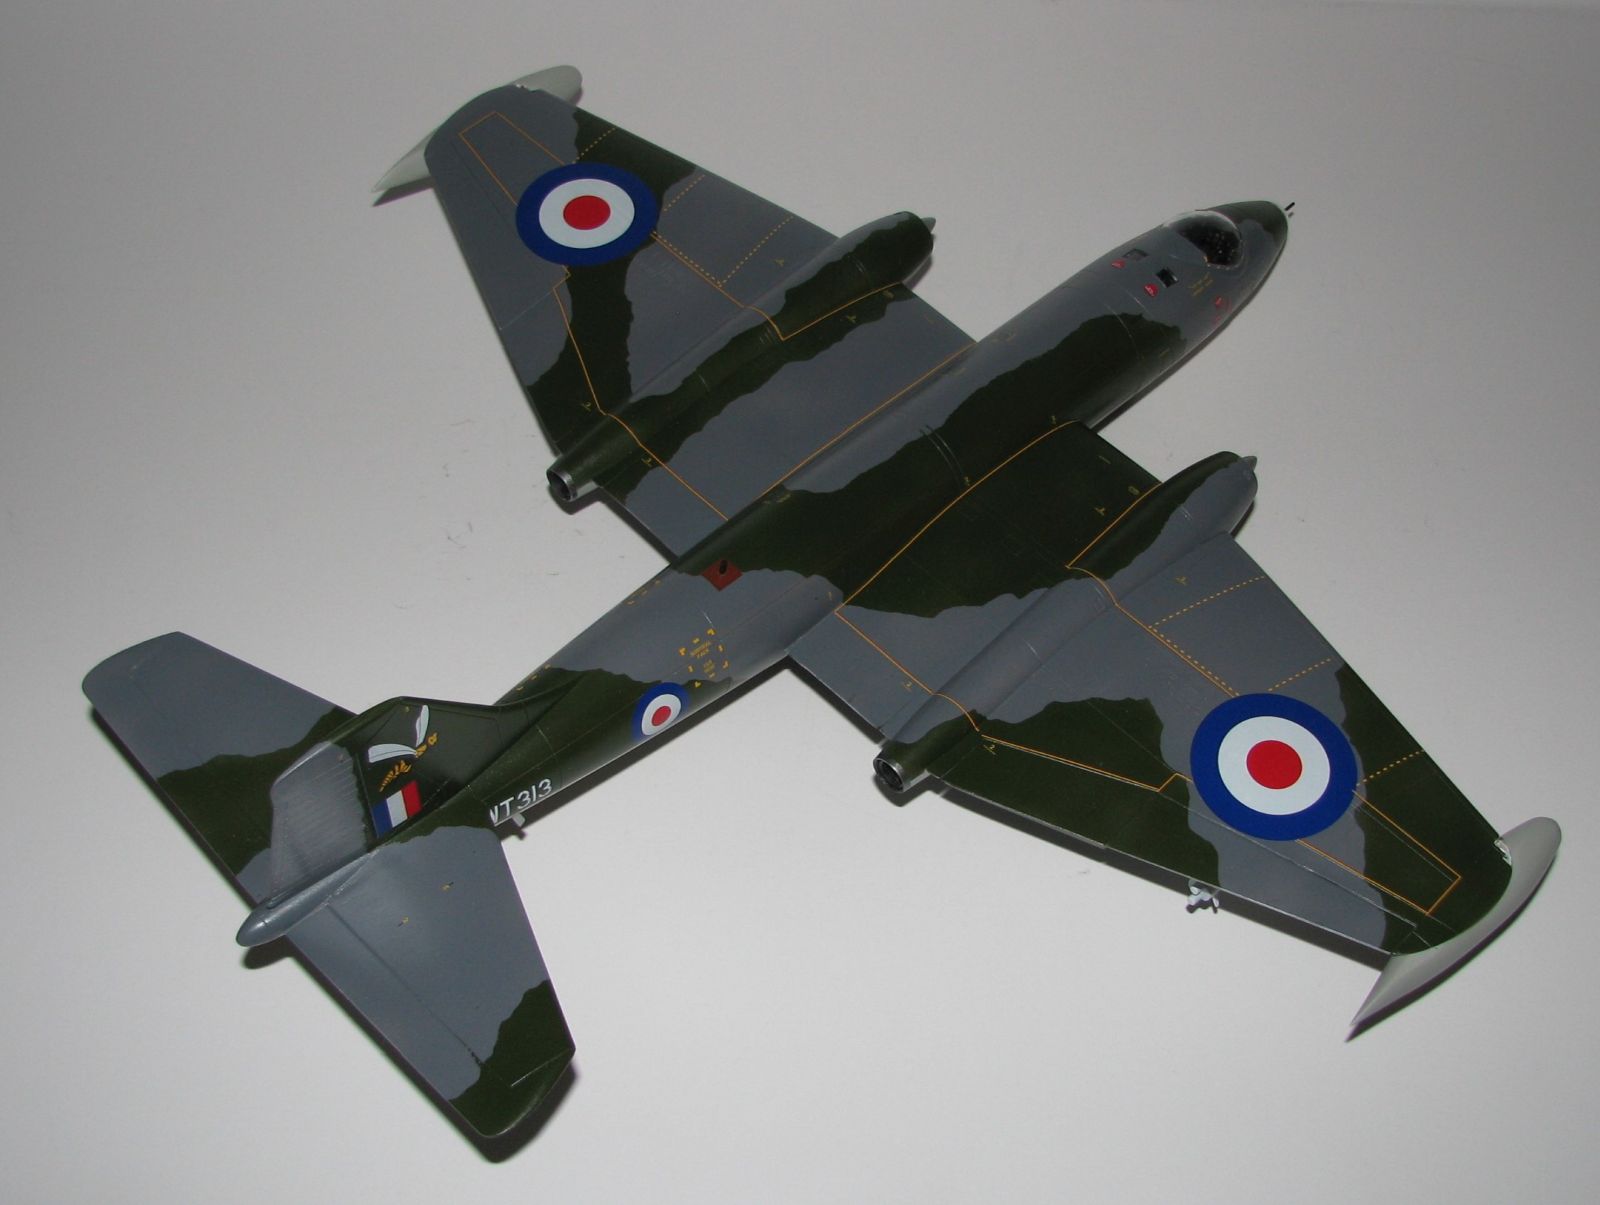
The English Electric Canberra traces its roots back to 1944 when the Air Ministry issued a requirement for a successor to the De Havilland Mosquito 'with no defensive armament and a high-altitude capability to evade interceptors'. Taxi tests began in May of 1949 and the first flight was May 13th, 1949…..and yes, it was a Friday! First delivery to the RAF was May 25th, 1951 t0 101Sqn, Binbrook and in the next 3 years, 23 squadrons received the aircraft. The Canberra proved so successful that it was exported to many other countries (15) and also built in Australia and the U.S. there were (including prototypes) 40 variants of the Canberra. The B9i).6 was the interim interdictor version for the RAF pending delivery of the B(I)8. Based on the B.6 with a detachable ventral pack housing four 20 mm Hispano Mk. V cannon for strafing; also had provision for two wing hard points. LABS (Low-Altitude Bombing System) for delivery of nuclear bombs. 22 were produced.
The Kit
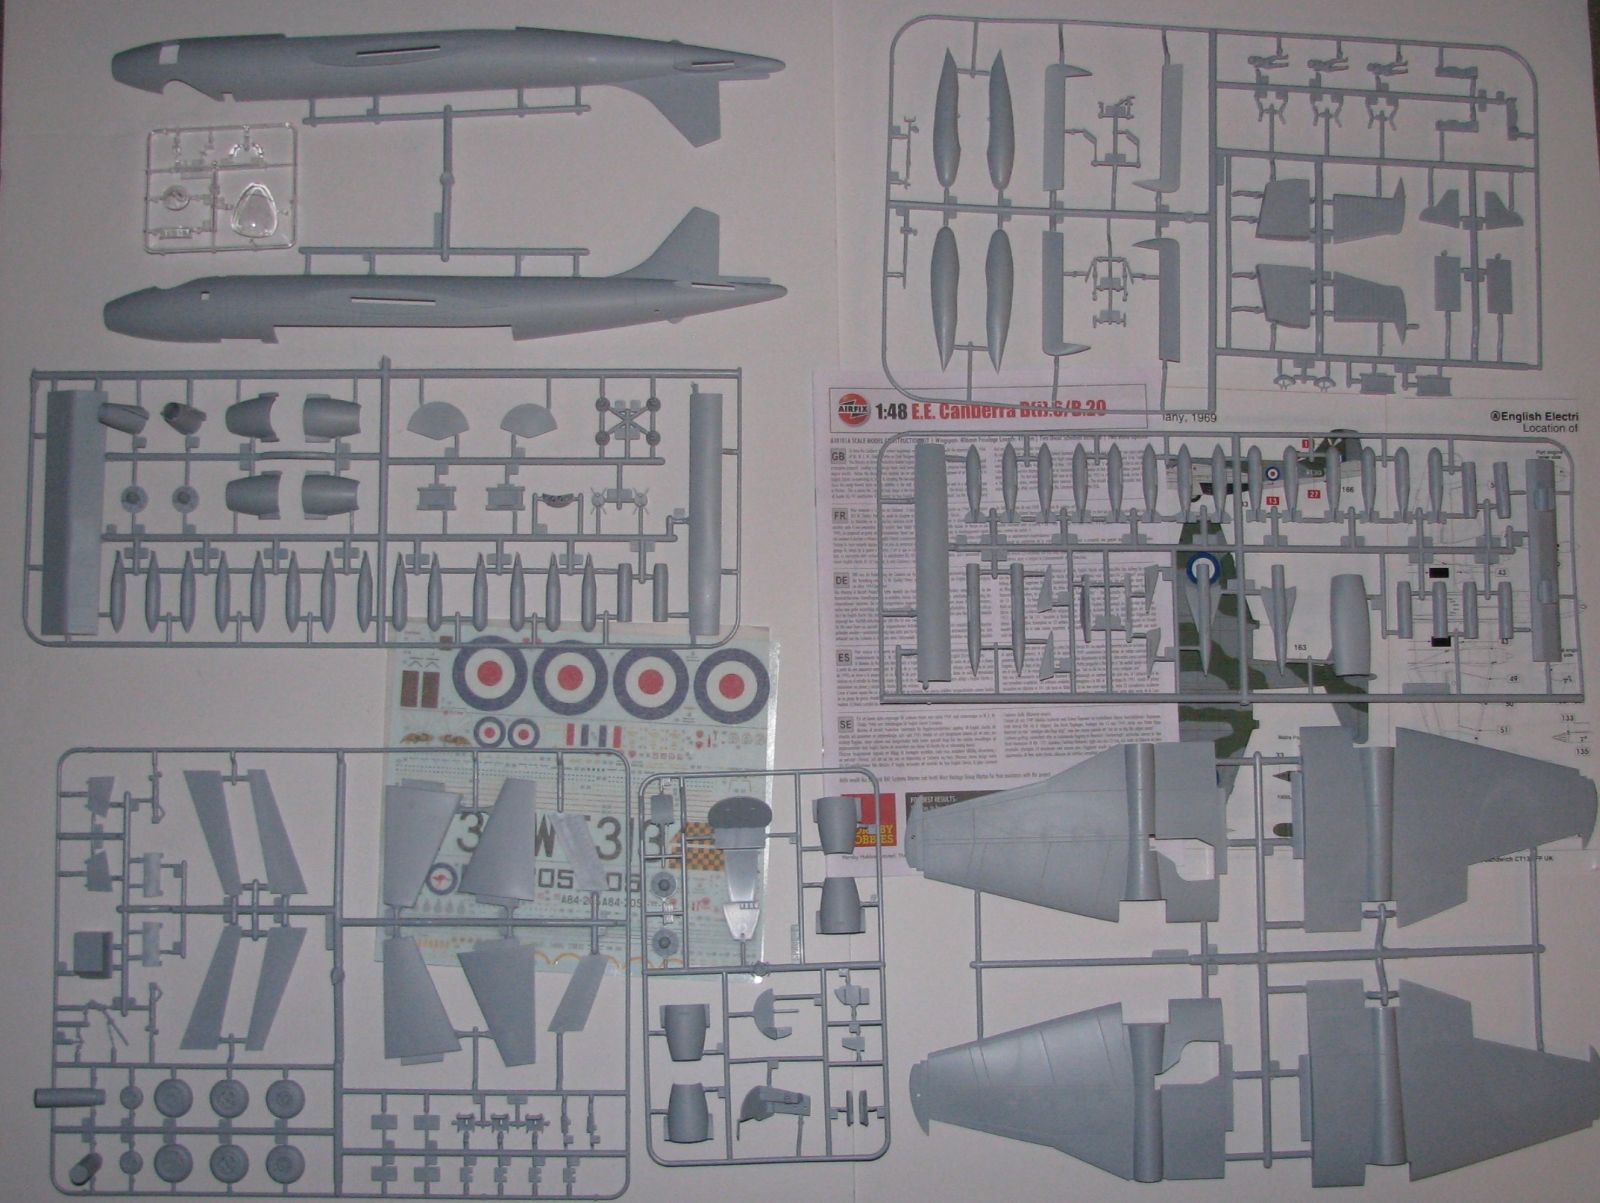
Inside the box, you will find 7 sprues of gray injected plastic and 1 clear, a large decal sheet, a 12-page instruction booklet and a color guide fold out. The plastic is pretty crisply molded with recessed panel lines and very little flash but there are a few pin marks to be cleaned up. One minor problem is that a few of the areas where parts are attached to the sprue are pretty thick so a good saw will come in handy. The clear parts look very nice and the decals are printed cleanly and in register. This kit was originally released in 2008
Construction
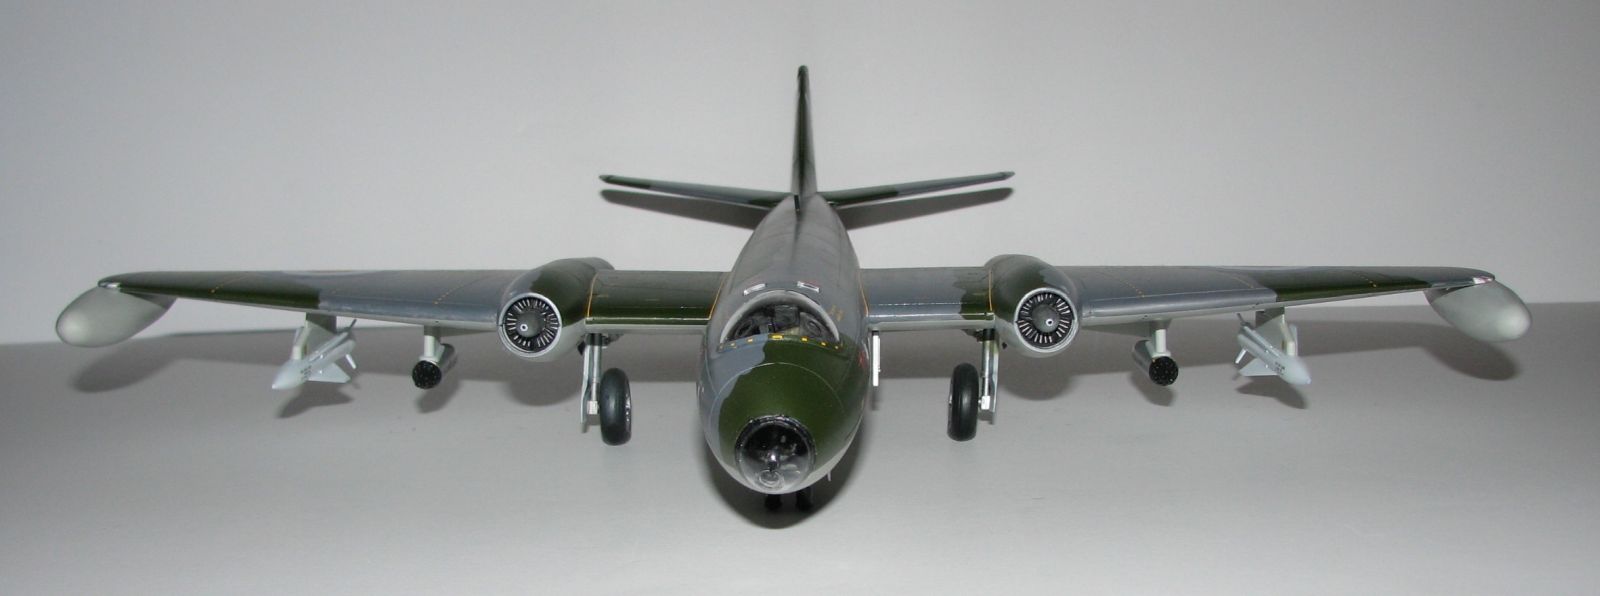
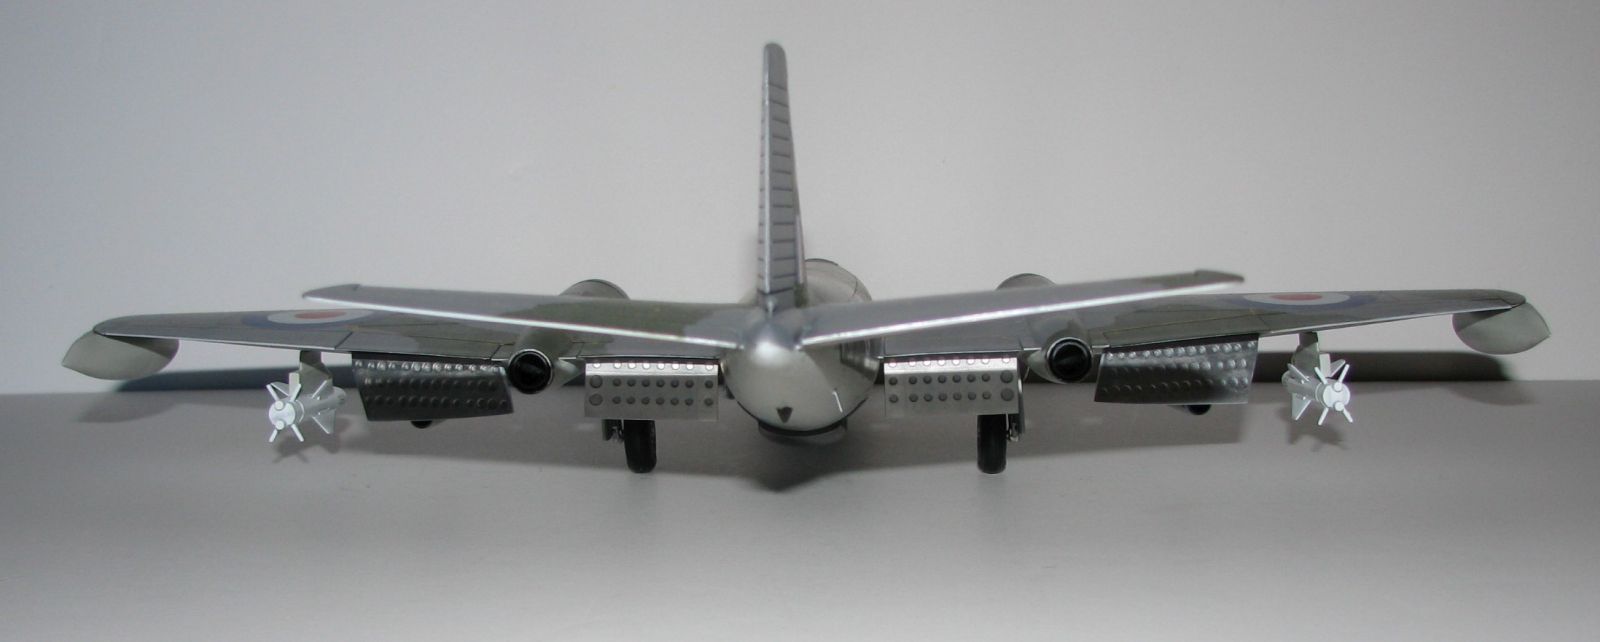
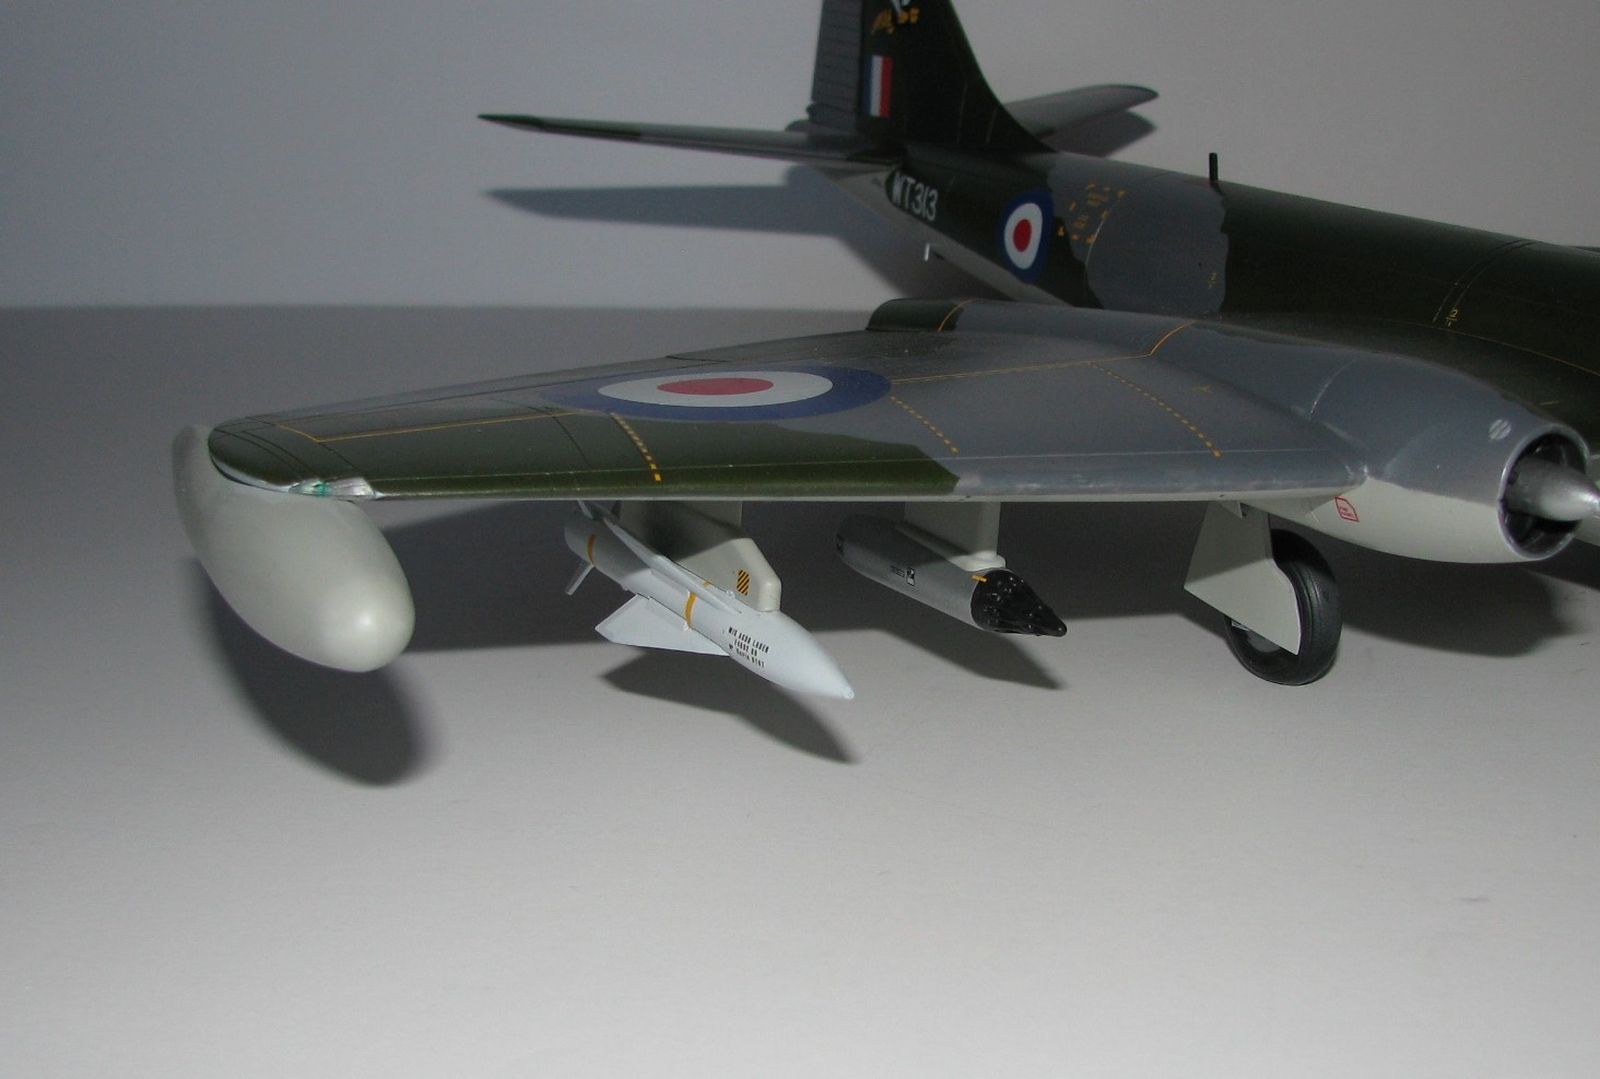
37 steps make up the assembly of this kit starting with the cockpit. The seats have molded in harnesses and look pretty good but could use a bit more detail and the control panel is nice but the gauges are blank with no raised detail nor is a decal provided. I was going to use the Eduard Zoom set but decided to just use decals by Mike Grant. The 3 crewmen have nice detail if you want to add them but I decided to leave them out. After the pit is complete and the Bombay is built you may close up the fuselage but not before adding the weight. The instructions call for 100 grams on top of the nose wheel bay and you will need every bit of that. I did not add enough and ended up putting some weight in the pit and nose (hidden of course!) to keep it from resting on its tail. On to the wings where you’ll have to open up the slots for the weapons pylons and add the wheel bays before closing them up. Next up are the engine intakes and there are 2 to choose from so make sure you have the right ones for the version you’re building. The main problem I had with the intakes was the seam line which was a bit of a pain to clean up and in my haste, I totally forgot the inside seam….DOH! The fan is soft on detail so you may want to use aftermarket if it bothers you much. Once these and the exhaust nozzles are built you can now attach them to the wings and then the wings to the fuselage. Sounds simple but there are a few gaps that need to be filled in wing roots and intake & exhaust to wing areas which some Evergreen strips filled in nicely. At this point, I assembled the horizontal stabilizers, ailerons, and rudder and all went on easily. The landing gear went together pretty easy but I’m not sure the nose gear will hold up over time with all of that weight….time will tell!
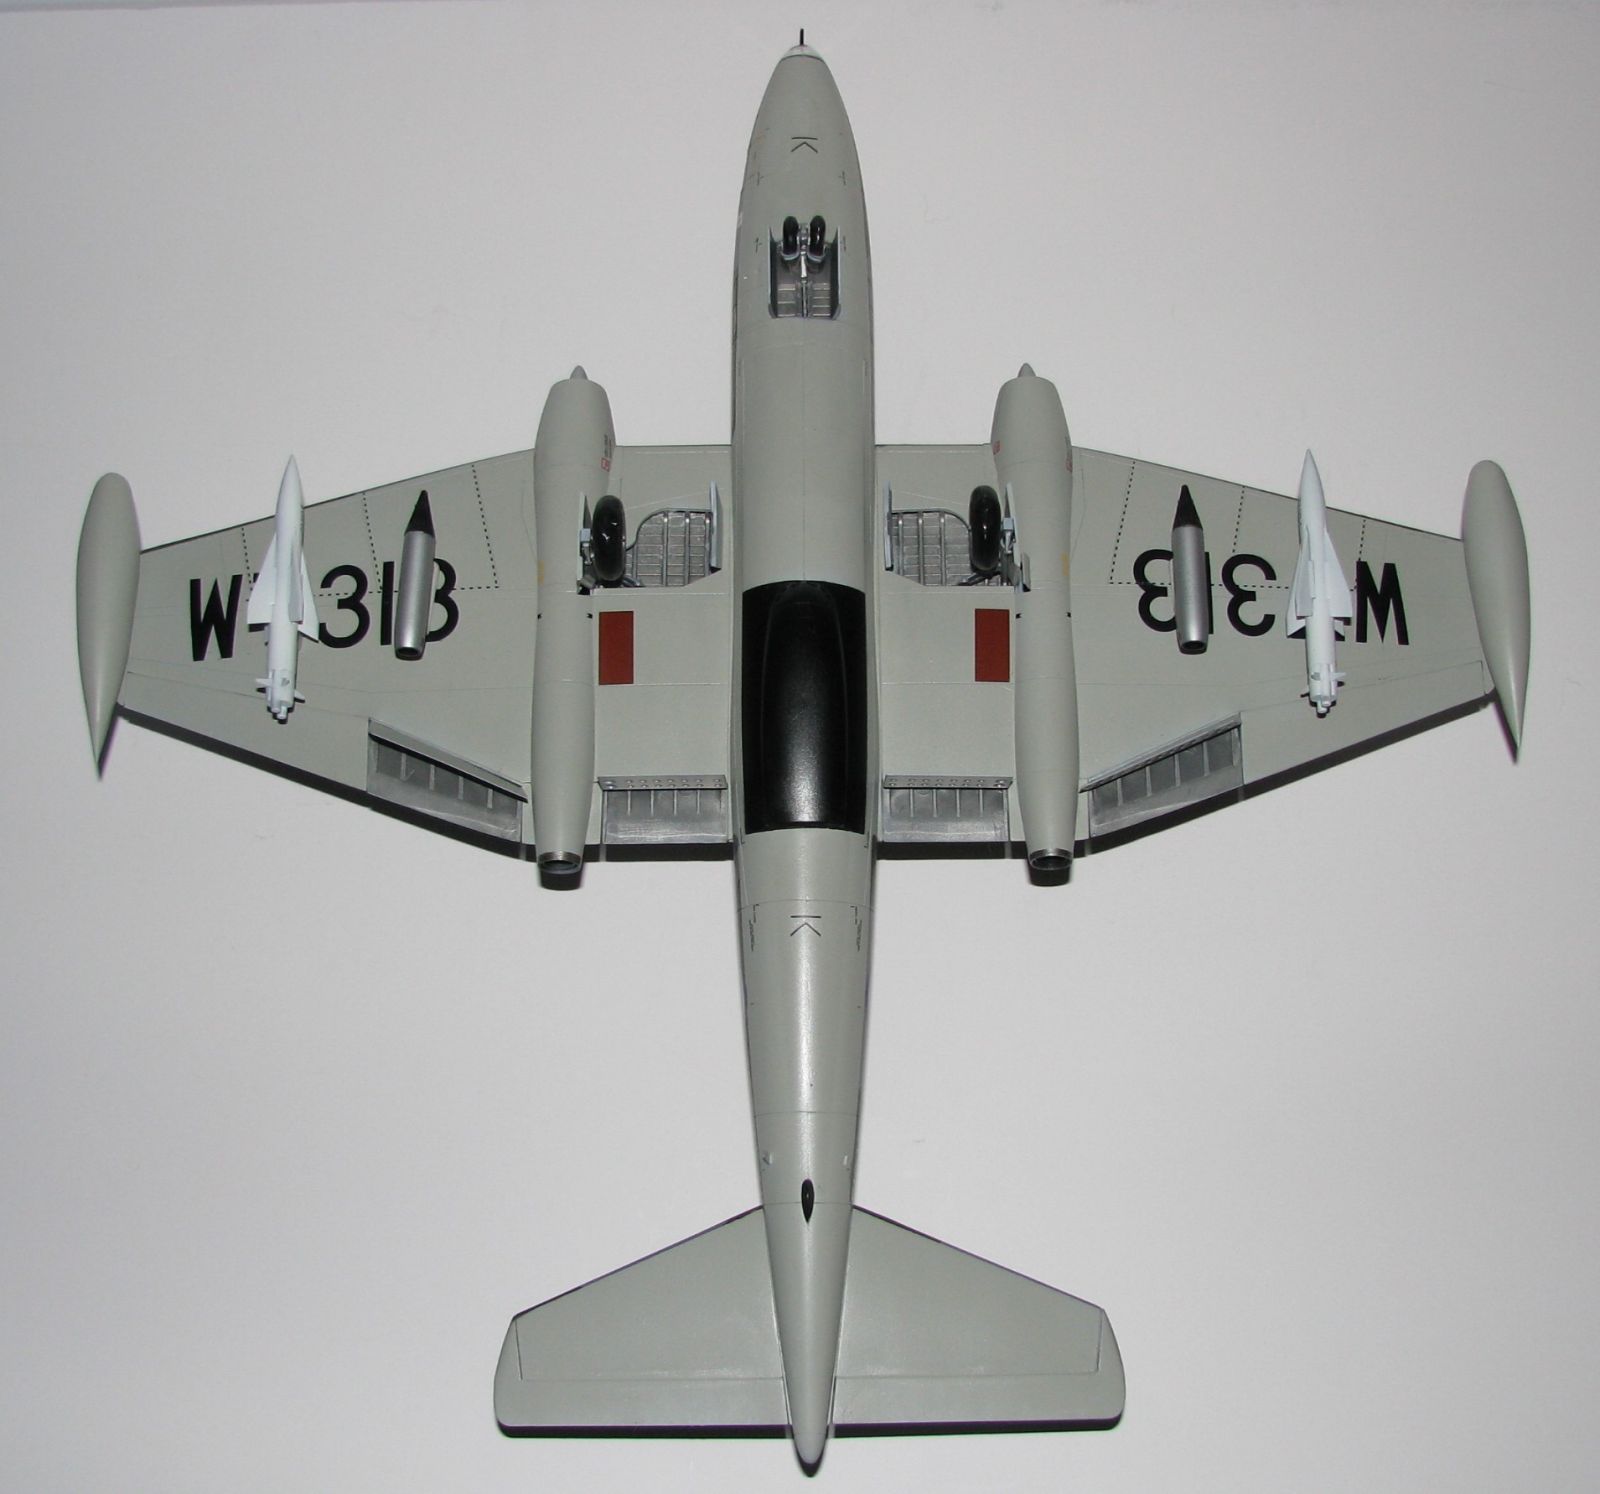
Next up is the bomb bay, which has some nice detail and you are provided with plenty of ordinance in this kit that it will look pretty good when finished. However, I chose to do the B(i).6 version so the bay is closed and that presented another problem. The bay doors take a bit of work to set them in the closed position and I could not do it. I ended up cementing them to the gun pod first then was able to place this ‘sub-assembly’ in the bay and came out ok. The wheels, pre-flattened tires and struts look pretty nice and went together well but I had a small problem adding them to the model. I thought I had them set right so the flat area was contacting the ground…looked good to my Mk 1 eyeball. Nope! Had to adjust it a couple times before the glue set. (I used the old Testors tube glue for this as it sets slower and I figured it would give me trouble)
Lastly, we have the wheel bay doors, flaps, underwing ordinance, wing tanks, and canopy. With the exception of the canopy, I left all of these off until after decaling so as to not knock them off accidentally. The canopy is a little tricky so be sure to test fit. The gear doors presented no problem but the flaps, which can be posed open or closed, do not have a lot of contact area when posed open so patience is the word. The ordinance is interesting due to the fact you have a few choices such as AS30 missiles, 1000lb bombs, and Matra pods. I do not believe the B(i).6 carried the AS30s but the kit instructions show it so that’s what I used and hey, they do look cool!
Finishing
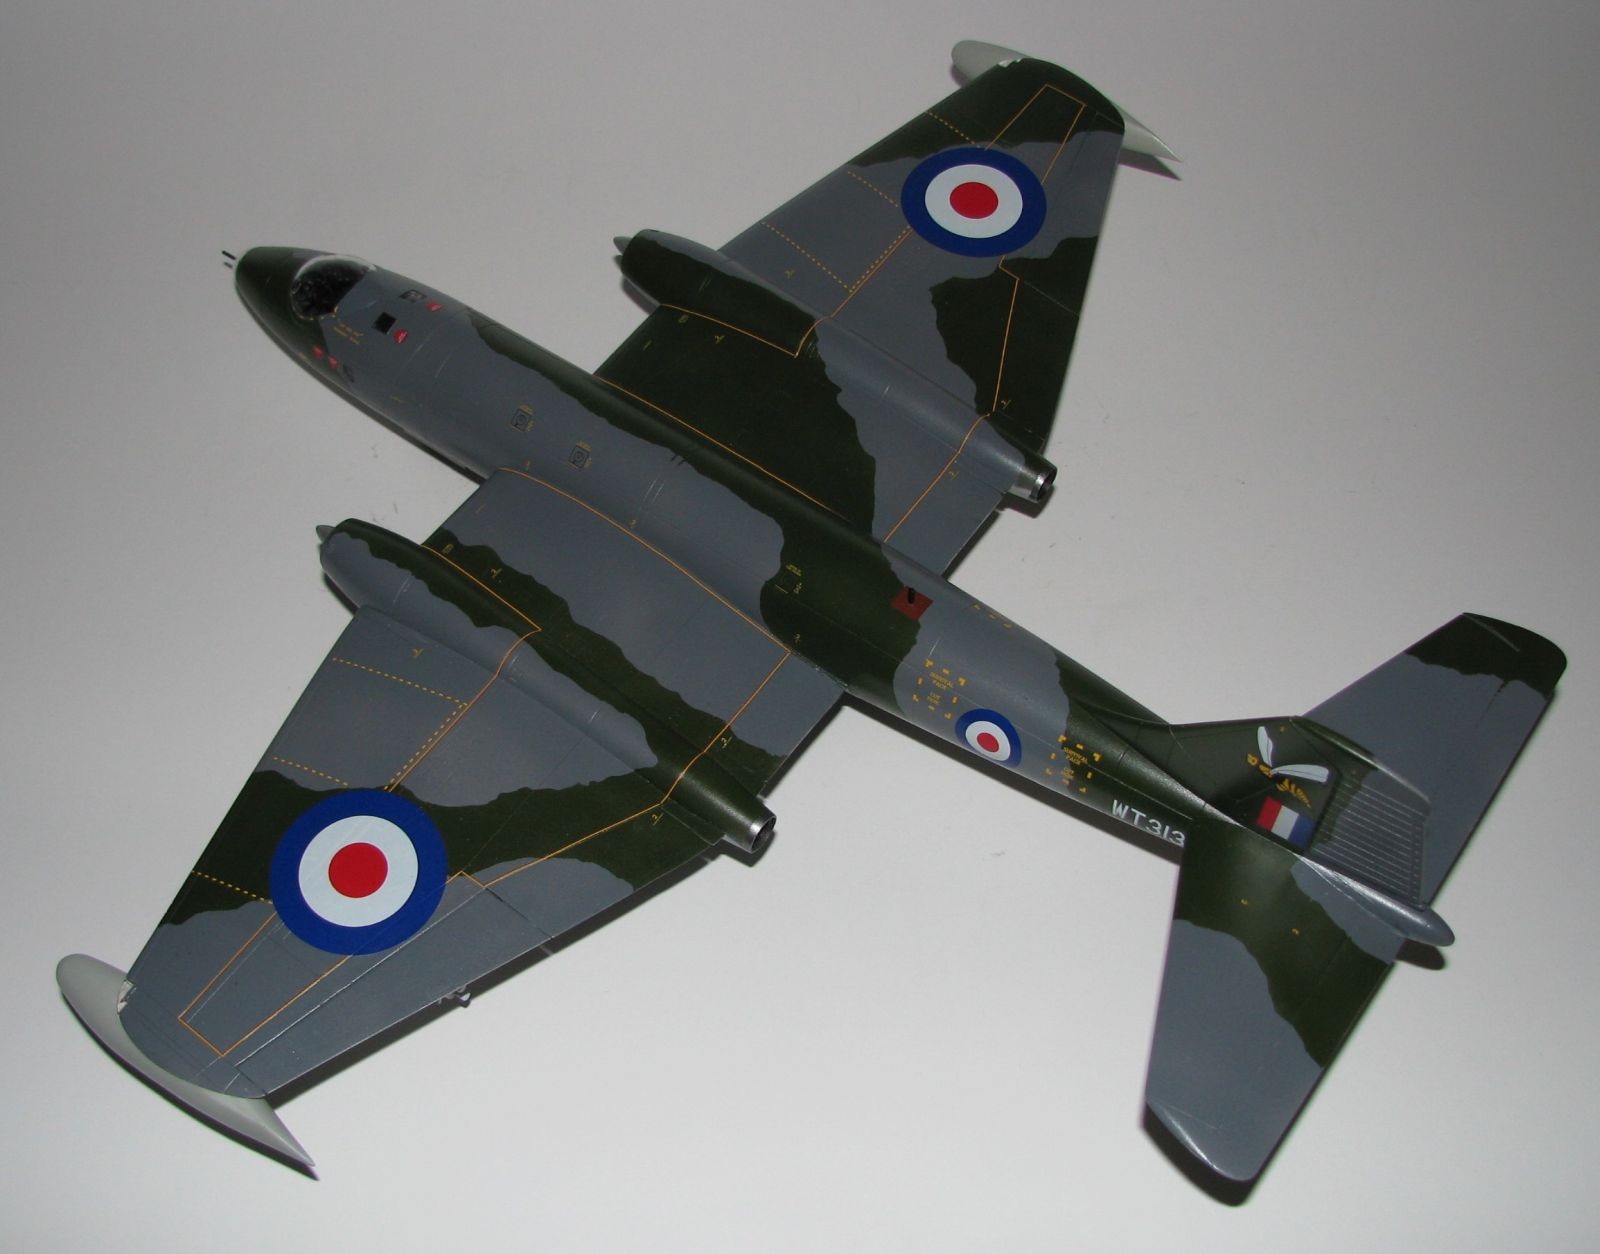
I used Testors MM paints on this one, Flat Gull Gray for the undersides and RAF Dark Sea Grey & Dark Green for the upper surface. The decals, and there are many of them, went on without a hitch with a little help from Micro Set/Sol. You get marking options for two aircraft:
- Canberra B(i).6 of 213 Squadron, Germany, 1969. (My choice)
- Canberra B.20 of No. 1 Operational Conversion Unit RAAF, Queensland, 1968.
Conclusion
This is not a bad kit that goes together pretty easy and I recommend it to all modelers, however, if you’re into accuracy this kit needs some work. There are panel lines that are missing and the ones you have are a bit overdone. Aftermarket engines and cockpit would be helpful also but out of the box it’s not too bad.
I would like to thank Hornby USA for providing this kit, the review corps for letting me build it and all of you for reading this….MODEL ON!


Comments
Add new comment
This site is protected by reCAPTCHA and the Google Privacy Policy and Terms of Service apply.
Similar Reviews