
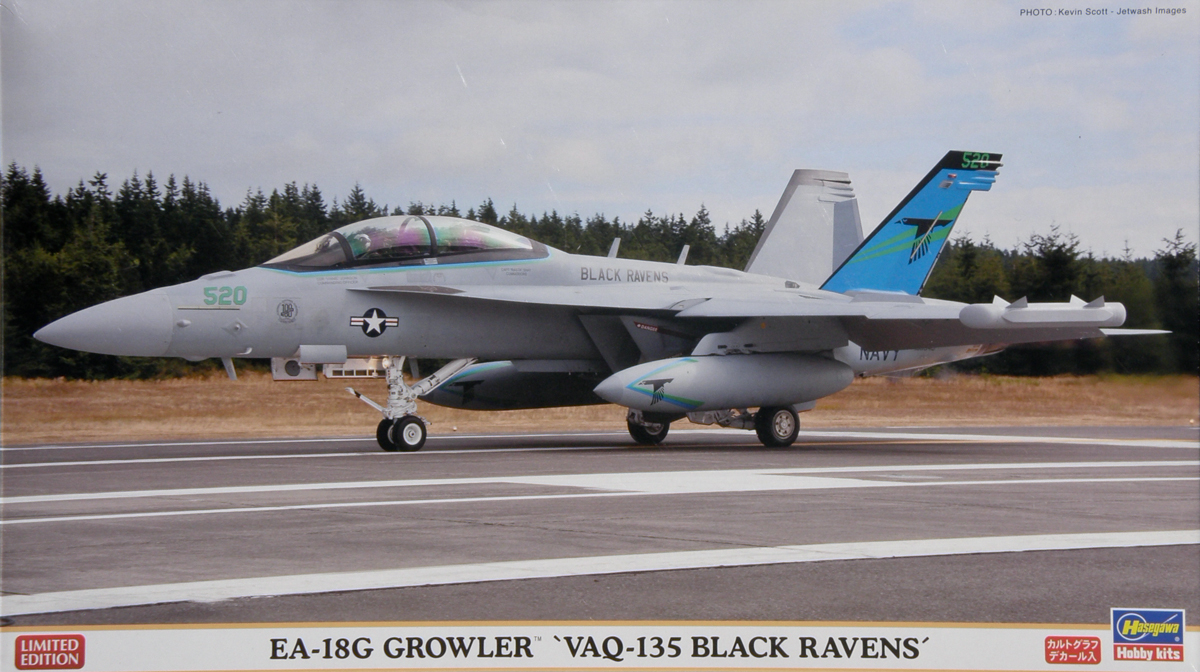
EA-18G VAQ-135 Black Ravens Limited Edition
Aircraft History
The EA-18G Growler is an electronics warfare aircraft developed in the 2000s for the US Navy as a replacement for the ageing EA-6B Prowler. It shares 90% of its components with the F/A-18F Super Hornet, saving time and money in development, construction and maintenance for the fleet. The Growler has been in operational service since 2009, and saw combat for the first time over Libya during Operation Odyssey Dawn in 2011. In addition to the US Navy, the Royal Australian Air Force has also recently announced plans to acquire 12 EA-18Gs.
Kit Contents
In 1/72 scale, Hasegawa has provided an EA-18G Growler of the VAQ-135 Black Ravens in much the same way as the 1/1 Growler; a modification of their existing F/A-18E/F molds. Those familiar with Hasegawa’s standard edition Growler kit (as well as the later “Block II” Super Hornet kits) will recognize the majority of the contents in this limited edition kit. There are 177 parts on 1 clear sprue and 14 light grey sprues, as well as a set of black polycaps to mount the posable horizontal stabilizers. The parts are crisply engraved with fine panel lines and have no flash and minimal mold lines, the most noticeable occurring on the landing gear. Sprues R, S, and T provide the Growler specific modifications including the AN/ALQ-218(V)2 wingtip-mounted wideband receivers, wing fences, wing leading edge flaps dogtooth extensions, spine mounted satellite antenna hump and various other smaller antennas, Advanced Crew Station cowling and instrument panel for the rear cockpit, AN/ALQ-99 underwing jamming pods (1 low-band and 4 high-band pods), and 2 AGM-88E AARGM missiles. In addition to the Growler specific armement, the kit also provides the standard Super Hornet kit’s suite of weapons including 2 AIM-9X Sidewinders, 2 AIM-120 AMRAAMs, an AN/ASQ-228 ATFLIR targeting pod and pylon, 4 480 gallon fuel tanks and 2 double ejector racks along with various launching rails.
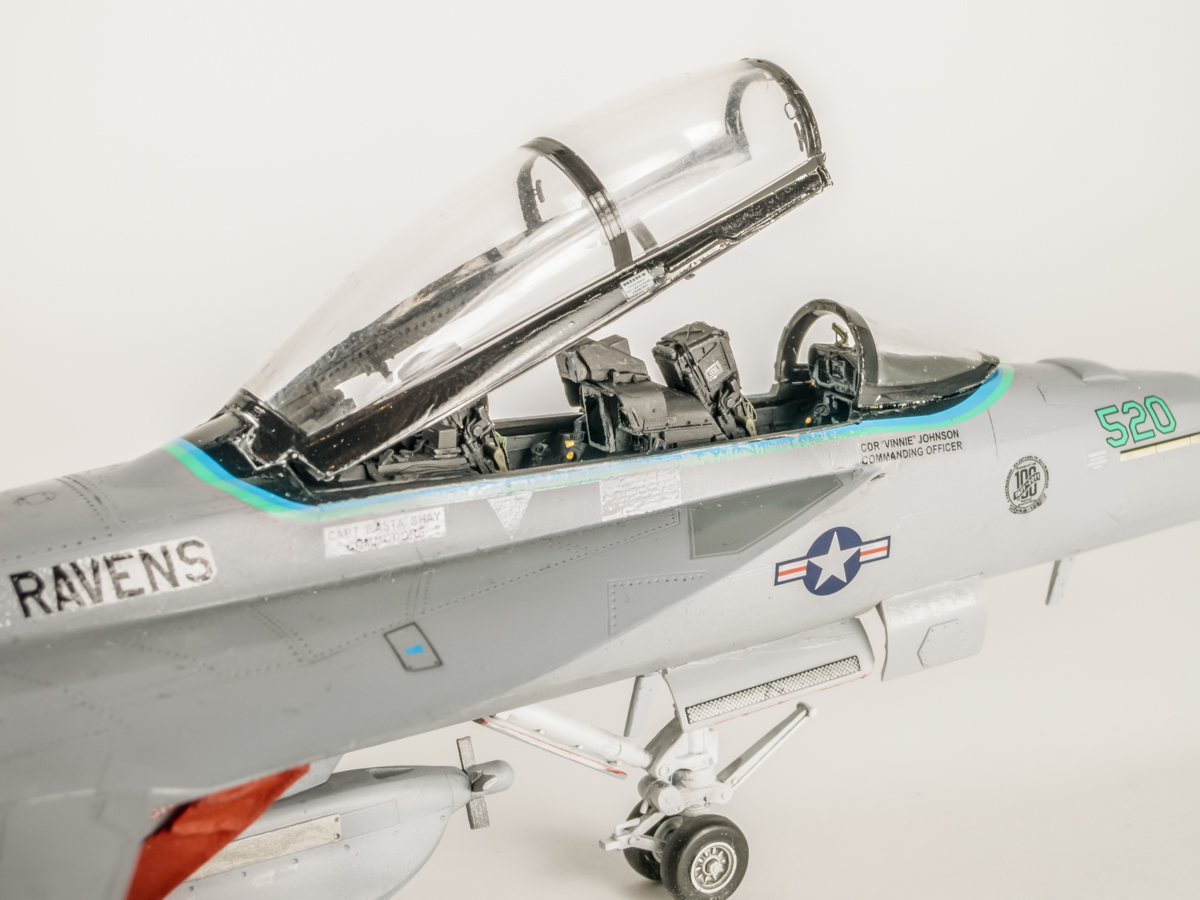
As with other Hasegawa Limited Editions, the highlight of this Growler kit is the Cartograf printed decal sheet. Decal options represent 2 aircraft from VAQ-135, the Black Ravens, during 2011. Both aircraft feature the standard overall two-tone grey paint scheme. The boxtop highlighted “CAG” bird features neon blue vertical stabilizers, neon green modex lettering, darker grey stencils, and gloss black canopy trim surrounded by small neon blue and green pin stripes. The second option, the “CO” plane, features more subdued markings; a light blue stripe at the vertical stabilizer tips as well as one wrapping underneath the Growler’s nose below the rear cockpit, black tail insignia and modex lettering with blue drop shadows, and low-viz stencils.
Construction
As is the case with the rest of Hasegawa’s Super Hornet range, building the Growler is a matter of converting the basic E/F kit into a particular variant. The most important thing to remember while building is to open up all the various holes to help correctly locate the Growler add-on antennas. Each antenna has a mounting pin, and the locating holes make quick work of attaching them evenly in the correct position.
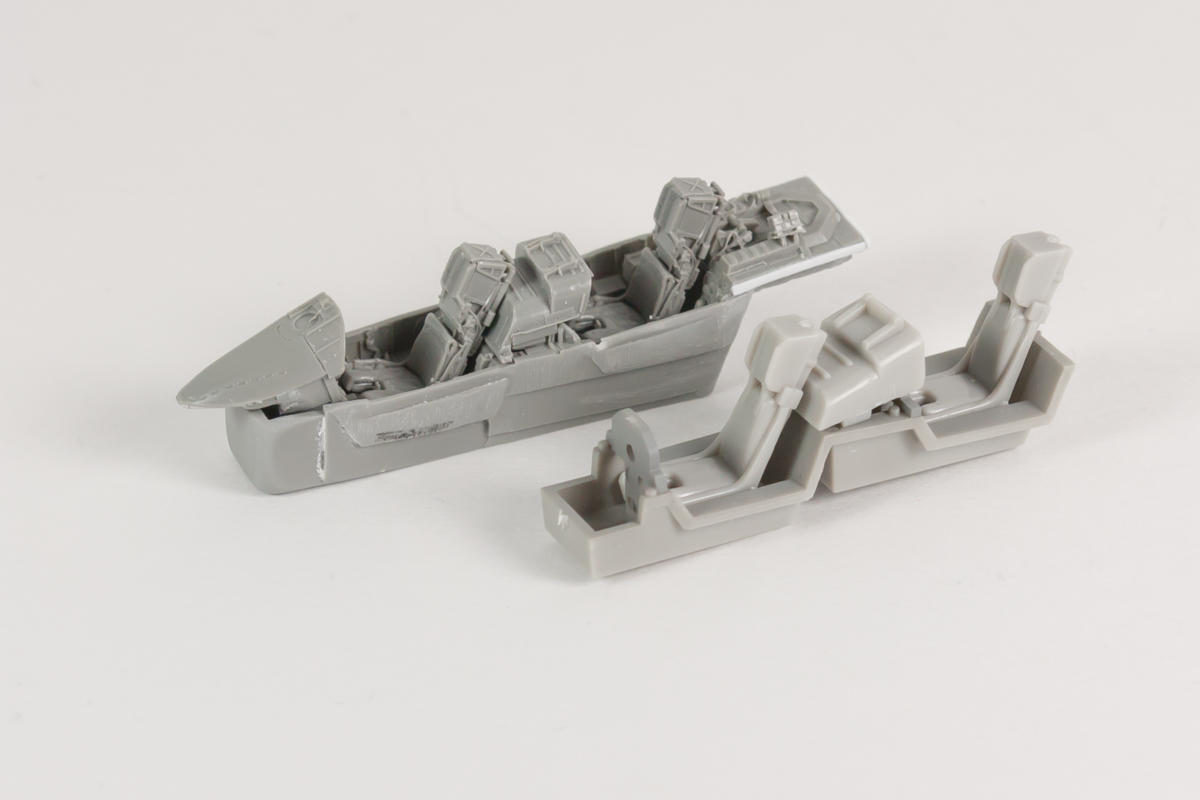
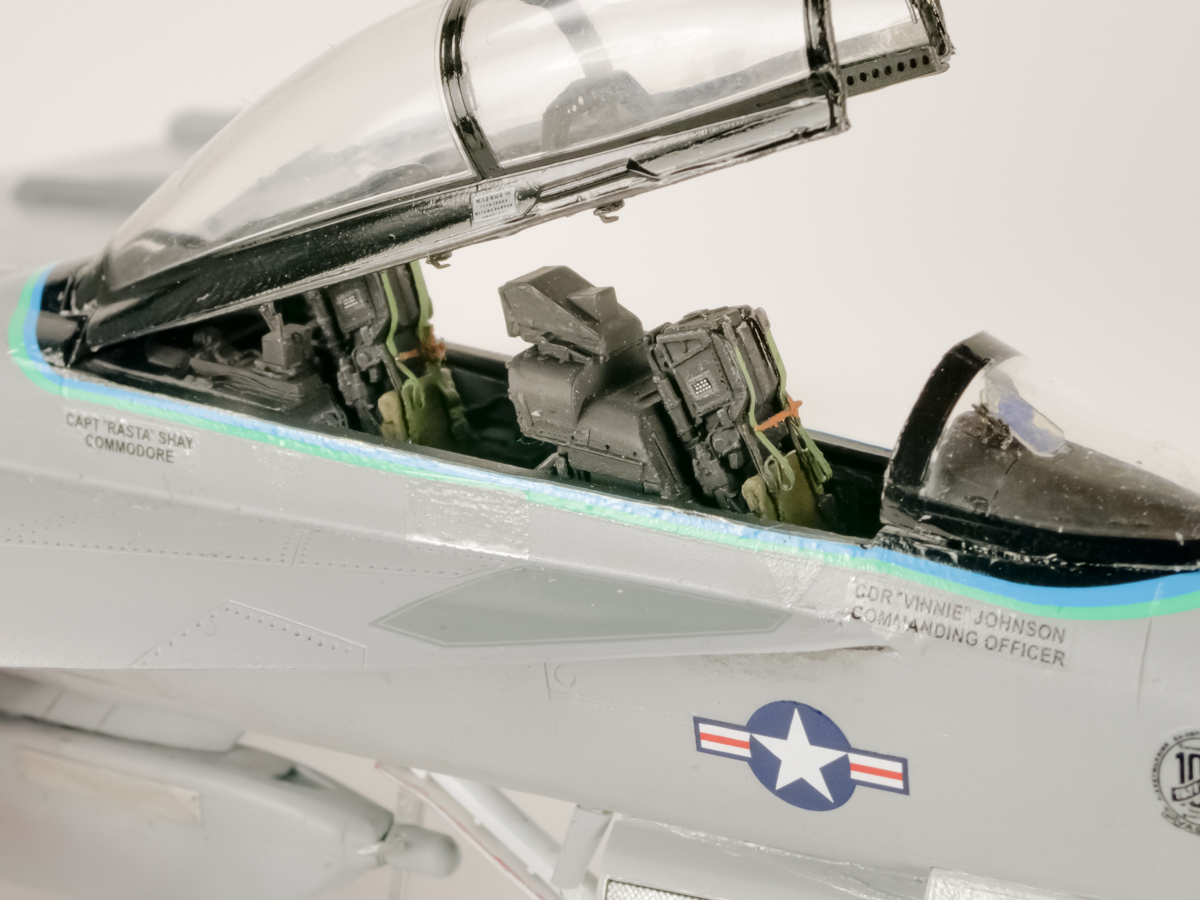
Construction starts with the cockpit, and it’s a rather simplified representation with no molded-in detail for either the instrument panel or the side panels. Instead, the panels are represented by basic black and white decals, which is a reasonable conceit as the cockpit is largely a modern “glass” one. Pleasantly, the rear cockpit decals represents the Advanced Crew Station appropriate for the Growler, featuring a large iPad-like touch screen along with a higher cowling that features yet another screen. Each ejection seat is a simple single part with some basic detail, included the upper seat belt harness molded in along with decals for the safety placards. The cockpit canopy is modeled with a realistically bulged cross-section, but the molding process leaves a seam running the length of the canopy that will need to be removed and polished back to clear.
Despite the reasonable kit cockpit, a previously reviewed aftermarket Aires F/A-18F resin cockpit was fitted to liven up this Growler build. A slight modification was made to the Aires resin by adding the upper portion of Hasegawa’s rear instrument panel cowling, featuring a small additional screen, to the top of Aires’ cowling and then creating the large central iPad-like screen out of a small bit of sheet styrene for a very convincing looking Growler rear cockpit.
With the cockpit taken care of, the next steps will require a fair amount of tweaking on the nose sections, Parts B1, B7 & B9. As called out in the instructions, various panel lines and bumps will need to be added and removed to represent a Growler as well as 2 antenna holes drilled on each side of the nose. Additionally the gun ports on the upper portion of the nose will need filled in as the Growler has the 20mm cannon deleted to accommodate the core electronic warfare systems. Not covered in the instructions is the need to fill the underside gunbay vents on Part B7 as they are not present on the full-scale Growler. A fantastic modeler’s reference covering the Growler and its specific eccentricities, like the lack of gunbay vents, is Jake Melampy’s The Modern Super Hornet Guide: The Boeing F-18E/F & EA-18G Exposed which was used extensively in this build to aid in making a more accurate jet.
The 3 nose pieces, along with the upper and lower fuselage (don’t forget to drill out the antenna holes!) will all need to be joined very precisely together to avoid a great deal of cleanup which would easily destroy the fine details previously tweaked into Growler appropriate configuration. Following the fit and cleanup of the nose the side fuselage panels, Parts A1 & A2, will need to be attached to the fuselage (antenna holes here, too!), and once again present a situation that requires great care to achieve a smooth fit that doesn't require a great deal of destructive cleanup, especially towards the rear of the aircraft.
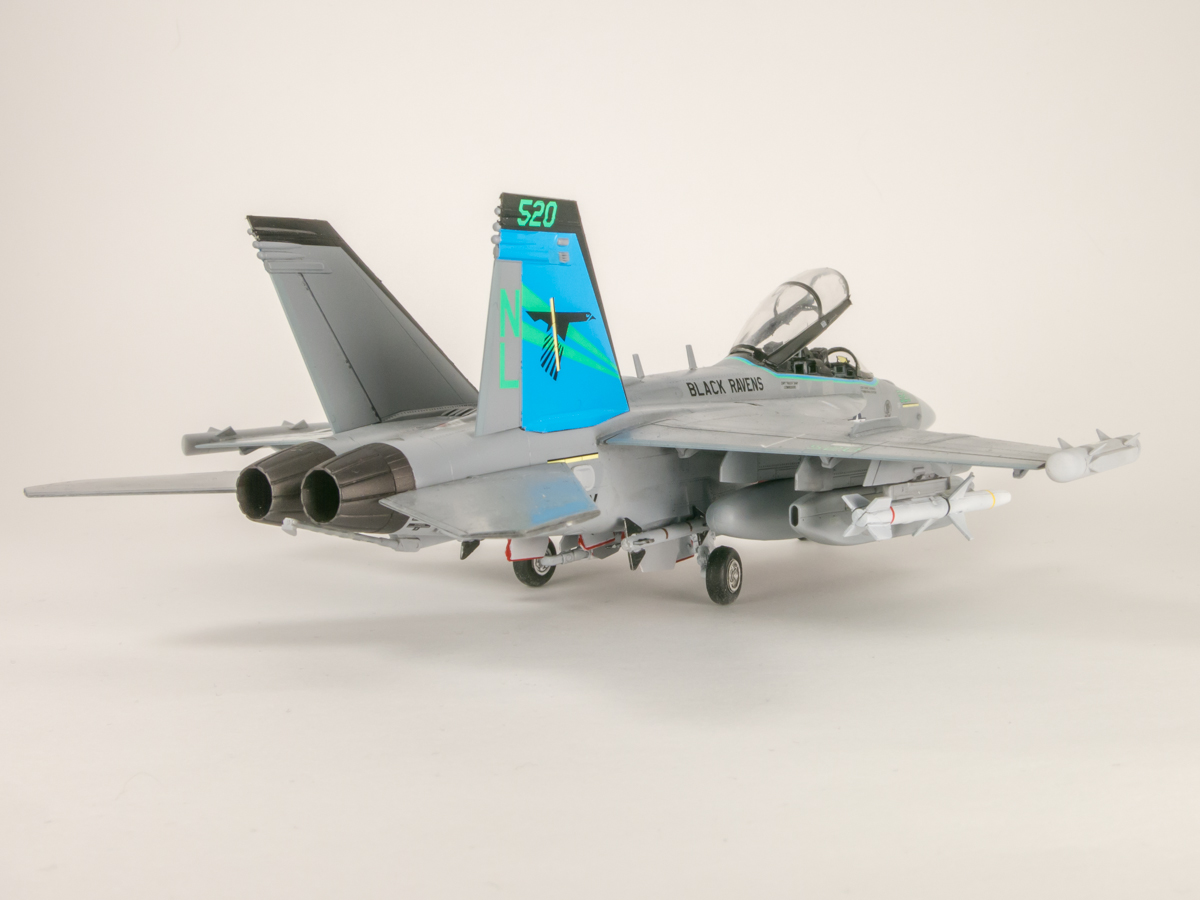
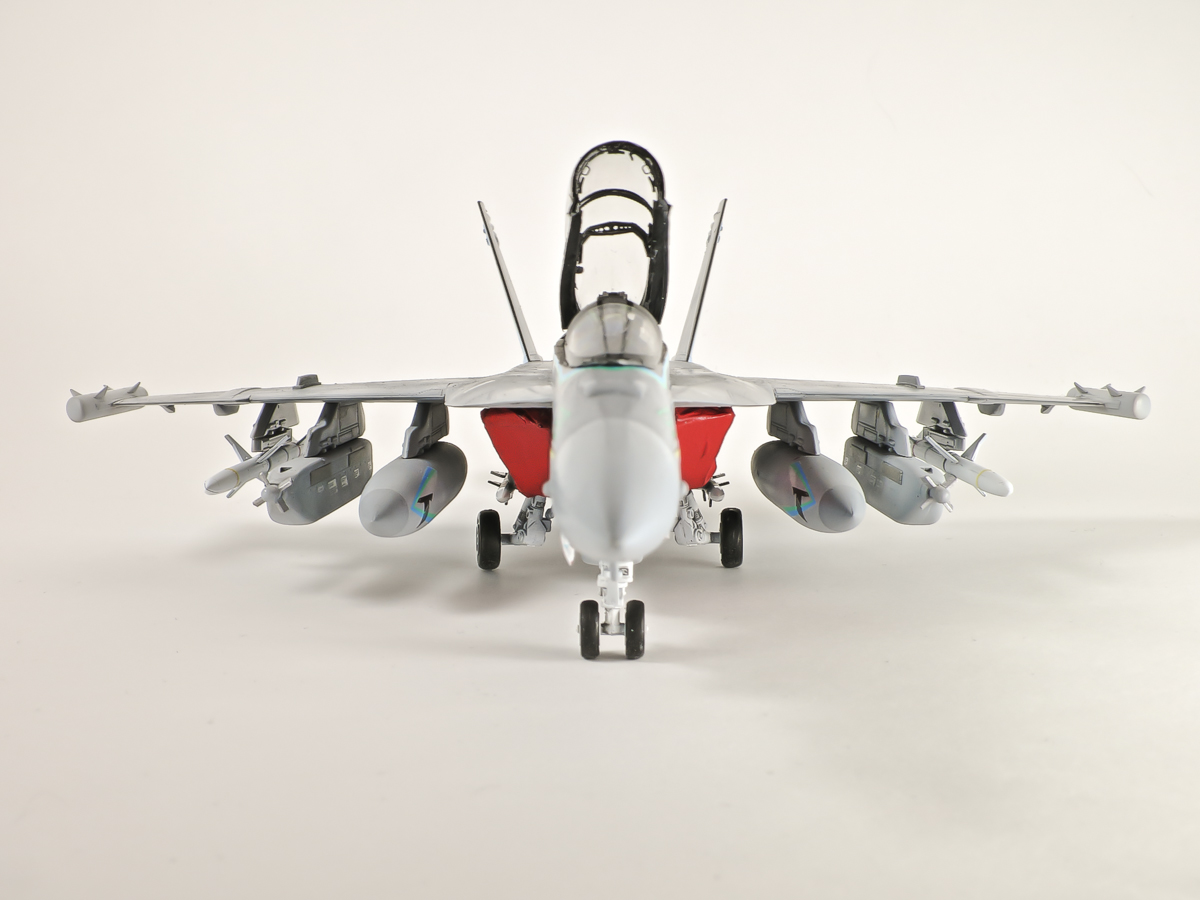
The same parts also create the jet intakes, however these are the weakest part of the kit. The intakes feature large seams from an iffy fit and there is only about a ½ inch of depth, ending at the start of the main landing gear bay molding and the open inner fuselage. The easy solution to dealing with the lackluster intakes is to create a set of FOD covers out of white glue soaked tissue paper painted Insignia Red as has been done for this build.
The two-part wings fit easily to the body, requiring a bit of effort to ensure they are even, and with the correct dihedral. While building the wings, a great deal of holes will need to be opened, both for ordinance on the bottom and the Growler specific wing fences on the top. The wings will also need formation marking lights removed from the wingtips. The leading edge wing flaps have 4 very thin parts (S16, S17, S18, & S19) that are attached to even out the transition between the inner wing and the dogtooth on the outer wing at the wingfold. These extensions fit well, but will require sanding and filler or thick CA glue for a smoother transition to the existing wing flaps as on the real jet. The vertical stabilizers fit tightly into the fuselage and can be left off until after painting and decaling, along with the press-in horizontal stabilizers.
On the spine of the Growler, a satellite antenna “hump” is represented by Part R2 which fits tightly against the fuselage, but leaves a noticeable joint. In reality, this hump is pressed into the skin of the spine and has no joint line. A great deal of sanding resulted in an acceptable look, but filler would be required for it to be perfect. The remainder of the Growler antennas have a “bolted on” look, which the parts do a great job representing. The prominent ALQ-218 wingtip pods fit nicely together from two halves requiring minimal sanding, and its 4 triangular antennas are easily installed with a steady hand and CA glue, all thanks to very delicate tabs and slots.
The rest of the kit is a straight-forward build. Once the wings and fuselage have gone together, the vast majority of the remaining parts (landing gear and doors, ordnance, stabilizers, most antennas) can be left off until after painting and decaling. The landing gear and landing gear doors are cursed with a plague of ejector pin marks, the only ones of any consequence outside of the already hopeless jet intakes, that will take a some time, sanding and filling to correct.
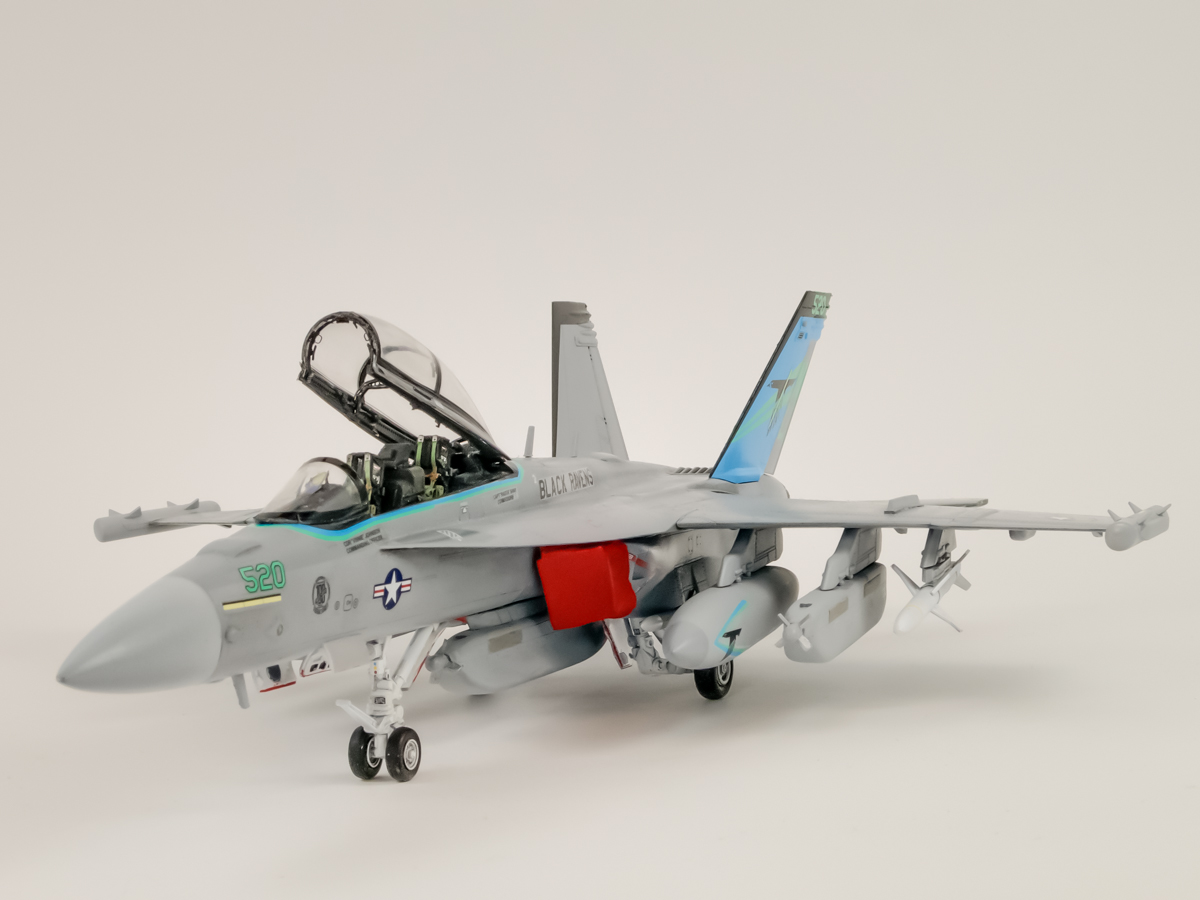
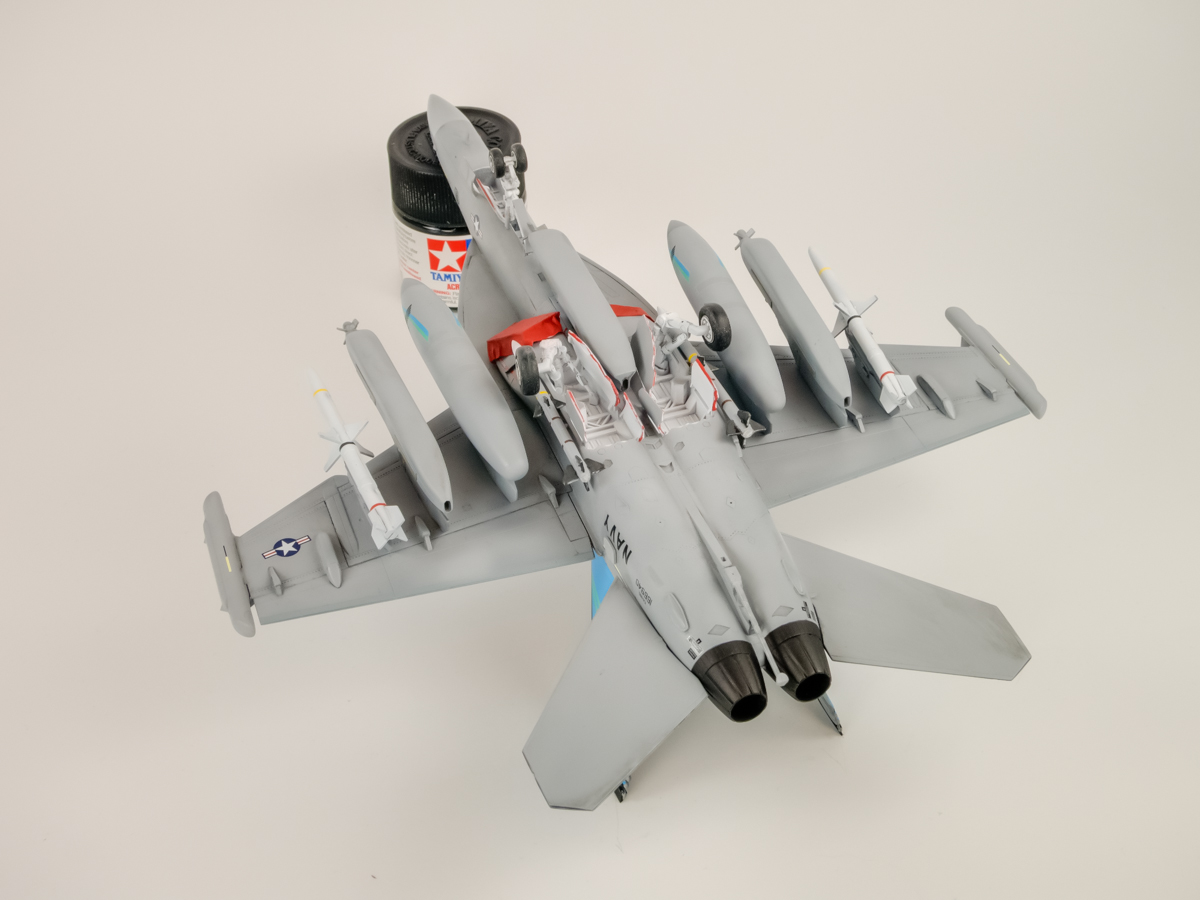
The ordinance is accurate and well done for the EA-18G. A typical load seems to be flown with at least two fuel tanks on the inboard pylons and jamming pods on the middle wing pylons and often a third low-band jammer on the center line. A “full” loadout as seen on this build also adds 2 AGM-88E missiles on the outermost wing pylons along with a pair of AIM-120s on the fuselage stations. The AIM-120 take a steady hand to attach to the mounting points molded into the fuselage, and should be done before attaching the other stores and main landing gear if possible. Using a slow setting CA glue allows for a bit of time to get the correct missile position, although a strong bond was hard to create initially, once the missiles were tacked in place, the joints can be easily strengthened by running some thin CA glue along the mounting points and quickly hitting it with an accelerator. A final note, the underwing stores have a characteristic outward toe from centerline when using the mounting holes provided. This is present on the real aircraft as well, but can look like a mistake if one is not aware of this fact.
Painting & Decals
Decals are produced by Cartograf in two schemes for VAQ-135: the CAG (as chosen for this build) and CO aircraft from 2011. Both decal options call for the standard Light Ghost Grey/Dark Ghost Grey featured on the Super Hornet. The decals are printed in register and crisp enough to read all of the text, even on small stencils.
Beyond the basic paint scheme, the various Growler antennas are all unpainted covers, much like the radome. The painting callouts suggest FS36375, Light Ghost Grey, and it looks to be a very close match in photographs from a distance or taken in shadows/bright sunlight. Up close there can be slight variations on the antennas from the Light Ghost Grey of the surround paint, and much like the radome, a slightly lighter shade could be mixed for contrast if so desired. For this build, the majority of the antennas were painted separately and then left unattached until after the jet itself was painted which resulted in a very subtle color differential without having to mix a new color.
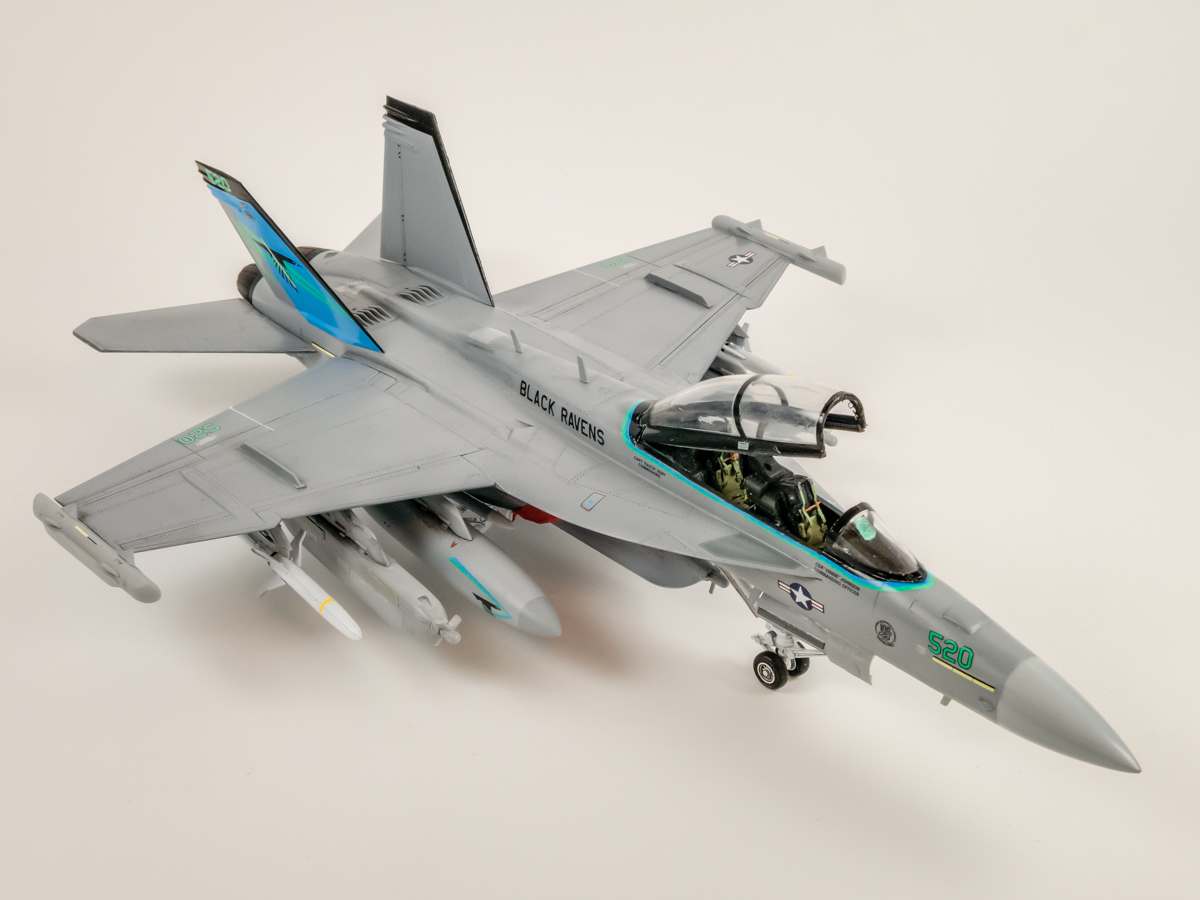
The CAG aircraft scheme, being used in this build, features the most colorful markings of the 2 options and offers a choice on how to represent the colorful neon blue vertical stabilizers. The first option is a large blue decal that covers the entire tail with all of the various markings (formation light, modex numbers and letters, “Black Ravens” logo with neon green stripes, and black leading edge trim) integrated into the single decal, Decals #8 & #11. The second option, not called out explicitly in the decal guide, is to paint the tail with a neon blue base color along with the black leading edge trim. The rest of the tail decoration are then provided as decals to apply over the painted blue undercoat (“Black Ravens” logo, formation light, and neon green stripes #12 & #13, and modex numbers #4).
As the second option requires color matching the neon blue found in other decals, this build was completed using the first option, the large single piece blue decal on each tail. A great deal of care is needed to place this large decal covering the whole stabilizer. Aligning the decal, then slowly pushing the water out of the center towards the edges allows the decal to settle down nicely. Generous applications of Micro Set will help position and adhere the decal to the surface, while a heavy coat of Micro Sol will settle the decal into the engraved surface details. The most troublesome area was at the top of the fin, around the navigation lights and radar warning receivers, but a few extra coats of Micro Sol helped settle the decal into the complicated recesses here. In the end, no matter how perfect the alignment, a bit of gloss black will be needed to trim the edges of the tail between the outside full decal, and the smaller leading edge decals (Decals #7 & #10) on the insides of the stabilizers.
The CAG scheme also features some interesting decal work around the cockpit and canopy. The canopy frames and small areas forward and aft of the cockpit are gloss black, which is then trimmed with the same neon blue and greens featured on the tail, droptank logos, and modex numbers.
The canopy frames are actually provided as decals, an oddity for a modern jet fighter kit, and warranted use in this build for the novelty of it. The decals adhere easily over a Future dipped canopy, but positioning them to line up perfectly with the raised frame lines on the canopy was difficult as they tended to disappear to the naked eye when wet. Additionally, the bumps for the canopy ejection rocket motors on the side rails made it difficult for the decals to settle smoothly, even with Micro Sol. These decals present an easy cheat for the novice builder, but will not satisfy an experienced modeler when compared with masking and painting the frame rails.
There are 4 decals for the cockpit surrounds. The decal for the front and rear surrounds feature the colored stripes, plus a fill of gloss black towards the canopy. The rear surround fits reasonably well, having cutouts for the canopy’s mounting tabs. Once the decal is set and dry, some of the gloss black and carrier film will need to be trimmed where it meets the canopy mounting holes for a clean look. The front surround, Decal #19, is extremely difficult to use as it must be trimmed, and then placed on the model before the windscreen, Part J2, is attached. The decal is printed as a horseshoe shape, and a paper template needs to be cut from the instruction sheet, aligned over the decal, and then 2 sections cut from the decal. These 2 removed sections will be used at the front of the cockpit. The best way to apply the decals is to put both on the model and then test fit the windscreen overtop of them while they are still wet and movable. Be sure to align them far enough forward that the windscreen won’t cover any of the colored stripes, just the gloss black area.
The two side decals feature only the 2 blue and green stripes, and no gloss black. These easily apply flush with the canopy side rails, although a touch of gloss black may need to be filled in towards the back of the stripes where they meet the rear decal surround. The best bet for a good look is to apply and align all 4 cockpit surrounding decals at once. Although a bit tricky to keep them all wet and movable for several minutes, it will offer the best alignment in the end. The experienced modeler may wish to trim all of the gloss black areas from the cockpit surround decals, mask and paint the gloss black on the model, and then use just the remaining decal stripes to edge the painted black areas for a better look.
Conclusion
Hasegawa’s EA-18G is welcome addition for modern-era 1/72 modelers. The conversion of the kit from Super Hornet to a Growler is very nicely done with only a few small oversights and issues. From the kit point of view, the only major issues are the same ones that crop up with the Super Hornet kit: a few difficult areas to align and sand smooth, the underwhelming air intakes, and some basic modelling issues that need corrected on the landing gear and doors. As for the Limited Edition decals in the kit, they were very nicely done with a few complicated areas. The option to paint the tail and use individual decals or to use a large decal was fantastic, but somewhat tempered by the complicated cockpit surround decals. If the cockpit surround pinstriping was also provided separately from the gloss black areas, the decals would have been perfect for both the advanced and novice modeler. In the end, for the experienced modeler, there should be no problems building an accurate representation of this cutting edge plane, and the availability of very recent and unique color schemes in kits is something to always be excited about. This kit would certainly be recommend for any fans of the Growler or modern jets.
My thanks to Hobbico for providing the kit, and IPMS/USA for the chance to review it!


Comments
Add new comment
This site is protected by reCAPTCHA and the Google Privacy Policy and Terms of Service apply.
Similar Reviews