
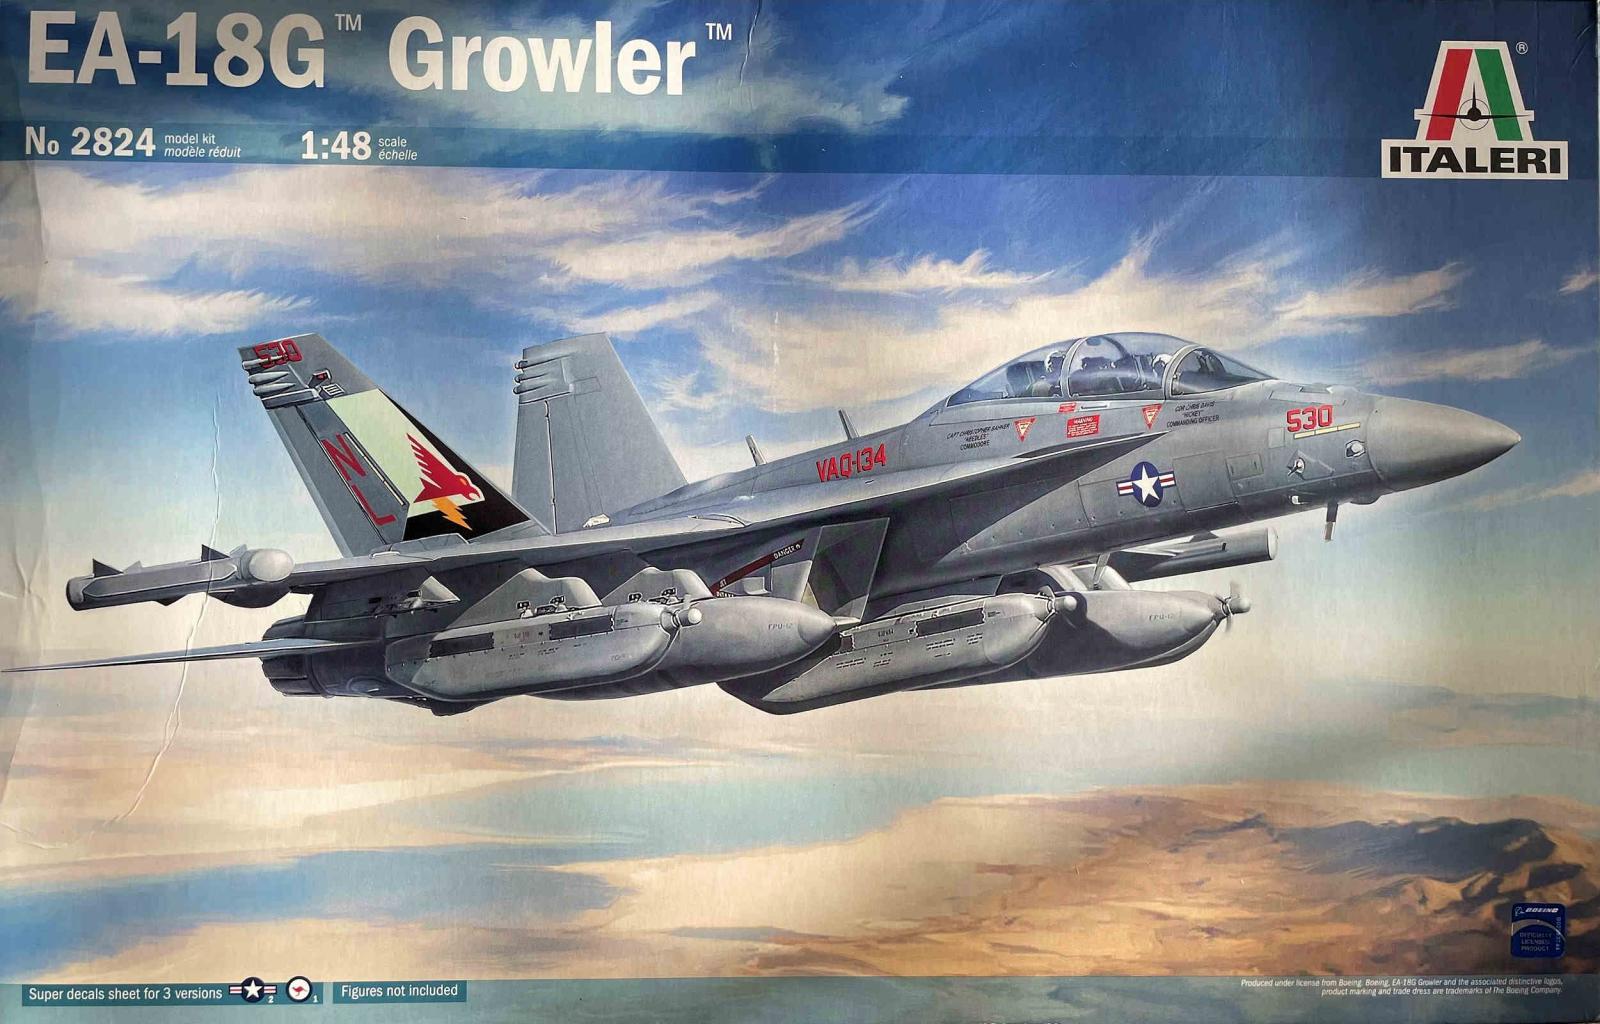
EA-18G Growler
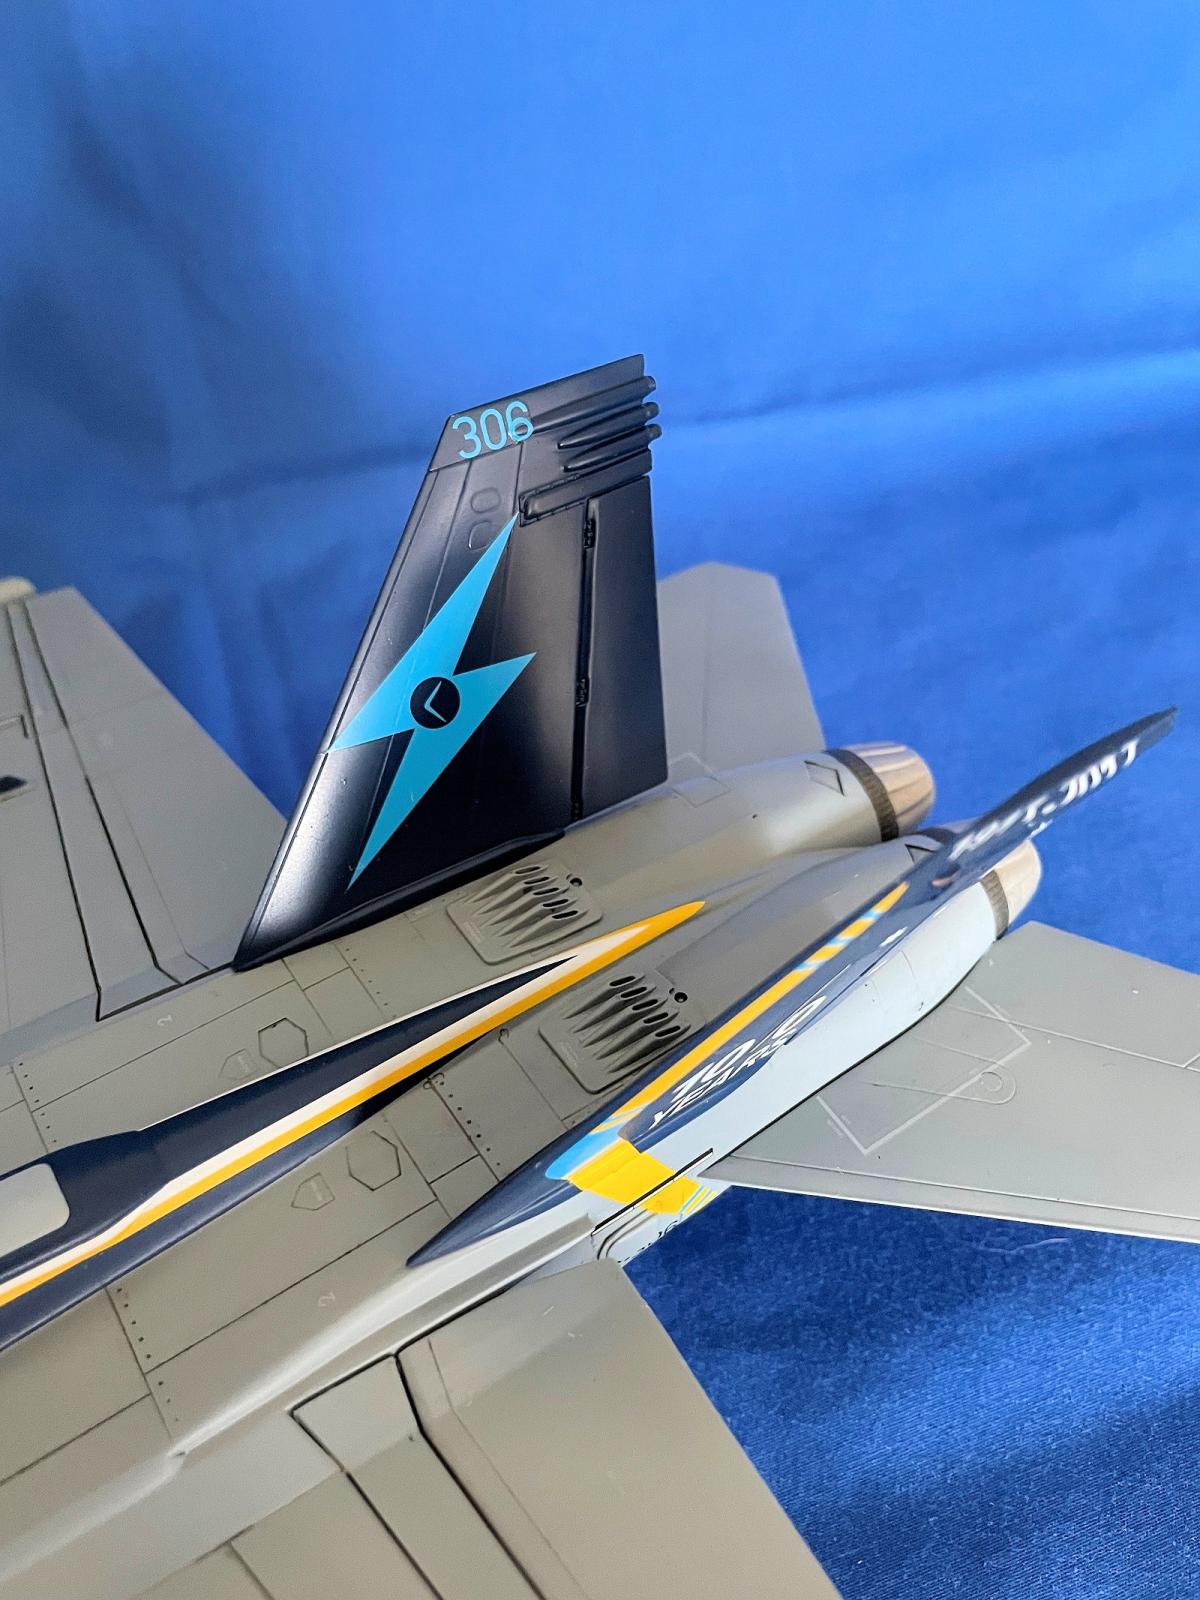
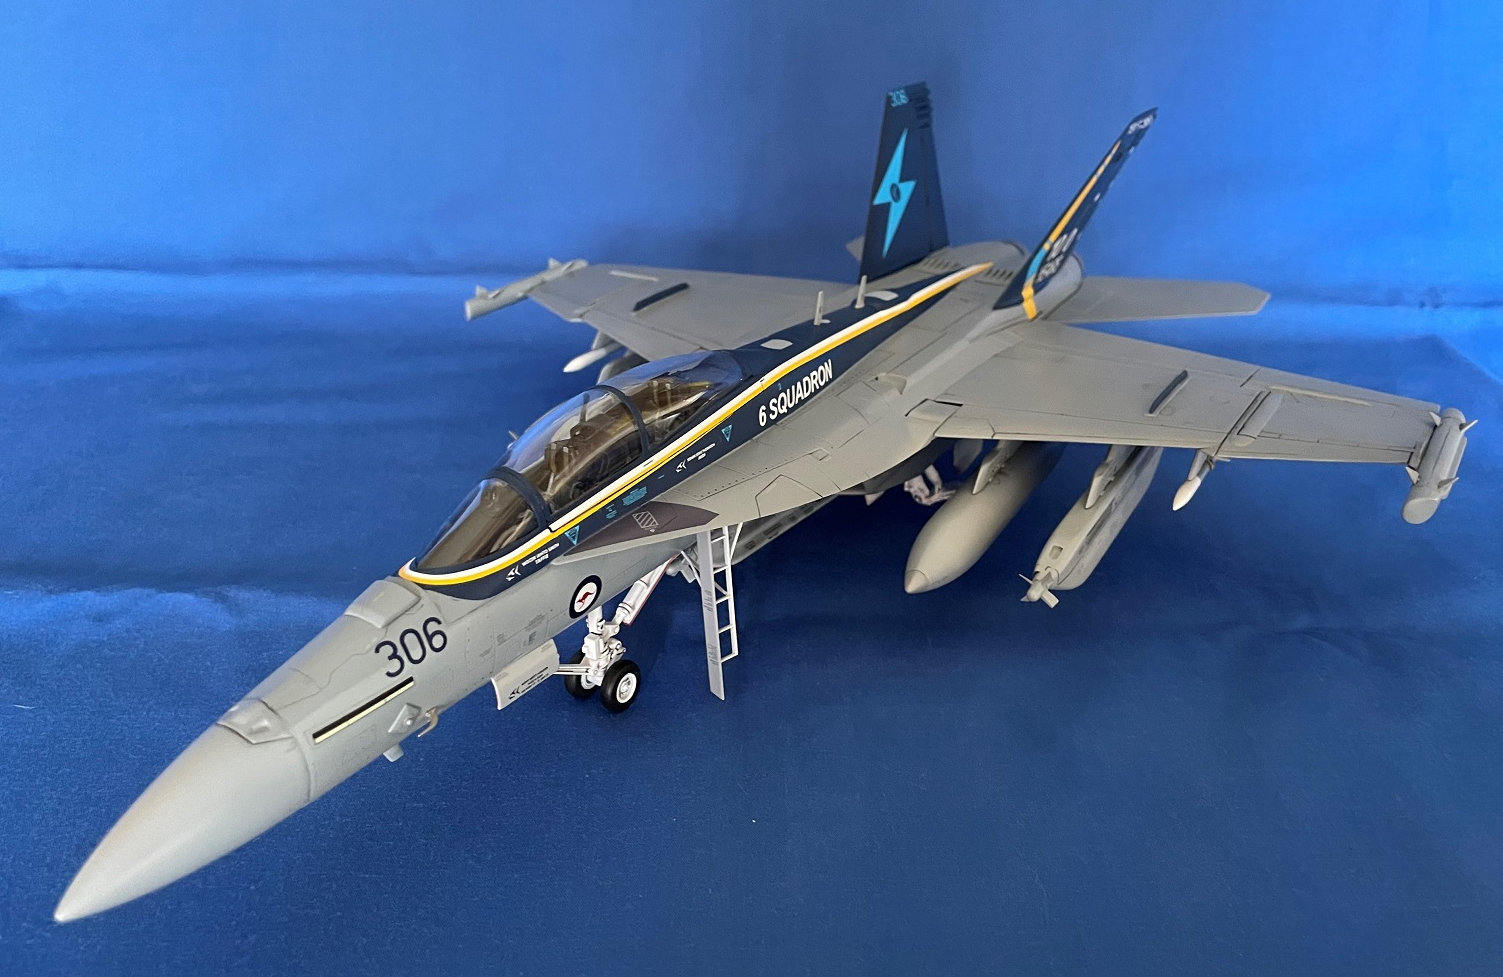
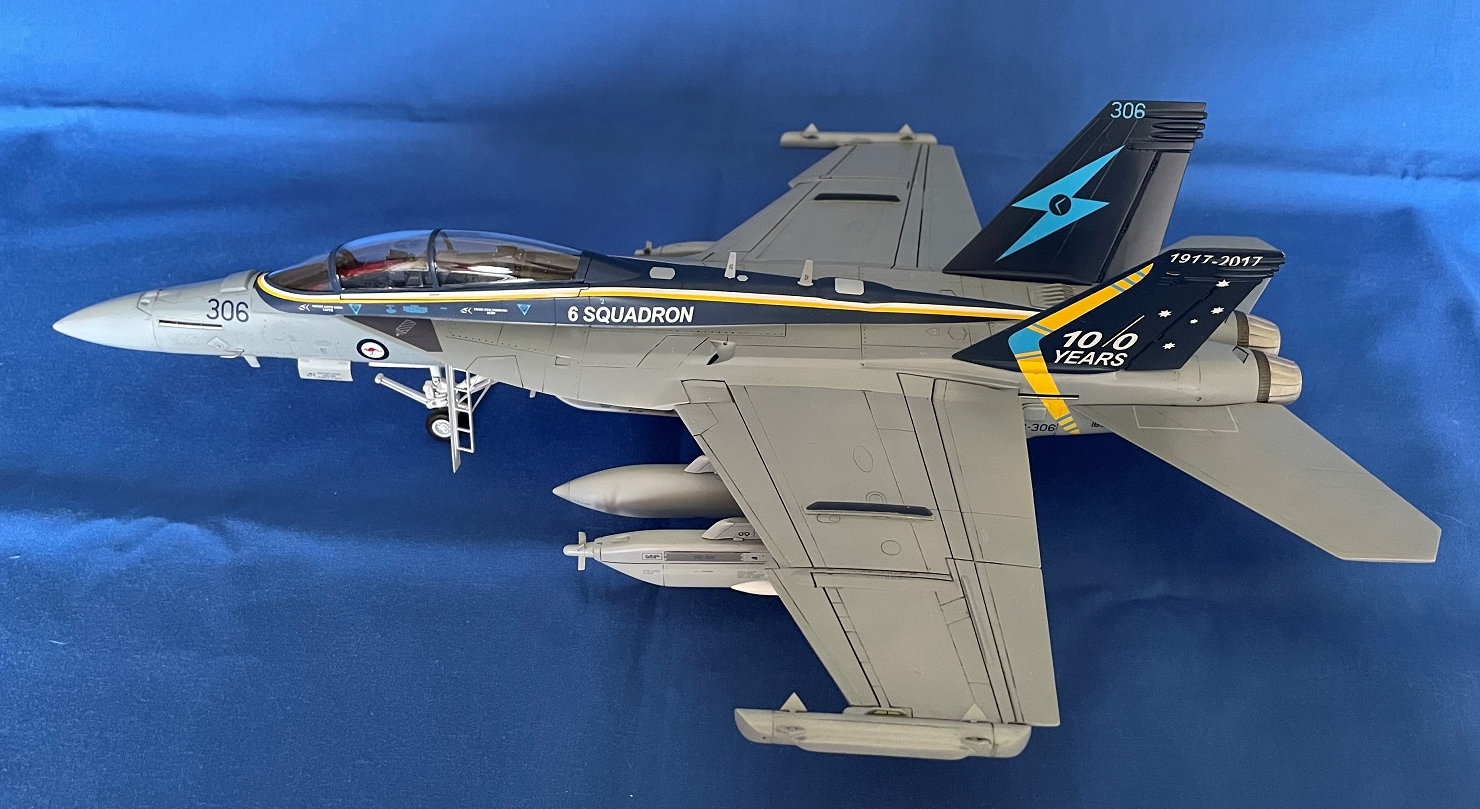
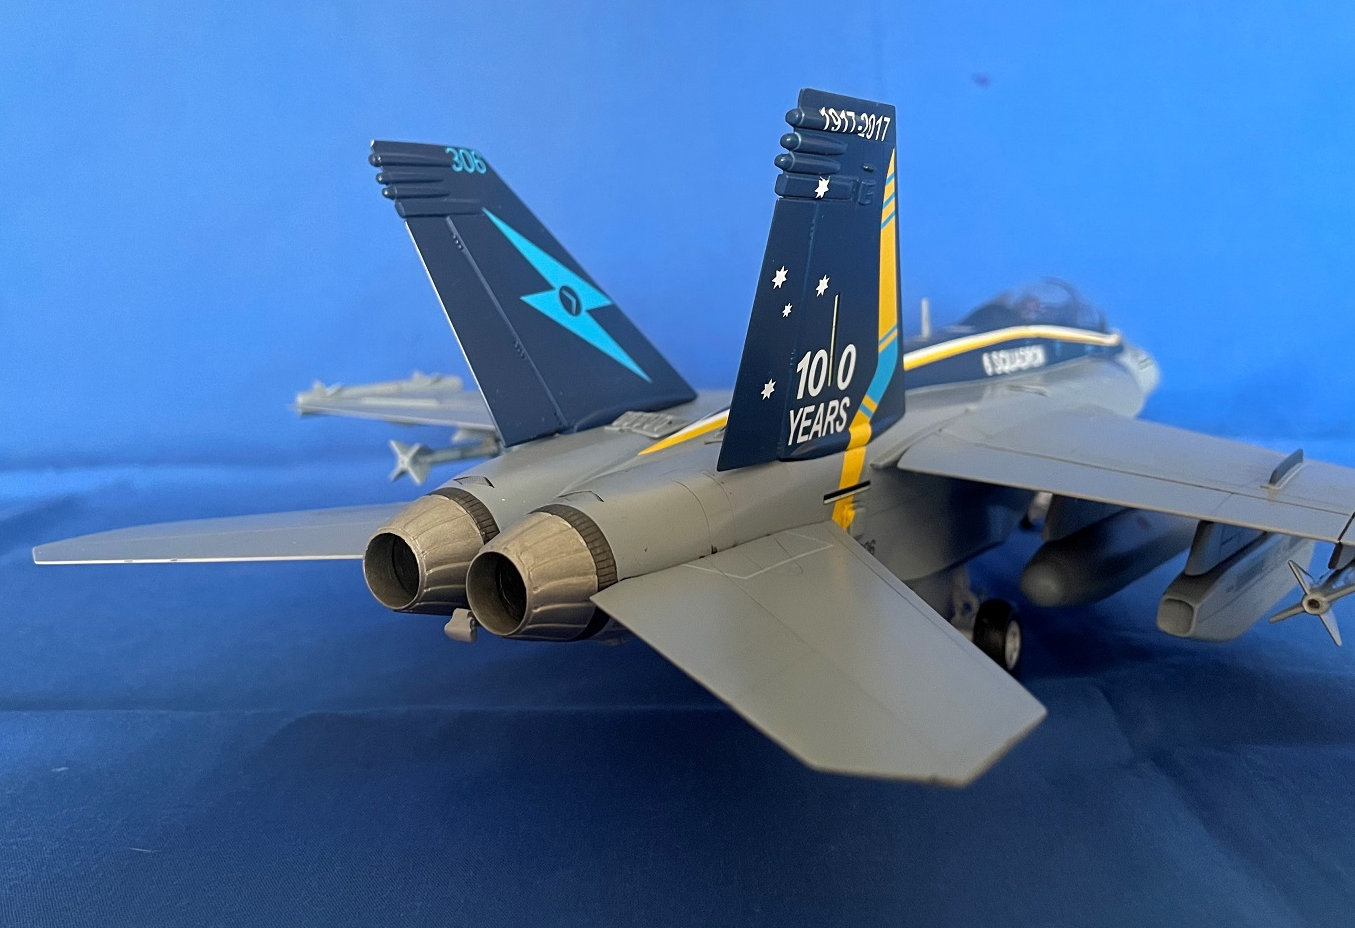
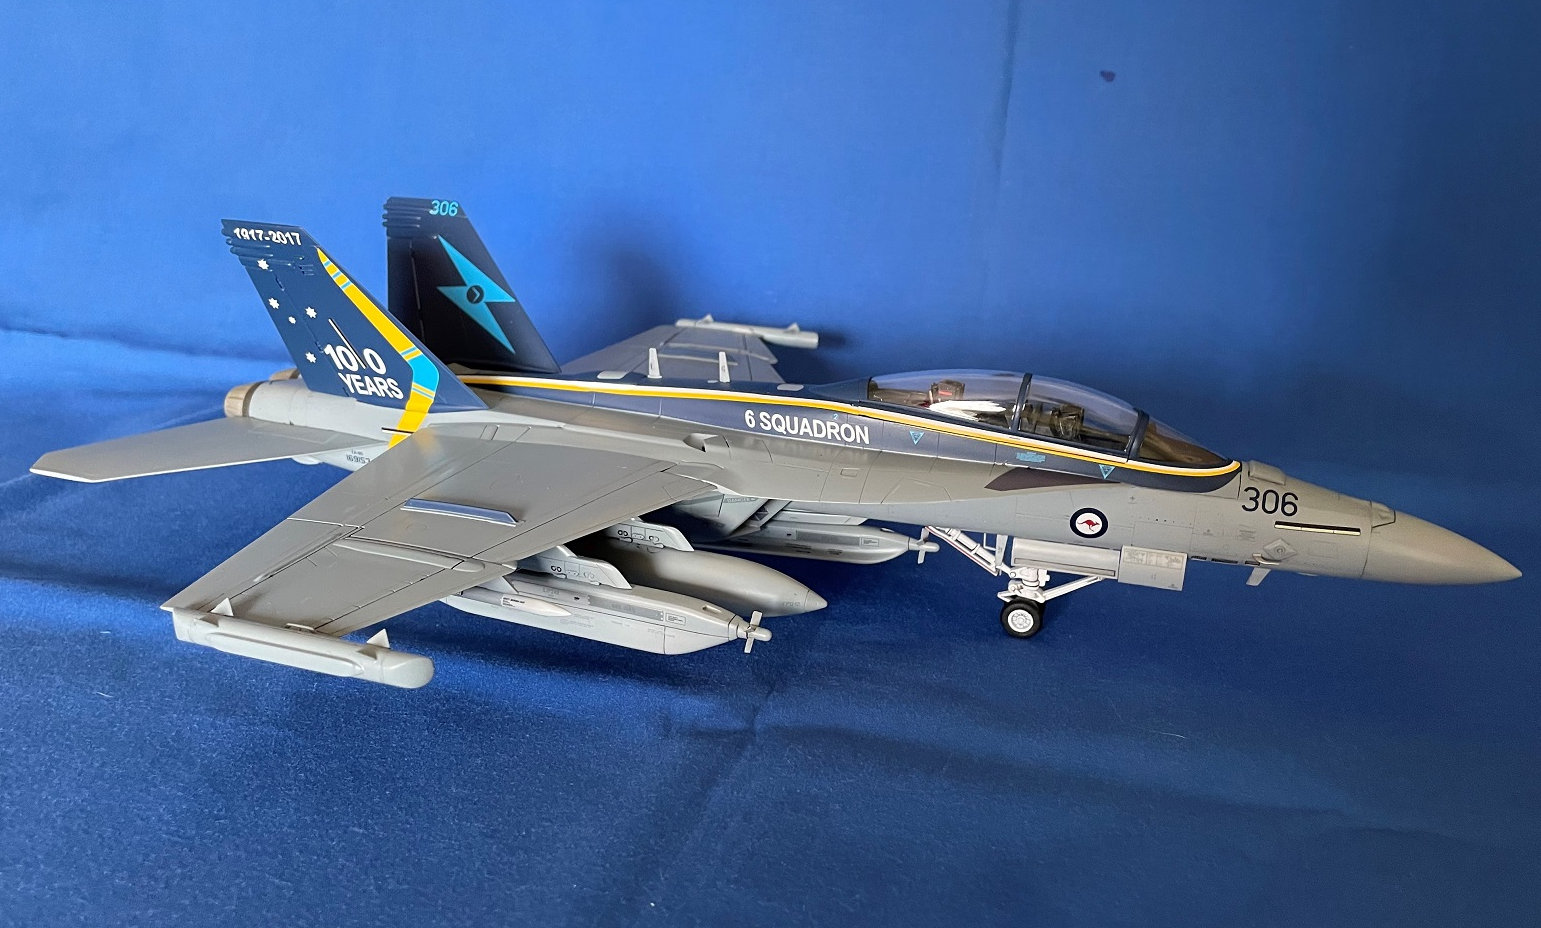
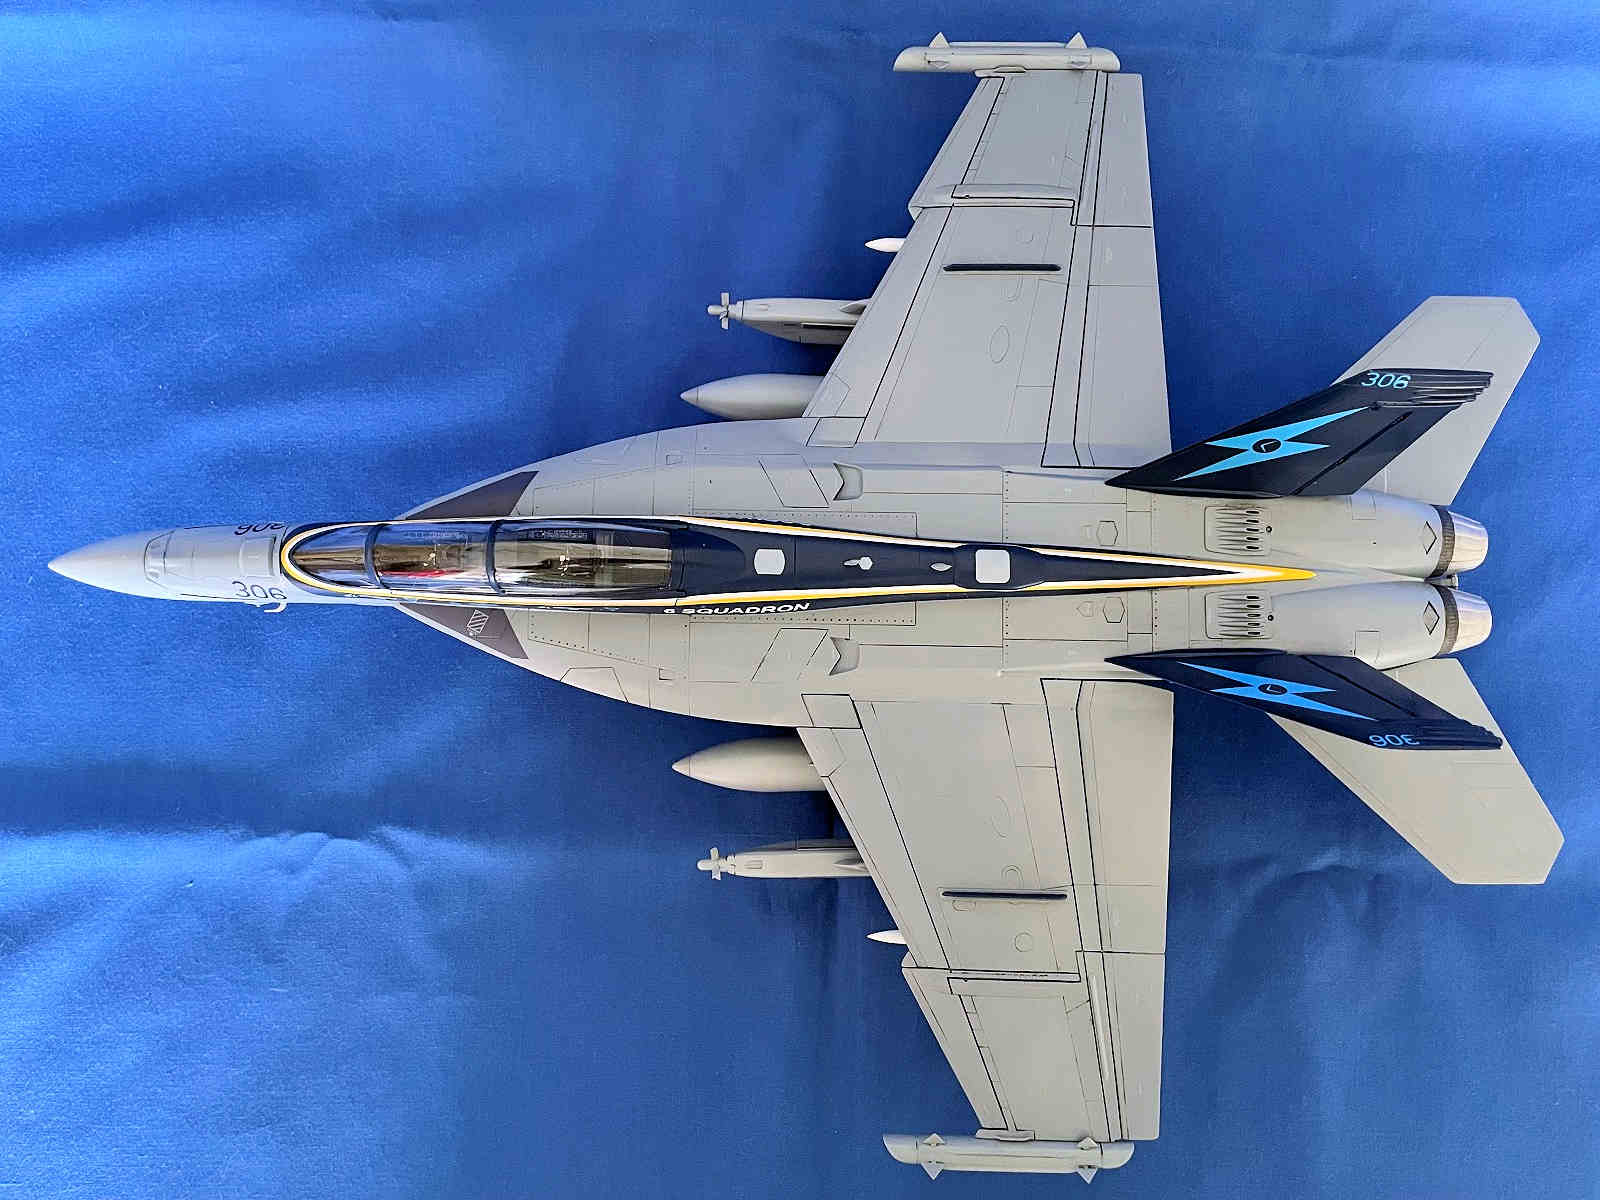
The EA-18G Growler was designed to replace the US Navy’s outdated Grumman EA-6B Prowler. It was derived from the tandem seat F/A-18F Super Hornet. The Australian RAAF operates these aircraft and I chose to model A46-06, celebrating the 6th Squadron’s 100 year Anniversary, based at Amberly Airbase, in 2017.
This kit was packed in Italeri’s standard sized, sturdy box, with the grey parts sprues protected in clear plastic bags. An instruction booklet and decals by Cartograf were in the bottom of the box.
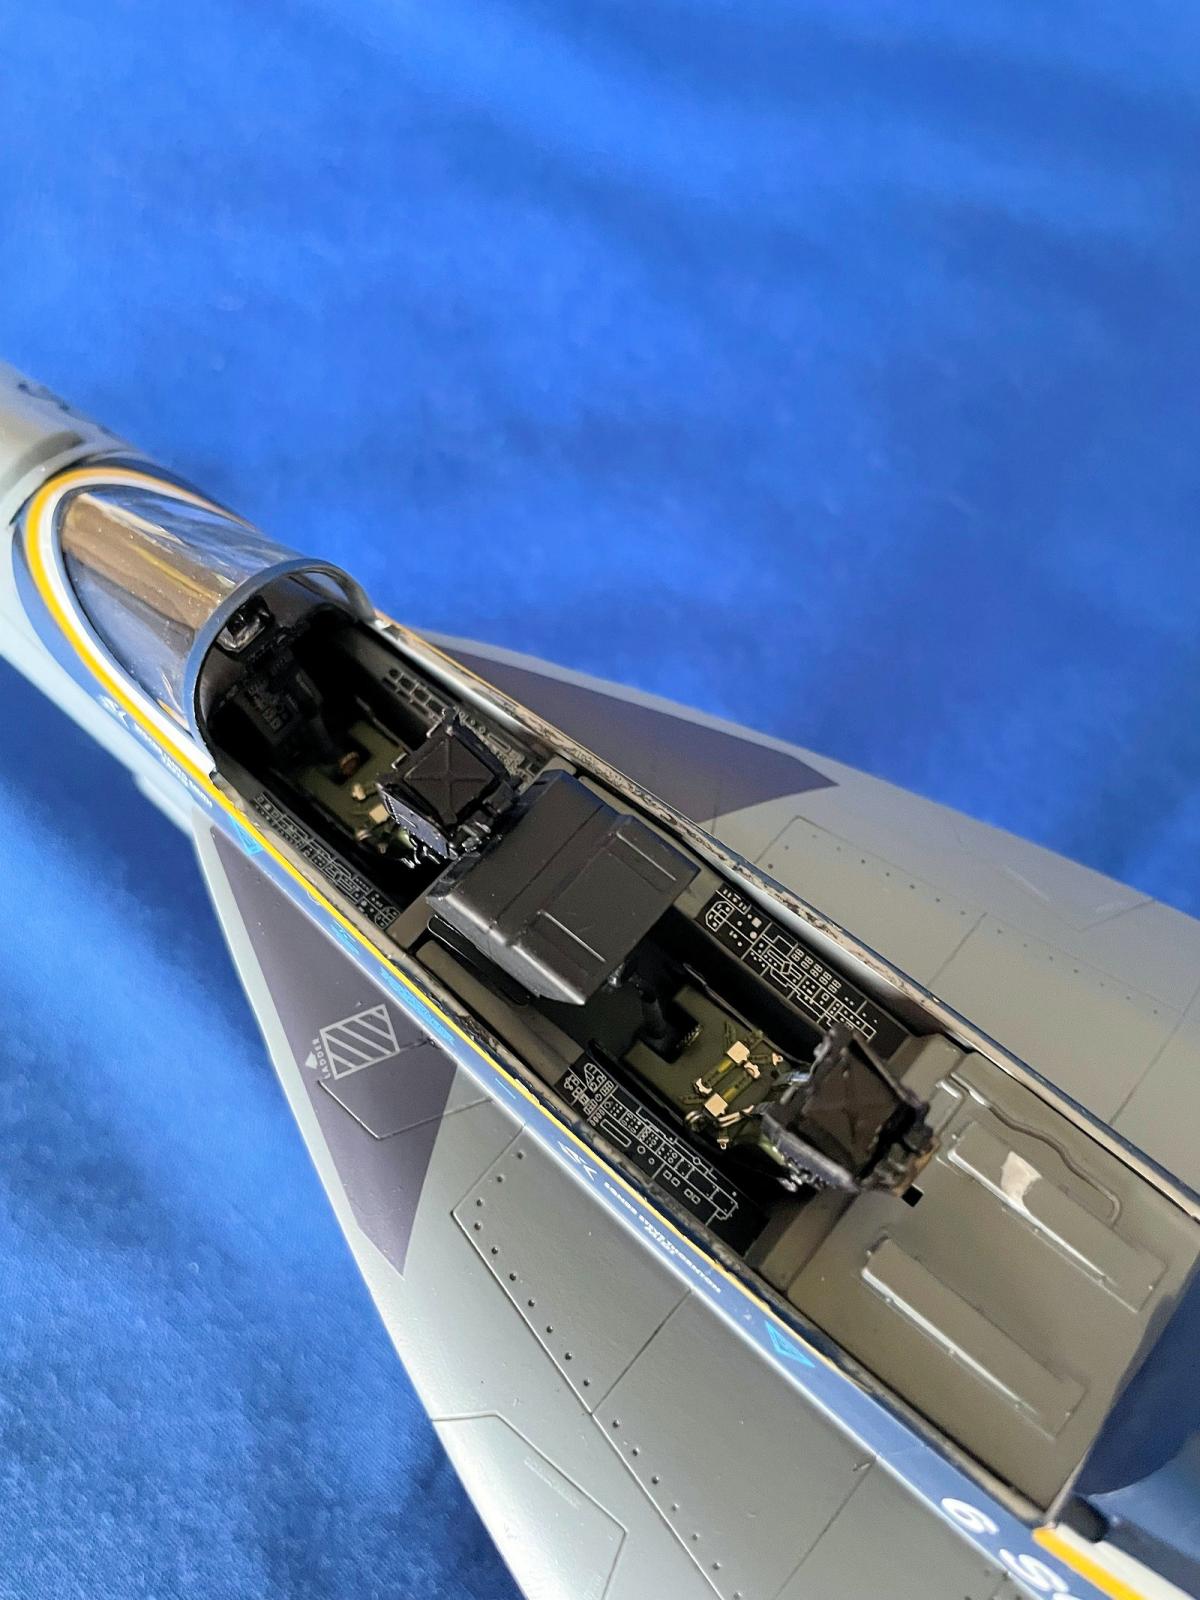
Construction started in the cockpit and ejection seats. The detail was quite basic and the instrument panels and side consoles were finished with decals provided on the decal sheet. I wanted to do the RAAF 100 Year Anniversary scheme and intended for the canopy to remain closed. My only addition to the cockpit was a set of Eduard photo etch seat belts for both seats.
Several parts and panels that insert into the upper fuselage half did not fit well and left large gaps that I filled and rescribed. A number of other parts showed the molds were misaligned and left a lip that needed cleaning up on both the mating side and visual side.
The rear fuselage was split into top and bottom halves. The bottom half included the wing undersides out to the wing fold mechanism and the two tailplanes. The top and bottom halves mated together with no issues, although there were large gaps left where the lower wings met at the control surfaces.
The forward fuselage halves fit together fine and cocooned the nose landing gear bay inside. The front and rear fuselage mated together quite nicely, except for a lip right in front of where the windscreen sat. A separate nose cone was then added, which fit nicely.
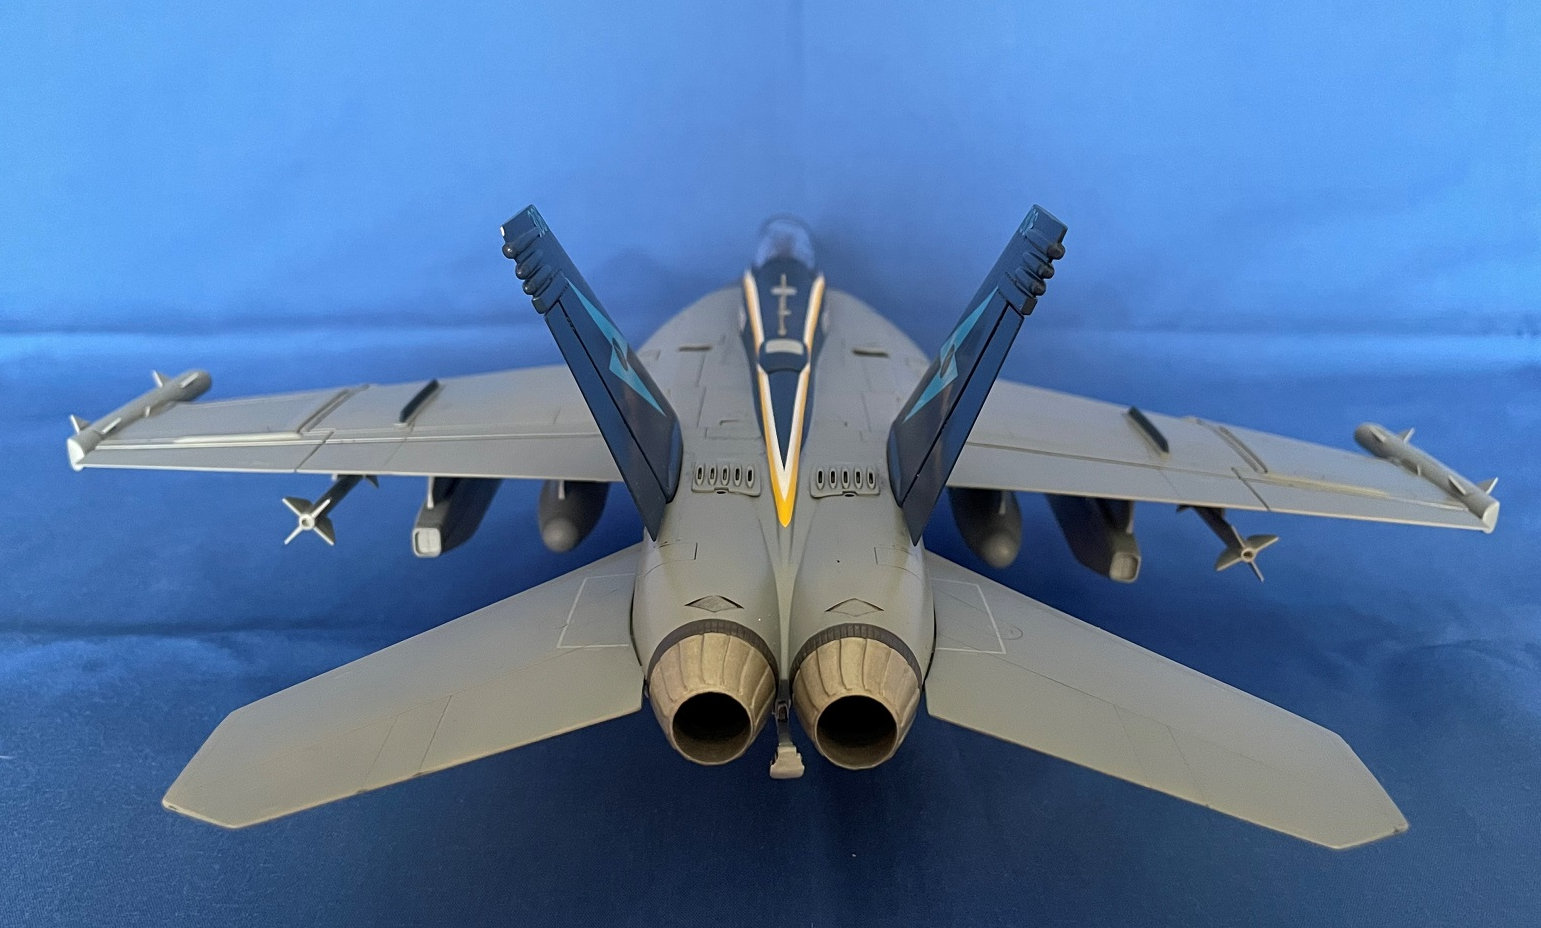
Both engine intakes were then assembled and included a novel solution to full length intake trunks leading to the compressor fans at the front of the engines. Italeri merely shrunk the diameter of the fan disks and shortened the trunk, giving the impression of the fans being further back inside the airframe. I did like this idea, but some large seams had to be dealt with.
The engine exhausts pipes showed large marks on the inside that would be visible if left. I scraped and sanded these smooth. The turbine blades and afterburner detail was very nice.
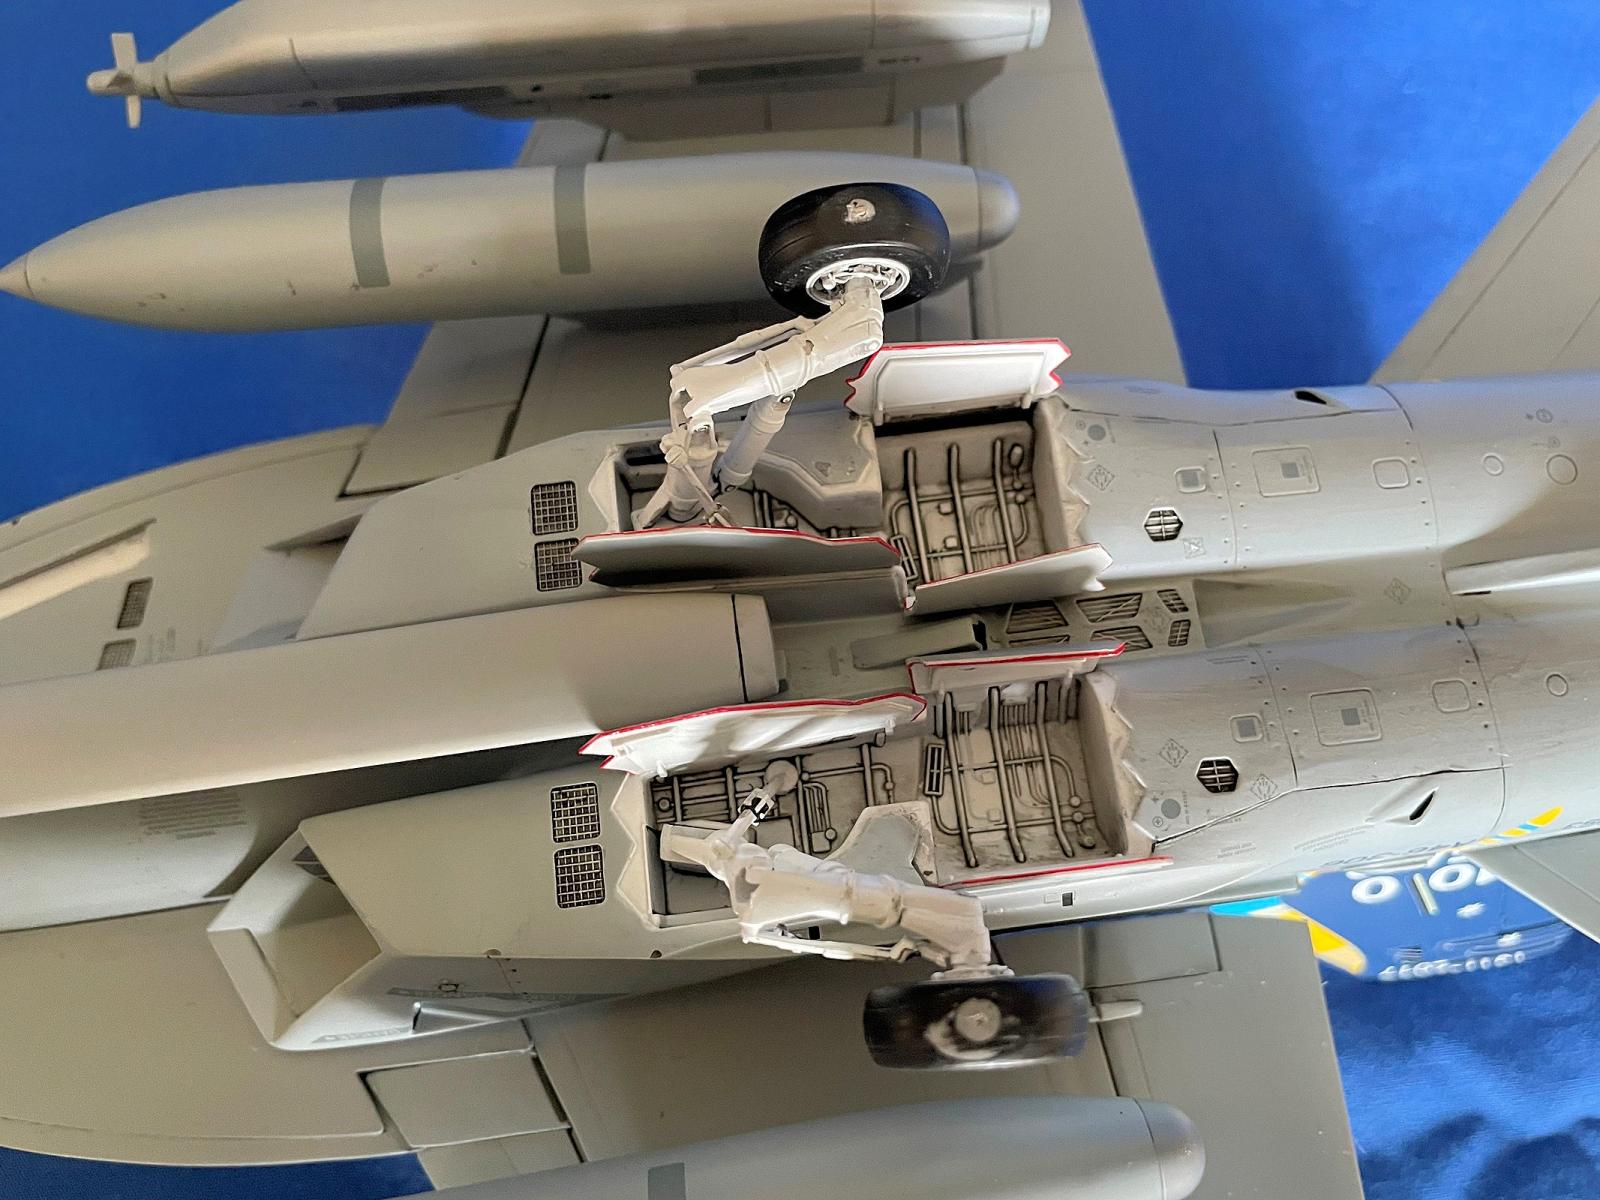
The main landing gear came in two halves as well as a separate part that included the axel. Everything fit fine and ended up being quite strong, as well as being suitably detailed. The main wheels were also in two halves and went together nicely. There was no tread pattern. All wheels were designed to rotate with end caps holding the wheels in place on the axles.
All the clear parts were very clear and nicely molded, but the windscreen was too narrow where its frame met up with the fuselage and left a step. The main canopy fit very well and butted nicely against the windscreen part.
I assembled two AN/ALQ99D High Band Jamming Pods that mounted to the center wing pylons and a single AN/ALQ99F Low Band Jamming Pod that mounted to the fuselage pylon. The main bodies of these glued together with no problems, but the small propellors at the front of each pod required careful removal and clean up from large sprue attachments. Two AN/ALQ-218 Detection Pods were also built and mounted to the wingtips.
Two fuel tanks were assembled and the fit was good. These mounted to the inboard wing pylons. A center fuselage fuel tank was also provided if the single AN/ALQ99F was not used.
The instructions show mounting two AIM missiles to each side of the fuselage. Internet pictures showed these being mounted to the outboard wing pylons on the Australian aircraft, so that’s where I glued mine to.
At that point I was ready to paint. I used Mr. Hobby Color light and dark ghost grey and Blue Angles blue. I cut out a copy of the yellow and white stripes on the decal sheet to find where the stripes would overlap the blue as it came to a point at the rear of the spine. Luckily, I measured correctly! A gloss coat readied everything for decal application.
The decals were great and performed as expected from Cartograf. However, even with a glossy surface I did get silvering under some of the decals. I took care of this by flooding the silvered area with Micro-Sol and pricking it with a sharp pin. The yellow and white stripes applied much easier than I thought they would and fit perfectly.
Final assembly included antenna’s, Pitot tubes, wheels, exhausts and inserting the ejection seats.
This kit was not a difficult build and I could recommend it to most modelers. I found it to be a bit of a mixed bag, though, where some parts fit well and others that did not. With some careful assembly it built into a good looking and colorful EA-18G Growler that looks great on my shelf.
My thanks to Italeri, MRC and the IPMS for the privilege of building this model kit.

Comments
Add new comment
This site is protected by reCAPTCHA and the Google Privacy Policy and Terms of Service apply.
Similar Reviews