
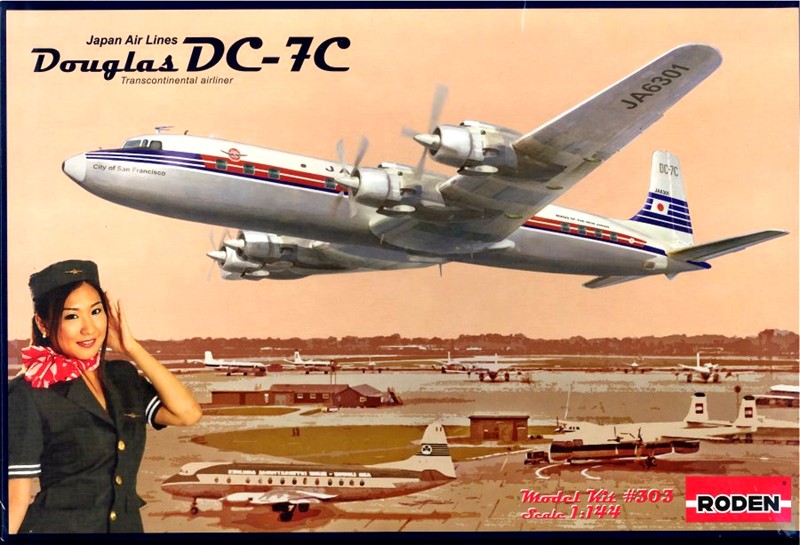
Douglas DC-7C, JAL
The Aircraft
The post World War II airliner market was rather like the competition between bomber aircraft in the war. Better engines, sleeker designs, more load carrying capability, longer range, were all sought after by the various airline companies both in the US and overseas. TWA bought the Lockheed Constellation, which could carry about 100 passengers on transatlantic flights. Pan American, the other US powerhouse airline bought "Connies", but they also had a long standing relationship with Douglas Aircraft. The Douglas DC-7 could fly New York to LA nonstop, but couldn’t do the Atlantic. The DC-7C could fly the Atlantic nonstop.
Unfortunately for the Connie and the DC-7, the Boeing 707, Douglas DC-8, Convair 880, and the VC-10 were coming into service, and the DC-7C began to disappear.
The Model
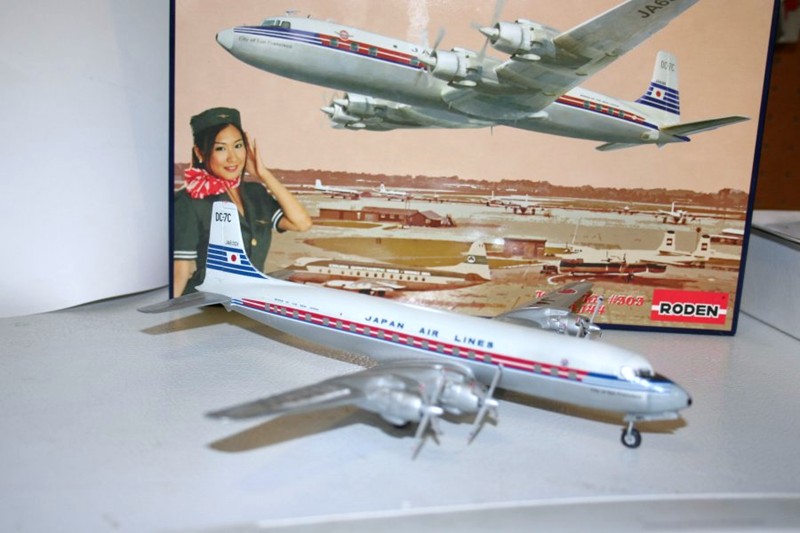
The box contains the fuselage halves, wing top and bottom, and two sprues of small parts. There’s a flight deck, with just a console for detail. I added two seats beside the console. They’re made from the part number tags from the sprue of another kit. I prefer the term “frugal”, thank you. Otherwise, the build was straight from the box.
Construction
This is pretty straightforward. Glue the flight deck in place, and add some weight. The instructions call for 10 grams. OK, I remember from my high school Chemistry class that the nickel weighs 5 grams, so I made a balance scale out of a pin vise, a ruler and two bottle caps. Put the nickels in one side, and add birdshot to the other until they balance. I then used modeling clay to hold the shot in place. I glued the fuselage halves together. The slight warp in the fuselage halves was easily taken care of, and was certainly less than I’ve seen in other kits.
The wings fit nicely to the fuselage; the horizontal stabilizers required only minimal fiddling. There was some mismatch between the upper and lower wing where the engines mounted. This required some attention with the coarse sanding stick to get the mountings for the engines square and even with each other. The engine and cowlings were a fairly easy, and once I got the mounts true and square, I still had to use some putty, as my eyeball didn’t get the mounts all even.
The propellers were a challenge. You get 16 prop blades, 4 spinner backs and 4 spinner fronts. Note that there are round and square tip prop blades. The prop blades attach to the sprue at the point where they mount on the spinners. Cutting them off leaves a cleanup job. I had a tendency to clean things up a little too well, leaving the prop blades a little undersized where they mount to the hubs. The other challenge was to get the blades to line up while I assembled them into the 2-part hubs.
I used the nickels I’d used for the nose weight to hold the blades in place while I glued them.
Paint and Decals
I painted the top of the fuselage white, put on a mask, and then used Model Master ® Aluminum Metalizer for the rest of the plane. As soon as it was dry I put on the Future coat, as the aluminum has a tendency to rub off during handling.
Once the Future had a couple of hours to dry, I put on decals. I had self-inflicted problems here. While I was looking at one end of the long decal sheet, I was dipping the whole other end of the sheet in the water. It is a tribute to the sturdiness of these decals that I managed to get them all on the aircraft, fairly straight in less than a half hour.
Final Construction
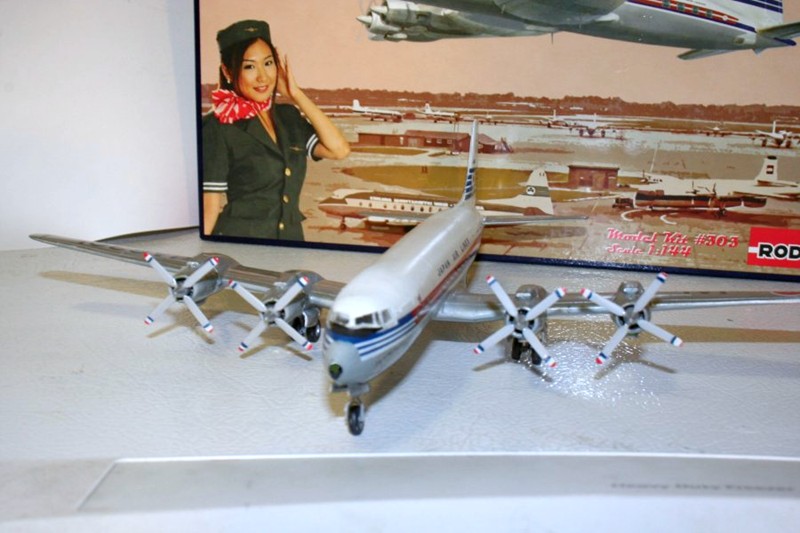
I always leave the landing gear and small parts off until I’ve finished decals. That way I’m not having to reinstall small stuff, or looking on the floor for them. The main landing gear went on cleanly, with only a couple of realignments needed. The nose gear fit into the opening, but there’s a strut that goes forward from there, which didn’t appear to hook to anything. But that’s OK, that big chunk of birdshot and modeling clay I used for a nose weight supports it nicely.
I was pleased with how well the propellers fit onto the front of the engines.
Overall Evaluation
Recommended. Except for the props, this is an easy build, with OK fit. This model fills a void in the airliner history. Somewhere between the DC-3 and the DC-9, we needed another Douglas airliner.
Thanks to Roden and IPMS/USA for the chance to review this kit.


Comments
Add new comment
This site is protected by reCAPTCHA and the Google Privacy Policy and Terms of Service apply.
Similar Reviews