
Do335 A-0 Pfeil - Fuselage and Wing Build, Part 2
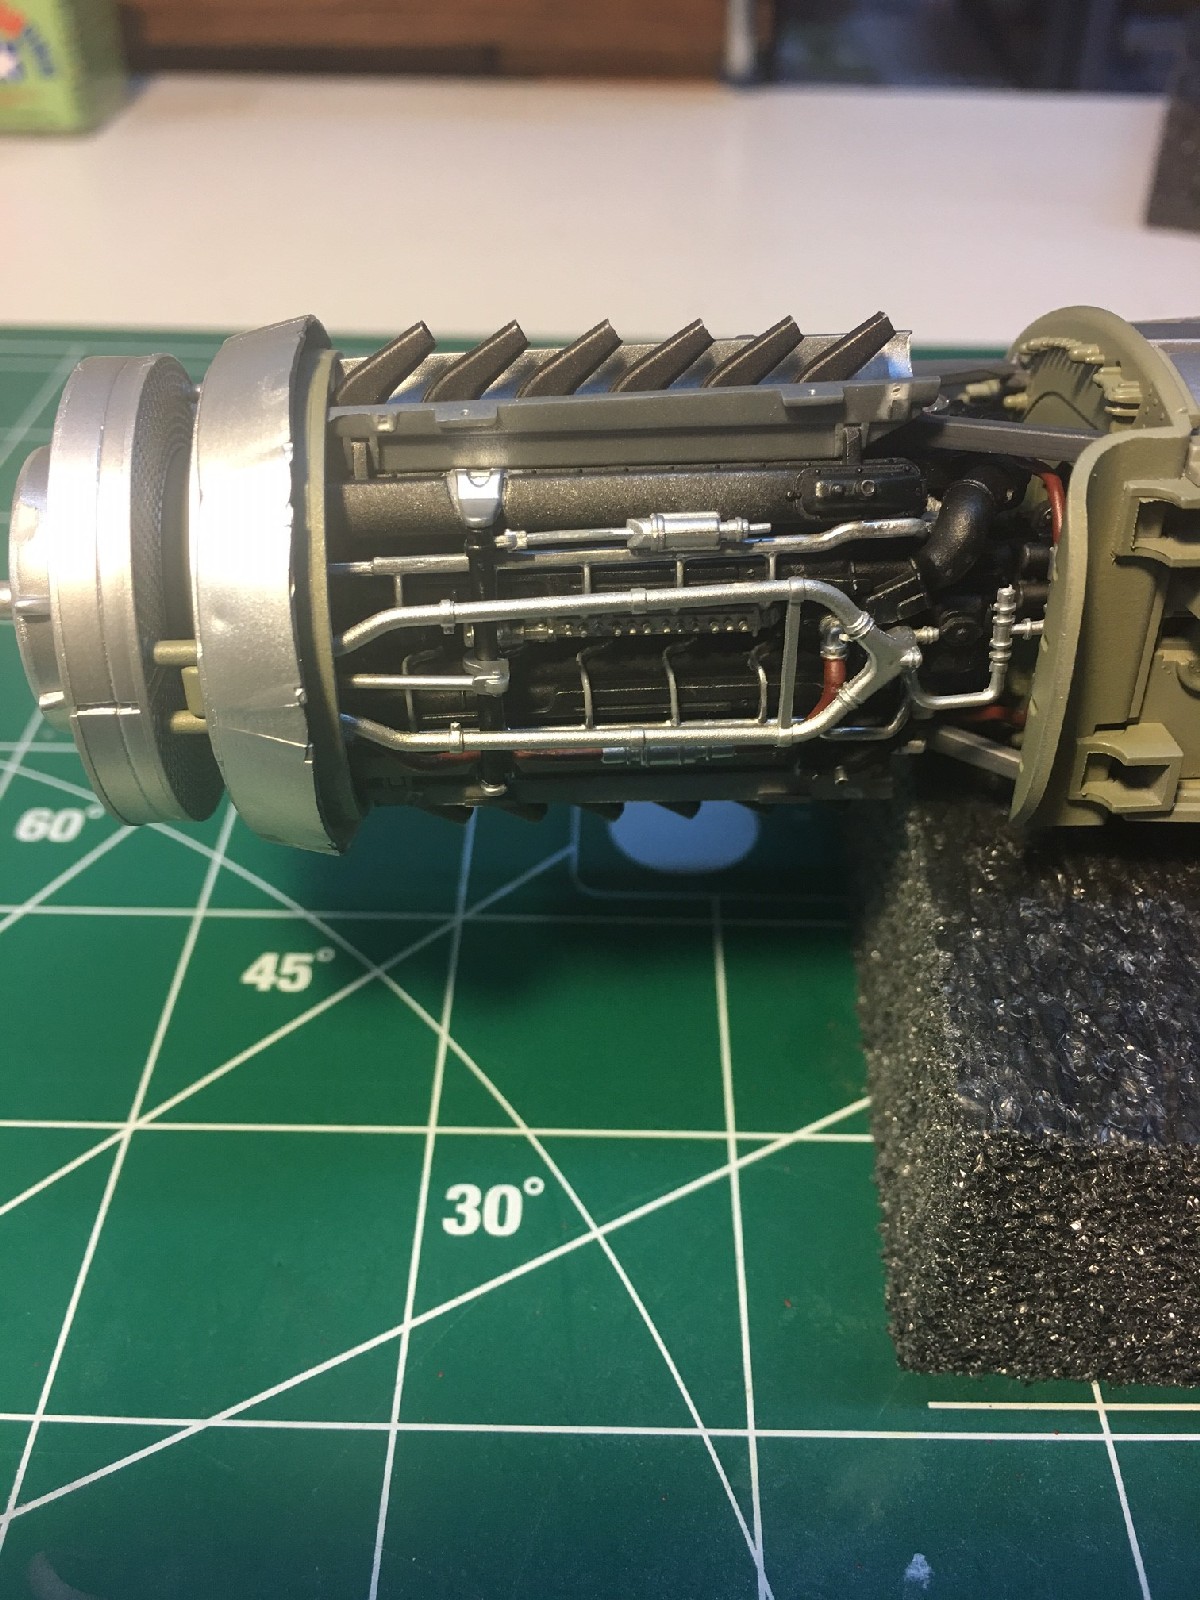
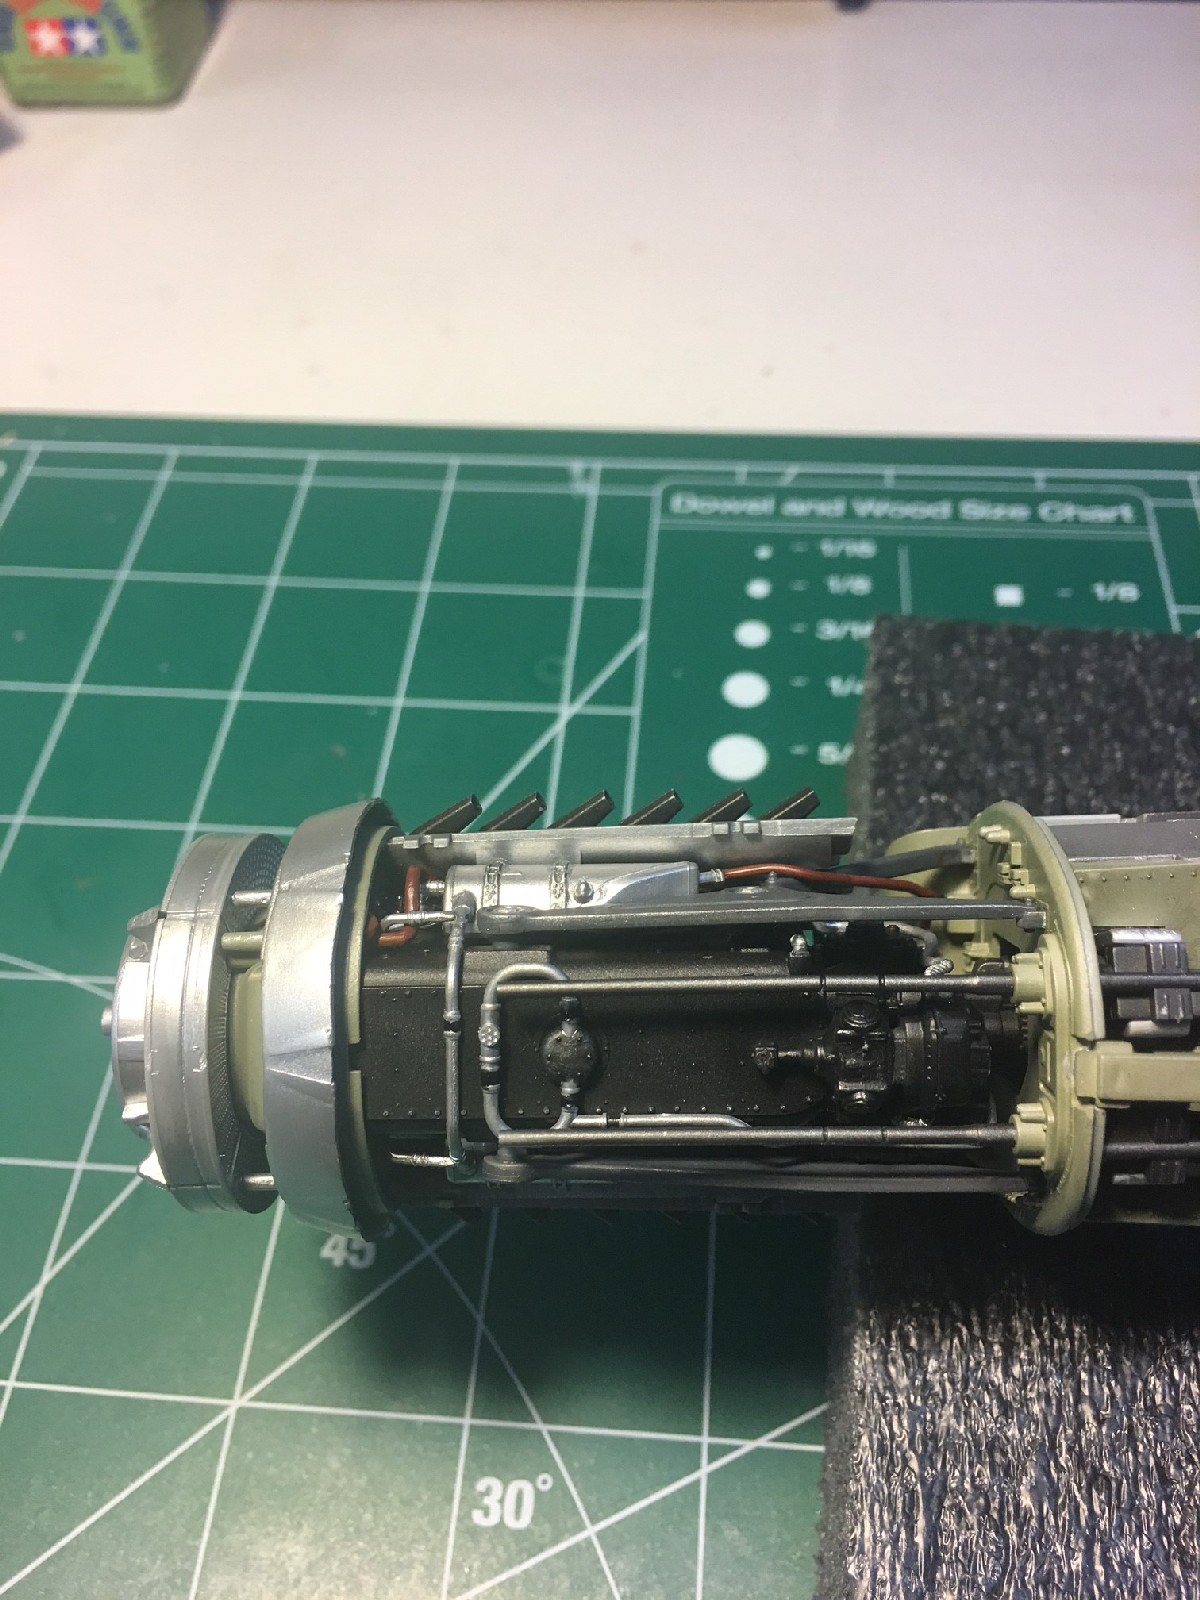
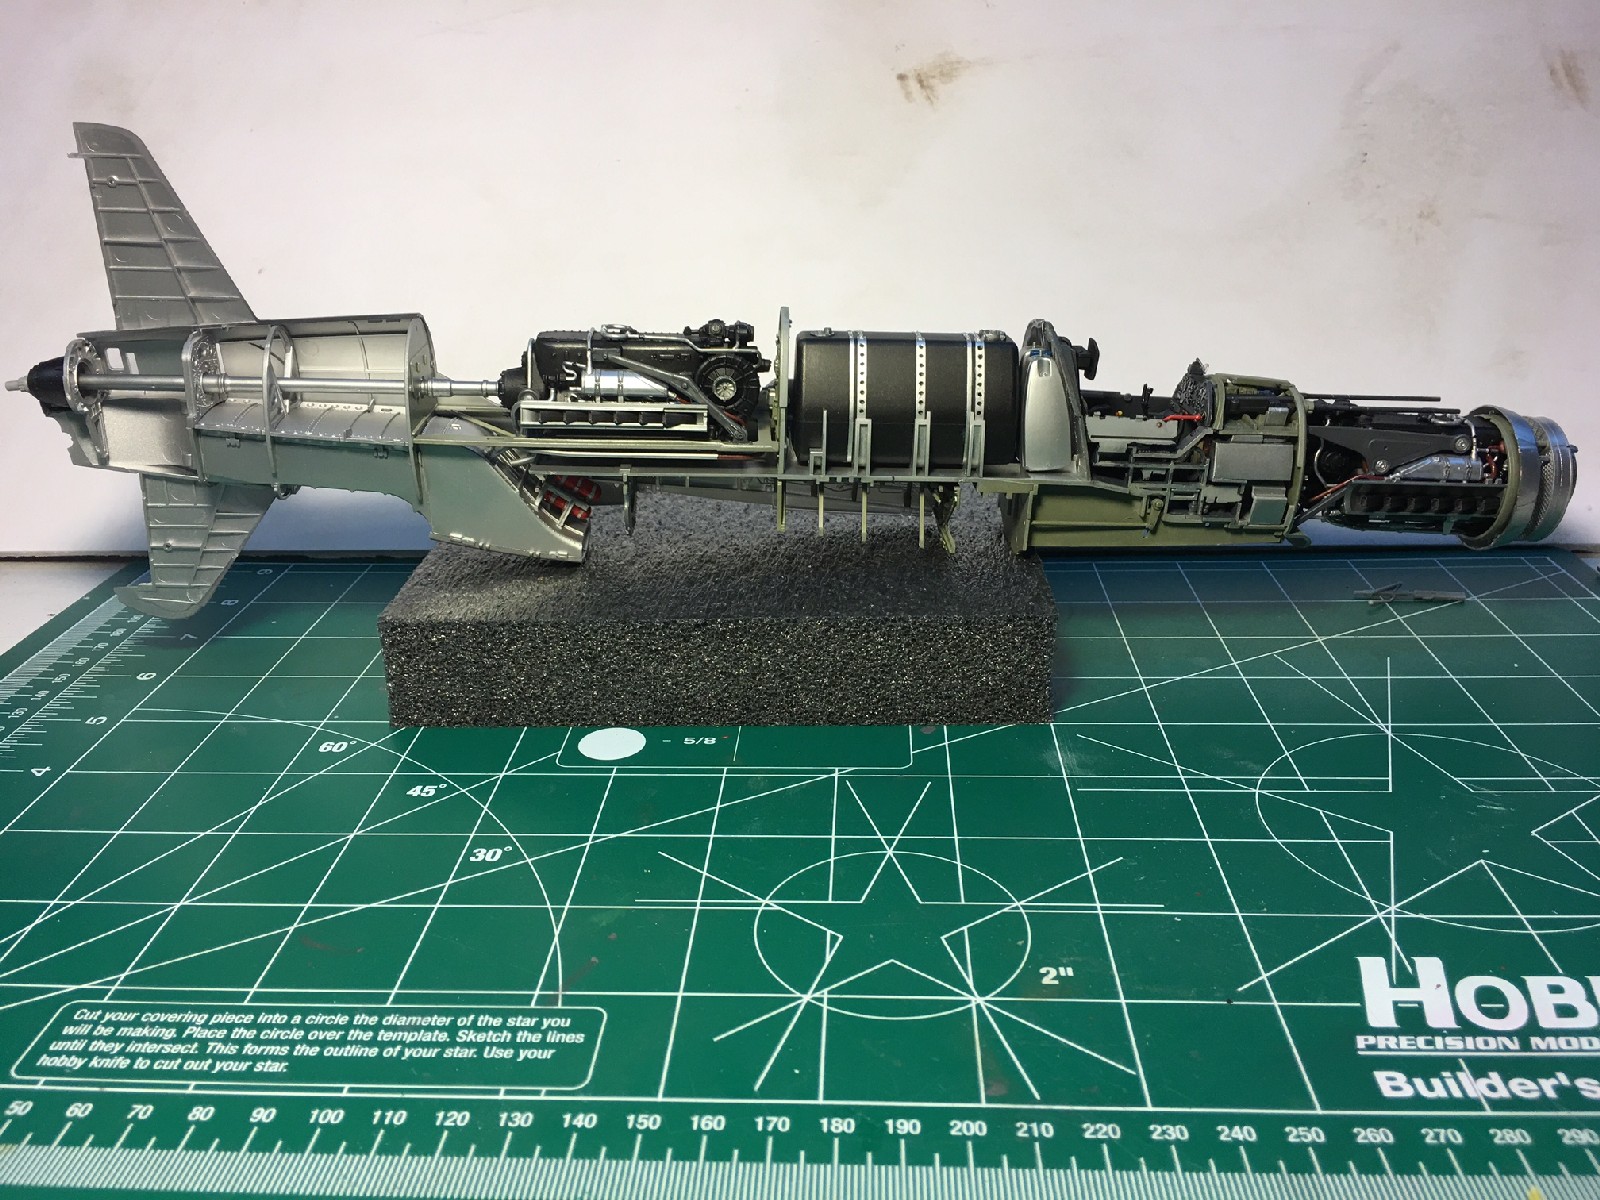
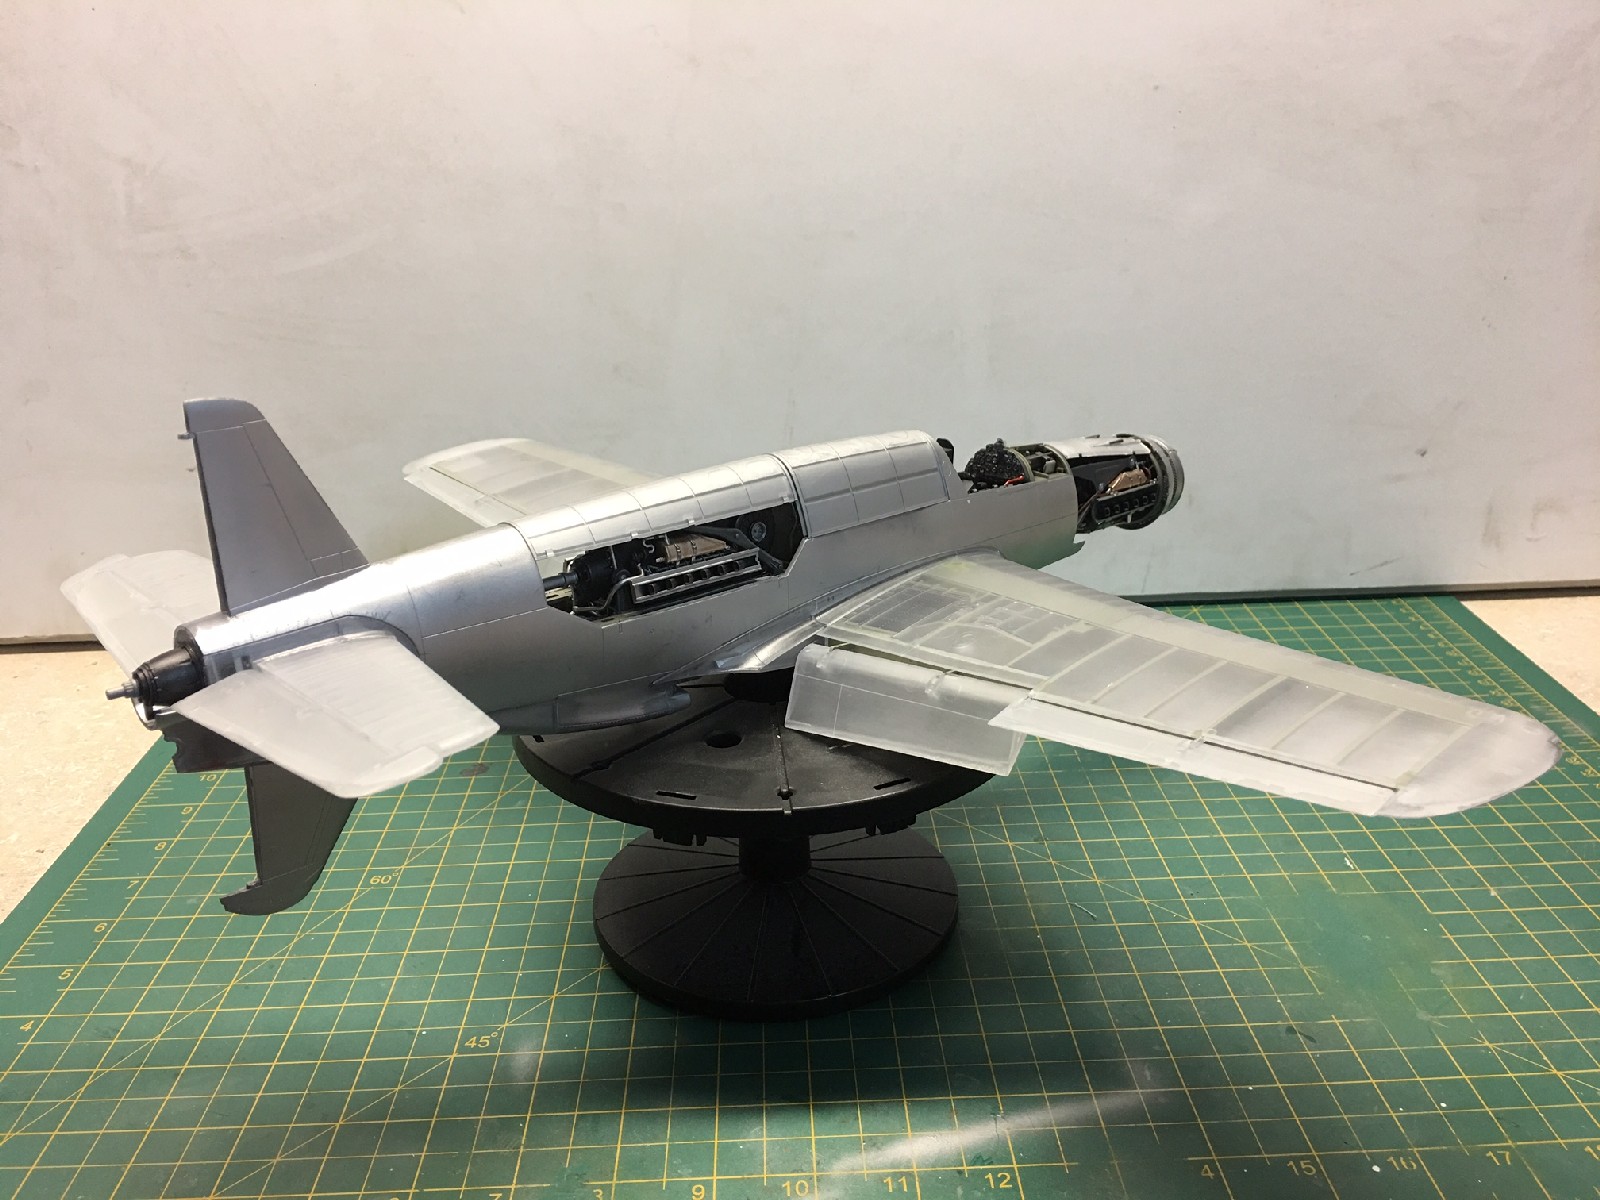
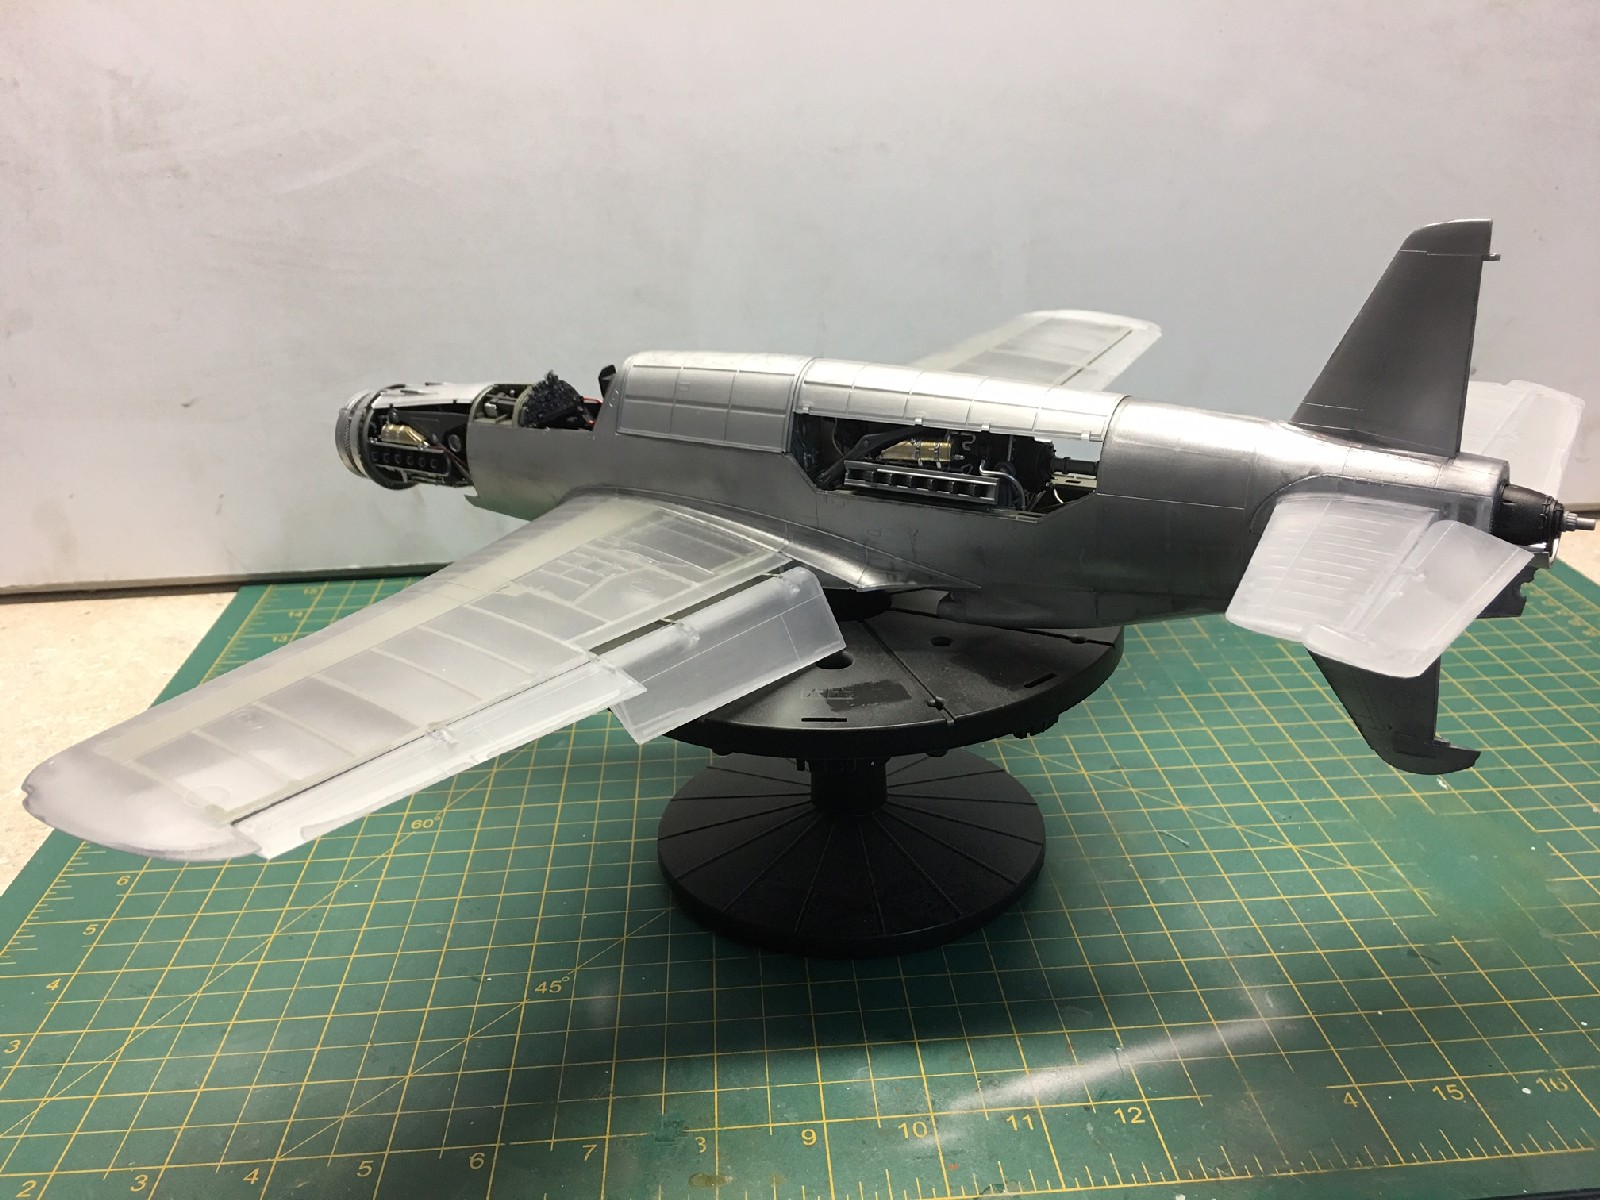
The Build Part 2: Continuing with the build is the 2 Daimler-Benz DB603 inverted V-12 liquid cooled engines. It starts with the two halves of the block with molded in pistons and rods. There are two halves of each bank of pistons that all get put together, then the upper sections are glued to that and the top cap of the whole assembly to finish it off. The valve covers are next along with the front gear box and propeller shaft and also the rear engine accessory components which are very well detailed. Next is the ignition piping and wiring, some oil tubing and the supercharger, all well detailed. The engine mounts are next along with the exhaust pipes, shrouds, cooling fluid tanks and related tubing. There are many tubes and piping that must be put together in this step that must be painted and applied and again all go together very well. That was the front engine now you have to do it all over again for the rear engine. I built them both at the same time and the only difference between the two are basically the engine mounts. Once together they are very nice and well detailed engines, I don’t think there is much more you could do to make them look better.
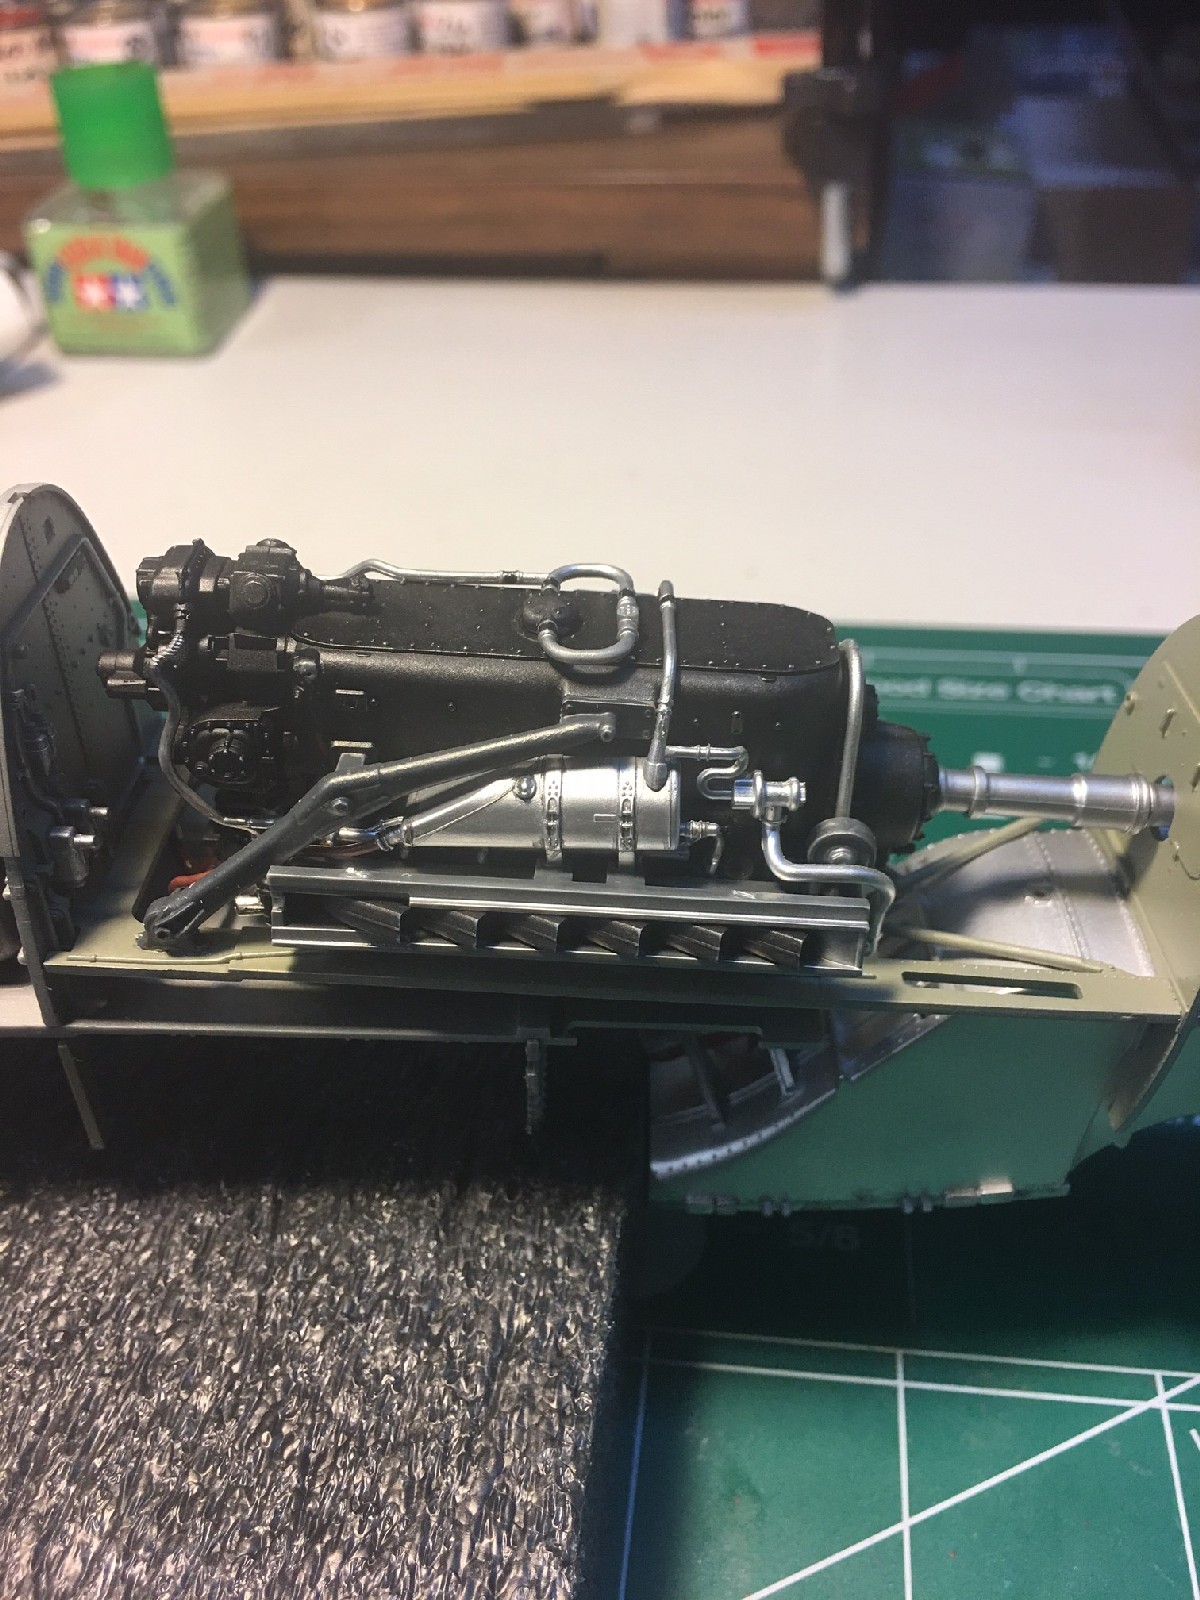
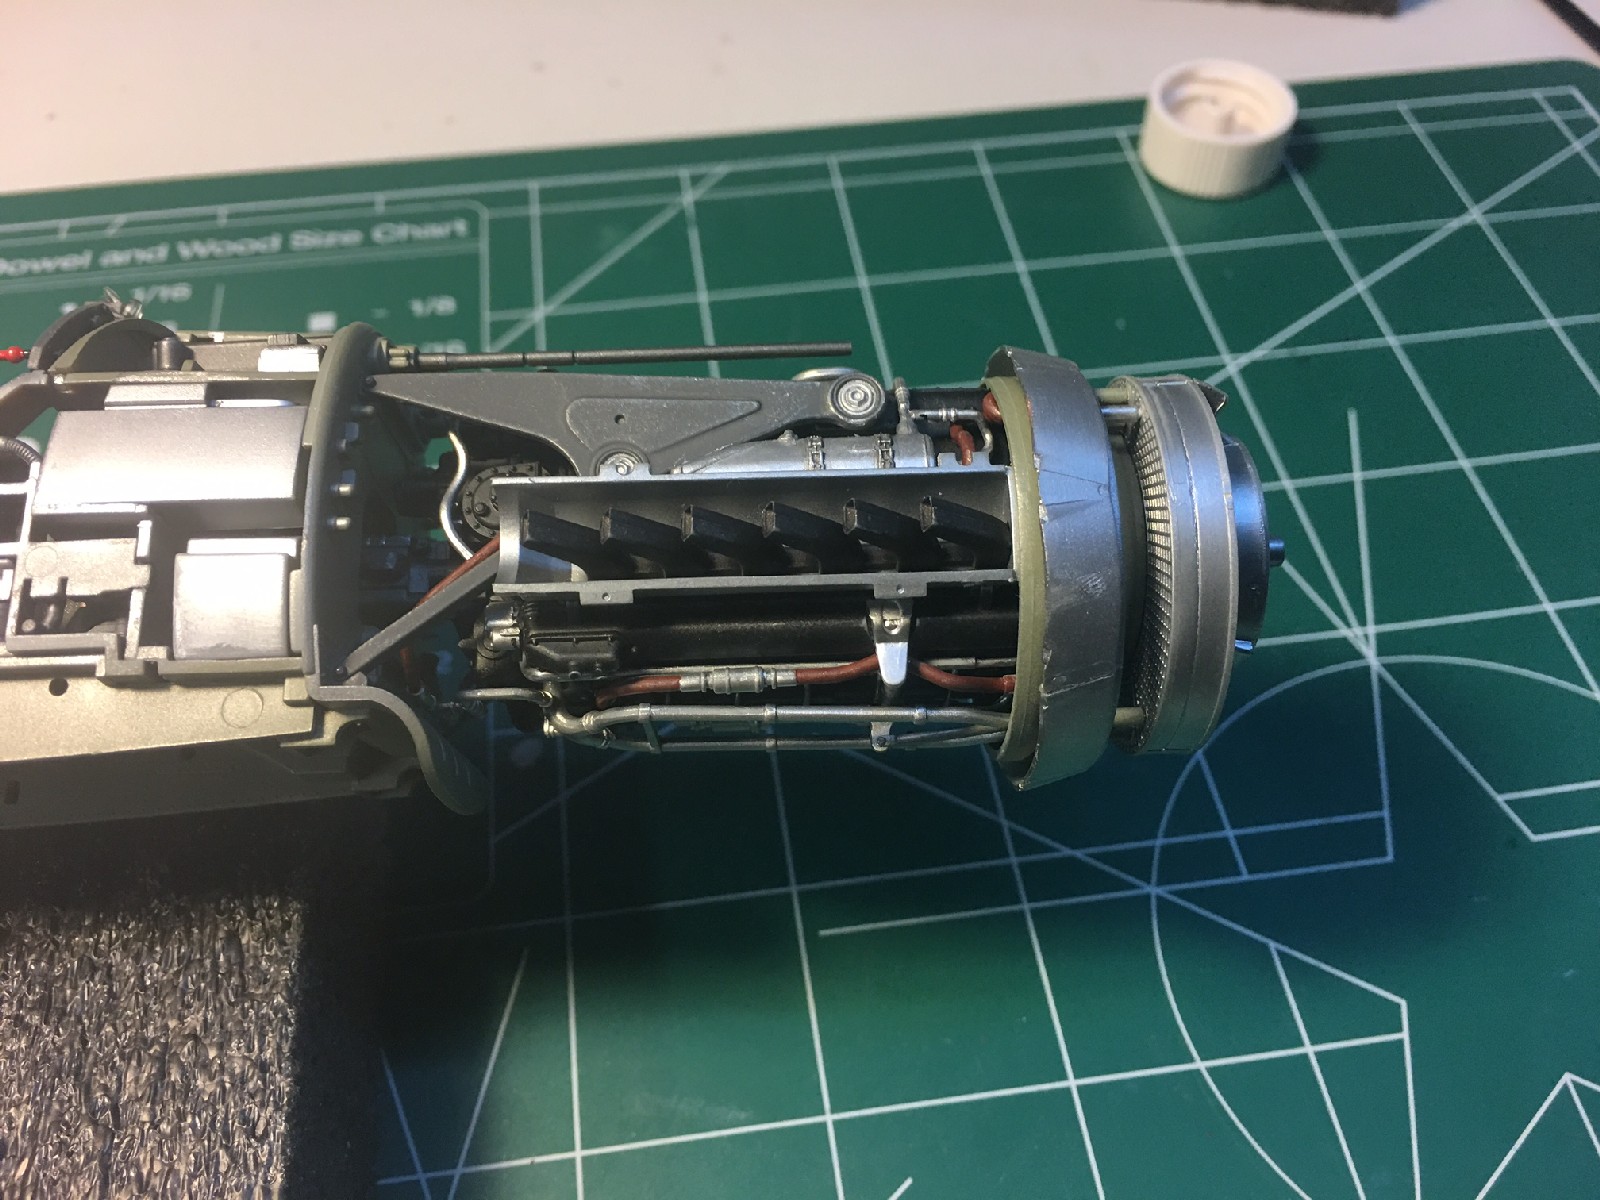
Next is the Fuselage. First up is the front engine attachment to the cockpit frame which fits beautifully. Then there is the cowl flaps of which you have to decide open or closed. I made mine open. There are a bunch of cowl flap rods and things to put together to attach the cowl flaps to, again very good fit and detail. Next is the front radiator and front cowl. All of these parts attach to the front of the engine. Next up is the rear radiator housing and bulkheads, again awesome detail and fit. The rear engine gets attached along with the rear radiator duct and the rear engine shaft, gear box and prop shaft. The oil cooler and duct is built next with great detail and fit. Now all of this assembly gets to be stuffed into the fuselage halves which have to be painted inside to match the different areas of the engine compartments, cockpit, and bomb bay areas. Everything fits very nicely into the fuselage halves with minor fiddling to get everything in its place. With everything glued up it’s on to the wings.
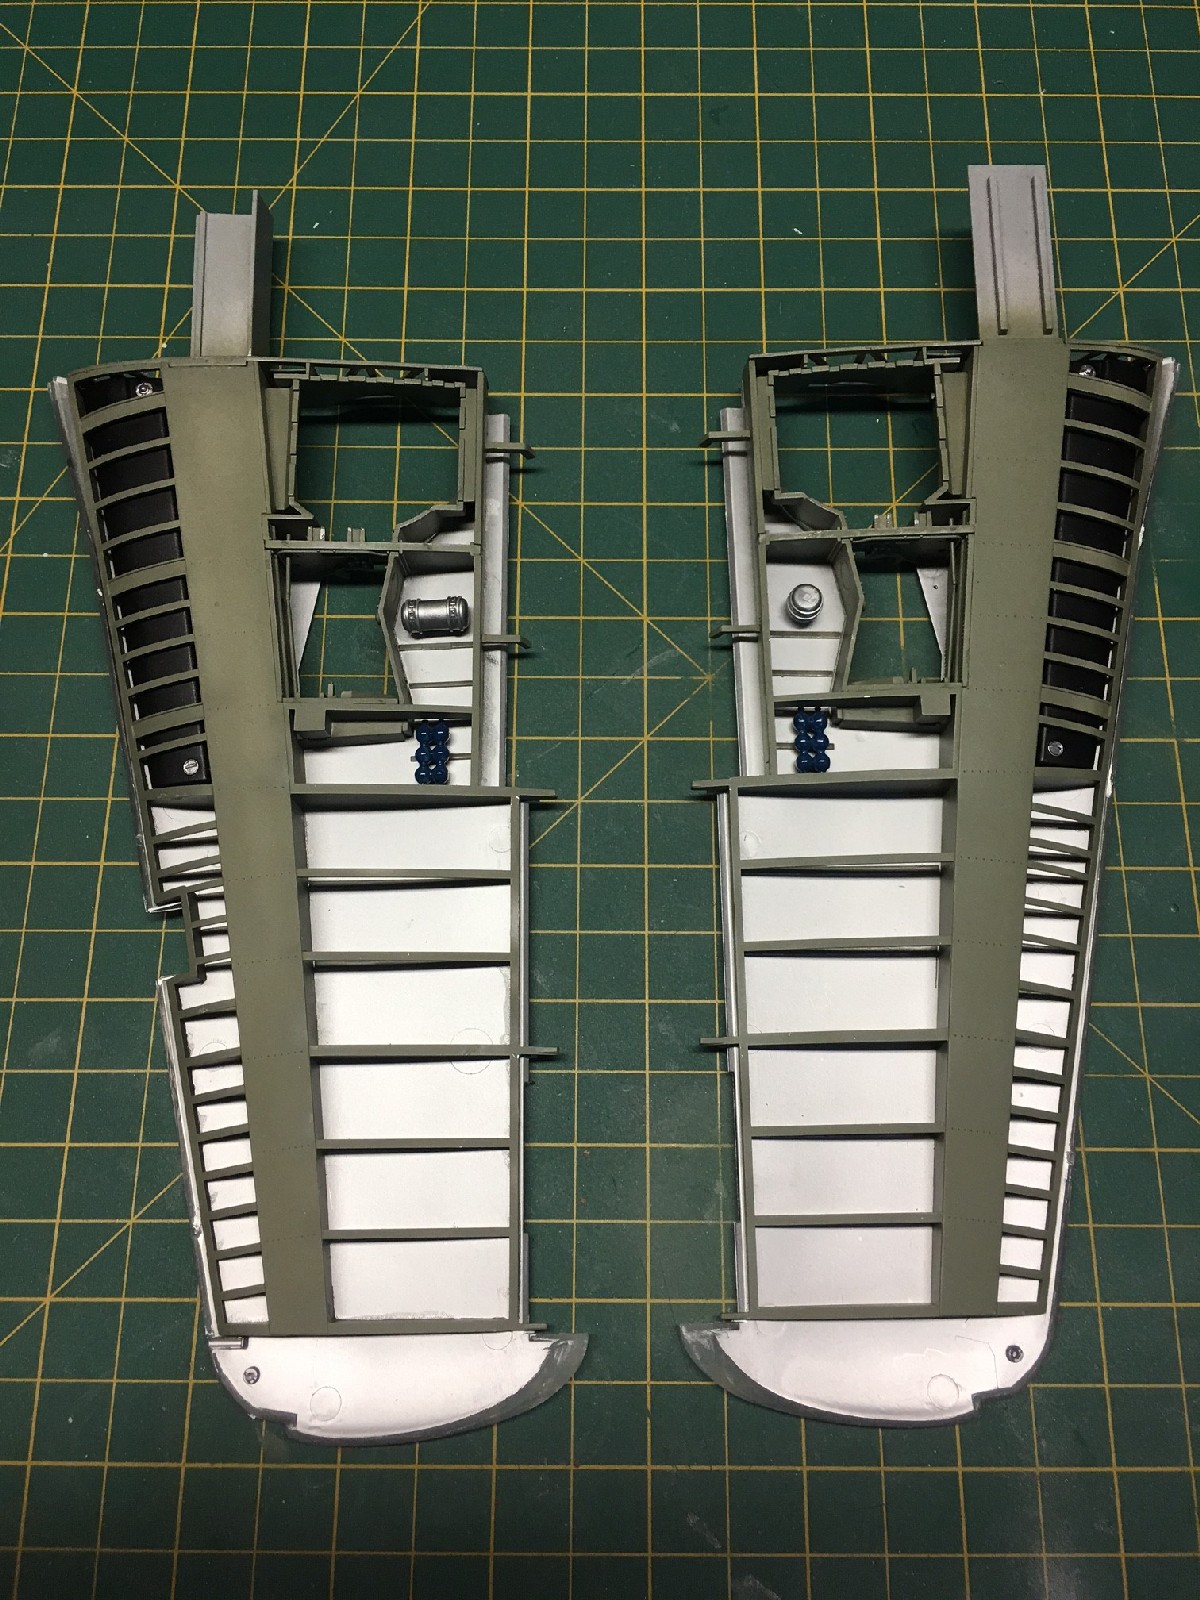
The wings start with the inside structure, the spar and ribs along with the wheel well structure and the wing fuel tanks. All of this nice detail goes together very well but once inside the wings and painted you won’t see any of it except the inside of the wheel wells, unless you opt to not paint the outside of the wings. The wing halves go together around the structure very well and everything gets glued up. Both wings get glued together in the center with a boxed spar that eventually gets installed in the fuselage. Now its time to install the wings to the fuselage. It’s a simple attachment, the box beam between the two wings slides up into a slot in the fuselage and gets glued in. There is a wing fillet that goes over the wing joint to make the smooth transition from wing to fuselage. The two horizontal stabs are glued together along with the elevators and the two rudders. Everything is clear so you can see the molded in rib structure underneath. The horizontals get glued on and that’s it for the fuselage assembly.
In conclusion this is one nice build so far, all the parts go together very well and everything is nicely detailed. There hasn’t been any issues with the instructions or the fitment of the parts, overall this has been the nicest build I have done so far and I look forward to finishing it up with paint and decals.

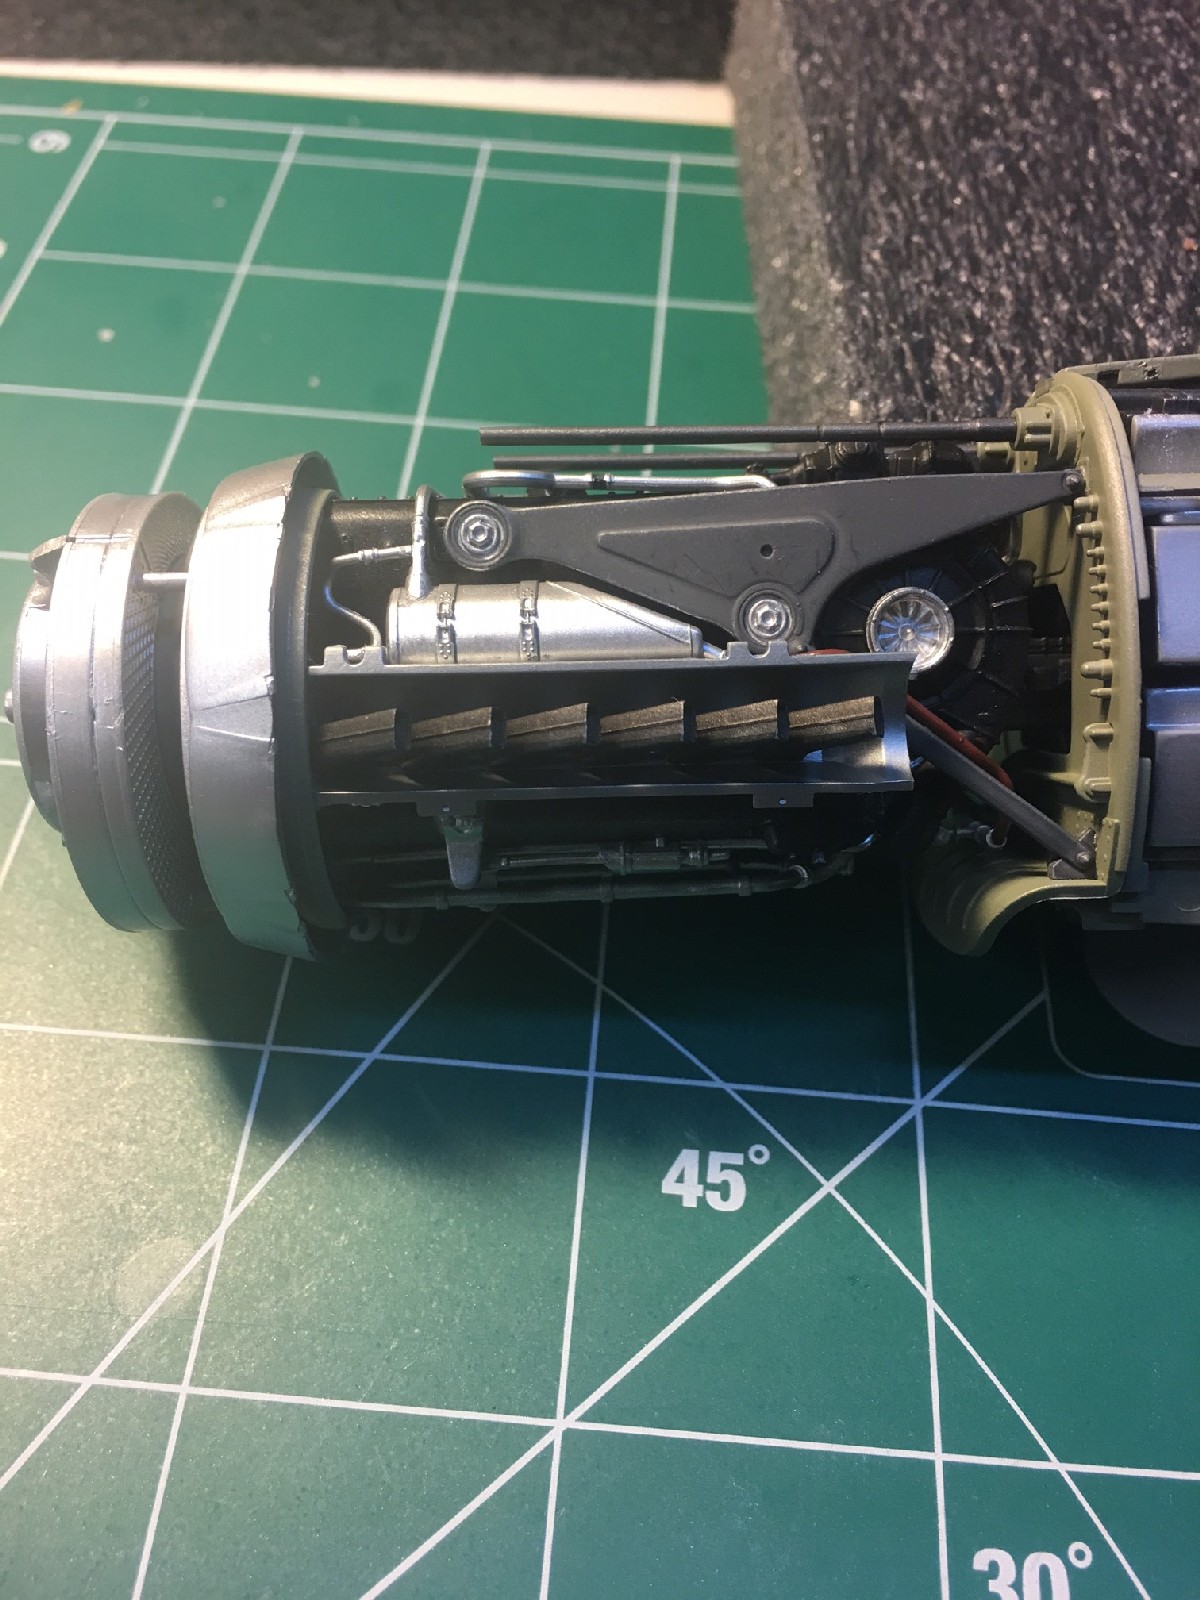
Forward engine detail
Forward engine detail
Forward engine detail
Aft engine detail

Aft engine detail
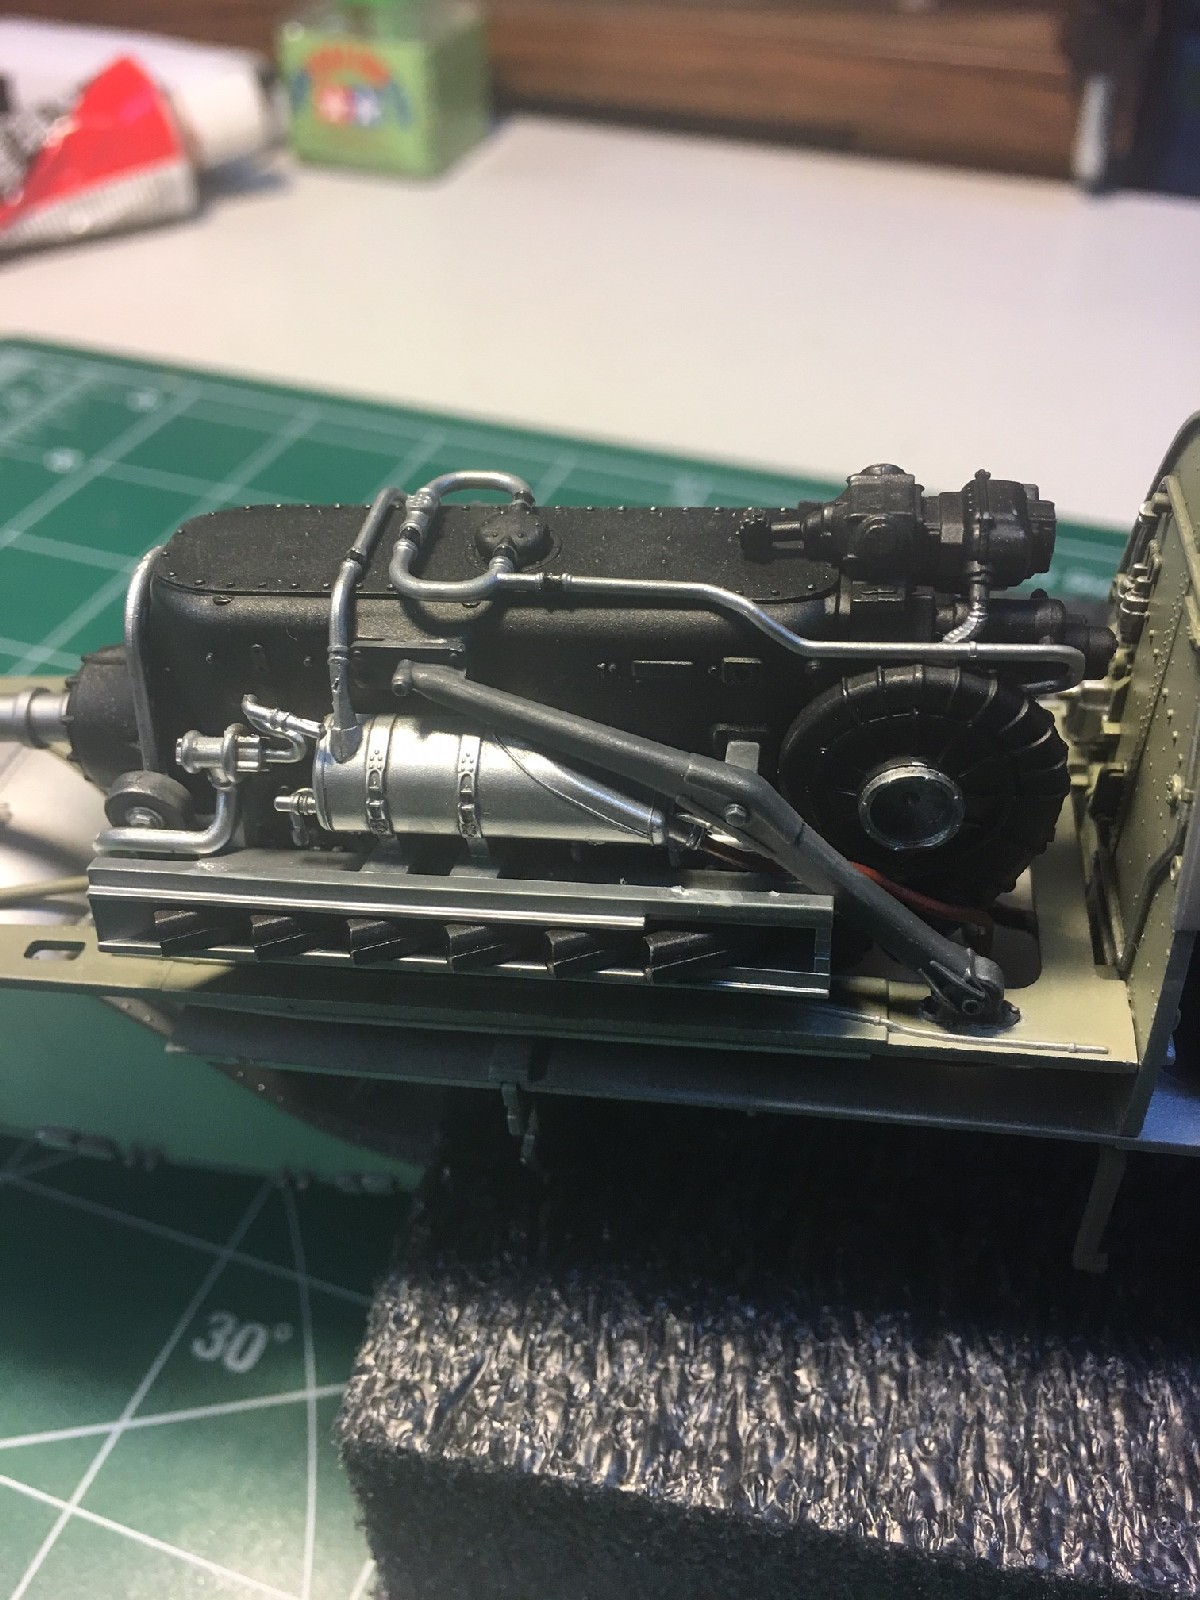
Aft engine detail

Aft engine detail
Forward Engine detail
Fuselage layout

Fuselage layout
Wing detail

Assembled model
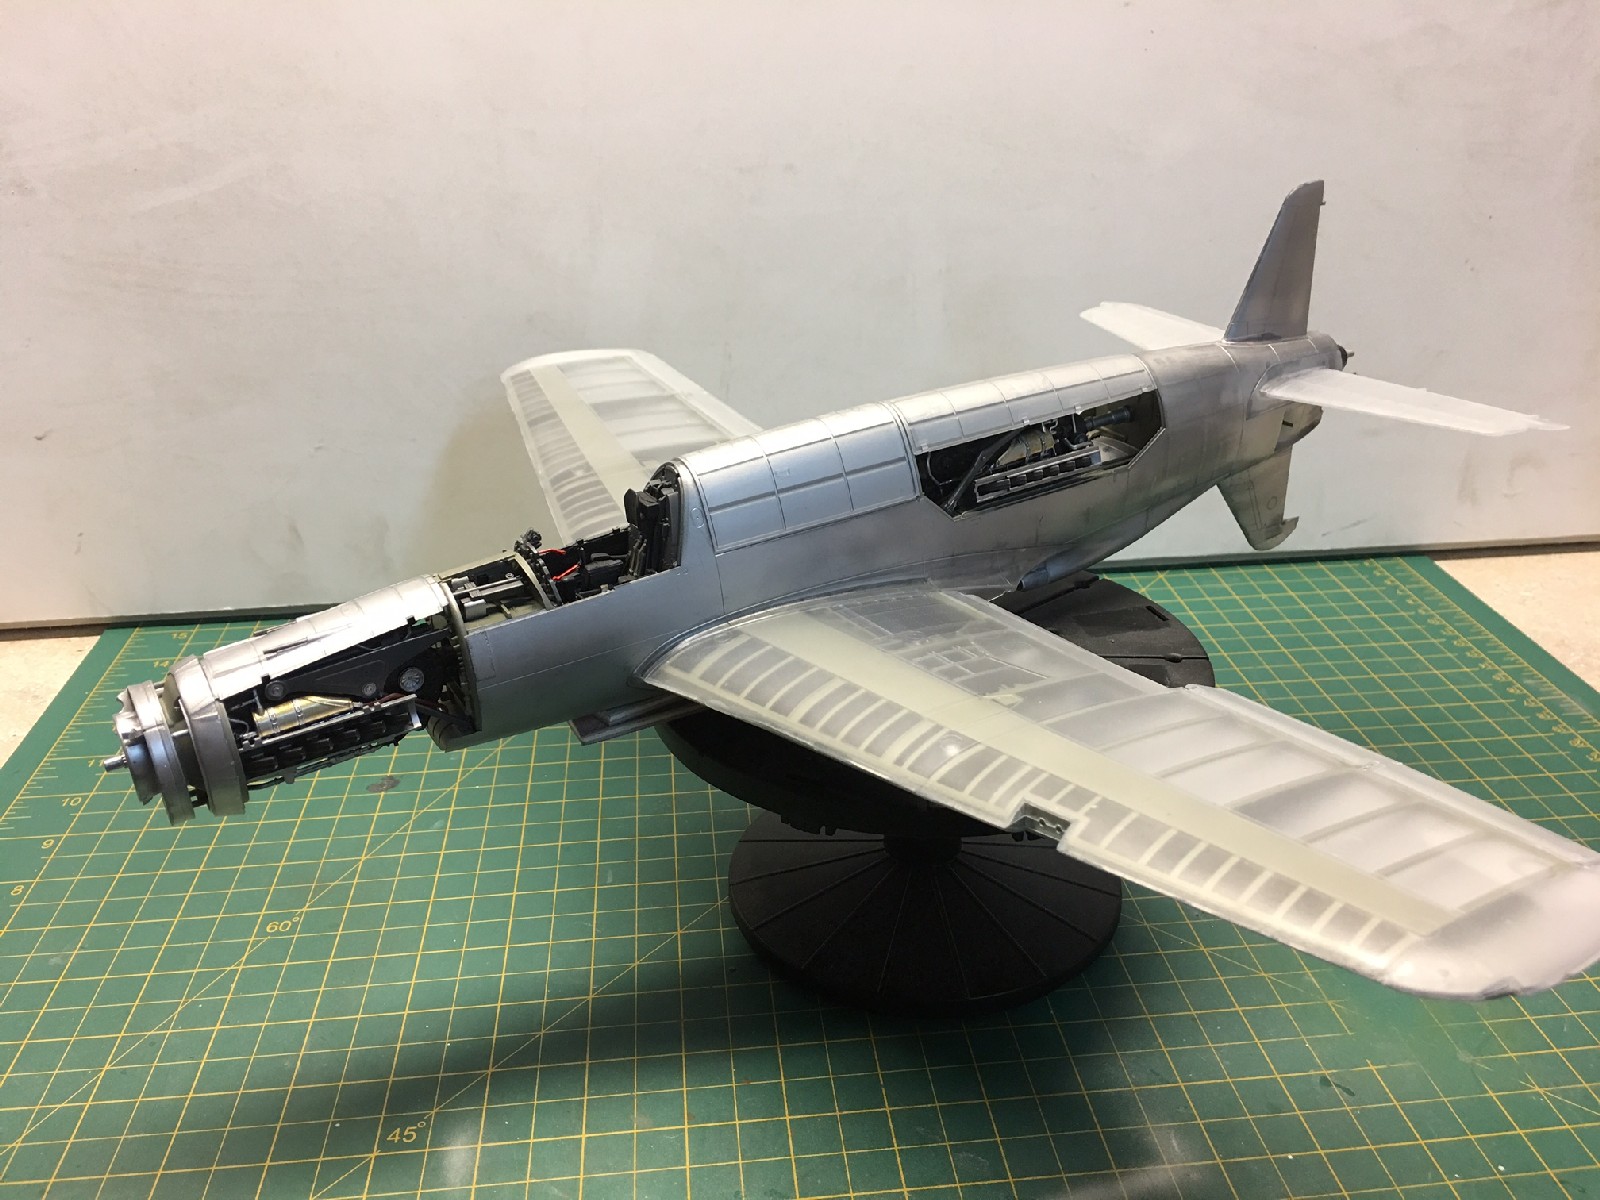
Assembled model

Assembled model
Assembled model
Assembled model

Underside detail

Comments
Add new comment
This site is protected by reCAPTCHA and the Google Privacy Policy and Terms of Service apply.
Similar Reviews