
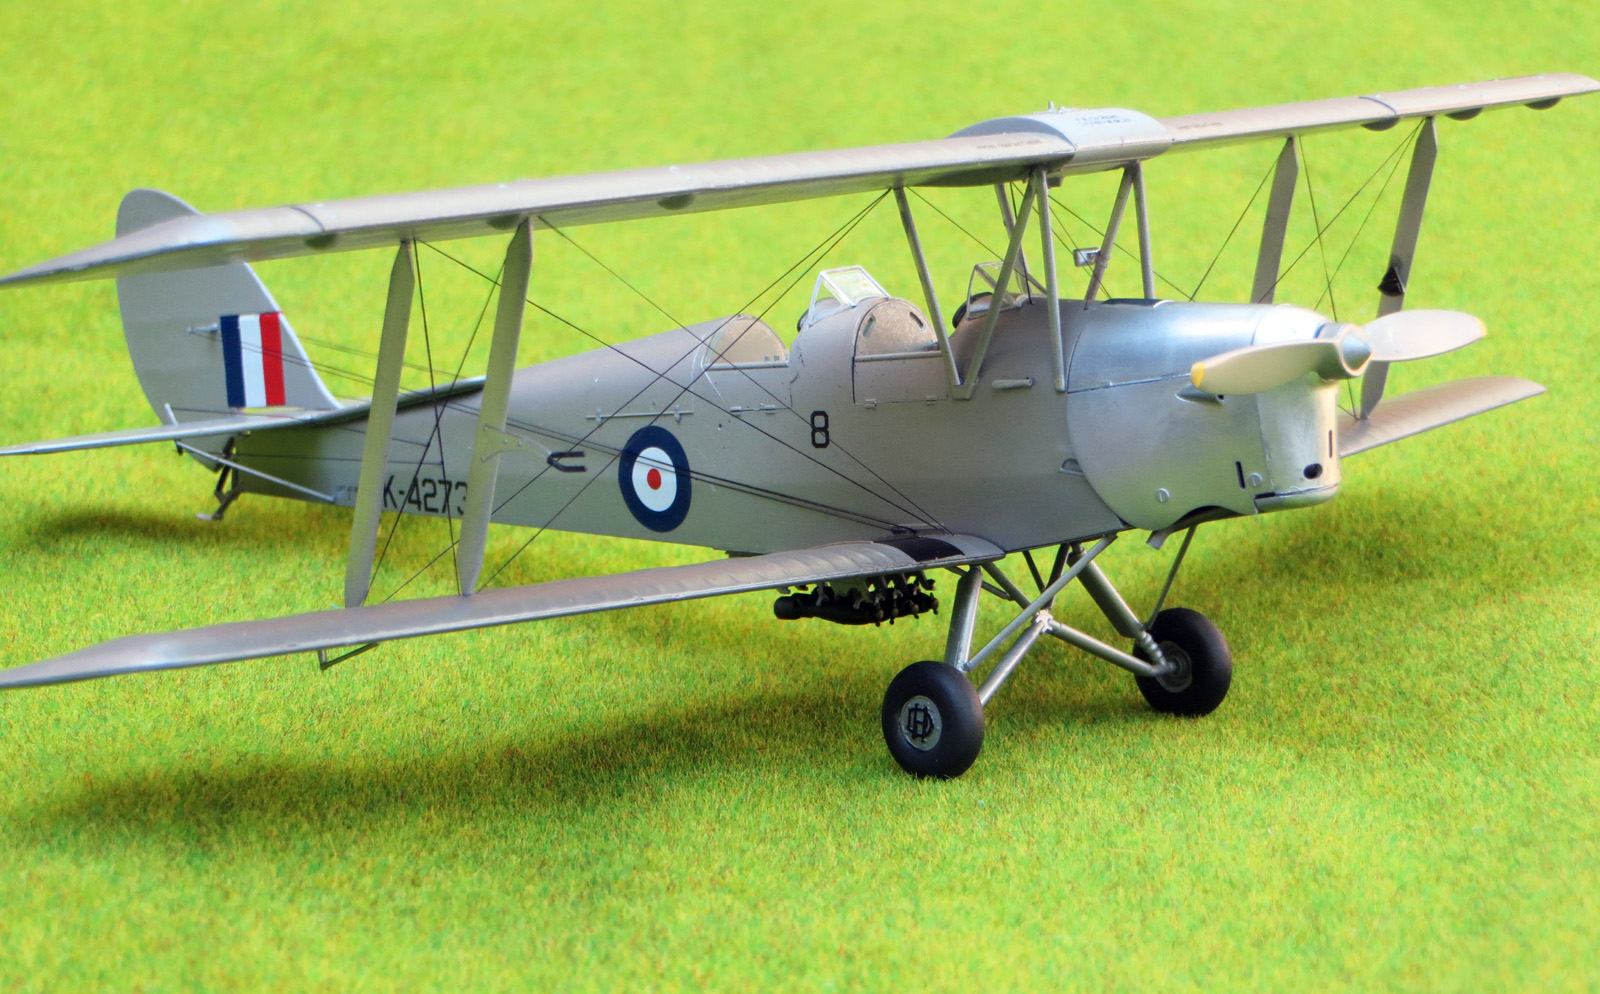
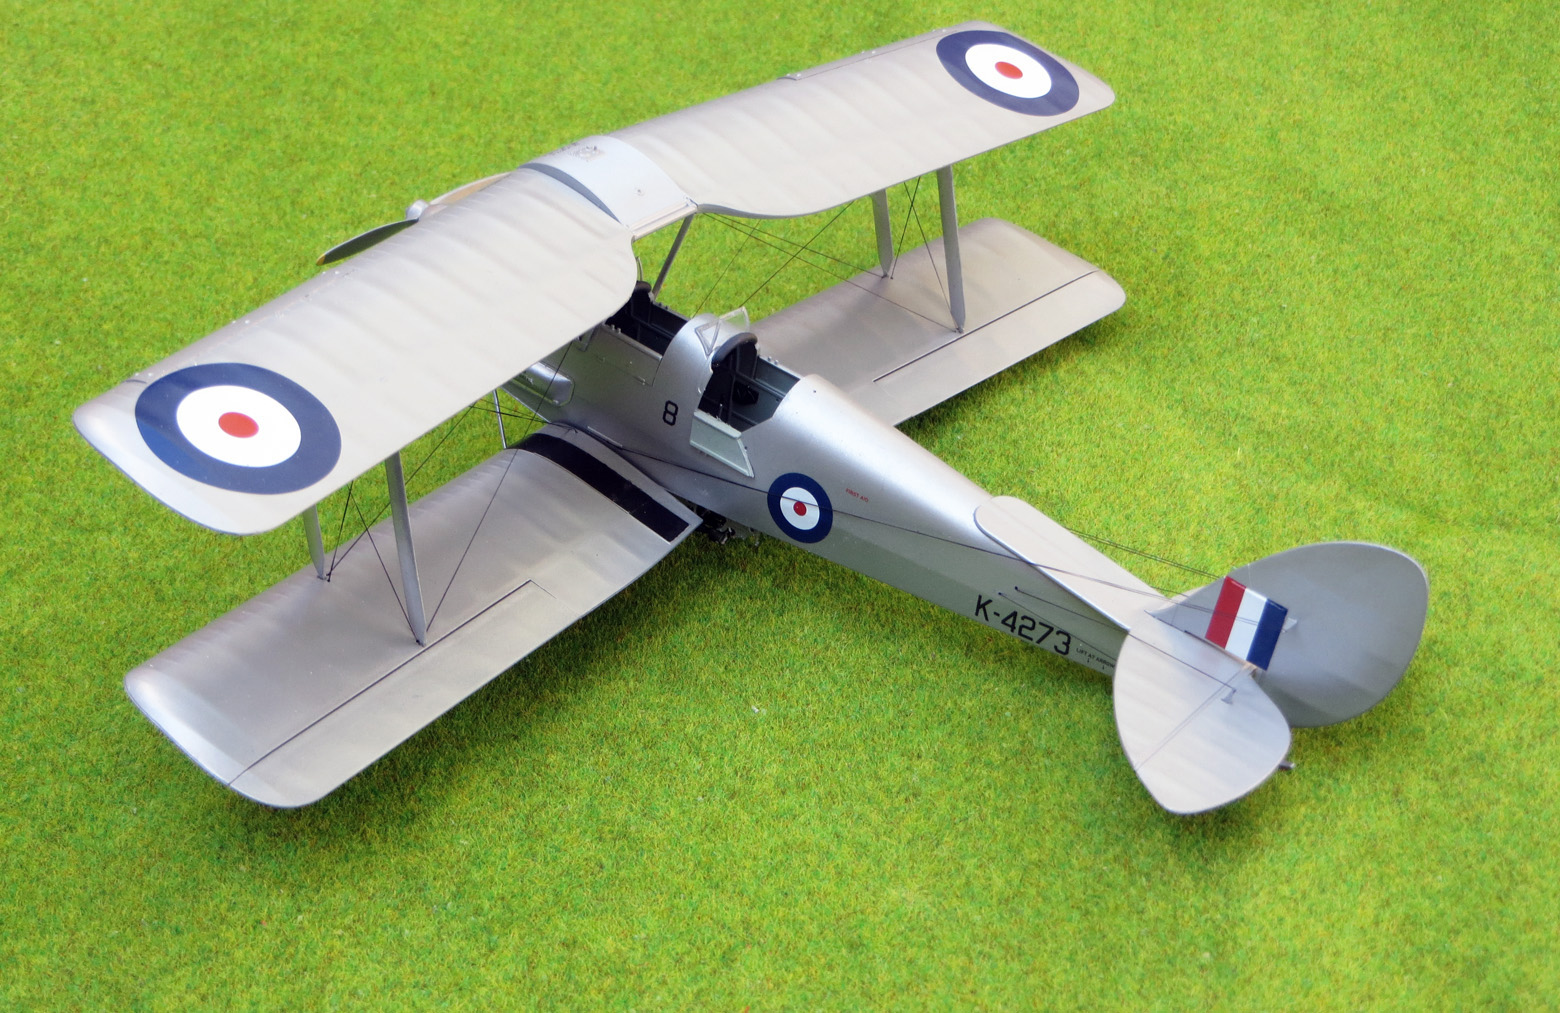
DH.82A Tiger Moth with Bombs
Ukraine’s ICM has gone from strength to strength in recent years, and even now with Russia’s invasion threatening their country’s very existence, ICM are still able to produce and export fine model kits, such as this one. Their first boxing of this kit of the universally-known DH.82A Tiger Moth, released in 2021, features the standard RAF trainer version; this new boxing goes a slightly different direction, showcasing a rare combat version of the type.
In 1940, the threat of invasion forced the British to improvise defensive systems, and this included developing and fitting small-bomb racks to around 300 of the Tiger Moths then in service with Elementary Flying Training Schools across Britain. Under the codename Operation Banquet, the idea was to have the experienced pilot instructors fly over the Nazi invasion fleet and landing beaches and drop up to eight 20-lb bombs. Not a pastime guaranteed for a long or peaceful life… This boxing also includes markings for a Malaya-based machine that was actually used in combat against the Japanese invasion fleet in 1942 and this is the markings choice I opted for.
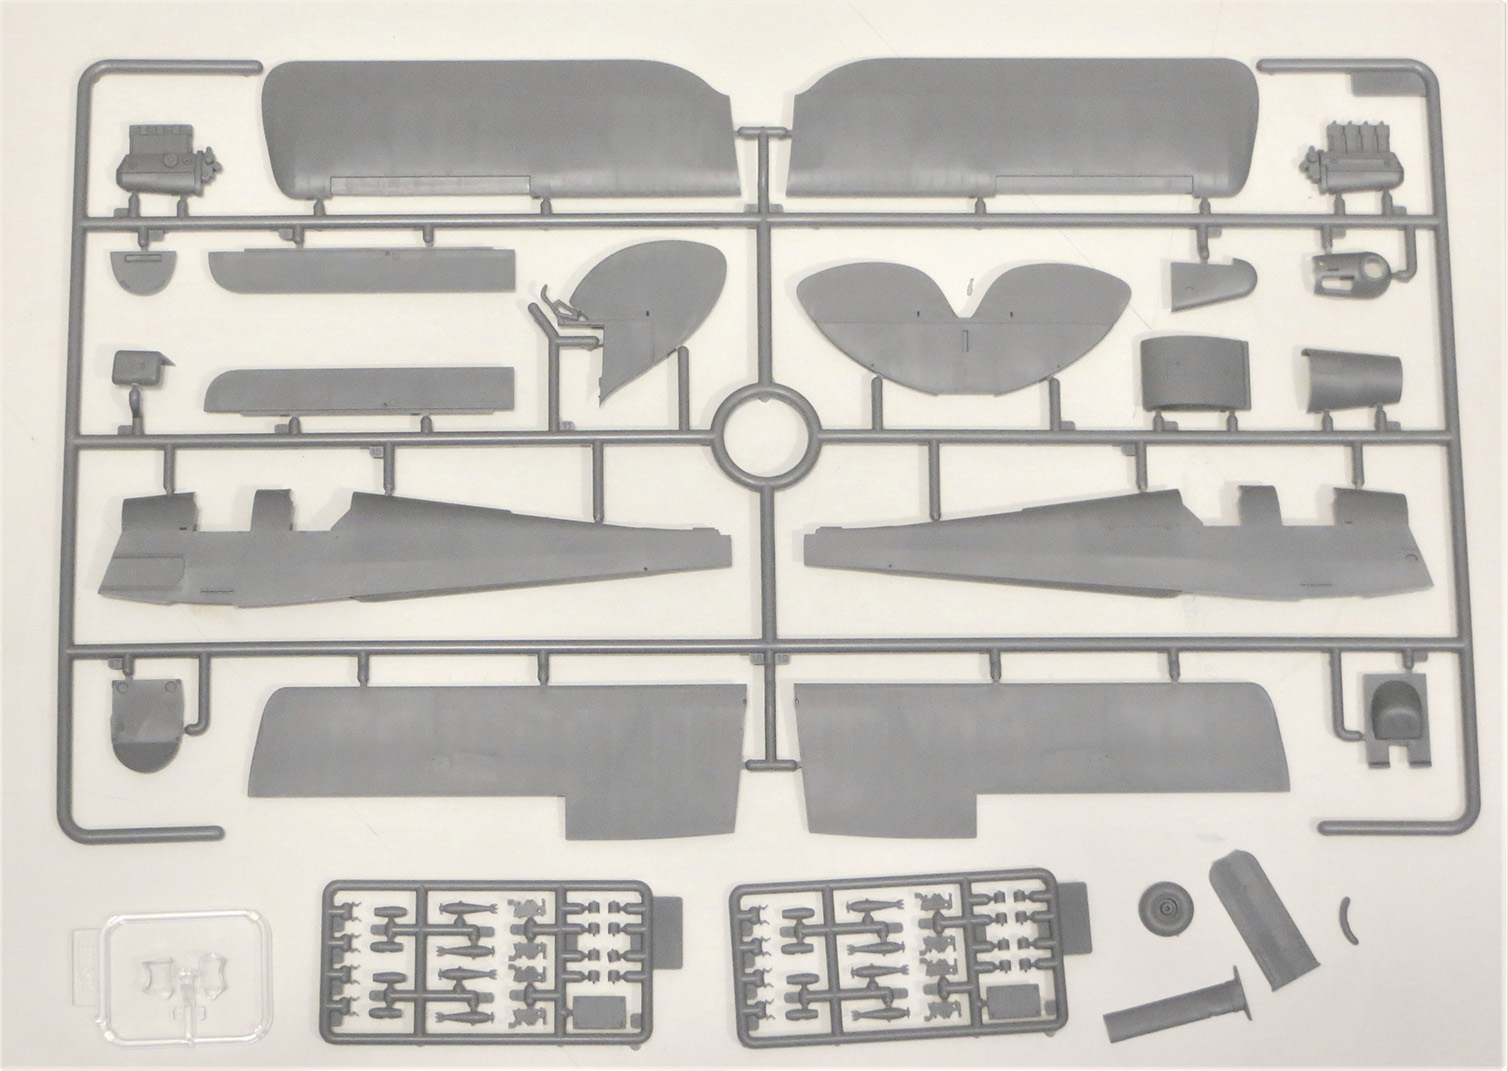
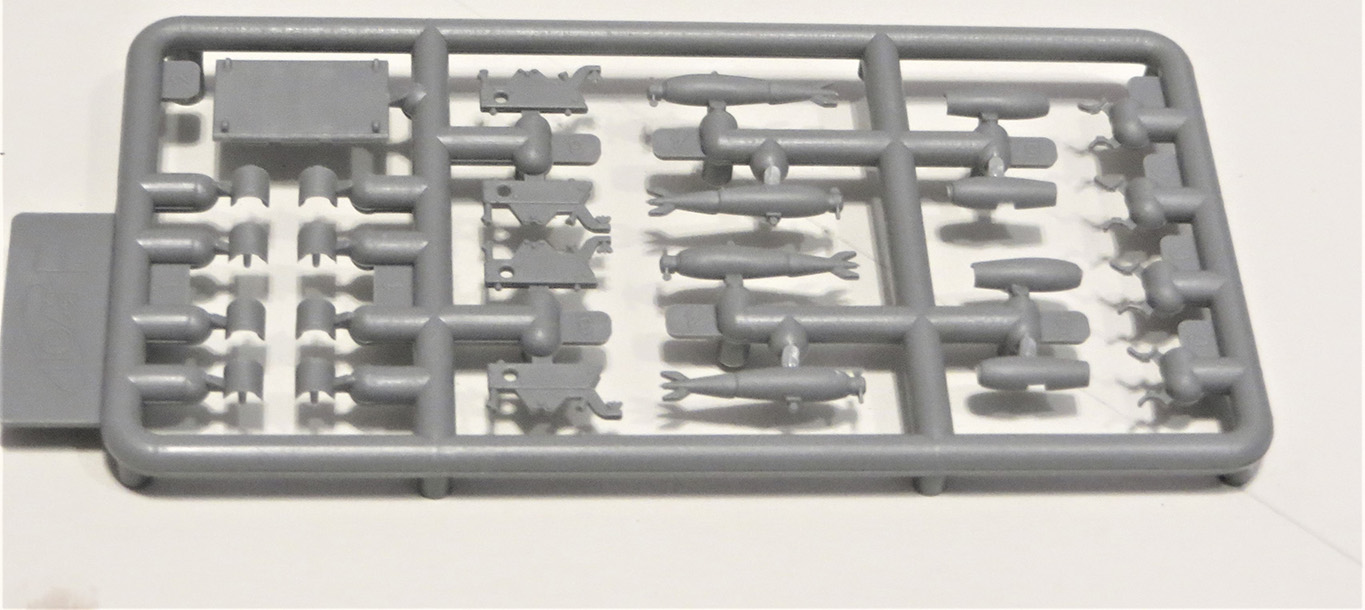
This new release includes all the parts from the standard trainer kit but adds a couple of small runners containing parts for the bomb racks and bombs, bringing the runner count up to seven and parts count to 149, most of which are used. ICM’s standard light grey plastic is used, this being easy to work but not too soft and has good engraved and raised detail. The representation of the fabric-covered surfaces is restrained, and overall levels of detail are good, though there are no seatbelts and a couple of other prominent details are missing; I’d say the level of detail is on a par with Airfix.
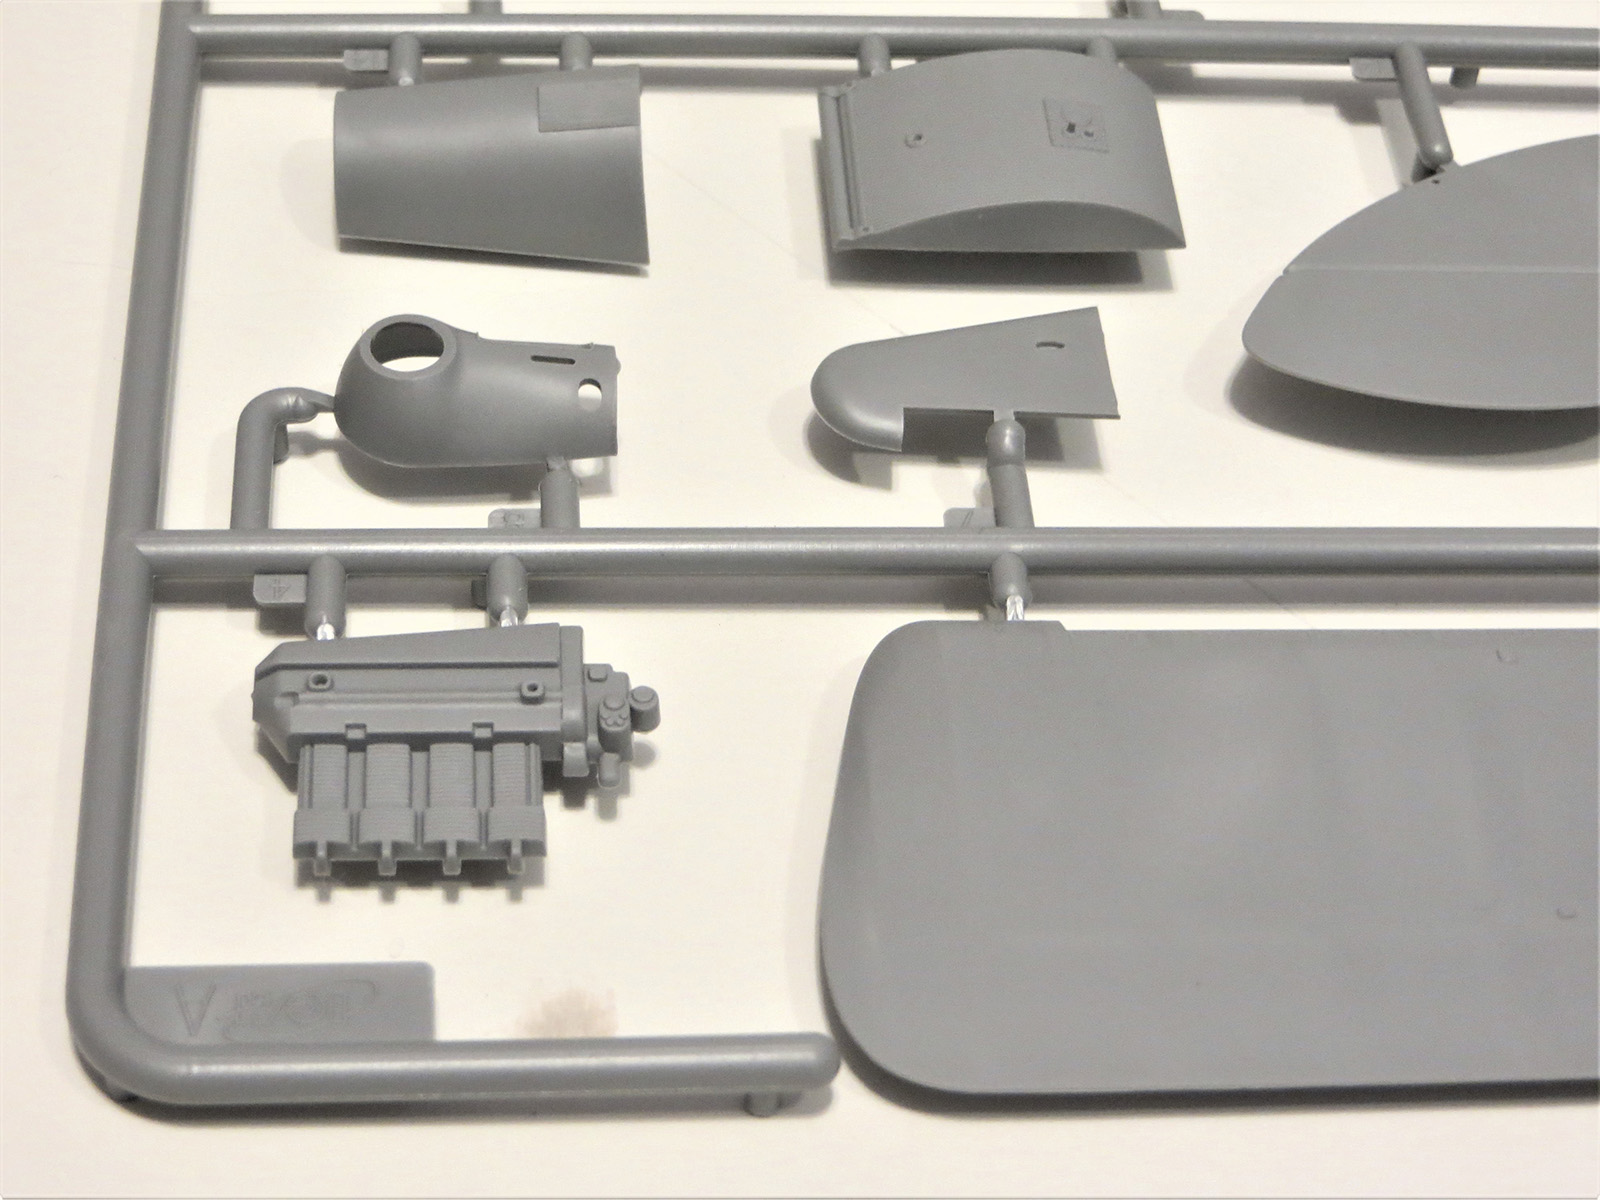
Construction begins with the cockpits and fuselage, including drilling holes for rigging later in the build. Fuselage construction is non-traditional in that the underside/floor is a separate piece, with the crew seats being added to that part later in the build. Decals are included for the instrument panels, these being added over basic dial detail. While the Tiger Moth had few controls, the cockpits seem rather Spartan when complete, especially as the seats don’t have any belts included – this is all very noticeable in the very open cockpits, particularly if you leave the separate entry doors in the open position. Separate parts are included for the two types of tailplane fairing, both with and without anti-spin strakes.
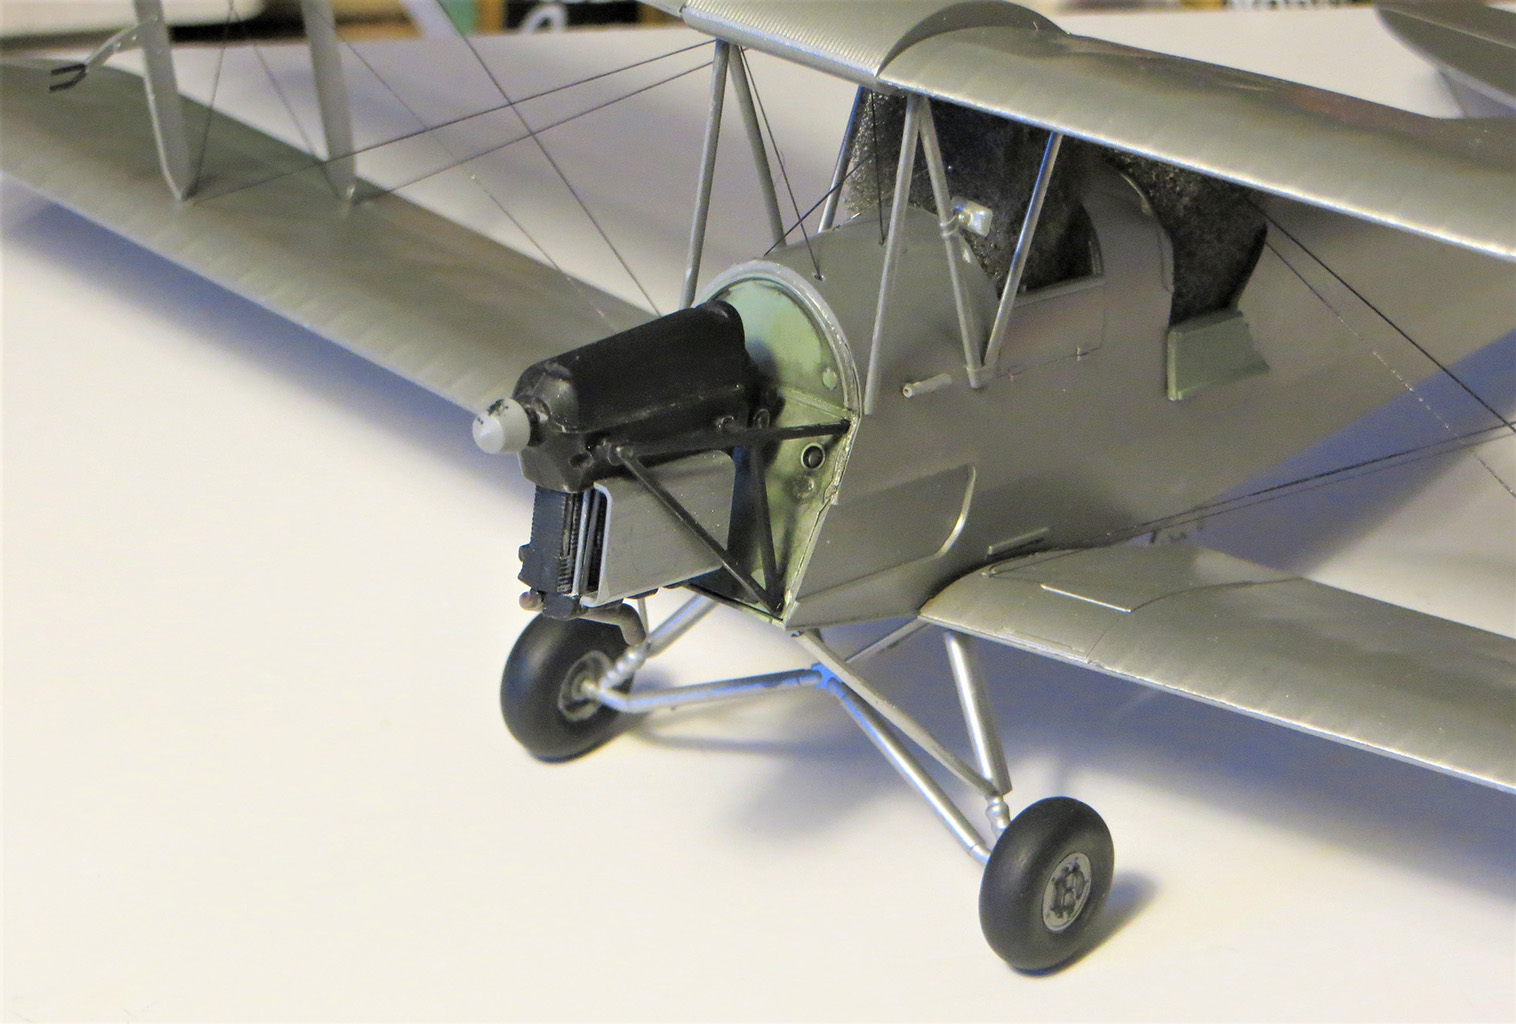
The engine is next on the agenda, this being quite basic and made up of just seven parts plus engine bearers, that fit to the separate firewall part that attaches to the front of the fuselage. The engine can be left uncovered, as all the engine cowlings are separate parts, though it would look a lot better if the modeler added more detail to both the engine and firewall.
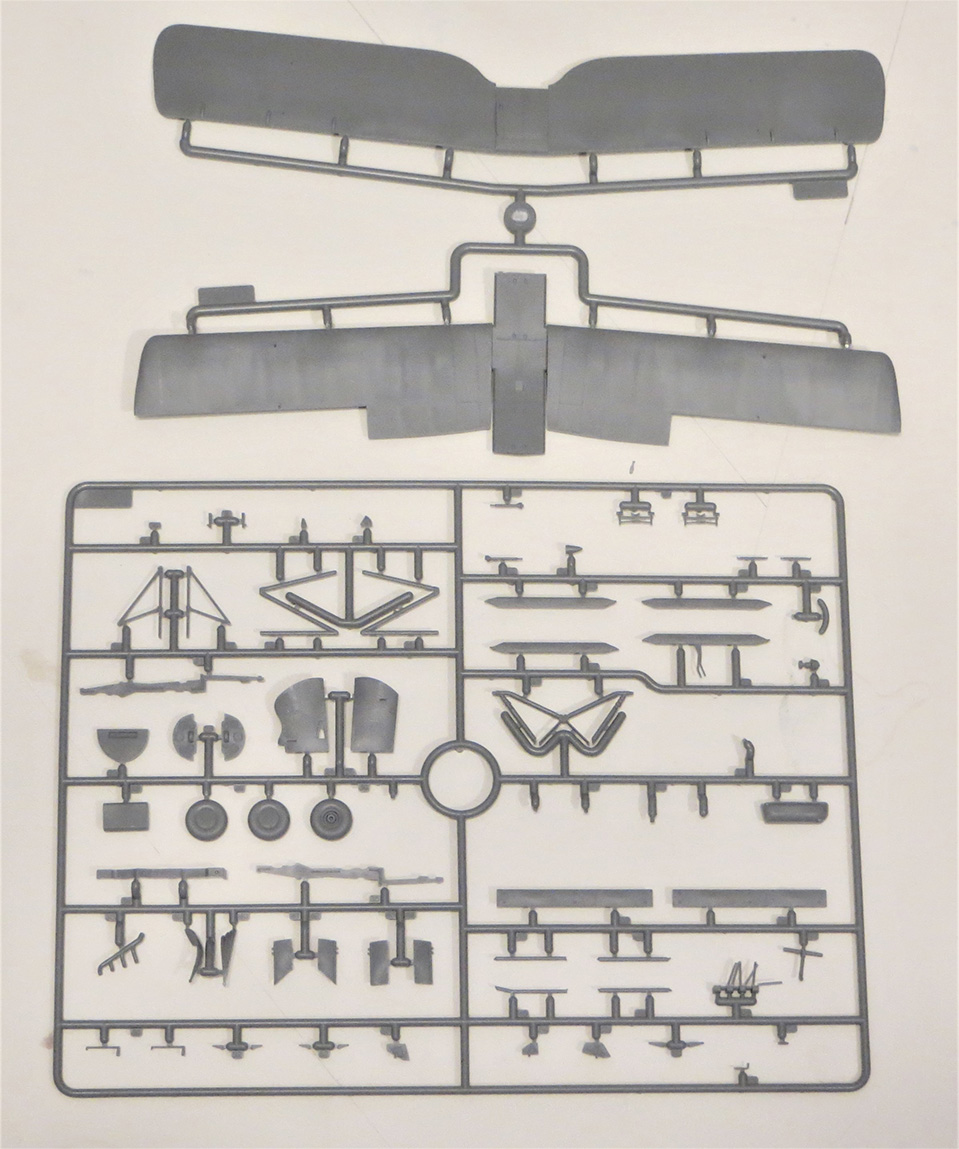
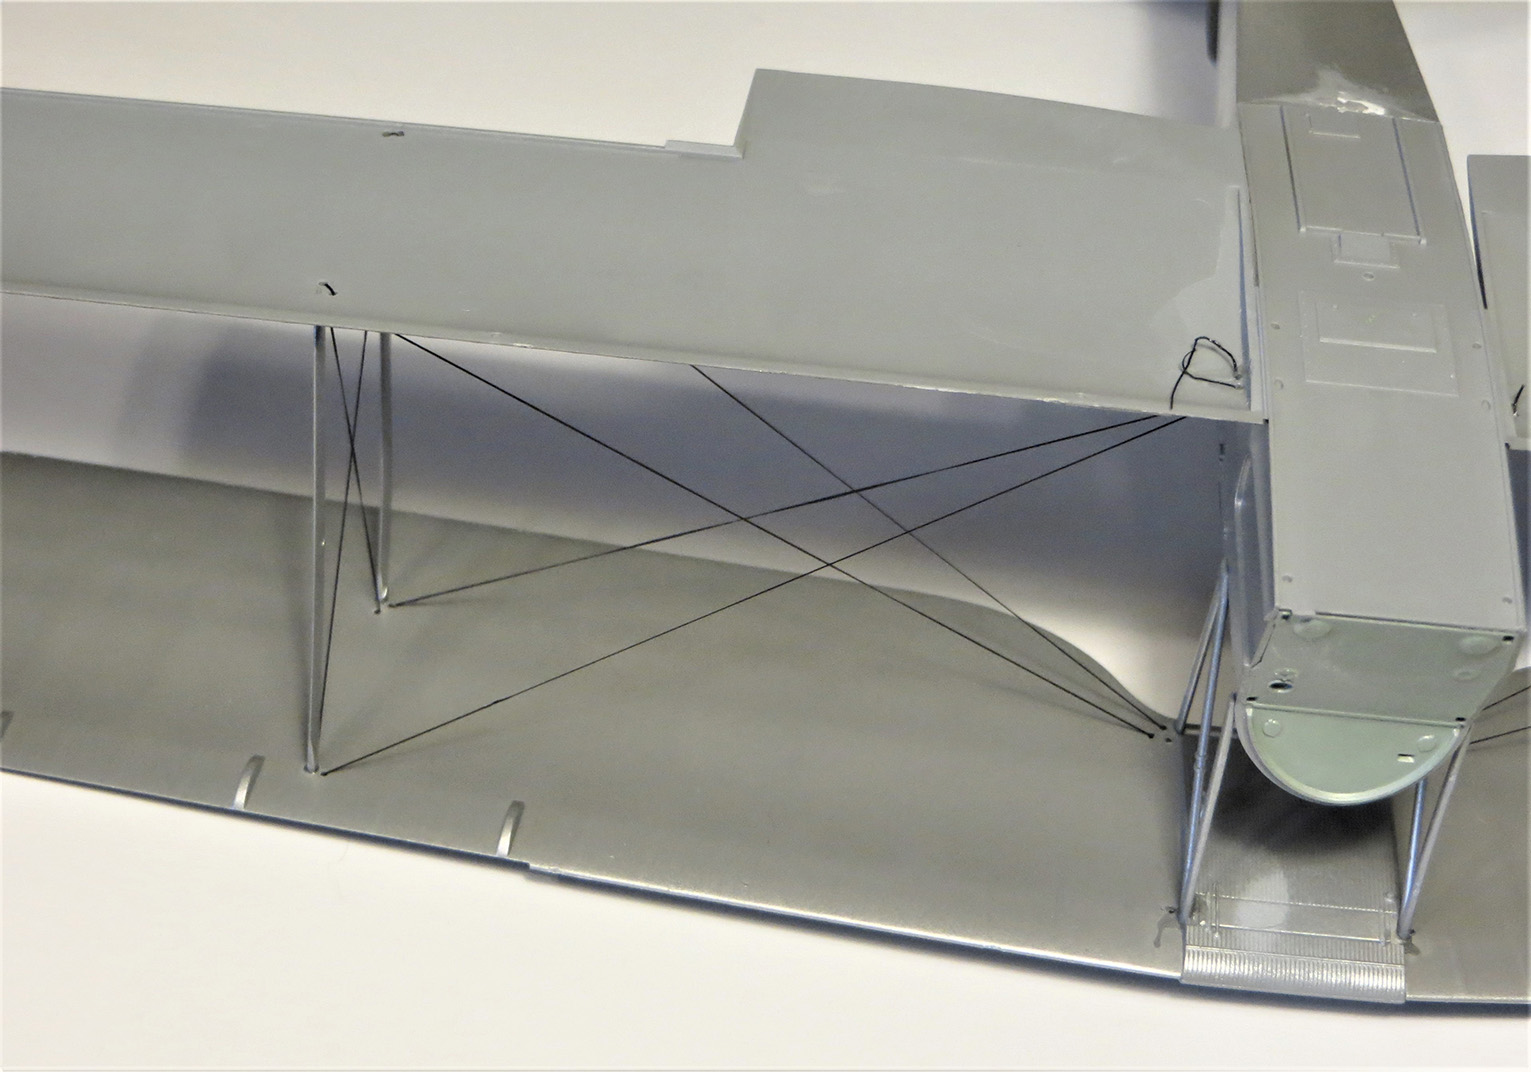
Turning to the wings, ICM have been very clever in their engineering to enable the rigging process to be as painless as possible for the modeler, something I certainly appreciated in this build! The one-piece top of the lower wings and the one-piece underpart of the upper wings all have recesses for the various rigging holes that need to be drilled out - 28 in all. Once the lower wing insert (which includes the cockpit floor and seats) has been glued to the fuselage, the struts are added followed by the upper wing underpart. Each rigging hole is numbered, so that the rigging material (I used elasticated EZ Line) can be threaded through each in turn. By following the exact sequence shown in the instructions, and gluing off both ends, the rigging process is really very easy and almost pain-free. Only once the rigging is in place are the rest of the wing parts (two upper uppers and two lower lowers) glued in place. With careful preparation of the wing parts, there should be no gaps or seams to fill. This rigging system is something I’ve never seen before and that other companies could learn from, and I’ll try to adapt the system to any future biplanes I build. Well done ICM!
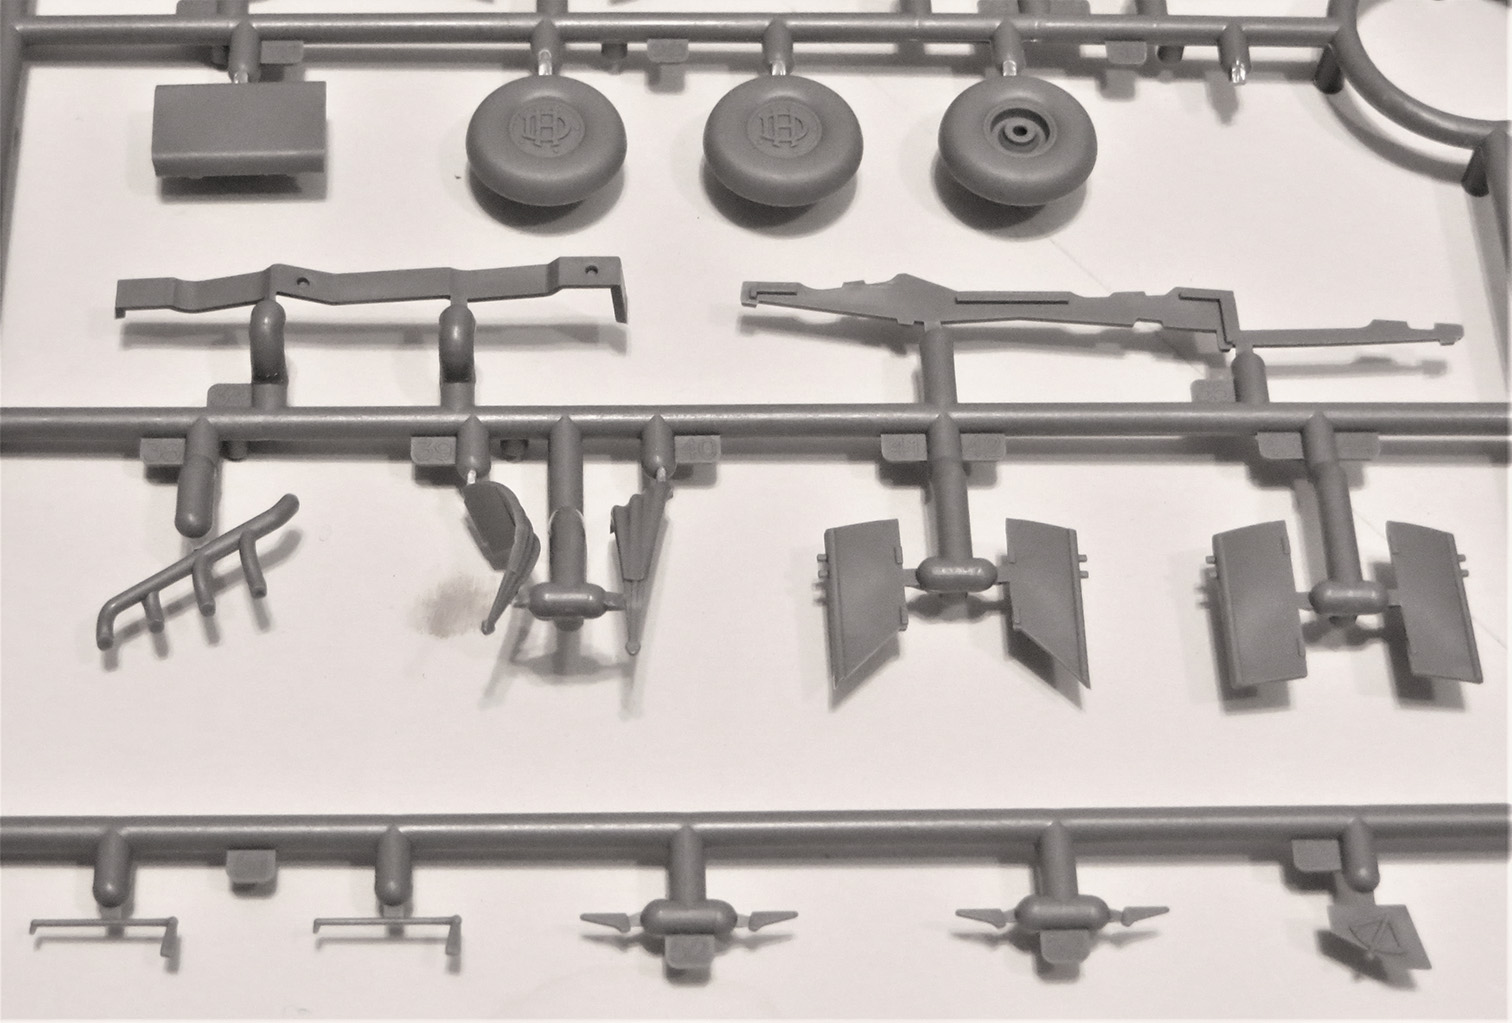
With basic airframe construction and rigging complete, the undercarriage is added next and this is also reasonably simple and aided by having the majority of the legs and struts molded as one piece. The wheels are very nice and the outer covers feature a nice representation of the ‘DH’ logo. Control horns are added to the tailplane and rudder with rigging stretched around those and disappearing into the pre-drilled holes in the fuselage from step 1.
The final stage is the construction of the raison d’etre of this kit – the bombs. In real life, these were 20lb bombs and the Tiger Moths were fitted with racks under the rear cockpit to carry 8 of these. In theory, these could be released either singly or all at once, though I can’t imagine any pilot willing to make eight passes over the German invasion forces…. Anyways, the kit’s racks are quite complex affairs with many small parts that need careful attention – in fact, for me they were the trickiest part of the build. The bombs themselves are each made up of four pieces and also weren’t easy to build, with lots of seams to try to eradicate. In the end, I only made four as they just didn’t look very good; I hope that some enterprising aftermarket company might make one-piece resin 20-pounders!
As stated earlier, I chose the Malayan option for my model as that was actually used in combat against the Japanese. This scheme was overall aluminum dope with bare metal engine cowlings and fuel tank. For the majority of the airframe, I used Vallejo Metal Colour 77-717 Dull Aluminium, while for the metal parts of the airframe, I used some of my dwindling stock of ModelMaster Metalizer Buffable Aluminum, which buffs up nicely with a cotton bud. Once dry, the airframe was coated with ICM satin varnish in preparation for decaling.
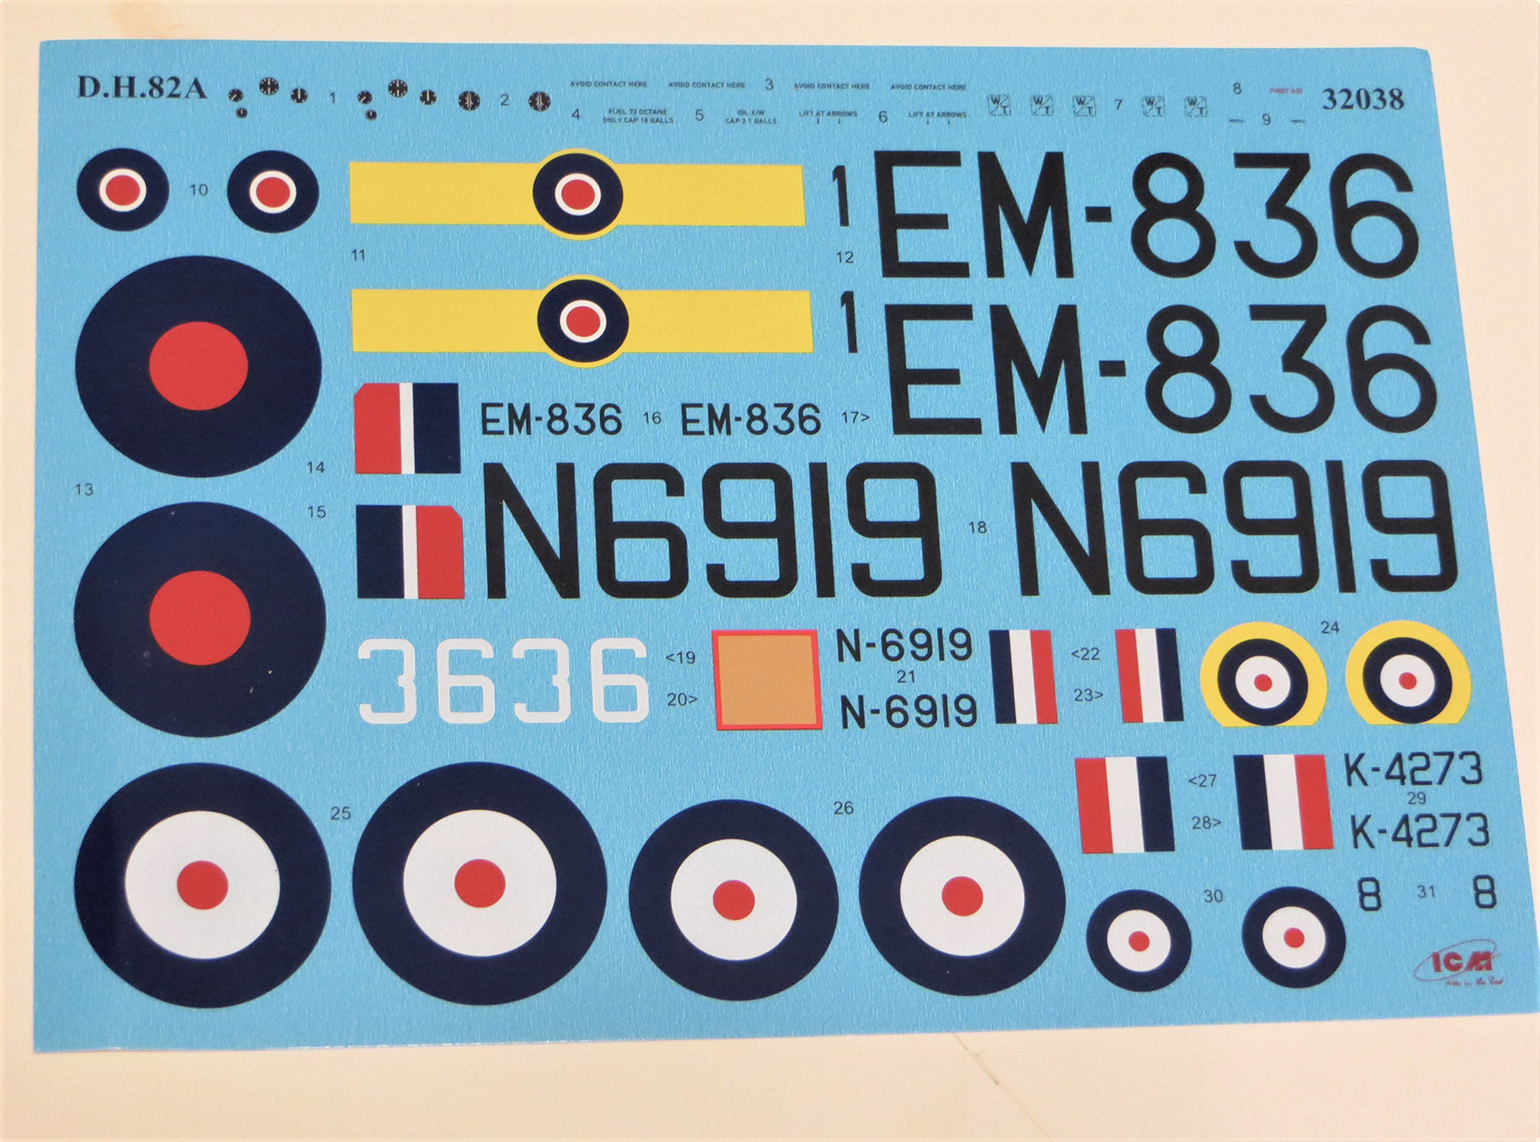
ICM offer three decal options in this boxing; the afore-mentioned overall aluminum Malayan option and two camouflaged options based in the UK, both for No.1 EFTS in 1940 and 1943. I think that the 1943 option probably wouldn’t have used the bomb racks as the invasion scare was over by that time following Germany’s entanglement in Russia. The decals were excellent – thin but opaque, they settled down nicely into detail. A further coat of ICM satin varnish after the decals had set completed the build.
Overall, this is a very nice kit, simple to put together (aside from the bombs and racks) and I used very little filler during the build; I especially liked the painless rigging process. On the minus side, the detail is basic for the scale, and there are a few things I would have liked to have seen – the seatbelts, the very prominent fuel line from the over wing fuel tank to the engine compartment, and the rigging spreader bars; I plan on adding these now that the review build is complete. Despite these minor gripes, I can recommend this kit to all experienced modellers, and it’s an ideal first large scale biplane. Many thanks for ICM for the review sample; good luck gentlemen - За демократію і незалежний Україну!


Comments
Add new comment
This site is protected by reCAPTCHA and the Google Privacy Policy and Terms of Service apply.
Similar Reviews