
'Desert Storm' OV-10A and OV-10D+
Manufacturer’s Kit Notes
‘Desert Storm’
“US aircraft OV-10A and OV-10D+, 1991
On August 2, 1990, Iraq launched an invasion of Kuwait. In response, the multinational coalition’s forces developed and conducted an operation called “Desert Storm”. The start of the operation, which began on January 17, 1991, was a massive air and missile strike by Allied forces. The ground phase of the operation involved the US Marine Corps, whose aircraft was armed with OV-10 Bronco aircraft of various modifications. These aircraft were based in Saudi Arabia, and were part of the 3rd Marine Wing, providing guidance, targeting and communication. The OV-10 Bronco found firing positions of Iraqi forces, which were later used by American attack aircraft and naval artillery. They also supported Marine attacks. This operation was the last episode of combat use of OV-10 Bronco aircraft in the US Marine Corps, and in 1994 they were finally withdrawn from its combat. However, the operation of various modifications of these aircraft continued in other countries.”
A Very Brief History of the OV-10 Aircraft
The initial OV-10 design was the result of two Marine aviators who saw the need for a highly maneuverable light aircraft whose primary function was the counter-insurgency operations, and the interdiction and marking of targets. The Bronco design was originally completed at the North American Rockwell plant in Ohio and very quickly became a well-respected aircraft for both the Marine Corps, Navy, and Air Force alike. It could carry a wide variety of weapons from the seven wing stations and four internal 7.62mm machine guns. Later versions even included a 20mm center line canon for more substantial targets. With it’s added fuel stores, and varied rockets it could be utilized for a variety marking and taking out targets which often eluded the fast movers. It was equipped with ejection seats, a large bullet resistant canopy and an early highly regarded low-level observation and infrared FLIR capability.
During the later lives of the Bronco, it served as a target tug, aerial mapping, forest fire reporting and observation, drug interdiction roles and several foreign operators.
In the mid 60’s I built the Revell kit, having recently photographed the aircraft at NAS Seattle and was thrilled find the ‘new’ kit at Campus Hobby Shop on ‘the Ave’. This kit represents an opportunity to build a state-of-the-art kit and to rekindle of my original kit construction of almost 50 years ago.
References
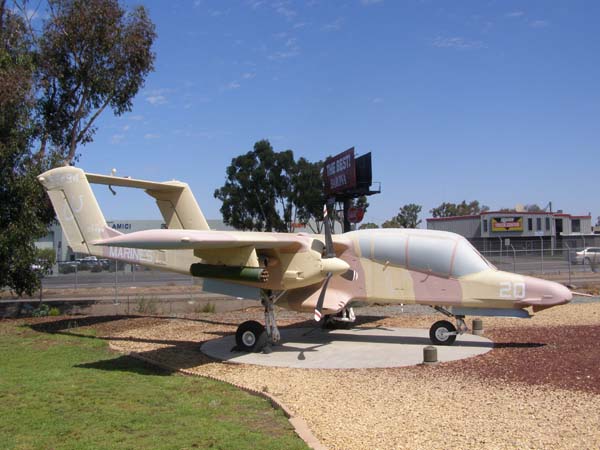
I have also attached one image of the specific OV-10D+, whose markings are included in this boxing. As its colors are starting to fade and its markings are barely discernable, it took part in the 1991 Operation Desert Storm after it’s 10,000-mile journey to the Saudi Arabian fields. A brief history is available and further information about the Bronco may be found at the Navy’s site and the Air Force Museum's website.
Additionally, there are a few YouTube videos with references to the OV-10’s military and civilian histories.
This Kit & Build
The construction of this kit is pretty much straightforward. The instruction booklet contains 44 pages, with the OV-10D+ beginning on page 22. Possibly a sign of my age, but I have noticed that my much earlier practice of just opening any new kit and using my intuition to guide me through the basics of the kit’s assembly, has now given way to first reading and then following the instructions step-by-step. I recommend reading the instructions carefully and follow them step-by-step (I also now check off the steps as I progress). These precautions may also because many of the kits contain such many details, number of parts and steps for the construction of the kit.
There are a number of online references, of which I found the Cybermodeler Online to be one of the most informative and containing many useful reference images: https://www.cybermodeler.com/aircraft/ov-10/ov-10_all.shtml
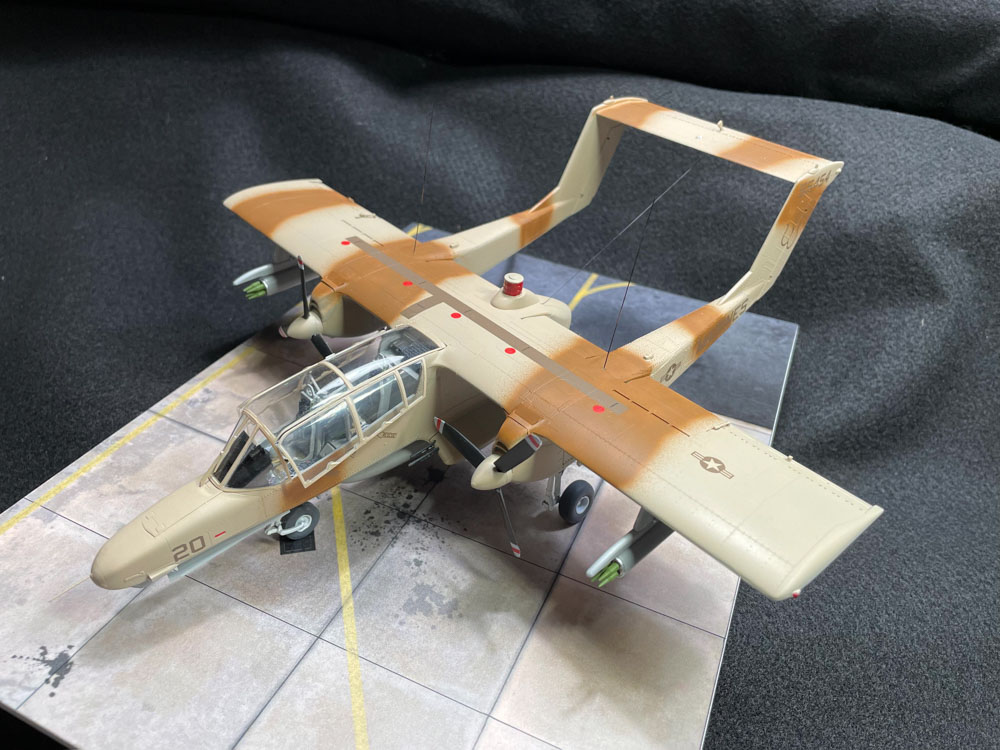
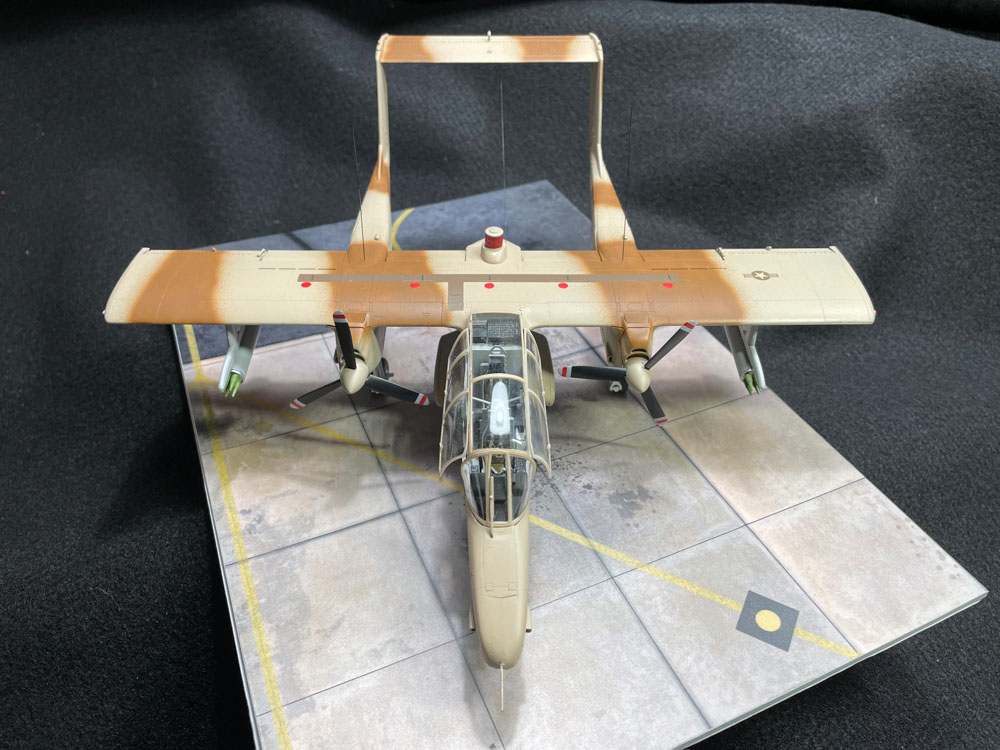
This model consists of both 245 and 247 pieces, from which two complete models may be constructed. Though it’s been a long time since I’ve had an opportunity to review an ICM kit, I am impressed with the overall surface details and finish of this kit. Even the surface rivets are produced like those on the real aircraft, with those of the larger size standing proud as on the OV-10 itself.
The overall engineering of this kit is beautiful, and I have been greatly impressed with most aspects of the kit. The parts match each other and fit well to the other kit surfaces and are guided to the appropriate positions using small locating pins. The kit appears to also match OV-10 dimensions accurately.
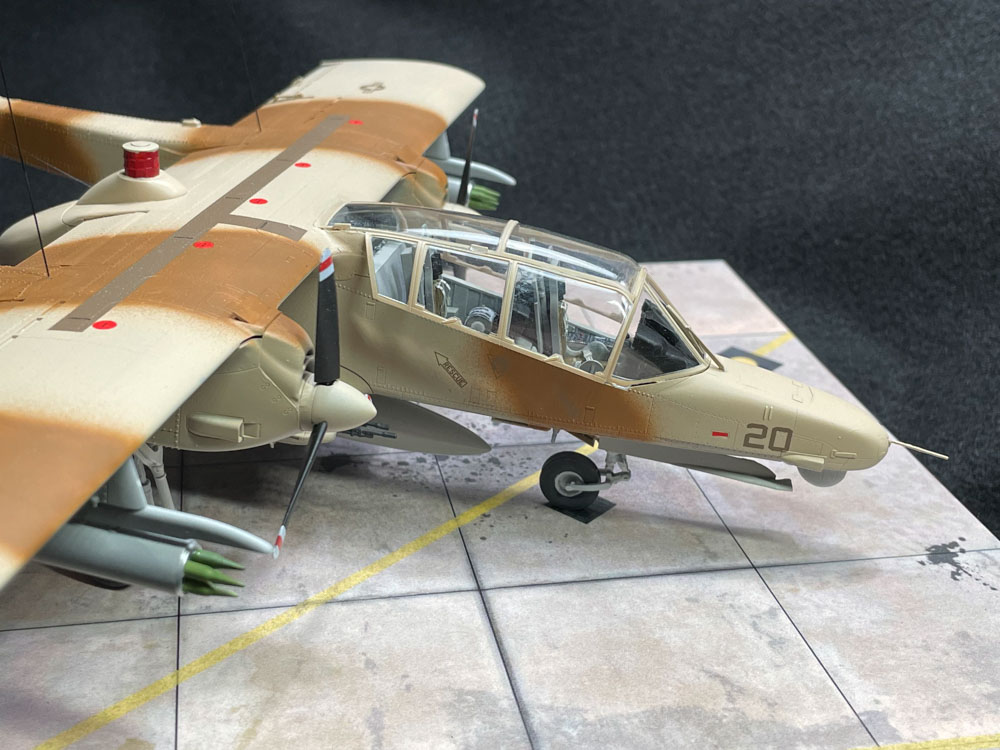
Two notable exceptions are the landing gear struts and nose weight. I found them to be weak, easily bent and wound up strengthening them with small amounts of CA wherever possible. I also recommend that these parts be held back if possible, during the build. Metal gear replacements would be most helpful, and I am sorry I couldn’t locate any such metal pieces. My completed model continued to show its gear splayed out and out of alignment. I attribute this to a combination of poor modeling skills on my part and poor engineering and fitting from the manufacturer. However, the main gear legs are very small and delicate and demand your full attention. As previously mentioned, a solution for the center of gravity issue requires addressing—in my case I used pieces of lead to counteract the tail-heavy inclination glued in place with 5-minute epoxy. Another possible solution would be the very fine grain Deluxe Materials Liquid Gravity, also requiring an epoxy sealing.
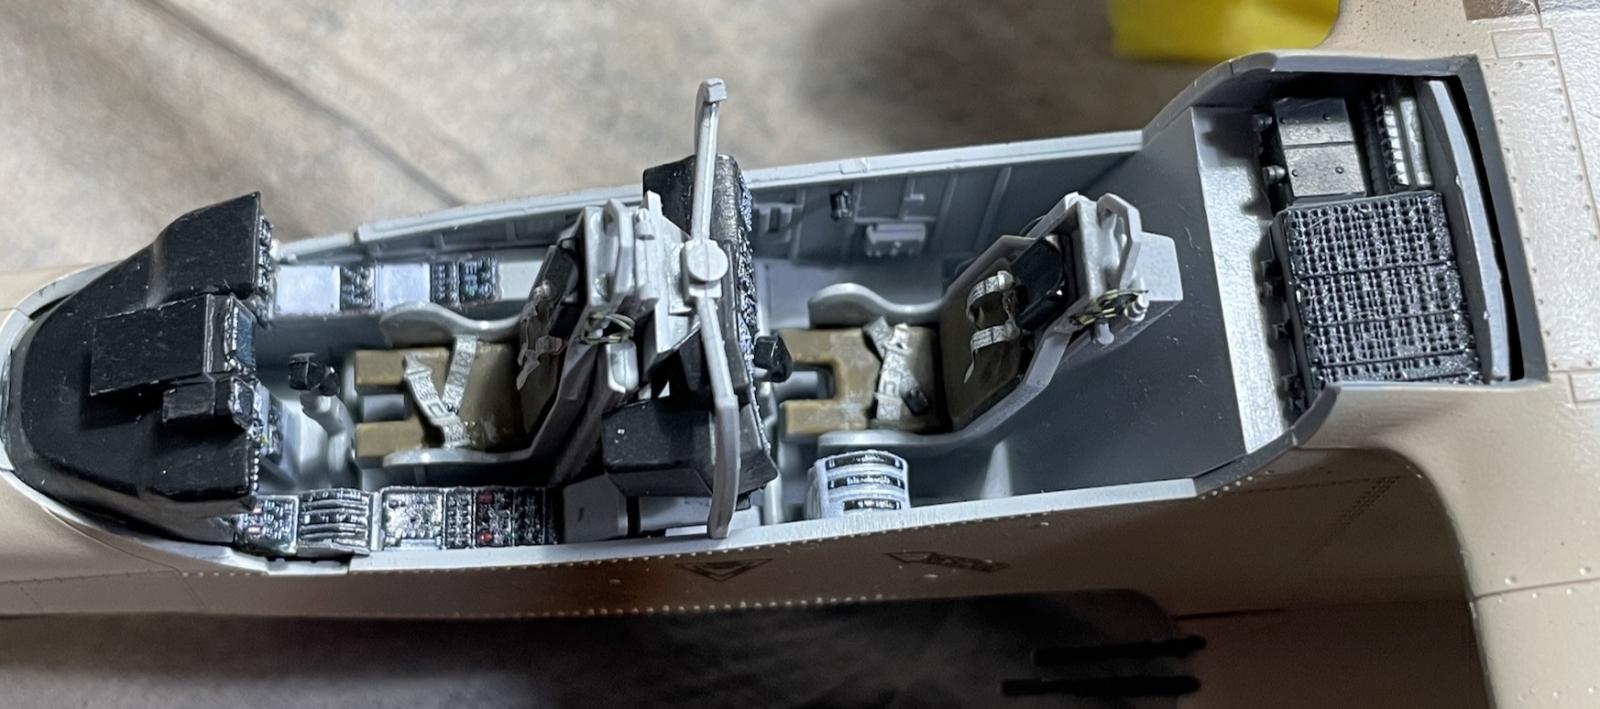
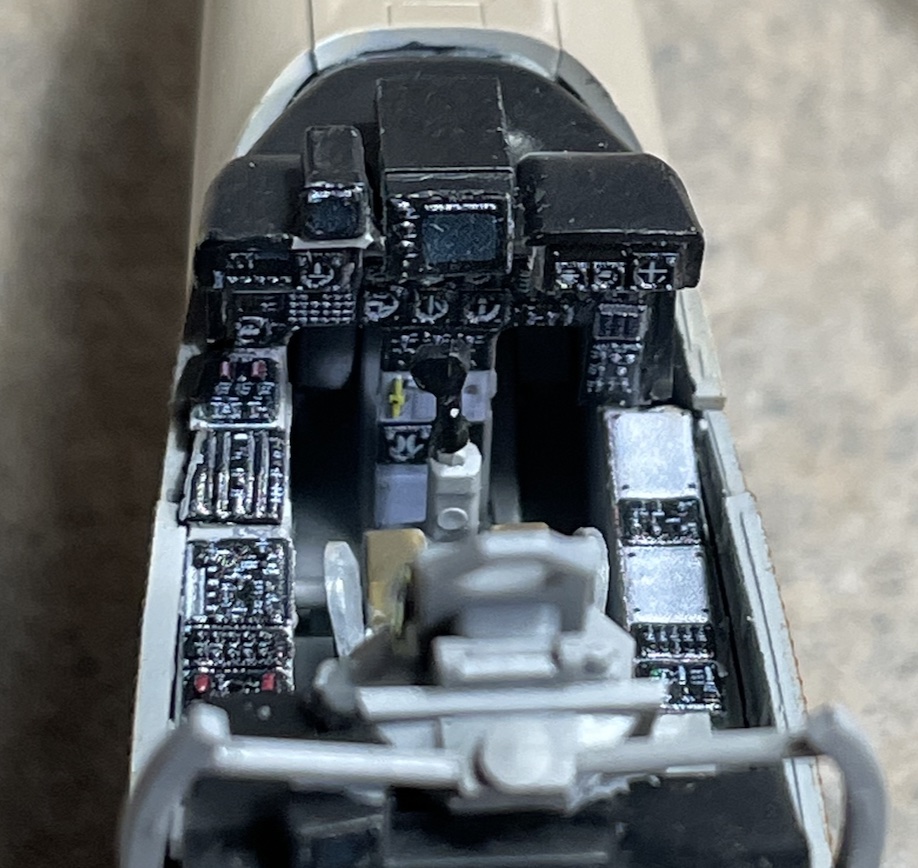
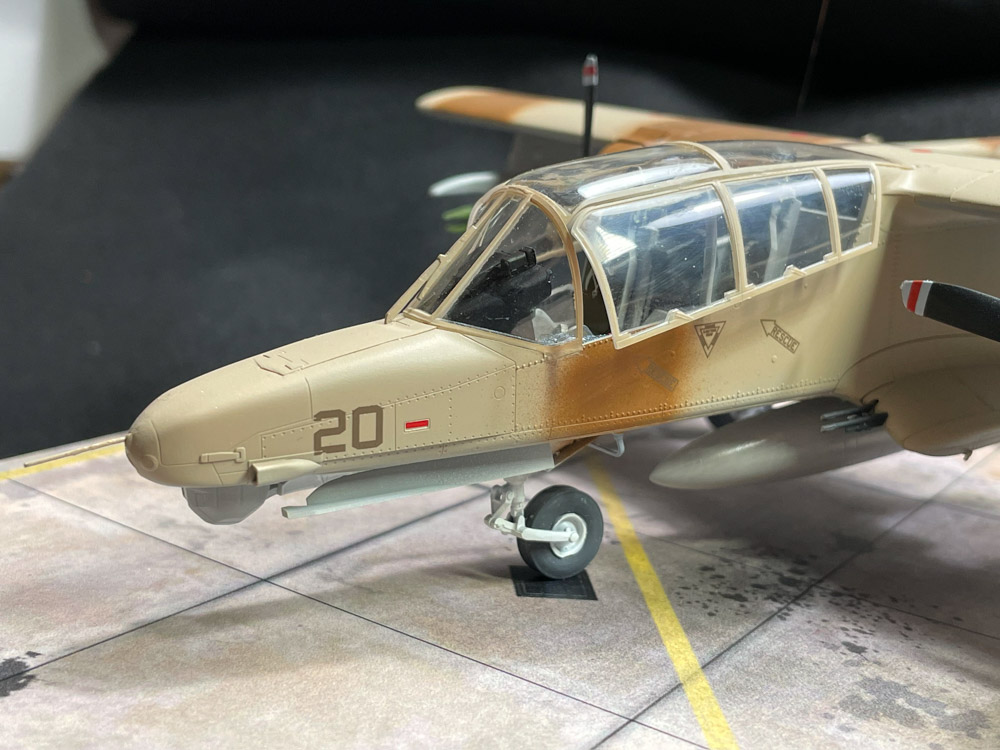
Assembly of the parts themselves begins with the interior. I added two additions to the kit at this junction: after-market metal seat belts (which are not included in the kit), and 3-D printed dash displays which provide much greater surface detail. This required sanding off the kit provided raised details prior to my application of the 3-D printed pieces (Eduard Space set for the ICM kit, #3DL 48062). I also employed the Eduard TFace masking set for the two-sided painting of the canopy which I displayed in the partially open positions both on the left and right sides (# EX847 for the ICM kit).
I noticed a few instruction sheet errors, e.g., the initial parts schematics show the small boom antenna as parts A4, while the actual parts are for two dash layouts labeled as A3 and -4. Try as I might, the two antenna items are just not included in either of these two kits and were omitted from the build altogether.
There are numerous instruction notes indicating one side are intended for duplication of a like on the other side. I missed several of these small details. Very careful attention must be paid to complete the model’s assembly and to watch the detailed drawings very carefully (I often found myself searching ahead for placement guidance or later detail drawings to verify the placement or positioning of parts shown in previous drawings). This was an ‘Optivisor’ moment for my aging Mk I optics, there were some very small plastic parts as well as some small challenging PE parts. A few aspects of the instruction drawings continue to puzzle or confuse me, and I found that very close inspection provides sufficient detail. Dry fitting is recommended. There are no brass, steel or PE parts included with either kit.
Painting
I completed the painting using both AK Real Color and Mission Model Paints. The instruction sheet lists only three basic paint color references, ICM (acrylics I believe), Revell and Tamiya. I was unable to even locate a source for the ICM paints (even using their named source distributors).
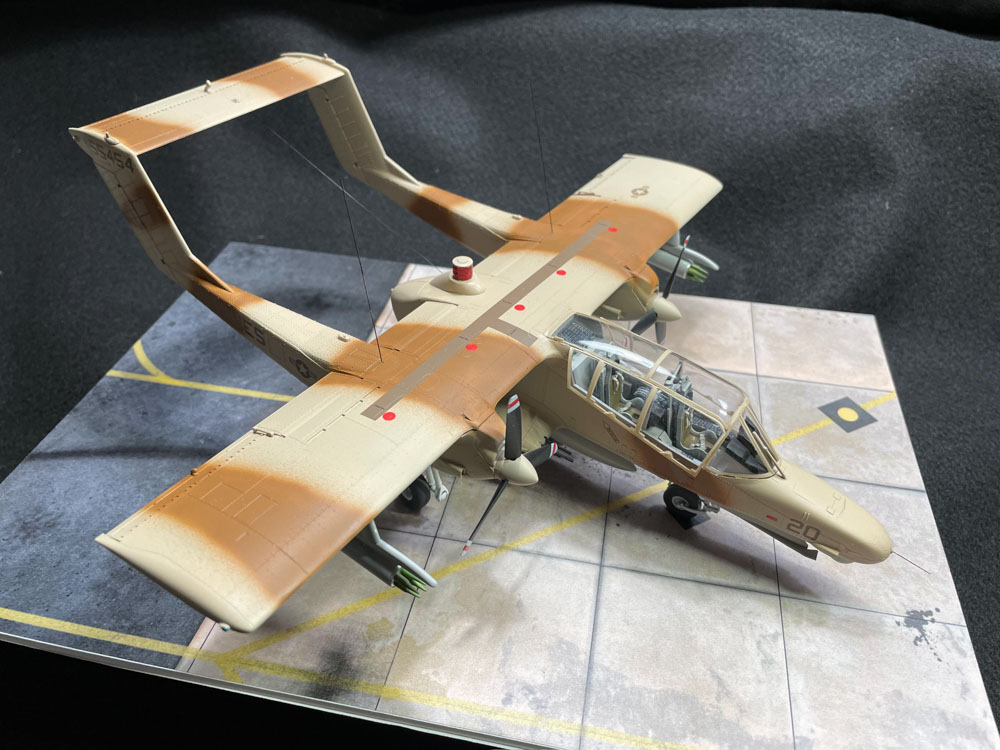
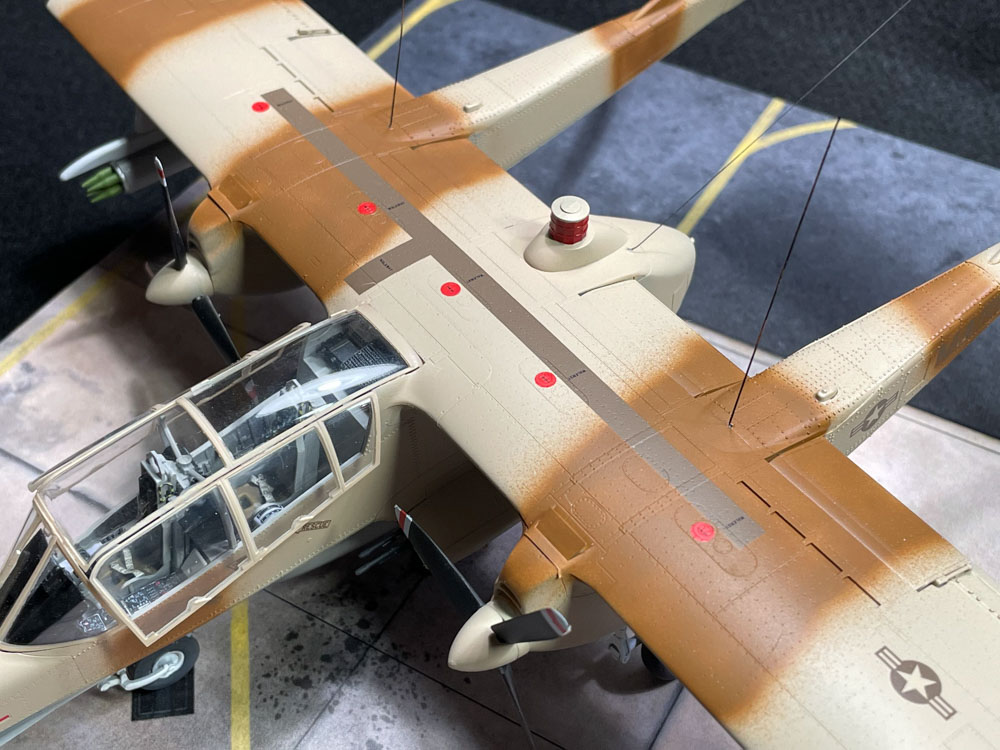
I chose to paint the basic aircraft using the box art and various photographic evidence to base my color selections from. This by airbrushing base colors, including AK Real Color Insignia White FS 17875 for the gear and wheel well interiors; under surface areas, fuel tank and basic stores: AK Real Color Light Gull Grey FS 16440 (RC220); AK Real Color Olivbraun (RC218); and Tamiya Lacquer Paint Wooden Deck Tan (LP-16). Touch up brush painting was done using both these colors and Mission Model acrylic paints. In the balance I feel these colors provide a good representation of those flown during Desert Storm.
Decals
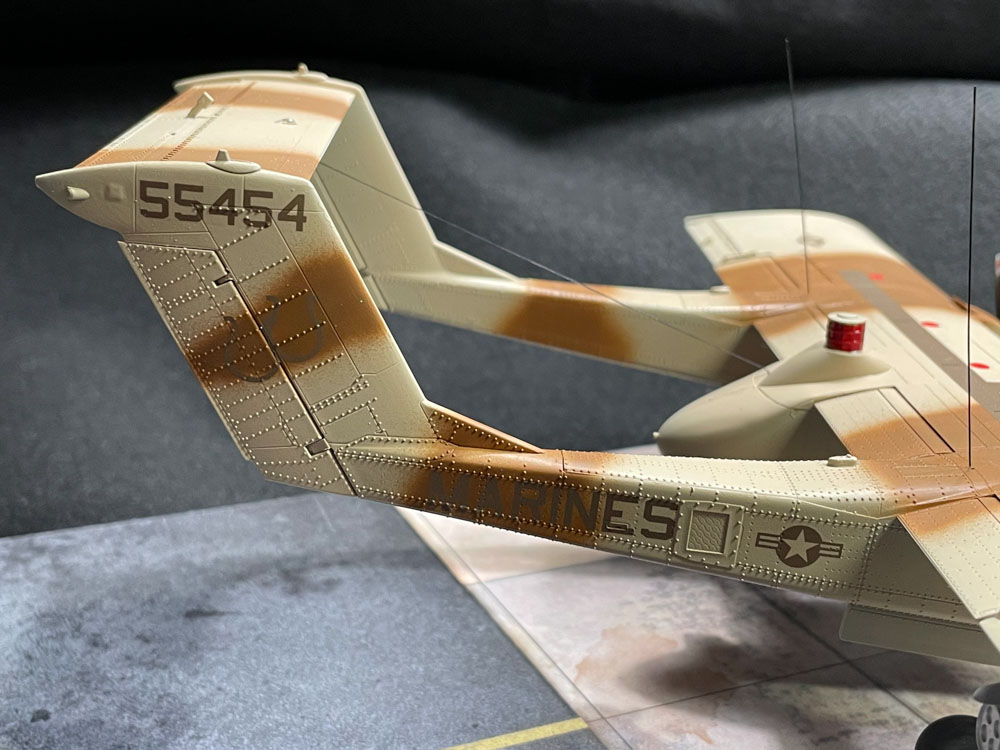
The kit provides several decals, from which I chose those displayed on the subject aircraft. They went on with no problems and didn’t require other than Micro Sol Set to move them into place on the model.
Overall Evaluation
I strongly recommend this double kit of the OV-10A and OV-10D+. The ICM kit builds into a beautiful representation model of the Bronco and with few other such kits in this scale. My suggestion is for someone interested in representing this interesting COIN aircraft, ICM is the kit to have and with four boxings currently available your choices of which kit is up to you, though this double kit represents the best option when you can build both the short and long nose versions.
I want to thank both Ukrainian manufacturer ICM and IPMS/USA for the opportunity to review this kit and to acknowledge the current military conflict and struggle facing the Ukrainian citizens daily. The daily sacrifices and bravery shown by the Ukrainians serves yet another example of the measures of what must be endured to insure freedom for the oppressed.


Comments
Add new comment
This site is protected by reCAPTCHA and the Google Privacy Policy and Terms of Service apply.
Similar Reviews