
DeHavilland DH-82a Tiger Moth
History
The DeHavilland DH-82 Tiger Moth, like the Stearman Model 75 and possibly the Curtiss JN-4 “Jenny”, is one of the standard and best known biplane training aircraft, in terms of numbers built, reputation, and number of surviving aircraft. Like the Stearman, the Tiger Moth began as a primary training aircraft, moving into fame as World War II began and providing the basis for the training programs for the British Commonwealth air forces, including the RAF, RCAF, RAAF, RNZAF, RSAAF, and many other smaller air arms. Originally conceived as a civilian trainer evolving from the DH-60 Gypsy Moth of the late twenties, the DH-82 featured staggered wings and an inverted engine to provide better forward visibility for the pilots. It was fully aerobatic. Wartime versions were equipped with anti-spin strakes ahead of the horizontal stabilizers, although all DH-82’s did not have these. All pre-war DH-82’s were impressed by the RAF at the beginning of the war, and while many were sold surplus afterwards, a large number remained in service, some until as late as the early sixties. Since over 6,000 were built in the UK and other countries, many have survived, mainly as antiques and warbirds. While many were flown by civilian schools and flying clubs after the war, some were used as crop dusters and sprayers, my favorite being the Australian DH-82 registered “VH-DDT”.
The Tiger Moth occasionally appears at an American EAA or Antique Airplane Association fly-in, so if you can attend one of these events, you will have an opportunity to examine one close up. They usually offer a chance to view the aircraft close-up, and even talk with the owners and pilots. Sometimes they will even do a flying demonstration.
The Tiger Moth was a good trainer, and after a student pilot had mastered it, he was on his way to mastery of any of the military aircraft of the period. Although some were equipped with tailwheels, most apparently had tailskids, which made operation a little more cumbersome in terms of moving the airplane around on the ground, but easier to handle on takeoff and landing than it would have been with a tailwheel. I only regret that I have never had the opportunity to fly one. Maybe someday……
References
There is quite a lot of information available on the Tiger Moth. The old Profile publications No. 132 gives a good account of the career of the plane, although it seems to emphasize the civil use of the type after the war. Owen Thetford’s Aircraft of the Royal Air Force Since 1918 gives a brief account of the military career of the type, while Stuart McKay’s Tiger Moth hardcover book has a lot of interesting photos, many taken during wartime, with a lot of color information. Other information is available online, so there should be no problem obtaining information on colors and markings.
Instructions
The kit comes with a detailed instruction sheet including a brief history in five languages, assembly instructions, 4 pages including 26 exploded assembly diagrams, and two full sized four view color drawings of the two aircraft depicted in the decals. There is a lot of color information offered, but none of the interior colors are identified, and although Humbrol paints are mentioned, I had to go online to find a Humbrol color guide to get the suggested interior colors. This could have easily been provided in the instructions, and since Humbrol paints are not available everywhere, a guide would have been useful.
One really useful inclusion is a rigging diagram. The diagram shows the locations of all of the wires necessary to make this a realistic model. One advantage of this airplane is that there are no parallel rigging wires as appear on American biplanes of that era, each wire is by itself, making the rigging process much easier. I checked with photos in the McKay book, and this is correct. This makes rigging much easier, as there are a lot of wires on this plane.
Decals
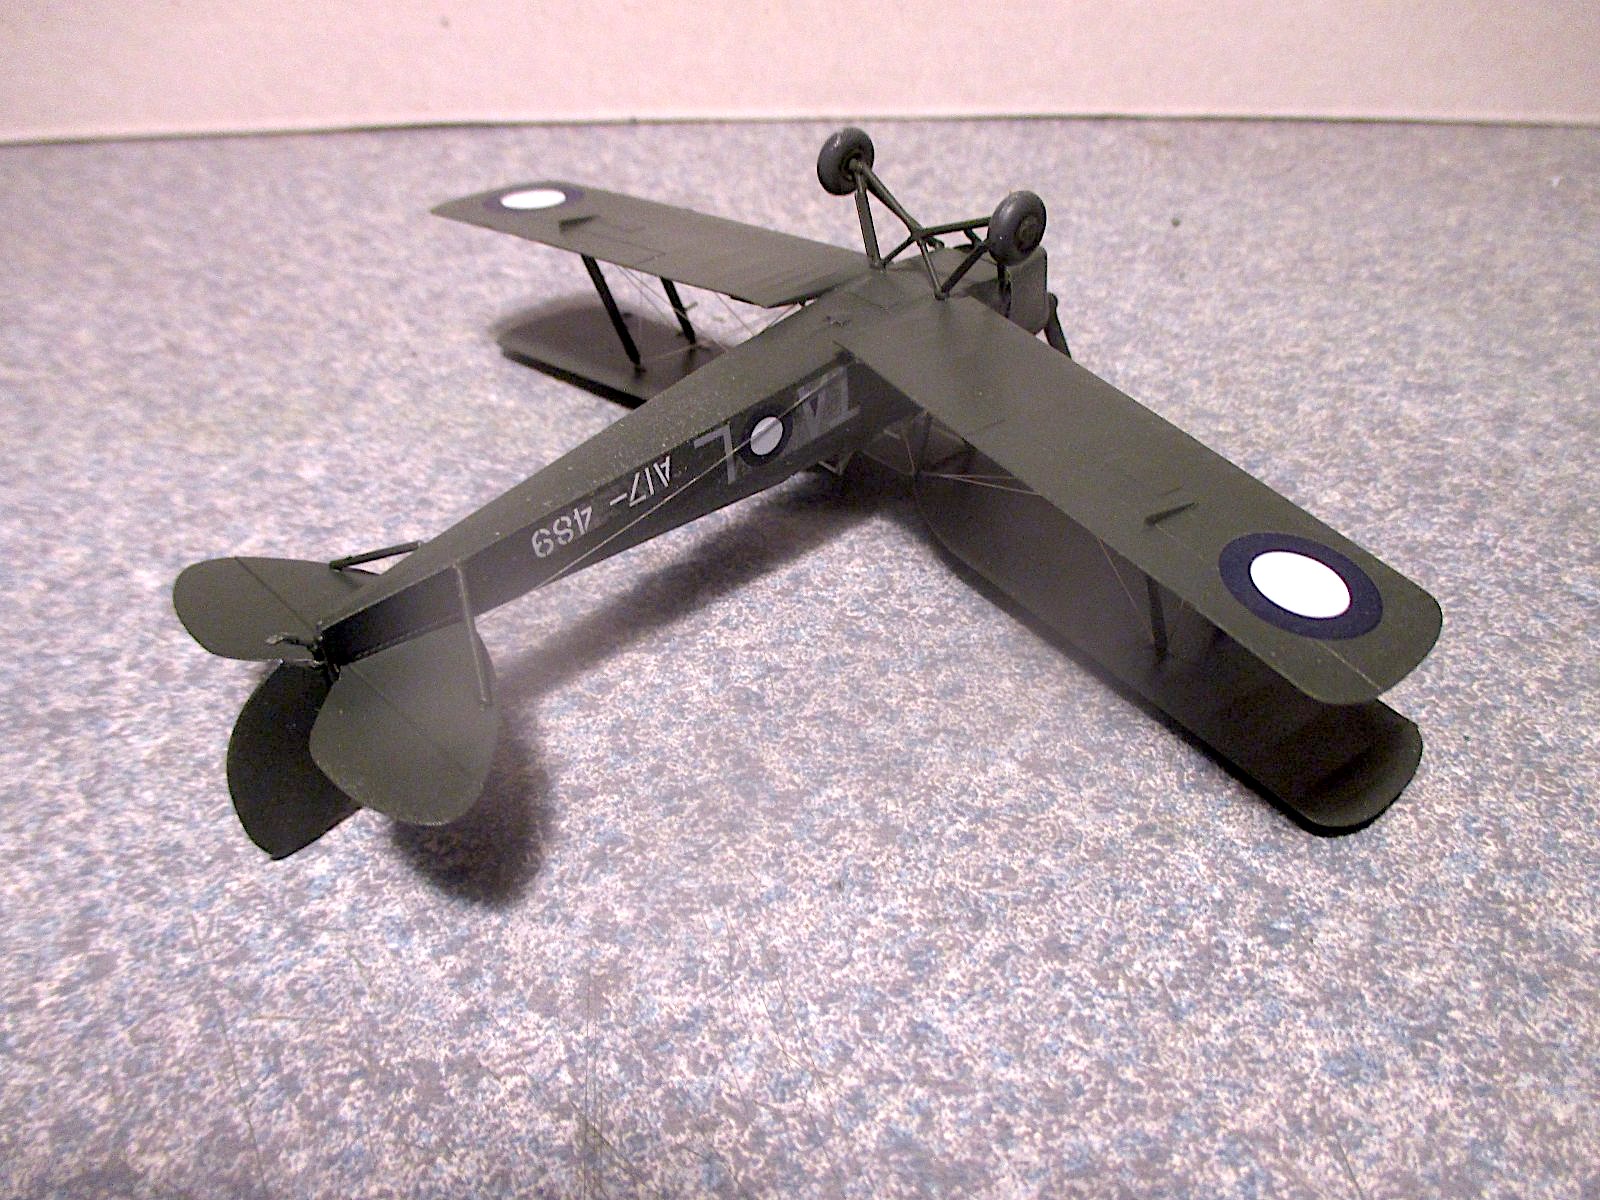
Decals are provides for two aircraft, a postwar DH-82A, sporting a silver color scheme with yellow wing and fuselage bands, still in service with the Royal Navy in 1962, and an all-dark green DH-82A in RAAF service with a supply unit in Papua, New Guinea, in August 1945. This looks like a strange selection of color schemes for this model, but maybe Airfix will reissue the kit soon in more common World War II colors, as the “sand and spinach” scheme with training yellow undersides would seem much more appropriate for this aircraft, or even an all-silver pre-war aircraft in RAF markings. The decals, including two excellent instrument panels, appear to be of excellent quality. No trimming is required, as the decal goes right to the edge of the image.
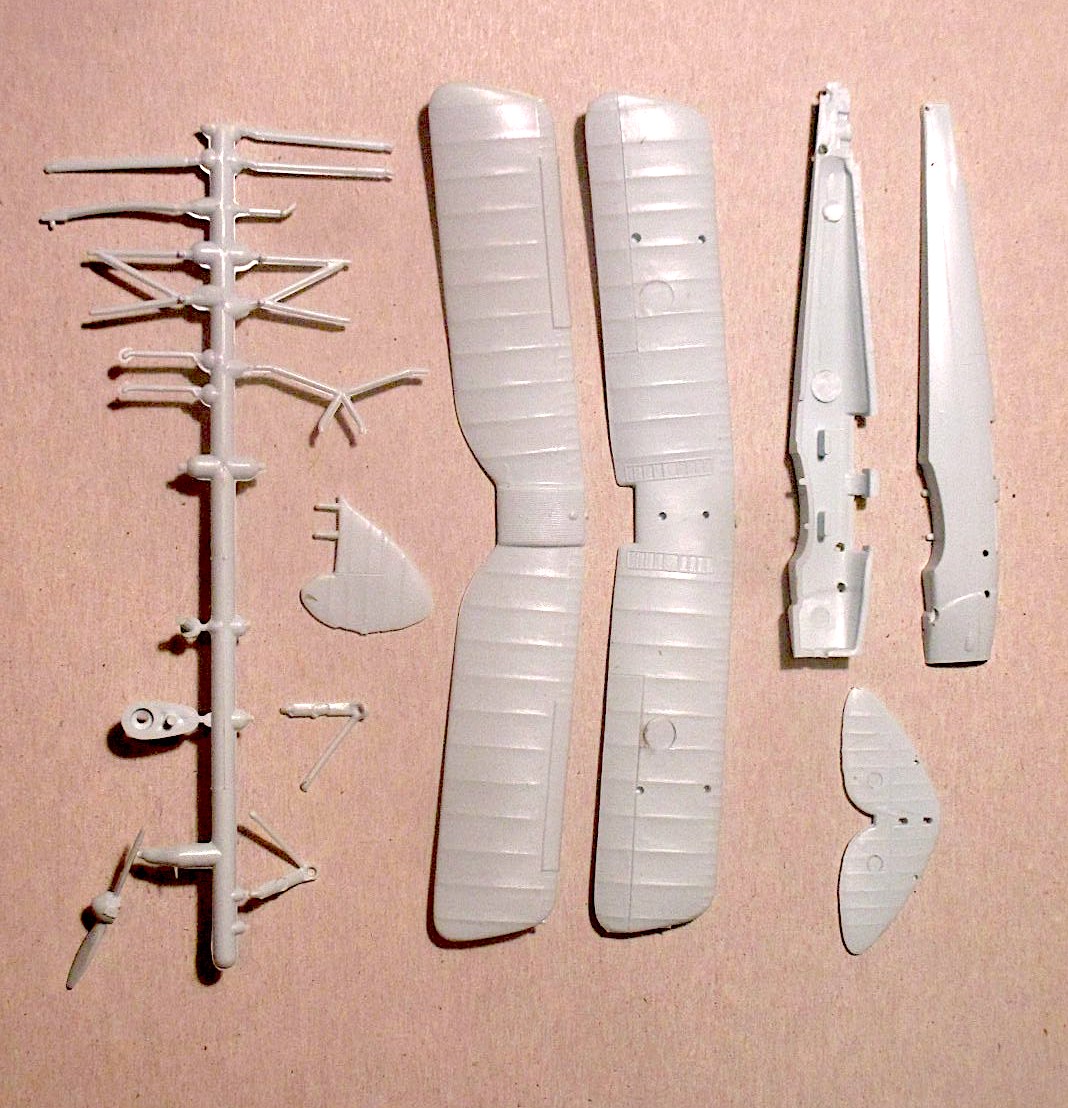
The Kit
This kit replaces the earlier Airfix offering that dates back at least to the late fifties. The early kit, while basically accurate, was a little heavy in detail, with no useful interior, and this issue rectifies all of those problems. Several other kits of the DH-82 have been issued, notably by Pavla and Aeroclub. Molded in soft light grey styrene, the new Airfix kit has excellent detail, and some of the parts are very finely molded, requiring some careful trimming. The wings and tail units are very thin, and excellent in every respect. I would suggest removing the parts from the sprue with an X-Acto knife rather than wire cutters as they are very fragile, but certainly not beyond the skill level of the average modeler. The kit is well engineered, and the parts fit together easily. One unusual feature is the wing struts, which are molded with a thinly attached center section that needs to be removed once the upper wing is mounted on the airplane. The interior detail is well done, with the two instrument panels mounting in their proper position in front of the cockpits.
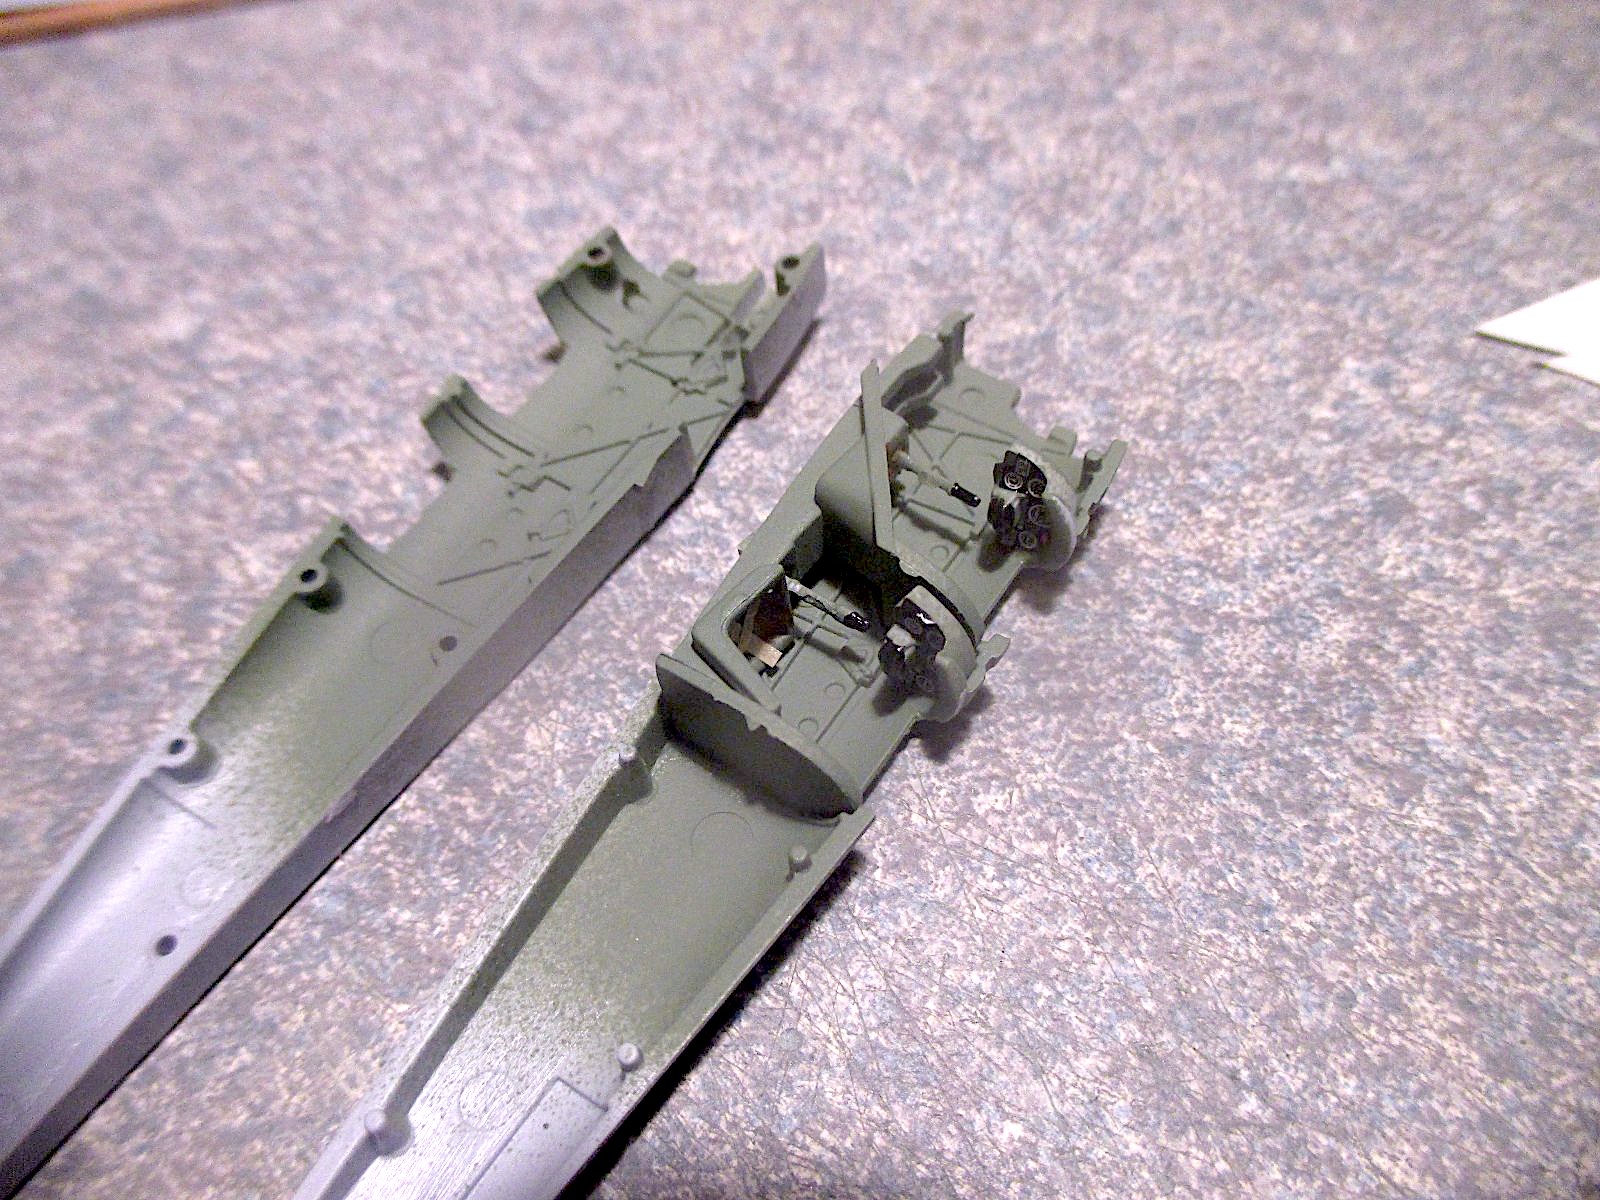
Assembly
The kit goes together like clockwork, only requiring some finesse in trimming the sprue attachment points. I used sandpaper, and had no problems. I filled the cockpits with foam material so I could paint the model once assembled. The model is engineered well enough that it would be very difficult to get the wings mis-aligned. The cabane struts fit into the upper wing, and need to be lined up correctly before attaching, although the outer wing struts should probably be attached to the upper wing before assembling the structure.
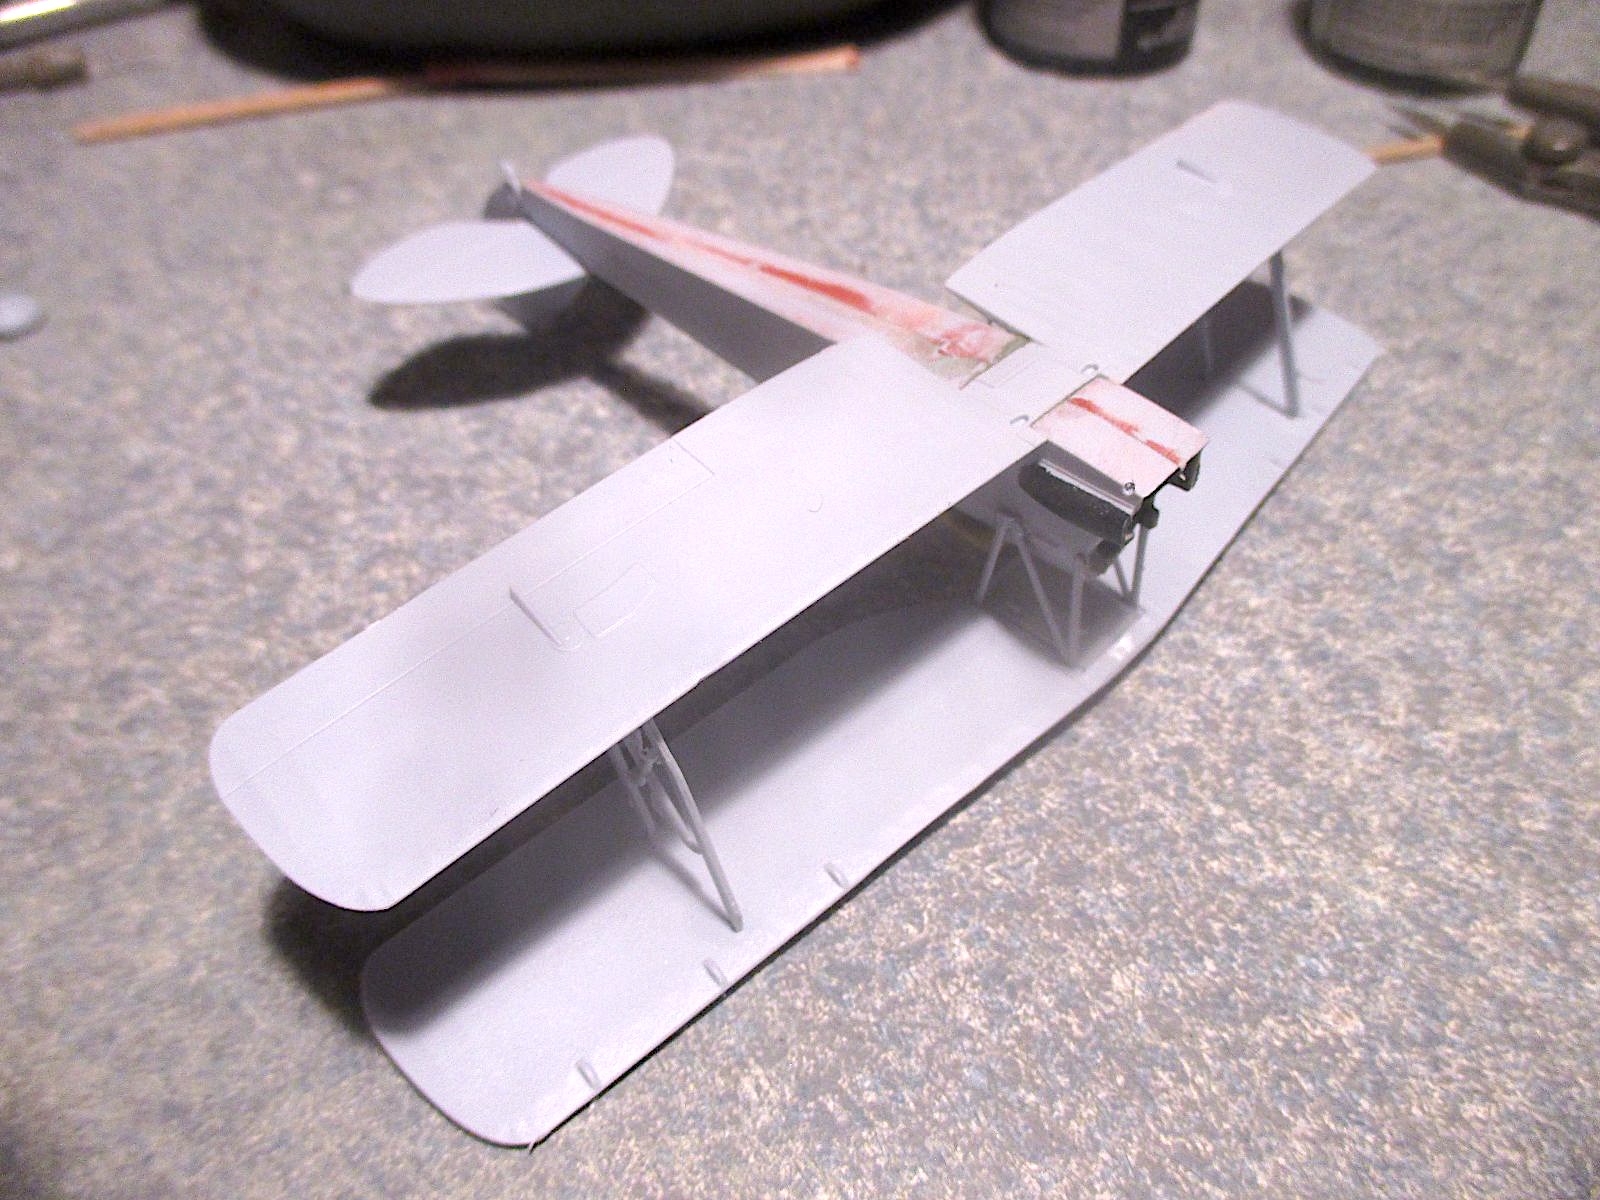
Painting and Finishing
I did the RAAF version, which does not require the anti-spin strakes, and this aircraft was painted foliage green overall (I used RAF Dark Green), which meant that I could assemble the model completely before painting. I then applied a coat of Testor’s Glosscote before applying the decals. Then a coat of Dullcote finished the job. Wheels and the propeller were then added, and then the wire rigging, for which I used unstranded electronic wire. I only ran into one problem with the rigging. While the rudder cables fit as described in the instructions, the elevator cables did not. They are not even mentioned in the instructions, even though every airplane has them, and they are quite visible in all of the photos I’ve seen. The major problem was primarily that the elevator horns, to which the cables are connected, are too small on top and non-existent underneath. They only run about 3 feet ahead of the front of the stabilizers, but even the upper cable cannot be run to its proper position because of the angle of the stabilizer. After some frustration, I just left the elevator cables off. The rudder cables run all the way to the forward fuselage, however, so all is not lost. Most people viewing the model probably won’t notice anyway, so it’s not that big a deal.
There is a large number of color variations that could be used for this model, military, civilian, and agricultural, and with a little imagination, you could build twenty of these and still not get all that are worth modeling.
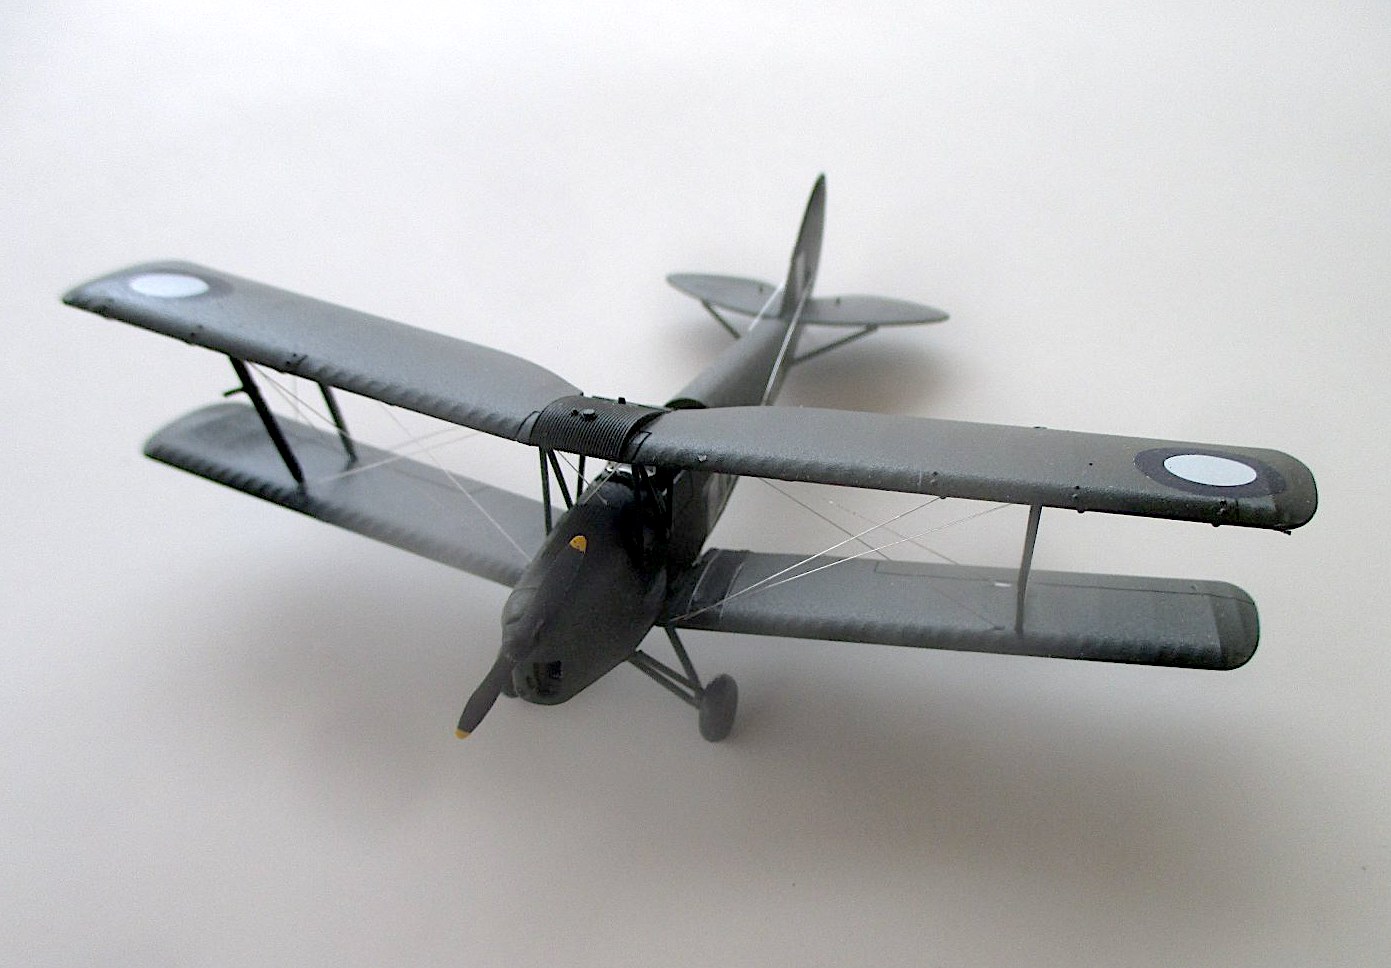
Conclusions and Recommendations
When completed, this is a very petite model. The wing structure is not that robust, so I would advise not storing the airplane where it could be handled by anyone. It is, however, a very accurate representation of a famous airplane, and should certainly be in any collection of 1/72 scale airplanes of the thirties through the fifties. This is an excellent model and definitely worth getting. Get several. Highly recommended.
Thanks to Phil Peterson, John Noack, and Airfix for the review sample.


Comments
Add new comment
This site is protected by reCAPTCHA and the Google Privacy Policy and Terms of Service apply.
Similar Reviews