
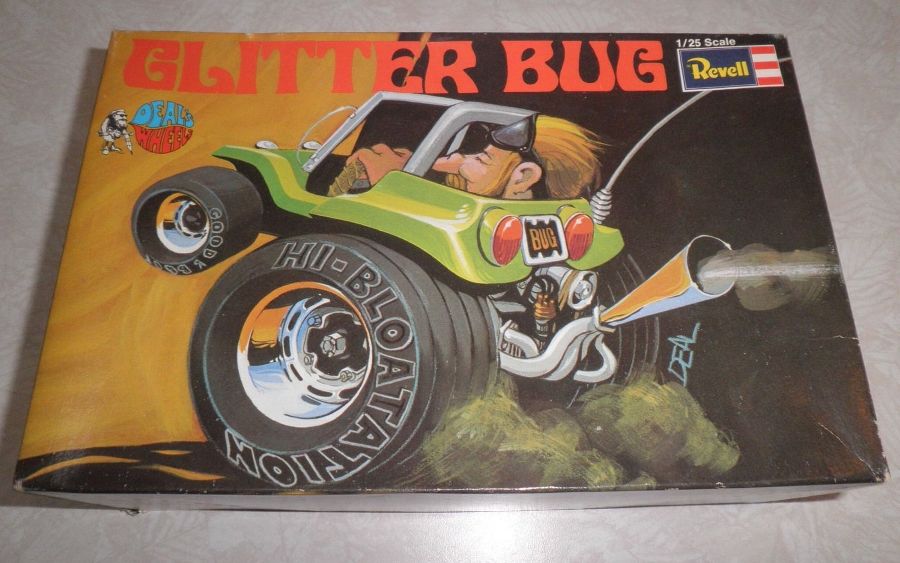
Deal’s Glitter Bug
Memory Lane……As a bonafide TreadHead, I am not much of a model nostalgic. My first armor kit was the old 1/48 Aurora Sherman. While it was a great kit and got me hooked on my TreadHead ways, I have no desire to find one and build it again. However, building the first model that I ever built would be neat! I actually have one of those. I paid $95.00 for it on Ebay and thought I would never get to actually build it as I could not bring myself to open the seal and have at it. However, I might get to do just that thanks to Revell. Those of you that are car builders know the name Dave Deal. If you don’t, look him up. He hooked up with Revell back in the 1970s and released thirteen model cars and four aircraft. These were not your typical run of the mill kits. They were three dimensional caricature models. They had oversized parts and even more oversized driver’s heads. My very first model was the Baja Humbug. My second was the Glitter Bug. Revell released several of the models under the Funster name and Lucky Pierre’s Neuport (I think) was released as a catchy desktop mounted advertising display model that actually flew in a circle with a banner on the tail. Revell had been re-releasing them under the “Old School” label. This made recognizing “Deal’s Wheels” kits from the newer releases very easy. However, their latest release, the “Glitter Bug”, does not have the moniker and unless you know what you are looking at might not realize this is actually a re-release.
This third re-release appears to have not been touched up at all. You get a white sprue that contains 16 pieces and a white body ( I believe these were both green metallic plastic back in the day), a chrome sprue containing 14 pieces, a clear sprue with 4 pieces, 8 pieces of rubber tire to make 4 tires, and a two page fold out instruction sheet. A funny note on the instructions…..There is a DECAL APPLICATION INSTRUCTIONS section but no decals are included in this kit.
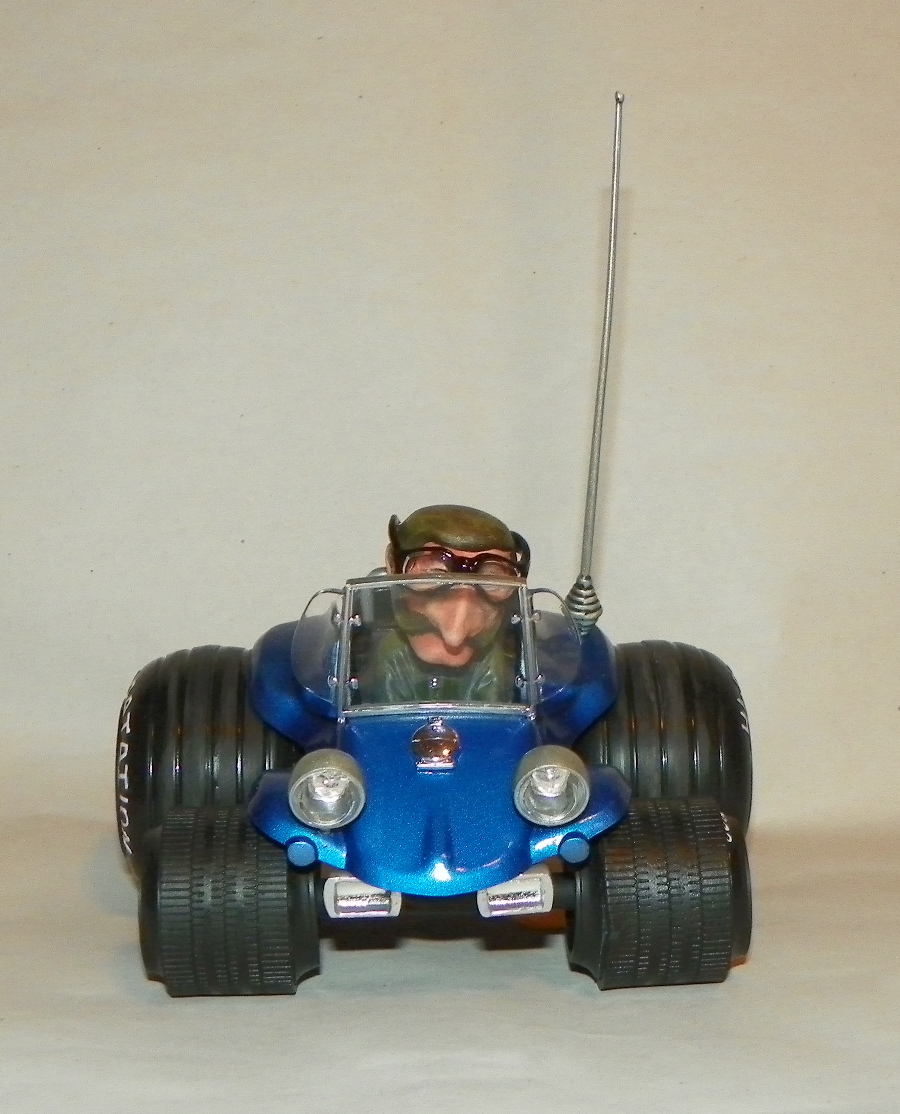
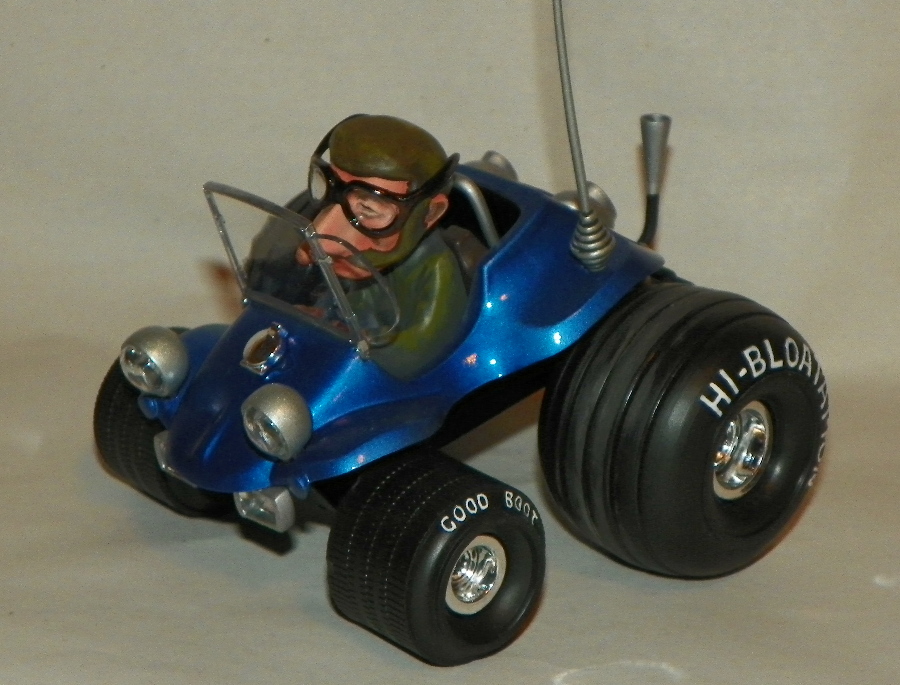
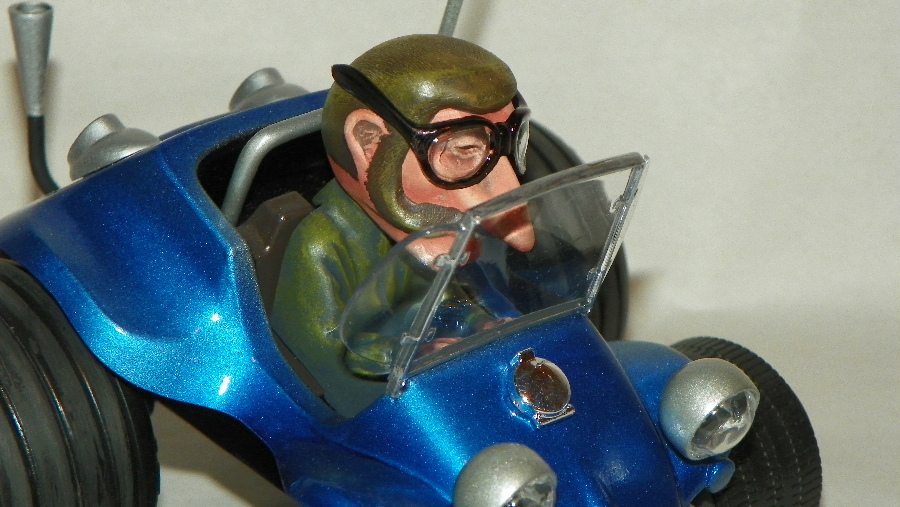
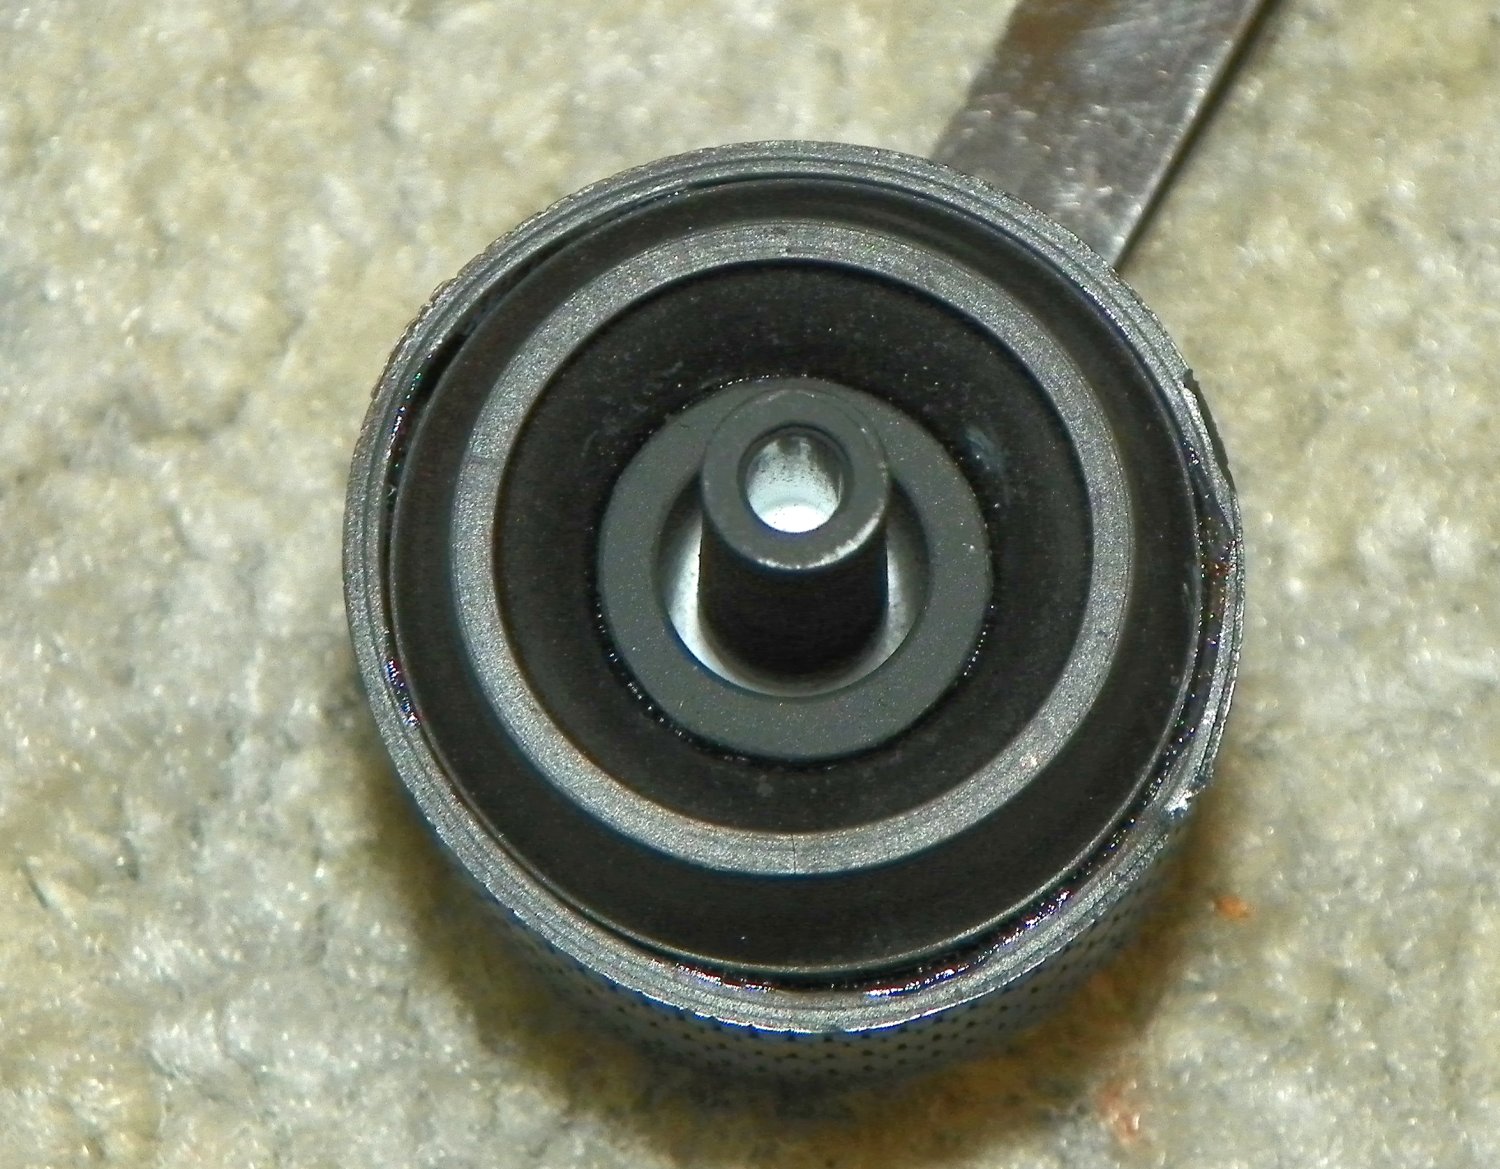
I started with the tires. The rears needed to be placed in hot water to make them pliable enough to attach to each other. The fronts are so loose, I am not sure if any version of glue will make them look right and stick together. I started cutting parts off the sprues to begin the cleanup process. Lots of cleaning is required as there are massive amounts of excess styrene around parts. By excess, I mean that the molds appear too old or are not being pressed together hard enough. There is excessive plastic at the mold halves. The head and fog lights are misaligned (my opinion) and I will not be able to leave the chrome finish on them to make them look right. The rear bulkhead is a chrome part that needed to be painted black. Chrome plating has changed over the years also. I sprayed it with over cleaner and it actually de-chromed in front of my eyes in less than a minute. No brushing was required. I just ran it under hot water. Also, on the bottom of the upper body was attached a Revell Inc. sticker and that took me almost 15 minutes to remove the left over adhesive residue. I cleaned up the edges and got it ready to mate with the lower tub. The front lower body has what I would think are turn signals but the instructions called out for them to be painted silver. These were so misshapen that I sanded them off and will use “stickos” to replace them once the body is painted.
I wanted a Metallic blue finish and after going to my LHS and picking up a Model Master Metallic Blue 2702 (or so I thought) and some other colors I needed I headed back to the man cave to get started. I fired up the booth and after shaking, stirring and pouring in the thinner I started mixing. Well, you guessed it........Oil and water!!!!! The paint was actually Model Master Artic Blue Metallic (4662) acrylic! I called up the owner and he checked and he had put them away wrong. He apologized, said I could trade out but it was late and I wanted to lay the paint so acrylic it is!!!!! I was actually impressed with the color! I applied an aluminum base (very bright) and fired the paint. I still need to work a little on my masking technique. There is a small line of the aluminum undercoat that is right in front of the windshield. I think the windshield will actually cover it well. I used Model Master “Wet Look” clear Lacquer over the paint to seal and even out the orange peel effect.
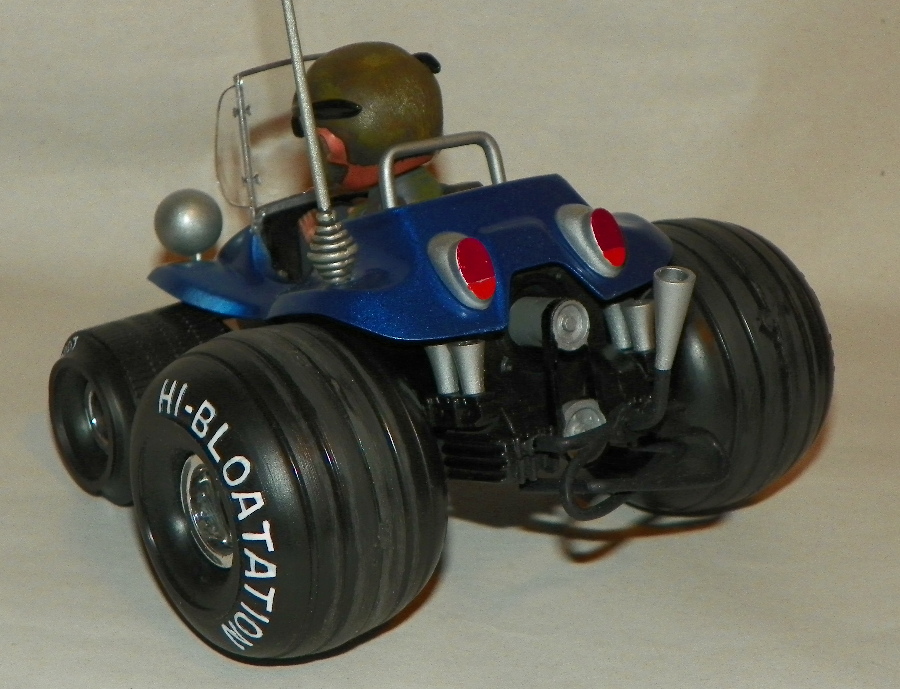
As most of the chrome parts have no chrome on them anymore, I figured I would try some buffing metalizers to see how they worked. I had some bright aluminum plate that I had never used and figured now might be the time. I looked on the “ole web” for instructions and gave it a shot. I was not super impressed with the results. I was not expecting plated aluminum but I was expecting a brighter buffability. The contrast is nice and it sets off the other items of the vehicle.
The exhaust came next. It is composed of two tubular pieces that intersect each other. These were a mess. Both needed extensive sanding, scrapping, and an attempt at re-rounding them. These were done to the best of my abilities and then painted black. The two pieces were glued and set on the rear and adjusted to fit in their location holes. After they were dry, the trumpet pipe was installed and this assembly was given a coat of flat and attached. The antenna was next and this suffered from the same rounded issues. Again, I did the best I could and painted it silver. This could be easily repaired if you have a large Punch and die. The actually antenna might be tricky but I think a nice stretched sprue antenna would look way better. The fuel cap was removed from the sprue and very carefully cleaned up. The sprue removal points were touched up with chrome silver. I wanted it to remain chrome as it’s location on the front hood would definitely provide some POP to the kit.
The driver was last. The body holding the steering wheel is a one piece affair. There is no wheel detail. The hands appear to be holding a tombstone as opposed to a steering wheel. The head is a two piece item and even using clamps and liquid glue resulted in a nonaligned join. There were lots of filling and sanded repeated several times. This resulted in the loss of hair detail on the head and face. The glasses are a single clear part that was tripped and shaped. It was dipped in future and the frames were painted black. I had thought about back painting the clear parts in a dark green to simulate sunglasses but I kind of like the Mike Myers “Austin Powers” look of the glasses. The driver’s head was finished and attached to the body and this Oldie was finished.
This is a really neat kit and brought back so many found memories! The molds are in need of cleaning up and the front tire issues really need to be looked at by Revell. With so many different automotive aftermarket items available, these kits can really be turned into something more spectacular than I accomplished.
I would like to thank Revell for re-releasing this Wonderful Oldie! I hope they keep it up to at least allow me the Baja Humbug and the Go-Mad Nomad! Special thanks to IPMS/USA for allowing me to review it. Get out there and pick up one of these kits. You can go wild with options!


Comments
Add new comment
This site is protected by reCAPTCHA and the Google Privacy Policy and Terms of Service apply.
Similar Reviews