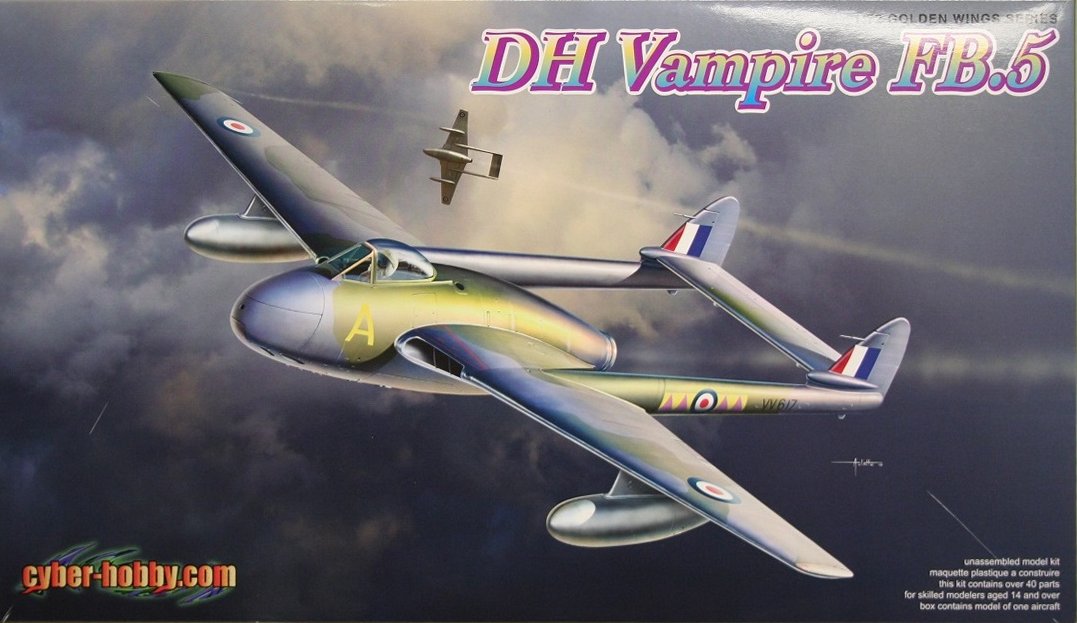
de Havilland Vampire FB.5
Although too late for World War 2, the de Havilland Vampire served in front-line RAF squadrons until 1953 and in training squadrons until 1966. The Vampire was the RAF’s second jet-powered aircraft, after the Gloster Meteor. Over 3200 copies were manufactured in numerous variants. The FB.5 was a single-seat fighter-bomber, of which over 1000 were built. It was powered by a de Havilland Goblin II turbojet, and it could reach a maximum speed of 550 mph.
Cyber Hobby’s new Vampire comes shortly after their Meteor, Sea Venom, and Sea Vixen, as they continue to build on their line of post-war aircraft. As a new tooling, the kit makes extensive use of slide-molding. The kit comes in the standard Dragon/Cyber Hobby top-opening box, with images on both the box top and bottom. Forty-five parts are included on three sprues, including one in clear, and are molded in light gray. The sprues are individually sealed in clear cellophane.
I found no flash at all, and cleanup of the parts was simple. The twin booms were formed via slide molds, and there was a small seam line down their lengths that had to be cleaned up. Panel lines are crisply rendered and look good under paint. The canopy and windscreen are in two parts, and there is also a seam line down the middle of the canopy that required polishing to remove. A larger issue is the windscreen, where the sprue attachment point is on the port side of the frame and can’t be removed without marring the frame.
The instructions are typical Dragon/Cyber Hobby, although because this is a relatively simple kit, they are not as troublesome as in their more complicated subjects. There are absolutely no color callouts during construction, although there are color codes called out on the profiles. If you want an accurate build, you will need to do some outside research for colors in the cockpit and wheel wells. Colors are listed for Gunze Aqueous Hobby Color, Gunze Mr. Color, and Model Master.
The build starts with the cockpit, which comprises all of three pieces. The instrument panel has no detail, and unfortunately there is not even a simple decal to represent anything. The canopy can be posed open, so there is a definite need for an upgrade here. The right-side console does have some raised detail. I painted the cockpit a dark gray and dry-brushed a light gray onto the console to highlight some knobs and other bits. The seat was painted khaki; there are no seat belts.
The fuselage and wings join horizontally with very little cleanup required on the seams. The panel lines are shallow, so I lost some of them when cleaning the seam. It was a simple matter to re-scribe them back into shape. The Vampire has tricycle landing gear, so it is a tail sitter without adding some weight to the nose.
After the wings/fuselage were ready, I moved onto the tail booms. They are beautifully molded, but this is also where the biggest challenge of the kit arises. The sockets on the trailing edge of the wings are much, much larger then the pegs on the front of the booms that go into the sockets. The fit is downright sloppy. I cannot understand how so much detail and effort could go into designing a slide mold to make these booms, and yet make the fit so sloppy. The fit of the horizontal stabilizer is also loose, so I was faced with trying to keep both vertical stabilizers parallel while at the same time trying to get both booms into the slots and in line with their exit points on the wings. I wound up using a lot of tape and still ended up with a noticeable step on one of the booms.
After masking the canopy and windscreen and installing them (in closed position), I decided to go with the paint scheme for 118 Squadron, 1953, RAF Fassberg, Germany. This was typical RAF dark green and dark sea gray on the upper surfaces and azure blue underneath. After a coat of Future, the decals went on smoothly. The decals are from Cartagraph, and as we have come to expect from them, they were superb. The only callout on the decals is they are completely packed in the decal sheet with very little space surrounding them. It required some delicate cutting to ensure they were not damaged. After everything was dry, I spayed a matte finish to remove the shine from the Future.
Final assembly comprised of the landing gear (which fits snugly into slots), gear doors, and drop tanks. The counterweights on the underside of the stabilizer are tiny, so I spent a few minutes on my hands and knees finding the one I dropped.
Marking Options:
- 502 Squadron, RAuxAF, RNAS Sydenham, Iraq 1953 (overall silver)
- 603 Squadron, RAuxAF, RAF Turnhouse, 1955 (gray/green upper, silver undersides)
- 602 Squadron, RAuxAF, RNAS Abbotsinch, 1954 (gray/green upper, silver undersides)
- 605 Squadron, RAF Gibraltar, 1955-56 (gray/green upper, silver undersides)
- 607 Squadron, RAuxAF, RAF Ouston, 1956 (gray/green upper, silver undersides)
- 118 Squadron, RAF Faasberg, Germany 1953 (gray/green upper, azure undersides)
- 98 Squadron, RAF Faasberg, Germany 1953 (gray/green upper, azure undersides)
Pros
Unique subject, slide-molded parts, Cartograf decals, nice detail in the wheel wells, strong and simple landing gear and door installation.
Cons
Poor fit on the tail booms, seam line on canopy, sprue attachment point on windscreen, lack of detail in the cockpit
Recommended, but the tail booms mean the build is not as simple as it should be.
Thanks to Dragon Models USA and IPMS/USA for the opportunity to review this fascinating kit.


Comments
Add new comment
This site is protected by reCAPTCHA and the Google Privacy Policy and Terms of Service apply.
Similar Reviews