
De Havilland Mosquito FB.VI Final Part
In this final installment of the review of this superb kit we will look at the engines and we will get the airframe assembled and get the decals applied.
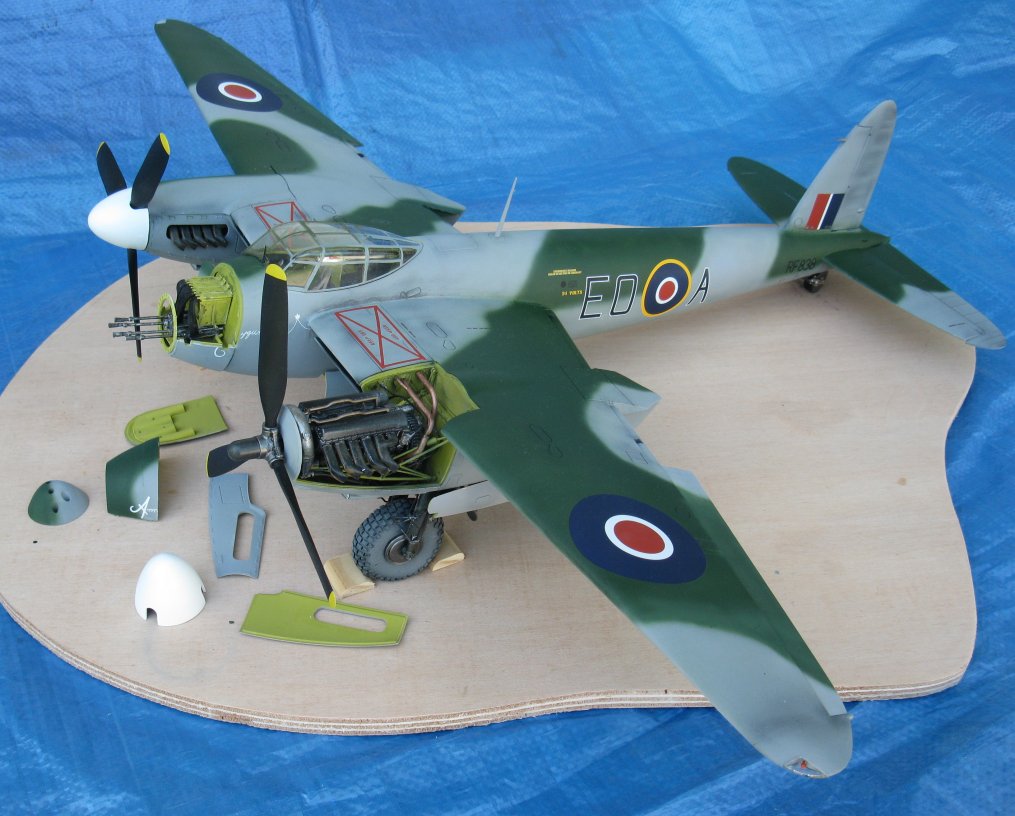
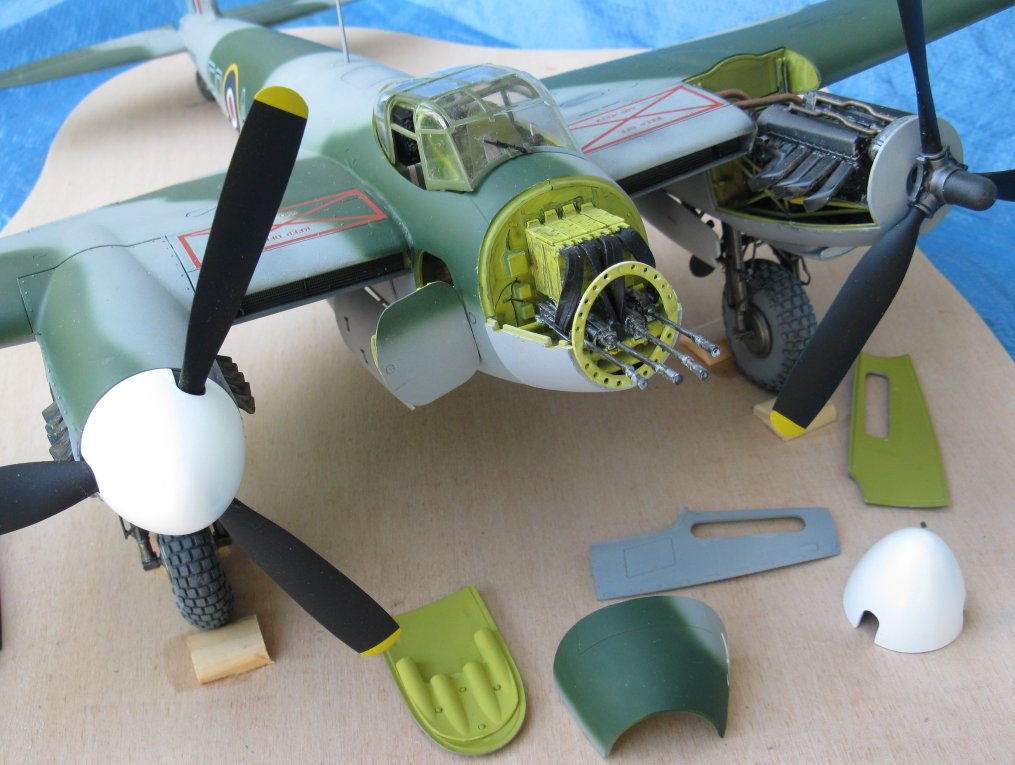
The engines are really models unto themselves. I took my Mosquito to a club meeting and displayed it as a Work In Progress, and most of the comments and questions about the kit dealt with the engines and the plumbing for the engines.
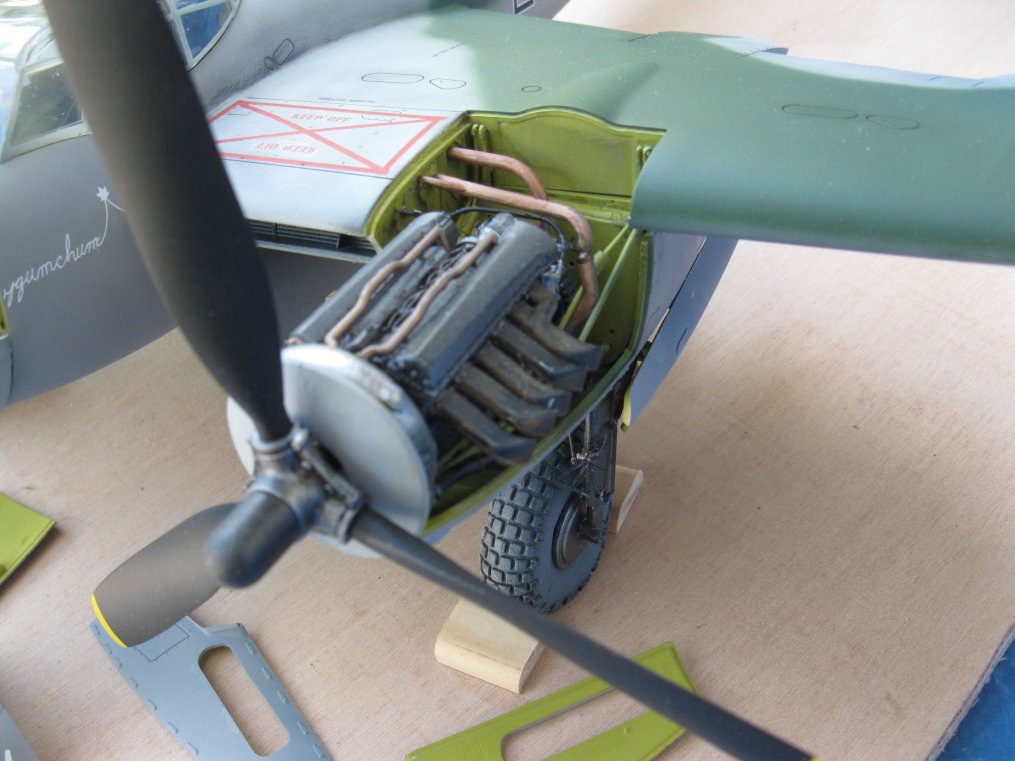
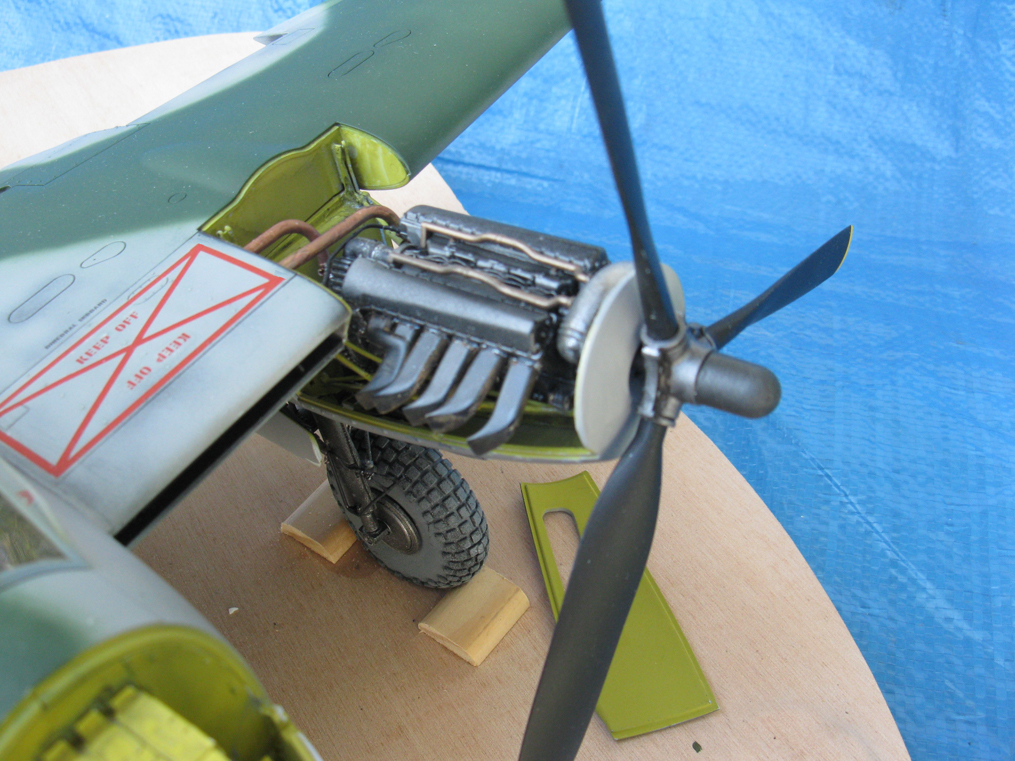
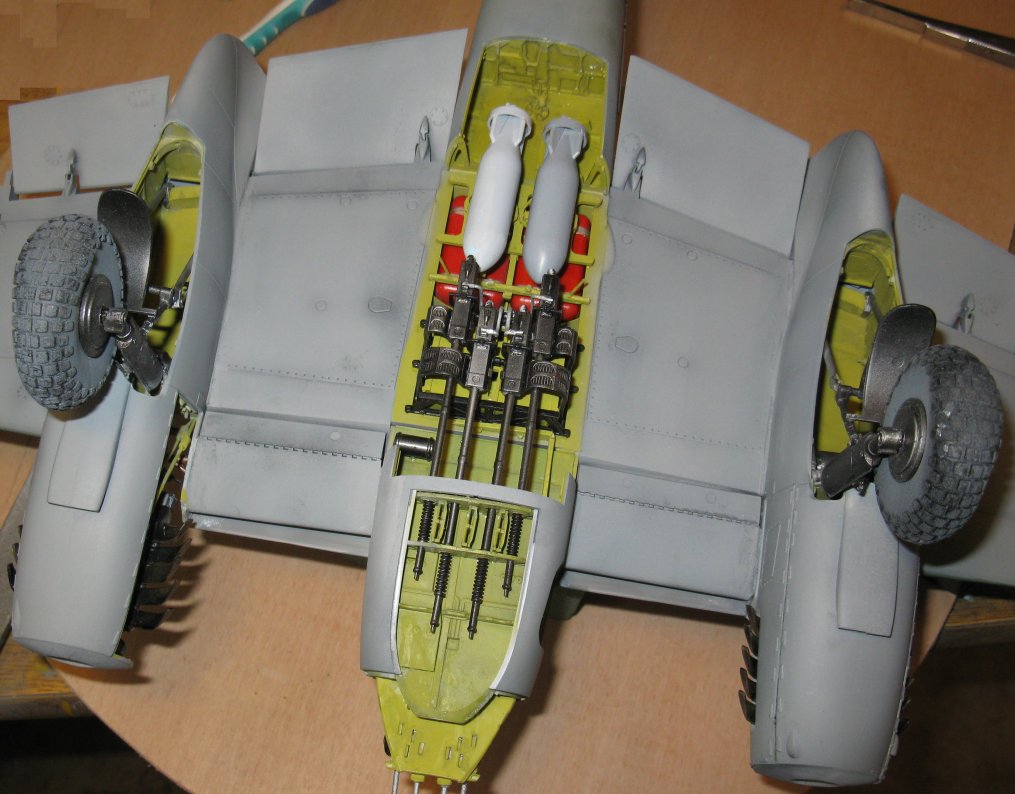
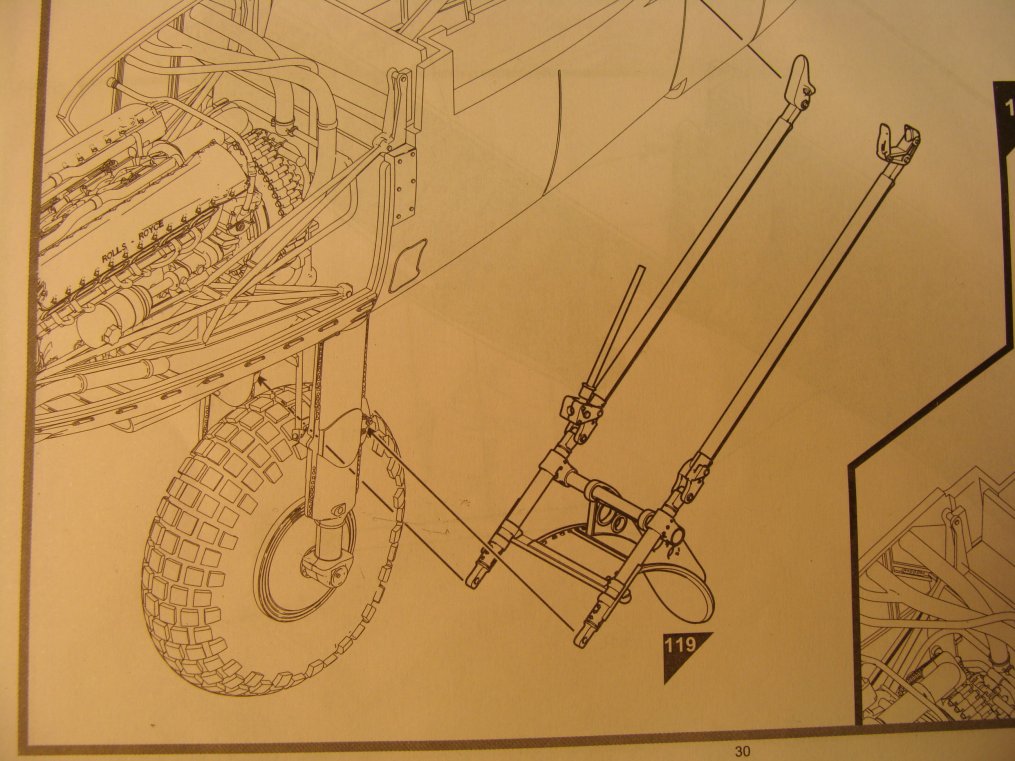
There is a great deal of detail and plumbing, and the best part is that the cowls can be left open to show off your handiwork. As with other aspects of this kit, you are strongly advised to study the instructions, and to follow the sequence of construction laid out in the instructions. This is especially important when it comes to the tubes and pipes that are attached to the engines, and that run from the airframe into/onto the engines. Test-fit as much as you can before assembly.
I found that the most challenging part of engine assembly were the support brackets which are used to attach the engine to the airframe. These are parts 14J, 15J, 16J, and 17J. The parts fit well, which is a testament to the quality of the molding, but are rather fragile. If I were to build another of these kits I would not clip the parts from the sprue but rather saw them off using some fine-toothed saws such as UMM provides or other small saws. Do not apply any twisting pressure to these parts as you remove them from the sprue.
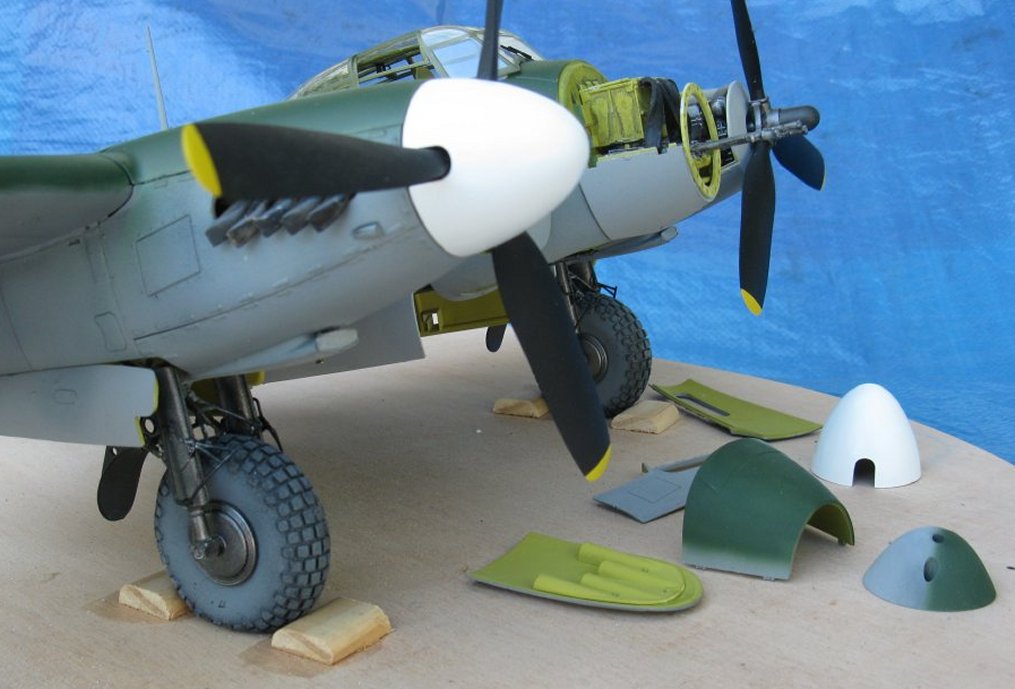
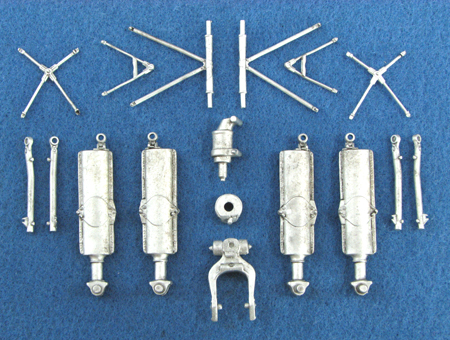
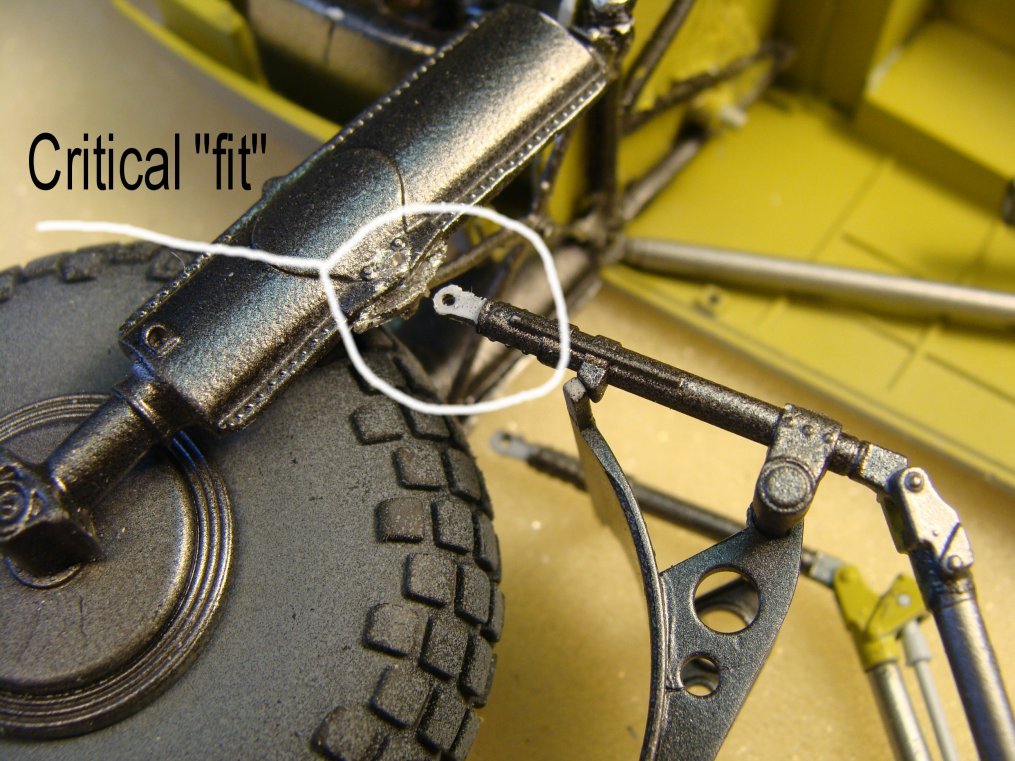
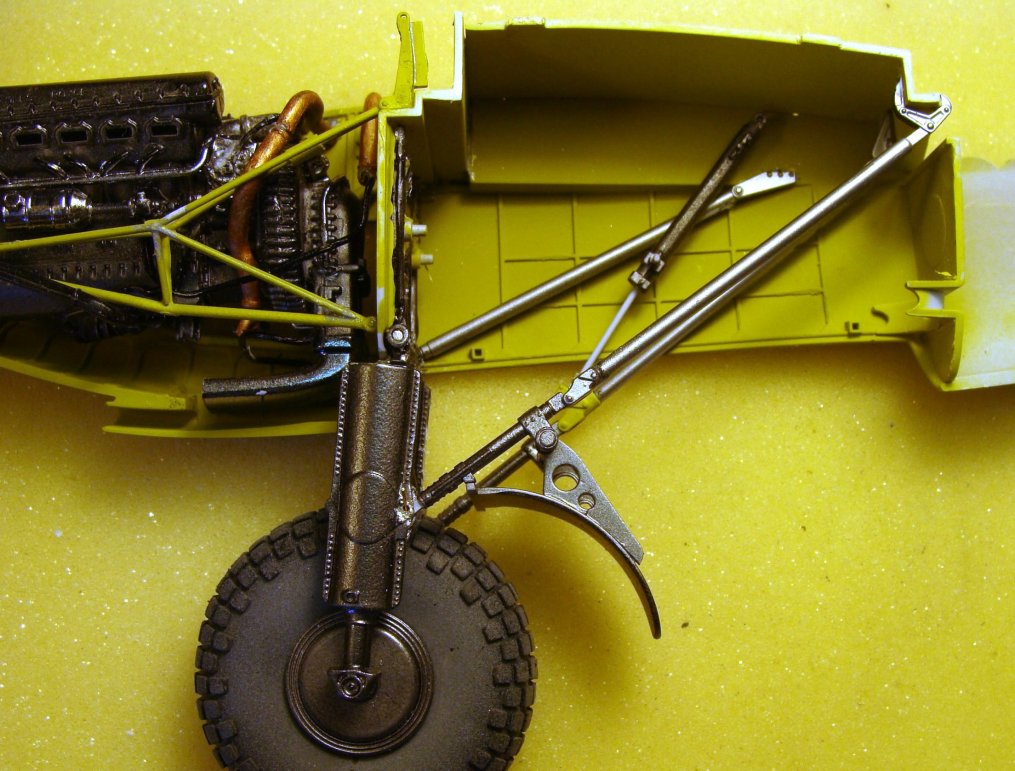
The landing gear require special attention. As with many high-quality kits these days the parts are molded in “scale”, which means the attachment points are also in “scale”. In the case of the Mossie that can be problem. I’m a mediocre modeler and I must confess that I fought the gear and the gear won, to paraphrase an old song. I’ve built the previously released Mossie (the release that includes the Night Fighter pieces) and I ruined the gear through shear clumsiness to the point at which the gear had trouble bearing the weight of the finished model. On this second effort (this review item) I decided to go with the SAC gear replacement parts. The SAC gear worked well, and I think my success with the gear on this kit also was aided by my being far more patient and knowledgeable about how the gear assembly was laid out. The key to success is to follow the assembly sequence, be sure to allow the glue ample drying time, and if you are so inclined, order a set of the outstanding SAC gear and have at it. Frankly, if I were to build a 3rd Mosquito I would start the project by ordered the SAC gear set.
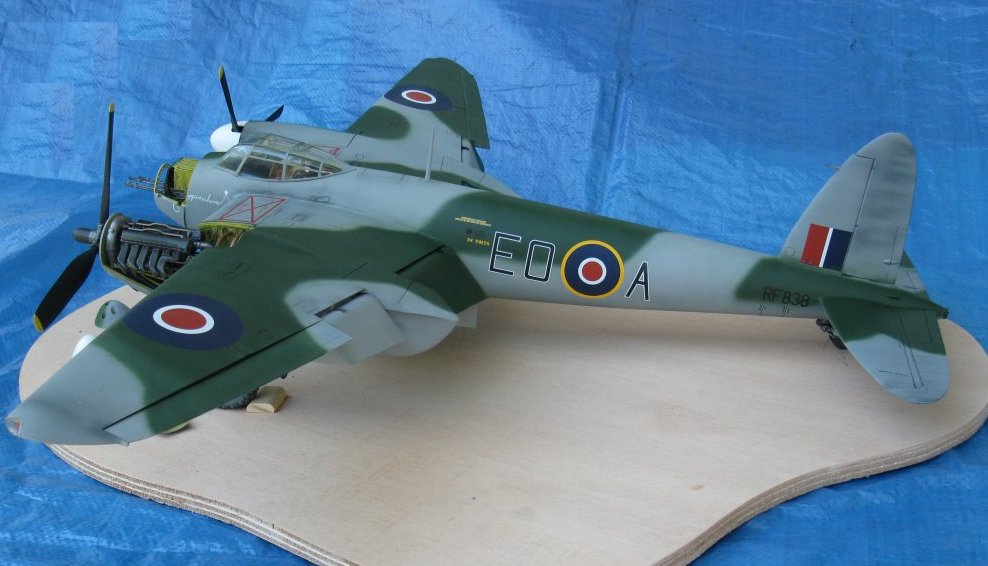
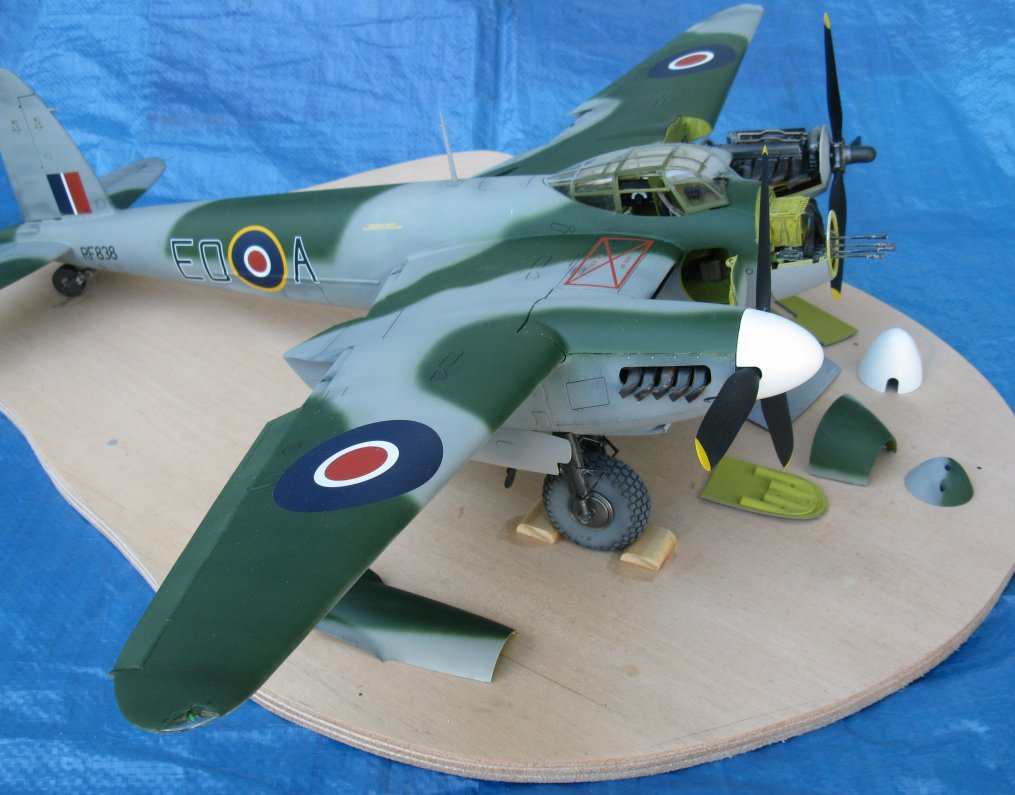
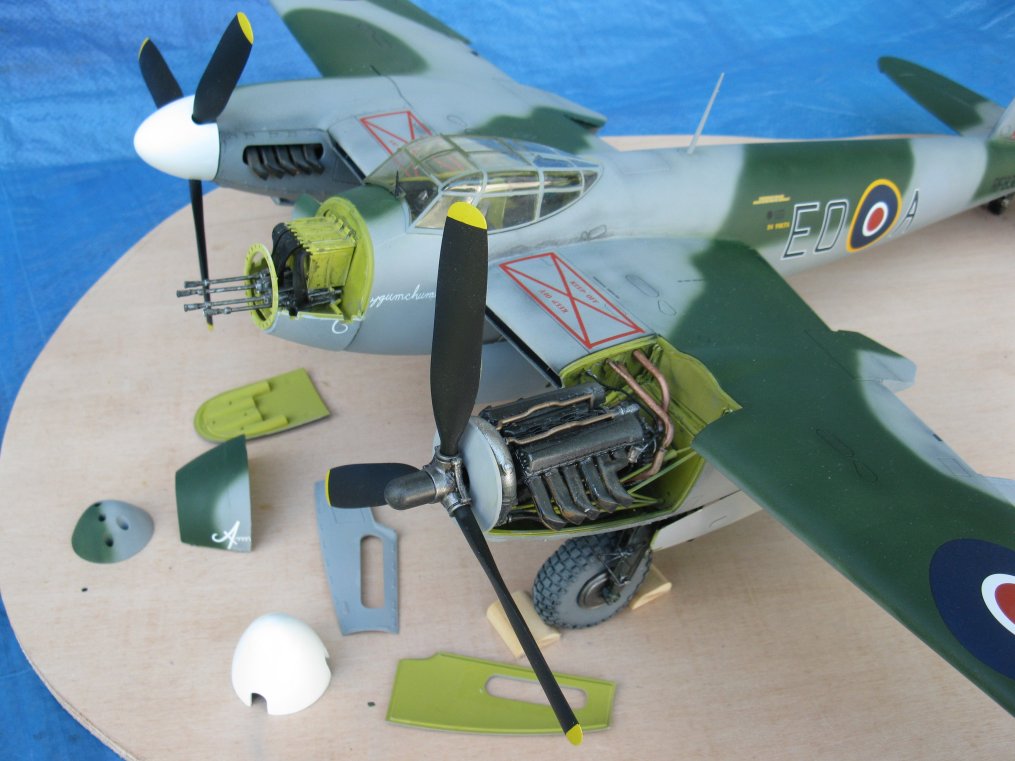
Once the gear and engines have been assembled and installed the project really speeds up. The main wing assembly and tail plane assembly fit into place with little difficulty. Again, test fit the subassemblies and when you are sure of the placement then apply glue. The fit is so good that you will find that very little work will need to be done to fill in the seams between the wing and fuselage.
Painting took some time. There’s a lot of “surface area” to be covered and one must mask off or protect the gear, the wheel wells, the cockpit and the engines. I chose not to mask off anything. Instead I used my airbrush for fine work and used small, hand-held strips of cardstock to prevent overspray. The camo scheme was free-handed on my review item.
That leaves nothing but the decals! My standard practice is to apply a coat of Model Master Lusterless Flat to the model and let it cure for at least 12 hours. I then polish down the surface with 12,000 grit sand paper. The decals were applied to this “polished” surface and, for the most part, no decal solutions were required to improve adhesion. I soaked each decal for about 60 to 70 seconds and then it was ready for application. The decals are opaque, so the camo separation lines do not show through any of the decals. The decals also have sufficient strength to prevent tearing, but they were handled as gently as possible. There is little clear carrier film around the roundels, but I did remove the clear carrier film on the “Keep Off” decals (those big rectangular markings on the top of the wings on both sides of the cockpit) and also the fuselage code letters.
In conclusion:
- Increase the diameter of the receiving hole for locating pins.
- Be sure to thoroughly understand the sequence of assembly and follow it.
- Test-fit, test-fit, test-fit
- If the part is not fitting properly then either you’ve not done steps 1,2, and 3, or you are attempting to use the wrong part in the wrong way.
- Make sure you have a large and obstruction-free workspace. I’d recommend a space at least 36”x36”. Forget using the spray booth….Mossie won’t fit.
- Remove the carrier film on the decals that have large clear spaces within such as the fuselage lettering and the “Keep Off” wing walks.
Even though this model beat me up in time and talent, each time I sat down to work on it I had a very enjoyable work session. I am very pleased with the results and I congratulate Airfix on a job “very well done”. I am also quite pleased with the quality of the SAC gear that I used.
I highly recommend this Mosquito kit for the more experienced modeler. While a beginner or less experienced modeler can get the job done the experience will require patience, time, and the learning curve will be steep. Thanks to Airfix for the opportunity to build this superb kit, and thanks to SAC for provided the gear set.


Comments
Add new comment
This site is protected by reCAPTCHA and the Google Privacy Policy and Terms of Service apply.
Similar Reviews