
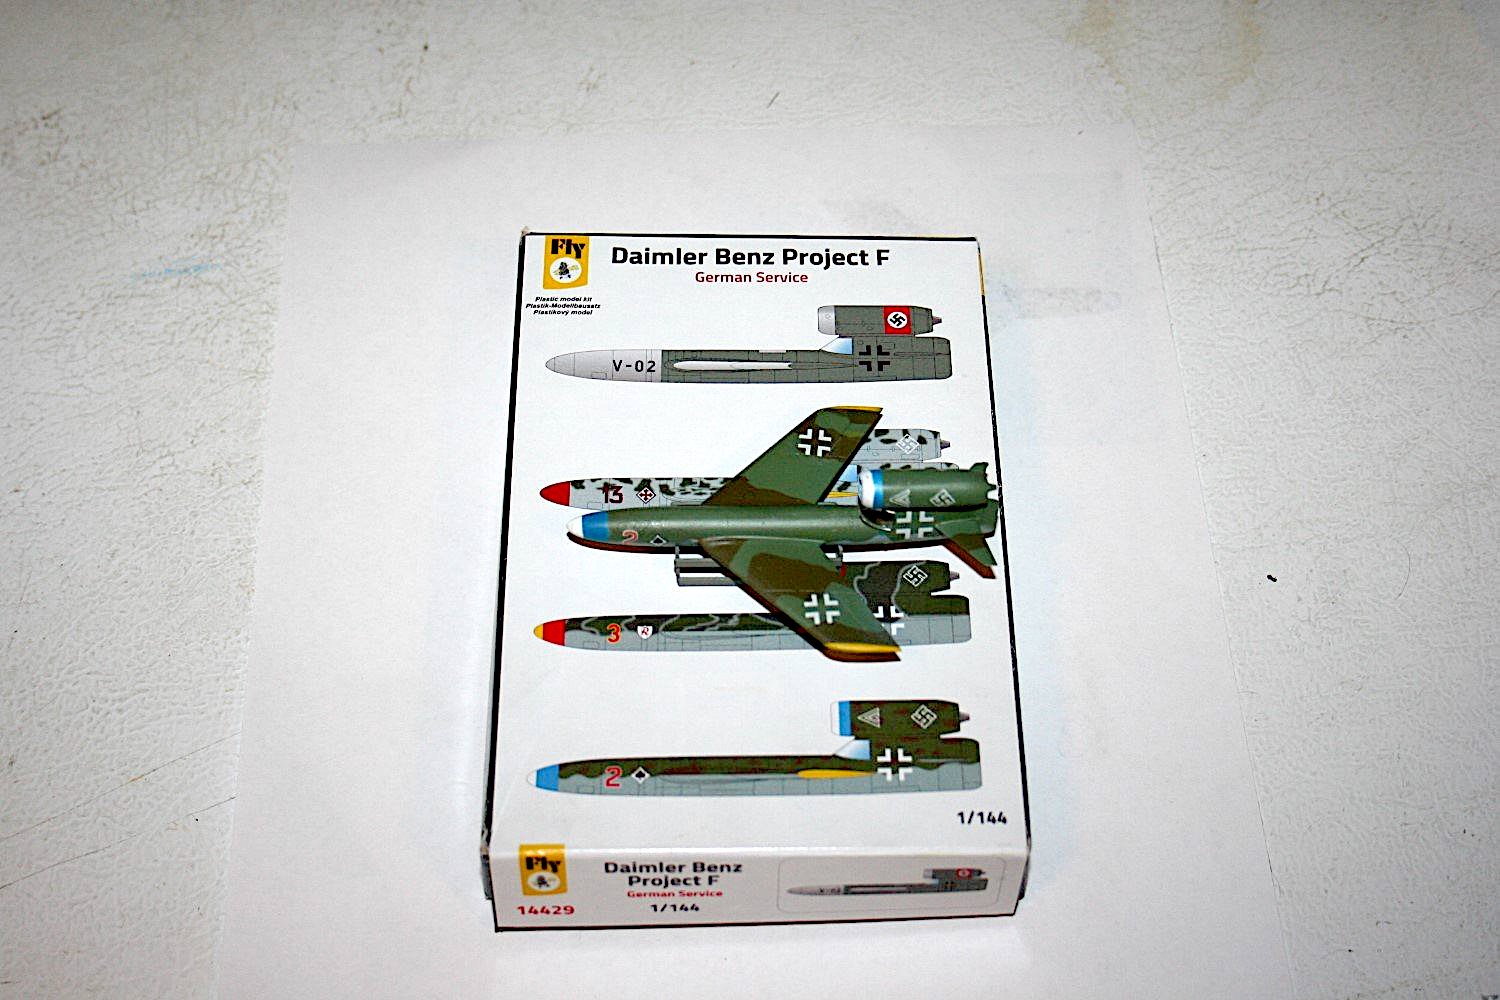
Daimler Benz Project F - German Service
The Aircraft
Daimler-Benz designed several large aircraft, Projects A through C, which were designed to carry air-to-ground missiles. These were huge planes, with 6 engines, and they were supposed to carry 5 or 6 of the “Project F” missiles. The targets were supposed to be Allied airfields and other strategic targets.
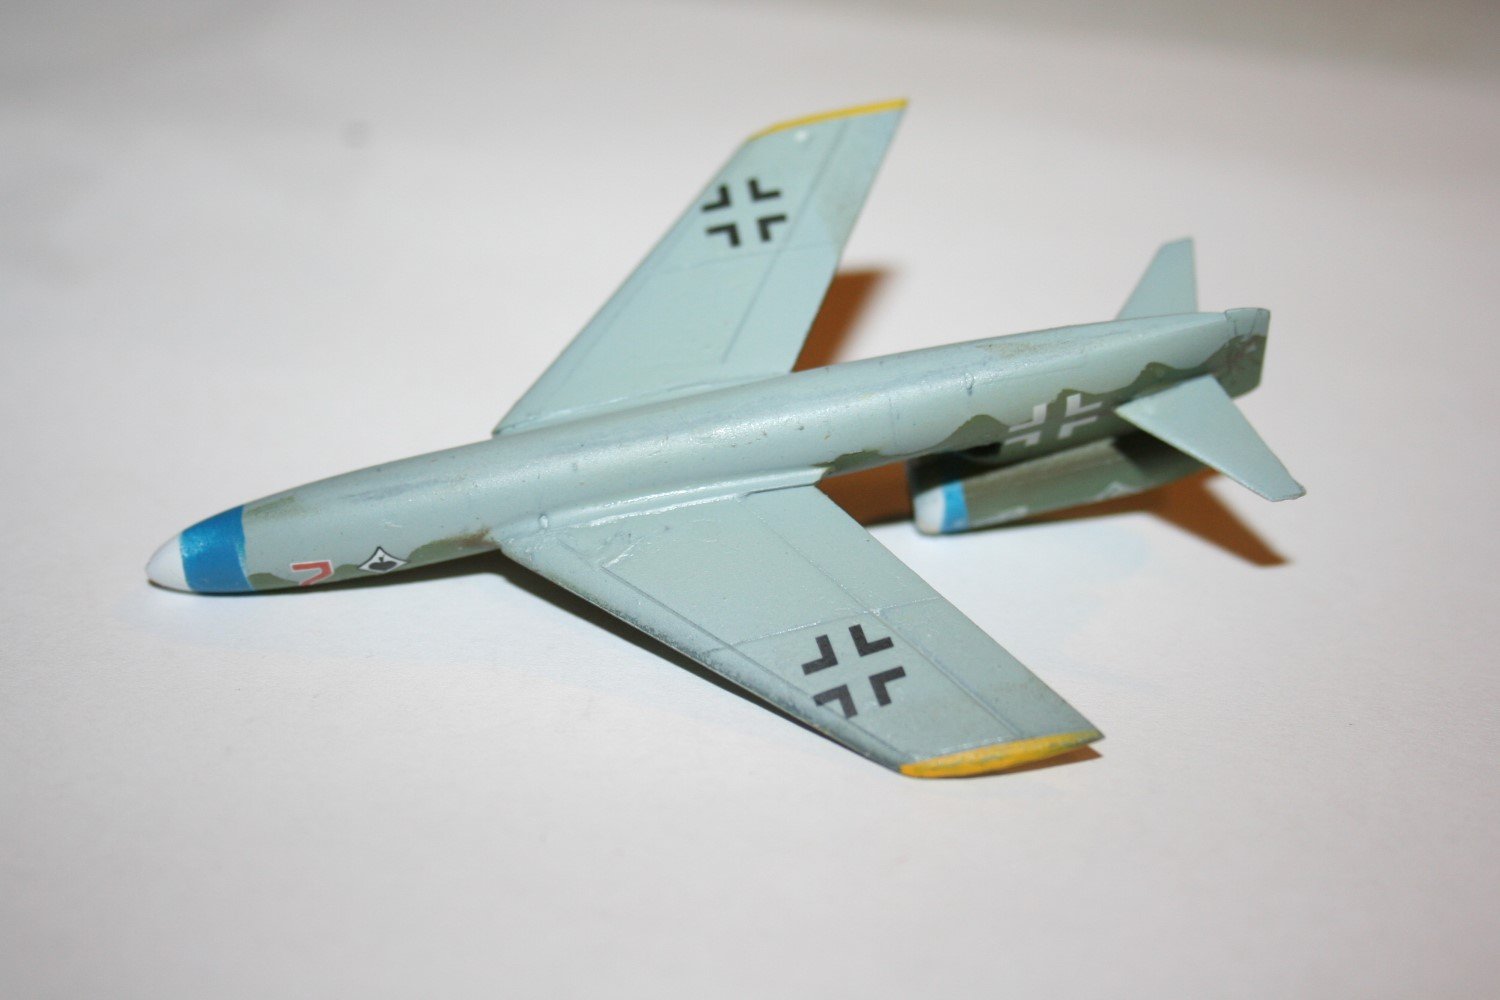
The Project F missiles were powered by a single BMW 018 jet engine. The F would be carried to near the target by the C, then released. The pilot would aim the missile at the target, then bail out through the bottom of the aircraft. The warhead was in the nose, weighed 3000 KG (6600 lb.) and was detonated upon contact.
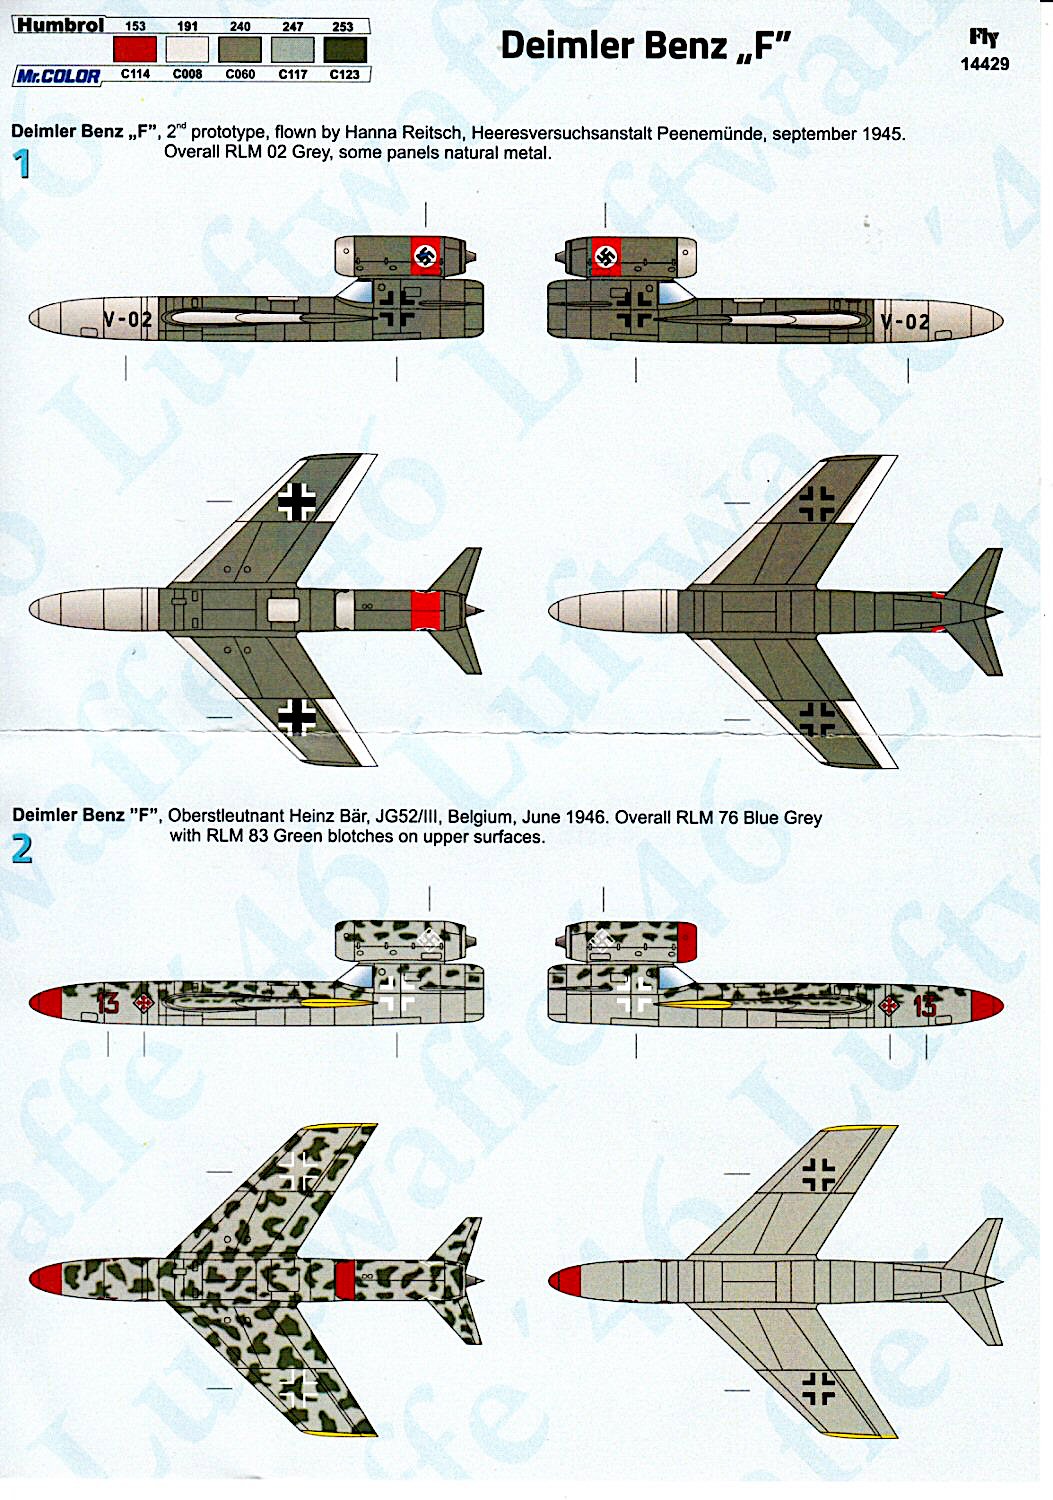
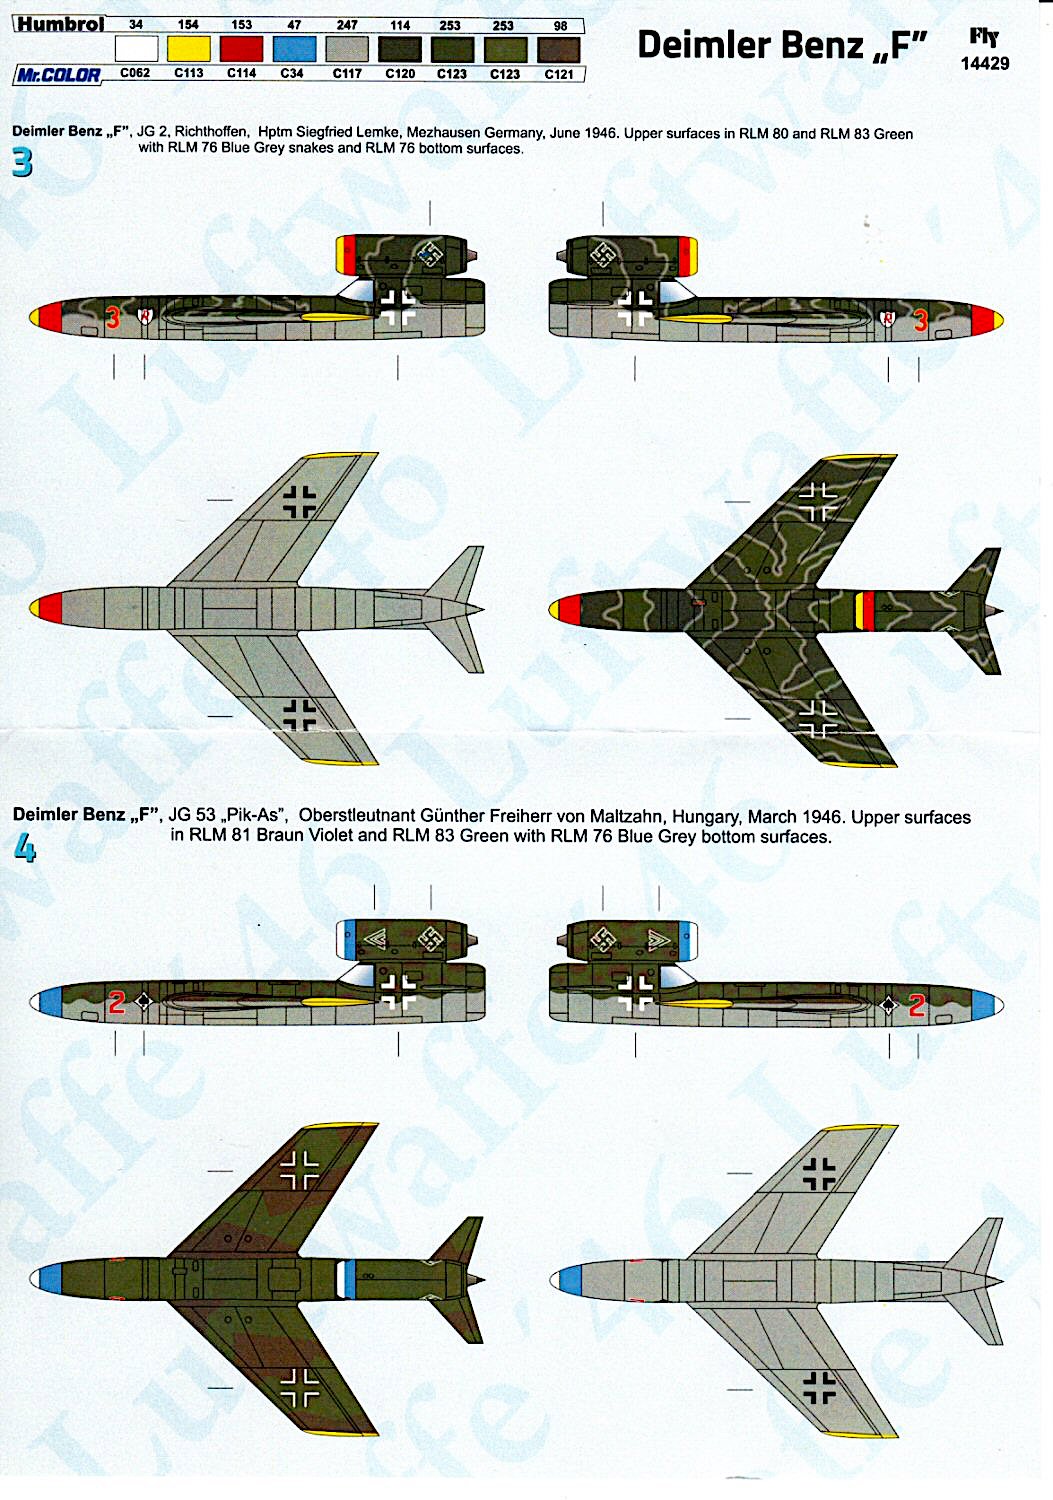
The Project C aircraft apparently never flew, and the F never reached the prototype stage. Therefore, this model qualifies for “Luftwaffe 46”. The four sets of aircraft markings in this kit are supposed to be from the Luftwaffe from September of 1945 to June of 1946.
In my opinion, this project is sort of like the Japanese “Okha” flying bomb. The pilot is supposed to parachute to safety, but at the speed of the plane, surviving the parachute descent is not highly likely. And the chances of surviving the local cops or populace after delivering 2 - B-29 loads of explosives might be pretty slim too.
Construction
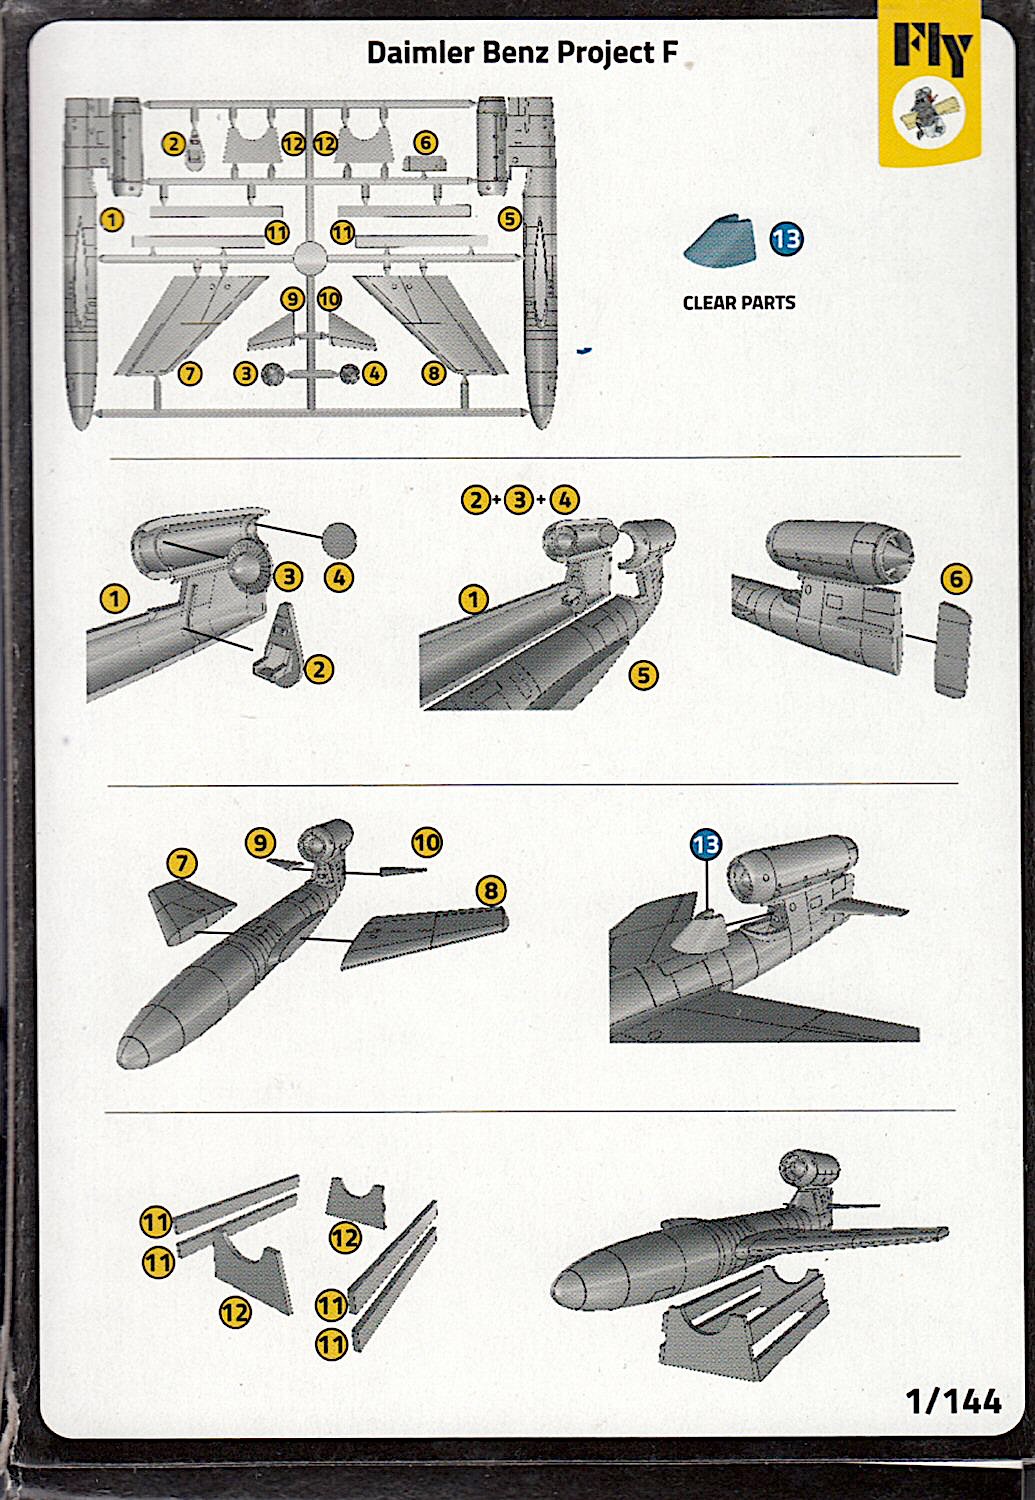
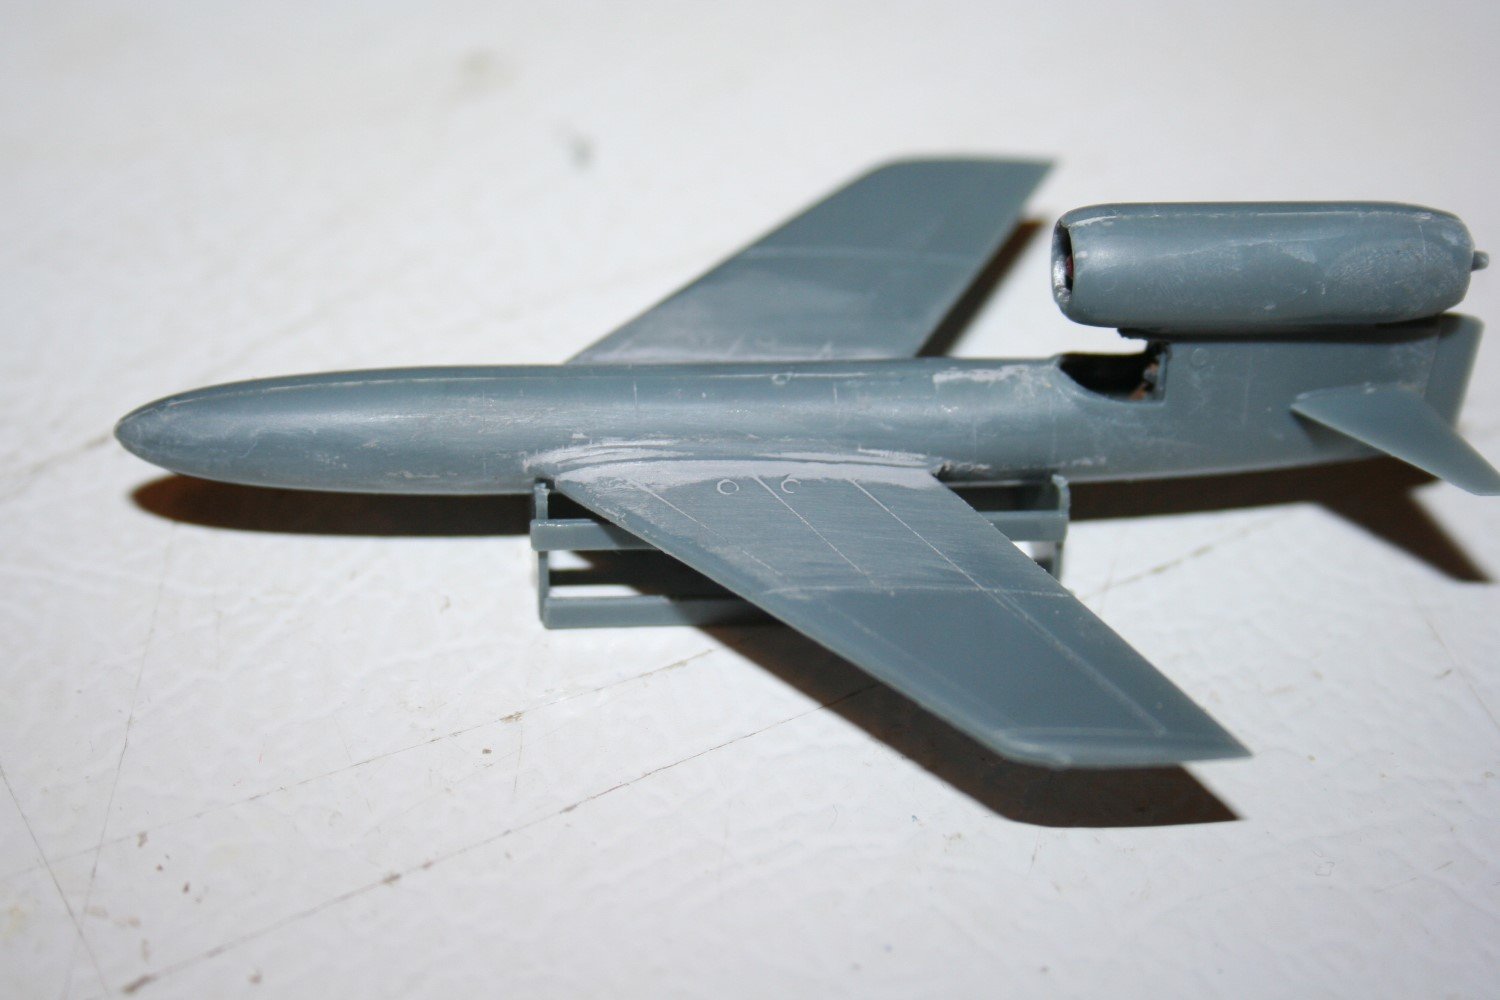
The kit is pretty basic, although I give them good marks for actually putting an interior in the craft. Not too many years ago, there were 1/144 jets without even an opening under the canopy, let alone a seat, stick, or instrument panel.
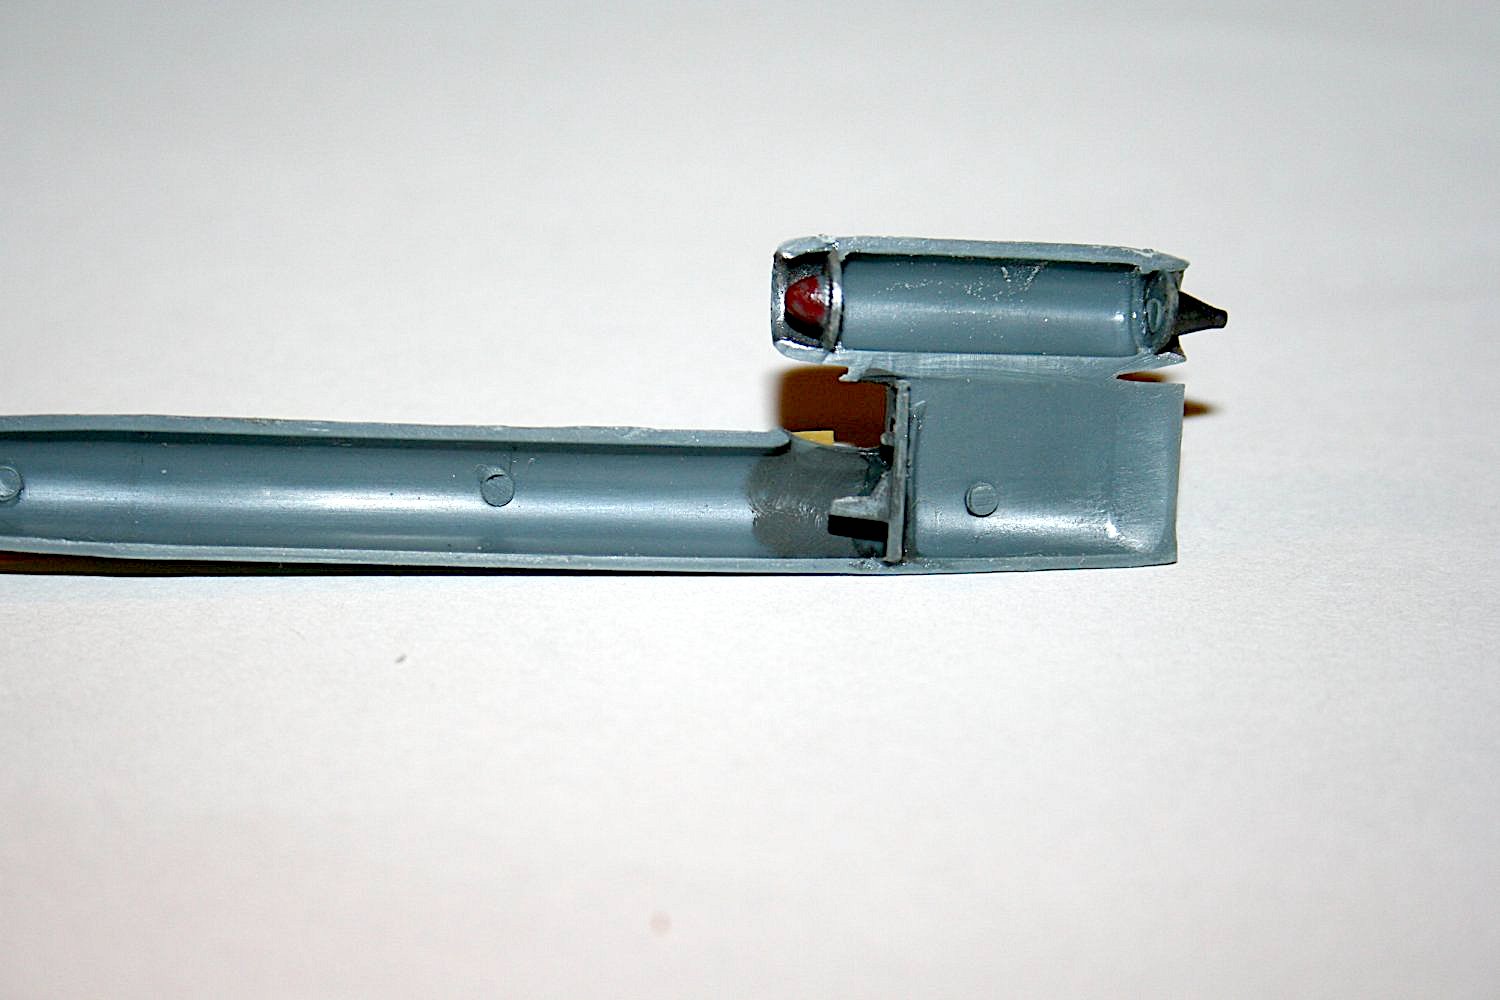
The assembly instructions are printed on the back of the box. There are 10 parts for the aircraft, and 6 parts for the stand. The interior is installed, the jet intake and exhaust parts are inserted, and the fuselage halves are put together. I had to do some file work on the jet intake and exhaust to get the engine together, and the bulkhead behind the seat also required a bit of work. There are no locating methods for the fuselage halves, but the fit was pretty good. I had to do just a little putty work on the seams
The wings and horizontal stabilizers are just glued to the fuselage sides. There are indicators for locations. I did some sanding on the wing roots to get a better fit, but still had to use putty to get a good smooth connection. The horizontal stabs went on nicely, no putty needed.
I assembled the stand which required a little bit of dexterity to keep the parts straight and even while applying the glue, but I managed.
And I was ready to paint the plane.
Painting
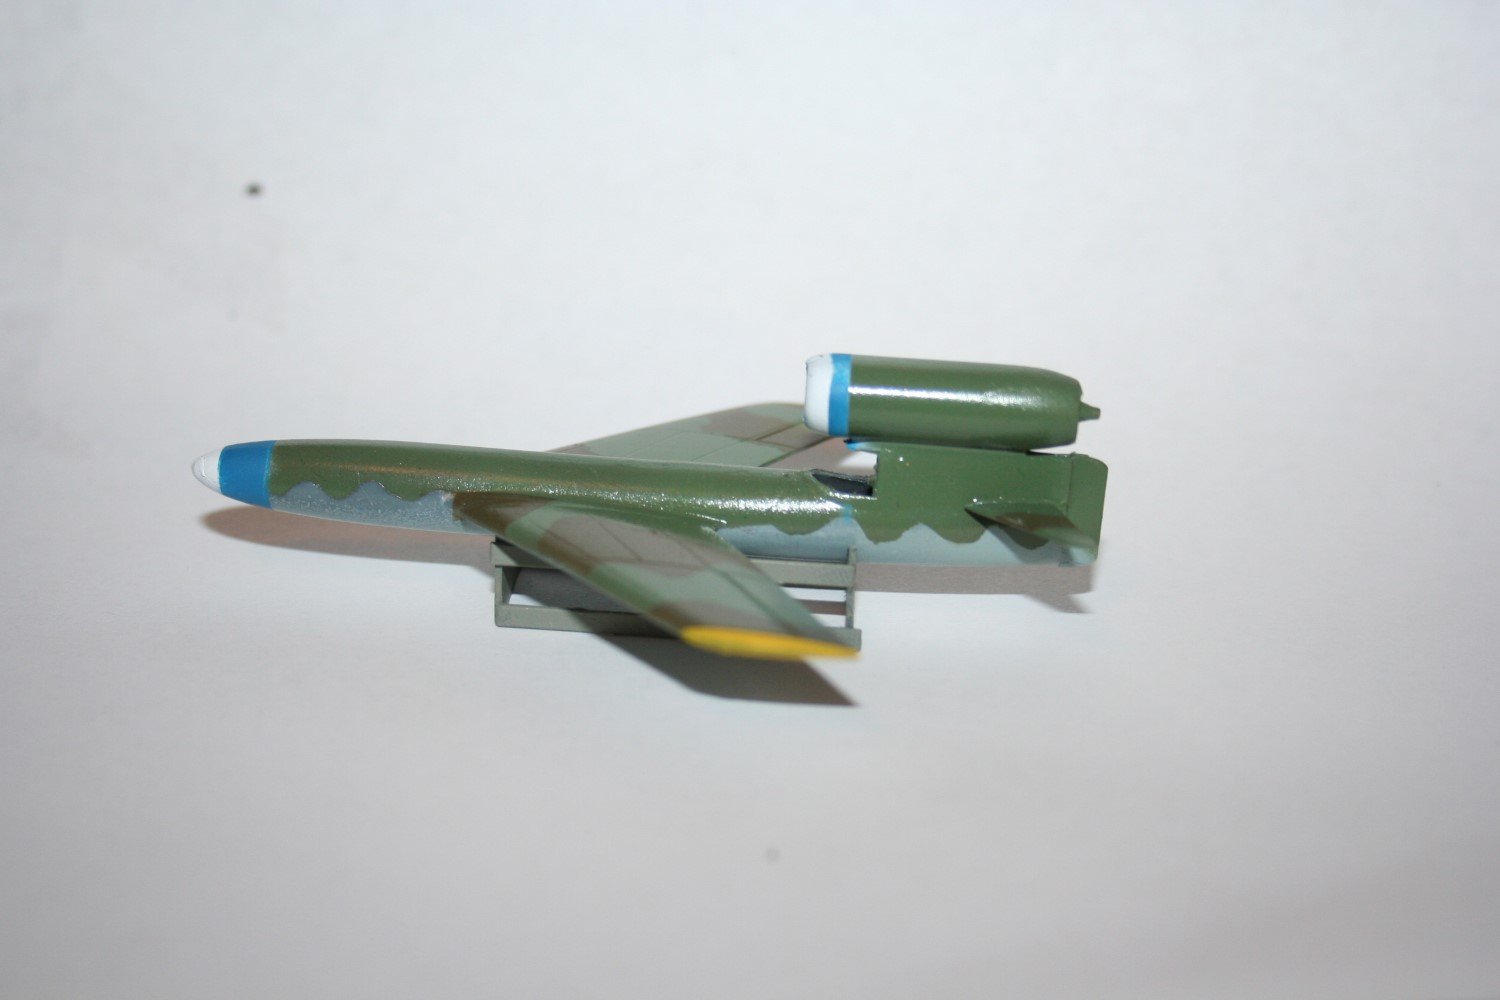
I painted the bottom RLM 76, light blue. I then cut some Tamiya tape in a wave pattern, and masked the bottom. I then painted the top RLM 81 Braun Violet. I used an enlarged and printed scan of the paint instruction to make masks for the top. I then painted the top with RLM 83 Green. I masked the front of the jet pod and the nose, and painted these areas white, followed by a blue stripe. I put on a coat of Future to give the decals a gloss base, and I was ready for decals.
I also painted the support stand 02, RLM gray.
Decals
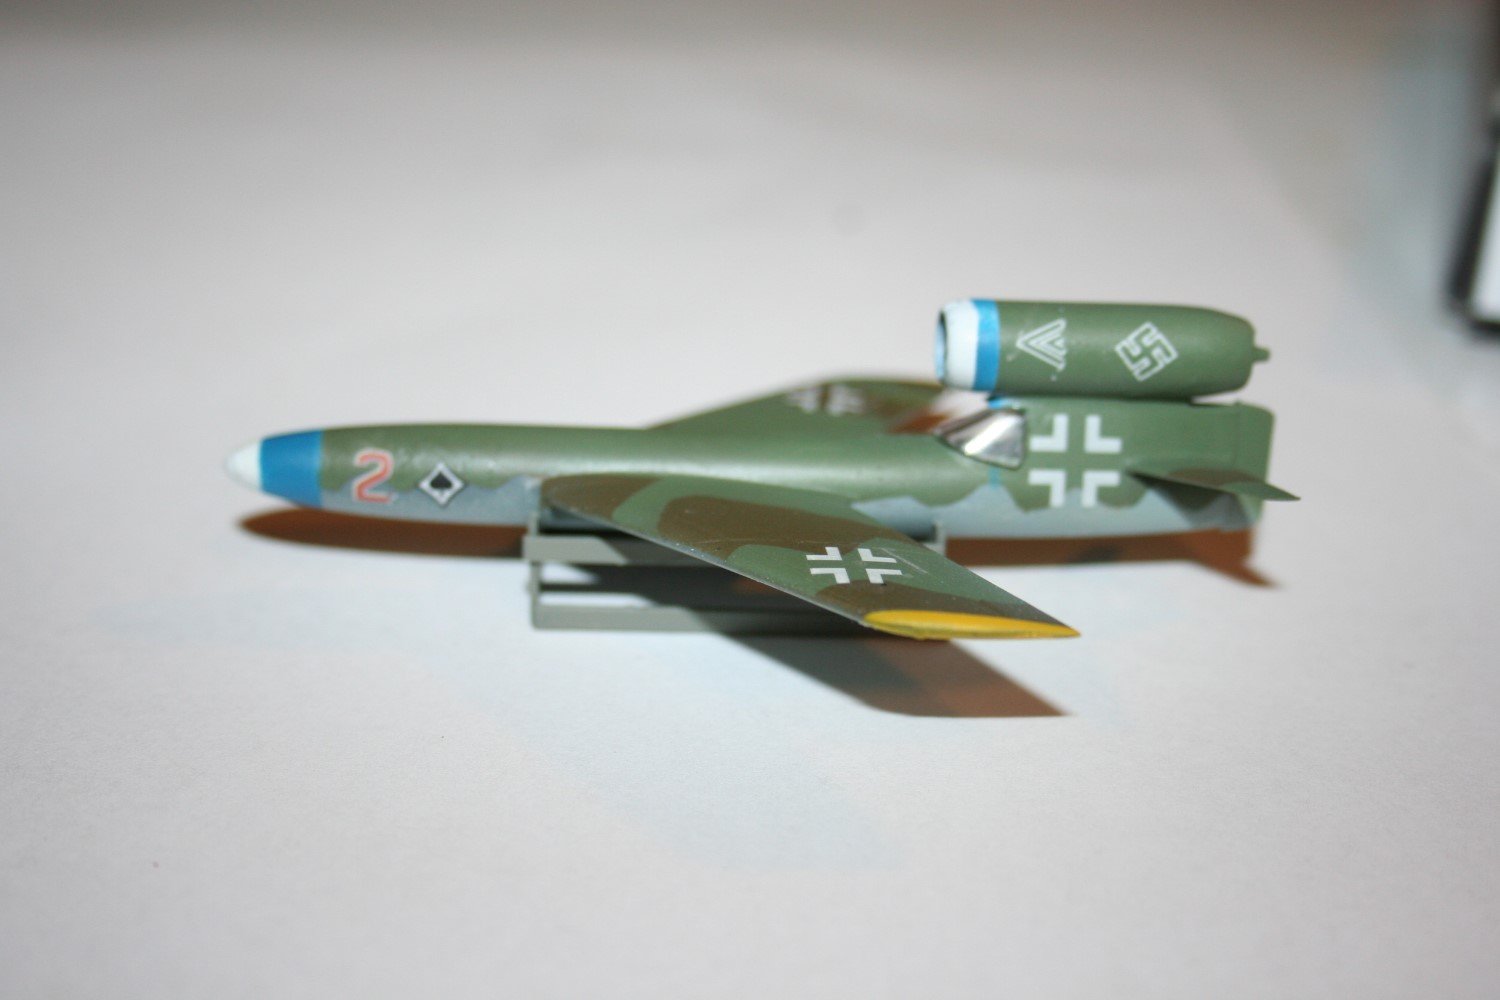
The decals were good. My personal method for the first impression is how long the decals take to be ready to slide off the paper once they’re dipped in water. These are above average in this area. Also, the decals were pretty easy to handle, and didn’t tear or fold during application. Again, above average.
My problem with the decal application was that the decals are printed on a very pale blue sheet, and the white markings were hard to see clearly. Additionally, the instructions have lines pointing to each decal on the model. But I suspect there were supposed to be numbers, telling you which decal to use, and the numbers just aren’t there. This makes it really hard to determine which of the white crosses to use in which place, and which other markings are used, and where they go. Especially the white ones.
Construction Continued and Concluded
When the decals had a chance to set, I put a coat of clear flat over the whole model. The only thing left to do was to install the canopy.
Overall Evaluation
Well Recommended. If you’re interested in “late war” Luftwaffe, or if you’re just a fan of “What If”, this kit will interest you. It’s not a complicated build, and it turns out a good looking aircraft. And no one’s going to be able to nit-pick the markings.
If you’re really interested in the Daimler-Benz projects, Anigrand makes a 1/144 model of the Project C “mother ship” for the Project F. And if you don’t want to do Luftwaffe, Fly also has two other kits of the Project F, one “captured”, with US, British, and Russian markings, and the other “Axis” with Italian, Rumanian, Bulgarian, and Japanese markings.
Thanks to Fly Models for providing the interesting kit, and to IPMS USA for letting me build and review it.


Comments
Add new comment
This site is protected by reCAPTCHA and the Google Privacy Policy and Terms of Service apply.
Similar Reviews