
Crusader Mk.III with British Crew
Modeling powerhouse Italeri has re-released an old classic; the British Crusader Mk III, this time with updated decals and an all-new figure set. The Crusader was used extensively in the North African campaign and, while ideally suited for combat in desert terrain, it’s light armor and moderate armament were not able to adequately match the German anti-tank guns and vast mine fields, causing substantial losses on allied forces.
Opening the Box
After building newer kits with hundreds of parts, photo-etch sheets, brass barrels, and multi-part track links, opening the Italeri Crusader box was breath of fresh air.
Even though my finish would be complex (due to of the amount of on-board detail and the hard-edge camouflage), the actual build would be a breeze due to the low parts count. The plastic is soft, free of flash, and reasonably detailed. There are some visible ejection pin marks that will need to be filled and/or covered with weathering, but overall, everything looks pretty good.
The contents of the box include:
- 3 sprues in soft, dark green plastic, packaged in separate bags
- 1 nylon sprue with six track sections
- 1 8-page, folding instruction sheet with 13 steps
The kit comes with three finishing schemes represented using two-tone, three-view drawings, and a medium sheet of decals, perfectly registered.
These schemes include:
- 2nd Dragoons Guard (Queen’s Bay), 2nd Armored Brigade, 1st Armored Division, Second Battle of El Alamein, October 1942
- 10th Royal Hussars (Prince of Wales’ Own), 2nd Armored Brigade, 1st Armored Division, El Alamein, November 1942
- Royal Army Unknown Unit, El Alamein, November 1942
The Instructions
The Italeri instructions contain an introduction written in six languages (including English) and describe the assembly steps using symbols only. Paint color callouts only list paints from the Italeri Acrylic Paint line, but Federal Standard (FS) paint codes are provided as well. The black and white, exploded-view images are clear, relatively uncluttered, and free of errors.
The sprues hold some part numbers, but not all, and the instructions show images that likewise are missing (some) part numbers. Thankfully, the instructions also contain a parts map showing the sprues and part numbers - a little sleuthing will clear things up.
The final two pages of the instructions are printed in two-tone color and show the vehicle paint schemes and a nice painting guide for uniforms and personal equipment for the figures.
Things to consider before building:
The Crusader as produced by Italeri is a pretty simple build. The parts fit, the build sequence is logical, and the images in the instructions are clean and helpful. Depending on what scheme you choose to finish the vehicle, you might have to detour off the planned route in the instructions to accommodate different painting steps. In the end, I separated the following parts/assemblies over to a sticky-board, adding these at the end of the build, before weathering: antenna (2), exhaust manifolds (2), spare track (4), external fuel tank, and the personal equipment I hung off the port side. Everything else was attached according to instructions and painted with the rest of the vehicle. The two tow/track cables are rigid and do not fit across the vehicle deck well, so you might consider scratch-built replacements (I left them off).
Finally, if you wish to mount any of the provided figures in and on the vehicle, you will need to open up the driver’s hatch, and add interior detail to both it and the commander’s hatch.
The Build
Lower Hull and Running Gear
The way the lower hull comes together in Step 1 is a bit unusual, but everything fits and by the end of Step 3 you end up with a pretty solid main hull with running gear. In Step 3, I left off the 10 circular spacers (Parts 10a). You will need to include them if you want the wheels to be able to turn (I didn’t).
I had a minor fit problem with the two front fenders (Parts 16C/17C), but everything else came together without issue.
Main Deck and Rear Hull
Once I had the lower chassis built up, it was time to address the somewhat busy main deck. In Step 5, the exact placement of the main storage bins on each side is vague. Choosing to make the bins flush with the sides opened up some gaps between them and main superstructure – I probably made the wrong choice here, but either way, the gaps are thin and may be right – it’s hard to tell from photographs and the 3-view drawings.
The track sections in Step 5 will actually glue down with modeling cement – even though Italeri says to use superglue for them. Perhaps my modeling glue (Testors ‘Black Bottle’ liquid cement) simply melted the plastic underneath the track enough to grab on to the pieces. I had my second fit issue with Part 40A, which needed a little carving to push into place.
In Step 7 I left off the tops of the exhaust manifolds (Parts 48C/49C) to paint and weather them separately, but attached everything else.
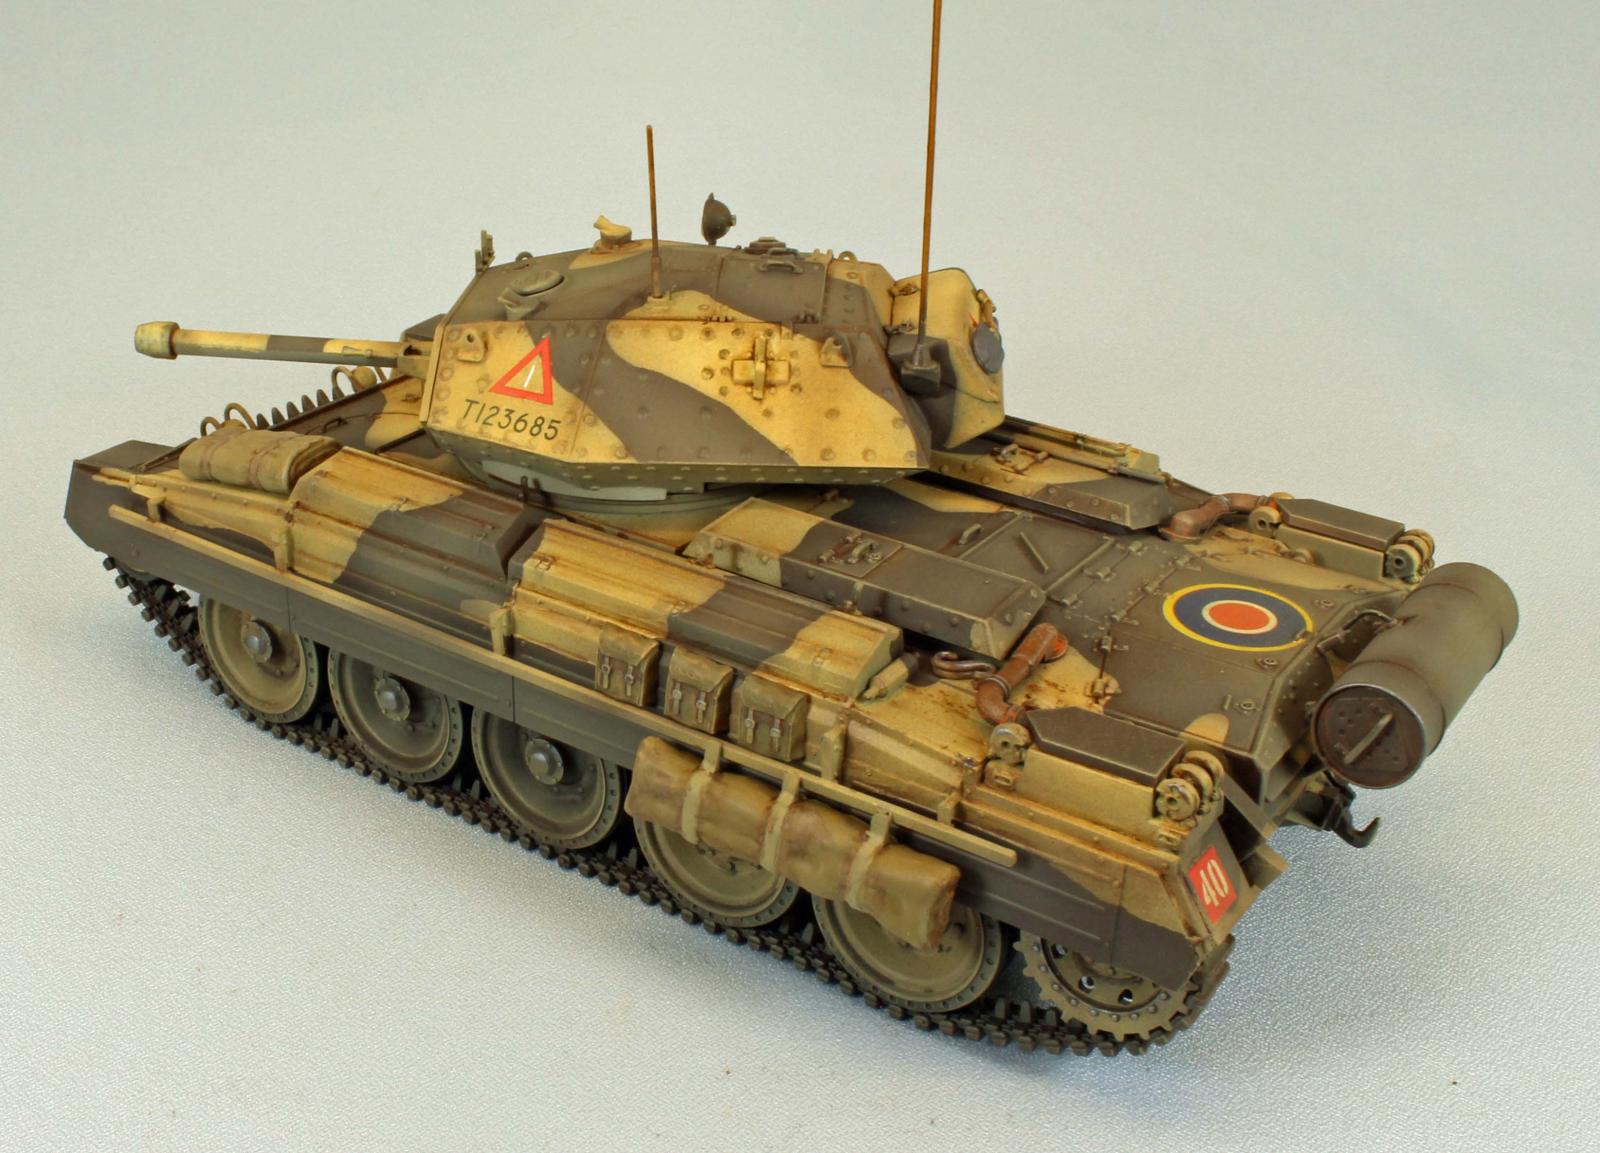
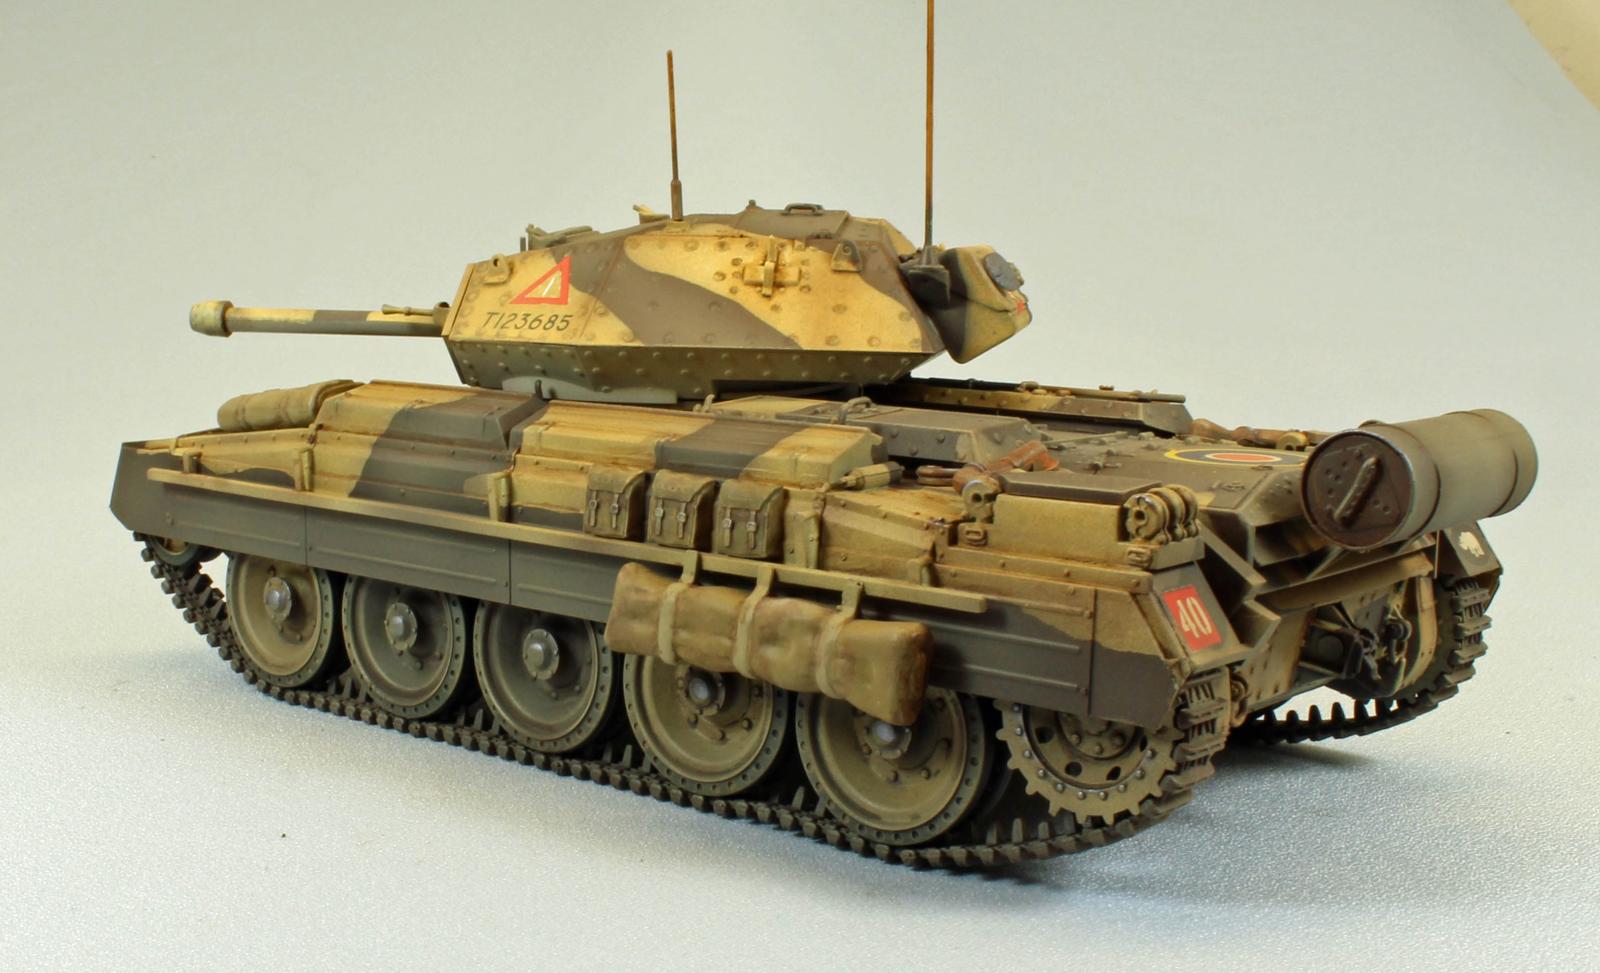
The parts at the rear of the vehicle are a little fiddly, but can be coaxed into place well enough. You will need to completely remove the seam lines from the external fuel tank since it sticks right up into the air, in full view, on the finished vehicle – ask me how I know.
Turret and Remaining Exterior Detail
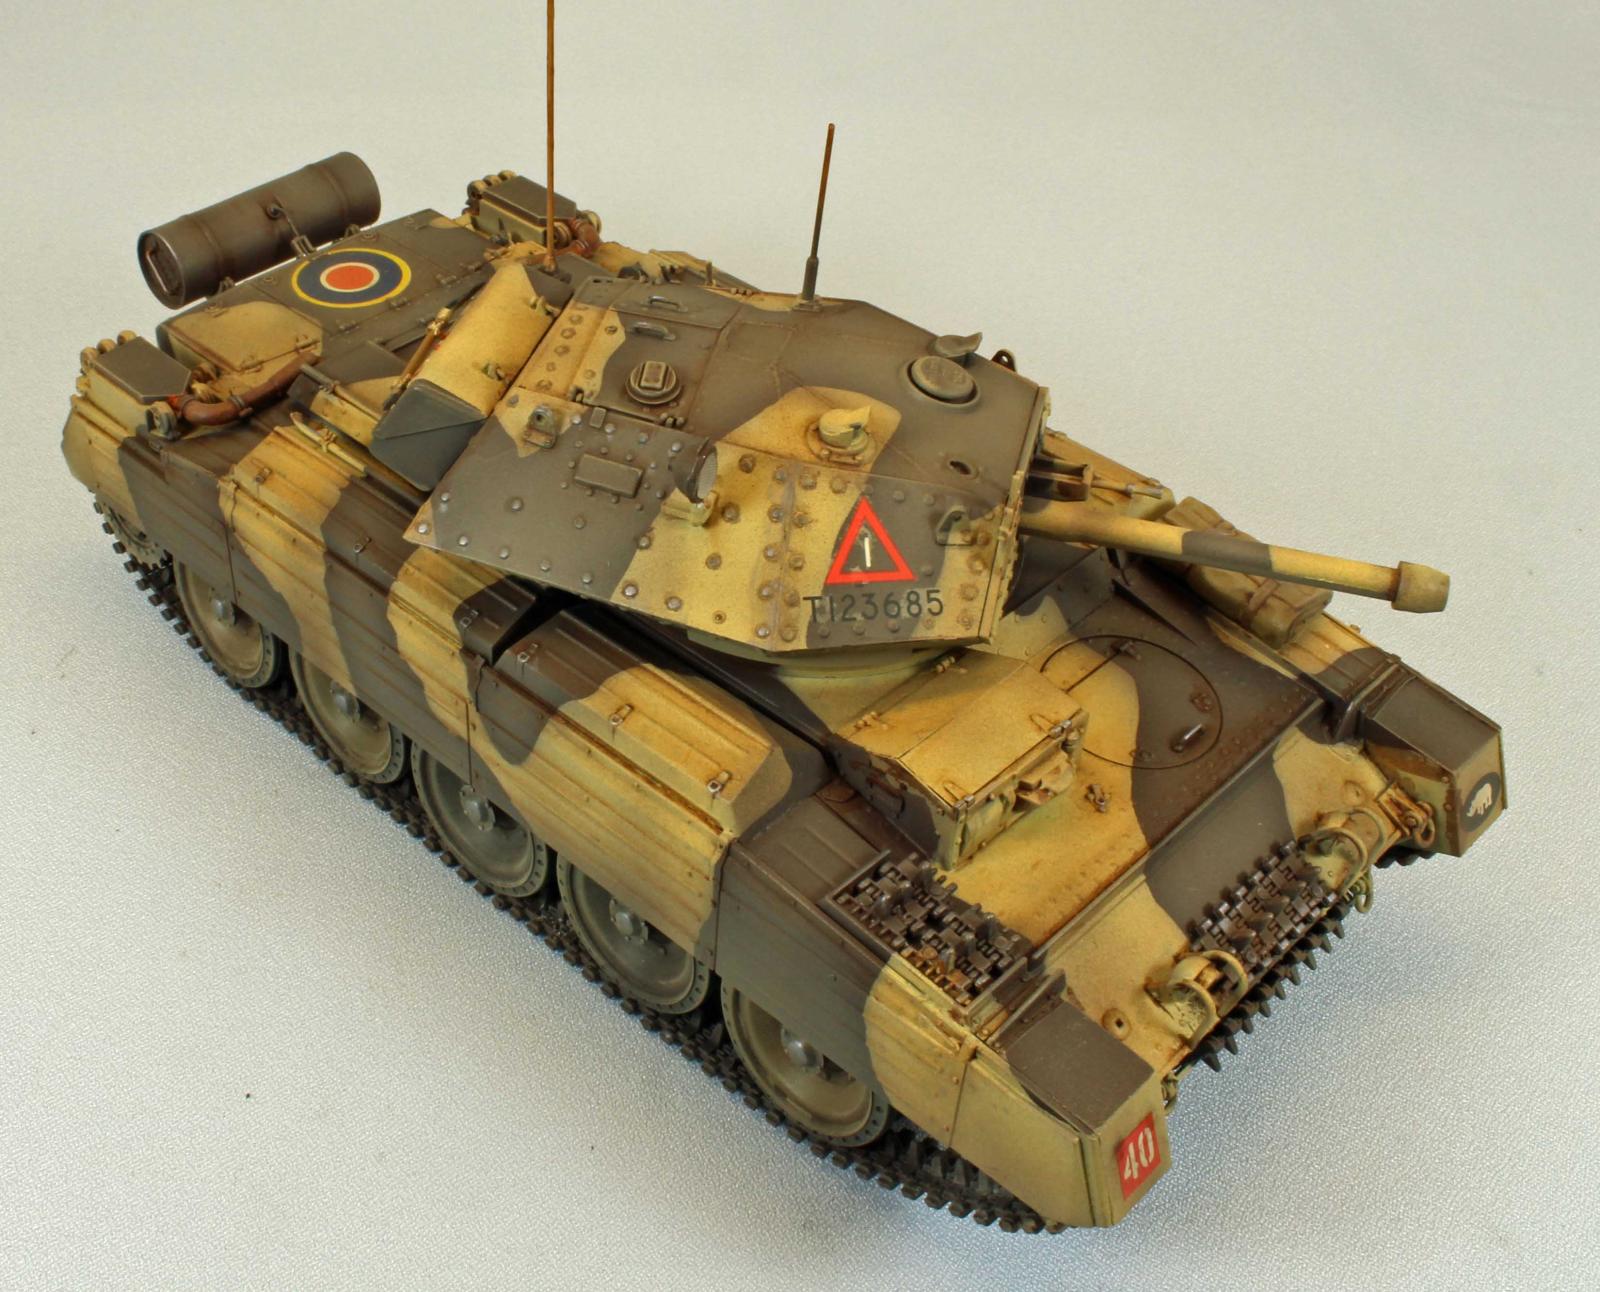
The simple, two-piece turret comes together well in Step 8, but I recommend painting the lower portion an off-white before masking it off and attaching it to the upper turret piece. If you choose this finishing scheme, this approach will save you some time and effort. The three pieces (Parts 69B, 70B, 71B) that make up the main hatch have no interior support and will take some finesse during assembly – I left those to dry overnight before moving on.
Everything else came together fine. There are a number of parts that can break off at this point in the build; a careful approach to handling pays off here.
Final Assembly and Track
The two runs of ‘rubber-band’ track responded well to ‘thin’ superglue, and held fast when stretched over the gear (later on, after painting). Say what you will about this kind of track – for me, it looks fine, is dead-simple to use, and allows me to move ahead without any hassle. When the side skirts are added (later), even the join areas are hidden from view. I commend Italeri for sticking to their guns here, and not making the track a chore for beginners.
As I said before, the tow/track cables are rigid and do not fit around the various deck protuberances as they should. I left them off, but chose to add the port-side rack included in the kit. Some modelers will want to replace both items with scratch-built versions that will improve on what is supplied in the kit.
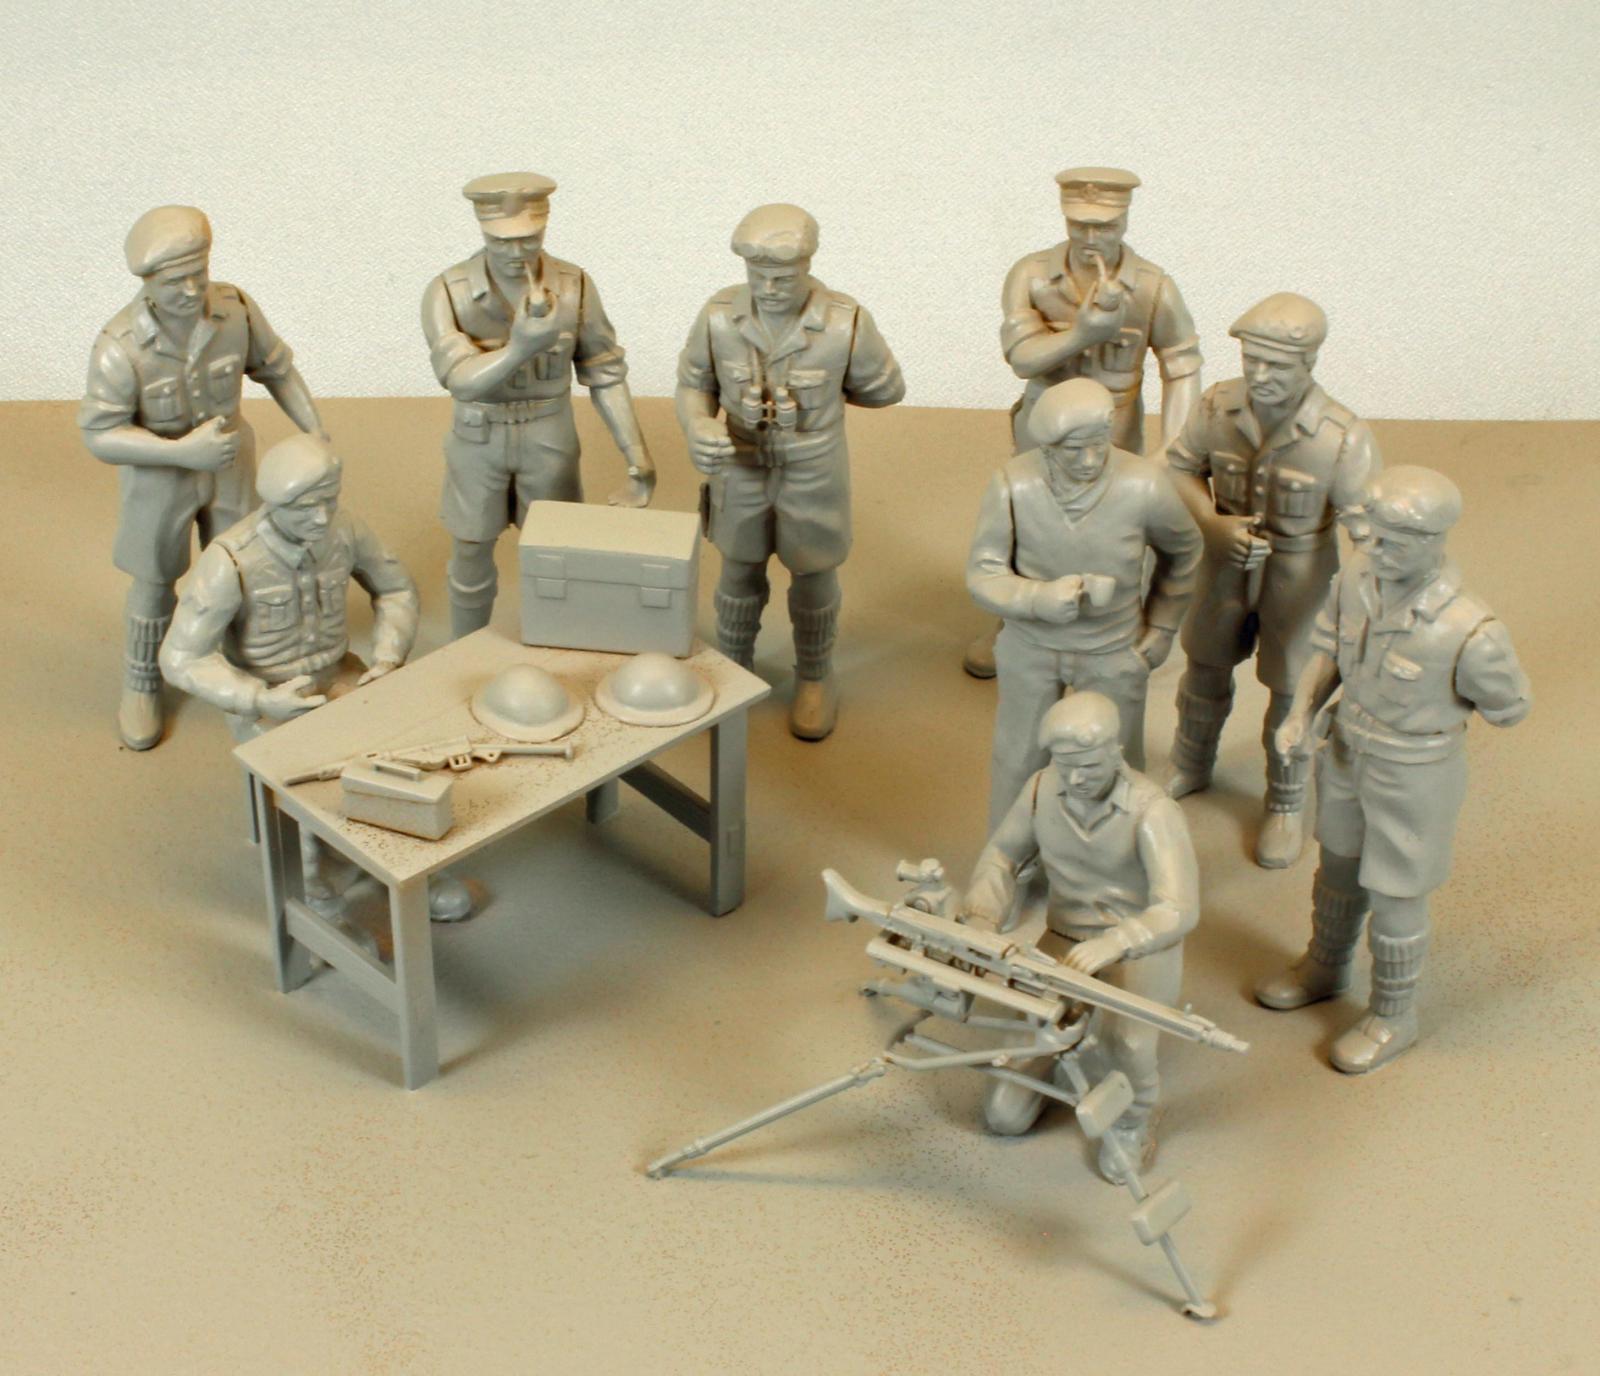
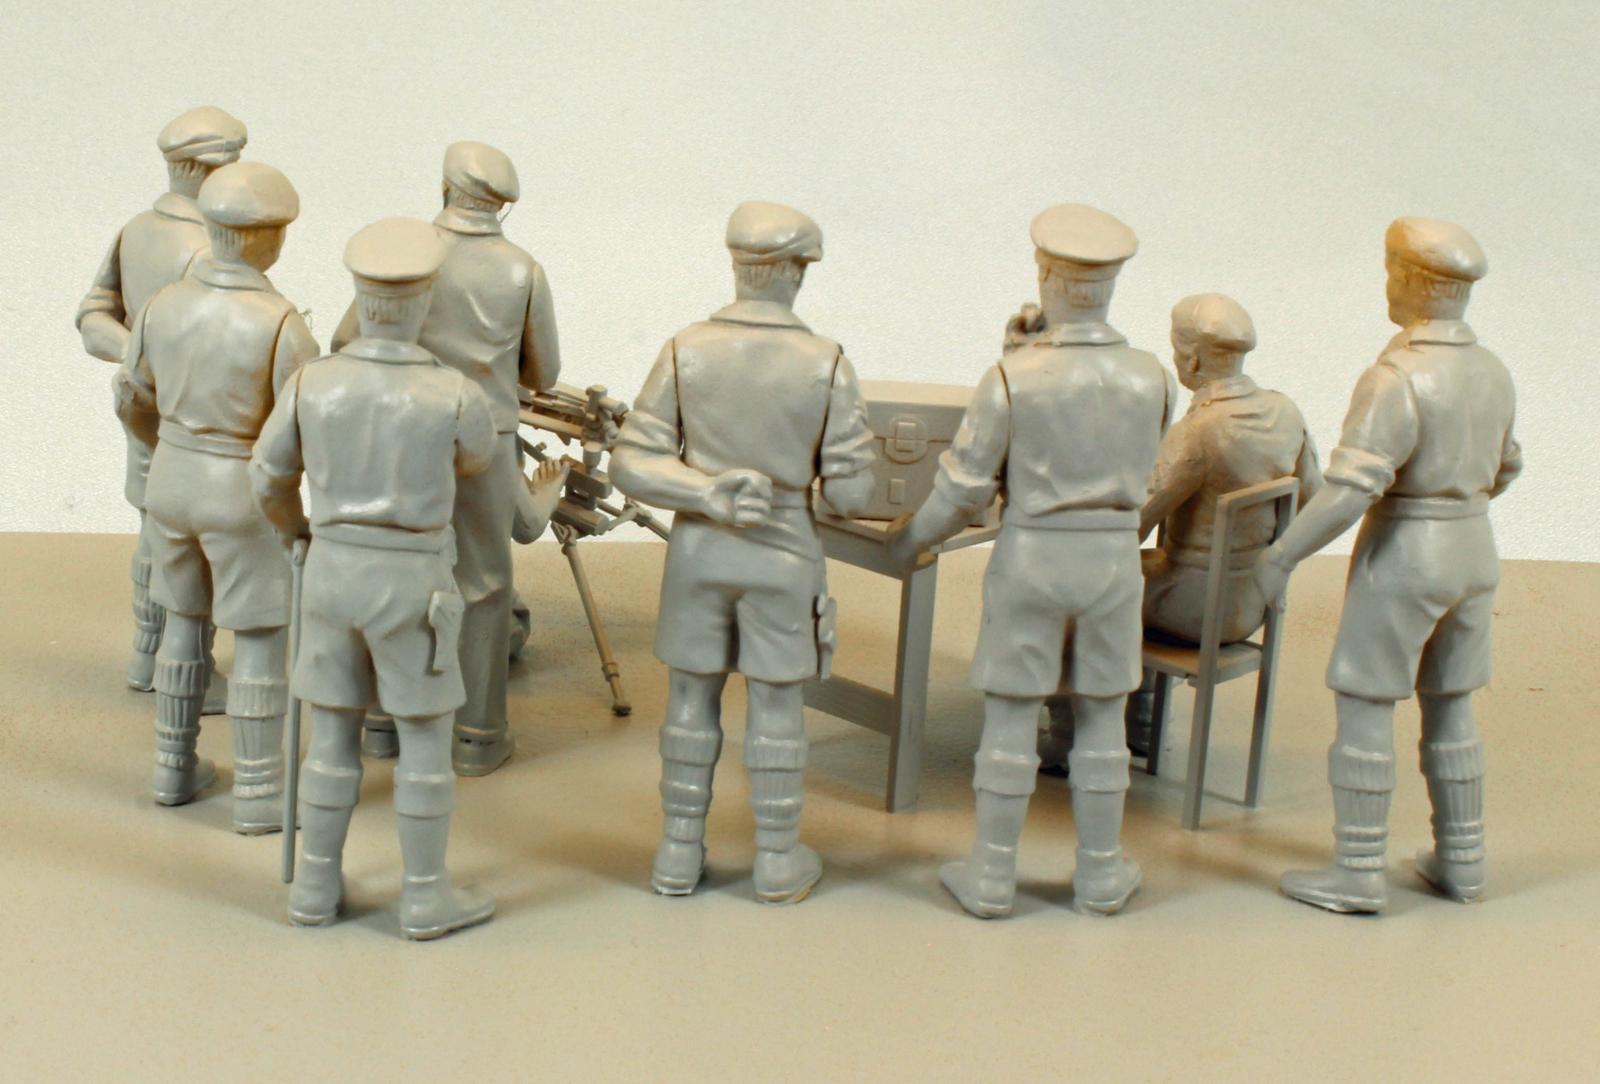
Figures
Italeri supplies no less than nine figures in the kit, along with a decent representation of a German MG42 machine gun, a table, chair and other assorted personal equipment. Some of the figures look ‘familiar’, even to someone who doesn’t know British commanders that well! I could have spent the same amount of time on the figures as I did on the kit, so, for this review, I just put them together and hit them with some Tamiya primer to give the reader an idea of what comes in the box. While Italeri figures may not occupy the top rung of detail that is available these days, I feel they are sufficient for most modelers who pick up this kit. Two or three of them (could) be assembled in slightly different poses to fit into the open hatches or on the main desk of the vehicle.
Painting, Decals and Finish
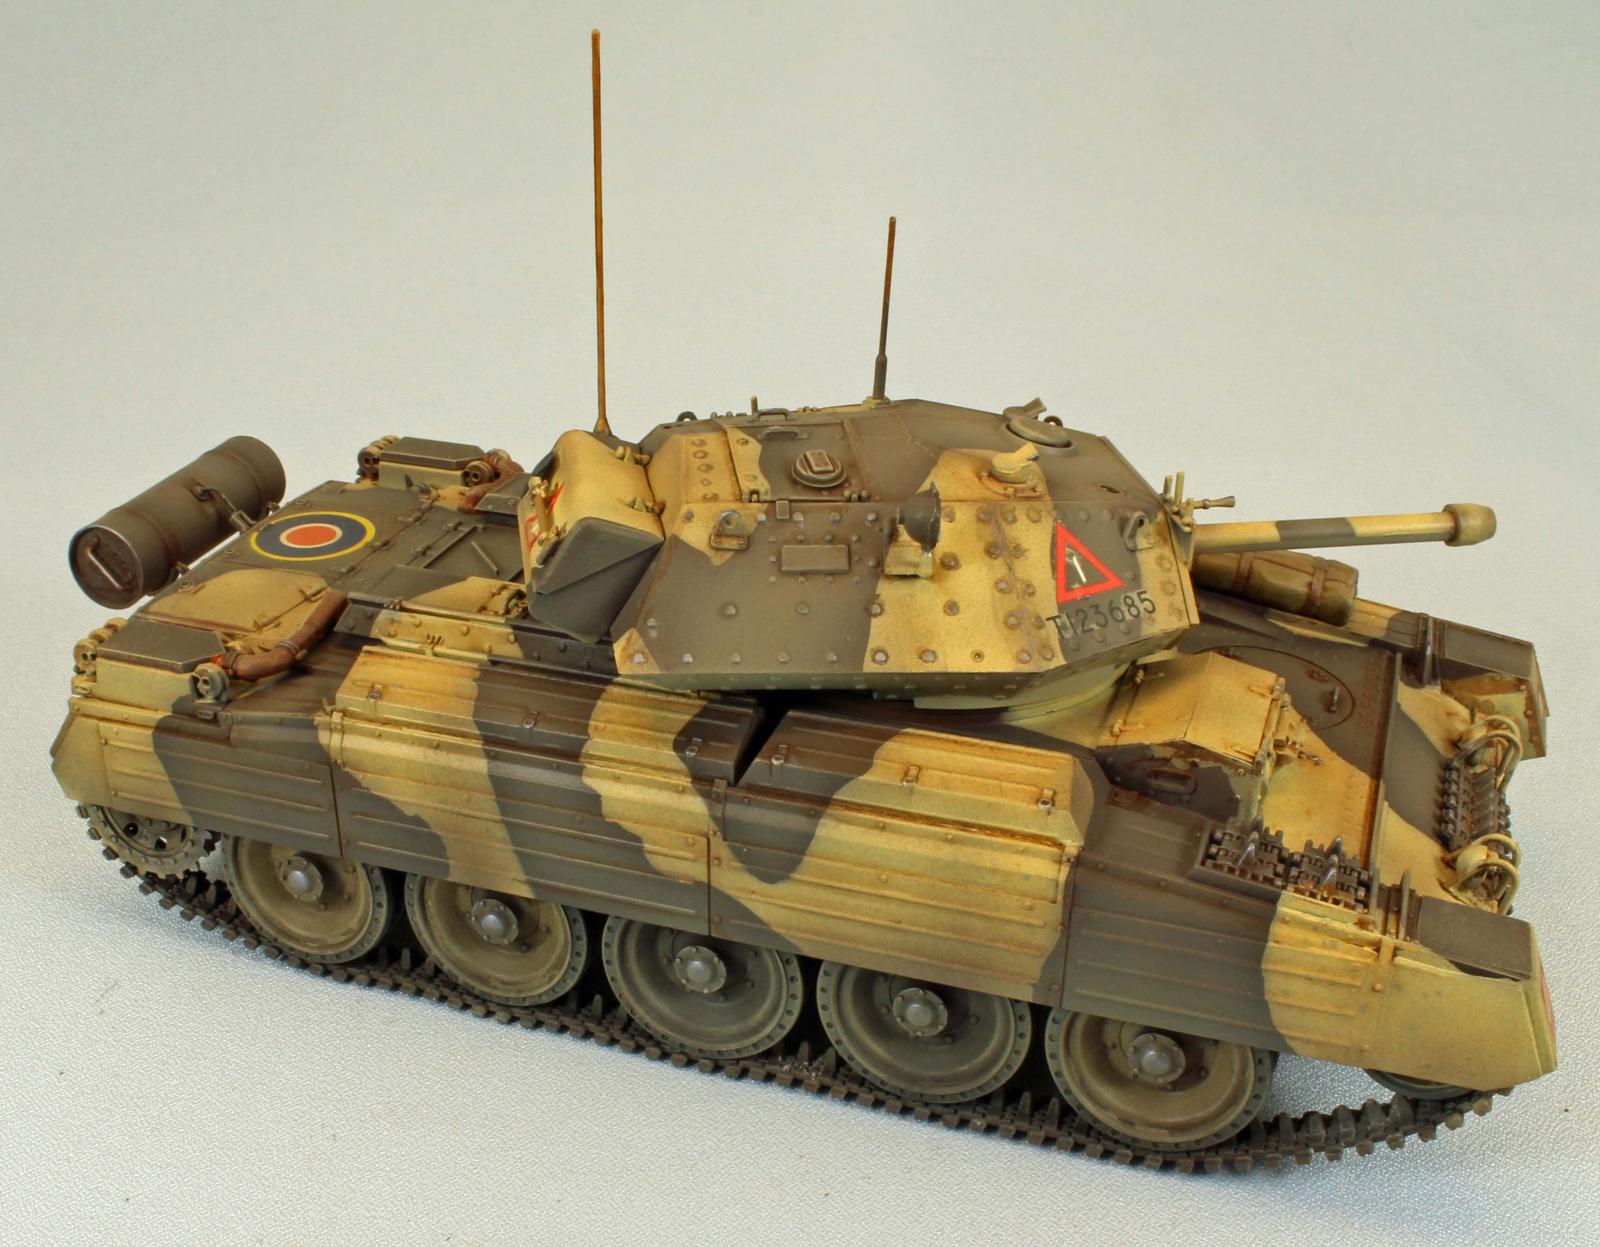
There is no shortage of images of the Crusader Mk. III online, and more than a few color schemes to work with. I chose the bold, two-color desert scheme, with the off-white lower turret and main weapon. Since I was planning to apply a significant amount of weathering, I felt that the bright demarcation between the hard-edge colors would turn out somewhat subdued. Once I finally was able to remove the top off my tin of AKI Panzer Putty (!!) I was ready to go to work.
Here is a breakdown of the colors and materials I used to finish the build:
Painting: Main Hull, Turret and Side Skirts
- Primer: Ammo 0110 SCC1A ‘Yellow Top’ Acrylic (British Brown 1941-42)
- Post Shade: NATO Black lower hull, tires very carefully along cracks and crevasses.
- Once the Panzer Putty was applied and left to settle overnight…
- Main Camouflage: Ammo 0061 ‘Yellow Top’ Acrylic (Warm Sand Yellow)
- Lower Turret and lower Main Gun: Tamiya XF-2 Flat White
Painting: Track Sections and Guns
- Primer and Base Coat – Tamiya XF-84 Dark Iron
- Interior guide posts on Track – Tamiya XF-16 Flat Aluminum
- Overall ‘bling’ – Uschi Chrome Metallic pigment
Detail Painting
- Small bags: Vallejo MC 70.988 Khaki
- Straps: Vallejo MC 70.821 German C. Beige WWII and 70.818 Red Leather
- Larger Baggage: Vallejo MC 70.880 Khaki Grey
Weathering (glossy surface)
- Mr. Hobby Mr. Weathering Color Enamels - Stain Brown – all surface detail, stumped with Mr. Hobby thinner.
- Pin Wash using Mig Dark Wash heavily thinned with Mona Lisa
- Treated the track with AKI Track Primer
Weathering (flat surface)
- Dusting of Ammo 0110 SCC1A ‘Yellow Top’ Acrylic (British Brown 1941-42)
- Overall ‘bling’ and bolt detail using Uschi Chrome Powder.
- Overall application of dry pigments to areas that needed a little toning, using MIG Russian Earth to darken areas, and European Dust as a mid-level dirt-color dusting.
- The decals went on without any issues using red and blue MicroSol/MicroSet products. I added a British roundel from my spares box – images online show this placed on the rear deck, ostensibly for aerial recognition.
Conclusion
Italieri kits are a great value – they go together well, are reasonably detailed, and are never hard on the pocketbook. If another company has a Crusader Mk III, you can bet that it will cost twice as much and have 3 times the number of parts. My bet is that the final result will be hard to distinguish from what Italeri has produced here, with a little attention. Throughout the build, Italeri’s solid engineering effort allowed me to concentrate less on the assembly, and more on the presentation. The gaggle of figures included in the box only increase the value of this kit. In the hands of a decent modeler, this old Italeri Crusader will remain a favorite (and a heck of a value) for British armor fans.
I would like to thank Italeri for providing this kit for review, and to IPMS USA for giving me the opportunity to review it.


Reviewer Bio
Eric Christianson

Eric Christianson is a father to two boys (Reed and Dean), the President of the Seattle Chapter of IPMS, and a long-time Little League umpire. He is also a devoted husband and companion to a wonderful woman named Jackie who enthusiastically supports his passions. Recently retired as a programmer, his home office has been scratch-built into ‘a perfect model room’. Modeling since he was a boy, Eric mostly builds armor these days, but still dabbles in 1/32nd aircraft and other types of models from time to time. He also enjoys presenting seminars on weathering and technique at local shows. Many of Eric’s kit reviews can be found on the IPMS USA website.
Comments
Add new comment
This site is protected by reCAPTCHA and the Google Privacy Policy and Terms of Service apply.
Similar Reviews