
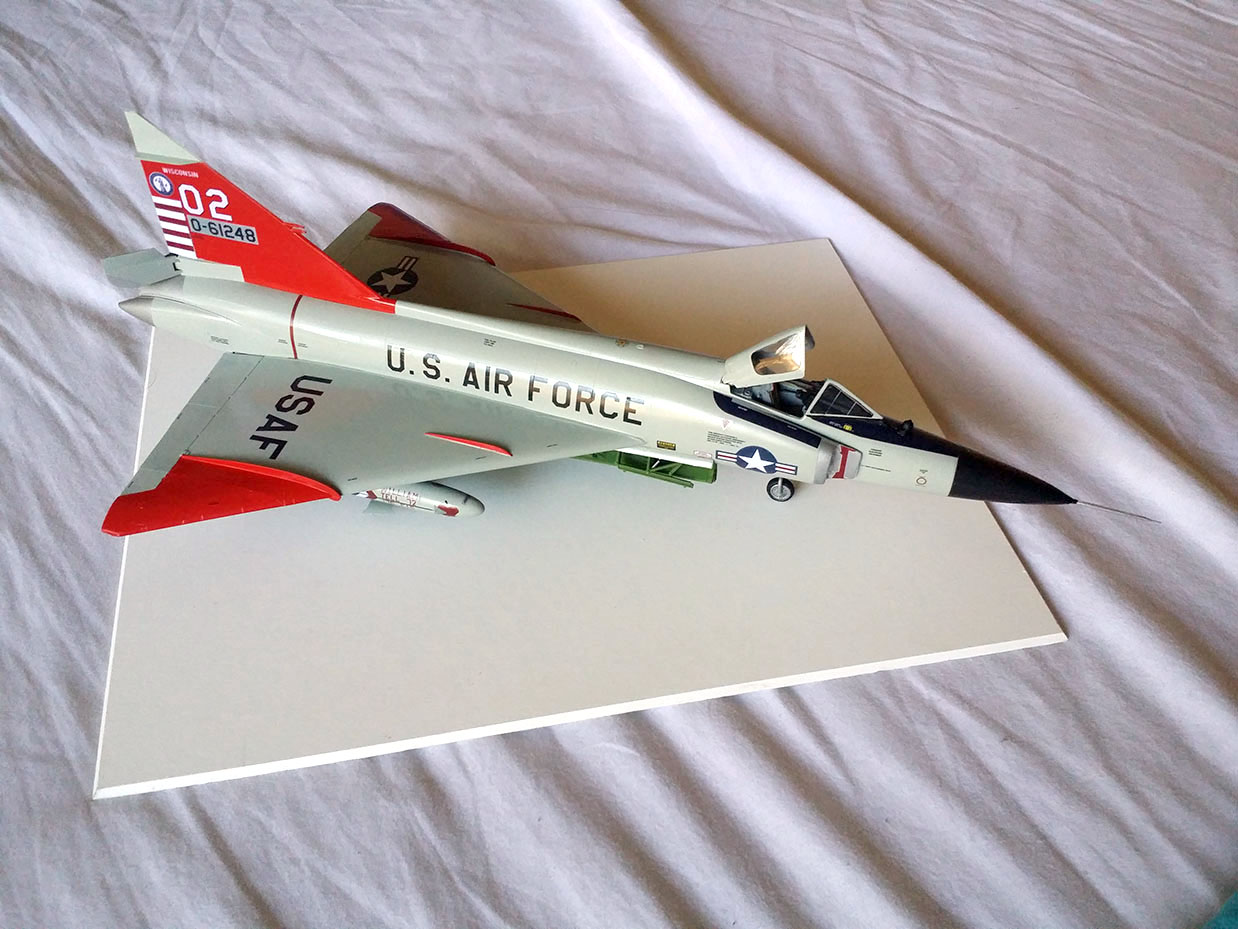
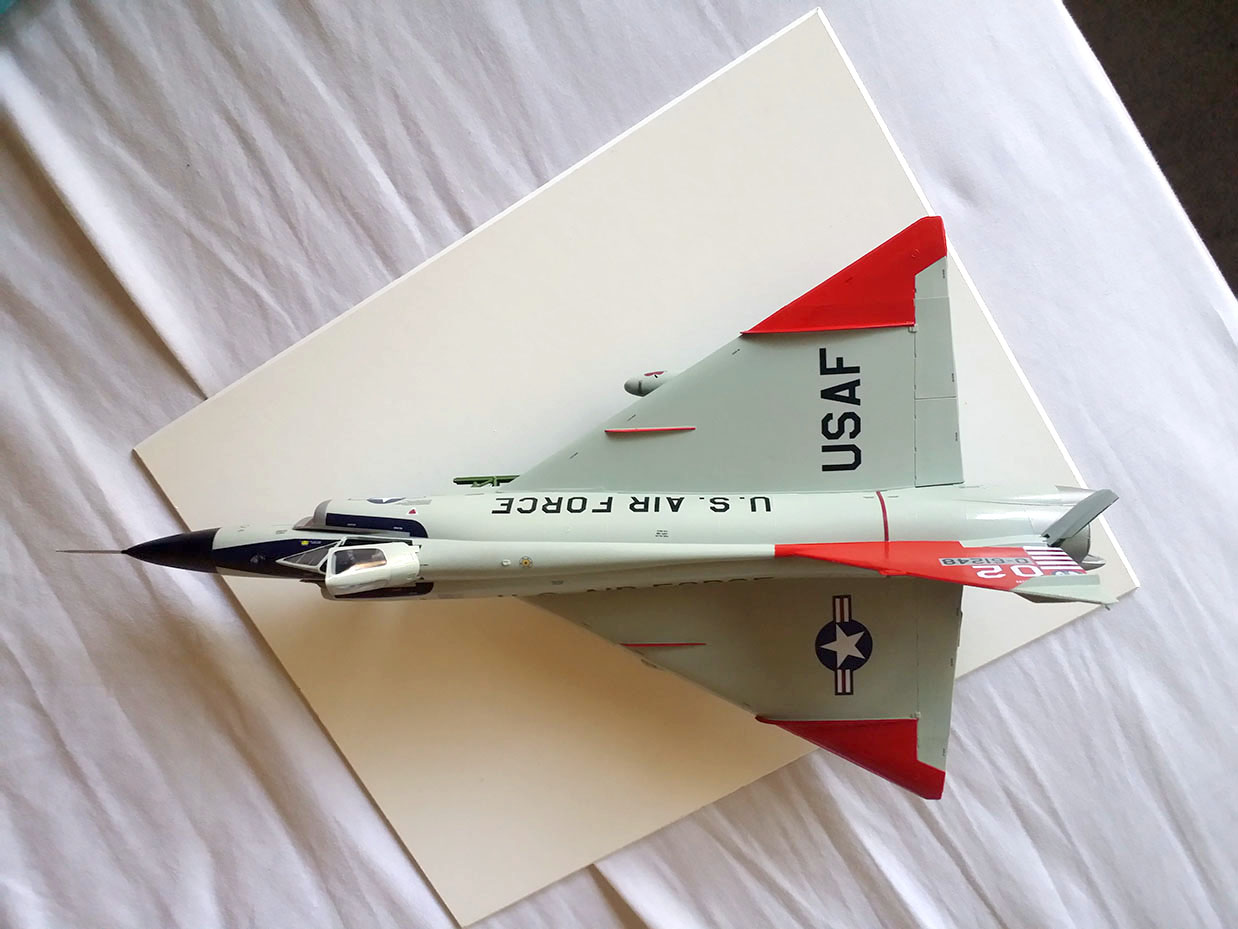
Convair F-102A Delta Dagger Interceptor
Convair’s F-102A originated as a response to a requirement for a Mach 1+ interceptor fighter. Based upon the XF-92 research fighter, the F-102 became the U.S’. first delta-winged fighter. The triangular wing was named after the Greek letter D (delta), which it resembled in shape.
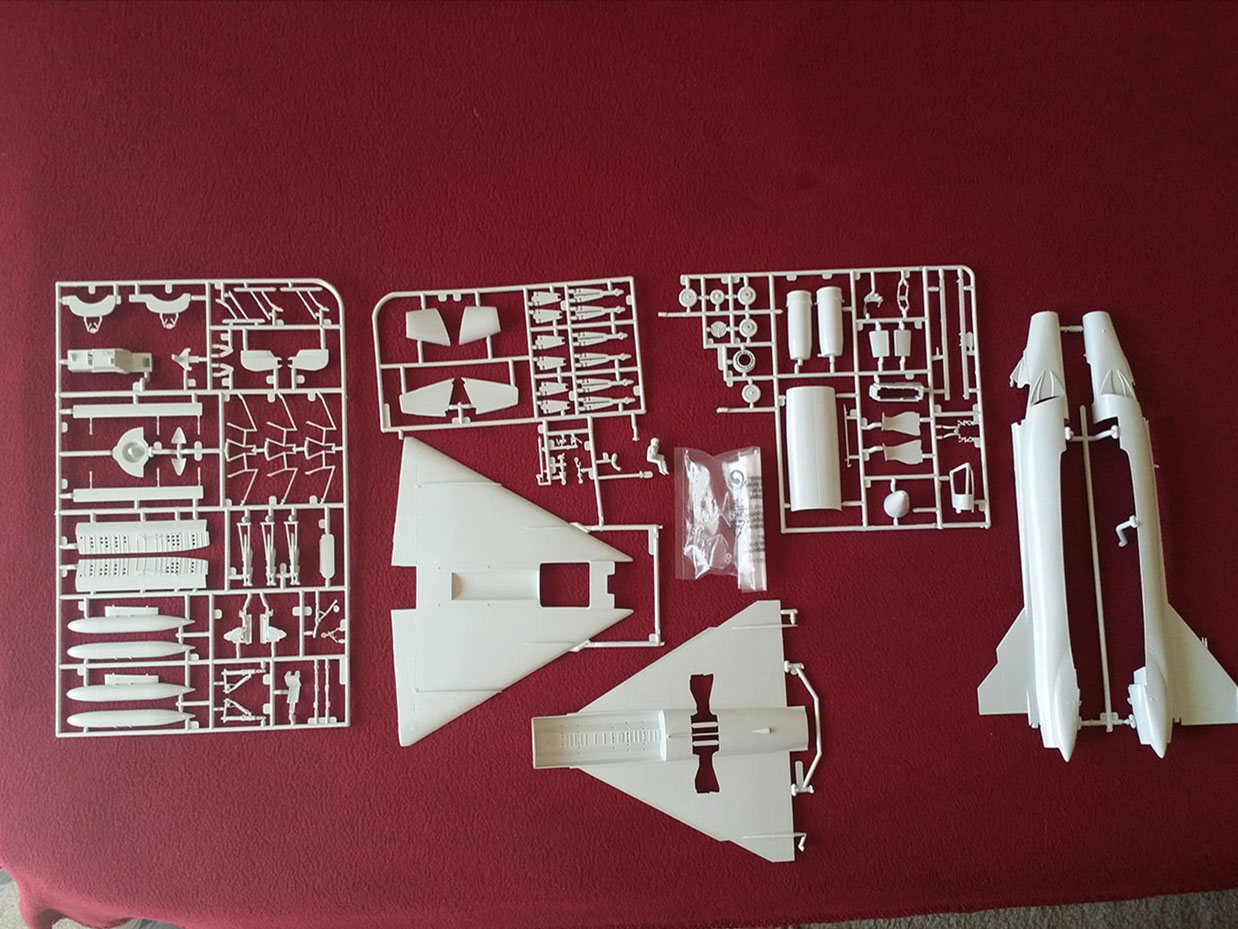
The kit comes molded in light grey plastic with a total of 97 parts with very little flash. The detail on the parts is quite good, with panel lines being represented by raised lines.
On the exhaust parts in Step 1, the afterburner and parts 86 and 87 should be sanded smooth before assembling the fuselage, as this area becomes almost impossible to work after assembly. There are ejector pin marks on the insides of both intake halves just inside of the air intake lips. As these will be seen from outside by looking down both intakes, I recommend sanding them smooth, along with painting the area silver or zinc chromate green.
While the instructions show only painting the walls of the cockpit, I recommend painting the cockpit, the area where the afterburner goes, and where the wing mounts to the fuselage, particularly where the weapons bay goes. While mostly not visible from outside, there are some minor joints and openings where plastic would show through.
The instructions show installing the cockpit/nose landing gear well assembly (parts 19 and 27) after the fuselage is glued together. I found it particularly difficult to insert this assembly once the fuselage was dry, and I would recommend trying to install these two parts before gluing the fuselage together. If you follow the kit instructions for these two parts, leave off parts 73, 23, 24 (ejection seat), and part 21 (control column), just to prevent breakage of the parts, especially the control column. It is a very tight fit and I am still unsure of exactly how I got those parts into place. One other part that may give you trouble is part 22, which is the throttle.
Before assembling the wing halves, drill out the mounting holes for the external tanks, if you desire to use them. There is a large gap between the wing halves at the leading edge that in some spots can be difficult to fill and sand. A lot of raised detail will be lost during sanding, and one trick that I would recommend for rescribing is to use a thin sheet of paper and rub a pencil over the details. It makes it easier to recreate the details when sanding is done.
Step 4 shows the assembly of both air intakes (parts 71 and 7 for the left, parts 70 and 8 for the right). I recommend painting the interior of the intake parts, splitter plate, and the small fuselage area behind them prior to assembling. I also recommend gluing the intake parts together prior to installing them on the fuselage halves.
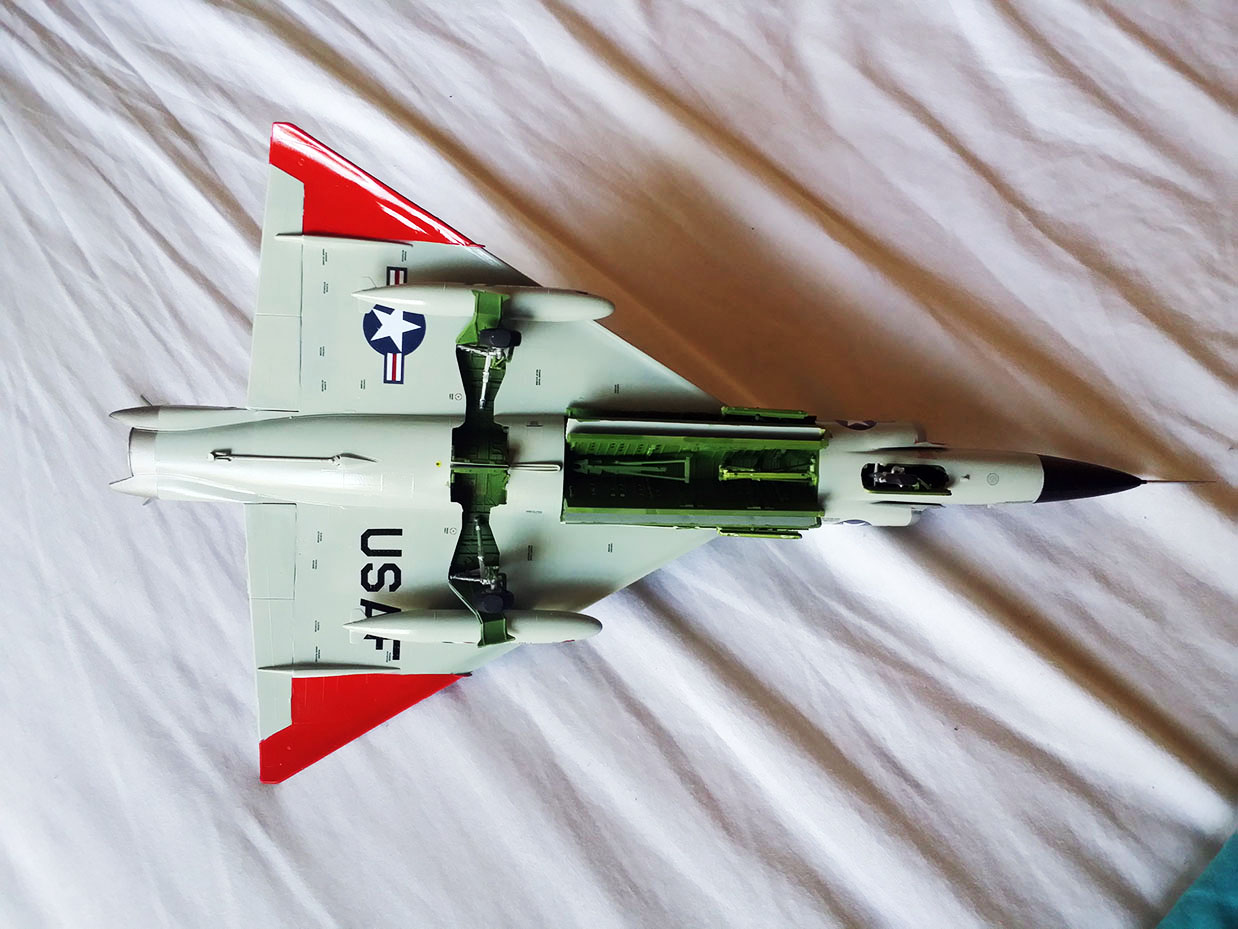
Step 6 gives you the option of building the weapons bay open or closed. Building the bay in the closed position involves gluing one part (42) over the weapons bay. I chose to have the weapons bay open without any missiles on the rails. The missiles that come with the kit leave a lot to be desired – while they are generally accurate in shape, there is an ugly seam where the second set of fins connects to the missile body. And speaking of fins, they are all too thick for the scale.
The weapons bay assembly is straightforward and fairly easy. I deviated from the instructions by installing the two bulkheads and inner doors (parts 43 and 80 for the left side, parts 44 and 79 for the right side), along with the inner door tips (parts 45 and 81) prior to installing the missile rails. This helps to prevent breaking the extended missile rails and also allows you full access to the bulkheads to tweak them as needed. The door tips create a hard to get to seam when they are glued in place.
While the retracted missile rails (parts 48) are fairly easy to install, the three extended rails (consisting of parts 49, 50, and 84) can be difficult to install. The kit’s mounting points for the extended rails are in the form of circular cups that allow some play when installing the assembly. I found that the outer two rail assemblies are a tight fit. Another problem that I had was mounting the outermost missile bay doors, which are extremely flexible due to their thinness. This flexibility made it extremely hard for me to keep the doors in place long enough to let the glue set up.
I normally leave off the landing gear until last to keep them from becoming damaged while handling the model. Only the nose landing gear gave me a bit of trouble while installing, as it is a tight fit for that gear. Pay particular attention to the main landing gear’s outer doors and their actuating mechanisms, as it can be very easy to mount the wrong parts to the wrong side.
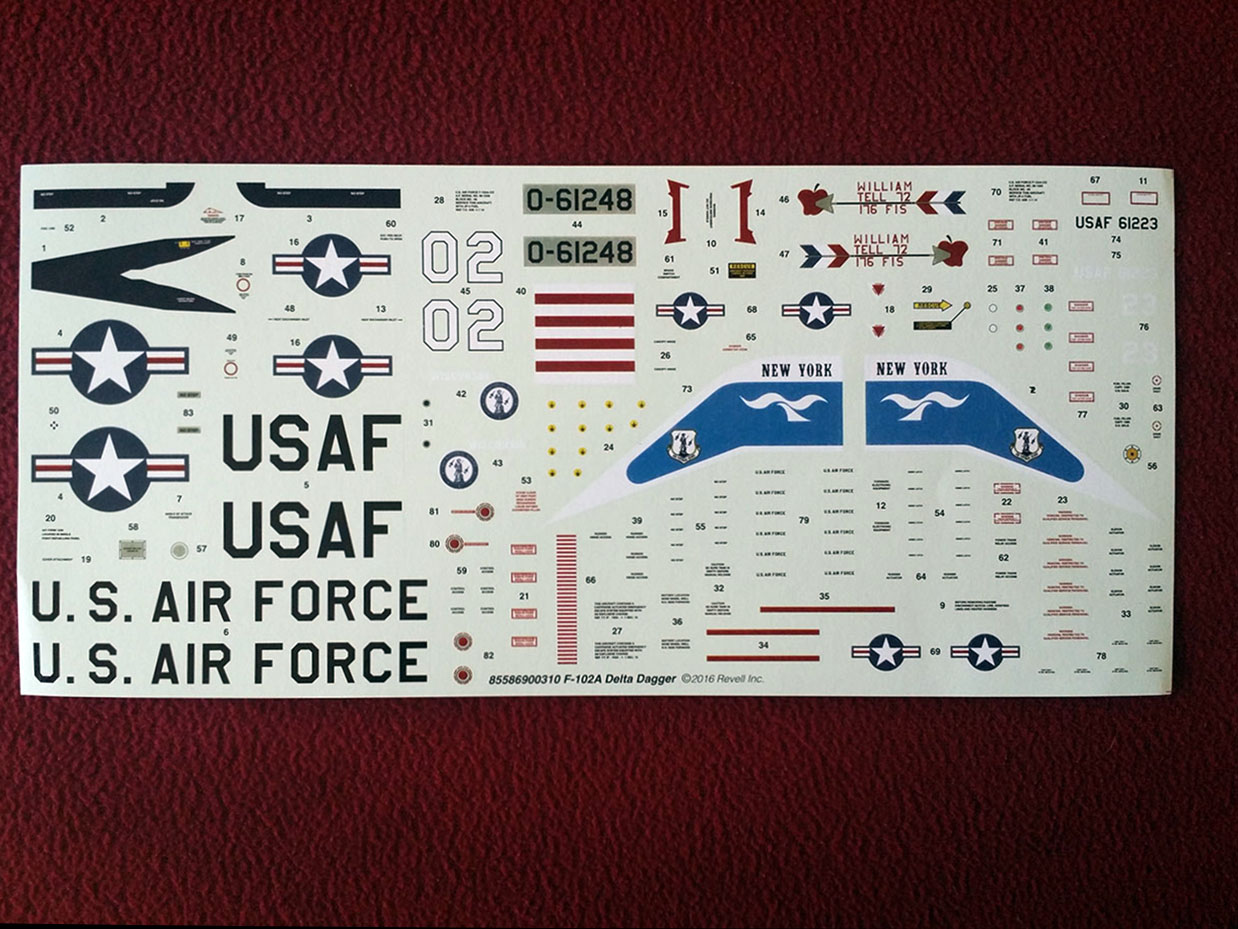
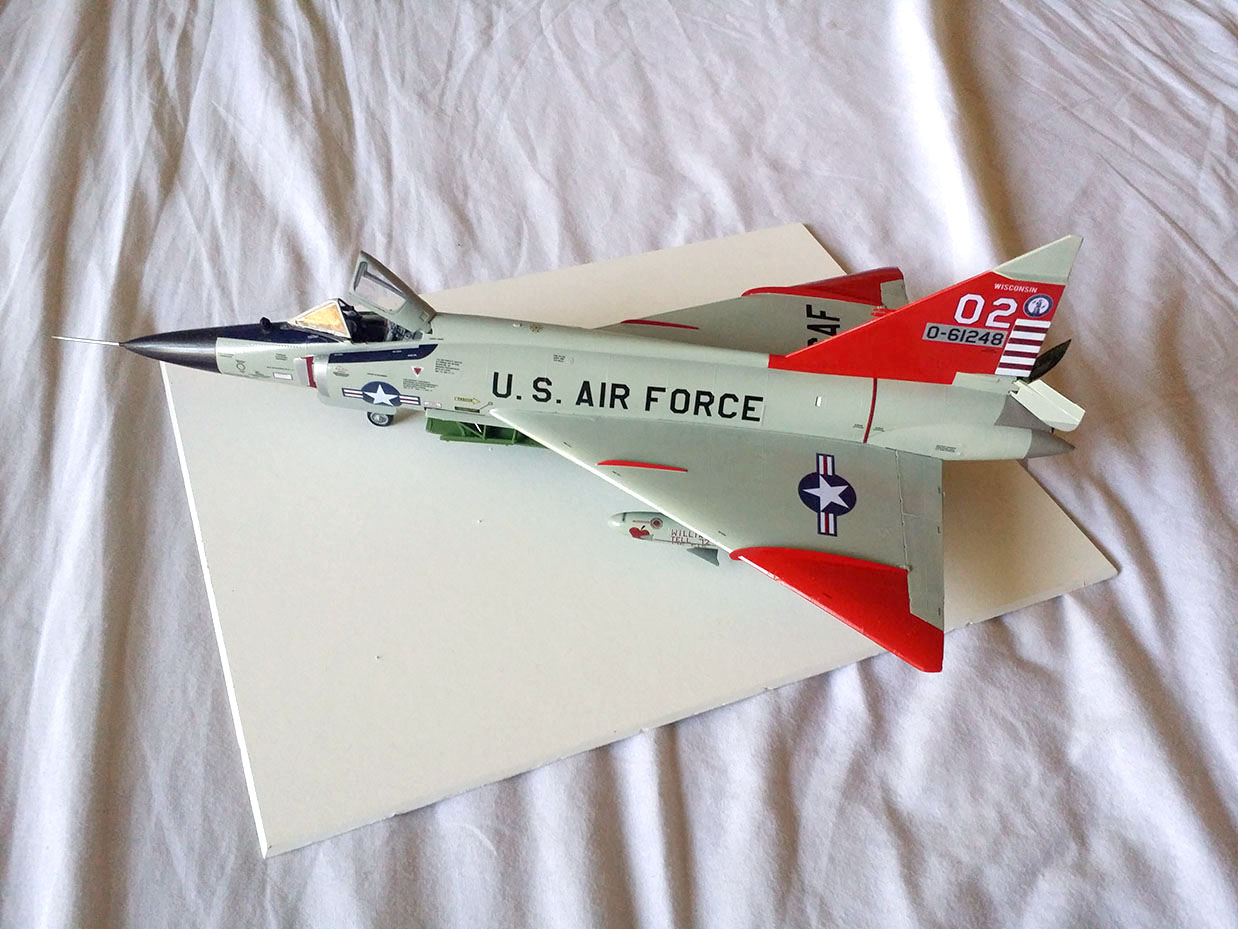
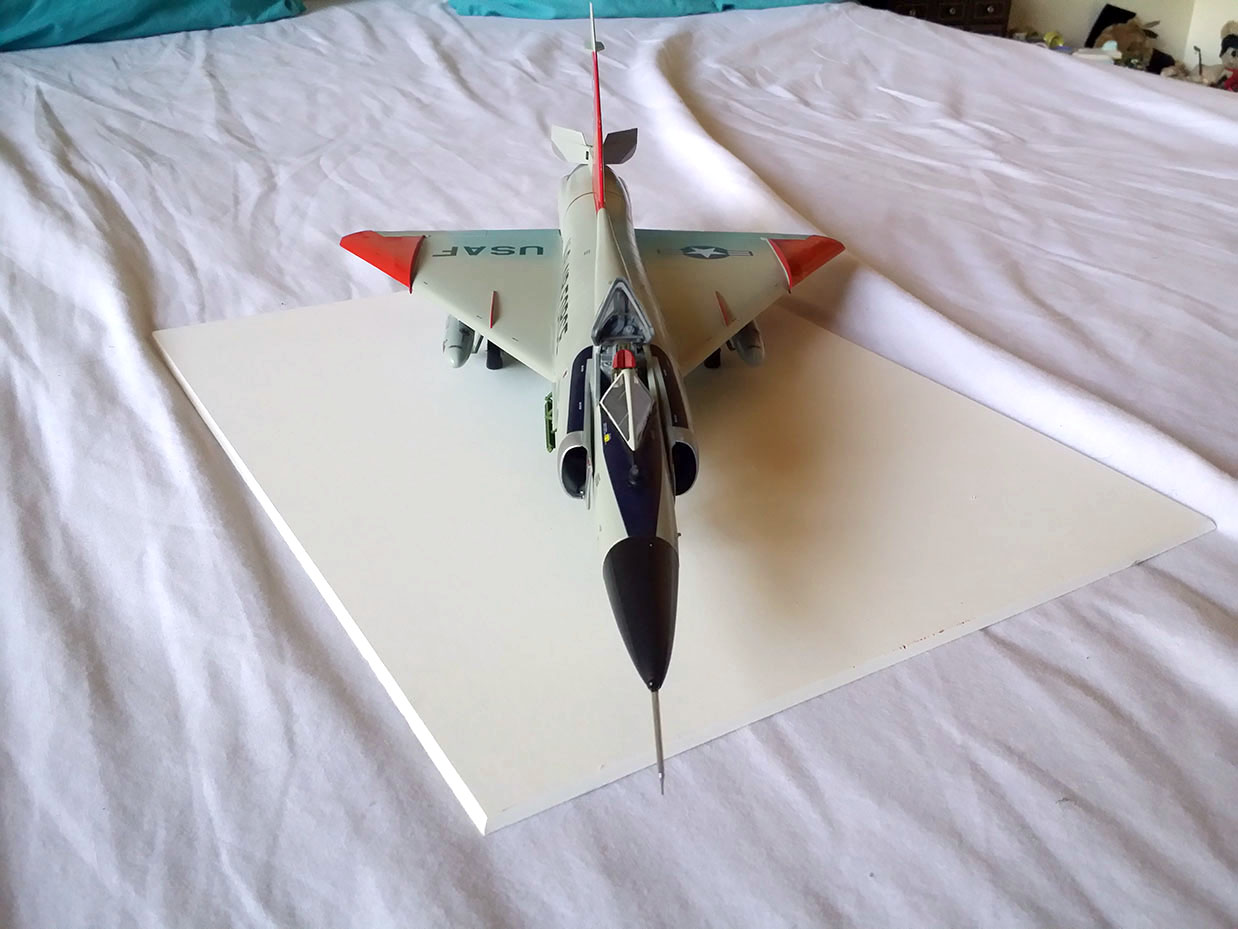
Decaling for the gloss grey version (Wisconsin Air National Guard) is time-consuming as there are many small decals all over the model. However, the time spent is well worth it once the model is completed since all those small decals add to a realistic look to the model. The second marking variation is for a camouflaged F-102A of the New York Air National Guard. I finished my sample as a gloss grey bird from the Wisconsin Air National Guard.
Overall, this is a nice kit that, with care, builds up into a wonderful replica of the U.S. Air Force’s first operational delta-winged aircraft. My thanks go to Revell for providing this sample kit.

Comments
Add new comment
This site is protected by reCAPTCHA and the Google Privacy Policy and Terms of Service apply.
Similar Reviews